Creating beautiful airbrushed rose nails may seem like a daunting task, but with the right techniques and tools, you can achieve stunning results. In this tutorial, we will walk you through the steps of creating a gorgeous airbrushed rose nail design that will elevate your manicure game. First, gather all the necessary supplies, including an airbrush machine, airbrush paints in your desired colors, a base coat, top coat, and a rose stencil. Make sure your nails are clean and free of any old polish or oils before starting. Start by applying a base coat to your nails to ensure a smooth and long-lasting application. Then, using your airbrush machine and paint, carefully spray a thin layer of color over your nails. You can choose to use a single color or a gradient effect for a more dynamic look. Next, place the rose stencil over your nail and use a contrasting color to spray over it. Gently remove the stencil to reveal a beautifully airbrushed rose design. Repeat this step on each nail, making sure to clean and dry the stencil between uses. Once you have completed the design, seal it with a top coat to protect the colors and add shine. Voila! You now have a stunning airbrushed rose nail design that is sure to turn heads.1. Airbrushed Rose Nail Design Tutorial


1. Airbrushed Rose Nail Design Tutorial


Looking for a unique and eye-catching nail design? Look no further than airbrushed rose nails. With a little practice and patience, you can easily create your own airbrushed rose nail design at home. The key to creating a beautiful airbrushed rose design is to start with a clean and smooth base. Make sure to properly prep your nails by cleaning, filing, and shaping them. Then, apply a base coat to protect your nails and help the colors adhere better. Next, choose your desired colors for the roses and background. You can opt for a monochromatic look or mix and match different colors for a more vibrant design. Using your airbrush machine, carefully spray a layer of color onto your nails, creating a base for your roses. Now comes the fun part – creating the roses. Use a rose stencil or freehand the design with your airbrush machine. Remember to clean and dry the stencil between uses to avoid any smudging. Once the roses are in place, add some details and highlights with a smaller airbrush or a fine-tipped brush. Finish off your design with a top coat to seal and protect the colors. With a little practice and creativity, you can create your own unique airbrushed rose nail design that will make a statement.2. How to Create an Airbrushed Rose Nail Design


2. How to Create an Airbrushed Rose Nail Design
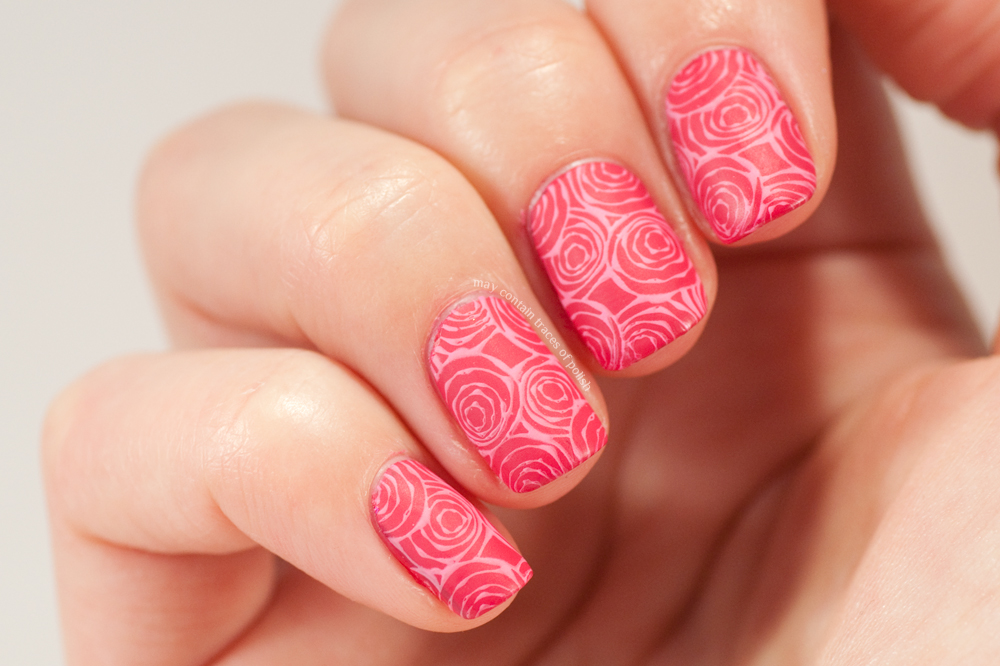


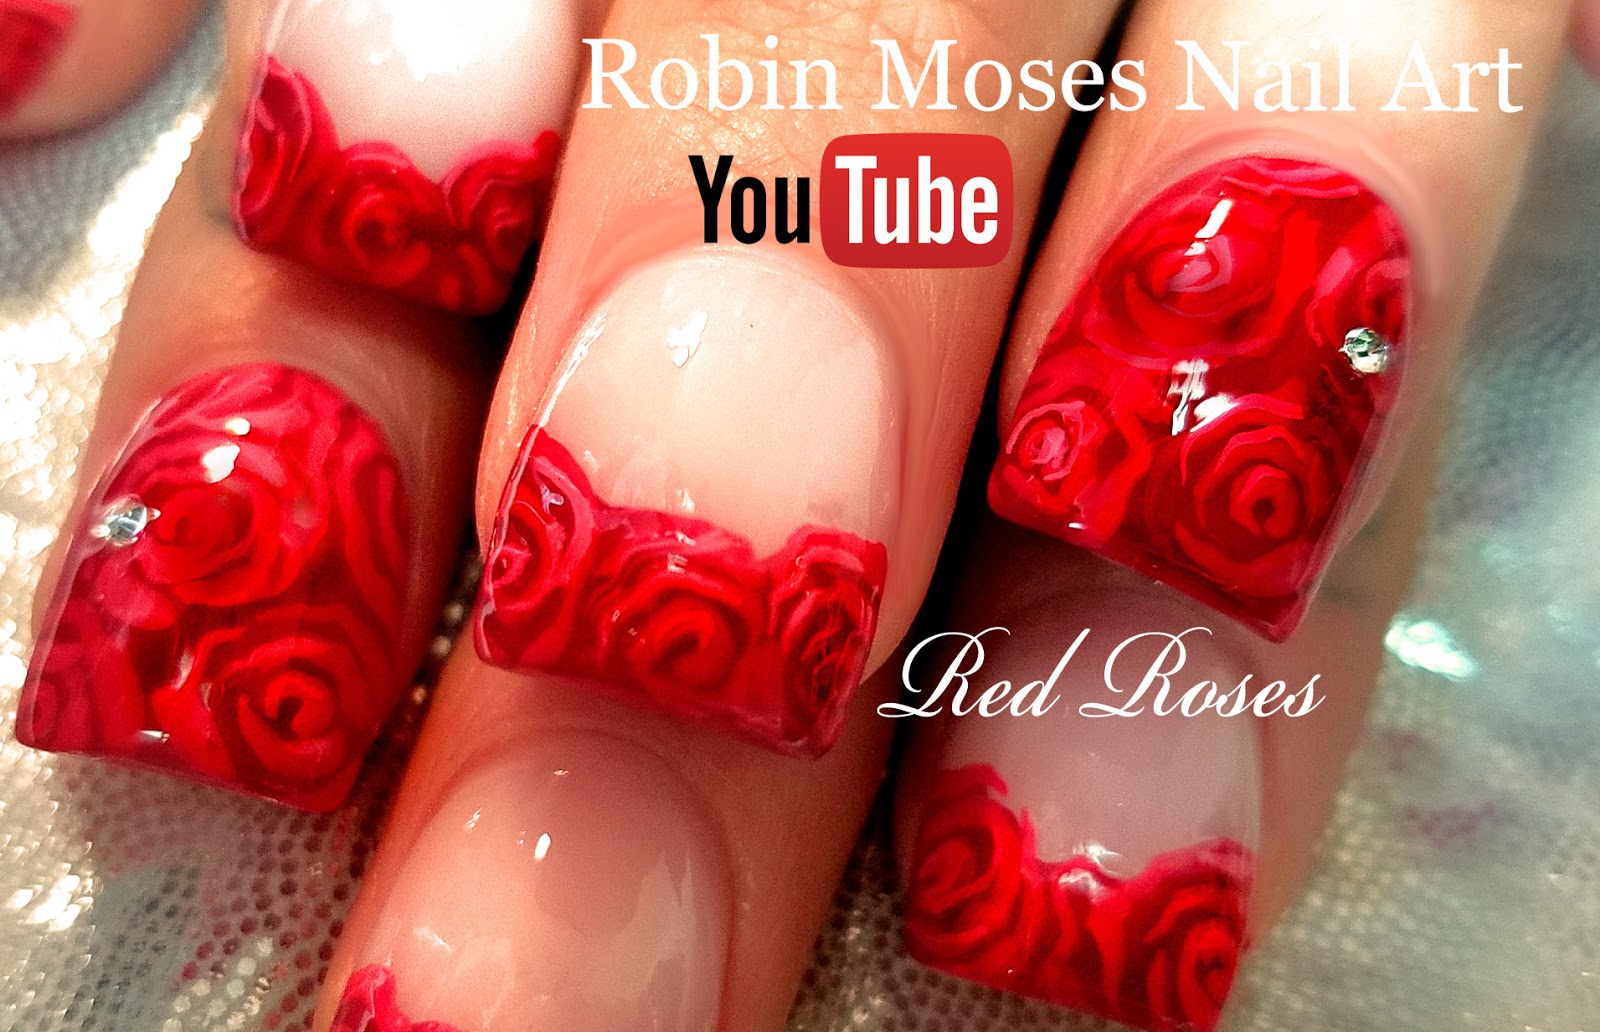
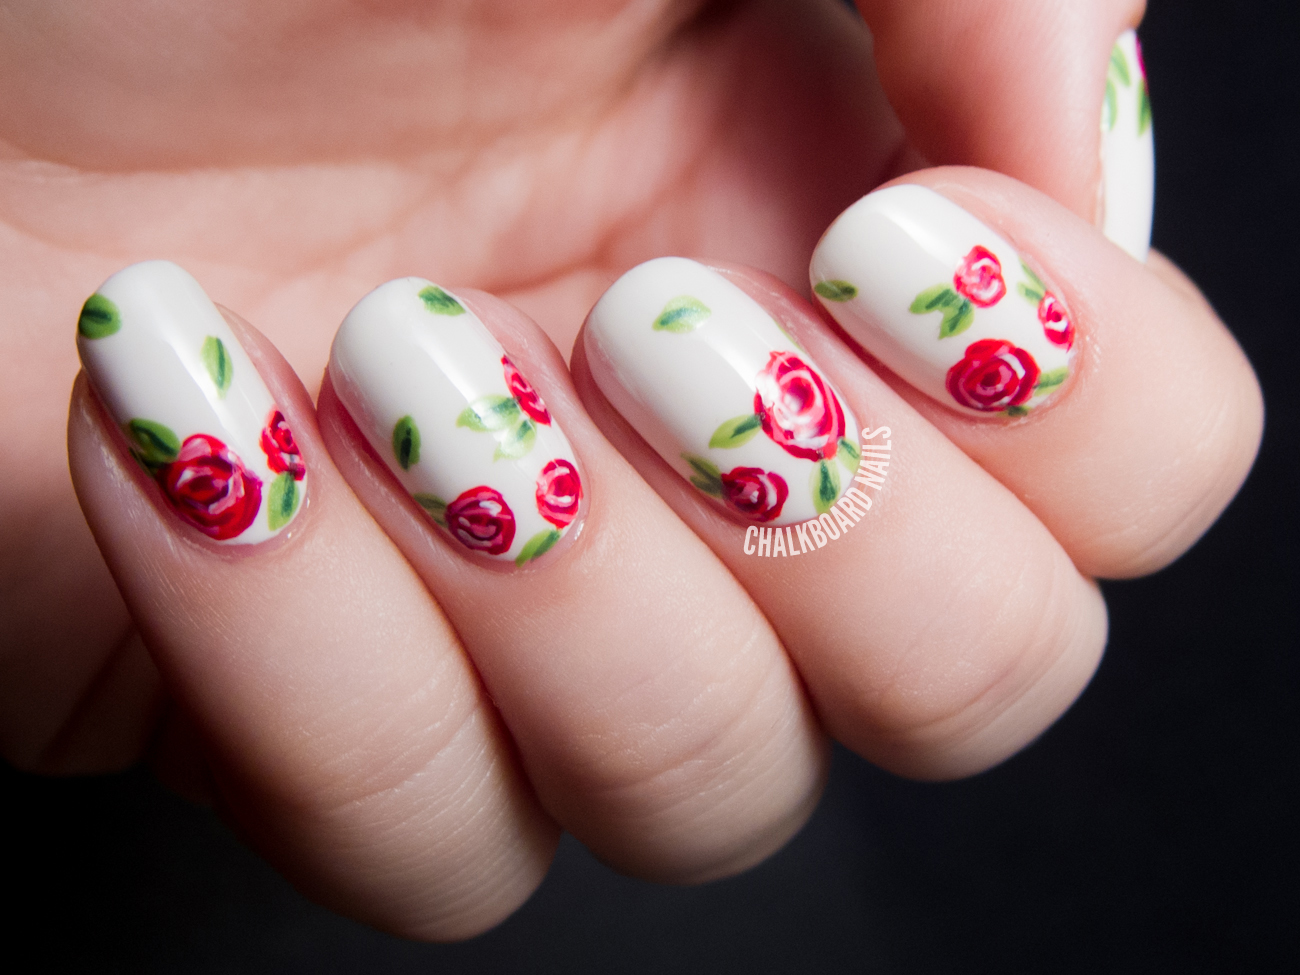

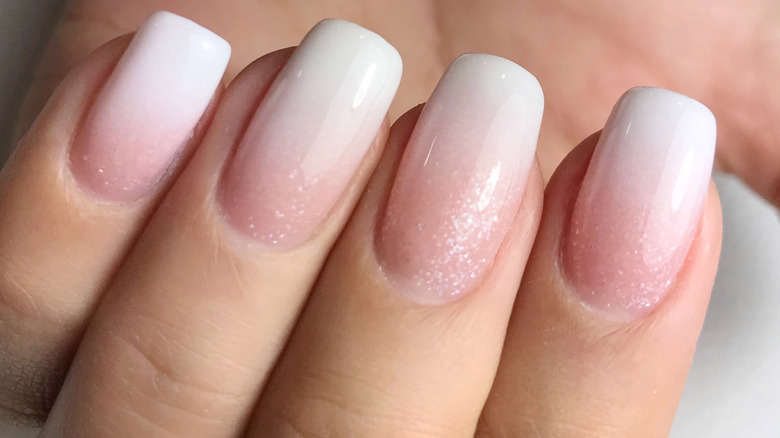
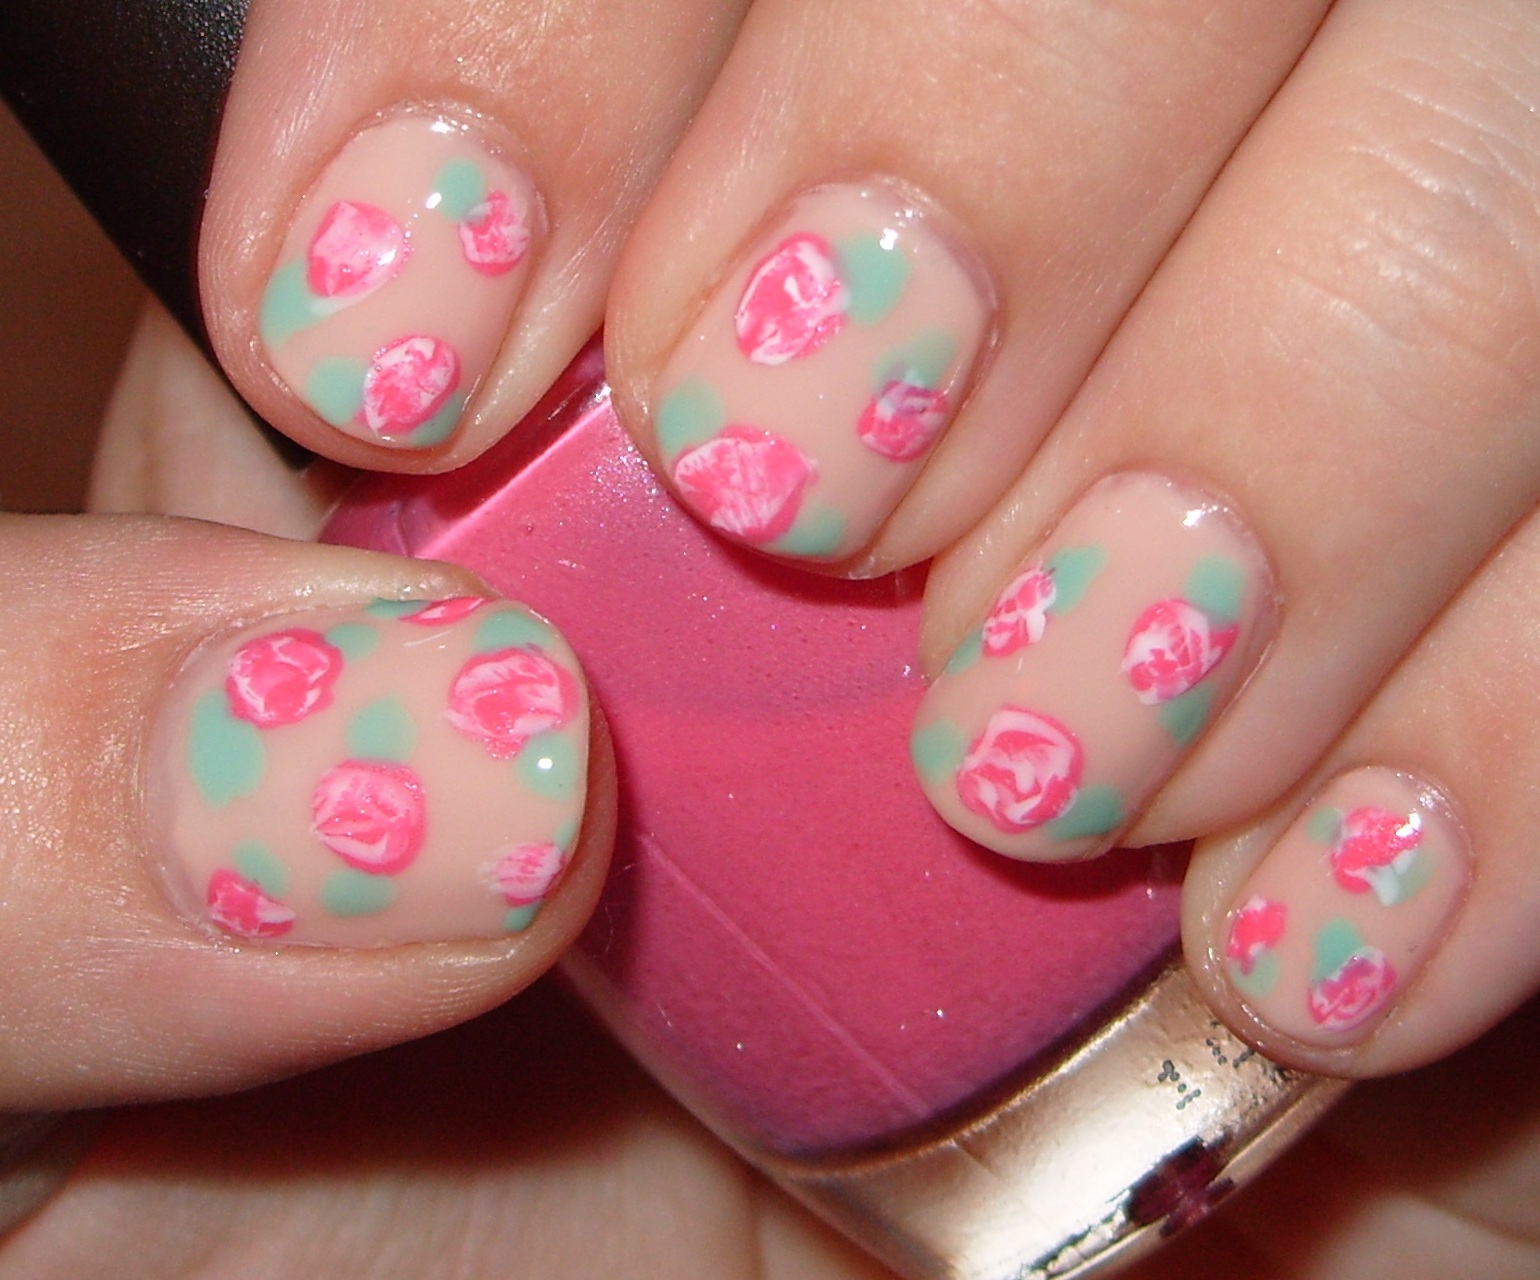
Airbrushed rose nails are a versatile and beautiful nail art option that can be customized to fit any occasion. Whether you prefer a bold and vibrant look or something more subtle and elegant, there is an airbrushed rose design for you. Here are some stunning ideas to inspire your next manicure: - Classic red roses with a black and white gradient background for a dramatic look - Soft pastel roses on a nude base for a delicate and romantic feel - A deep purple base with gold and silver accent roses for a luxurious and regal design - Rainbow-colored roses on a white base for a fun and playful look - Metallic gold roses on a black base for a chic and edgy design With endless color combinations and designs, airbrushed rose nails offer a unique and personalized way to express yourself through your manicure.3. Stunning Airbrushed Rose Nail Art Ideas


3. Stunning Airbrushed Rose Nail Art Ideas


If you are new to airbrushed nails, don’t worry – creating a gorgeous rose design is easier than you think. Follow these simple steps for a foolproof guide to achieving flawless airbrushed rose nails: Step 1: Prep your nails by cleaning, filing, and shaping them. Step 2: Apply a base coat to protect your nails and help the colors adhere better. Step 3: Choose your desired colors for the roses and background and carefully spray a layer of color onto your nails. Step 4: Place the rose stencil over your nail and use a contrasting color to spray over it. Remove the stencil to reveal a beautifully airbrushed rose design. Step 5: Add some details and highlights with a smaller airbrush or a fine-tipped brush. Step 6: Finish off your design with a top coat to seal and protect the colors. With a little practice, you will be able to create stunning airbrushed rose nails in no time.4. Step-by-Step Guide to Airbrushed Rose Nails


4. Step-by-Step Guide to Airbrushed Rose Nails

:max_bytes(150000):strip_icc()/293212593_589892279374684_7867645752657859030_n-686cd44ab40742219df369ce76c03ff2.jpg)


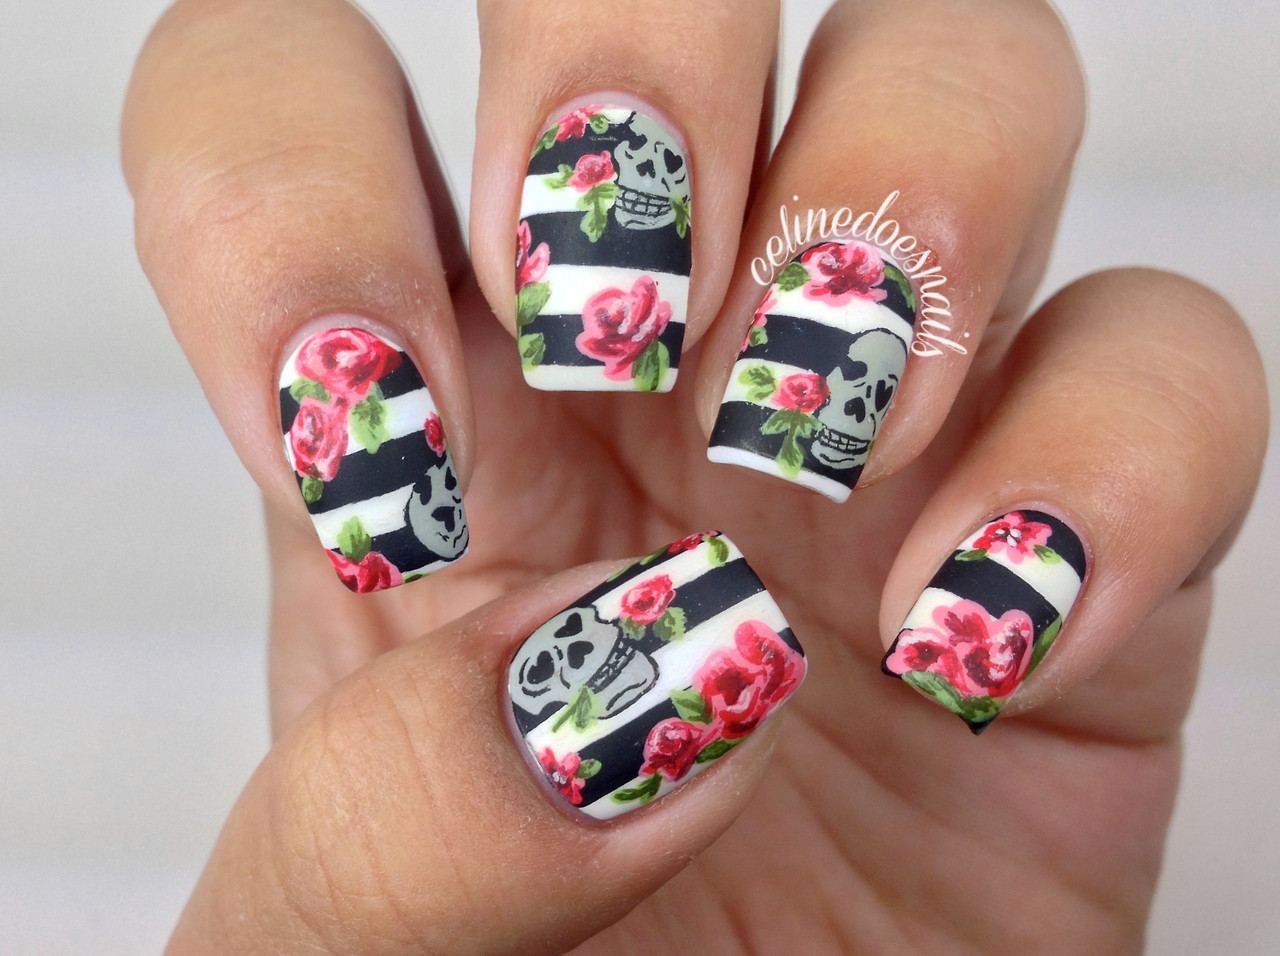
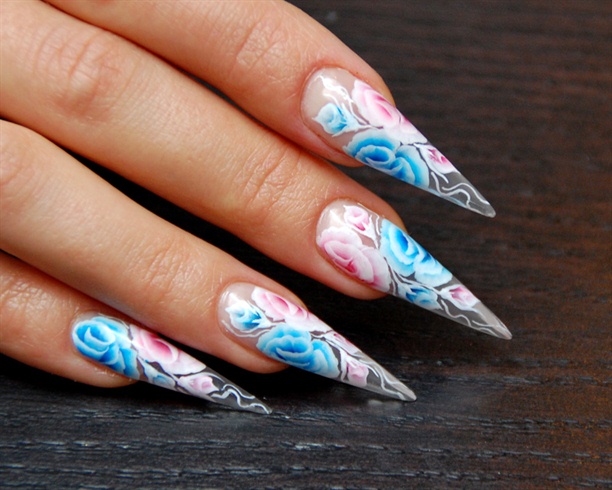
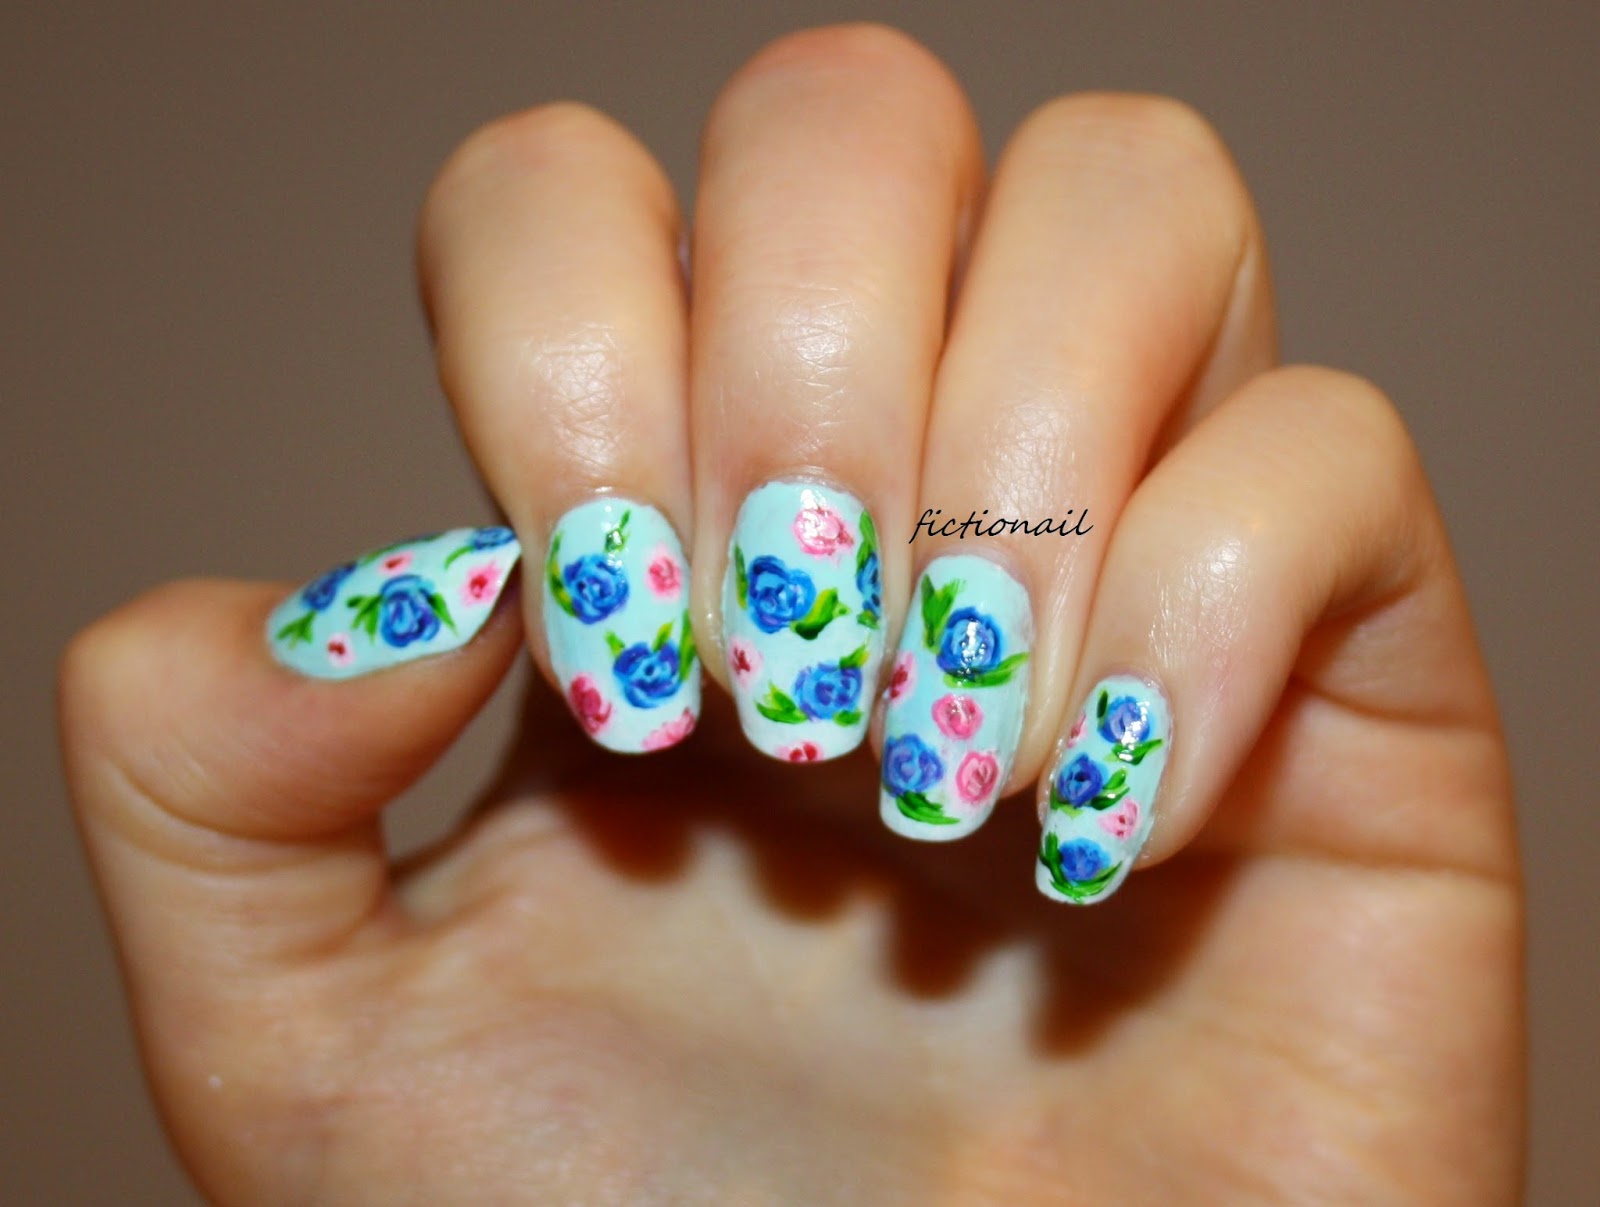
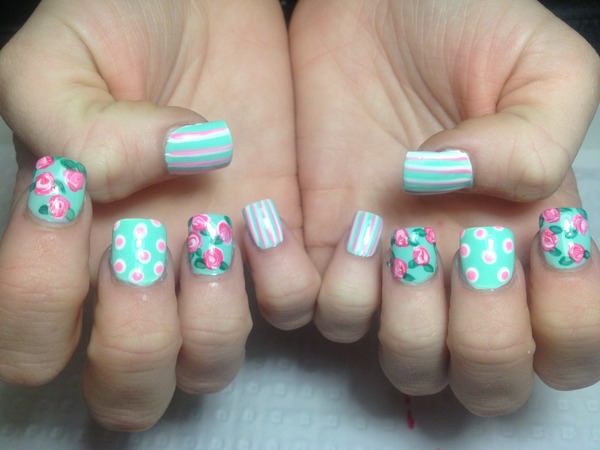
Still looking for the perfect airbrushed rose nail design? Let these beautiful and creative designs inspire your next manicure: - A white base with delicate pink and purple roses and a touch of gold for a romantic and feminine look - Black and white stripes with bold, colorful roses for a modern and edgy design - A soft ombre background with vibrant orange and yellow roses for a summery and tropical feel - A subtle marble background with delicate white roses for a chic and elegant look - A monochromatic design with shades of blue and a pop of metallic silver for a cool and trendy vibe With so many options, you can easily find an airbrushed rose nail design that suits your personal style and mood.5. Airbrushed Rose Nail Design Inspiration

5. Airbrushed Rose Nail Design Inspiration


While airbrushed rose nails may seem intimidating, with the right techniques and tools, you can easily create a flawless design. Here are some tips to help you perfect your airbrushed rose nails: - Practice makes perfect – don’t be discouraged if your first attempts don’t turn out as expected. Keep practicing and experimenting with different techniques and designs. - Use a light hand when spraying the colors to avoid a messy and uneven application. - Clean and dry the stencil between uses to avoid any smudging or bleeding of colors. - Don’t be afraid to add some details and highlights with a smaller airbrush or a fine-tipped brush to make your design pop. - Use a quality top coat to seal and protect your design for long-lasting wear. With these tips in mind, you can elevate your airbrushed rose nail game and achieve professional-looking results.6. Tips for Perfecting Your Airbrushed Rose Nails


6. Tips for Perfecting Your Airbrushed Rose Nails


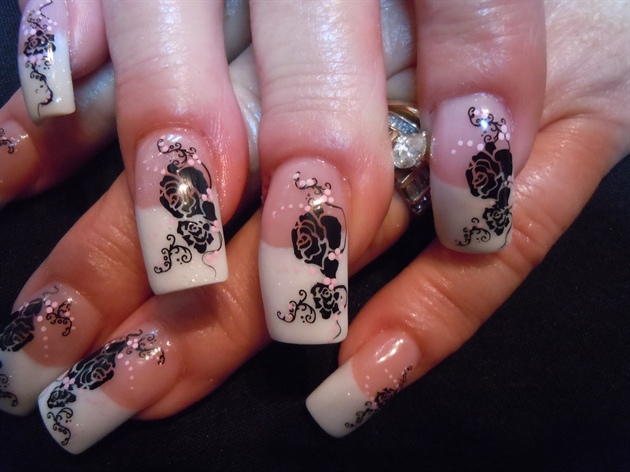
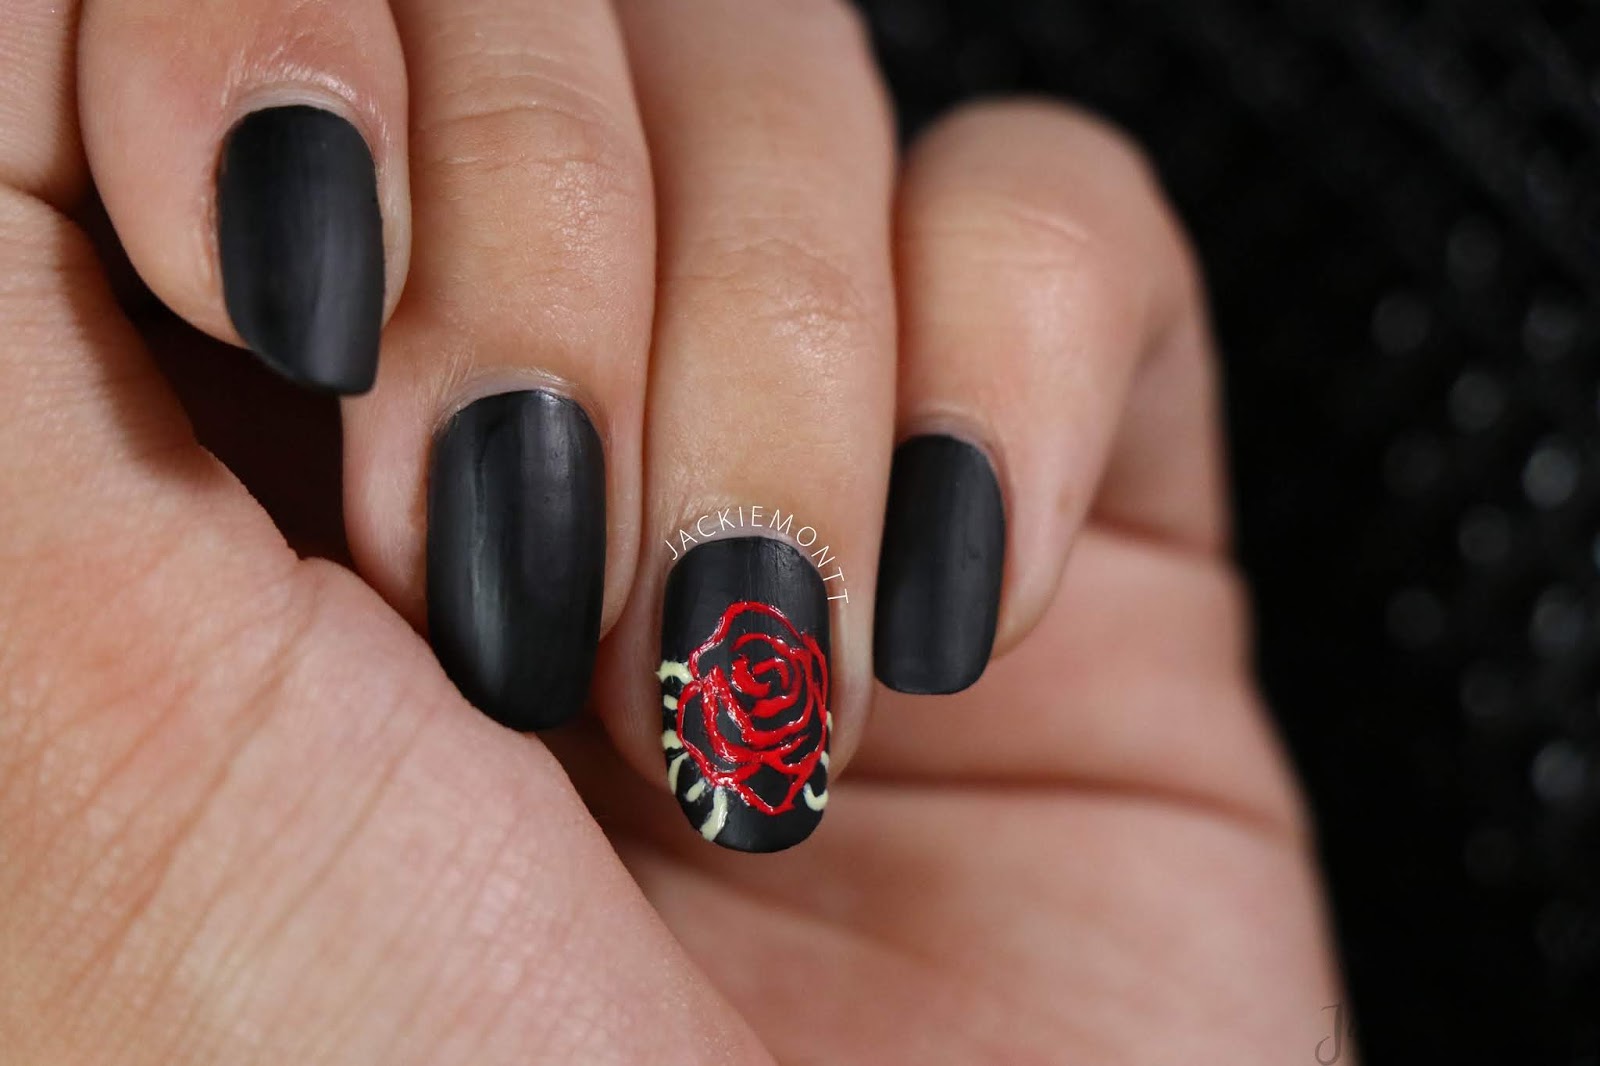
Airbrushed rose nails are a versatile and elegant option for any occasion. Whether you are attending a formal event or just want to add some glamour to your everyday look, these designs are sure to impress. Here are some elegant airbrushed rose nail designs for any occasion: - A black base with white roses and gold accents for a sophisticated and chic look - A soft pink base with delicate white roses and silver details for a romantic and feminine feel - A nude ombre background with bold red roses for a classic and timeless design - A subtle marble design with delicate pink and purple roses for a chic and understated look - A gradient background with vibrant purple and blue roses for a regal and luxurious feel With these elegant designs, you can take your airbrushed rose nails to the next level and make a statement at any event.7. Elegant Airbrushed Rose Nail Designs for Any Occasion


7. Elegant Airbrushed Rose Nail Designs for Any Occasion


To achieve the perfect airbrushed rose nail design, you will need some essential tools. Here are the top tools for creating beautiful airbrushed rose nails: - An airbrush machine: This is the main tool for creating airbrushed designs. Choose one with adjustable pressure and a variety of nozzle sizes for more precision. - Airbrush paints: Look for high-quality, water-based paints specifically made for airbrushing nails. - Rose stencils: These are a great tool for creating consistent and symmetrical rose designs on your nails. - A fine-tipped brush: This is helpful for adding details and highlights to your design. - A top coat: To seal and protect your design for a long-lasting and shiny finish. With these tools in hand, you can create beautiful airbrushed rose nails that will rival any professional manicure.8. Top Tools for Creating Airbrushed Rose Nails


8. Top Tools for Creating Airbrushed Rose Nails


Airbrushed rose nails don’t have to be dainty and delicate – they can also make a statement with bold and vibrant designs. Here are some bold and beautiful airbrushed rose nail designs to inspire your next manicure: - A black base with neon roses for a bold and eye-catching look - A rainbow ombre background with black roses for a playful and colorful design - A metallic silver base with bold red roses and silver accents for a modern and edgy vibe - A gradient background with vibrant blue and purple roses for a whimsical and dreamy design - A black and white marble background with bold pink roses for a chic and trendy look Let your creativity run wild with these bold airbrushed rose nail designs.9. Bold and Beautiful Airbrushed Rose Nail Designs


9. Bold and Beautiful Airbrushed Rose Nail Designs
After putting time and effort into creating the perfect airbrushed rose nail design, you want it to last as long as possible. Here are some tips for maintaining your airbrushed rose nails for long-lasting beauty: - Avoid using harsh chemicals, such as acetone, on your nails as they can fade and chip the design. - Wear gloves when doing tasks that involve water or chemicals to protect your nails. - Moisturize your hands and nails regularly to keep them healthy and prevent the design from cracking or peeling. - Avoid using your nails as tools to prevent any damage to the design. By following these maintenance tips, you can enjoy your beautiful airbrushed rose nails for weeks to come.10. How to Maintain Your Airbrushed Rose Nails for Long-Lasting Beauty


10. How to Maintain Your Airbrushed Rose Nails for Long-Lasting Beauty


Creating a Beautiful Space with Air Brushed Roses Nail Design

Transforming Your Home with a Touch of Elegance
 The design of a home is a reflection of one's personal style and taste. A beautifully designed house not only provides a comfortable living space, but also adds a touch of elegance and sophistication. Among the many elements that contribute to a well-designed home, the
air brushed roses nail design
is one that has gained popularity in recent years. This unique and intricate design adds a beautiful and delicate touch to any room, making it the perfect addition to your home.
The design of a home is a reflection of one's personal style and taste. A beautifully designed house not only provides a comfortable living space, but also adds a touch of elegance and sophistication. Among the many elements that contribute to a well-designed home, the
air brushed roses nail design
is one that has gained popularity in recent years. This unique and intricate design adds a beautiful and delicate touch to any room, making it the perfect addition to your home.
What is Air Brushed Roses Nail Design?
 Air brushed roses nail design is a technique in which delicate rose patterns are airbrushed onto walls, furniture, or other surfaces. This technique originated from Japanese nail art, where intricate designs are airbrushed onto nails. However, it has now expanded to home decor, with many homeowners using it to add a touch of femininity and elegance to their living spaces.
Why Choose Air Brushed Roses Nail Design?
 There are many reasons why air brushed roses nail design is a great choice for your home. Firstly, it adds a unique and personalized touch to your space. Each design is hand-painted, making it one-of-a-kind. This makes it a great way to express your personal style and add a touch of individuality to your home.
Furthermore, air brushed roses nail design is a versatile technique that can be applied to various surfaces. From walls to furniture to accessories, this design can be incorporated into any part of your home. It can also be customized to fit any color scheme, making it a perfect addition to any room.
There are many reasons why air brushed roses nail design is a great choice for your home. Firstly, it adds a unique and personalized touch to your space. Each design is hand-painted, making it one-of-a-kind. This makes it a great way to express your personal style and add a touch of individuality to your home.
Furthermore, air brushed roses nail design is a versatile technique that can be applied to various surfaces. From walls to furniture to accessories, this design can be incorporated into any part of your home. It can also be customized to fit any color scheme, making it a perfect addition to any room.
The Benefits of Air Brushed Roses Nail Design
 Aside from its aesthetic appeal, air brushed roses nail design also offers practical benefits. The airbrush technique creates a smooth and seamless finish, making it easy to clean and maintain. This is especially beneficial for high-traffic areas of the house, such as the living room or kitchen.
Moreover, air brushed roses nail design is a cost-effective way to add a touch of luxury to your home. Instead of investing in expensive wallpaper or decor, this technique provides a budget-friendly option without compromising on style and elegance.
Aside from its aesthetic appeal, air brushed roses nail design also offers practical benefits. The airbrush technique creates a smooth and seamless finish, making it easy to clean and maintain. This is especially beneficial for high-traffic areas of the house, such as the living room or kitchen.
Moreover, air brushed roses nail design is a cost-effective way to add a touch of luxury to your home. Instead of investing in expensive wallpaper or decor, this technique provides a budget-friendly option without compromising on style and elegance.
In Conclusion
 Air brushed roses nail design is a perfect choice for those looking to add a touch of elegance and femininity to their home. Its versatility, uniqueness, and practical benefits make it a popular choice among homeowners. So why not elevate the design of your home with this beautiful and intricate technique? Trust us, your space will thank you.


