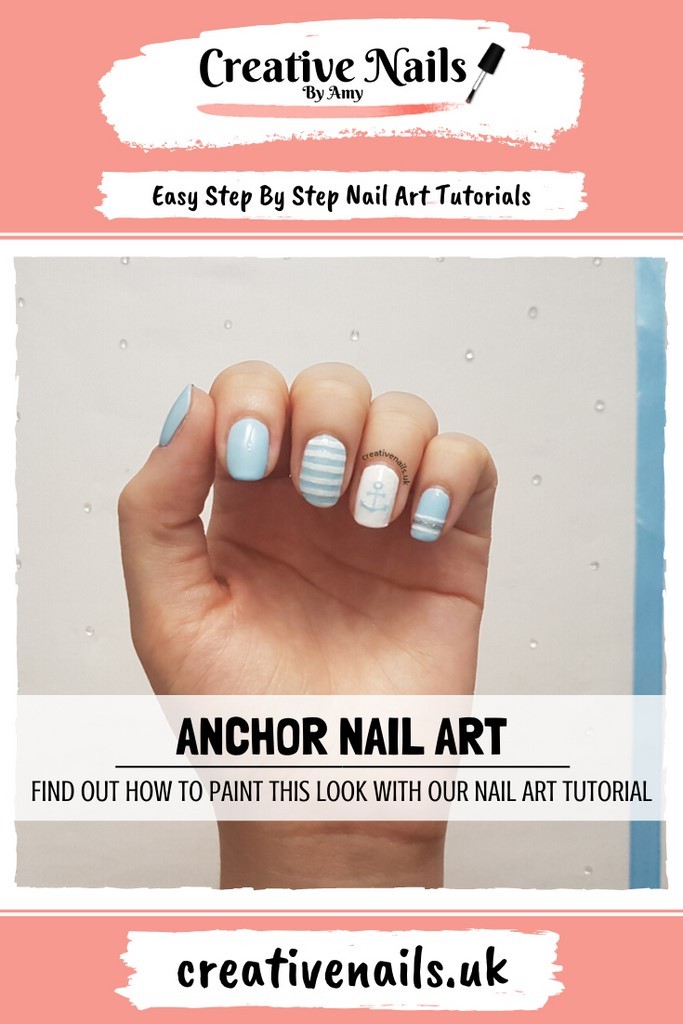
Looking for a quick and easy way to add a touch of nautical flair to your nails? Look no further than this easy anchor nail design tutorial! With just a few simple steps, you can have cute and stylish anchor nails in no time. To start, gather your materials. You will need a base coat, a white nail polish, a blue nail polish, a black nail polish, a small brush or toothpick, and a top coat. Don't forget to use a nail polish remover to clean up any mistakes! First, apply a base coat to protect your nails and help your polish last longer. Once dry, apply two coats of white nail polish. You can use any shade of white, but a slightly off-white shade will give the design a more worn and vintage look. Next, take your blue nail polish and paint a diagonal stripe across your nail, leaving the tip and bottom of your nail white. This will be the base of your anchor. For a fun twist, try using a navy blue or turquoise polish instead of a traditional blue. Using your small brush or toothpick, create a small triangle on the tip of your nail with the black nail polish. This will be the top of your anchor. Make sure to leave a small white space between the blue stripe and the black triangle. Then, create a curved line connecting the bottom of the triangle to the bottom of the blue stripe. This will be the base of your anchor. You can also use a silver or gold nail polish for a more metallic and shiny anchor. Finally, add a small dot in the middle of the blue stripe with the black nail polish. This will be the center of your anchor. Once all the polish is dry, finish off with a top coat to seal in your design and add shine. There you have it – an easy and adorable anchor nail design that will have you feeling like you're sailing the seas in no time.1. Easy Anchor Nail Design Tutorial


1. Easy Anchor Nail Design Tutorial


If you're looking for a more detailed and step-by-step guide to creating anchor nail art, this tutorial is for you. It may take a bit more time and patience, but the end result will be worth it. First, start by following the same steps as the easy anchor nail design tutorial – apply a base coat, two coats of white polish, and a blue diagonal stripe. For an extra pop of color, try using a coral or yellow polish instead of white. Next, using a small brush or toothpick, create a small triangle at the tip of your nail with the black nail polish. Then, using the same black polish, draw a curved line connecting the bottom of the triangle to the bottom of the blue stripe. Now, here's where the extra detail comes in. Take a silver or gold nail polish and create a small circle around the top of the triangle and the curved line. This will add a more realistic look to your anchor and make it stand out. For the final touch, take a white nail polish and create small dots on the blue stripe. These will be the holes where the rope attaches to the anchor. Once all the polish is dry, finish off with a top coat. And there you have it – a more intricate and detailed anchor nail art design that will surely make a statement.2. Step-by-Step Anchor Nail Art Tutorial
2. Step-by-Step Anchor Nail Art Tutorial


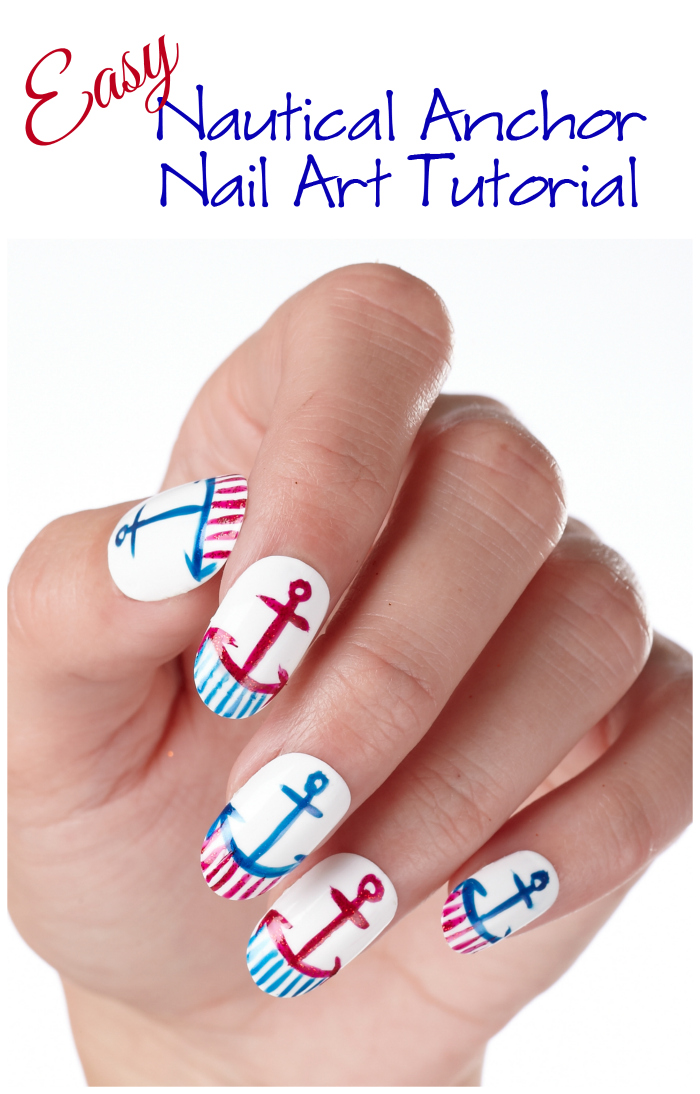
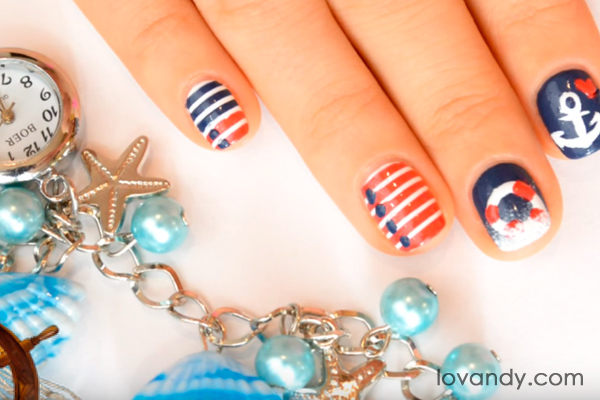
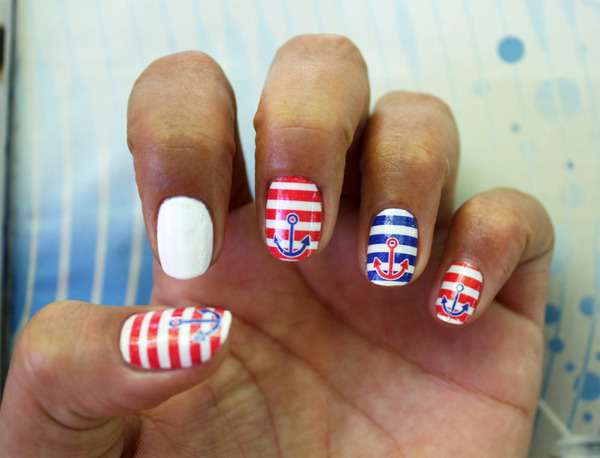
For those who want to fully embrace the nautical theme, this anchor nail design tutorial is for you. With a combination of stripes and anchors, your nails will be ready to set sail. Start by painting your nails with a base coat and two coats of a light blue nail polish. Once dry, take a white nail polish and create vertical stripes on each nail. You can use a thin brush or a striping tape to help create straight lines. Next, create a diagonal stripe with a darker blue nail polish on one side of each nail. This will create a contrast and add dimension to your design. Try using a royal blue or navy blue polish for a bold look. Now it's time to add the anchors. Using a small brush or toothpick, create a small triangle with a black nail polish at the tip of each nail. Then, using a silver or gold nail polish, add a small circle around the top of the triangle and a small dot in the middle. For an extra touch, you can also add small white dots on the blue stripes to represent the holes in the anchor. Once all the polish is dry, finish off with a top coat for a shiny and long-lasting finish. With this nautical anchor nail design, you'll be ready to set sail in style.3. Nautical Anchor Nail Design Tutorial


3. Nautical Anchor Nail Design Tutorial


Want to create an anchor nail design using only household items? This DIY tutorial is perfect for you. With just a few simple steps, you can have cute anchor nails using items you already have at home. To start, you will need a base coat, a white nail polish, a blue nail polish, a toothpick, and a top coat. You can also use a red or pink polish for a pop of color. First, apply a base coat to protect your nails. Once dry, paint your nails with two coats of white polish. Then, using a toothpick dipped in blue nail polish, create a diagonal stripe on one side of each nail. Next, use the toothpick to create a small triangle at the tip of each nail with the blue polish. Make sure to leave a small white space between the stripe and the triangle. Then, create a curved line connecting the bottom of the triangle to the bottom of the blue stripe. This will be the base of your anchor. You can also use a gold or silver polish for a metallic look. Finally, add a small dot in the middle of the blue stripe with the blue polish. Once all the polish is dry, finish off with a top coat. There you have it – a simple and affordable DIY anchor nail art design that anyone can do.4. DIY Anchor Nail Art Tutorial


4. DIY Anchor Nail Art Tutorial


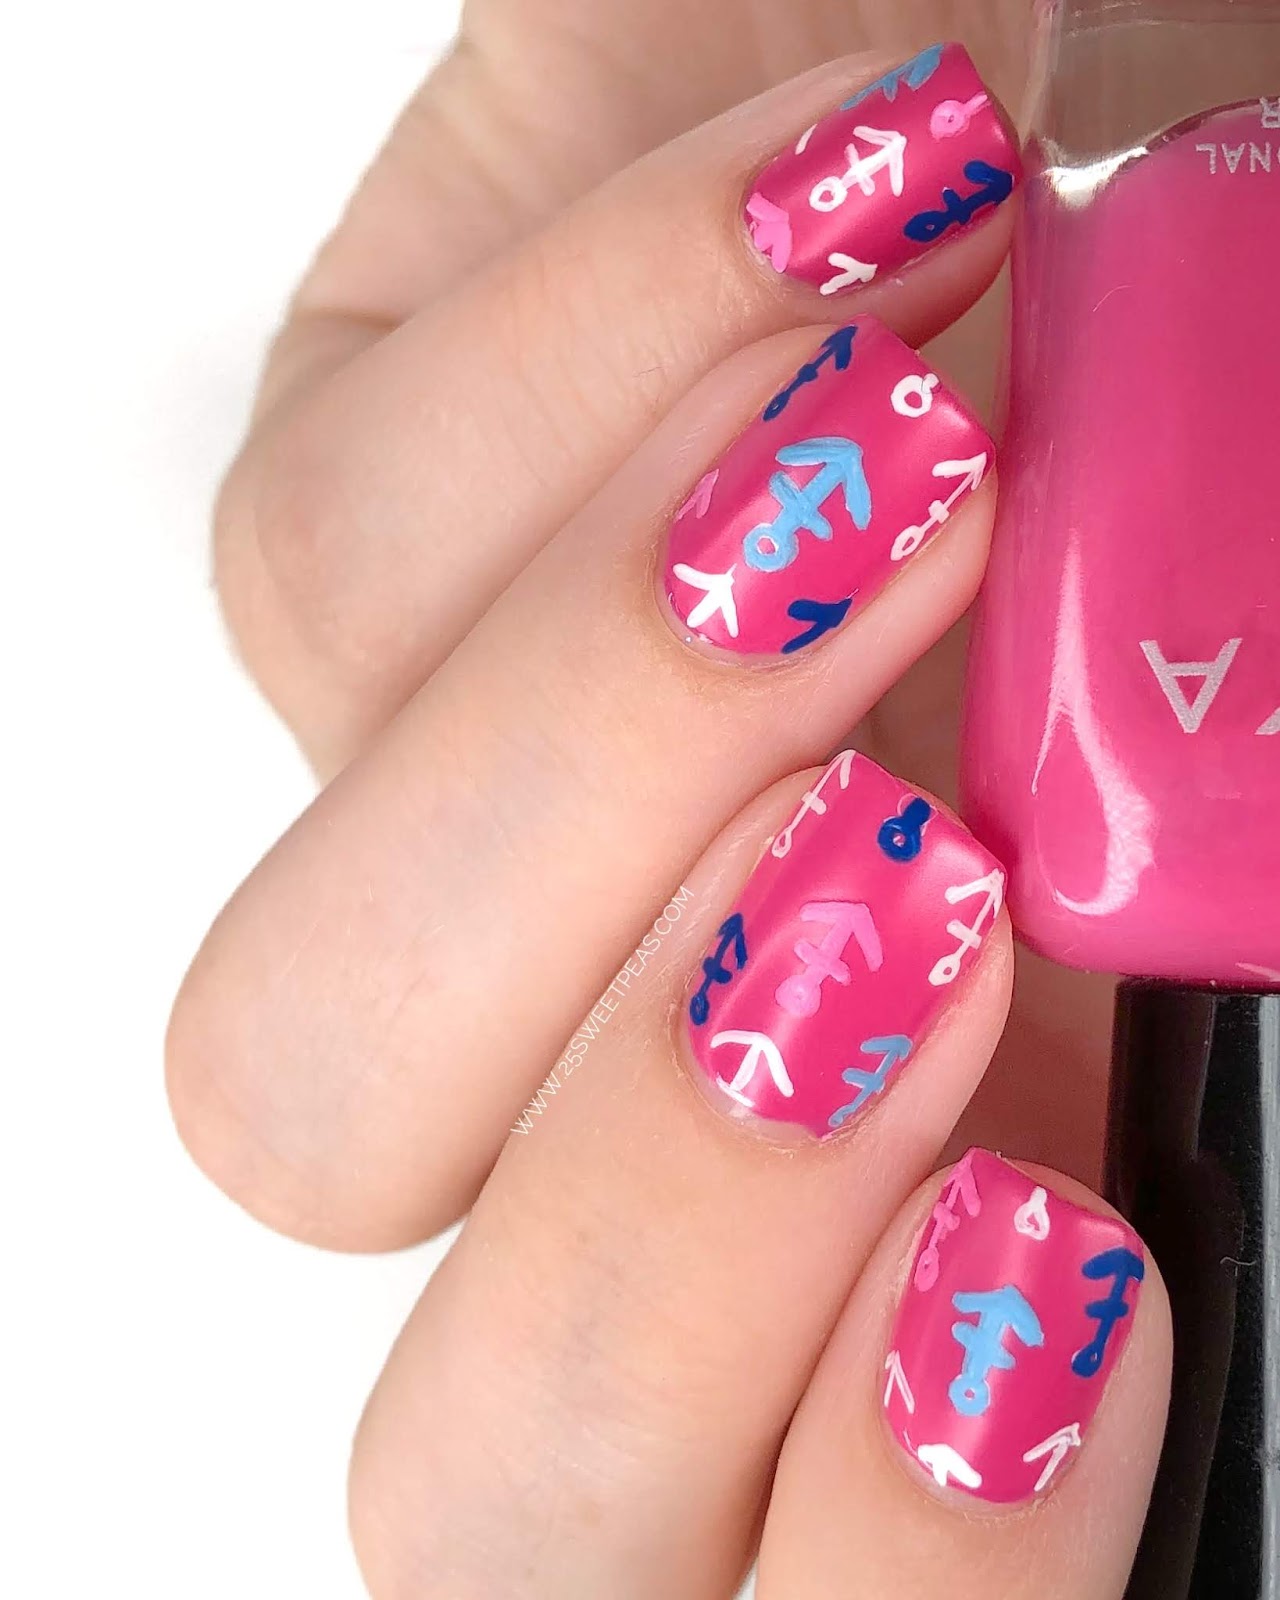
If you're looking for a cute and playful anchor nail design, this tutorial is perfect for you. With a combination of bright colors and polka dots, your nails will be sure to stand out. Start by painting your nails with a base coat and two coats of a light pink nail polish. Once dry, use a white nail polish to create polka dots on each nail. You can use a dotting tool or a toothpick to help create the dots. Next, take a blue nail polish and paint a diagonal stripe on one side of each nail. For a fun twist, try using a mint green or lavender polish instead of blue. Using a small brush or toothpick, create a small triangle at the tip of each nail with a black nail polish. Then, using a silver or gold nail polish, add a small circle around the top of the triangle and a small dot in the middle. For an extra touch, you can also add small white dots on the blue stripes to represent the holes in the anchor. Finish off with a top coat for a shiny and long-lasting finish. This cute anchor nail design is perfect for anyone who loves a touch of whimsy in their nail art.5. Cute Anchor Nail Design Tutorial


5. Cute Anchor Nail Design Tutorial


:max_bytes(150000):strip_icc()/101221-minimalist-nail-designs-lead-2000-e666693dacf649149d33554283383c62.jpg)
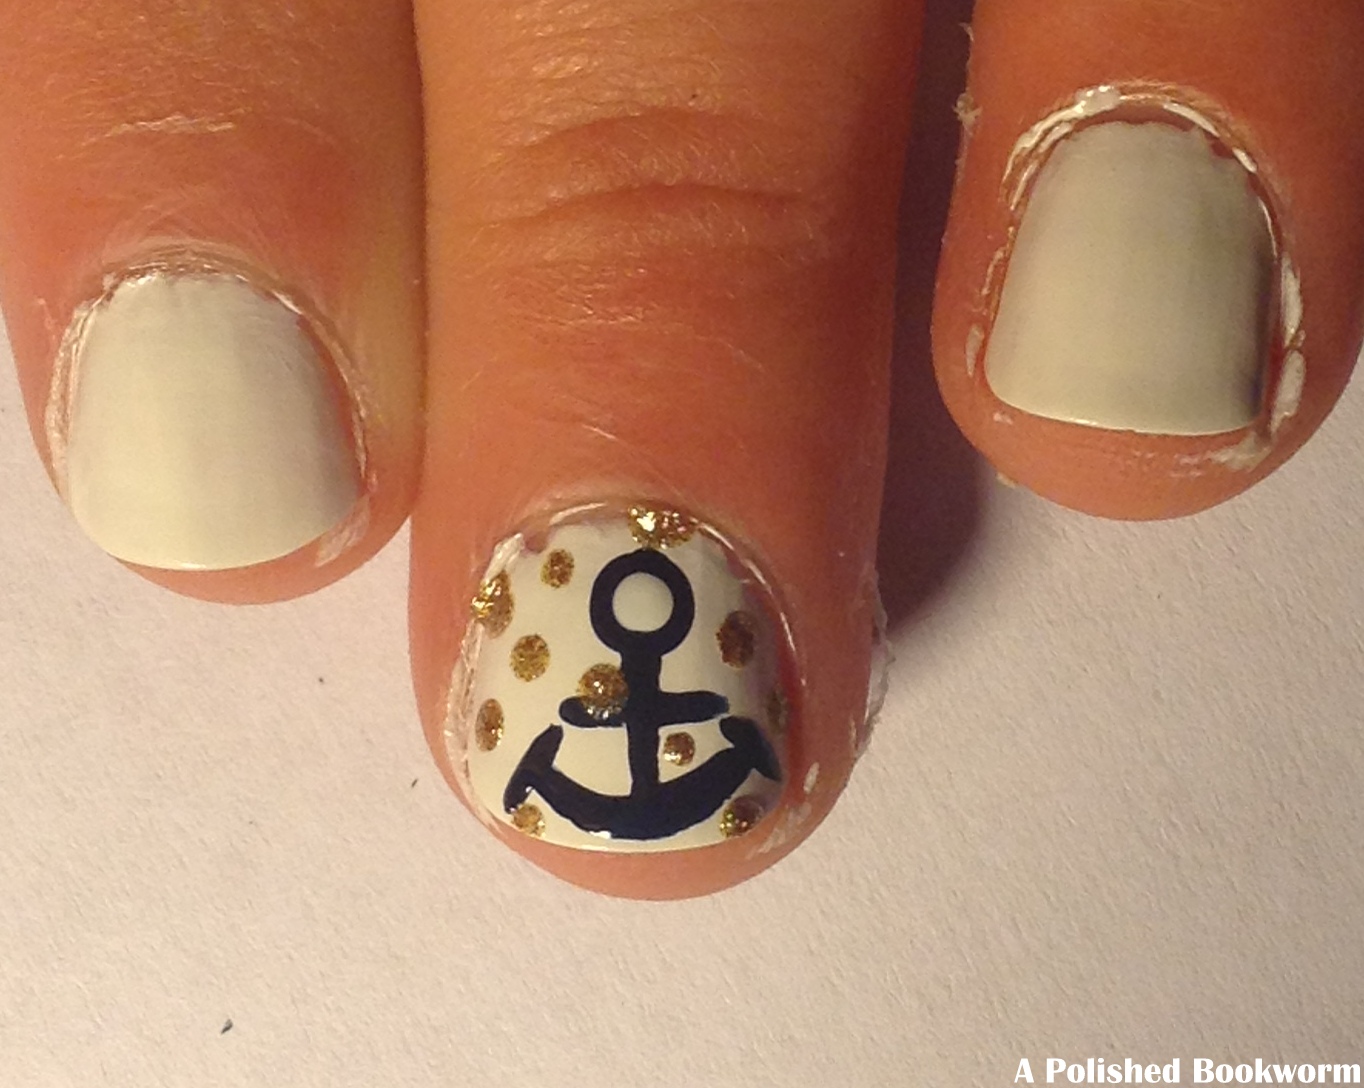
If you're new to nail art or just prefer a more simple and minimalistic design, this anchor nail art tutorial is for you. With just a few steps, you can have a subtle and stylish anchor design on your nails. Start by applying a base coat to protect your nails. Once dry, paint your nails with two coats of a light grey nail polish. For a more neutral look, try using a beige or taupe polish. Next, using a small brush or toothpick, create a small triangle at the tip of each nail with a black nail polish. Then, using a silver or gold nail polish, add a small circle around the top of the triangle and a small dot in the middle. For an extra touch, you can also add a small dot of white polish on the bottom of the triangle to represent the base of the anchor. Finish off with a top coat for a shiny and long-lasting finish. This simple anchor nail art is perfect for those who want a stylish and understated design.6. Simple Anchor Nail Art Tutorial


6. Simple Anchor Nail Art Tutorial

If you're new to nail art, this anchor nail design tutorial is perfect for you. With just a few simple steps, you can create a cute and easy anchor design on your nails. Start by painting your nails with a base coat to protect them. Once dry, paint your nails with two coats of a light blue nail polish. For a more vibrant look, try using a purple or teal polish. Next, using a toothpick dipped in white nail polish, create vertical stripes on each nail. You can also use a striping tape to help create straight lines. For a more playful look, try using a pastel rainbow of colors instead of just white. Then, create a diagonal stripe with a darker blue nail polish on one side of each nail. This will add dimension to your design. Using a small brush or toothpick, create a small triangle at the tip of each nail with a black nail polish. For the final touch, add a small dot in the middle of the dark blue stripe with the black polish. Finish off with a top coat for a shiny and long-lasting finish. This anchor nail design is perfect for beginners who want to add a touch of fun to their nails.7. Anchor Nail Design Tutorial for Beginners

7. Anchor Nail Design Tutorial for Beginners


Looking for a fun and festive anchor nail design for the summer? Look no further than this tutorial. With bright colors and a tropical twist, your nails will be ready for any summer vacation. Start by applying a base coat to protect your nails. Once dry, paint your nails with two coats of a light pink nail polish. For a more tropical look, try using a coral or orange polish instead. Next, using a small brush or toothpick, create a small triangle at the tip of each nail with a black nail polish. Then, using a silver or gold nail polish, add a small circle around the top of the triangle and a small dot in the middle. For the tropical twist, take a green nail polish and create small leaves on the sides of the anchor. You can also add small dots of white polish on the pink part of your nail to represent flowers. Finish off with a top coat for a shiny and long-lasting finish. This summer anchor nail art design is perfect for anyone who loves a touch of the tropics on their nails.8. Summer Anchor Nail Art Tutorial


8. Summer Anchor Nail Art Tutorial

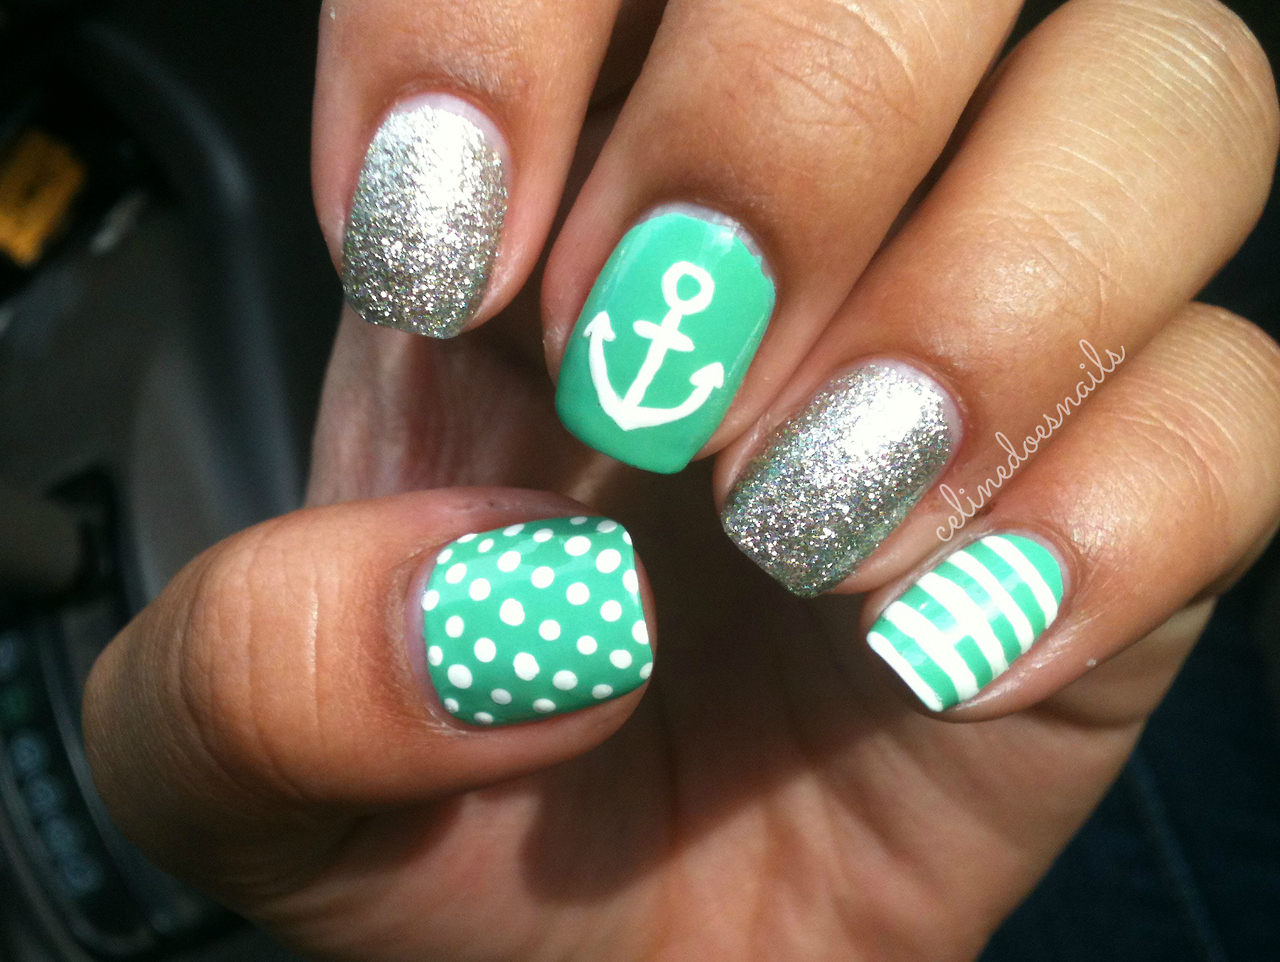
If you love stripes and anchors, this tutorial is for you. With a combination of bold stripes and cute anchors, your nails will be sure to make a statement. To start, paint your nails with a base coat to protect them. Once dry, use a white nail polish to create vertical stripes on each nail. You can use a thin brush or a striping tape to help create straight lines. Next, take a blue nail polish and paint a diagonal stripe on one side of each nail. For a more playful look, try using a pink or yellow polish instead of blue. Using a small brush or toothpick, create a small triangle at the tip of each nail with a black nail polish. Then, using a silver or gold nail polish, add a small circle around the top of the triangle and a small dot in the middle. For an extra touch, you can also add small white dots on the blue stripes to represent the holes in the anchor. Finish off with a top coat for a shiny and long-lasting finish. This anchor nail design with stripes is perfect for anyone who loves a bold and eye-catching look.9. Anchor Nail Design Tutorial with Stripes


9. Anchor Nail Design Tutorial with Stripes
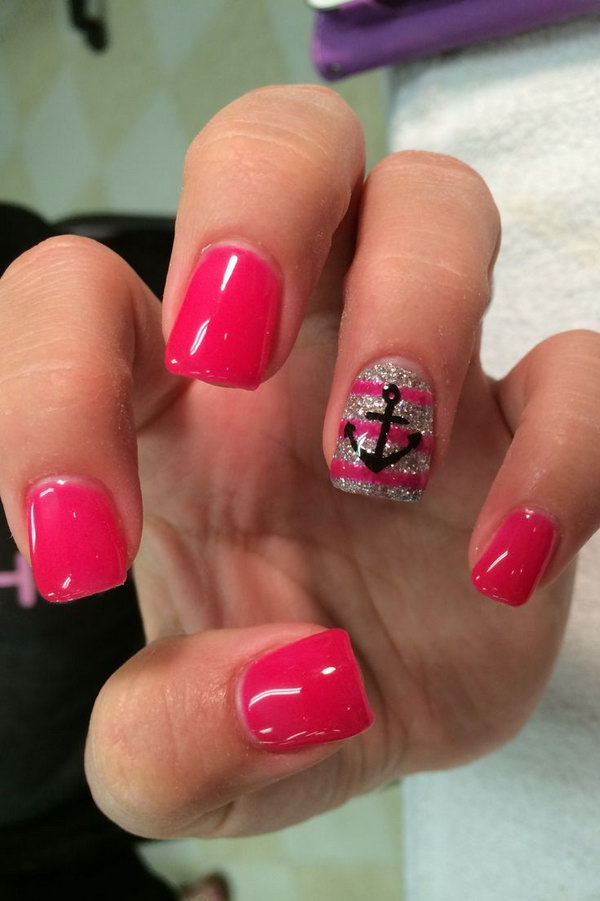
Want to add a touch of sparkle to your nails? This glitter anchor nail art tutorial is perfect for you. With just a few simple steps, you can have glittery and glamorous anchor nails. To start, apply a base coat to protect your nails. Once dry, paint your nails with two coats of a light pink nail polish. For a more dramatic look, try using a black or navy blue polish instead. Next, take a glitter nail polish and paint a diagonal stripe on one side of each nail. For a more subtle look, try using a silver or gold glitter polish. Using a small brush or toothpick, create a small triangle at the tip of each nail with a black nail polish. Then, using a silver or gold nail polish, add a small circle around the top of the triangle and a small dot in the middle. For an extra touch of sparkle, you can also add small dots of glitter on the pink part of your nail. Finish off with a top coat for a shiny and long-lasting finish. This glitter anchor nail art is perfect for a special occasion or for anyone who loves a bit of sparkle in their life.10. Glitter Anchor Nail Art Tutorial

10. Glitter Anchor Nail Art Tutorial
Create a Unique Look with Anchor Nail Design
Add a Touch of Nautical Charm to Your Nails
 Are you looking for a fun and creative way to style your nails? Look no further than anchor nail design. This trendy and unique nail art is perfect for those who love all things nautical or want to add a touch of charm and personality to their nails.
Anchor nail design involves painting a small anchor symbol onto your nails, typically on top of a colored base coat. The anchor symbol can be as simple or intricate as you'd like, making it a versatile and customizable design.
Are you looking for a fun and creative way to style your nails? Look no further than anchor nail design. This trendy and unique nail art is perfect for those who love all things nautical or want to add a touch of charm and personality to their nails.
Anchor nail design involves painting a small anchor symbol onto your nails, typically on top of a colored base coat. The anchor symbol can be as simple or intricate as you'd like, making it a versatile and customizable design.
How to Achieve the Perfect Anchor Nail Design
 To create your own anchor nail design, you will need a few tools and supplies. These include a base coat, a top coat, your desired nail polish colors, a small nail art brush, and a dotting tool.
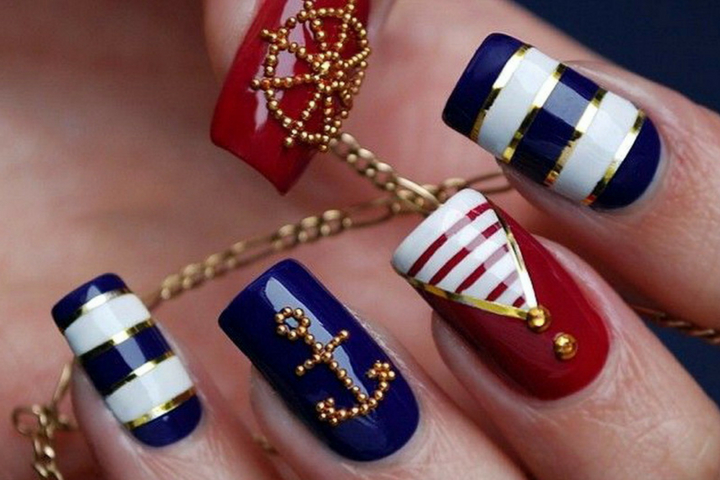
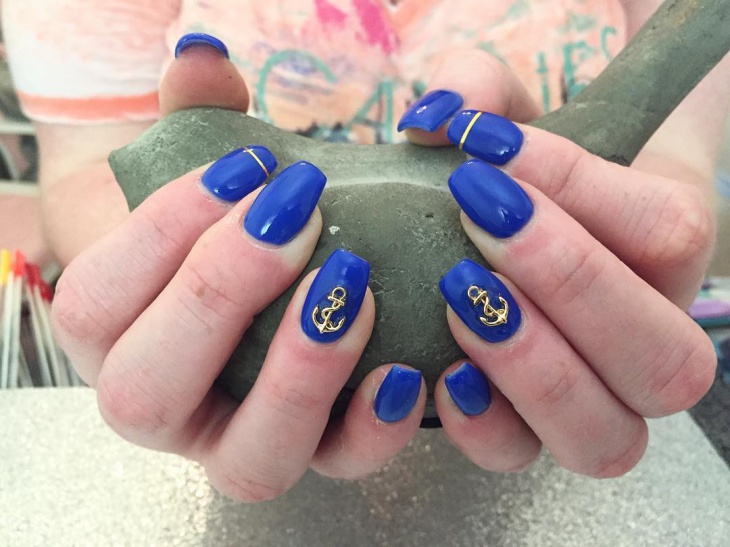
Start by applying a base coat to your nails to protect them and help your nail polish last longer. Once the base coat is dry, apply your chosen color as the base for your anchor design. You can use any color you like, but navy blue, red, and white are popular choices for a nautical theme.
Next, use your nail art brush to paint a small anchor symbol onto your nails. You can choose to paint the anchor on all of your nails or just one or two, depending on your preference. If you're new to nail art, you can always practice on a piece of paper before attempting it on your nails.
For a more intricate design, you can add details such as ropes or chains to your anchor using the dotting tool. Once your design is complete, let it dry for a few minutes before applying a top coat to seal and protect your nail art.
To create your own anchor nail design, you will need a few tools and supplies. These include a base coat, a top coat, your desired nail polish colors, a small nail art brush, and a dotting tool.
Start by applying a base coat to your nails to protect them and help your nail polish last longer. Once the base coat is dry, apply your chosen color as the base for your anchor design. You can use any color you like, but navy blue, red, and white are popular choices for a nautical theme.
Next, use your nail art brush to paint a small anchor symbol onto your nails. You can choose to paint the anchor on all of your nails or just one or two, depending on your preference. If you're new to nail art, you can always practice on a piece of paper before attempting it on your nails.
For a more intricate design, you can add details such as ropes or chains to your anchor using the dotting tool. Once your design is complete, let it dry for a few minutes before applying a top coat to seal and protect your nail art.
Tips for a Long-Lasting Anchor Nail Design
 To ensure your anchor nail design stays looking fresh and lasts as long as possible, here are a few tips to keep in mind:
- Start with clean and dry nails to help your nail polish adhere better.
- Use a good quality top coat to protect your design and prevent chipping.
- If you're using multiple colors, make sure to let each layer dry completely before adding the next.
- For a more durable design, consider using gel nail polish or adding a layer of gel top coat.
With these tips in mind, you can enjoy your beautiful anchor nail design for days to come.
To ensure your anchor nail design stays looking fresh and lasts as long as possible, here are a few tips to keep in mind:
- Start with clean and dry nails to help your nail polish adhere better.
- Use a good quality top coat to protect your design and prevent chipping.
- If you're using multiple colors, make sure to let each layer dry completely before adding the next.
- For a more durable design, consider using gel nail polish or adding a layer of gel top coat.
With these tips in mind, you can enjoy your beautiful anchor nail design for days to come.
Final Thoughts
 Anchor nail design is a fun and unique way to add a touch of nautical charm to your nails. With a few simple tools and some creativity, you can achieve a beautiful and personalized design that will make your nails stand out. So why not give it a try and see how anchor nail design can elevate your nail game?


