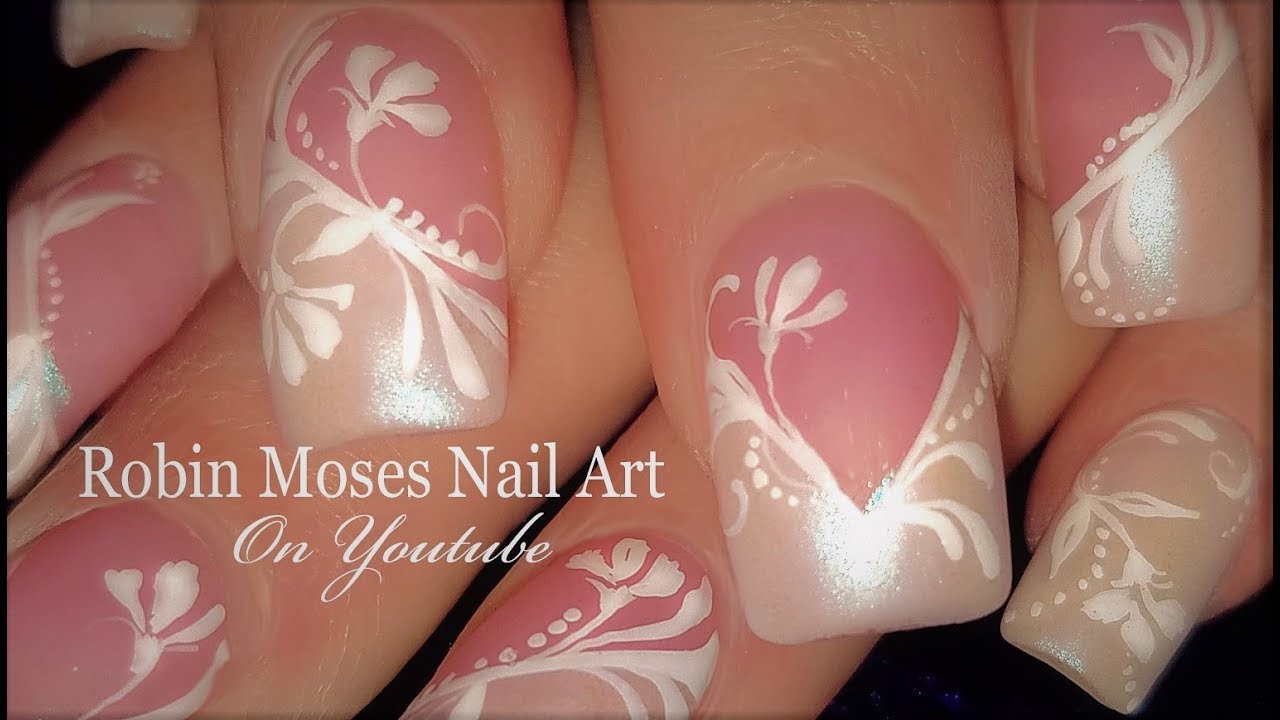
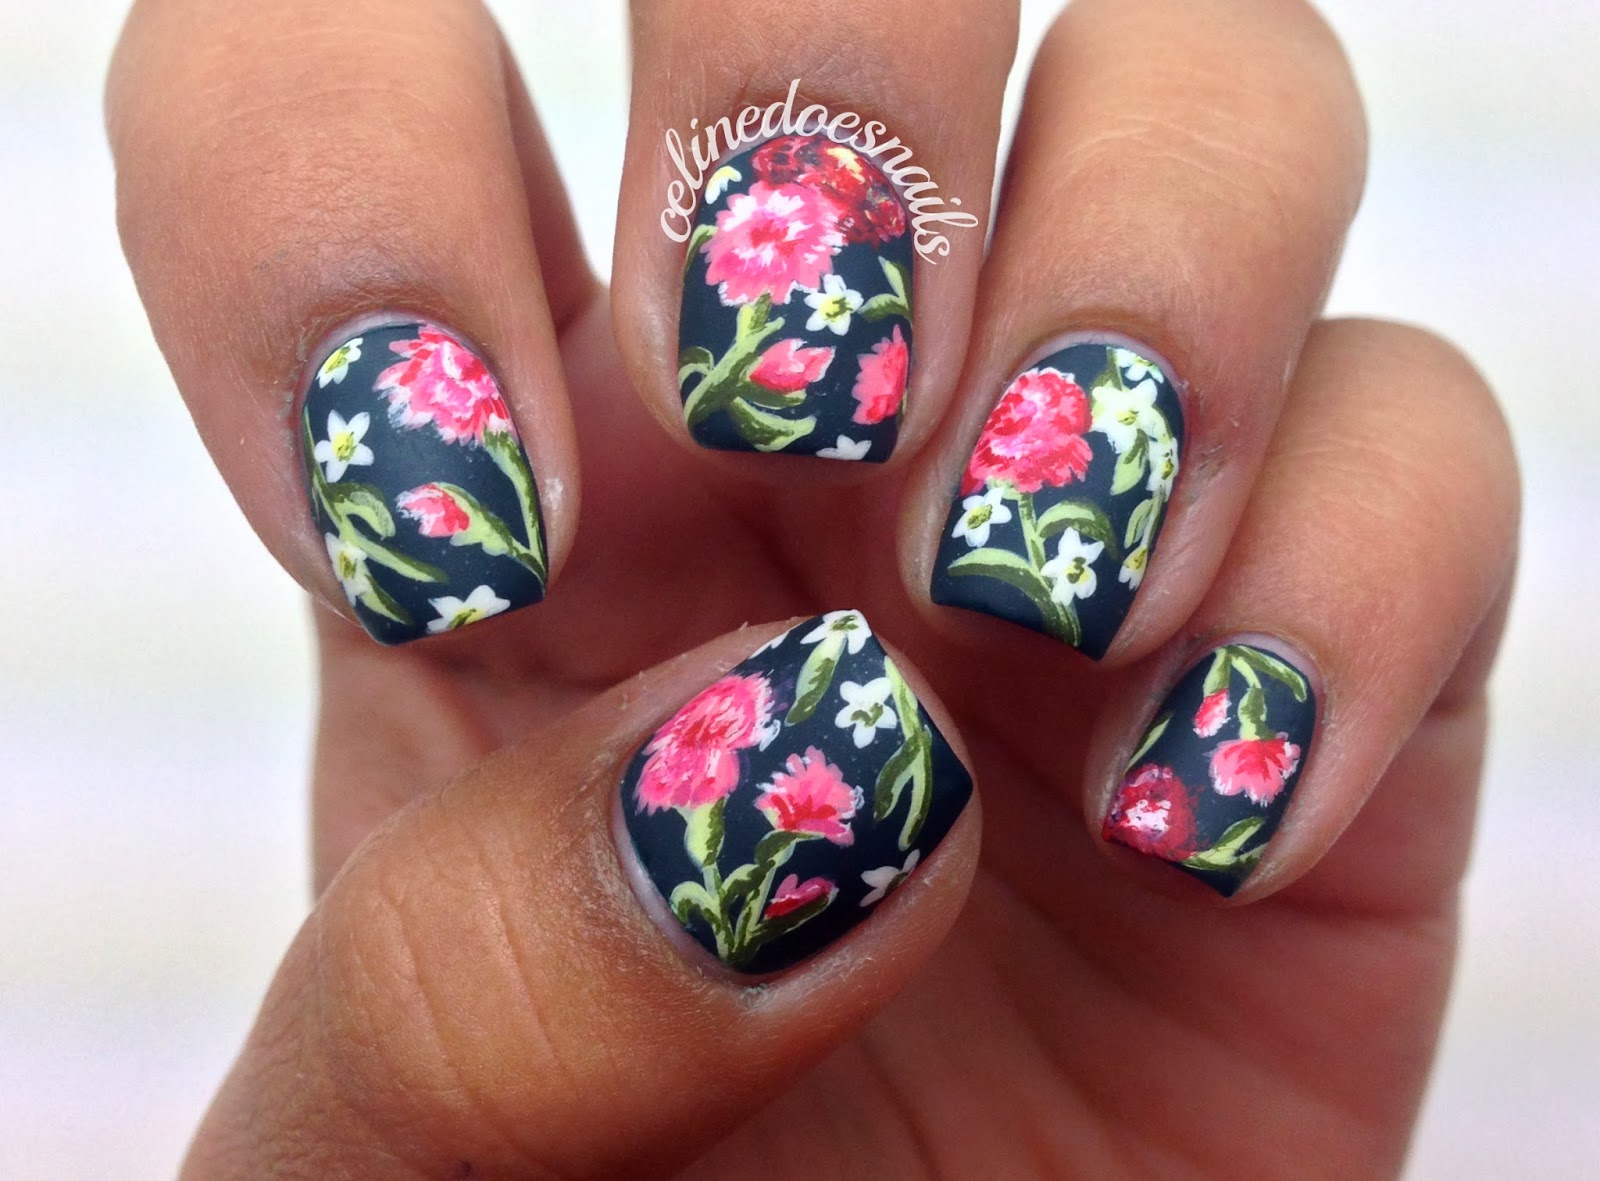
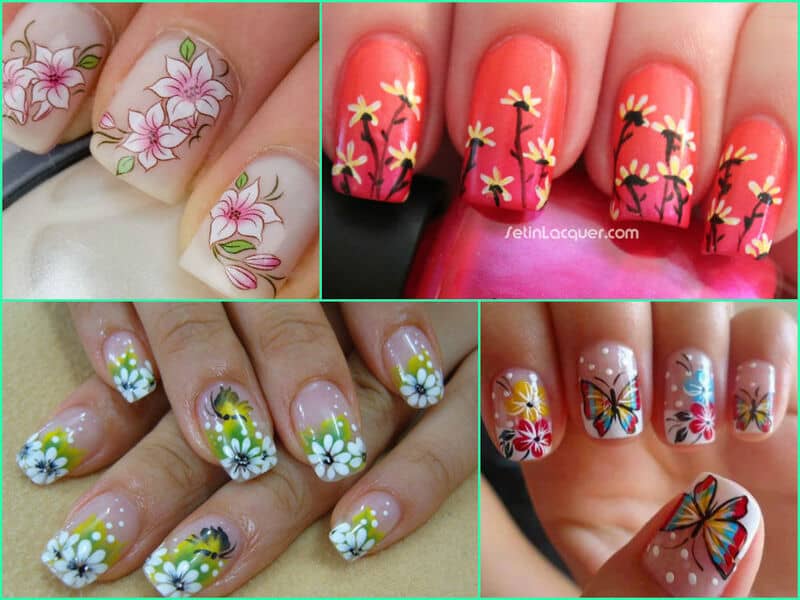
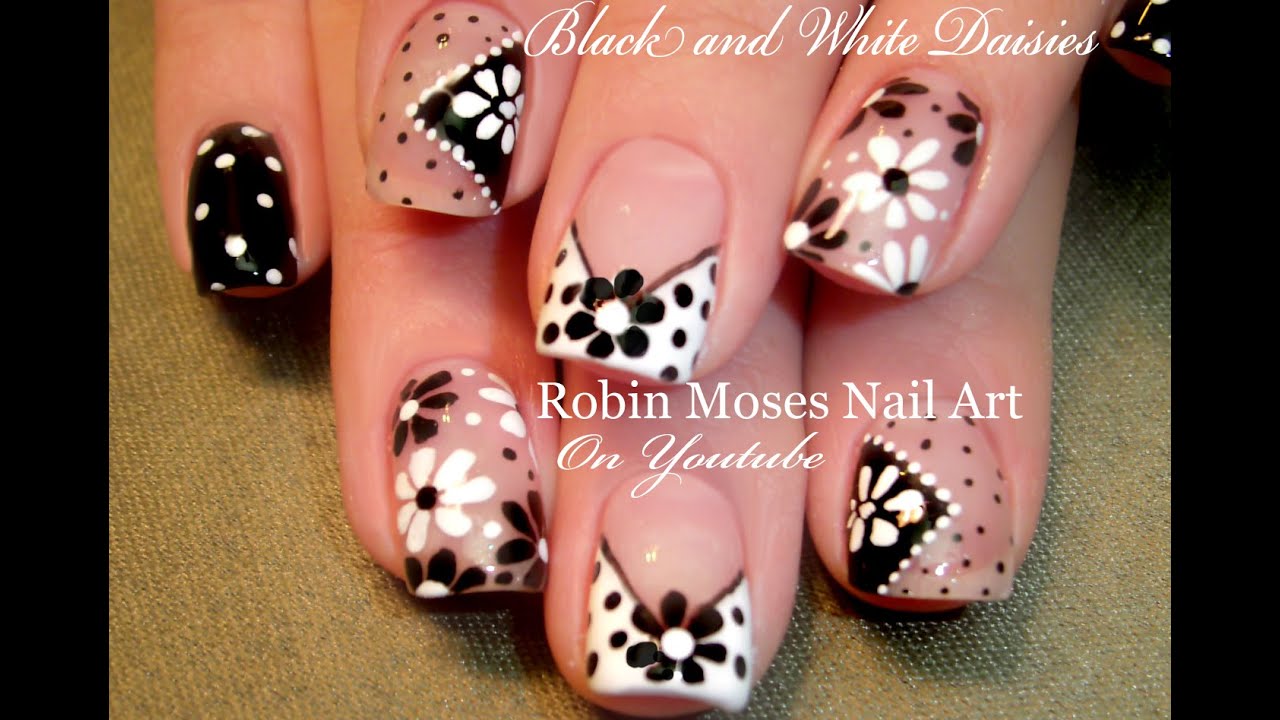
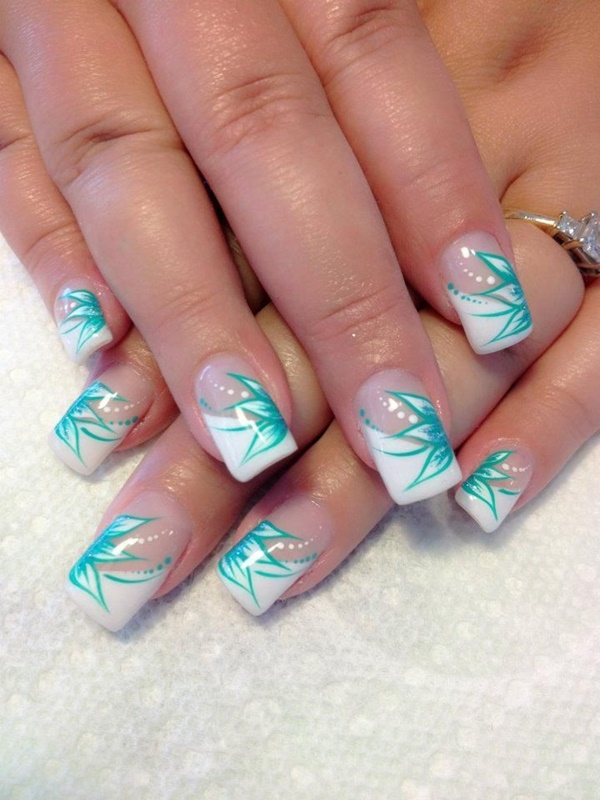
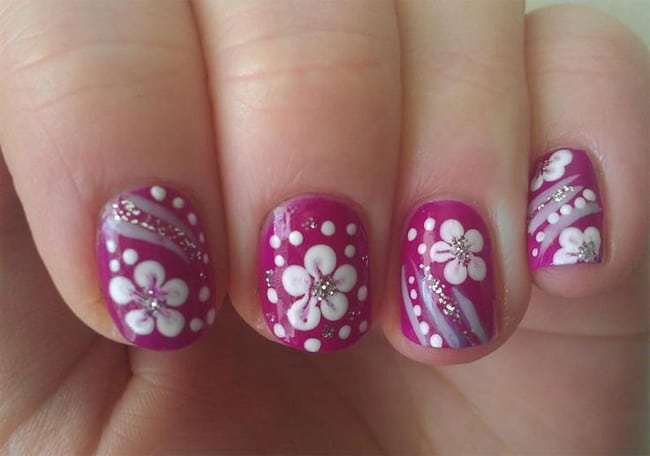
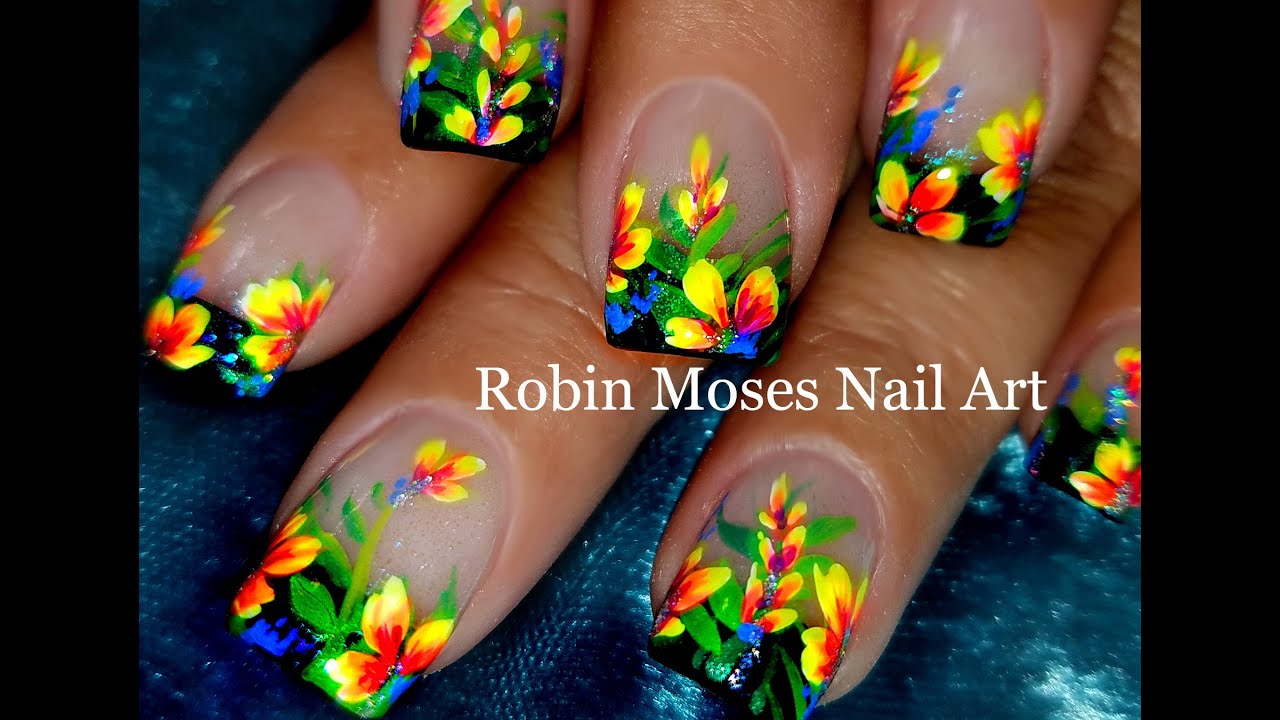
Looking to add some vibrant and eye-catching designs to your nails? Look no further than this bright floral nail art tutorial! With bold colors and delicate flowers, this design is sure to make a statement. Follow these simple steps to achieve a stunning floral look on your nails. To start, gather your materials. You will need a base coat, top coat, white nail polish, and a variety of bright nail polish colors. You will also need a small dotting tool or toothpick for creating the flower designs. Begin by applying a clear base coat to your nails. This will help protect your natural nails and make your manicure last longer. Once the base coat is dry, apply two coats of white nail polish for a clean canvas to work with. Next, take your bright nail polish colors and use the dotting tool or toothpick to create small dots on your nails. You can create a pattern or randomly place the dots for a more abstract look. Make sure to leave some white space on each nail for the flowers to stand out. Once the dots are dry, it's time to create the flowers. Using a small dotting tool or toothpick, create five dots in a circle shape to form the petals of the flower. You can use different colors for each flower or stick to one color for a cohesive look. After creating the petals, use a different color to create a small dot in the center of the flower. This will give the flower some depth and dimension. Repeat this process for each nail, creating as many flowers as you'd like. Once all of the flowers are complete, allow them to dry completely before applying a top coat. This will seal in your design and make it last longer. You can also add some extra sparkle by using a glitter top coat. And there you have it! A bright and beautiful floral nail art design that is sure to turn heads. Experiment with different color combinations and patterns to make this design your own. Now you can show off your gorgeous floral nails with pride!1. "Bright Floral Nail Art Tutorial"

1. "Bright Floral Nail Art Tutorial"
:max_bytes(150000):strip_icc()/284224607_818102752504475_277547827964259801_n-3ef75484d6c149c986288e35e05275b0.jpg)

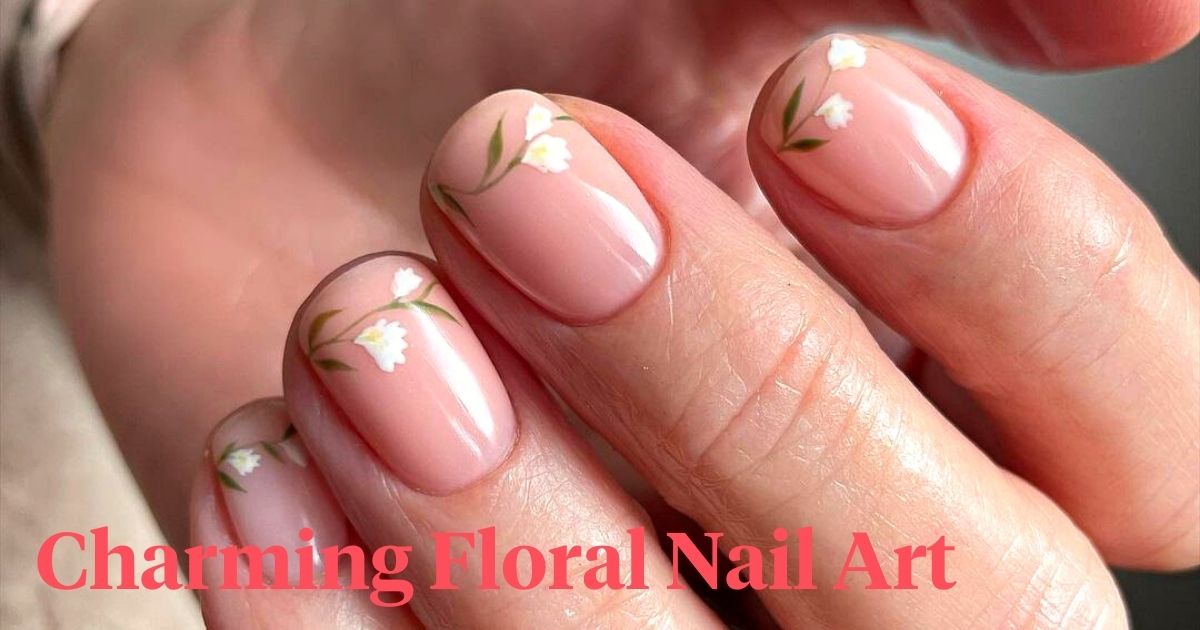


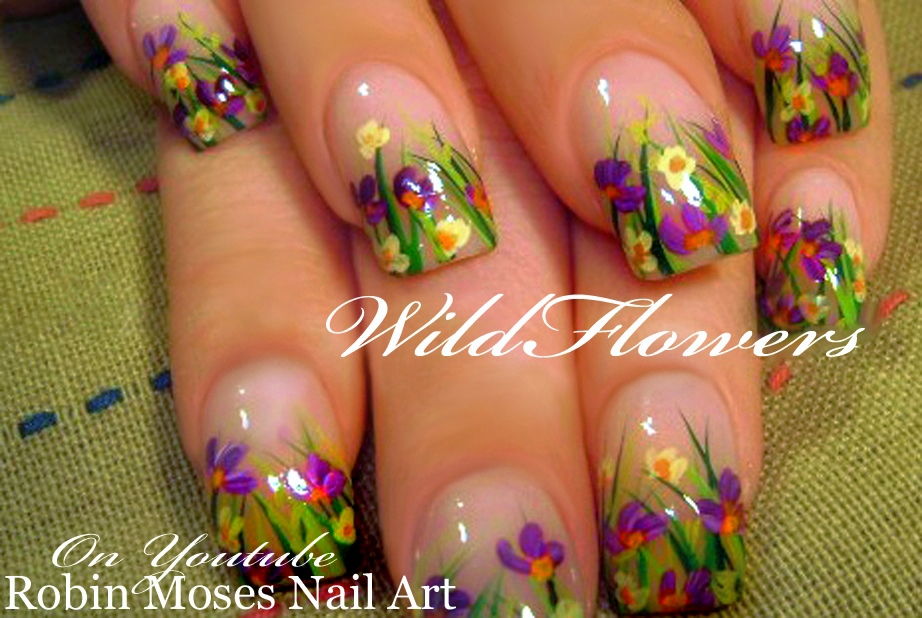
If you're new to nail art, this easy flower nail art design tutorial is perfect for you. With just a few simple steps, you can achieve a stunning floral design on your nails. Follow along and create your own beautiful manicure. To start, gather your materials. You will need a base coat, top coat, white nail polish, and a few different colors of nail polish for the flowers. You will also need a toothpick or small brush for creating the flower designs. Begin by applying a clear base coat to your nails. This will protect your natural nails and make your manicure last longer. Once the base coat is dry, apply two coats of white nail polish for a clean base. Next, choose your first color for the flowers and use the toothpick or small brush to create small dots on your nails. These will be the centers of your flowers, so make sure to leave enough white space around them for the petals. Using a different color, create small lines around the dot to form the petals of the flower. You can use as many or as few petals as you'd like, depending on the size of your flowers. Repeat this process for each nail, using different colors for each flower. Once the flowers are complete, allow them to dry before applying a top coat. This will seal in your design and make it last longer. You can also add some extra shine by using a glitter top coat. And that's it! With just a few simple steps, you have a gorgeous floral manicure. Feel free to experiment with different colors and patterns to make this design your own. Now you're ready to show off your beautiful flower nails!2. "Easy Flower Nail Art Design Tutorial"


2. "Easy Flower Nail Art Design Tutorial"


Take your floral nail art to the next level with this colorful floral nail art tutorial. With a rainbow of colors and intricate flower designs, this manicure is perfect for those who love a bold and vibrant look. Follow these steps to achieve this stunning design. Start by gathering your materials. You will need a base coat, top coat, white nail polish, and a variety of bright nail polish colors. You will also need a small dotting tool or toothpick for creating the flower designs. Begin by applying a clear base coat to your nails. This will protect your natural nails and make your manicure last longer. Once the base coat is dry, apply two coats of white nail polish for a clean base to work with. Next, take your bright nail polish colors and use the dotting tool or toothpick to create small dots on your nails. You can create a rainbow pattern or mix and match the colors for a more abstract look. Make sure to leave some white space on each nail for the flowers to stand out. Once the dots are dry, use a different color to create small dots in a circular shape to form the petals of the flower. You can use different colors for each flower or stick to one color for a cohesive look. After creating the petals, use a different color to create a small dot in the center of the flower. This will give the flower some depth and dimension. Repeat this process for each nail, creating as many flowers as you'd like. Once all of the flowers are complete, allow them to dry completely before applying a top coat. This will seal in your design and make it last longer. You can also add some extra sparkle by using a glitter top coat. And there you have it! A colorful and stunning floral nail art design that is sure to make a statement. Have fun experimenting with different color combinations and patterns to make this design your own. Now you're ready to show off your beautiful rainbow flower nails!3. "Colorful Floral Nail Art Tutorial"


3. "Colorful Floral Nail Art Tutorial"


For a detailed and easy-to-follow tutorial, this step-by-step flower nail art tutorial is perfect for you. With clear instructions and photos, you can achieve a beautiful floral design on your nails in no time. Follow these steps to create your own stunning manicure. To start, gather your materials. You will need a base coat, top coat, white nail polish, and a few different colors of nail polish for the flowers. You will also need a small dotting tool or toothpick for creating the flower designs. Begin by applying a clear base coat to your nails. This will protect your natural nails and make your manicure last longer. Once the base coat is dry, apply two coats of white nail polish for a clean base to work with. Next, choose your first color for the flowers and use the toothpick or small brush to create small dots on your nails. These will be the centers of your flowers, so make sure to leave enough white space around them for the petals. Using a different color, create small lines around the dot to form the petals of the flower. You can use as many or as few petals as you'd like, depending on the size of your flowers. Repeat this process for each nail, using different colors for each flower. Once the flowers are complete, allow them to dry before applying a top coat. This will seal in your design and make it last longer. You can also add some extra shine by using a glitter top coat. And that's it! With just a few simple steps, you have a gorgeous floral manicure. Feel free to experiment with different colors and patterns to make this design your own. Now you're ready to show off your beautiful flower nails!4. "Step-by-Step Flower Nail Art Tutorial"
4. "Step-by-Step Flower Nail Art Tutorial"
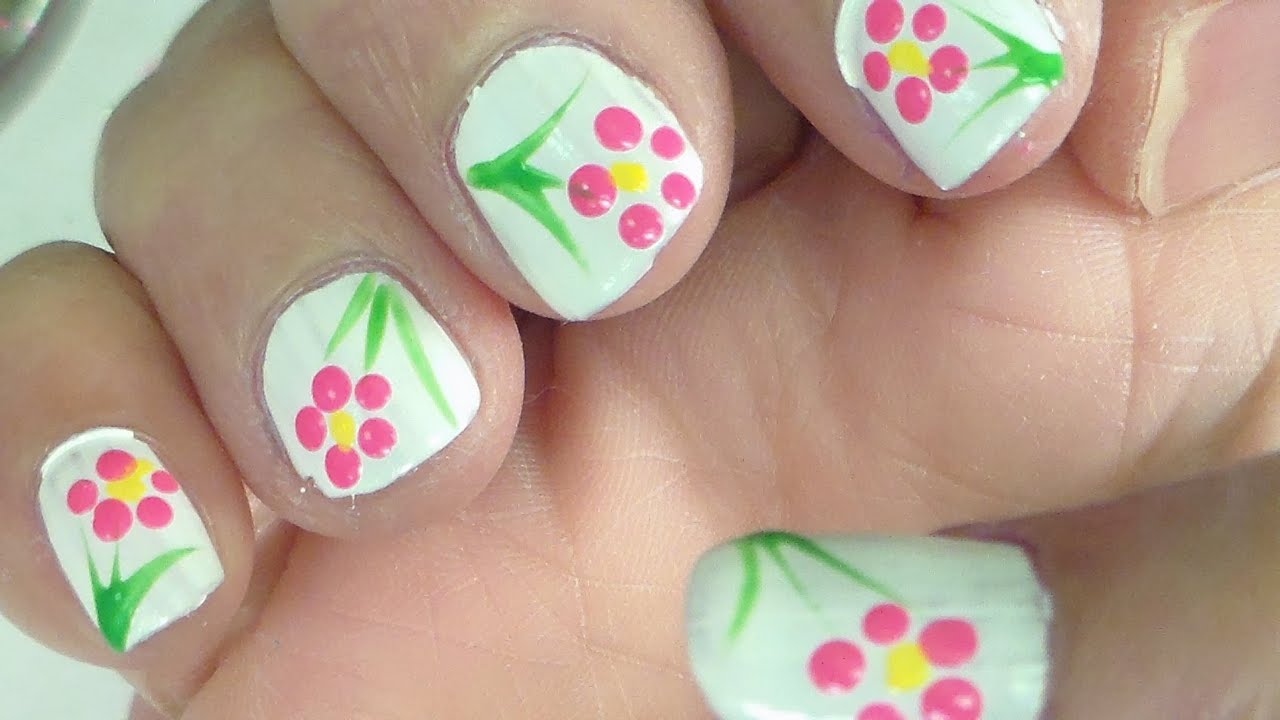
Make a statement with your nails with this bright and bold flower nail art tutorial. With eye-catching colors and intricate designs, this manicure is perfect for those who love a bold and vibrant look. Follow these steps to achieve this stunning design. Start by gathering your materials. You will need a base coat, top coat, white nail polish, and a variety of bright nail polish colors. You will also need a small dotting tool or toothpick for creating the flower designs. Begin by applying a clear base coat to your nails. This will protect your natural nails and make your manicure last longer. Once the base coat is dry, apply two coats of white nail polish for a clean base to work with. Next, take your bright nail polish colors and use the dotting tool or toothpick to create small dots on your nails. You can create a pattern or randomly place the dots for a more abstract look. Make sure to leave some white space on each nail for the flowers to stand out. Once the dots are dry, use a different color to create small dots in a circular shape to form the petals of the flower. You can use different colors for each flower or stick to one color for a cohesive look. After creating the petals, use a different color to create a small dot in the center of the flower. This will give the flower some depth and dimension. Repeat this process for each nail, creating as many flowers as you'd like. Once all of the flowers are complete, allow them to dry completely before applying a top coat. This will seal in your design and make it last longer. You can also add some extra sparkle by using a glitter top coat. And there you have it! A bright and bold floral nail art design that is sure to turn heads. Experiment with different color combinations and patterns to make this design your own. Now you can show off your gorgeous floral nails with pride!5. "Bright and Bold Flower Nail Art Tutorial"

5. "Bright and Bold Flower Nail Art Tutorial"


New to nail art? No problem! This flower nail art design for beginners is simple and easy to achieve. With just a few basic steps, you can create a beautiful floral design on your nails. Follow along and create your own stunning manicure. To start, gather your materials. You will need a base coat, top coat, white nail polish, and a few different colors of nail polish for the flowers. You will also need a small dotting tool or toothpick for creating the flower designs. Begin by applying a clear base coat to your nails. This will protect your natural nails and make your manicure last longer. Once the base coat is dry, apply two coats of white nail polish for a clean base to work with. Next, choose your first color for the flowers and use the toothpick or small brush to create small dots on your nails. These will be the centers of your flowers, so make sure to leave enough white space around them for the petals. Using a different color, create small lines around the dot to form the petals of the flower. You can use as many or as few petals as you'd like, depending on the size of your flowers. Repeat this process for each nail, using different colors for each flower. Once the flowers are complete, allow them to dry before applying a top coat. This will seal in your design and make it last longer. You can also add some extra shine by using a glitter top coat. And that's it! With just a few simple steps, you have a gorgeous floral manicure. Feel free to experiment with different colors and patterns to make this design your own. Now you're ready to show off your beautiful flower nails!6. "Flower Nail Art Design for Beginners"

6. "Flower Nail Art Design for Beginners"

Add some fun to your nails with this bright and fun floral nail art tutorial. With bold colors and playful designs, this manicure is perfect for those who love a whimsical look. Follow these steps to achieve this stunning design. Start by gathering your materials. You will need a base coat, top coat, white nail polish, and a variety of bright nail polish colors. You will also need a small dotting tool or toothpick for creating the flower designs. Begin by applying a clear base coat to your nails. This will protect your natural nails and make your manicure last longer. Once the base coat is dry, apply two coats of white nail polish for a clean base to work with. Next, take your bright nail polish colors and use the dotting tool or toothpick to create small dots on your nails. You can create a pattern or randomly place the dots for a more abstract look. Make sure to leave some white space on each nail for the flowers to stand out. Once the dots are dry, use a different color to create small dots in a circular shape to form the petals of the flower. You can use different colors for each flower or stick to one color for a cohesive look. After creating the petals, use a different color to create a small dot in the center of the flower. This will give the flower some depth and dimension. Repeat this process for each nail, creating as many flowers as you'd like. Once all of the flowers are complete, allow them to dry completely before applying a top coat. This will seal in your design and make it last longer. You can also add some extra sparkle by using a glitter top coat. And there you have it! A bright and fun floral nail art design that is sure to put a smile on your face. Experiment with different color combinations and patterns to make this design your own. Now you can show off your playful and beautiful floral nails with pride!7. "Bright and Fun Floral Nail Art Tutorial"

7. "Bright and Fun Floral Nail Art Tutorial"

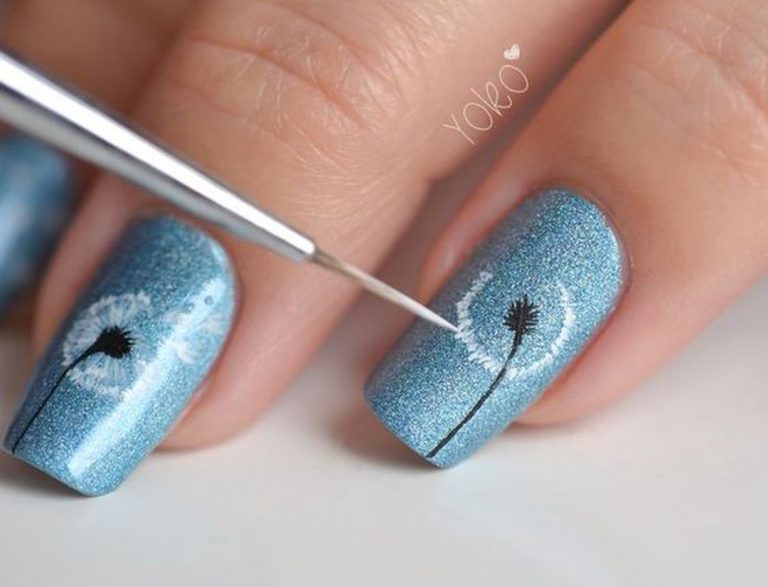
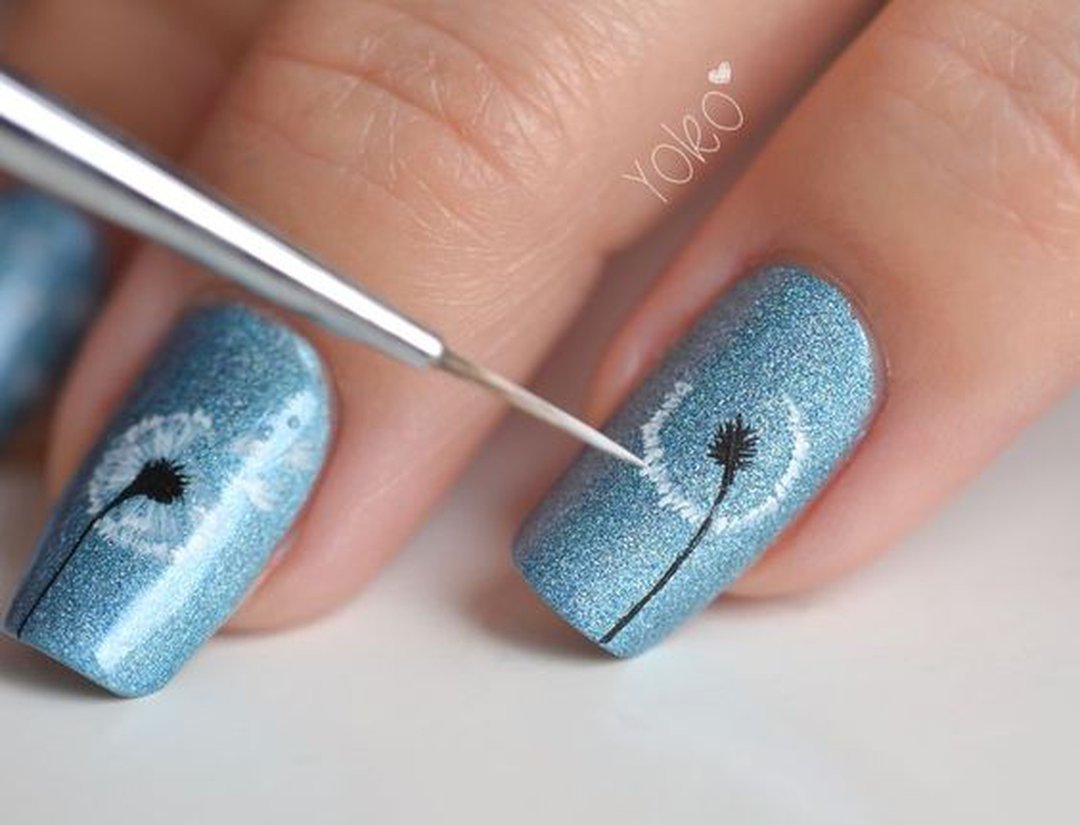
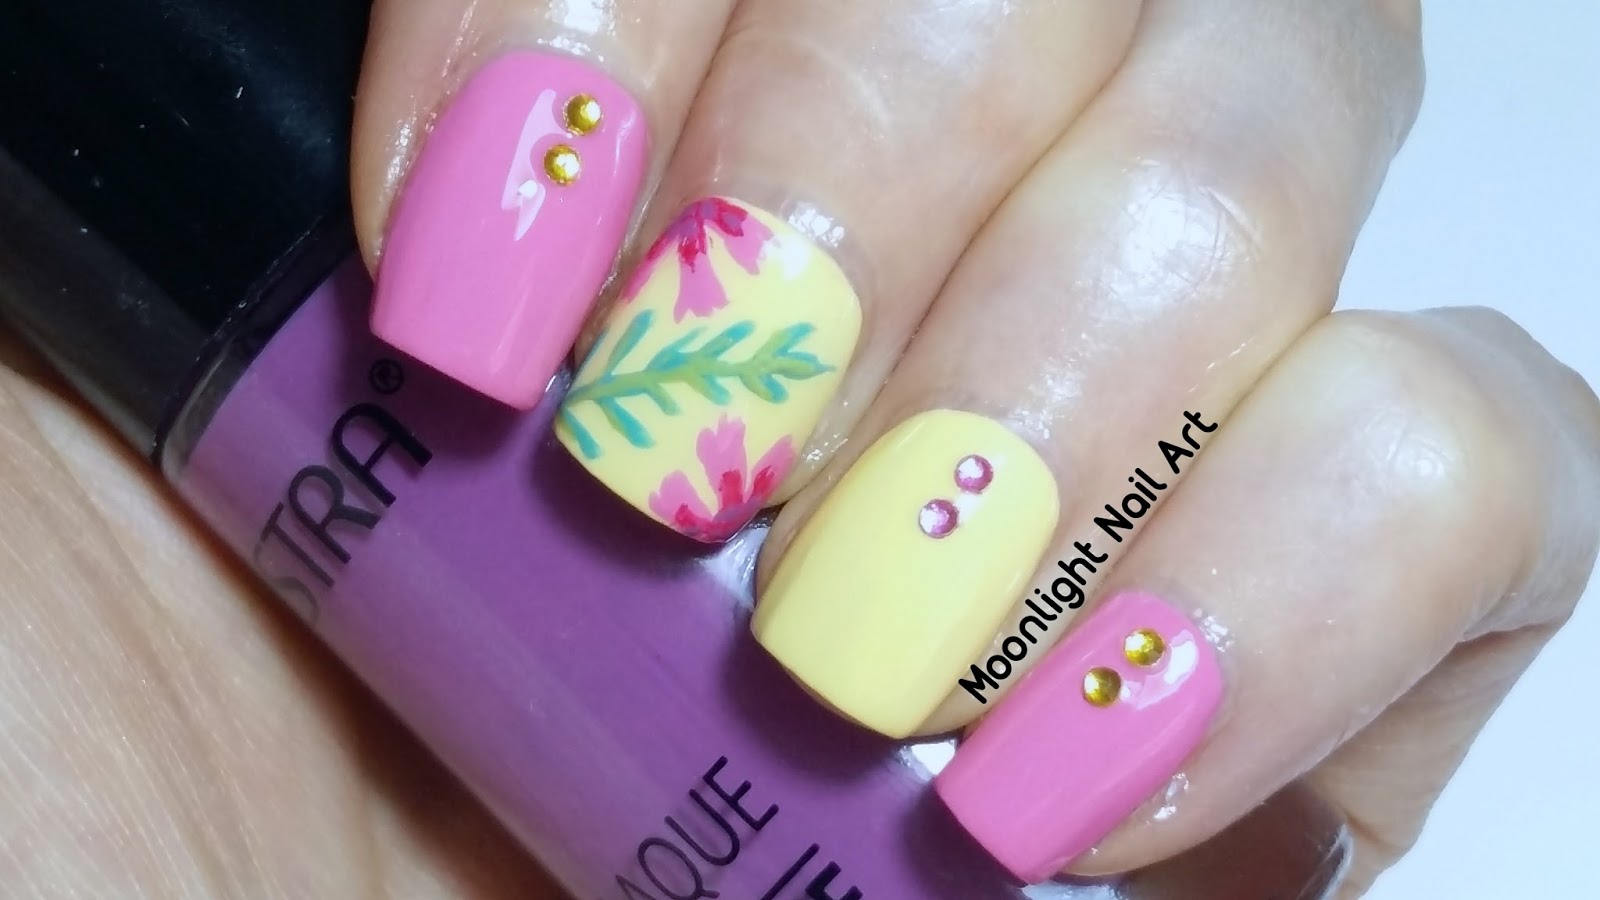
Looking for a fun and creative project? This DIY flower nail art tutorial is perfect for you. With just a few simple steps, you can create a beautiful floral design on your nails. Follow along and create your own stunning manicure. To start, gather your materials. You will need a base coat, top coat, white nail polish, and a few different colors of nail polish for the flowers. You will also need a small dotting tool or toothpick for creating the flower designs. Begin by applying a clear base coat to your nails. This will protect your natural nails and make your manicure last longer. Once the base coat is dry, apply two coats of white nail polish for a clean base to work with. Next, choose your first color for the flowers and use the toothpick or small brush to create small dots on your nails. These will be the centers of your flowers, so make sure to leave enough white space around them for the petals.8. "DIY Flower Nail Art Tutorial"

8. "DIY Flower Nail Art Tutorial"

The Beauty of Bright Flower Nail Art Designs

Adding a Pop of Color to Your Nail Game
 Bright flower nail art designs have become a popular trend amongst nail enthusiasts, and it's not hard to see why. With its vibrant colors and intricate details, it's the perfect way to add a pop of color to your nail game. Whether you're looking for a subtle touch or a bold statement, these designs are sure to make your nails stand out.
Bringing Nature to Your Fingertips
 Flowers have always been a symbol of beauty and life, and incorporating them into your nail art is a great way to bring a touch of nature to your fingertips. The bright colors and delicate petals of flowers can instantly brighten up your mood and add a touch of femininity to your look.
Unleashing Your Creativity
 One of the best things about bright flower nail art designs is that they offer endless possibilities for creativity. You can mix and match different colors and flower types to create your own unique design. You can also experiment with different techniques such as stamping, freehand painting, or using nail decals to achieve your desired look.
Perfect for Any Occasion
 Whether you're attending a wedding, a music festival, or just want to add some fun to your everyday look, bright flower nail art designs are versatile and suitable for any occasion. You can opt for a simple design with small flowers for a more subtle look, or go all out with a full floral pattern for a statement look.
DIY Tutorial: How to Create Your Own Bright Flower Nail Art
 Now that you know the beauty and versatility of bright flower nail art designs, it's time to learn how to create your own. Here's a simple step-by-step tutorial to help you achieve the perfect flower nail art:
Step 1:
Start by applying a base coat to protect your nails. Let it dry completely.
Step 2:
Choose your desired base color. It can be a solid color or a gradient of two or more colors.
Step 3:
Using a thin brush, create the outline of your flower petals with white nail polish.
Step 4:
Fill in the petals with different colors of your choice. You can also use a dotting tool to create the center of the flower.
Step 5:
Add some green leaves or stems to your design.
Step 6:
Once the design is dry, apply a top coat to seal and protect your design.
Now that you know the beauty and versatility of bright flower nail art designs, it's time to learn how to create your own. Here's a simple step-by-step tutorial to help you achieve the perfect flower nail art:
Step 1:
Start by applying a base coat to protect your nails. Let it dry completely.
Step 2:
Choose your desired base color. It can be a solid color or a gradient of two or more colors.
Step 3:
Using a thin brush, create the outline of your flower petals with white nail polish.
Step 4:
Fill in the petals with different colors of your choice. You can also use a dotting tool to create the center of the flower.
Step 5:
Add some green leaves or stems to your design.
Step 6:
Once the design is dry, apply a top coat to seal and protect your design.
Brighten Up Your Nails with Flower Power
 In conclusion, bright flower nail art designs are a fun and creative way to add a pop of color to your nails. With endless possibilities and versatility, it's a trend that is here to stay. So why not unleash your creativity and try out some bright flower nail art designs for your next manicure? Trust us, your nails will thank you.
HTML Code:
The Beauty of Bright Flower Nail Art Designs

Adding a Pop of Color to Your Nail Game
Bright flower nail art designs have become a popular trend amongst nail enthusiasts, and it's not hard to see why. With its vibrant colors and intricate details, it's the perfect way to add a pop of color to your nail game. Whether you're looking for a subtle touch or a bold statement, these designs are sure to make your nails stand out.
Bringing Nature to Your Fingertips

Flowers have always been a symbol of beauty and life, and incorporating them into your nail art is a great way to bring a touch of nature to your fingertips. The bright colors and delicate petals of flowers can instantly brighten up your mood and add a touch of femininity to your look.
Unleashing Your Creativity
One of the best things about bright flower nail art designs is that they offer endless possibilities for creativity. You can mix and match different colors and flower types to create your own unique design. You can also experiment with different techniques such as stamping, freehand painting, or using nail decals to achieve your desired look.
Perfect for Any Occasion
Whether you're attending a wedding, a music festival, or just want to add some fun to your everyday look, bright flower nail art designs are versatile and suitable for any occasion. You can opt for a simple design with small flowers for a more subtle look, or go all out with a full floral pattern for a statement look.
DIY Tutorial