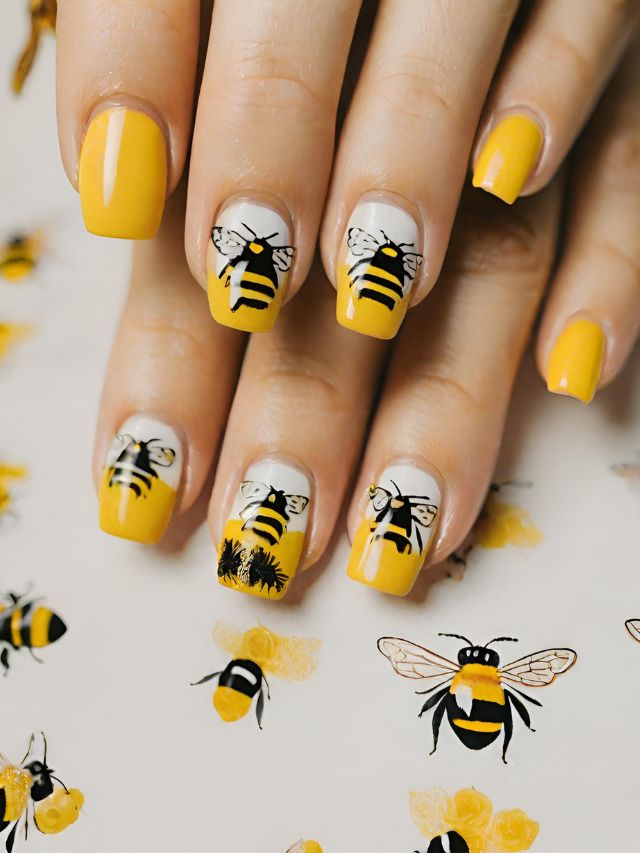
Want to add a touch of buzz to your nails? Look no further than this easy bumble bee nail art tutorial! With just a few simple steps, you can achieve a cute and playful look that is perfect for any occasion. To start, apply a base coat to your nails to protect them and help the polish last longer. Then, using a yellow nail polish, paint your nails and let them dry completely. Next, using a small nail art brush or a toothpick, create black stripes on your nails to resemble a bee's body. You can also use black nail polish with a thin brush for more precision. For the bee's head, use a dotting tool or a toothpick to create a black circle at the tip of your nail. Let it dry before moving on to the next step. Finally, add two small white dots on the bee's head for the eyes. You can use a toothpick or a dotting tool for this as well. Finish off with a top coat to seal in your design and give it a shiny finish. Voila! You now have adorable bumble bee nails that are sure to make a statement.1. "Easy Bumble Bee Nail Art Tutorial"


1. "Easy Bumble Bee Nail Art Tutorial"


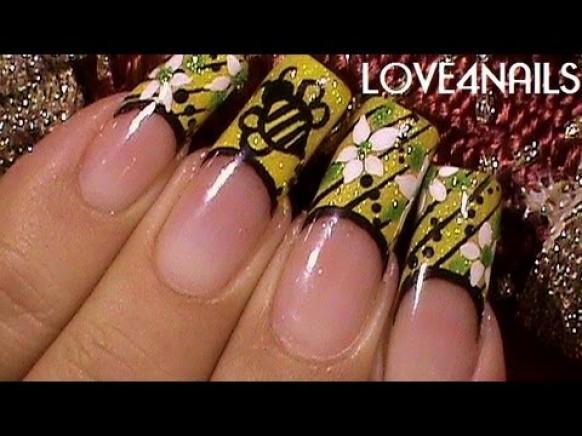
If you're new to nail art and want to create a more detailed bumble bee design, this step-by-step tutorial is for you. It may look complicated, but with a little patience and practice, you'll have buzz-worthy nails in no time! Start by applying a base coat and then painting your nails with a bright yellow polish. Let them dry completely before moving on to the next step. Using a thin brush or a toothpick, create black stripes on your nails to resemble a bee's body. Make sure to leave some space in the middle for the bee's head. Next, use a dotting tool or a toothpick to create a black circle for the bee's head. Then, using a white polish, add two small dots for the eyes. Let everything dry before moving on to the next step. For the wings, use a thin brush or a toothpick to create two curved lines above the bee's body. You can also use a white nail polish with a thin brush for this step. Finally, add small black dots on the wings to give them some texture. Finish off with a top coat to seal in your design and give it a shiny finish. There you have it! Your cute bumble bee nails are now complete and ready to fly!2. "Step-by-Step Bumble Bee Nail Design"


2. "Step-by-Step Bumble Bee Nail Design"

Don't have much experience with nail art? No problem! This cute bumble bee nail tutorial is perfect for beginners and requires minimal tools. Start by painting your nails with a bright yellow polish. Let them dry completely before moving on to the next step. Using a dotting tool or a toothpick, create black dots on your nails to resemble a bee's body. You can also use a black nail polish with a thin brush for this step. Next, use a thin brush or a toothpick to create two white dots for the bee's eyes. Let everything dry before moving on to the next step. For the wings, use a thin brush or a toothpick to create two curved lines above the bee's body. You can also use a white nail polish with a thin brush for this step. Finally, add small black dots on the wings to give them some texture. Finish off with a top coat to seal in your design and give it a shiny finish. There you have it! Your simple yet cute bumble bee nails are now complete.3. "Cute Bumble Bee Nail Tutorial for Beginners"


3. "Cute Bumble Bee Nail Tutorial for Beginners"


If you want to achieve a more intricate bumble bee nail design, stamping plates are the way to go. Not only do they make the process faster, but they also give you precise and professional-looking results. Start by applying a base coat to your nails and then painting them with a bright yellow polish. Let them dry completely before moving on to the next step. Using a black stamping polish, transfer a bee design onto your nails using a stamping plate and a stamping tool. If you're new to stamping, there are plenty of tutorials online that can help you get the hang of it. Next, using a thin brush or a toothpick, create two white dots for the bee's eyes. Let them dry before moving on to the next step. For the wings, use a thin brush or a toothpick to create two curved lines above the bee's body. You can also use a white nail polish with a thin brush for this step. Finally, add small black dots on the wings to give them some texture. Finish off with a top coat to seal in your design and give it a shiny finish. There you have it! Your bumble bee nails are now complete and look like they were done by a professional.4. "Bumble Bee Nail Design Using Stamping Plates"


4. "Bumble Bee Nail Design Using Stamping Plates"


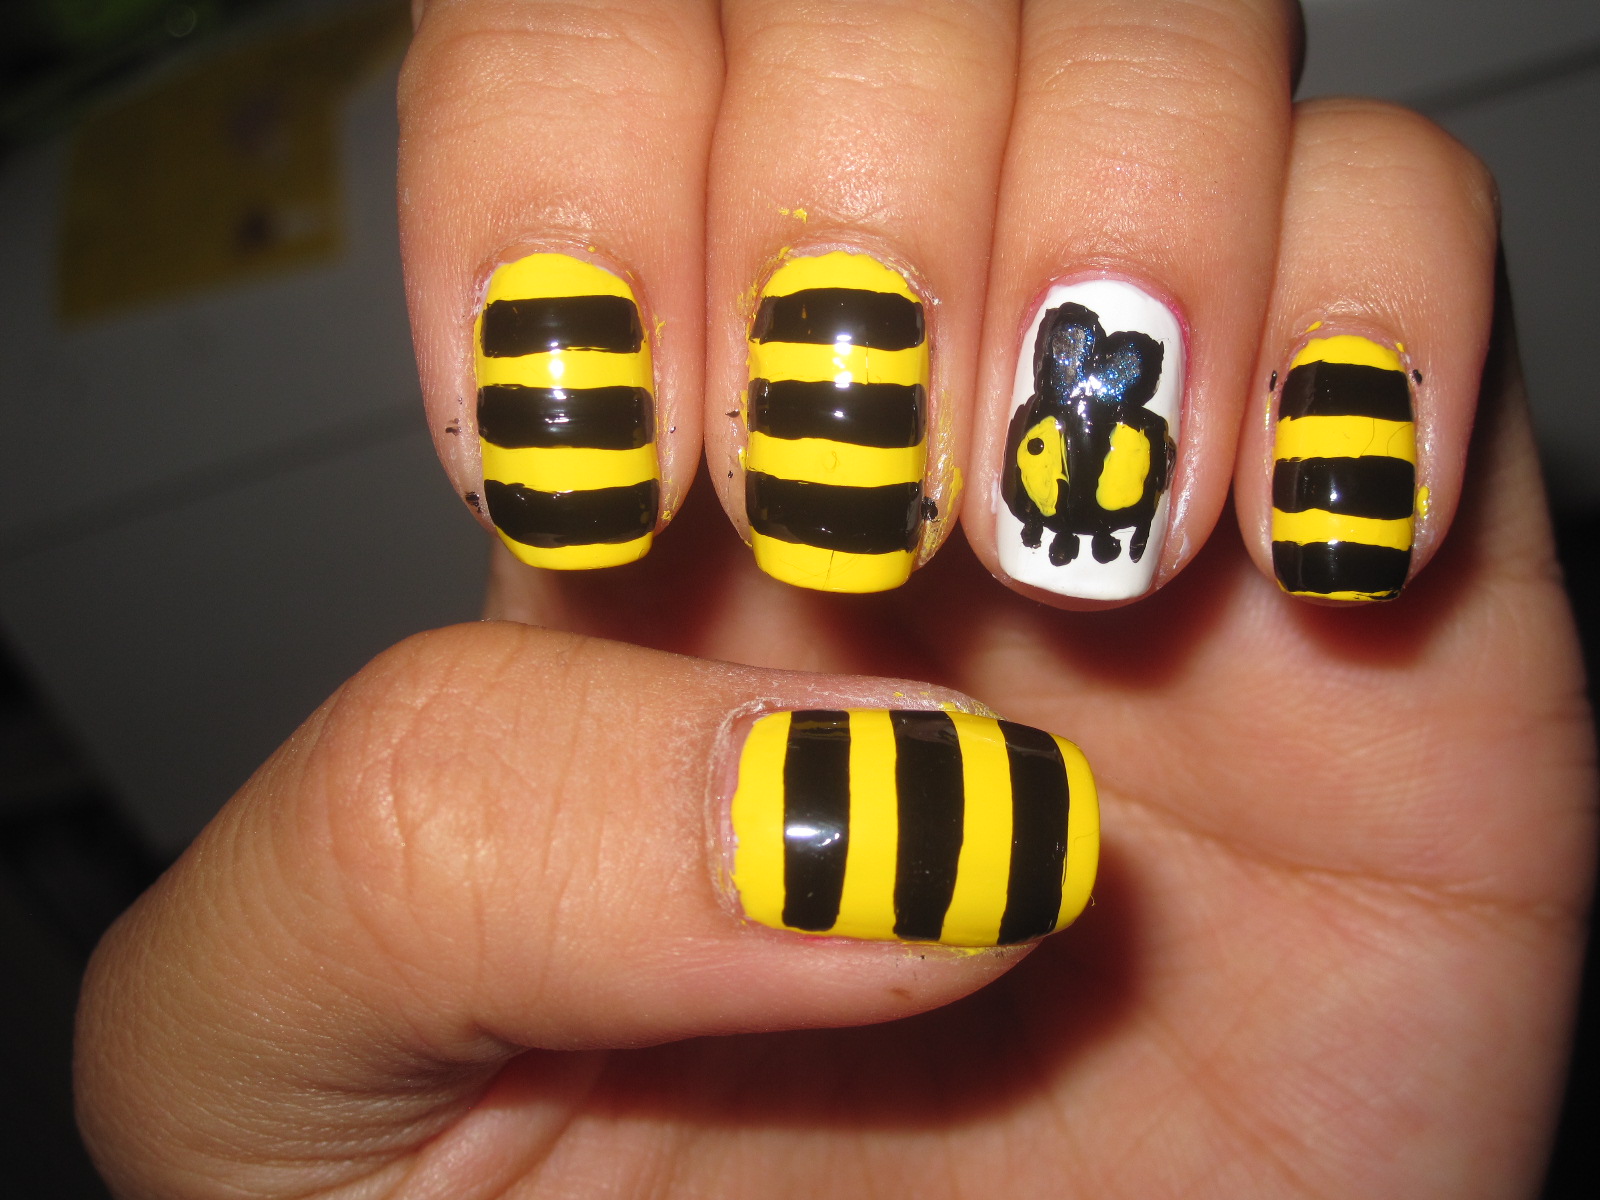
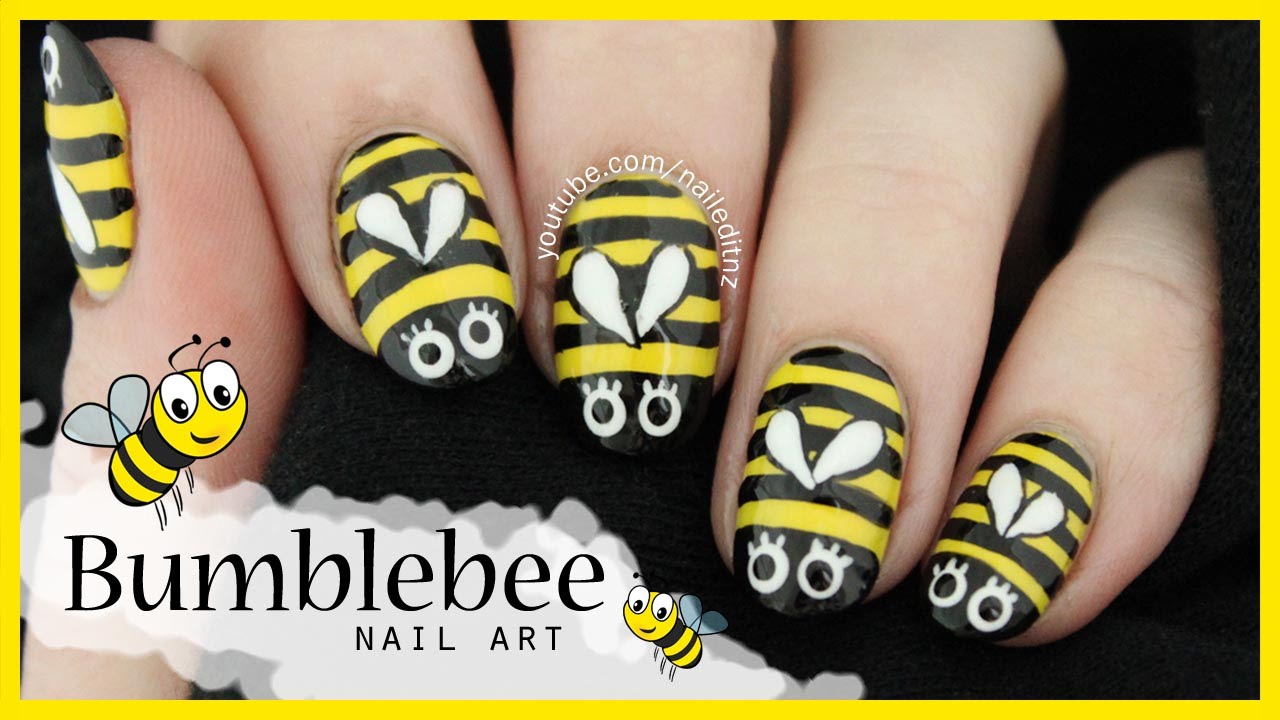
If you're looking for a more bold and edgy bumble bee nail design, this tutorial is for you. This black and yellow combination is not only eye-catching, but also perfect for those who prefer darker nail looks. Start by applying a base coat and then painting your nails with a bright yellow polish. Let them dry completely before moving on to the next step. Using a black nail polish, create black stripes on your nails to resemble a bee's body. You can use a thin brush or a toothpick for this step. Next, using a dotting tool or a toothpick, create a black circle for the bee's head. Then, add two small white dots for the eyes using a white polish. Let everything dry before moving on to the next step. For the wings, use a thin brush or a toothpick to create two curved lines above the bee's body. You can also use a white nail polish with a thin brush for this step. Finally, add small black dots on the wings to give them some texture. Finish off with a top coat to seal in your design and give it a shiny finish. Your black and yellow bumble bee nails are now complete!5. "Black and Yellow Bumble Bee Nail Tutorial"


5. "Black and Yellow Bumble Bee Nail Tutorial"

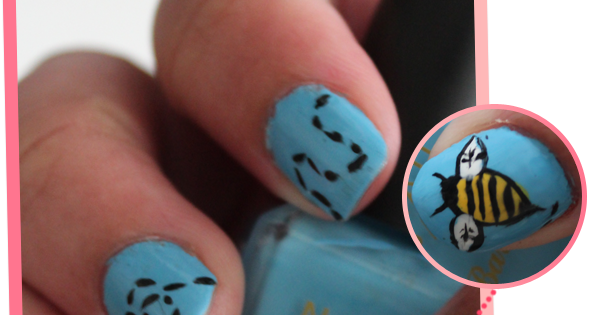
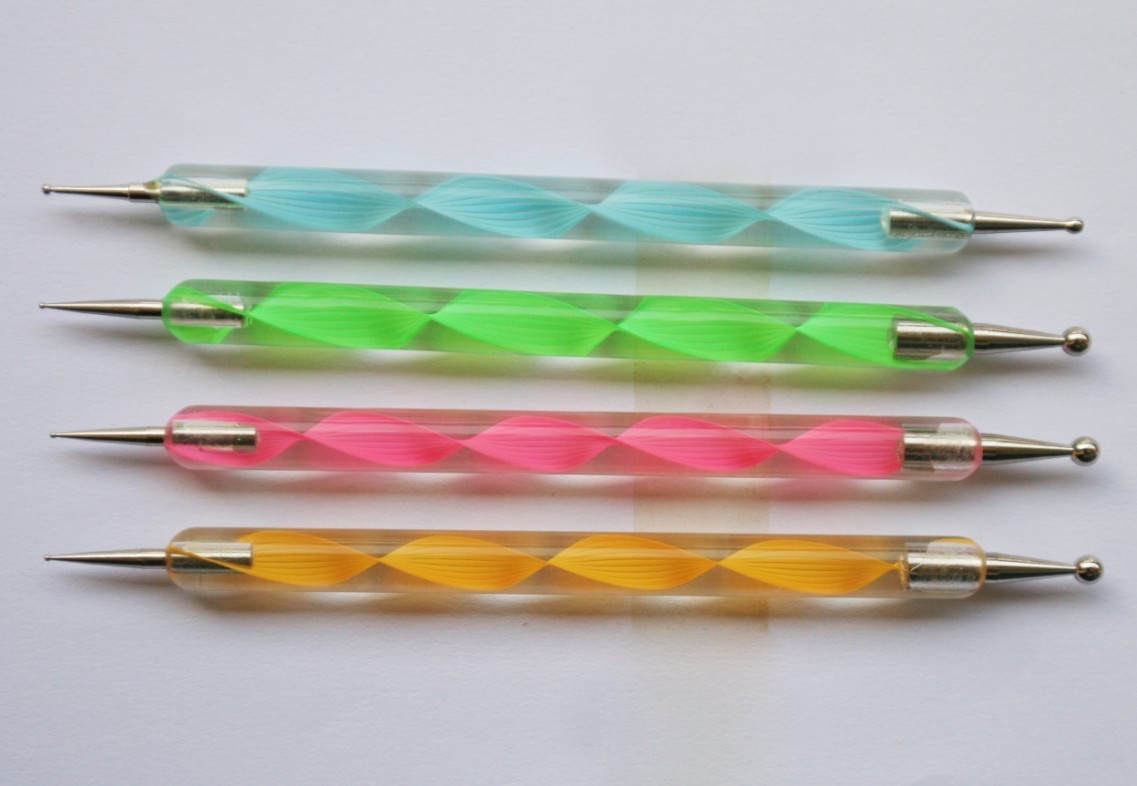
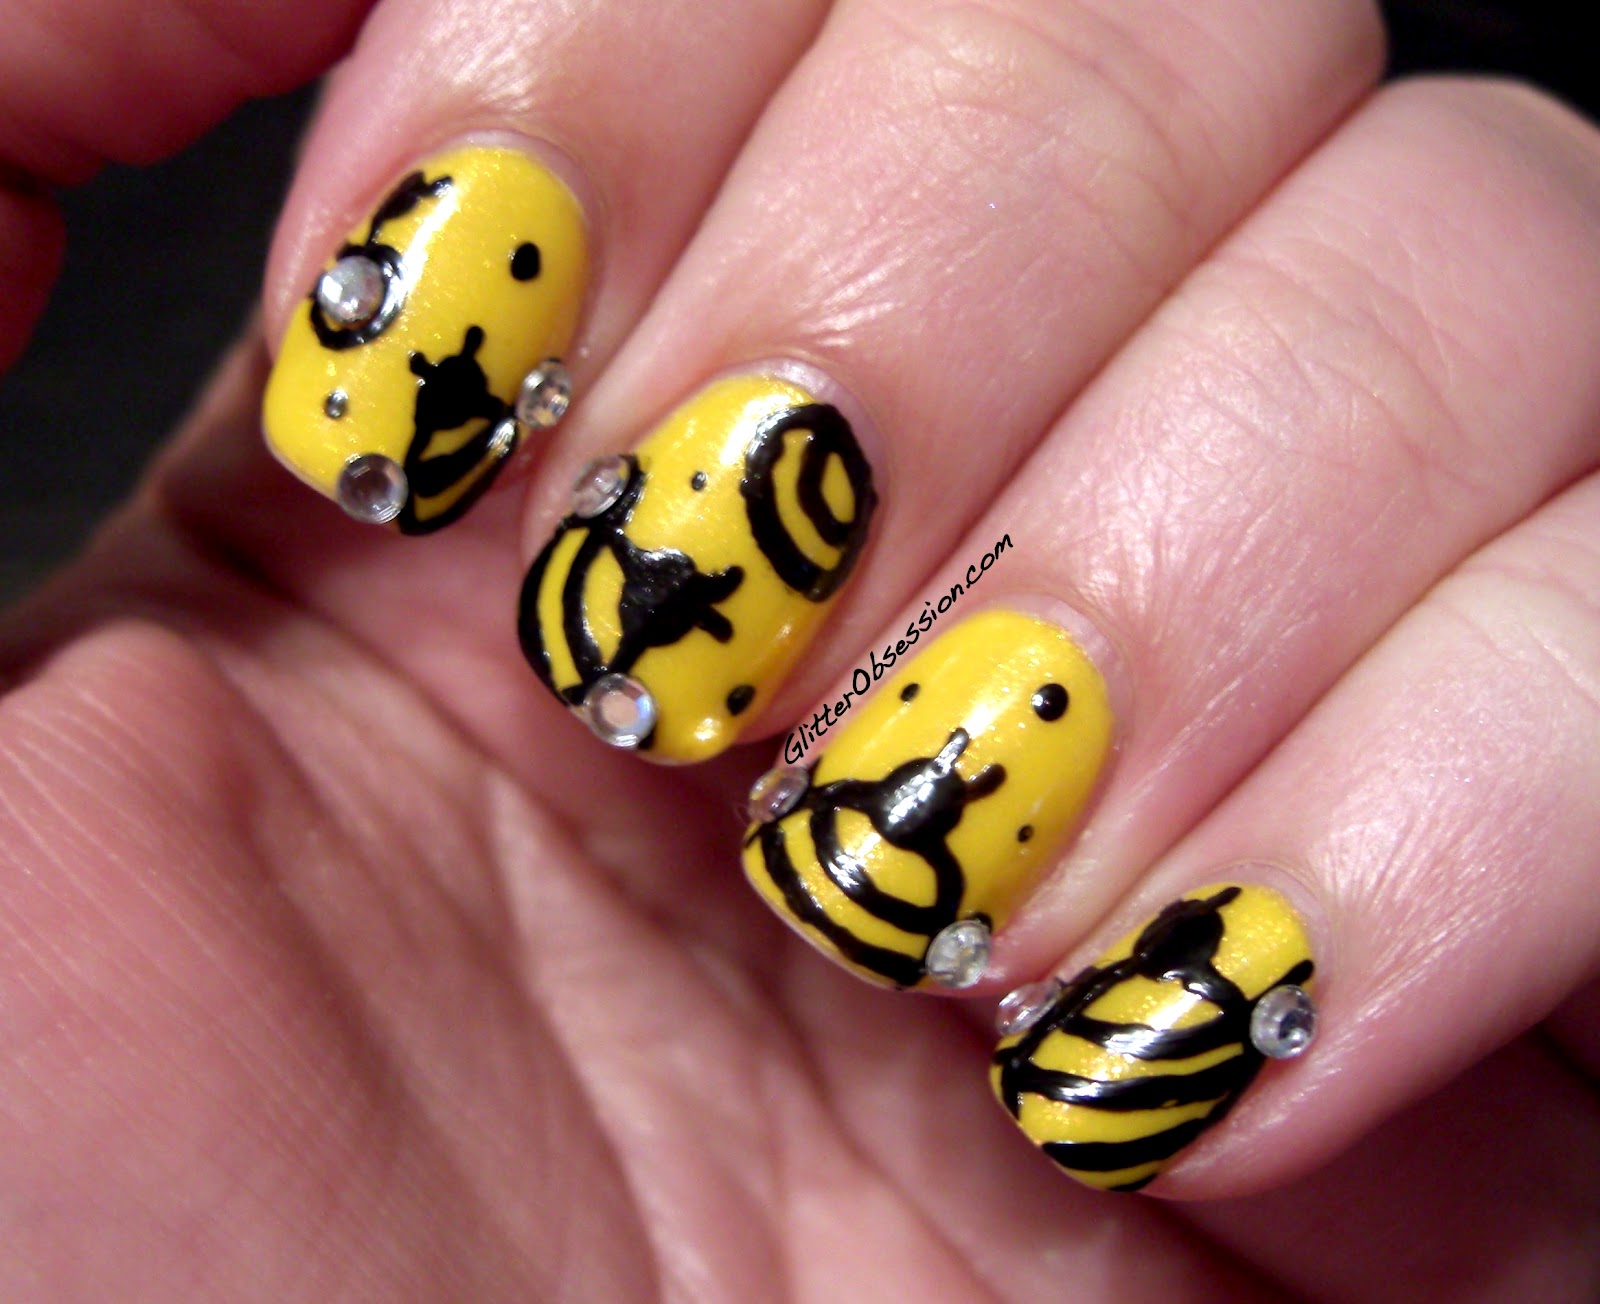
A dotting tool is a must-have for any nail art enthusiast. With this simple tool, you can create adorable bumble bee nails in no time! Start by applying a base coat and then painting your nails with a bright yellow polish. Let them dry completely before moving on to the next step. Using a dotting tool, create black dots on your nails to resemble a bee's body. You can also use a black nail polish with a thin brush for this step. Next, use a thin brush or a toothpick to create two white dots for the bee's eyes. Let them dry before moving on to the next step. For the wings, use a thin brush or a toothpick to create two curved lines above the bee's body. You can also use a white nail polish with a thin brush for this step. Finally, add small black dots on the wings to give them some texture. Finish off with a top coat to seal in your design and give it a shiny finish. Your bumble bee nails with a dotting tool are now complete!6. "Bumble Bee Nail Art with Dotting Tool"


6. "Bumble Bee Nail Art with Dotting Tool"


If you want to keep your bumble bee nail design simple and minimal, this accent nail tutorial is perfect for you. Start by painting your nails with a bright yellow polish. Let them dry completely before moving on to the next step. Using a black nail polish, create black stripes on one of your nails to resemble a bee's body. You can use a thin brush or a toothpick for this step. Next, use a dotting tool or a toothpick to create a black circle for the bee's head. Then, add two small white dots for the eyes using a white polish. Let everything dry before moving on to the next step. For the wings, use a thin brush or a toothpick to create two curved lines above the bee's body. You can also use a white nail polish with a thin brush for this step. Finally, add small black dots on the wings to give them some texture. Finish off with a top coat to seal in your design and give it a shiny finish. There you have it! Your accent bumble bee nail is now complete and adds a touch of cuteness to your overall manicure.7. "Bumble Bee Accent Nail Tutorial"


7. "Bumble Bee Accent Nail Tutorial"


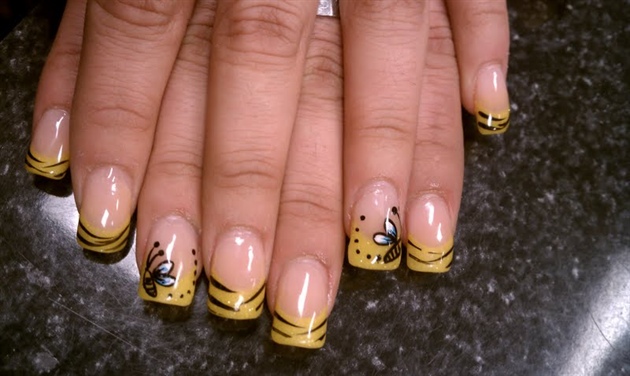
Stripes are a classic pattern that never goes out of style. Incorporate them into your bumble bee nail design with this simple tutorial. Start by applying a base coat and then painting your nails with a bright yellow polish. Let them dry completely before moving on to the next step. Using a thin brush or a toothpick, create black stripes on your nails to resemble a bee's body. You can also use a black nail polish with a thin brush for this step. Next, use a dotting tool or a toothpick to create a black circle for the bee's head. Then, add two small white dots for the eyes using a white polish. Let everything dry before moving on to the next step. For the wings, use a thin brush or a toothpick to create two curved lines above the bee's body. You can also use a white nail polish with a thin brush for this step. Finally, add small black dots on the wings to give them some texture. Finish off with a top coat to seal in your design and give it a shiny finish. There you have it! Your bumble bee nails with stripes are now complete and look chic and stylish.8. "Bumble Bee Nail Design with Stripes"

8. "Bumble Bee Nail Design with Stripes"

Take your bumble bee nail design to the next level with the addition of a honeycomb pattern. Start by painting your nails with a bright yellow polish. Let them dry completely before moving on to the next step. Using a black nail polish, create black stripes on your nails to resemble a bee's body. You can use a thin brush or a toothpick for this step. Next, use a dotting tool or a toothpick to create a black circle for the bee's head. Then, add two small white dots for the eyes using a white polish. Let everything dry before moving on to the next step. For the wings, use a thin brush or a toothpick to create two curved lines above the bee's body. You can also use a white nail polish with a thin brush for this step. Finally, use a thin brush or a toothpick to create a honeycomb pattern on one of your nails. You can alternate between black and white lines to create the pattern. Finish off with a top coat to seal in your design and give it a shiny finish. Your bumble bee nails with a honeycomb pattern are now complete!9. "Bumble Bee Nail Tutorial with Honeycomb Pattern"

9. "Bumble Bee Nail Tutorial with Honeycomb Pattern"
For those who want to take their bumble bee nail design to the next level, adding 3D accents is a fun and unique way to do so. Start by applying a base coat and then painting your nails with a bright yellow polish. Let them dry completely before moving on to the next step. Using a black nail polish, create black stripes on your nails to resemble a bee's body. You can use a thin brush or a toothpick for this step. Next, use a dotting tool or a toothpick to create a black circle for the bee's head. Then, add two small white dots for the eyes using a white polish. Let everything dry before moving on to the next step. For the wings, use a thin brush or a toothpick to create two curved lines above the bee's body. You can also use a white nail polish with a thin brush for this step. Finally, add small 3D bee accents using nail glue or a clear top coat. You can purchase these accents at most beauty supply stores or online. Finish off with a top coat to seal in your design and give it a shiny finish. Your bumble bee nails with 3D accents are now complete and sure to make a statement!10. "Bumble Bee Nail Design with 3D Accents"


10. "Bumble Bee Nail Design with 3D Accents"
Creating the Perfect Bumble Bee Nail Design: A Step-by-Step Tutorial
Step 1: Gather Your Supplies
 Before we begin, make sure you have all the necessary supplies for this bumble bee nail design. You will need a yellow nail polish, black nail polish, a thin nail art brush, a dotting tool, and a top coat. It's important to use high-quality polishes to achieve the best results.
Step 2: Prep Your Nails
 Start by prepping your nails for the design. This includes shaping and buffing your nails, pushing back your cuticles, and applying a base coat. This will ensure that your bumble bee design stays on your nails for a longer period of time.
Step 3: Paint Your Nails Yellow
 Using your yellow nail polish, paint all your nails with two coats. Make sure to let each coat dry completely before adding the next one. This will give you a solid base for your bumble bee design.
Step 4: Create the Stripes
 Using your black nail polish and thin nail art brush, carefully draw diagonal stripes on your nails. These stripes will represent the black stripes on a bumble bee's body. Start from the cuticle and paint towards the tip of your nail. You can make the stripes as thick or thin as you like, depending on your preference.
Step 5: Add the Wings
 Using your dotting tool and black nail polish, create two small dots on the top corners of your nails. These will be the wings of the bumble bee. You can also use a small brush to create a more defined wing shape if you prefer.
Step 6: Finish with a Top Coat
 To seal in your bumble bee design and make it last longer, apply a top coat over your entire nail. This will also give your nails a shiny finish.
Congratulations! You now have a cute and trendy bumble bee nail design. With a little practice, you can create this design in no time. Don't be afraid to experiment with different colors and designs to make it your own. Have fun and rock those bumble bee nails!
To seal in your bumble bee design and make it last longer, apply a top coat over your entire nail. This will also give your nails a shiny finish.
Congratulations! You now have a cute and trendy bumble bee nail design. With a little practice, you can create this design in no time. Don't be afraid to experiment with different colors and designs to make it your own. Have fun and rock those bumble bee nails!


