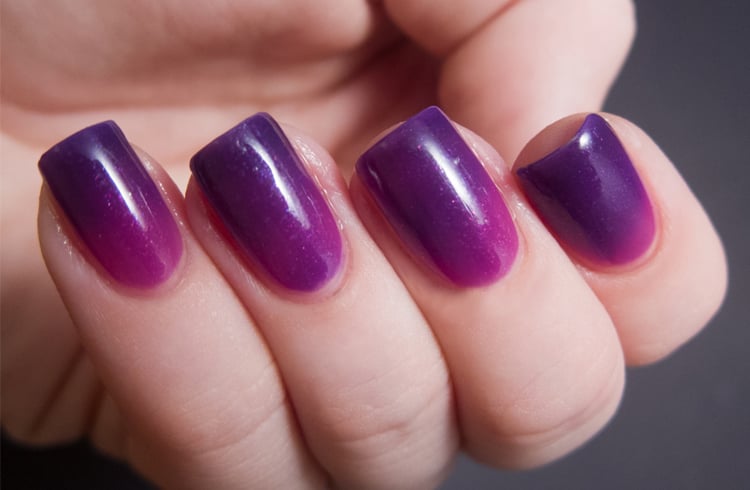
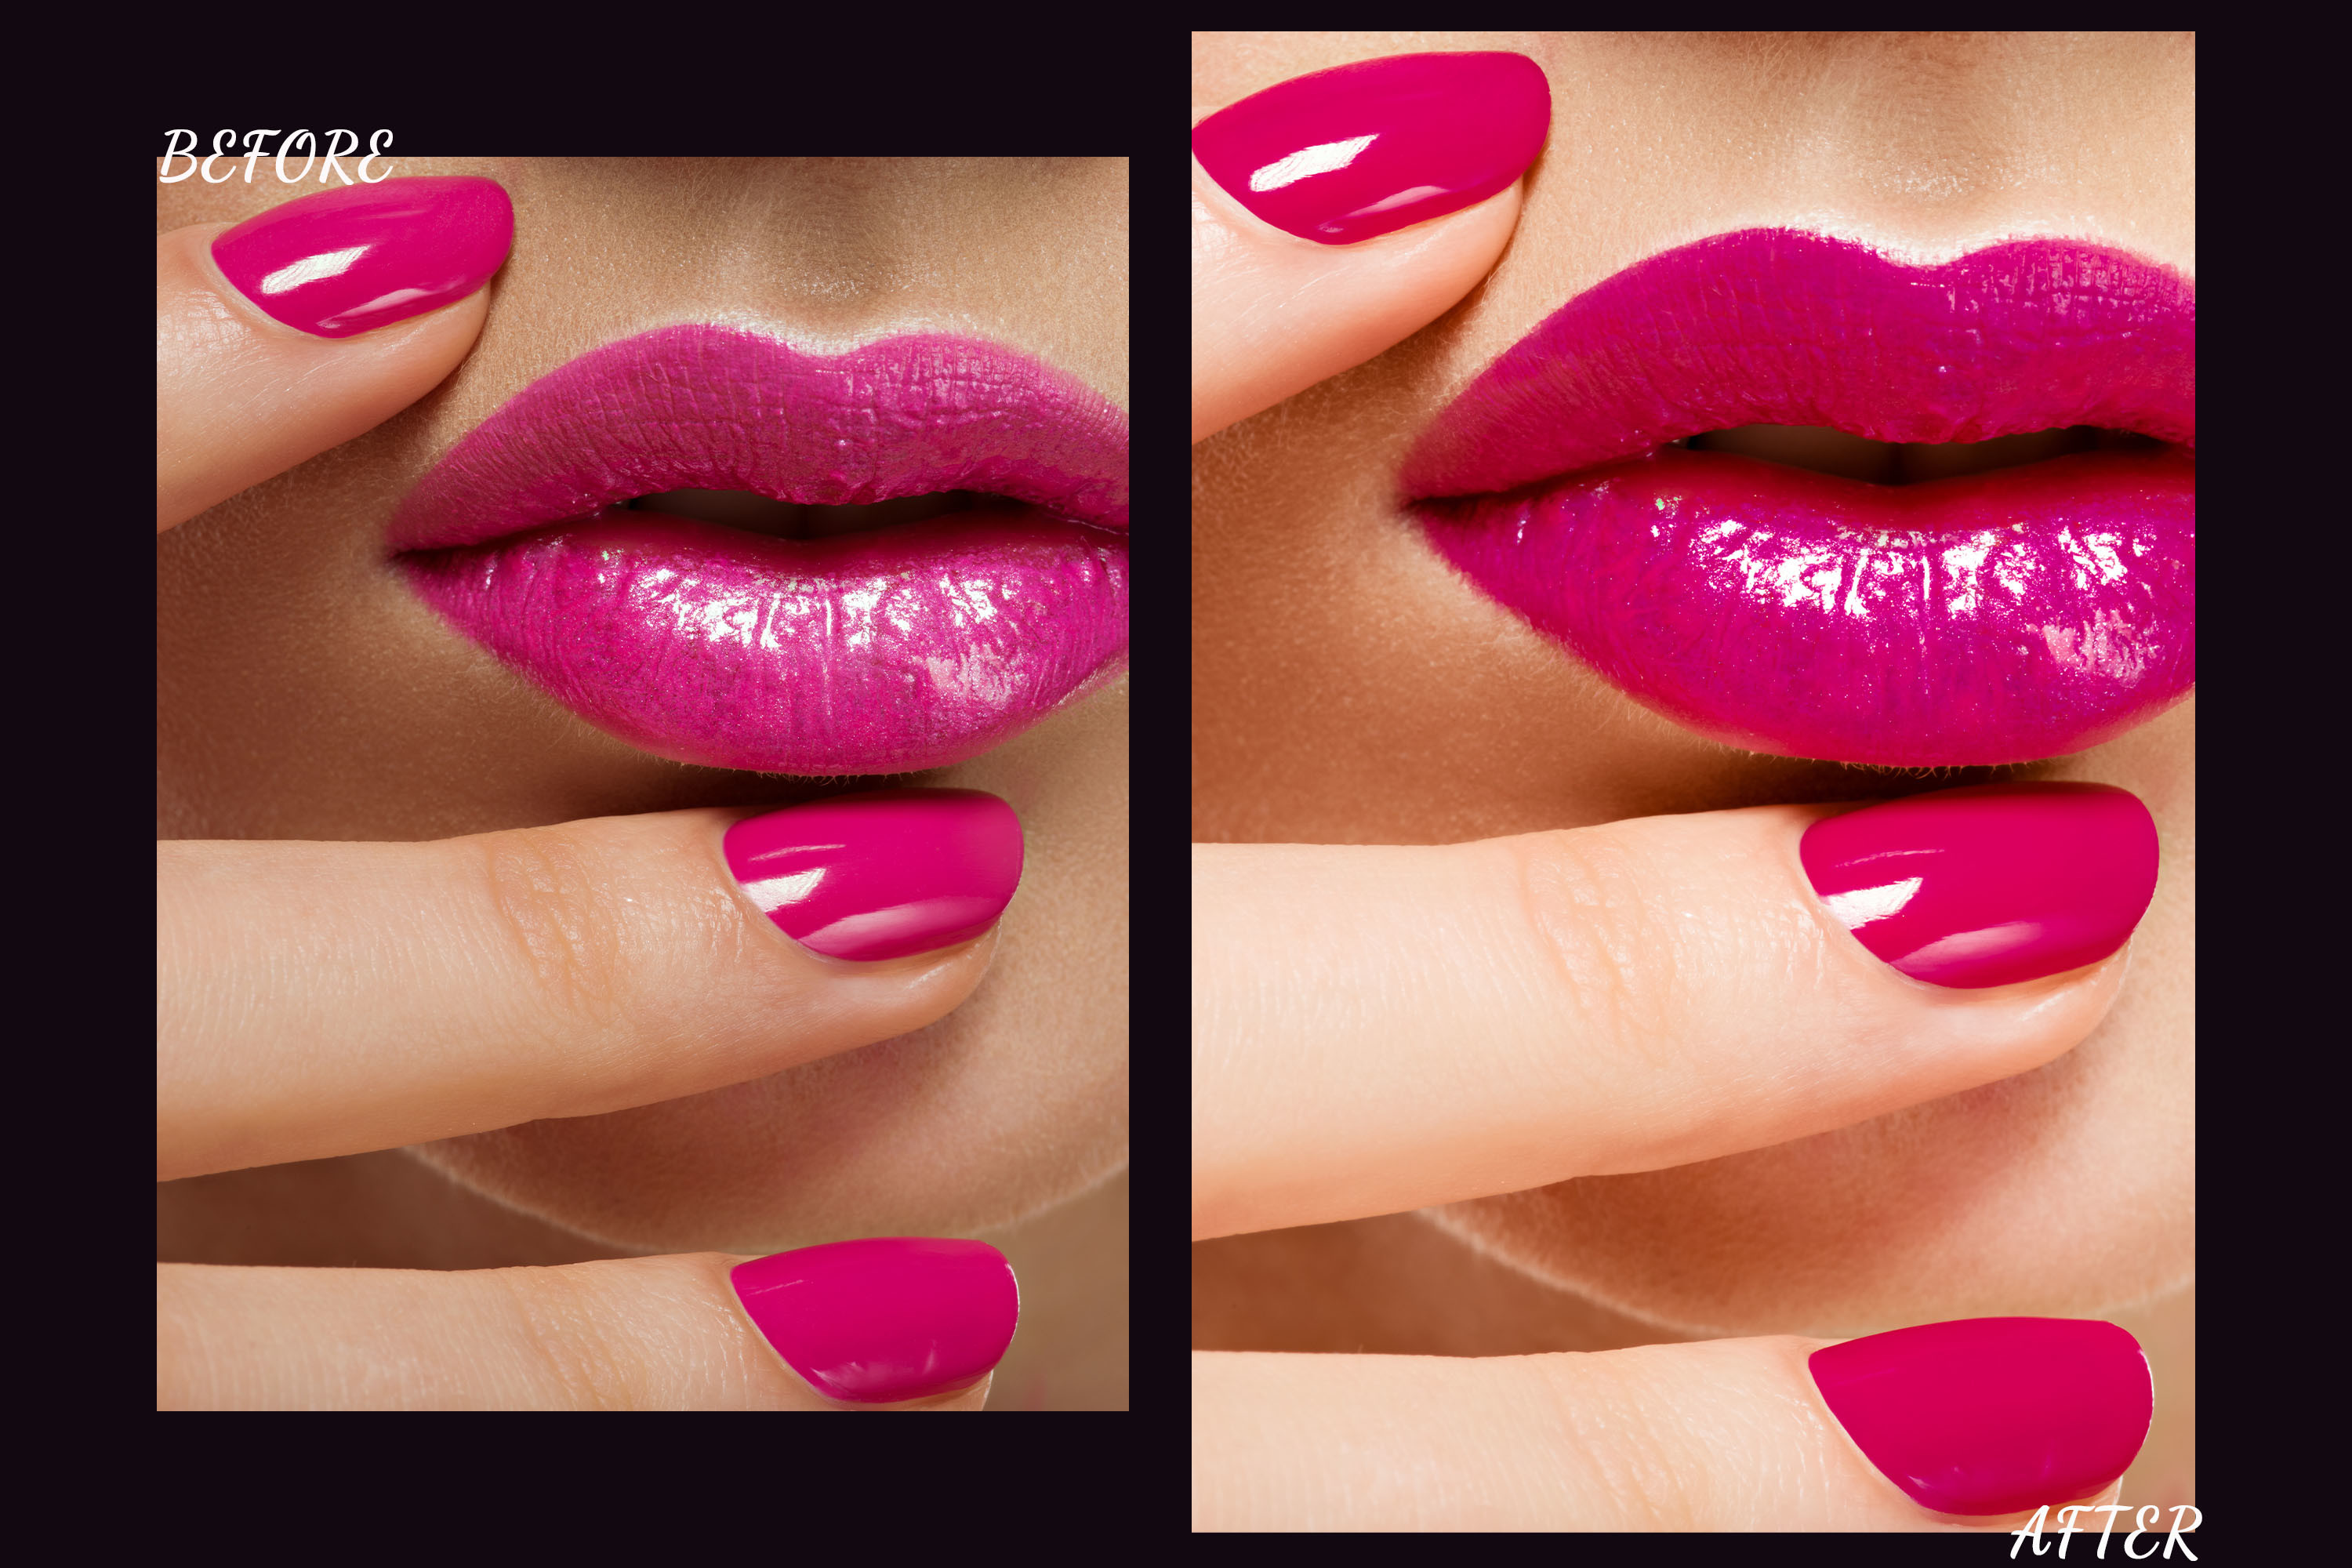
Photoshop is a powerful tool for editing photos, and one of its many useful features is the ability to change nail polish color. Whether you want to try out a new shade or fix a smudged nail in a photo, Photoshop has got you covered. In this tutorial, we will guide you through the steps of changing nail polish color in Photoshop. So grab your favorite nail polish and let's get started!How to Change Nail Polish Color in Photoshop


How to Change Nail Polish Color in Photoshop

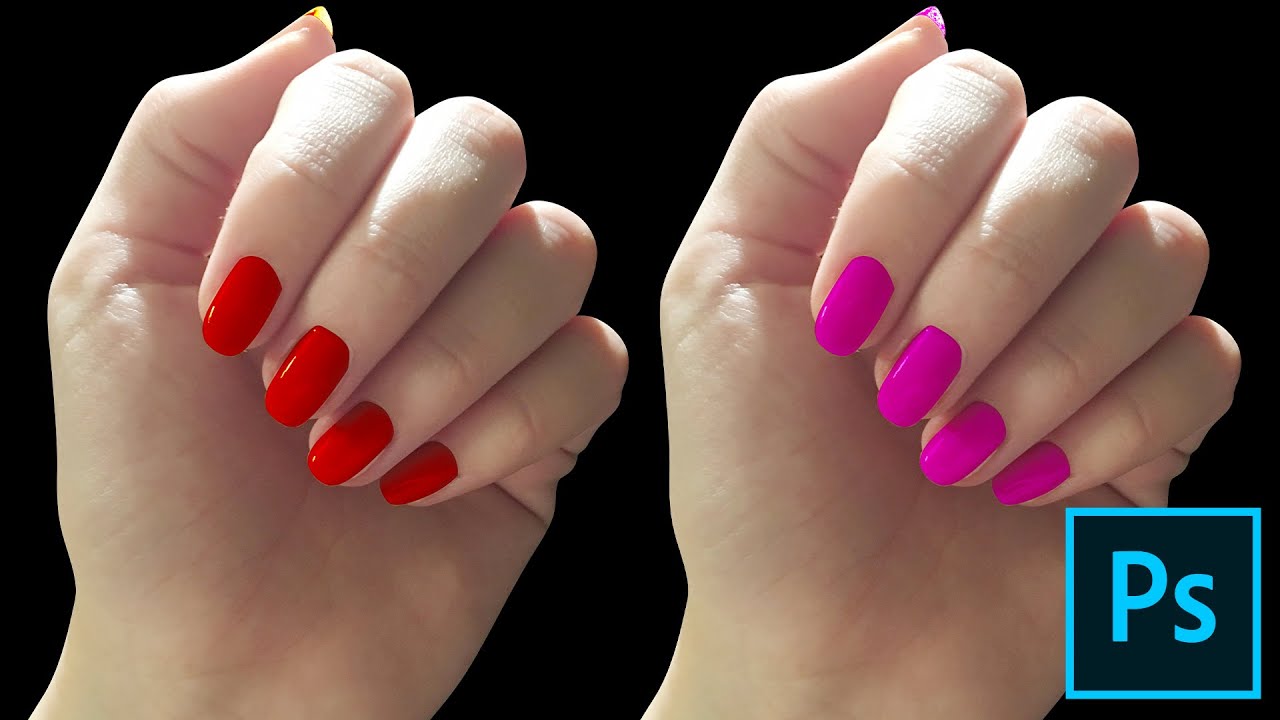


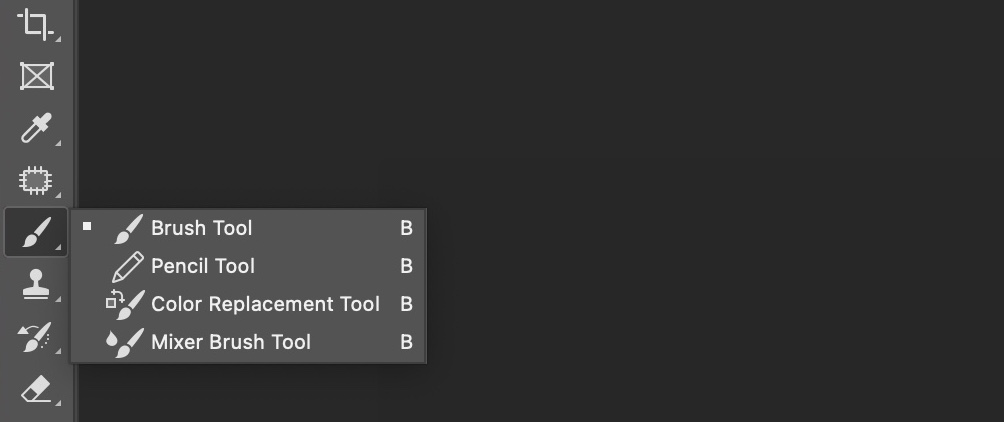
To change nail polish color in Photoshop, follow these simple steps: Step 1: Open your photo in Photoshop. Step 2: Select the Brush Tool from the toolbar on the left side of the screen. Step 3: In the top menu, click on the Color Picker button and select the color you want to use for your nail polish. You can also use the dropper tool to select a color from the photo itself. Step 4: Adjust the size and hardness of the brush according to your needs. Step 5: Carefully paint over the existing nail polish using the brush tool. You can zoom in for more precision by pressing Ctrl+ (or Cmd+ on Mac) on your keyboard. Step 6: If you make a mistake, you can use the Eraser Tool to remove any excess polish. Step 7: Once you are satisfied with the color, save your photo by going to File > Save As.Changing Nail Polish Color in Photoshop: A Step-by-Step Guide


Changing Nail Polish Color in Photoshop: A Step-by-Step Guide


Not sure how to change nail polish color in Photoshop? Don't worry, we've got you covered with this step-by-step tutorial. Step 1: Open your photo in Photoshop. Step 2: Select the Brush Tool from the toolbar on the left side of the screen. Step 3: In the top menu, click on the Color Picker button and select the color you want to use for your nail polish. You can also use the dropper tool to select a color from the photo itself. Step 4: Adjust the size and hardness of the brush according to your needs. Step 5: Carefully paint over the existing nail polish using the brush tool. You can zoom in for more precision by pressing Ctrl+ (or Cmd+ on Mac) on your keyboard. Step 6: If you make a mistake, you can use the Eraser Tool to remove any excess polish. Step 7: Once you are satisfied with the color, save your photo by going to File > Save As.Photoshop Tutorial: How to Change Nail Polish Color

Photoshop Tutorial: How to Change Nail Polish Color


If you are using the latest version of Photoshop, CC, the steps for changing nail polish color are slightly different. Here's how to do it: Step 1: Open your photo in Photoshop CC. Step 2: Select the Brush Tool from the toolbar on the left side of the screen. Step 3: In the top menu, click on the Color Picker button and select the color you want to use for your nail polish. You can also use the dropper tool to select a color from the photo itself. Step 4: Adjust the size and hardness of the brush according to your needs. Step 5: Carefully paint over the existing nail polish using the brush tool. You can zoom in for more precision by pressing Ctrl+ (or Cmd+ on Mac) on your keyboard. Step 6: If you make a mistake, you can use the Eraser Tool to remove any excess polish. Step 7: Once you are satisfied with the color, save your photo by going to File > Save As.Changing Nail Polish Color in Photoshop CC


Changing Nail Polish Color in Photoshop CC
Changing nail polish color in a photo may seem like a daunting task, but with these simple tips, you'll be a pro in no time! Tip 1: Use a small brush for more precision when painting over the nail polish. Tip 2: If you're having trouble selecting the right color, use the Hue/Saturation tool to adjust the color to your liking. Tip 3: Don't be afraid to zoom in for more accuracy when painting over the nail polish. Tip 4: Use the Clone Stamp Tool to fix any smudges or mistakes. Tip 5: Save your progress often to avoid losing your work.Photoshop Tips: How to Change Nail Polish Color in a Photo


Photoshop Tips: How to Change Nail Polish Color in a Photo
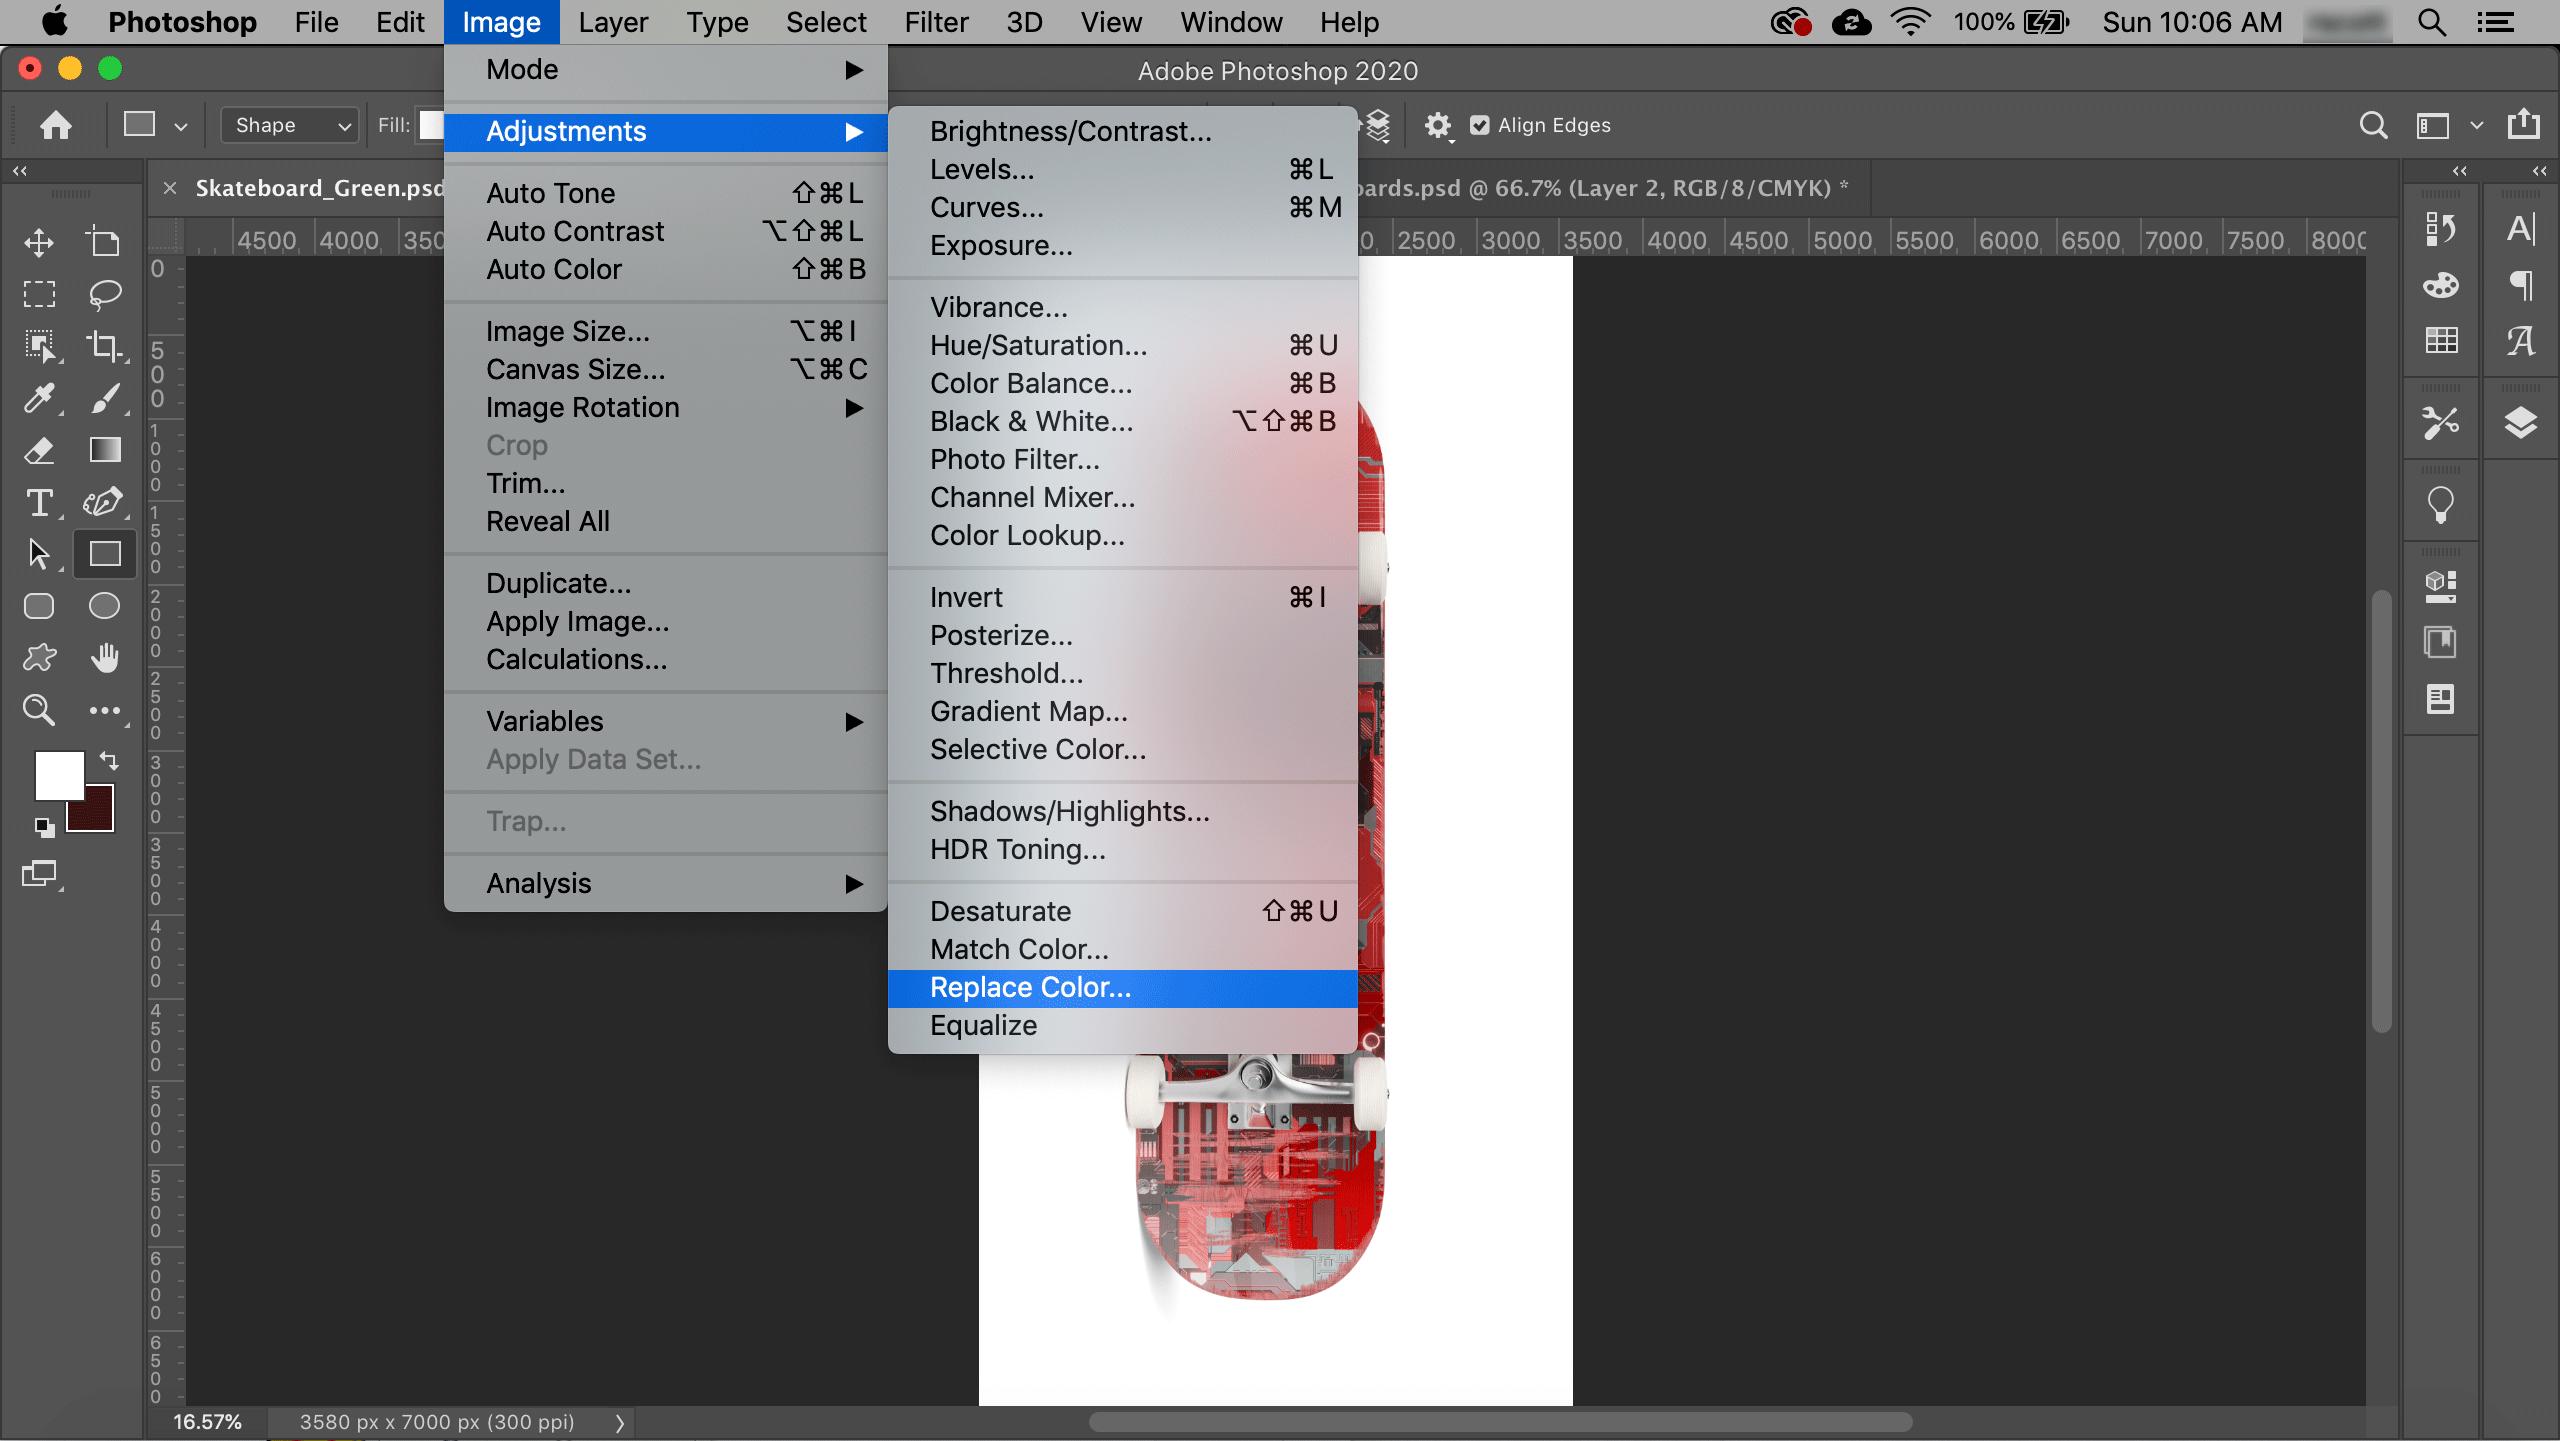
If you're short on time or just looking for a quick and easy way to change nail polish color in Photoshop, follow these steps: Step 1: Open your photo in Photoshop. Step 2: In the top menu, go to Image > Adjustments > Replace Color. Step 3: Click on the nail polish color in the photo. Step 4: Use the Hue, Saturation, and Lightness sliders to adjust the color to your liking. Step 5: Click OK once you are satisfied with the color. Step 6: Save your photo by going to File > Save As.Quick and Easy Way to Change Nail Polish Color in Photoshop


Quick and Easy Way to Change Nail Polish Color in Photoshop

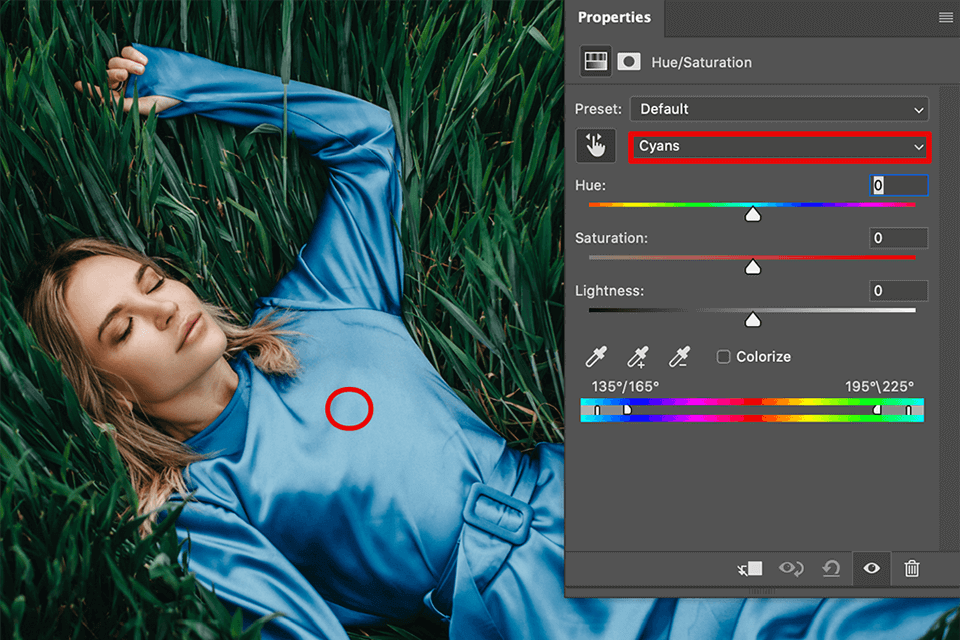


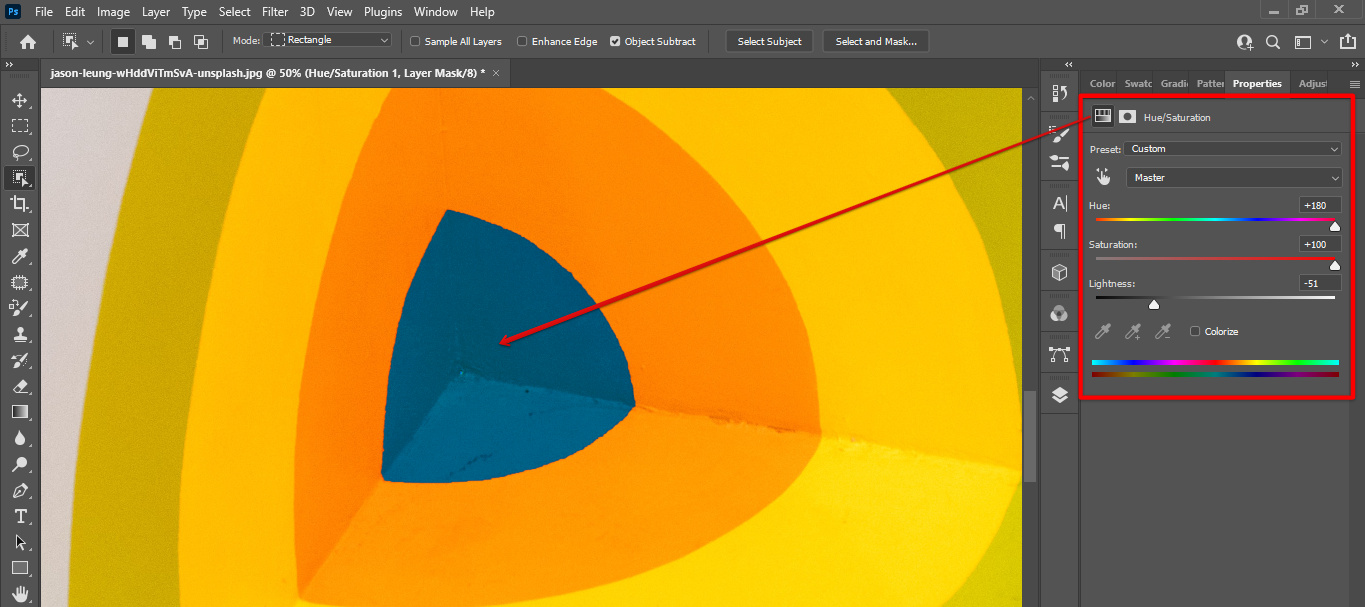
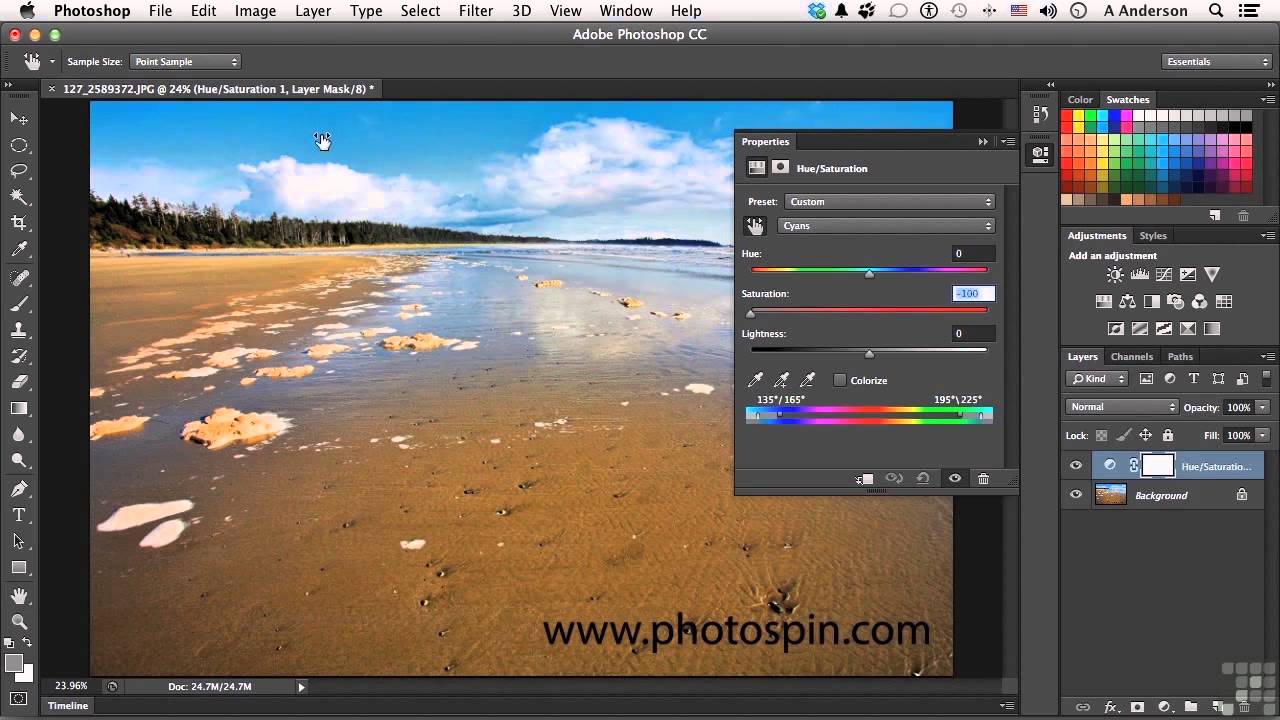
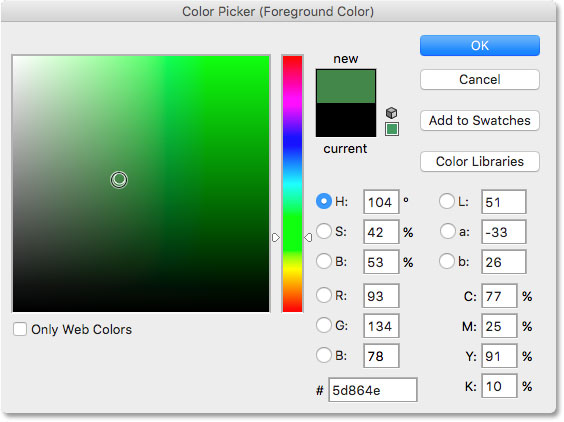
The Hue/Saturation tool is a powerful feature in Photoshop that allows you to adjust the colors in your photo. Here's how you can use it to change nail polish color: Step 1: Open your photo in Photoshop. Step 2: In the top menu, go to Image > Adjustments > Hue/Saturation. Step 3: Use the Hue slider to change the color of the nail polish. Step 4: Adjust the Saturation and Lightness sliders to fine-tune the color. Step 5: Click OK once you are satisfied with the color. Step 6: Save your photo by going to File > Save As.Photoshop Tutorial: Changing Nail Polish Color with the Hue/Saturation Tool


Photoshop Tutorial: Changing Nail Polish Color with the Hue/Saturation Tool


If you're using Photoshop Elements, the steps for changing nail polish color are very similar to the ones for Photoshop CC. Here's how to do it: Step 1: Open your photo in Photoshop Elements. Step 2: Select the Brush Tool from the toolbar on the left side of the screen. Step 3: In the top menu, click on the Color Picker button and select the color you want to use for your nail polish. You can also use the dropper tool to select a color from the photo itself. Step 4: Adjust the size and hardness of the brush according to your needs. Step 5: Carefully paint over the existing nail polish using the brush tool. You can zoom in for more precision by pressing Ctrl+ (or Cmd+ on Mac) on your keyboard. Step 6: If you make a mistake, you can use the Eraser Tool to remove any excess polish. Step 7: Once you are satisfied with the color, save your photo by going to File > Save As.How to Change Nail Polish Color in Photoshop Elements


How to Change Nail Polish Color in Photoshop Elements

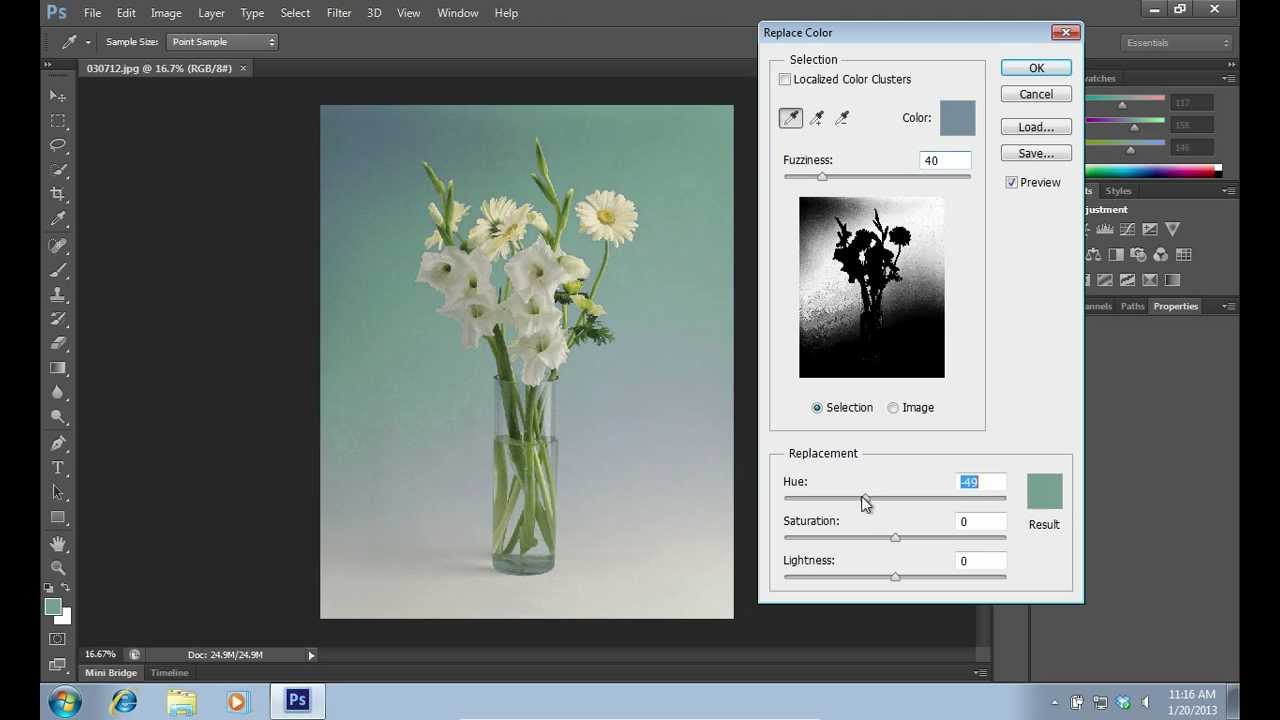
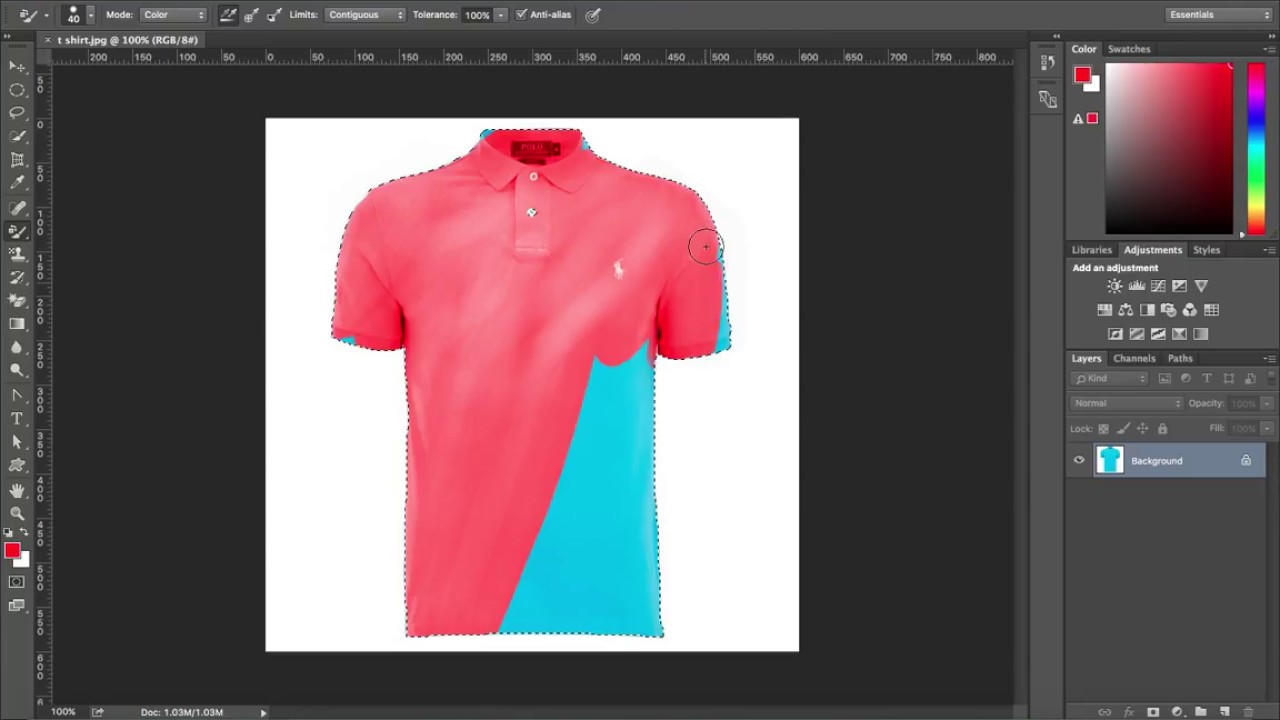
The Color Replacement Tool is a quick and easy way to change nail polish color in Photoshop. Here's how to use it: Step 1: Open your photo in Photoshop. Step 2: Select the Color Replacement Tool from the toolbar on the left side of the screen. Step 3: In the top menu, select the color you want to use for your nail polish. Step 4: Carefully paint over the existing nail polish using the Color Replacement Tool. Step 5: Use the Fuzziness slider to adjust the range of colors that will be replaced. Step 6: Save your photo by going to File > Save As.Photoshop Tricks: Changing Nail Polish Color with the Color Replacement Tool

Photoshop Tricks: Changing Nail Polish Color with the Color Replacement Tool

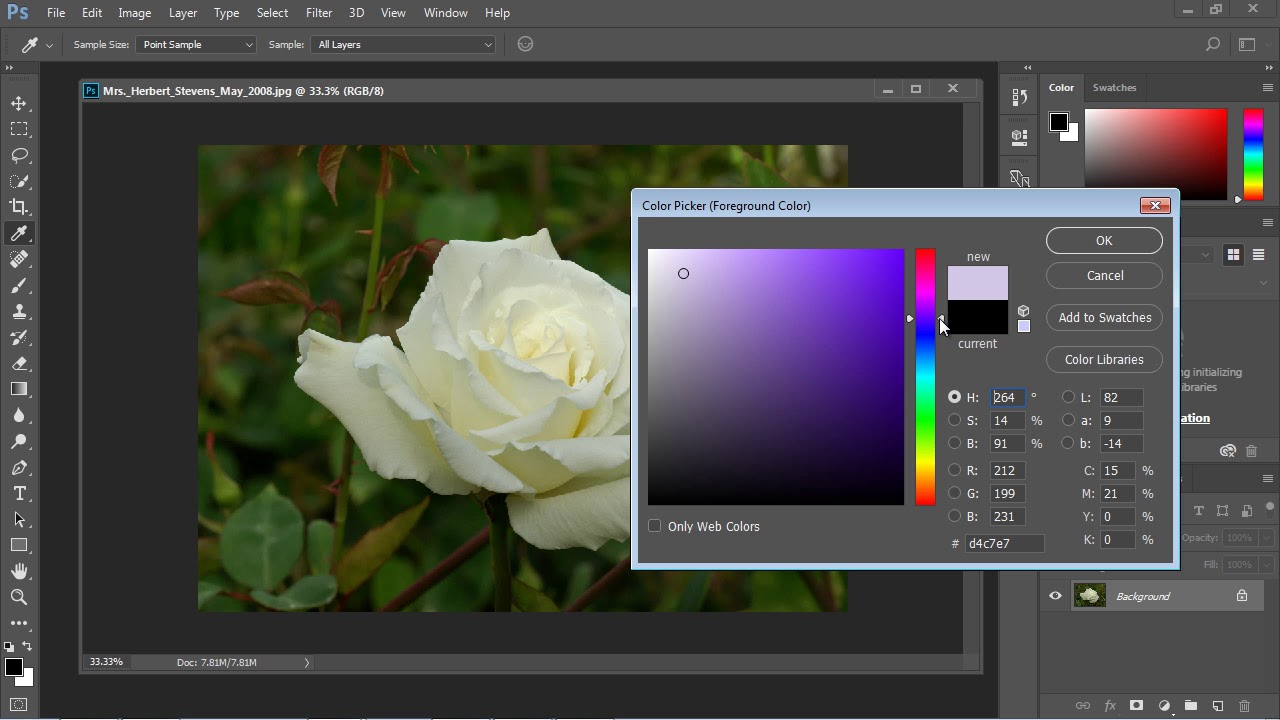

If you're using Photoshop CS6, the steps for changing nail polish color are very similar to the ones for Photoshop CC. Here's how to do it: Step 1: Open your photo in Photoshop CS6. Step 2: Select the Brush Tool from the toolbar on the left side of the screen. Step 3: In the top menu, click on the Color Picker button and select the color you want to use for your nail polish. You can also use the dropper tool to select a color from the photo itself. Step 4: Adjust the size and hardness of the brush according to your needs. Step 5: Carefully paint over the existing nail polish using the brush tool. You can zoom in for more precision by pressing Ctrl+ (or Cmd+ on Mac) on your keyboard. Step 6: If you make a mistake, you can use the Eraser Tool to remove any excess polish. Step 7: Once you are satisfied with the color, save your photo by going to File > Save As. With these easy-to-follow tutorials, you can change nail polish color in Photoshop like a pro. Whether you want to experiment with different shades or fix a smudged nail in a photo, Photoshop has all the tools you need to perfect your manicure. So go ahead and give it a try!Step-by-Step Guide to Changing Nail Polish Color in Photoshop CS6


Step-by-Step Guide to Changing Nail Polish Color in Photoshop CS6


Why Changing Nail Polish Color in Photoshop Can Enhance Your House Design

The Power of Details
 When it comes to designing your dream house, every little detail counts. From the furniture to the paint color, each element plays a vital role in creating the perfect ambiance and aesthetic.
Nail polish color
may seem like a minor detail, but it can actually make a significant impact on the overall look and feel of your home. This is where
Photoshop
comes into play. With its advanced editing tools and techniques, you can easily change the nail polish color in your interior design photos, and take your house design to the next level.
When it comes to designing your dream house, every little detail counts. From the furniture to the paint color, each element plays a vital role in creating the perfect ambiance and aesthetic.
Nail polish color
may seem like a minor detail, but it can actually make a significant impact on the overall look and feel of your home. This is where
Photoshop
comes into play. With its advanced editing tools and techniques, you can easily change the nail polish color in your interior design photos, and take your house design to the next level.
Unlimited Color Options
 One of the main benefits of using
Photoshop
to change nail polish color is the unlimited color options it provides. Whether you have a specific shade in mind or just want to experiment with different colors, Photoshop offers a wide range of options to choose from. You can even create custom colors by mixing and matching different hues, allowing you to perfectly match the nail polish color to your desired color scheme for your house design.
One of the main benefits of using
Photoshop
to change nail polish color is the unlimited color options it provides. Whether you have a specific shade in mind or just want to experiment with different colors, Photoshop offers a wide range of options to choose from. You can even create custom colors by mixing and matching different hues, allowing you to perfectly match the nail polish color to your desired color scheme for your house design.
Save Time and Money
 Another advantage of changing nail polish color in Photoshop is that it saves you time and money. Instead of physically painting your walls or furniture in different colors, which can be time-consuming and costly, you can easily change the nail polish color in your photos with just a few clicks. This allows you to visualize different color options and make the right decision without any additional expenses.
Perfectly Match Your House Design
 Changing nail polish color in Photoshop also allows you to see how different colors will look in your house design. This helps you to choose the perfect shade that complements your interior design and creates a cohesive look throughout your home. With
Photoshop
, you can easily swap out different nail polish colors until you find the one that best suits your house design.
Changing nail polish color in Photoshop also allows you to see how different colors will look in your house design. This helps you to choose the perfect shade that complements your interior design and creates a cohesive look throughout your home. With
Photoshop
, you can easily swap out different nail polish colors until you find the one that best suits your house design.
Final Thoughts
 In conclusion, changing nail polish color in
Photoshop
is a simple yet effective way to enhance your house design. It allows you to experiment with different colors, save time and money, and find the perfect shade that ties your interior design together. So next time you're struggling to decide on a nail polish color, don't hesitate to turn to
Photoshop
for some digital design inspiration.
In conclusion, changing nail polish color in
Photoshop
is a simple yet effective way to enhance your house design. It allows you to experiment with different colors, save time and money, and find the perfect shade that ties your interior design together. So next time you're struggling to decide on a nail polish color, don't hesitate to turn to
Photoshop
for some digital design inspiration.