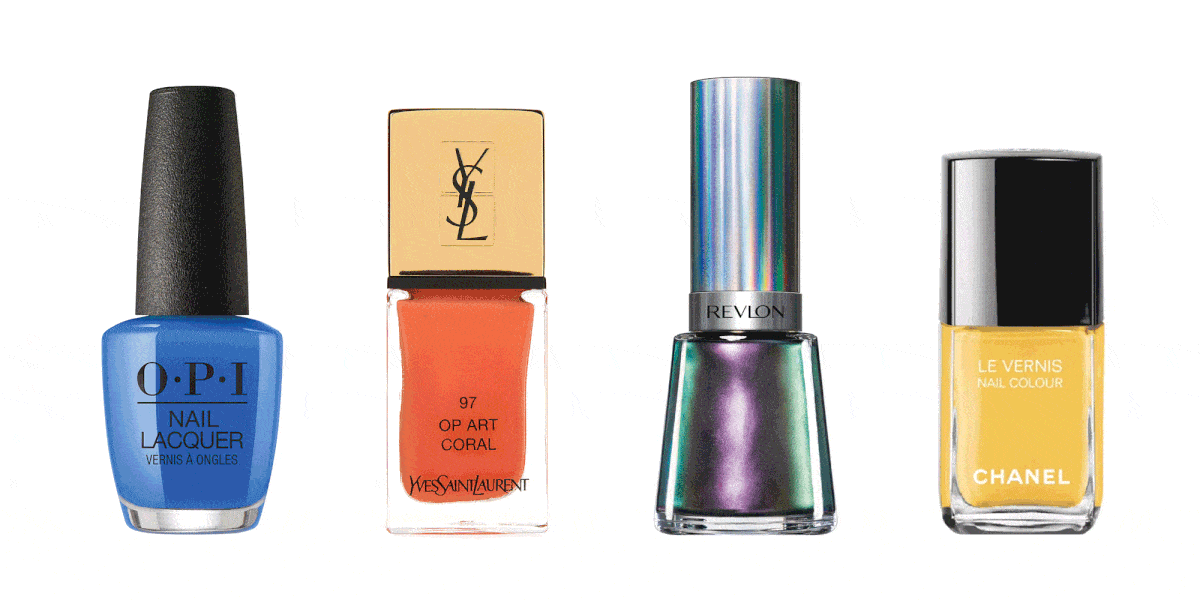
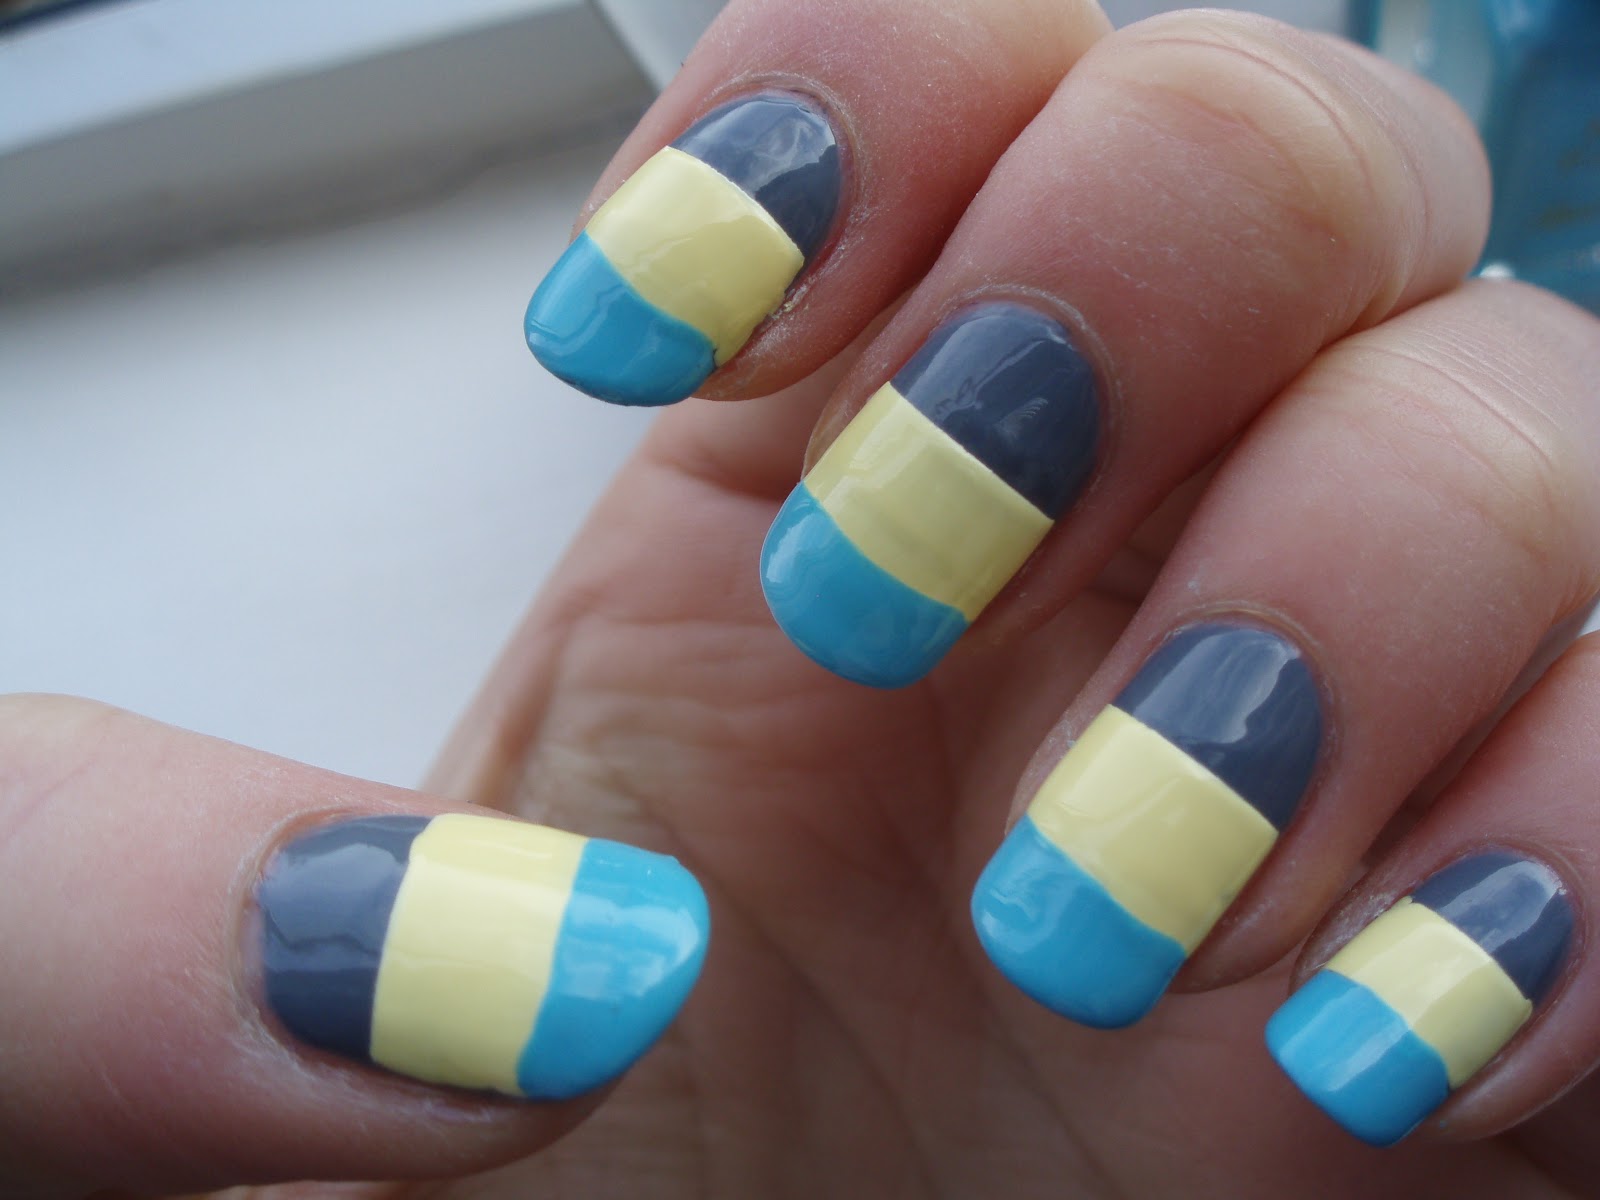
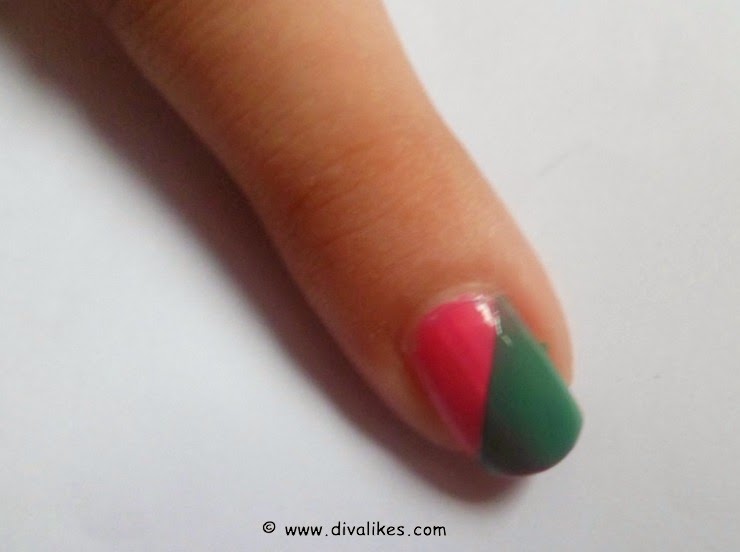
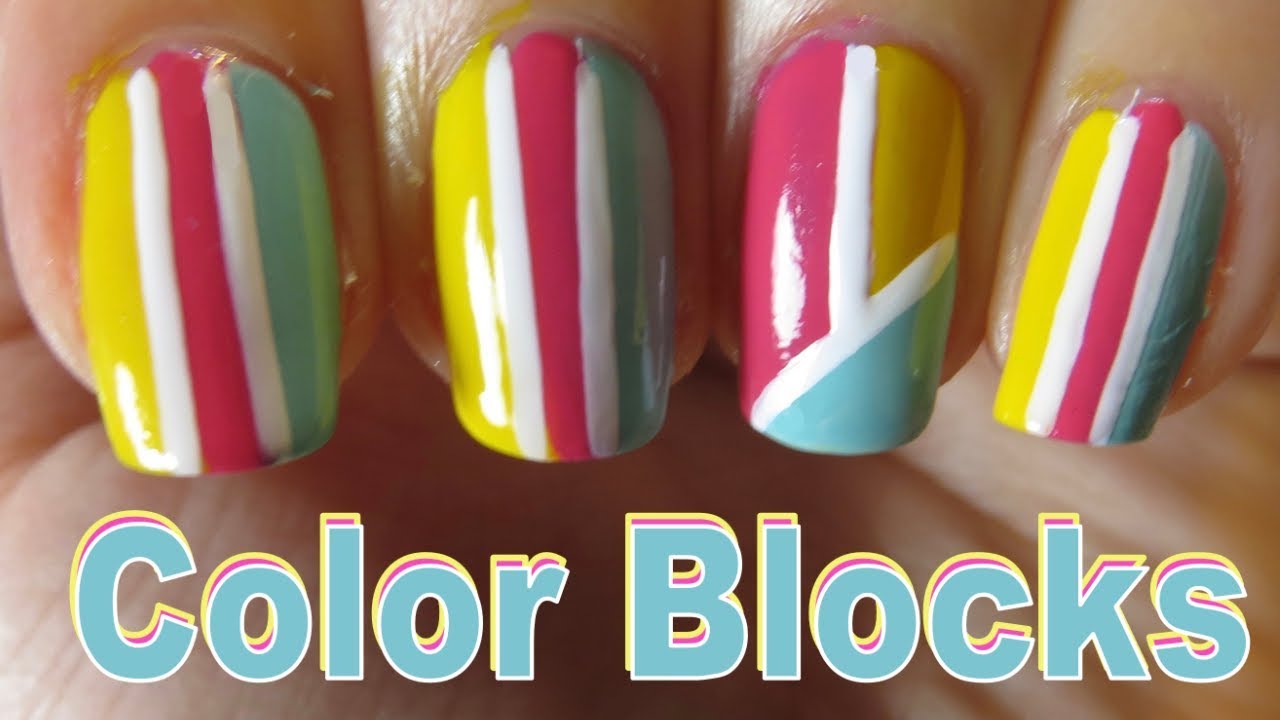
If you're new to nail art, creating intricate designs may seem intimidating. But don't worry, with this easy color block nail tutorial, you can achieve a trendy and eye-catching look in no time. All you need are a few nail polish colors and some tape to create clean lines. Let's get started!1. "Easy Color Block Nail Tutorial for Beginners"


1. "Easy Color Block Nail Tutorial for Beginners"


If you're a visual learner, this step-by-step color block nail tutorial is perfect for you. We have broken down the process into simple and easy-to-follow steps, so you can recreate this look at home. From prepping your nails to adding the finishing touches, we've got you covered.2. "Step-by-Step Color Block Nail Tutorial"


2. "Step-by-Step Color Block Nail Tutorial"


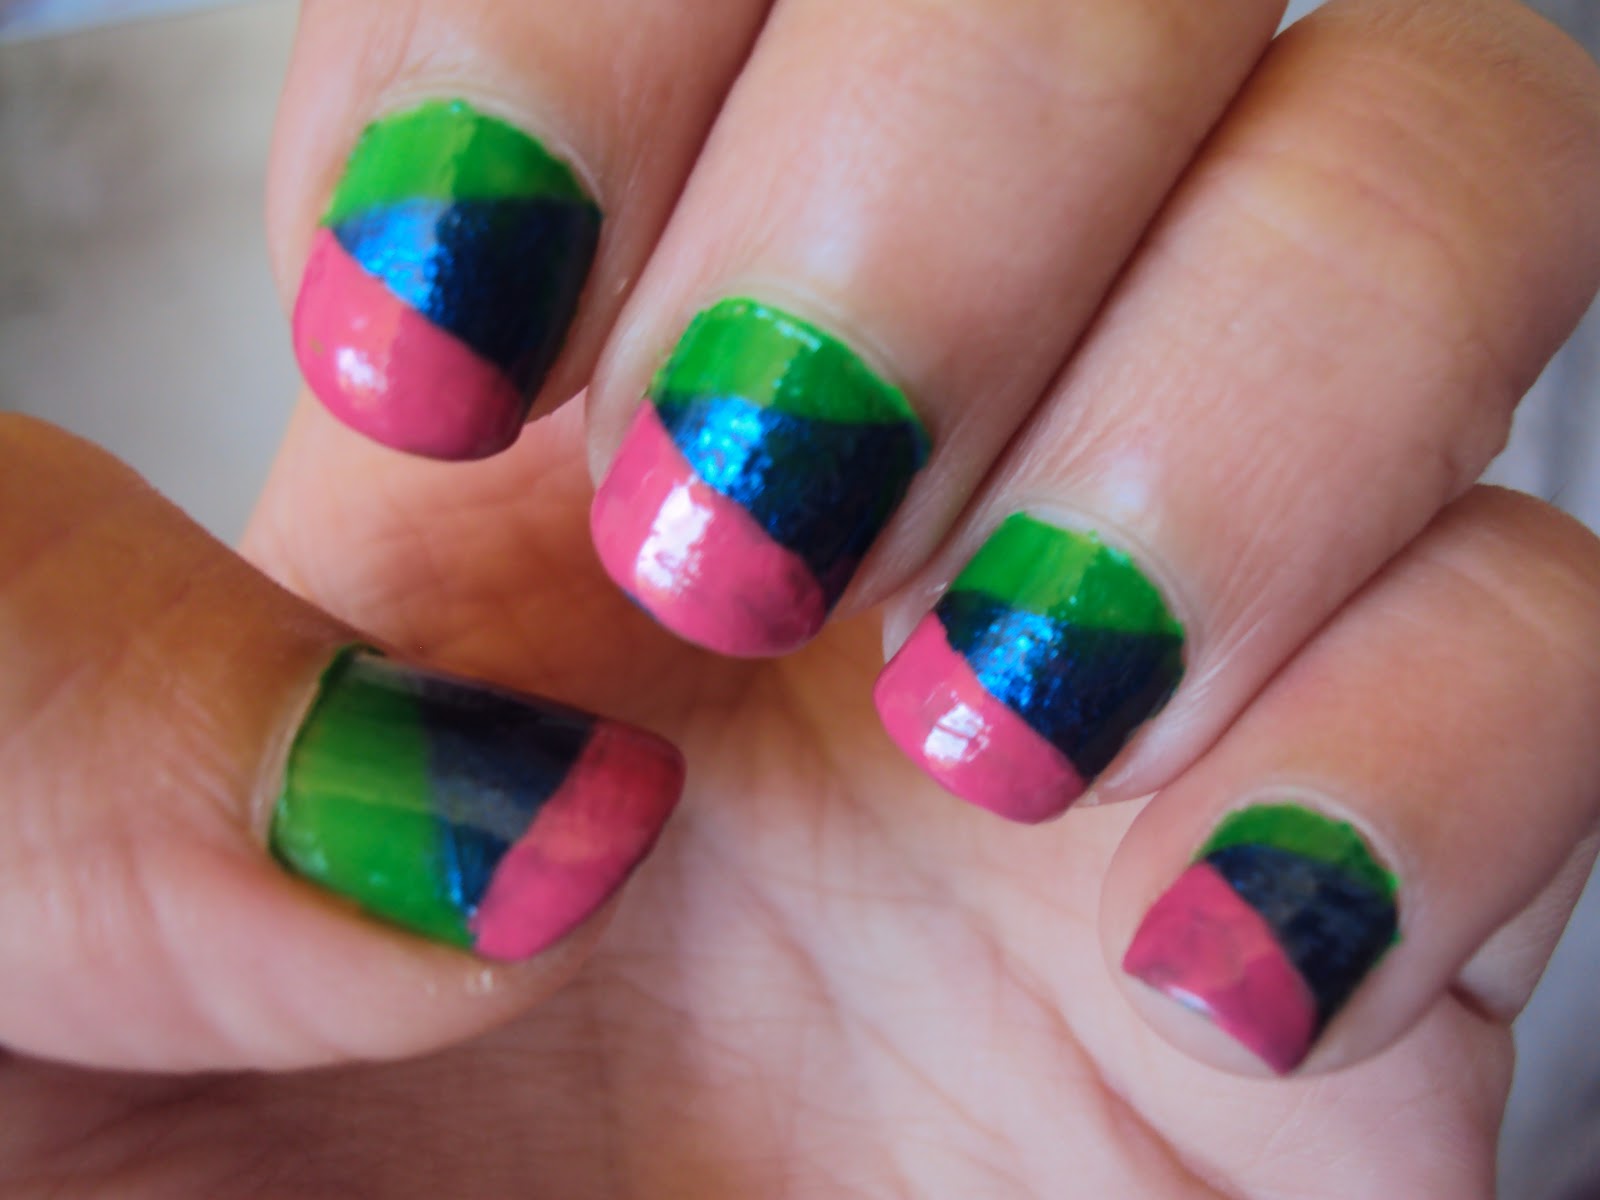
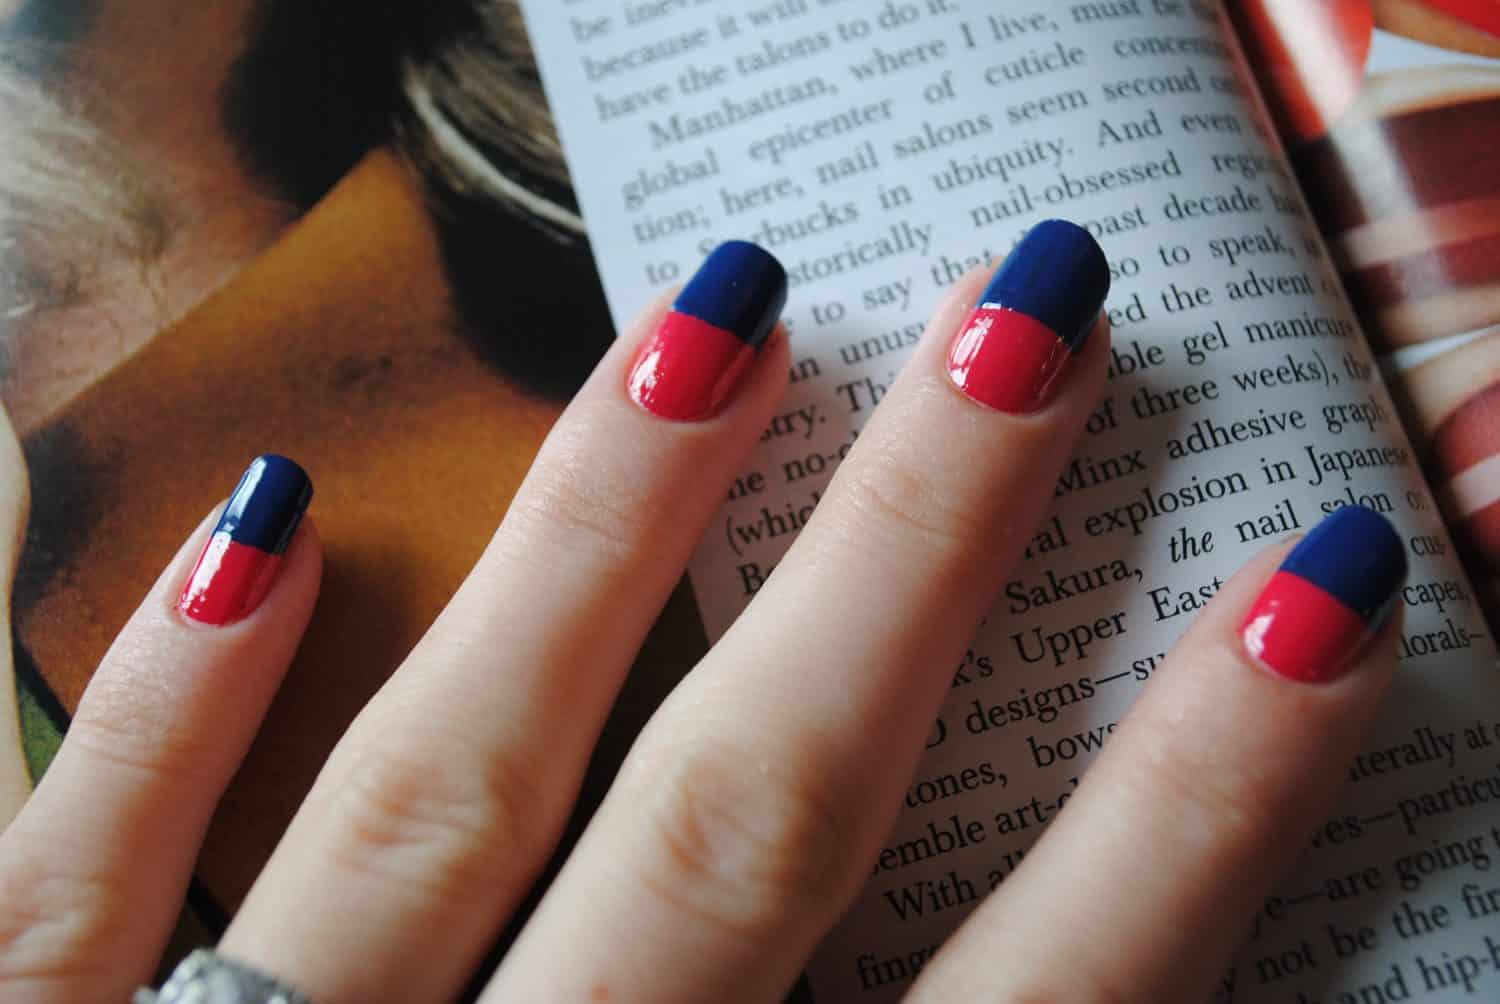
One of the easiest ways to achieve a clean and precise color block design is by using tape. In this tutorial, we will show you how to create a color block pattern using tape as a guide. This technique is perfect for those who struggle with shaky hands or want to achieve a more intricate design.3. "Color Block Nail Tutorial with Tape"


3. "Color Block Nail Tutorial with Tape"
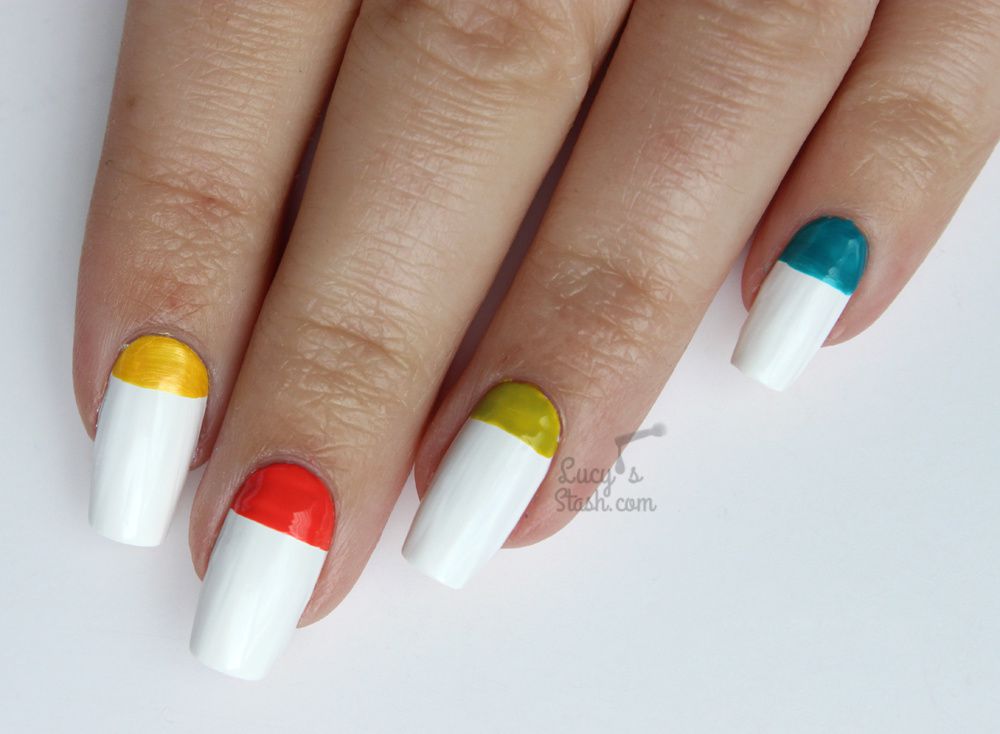


Short nails can also rock a color block design, and this tutorial will show you how. We will share tips and tricks on how to make your nails appear longer and create a flattering color block design. With the right color combination and placement, your short nails will look chic and stylish.4. "Color Block Nail Tutorial for Short Nails"


4. "Color Block Nail Tutorial for Short Nails"


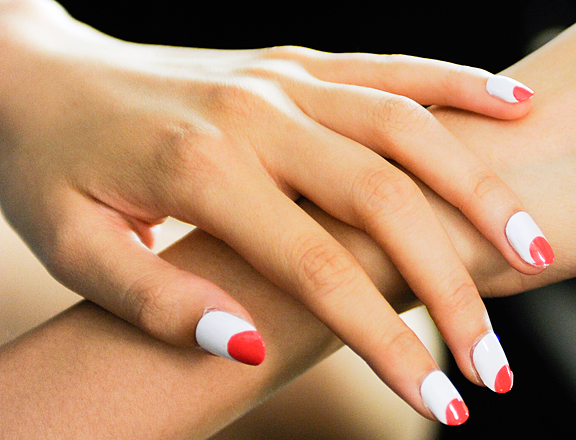
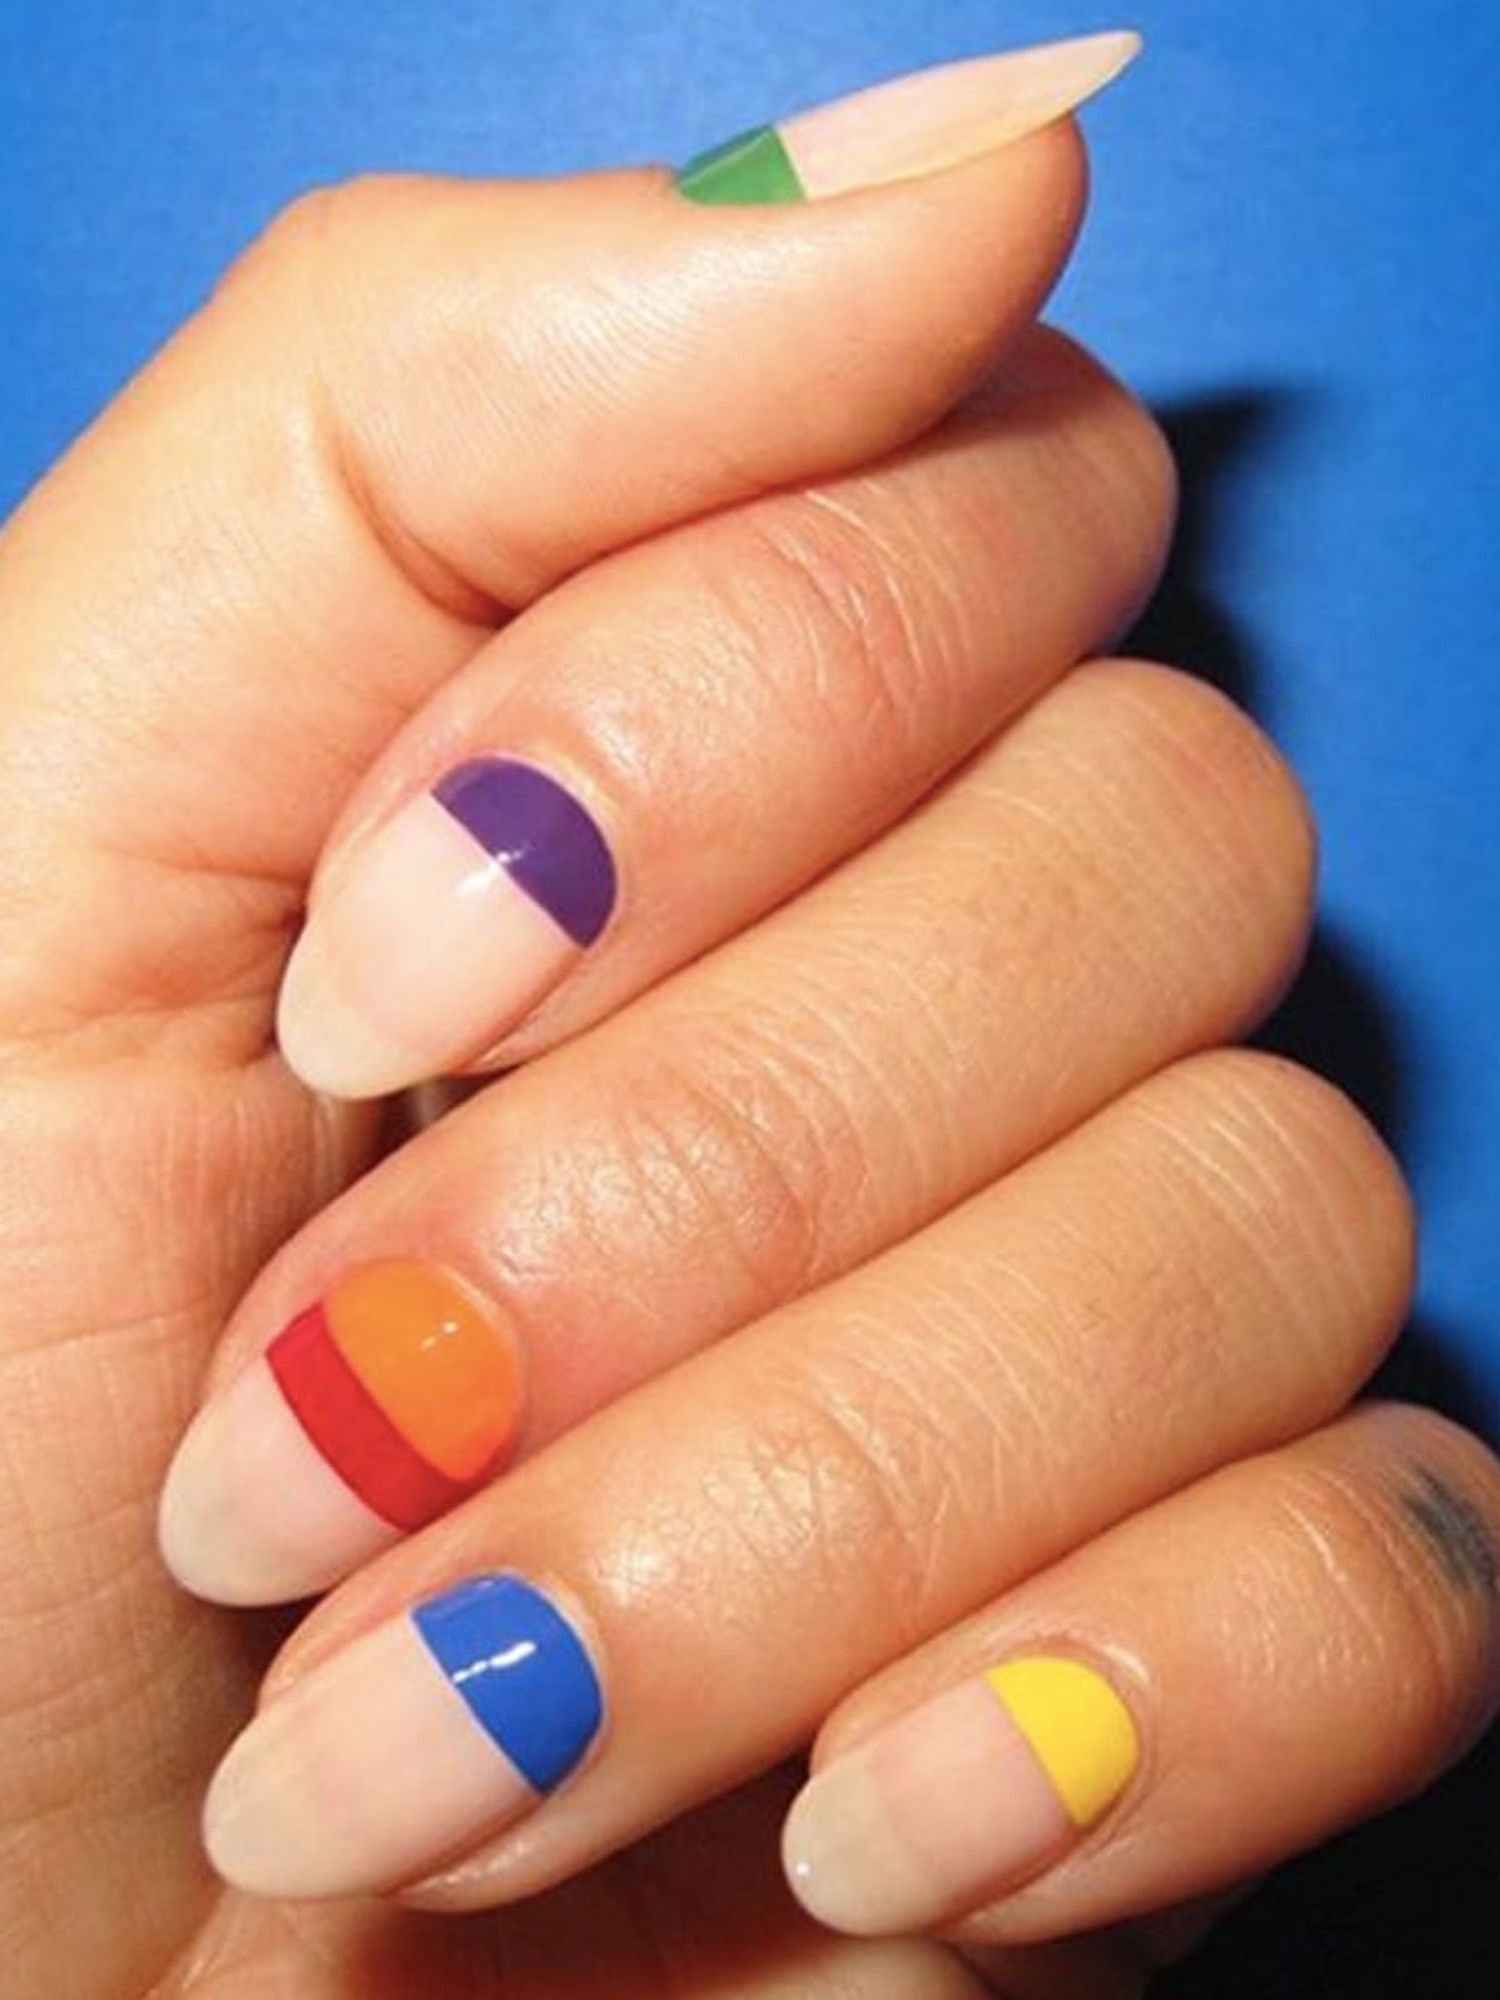
For a modern and edgy take on the color block trend, try incorporating negative space into your design. This tutorial will show you how to create negative space color block nails in different shapes and sizes. It's a great way to add some interest and dimension to your manicure.5. "Color Block Nail Tutorial with Negative Space"


5. "Color Block Nail Tutorial with Negative Space"


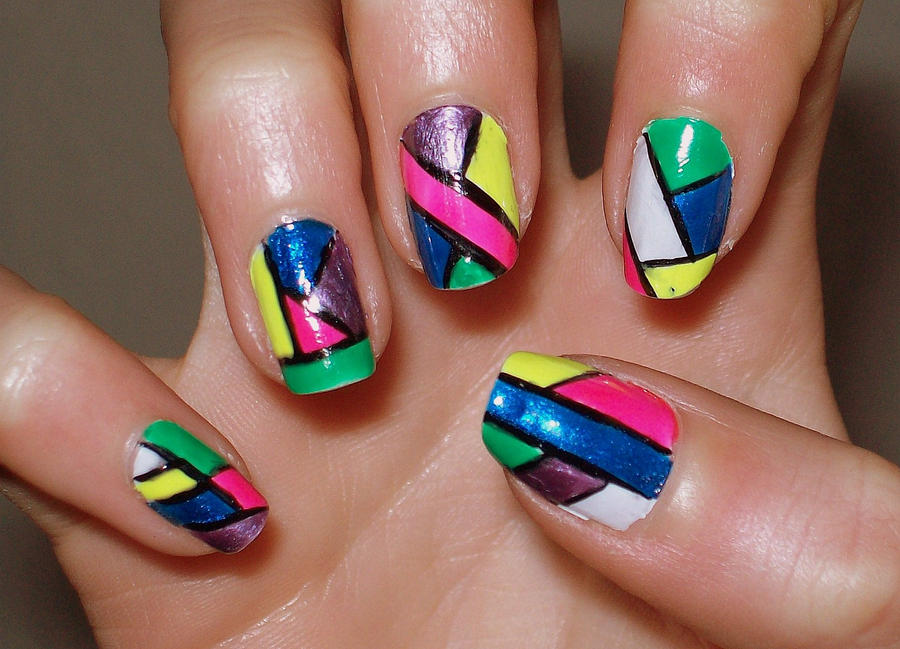
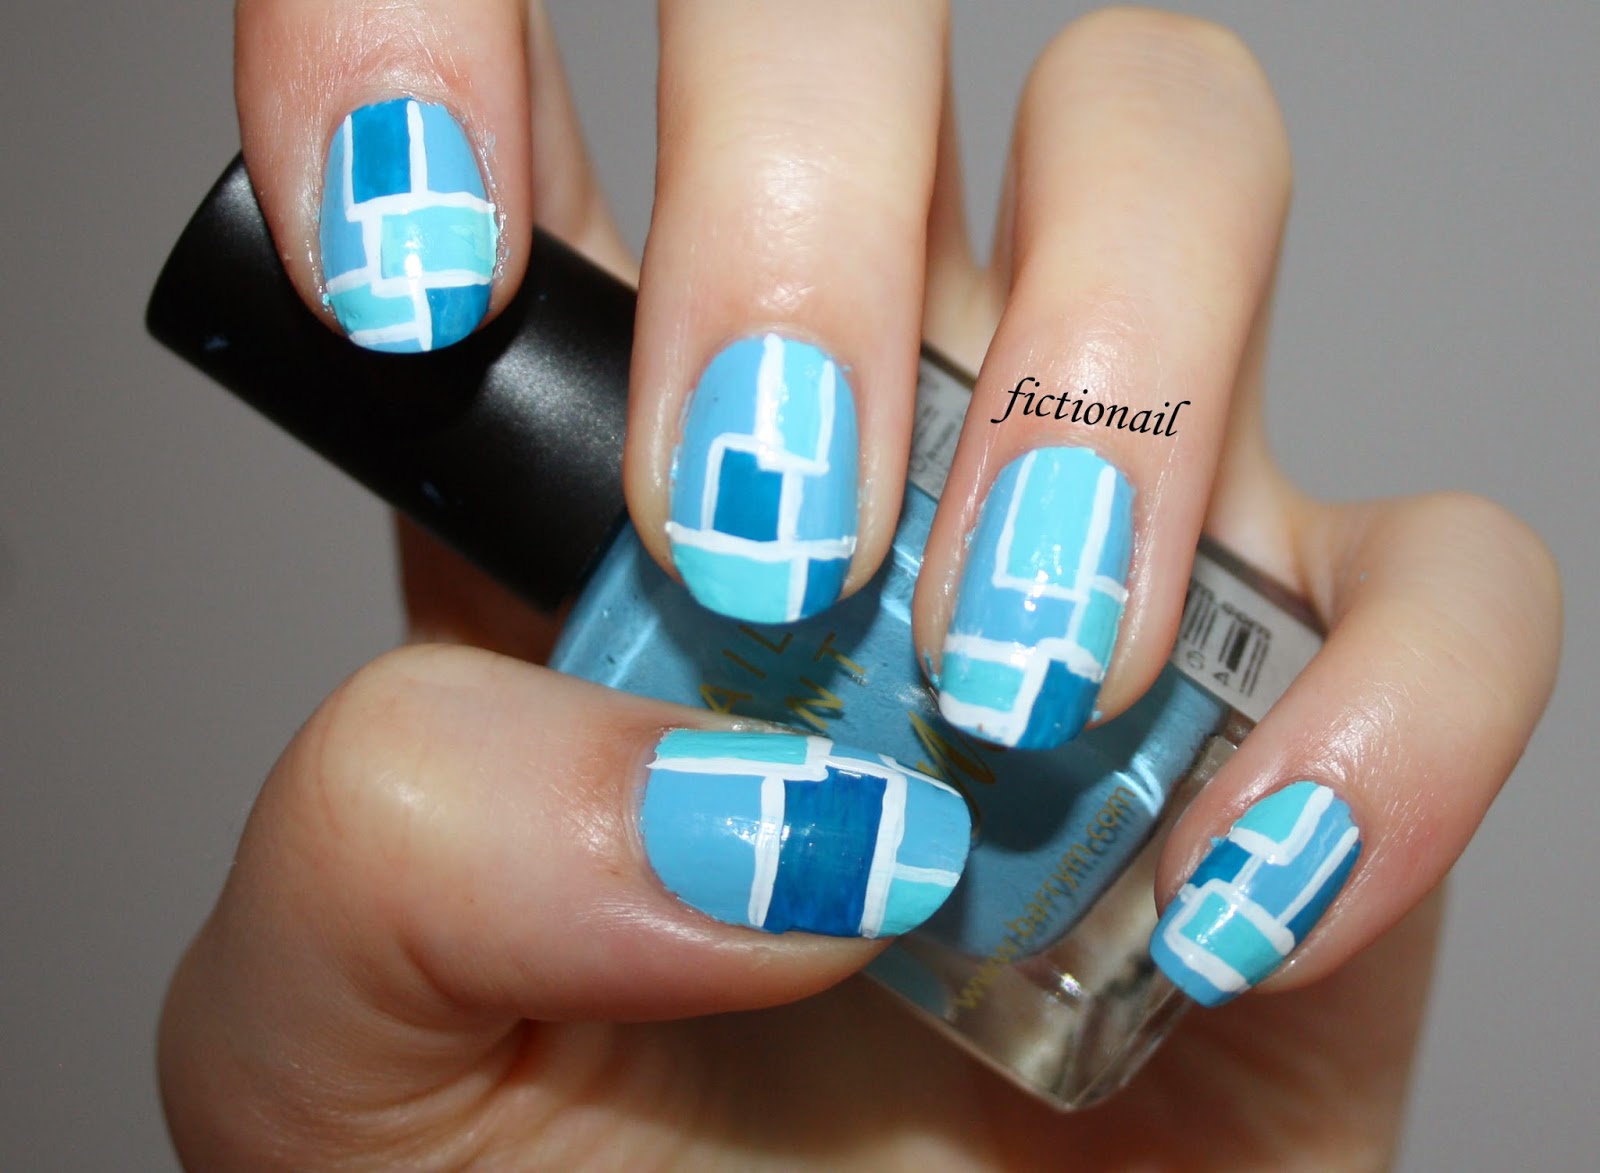
If you love geometric shapes and patterns, this tutorial is perfect for you. We will show you how to create a color block design using different geometric shapes, such as triangles, squares, and circles. It's a fun and creative way to incorporate multiple colors into your manicure.6. "Color Block Nail Tutorial with Geometric Designs"


6. "Color Block Nail Tutorial with Geometric Designs"


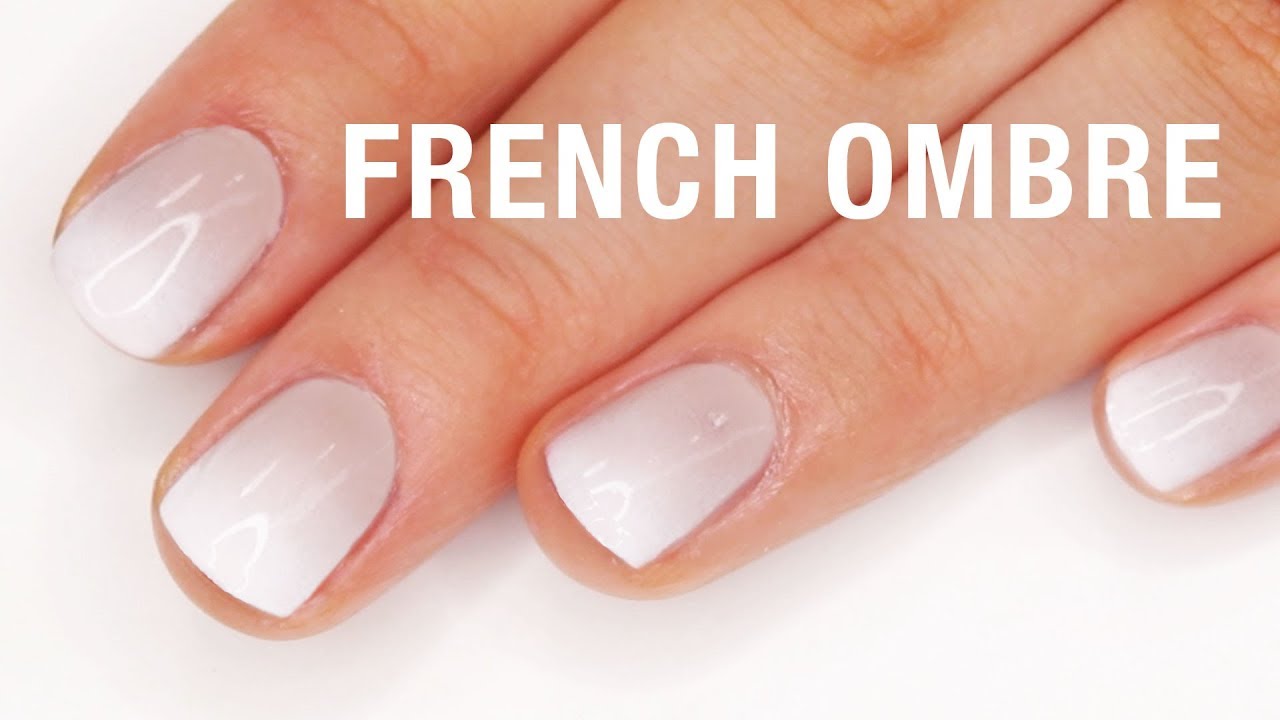
If you can't decide on just one color, why not create an ombre effect with your color block design? This tutorial will show you how to blend two or more colors seamlessly to achieve a gradient effect. It's a unique twist on the classic color block look.7. "Color Block Nail Tutorial with Ombre Effect"


7. "Color Block Nail Tutorial with Ombre Effect"


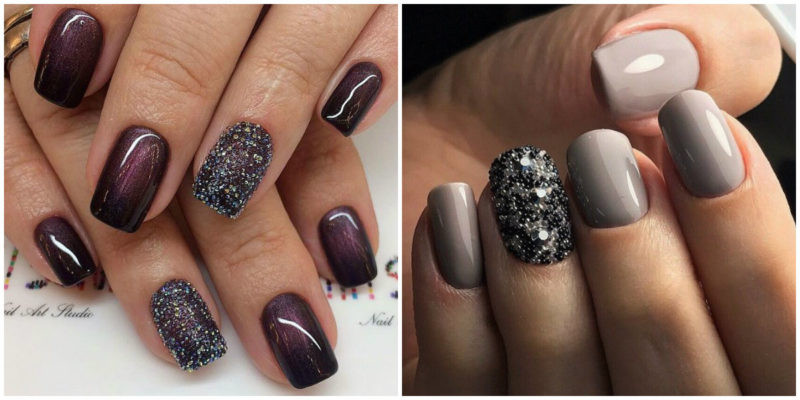
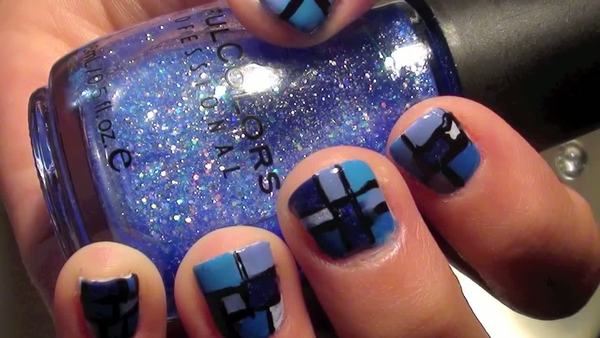
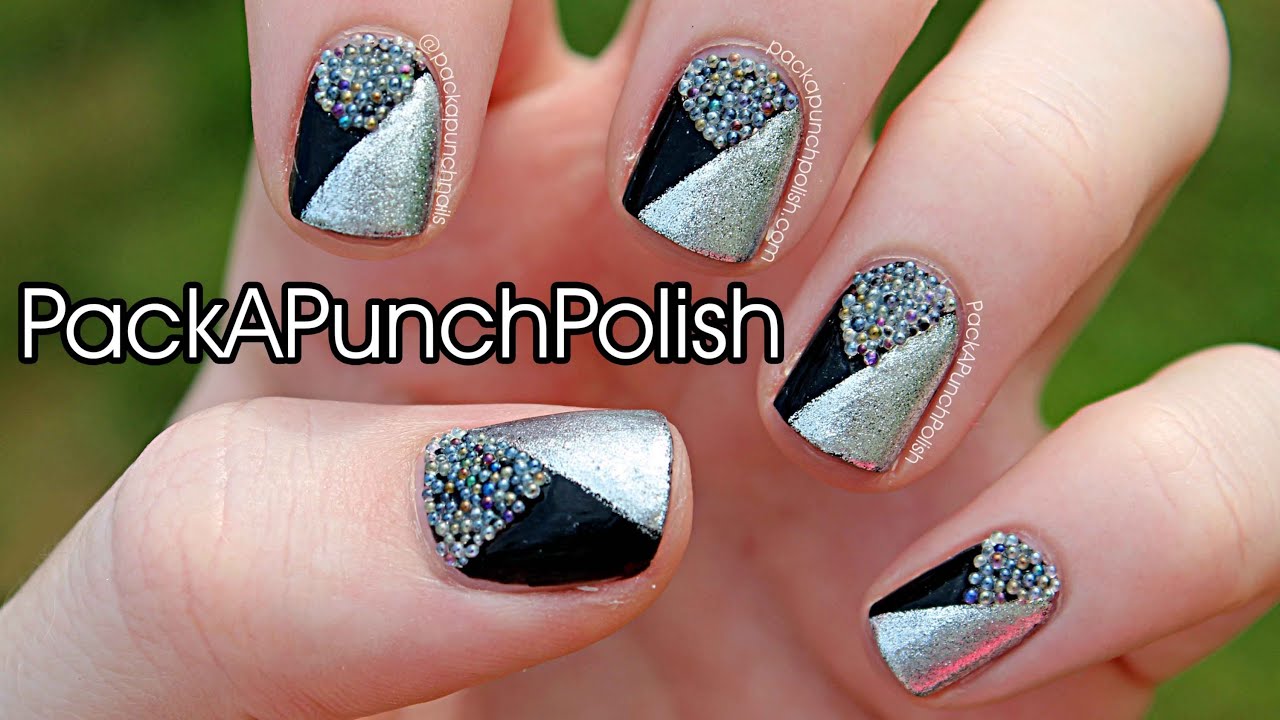
For a touch of sparkle and glam, try adding glitter accents to your color block nails. This tutorial will show you how to incorporate glitter into your design in a subtle or bold way. You can use loose glitter or opt for a glitter polish for an easy application.8. "Color Block Nail Tutorial with Glitter Accents"

8. "Color Block Nail Tutorial with Glitter Accents"


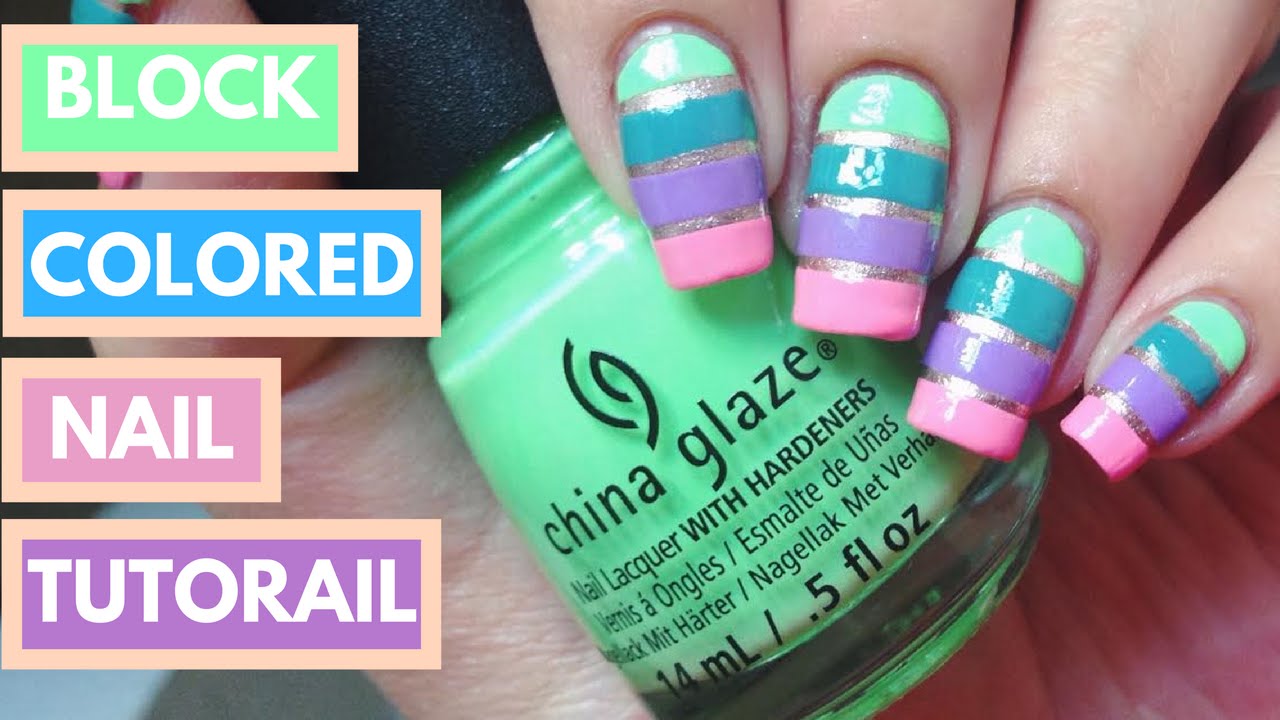
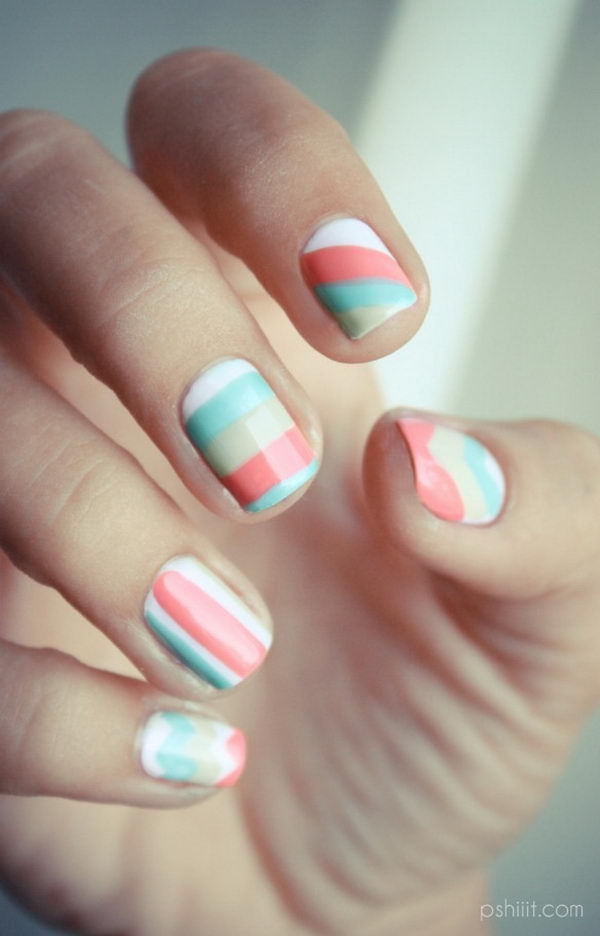
Pastel colors are perfect for spring and summer, and they also look great in a color block design. In this tutorial, we will show you how to create a soft and feminine look using pastel shades. It's a great way to add a pop of color to your outfit.9. "Color Block Nail Tutorial with Pastel Colors"
9. "Color Block Nail Tutorial with Pastel Colors"


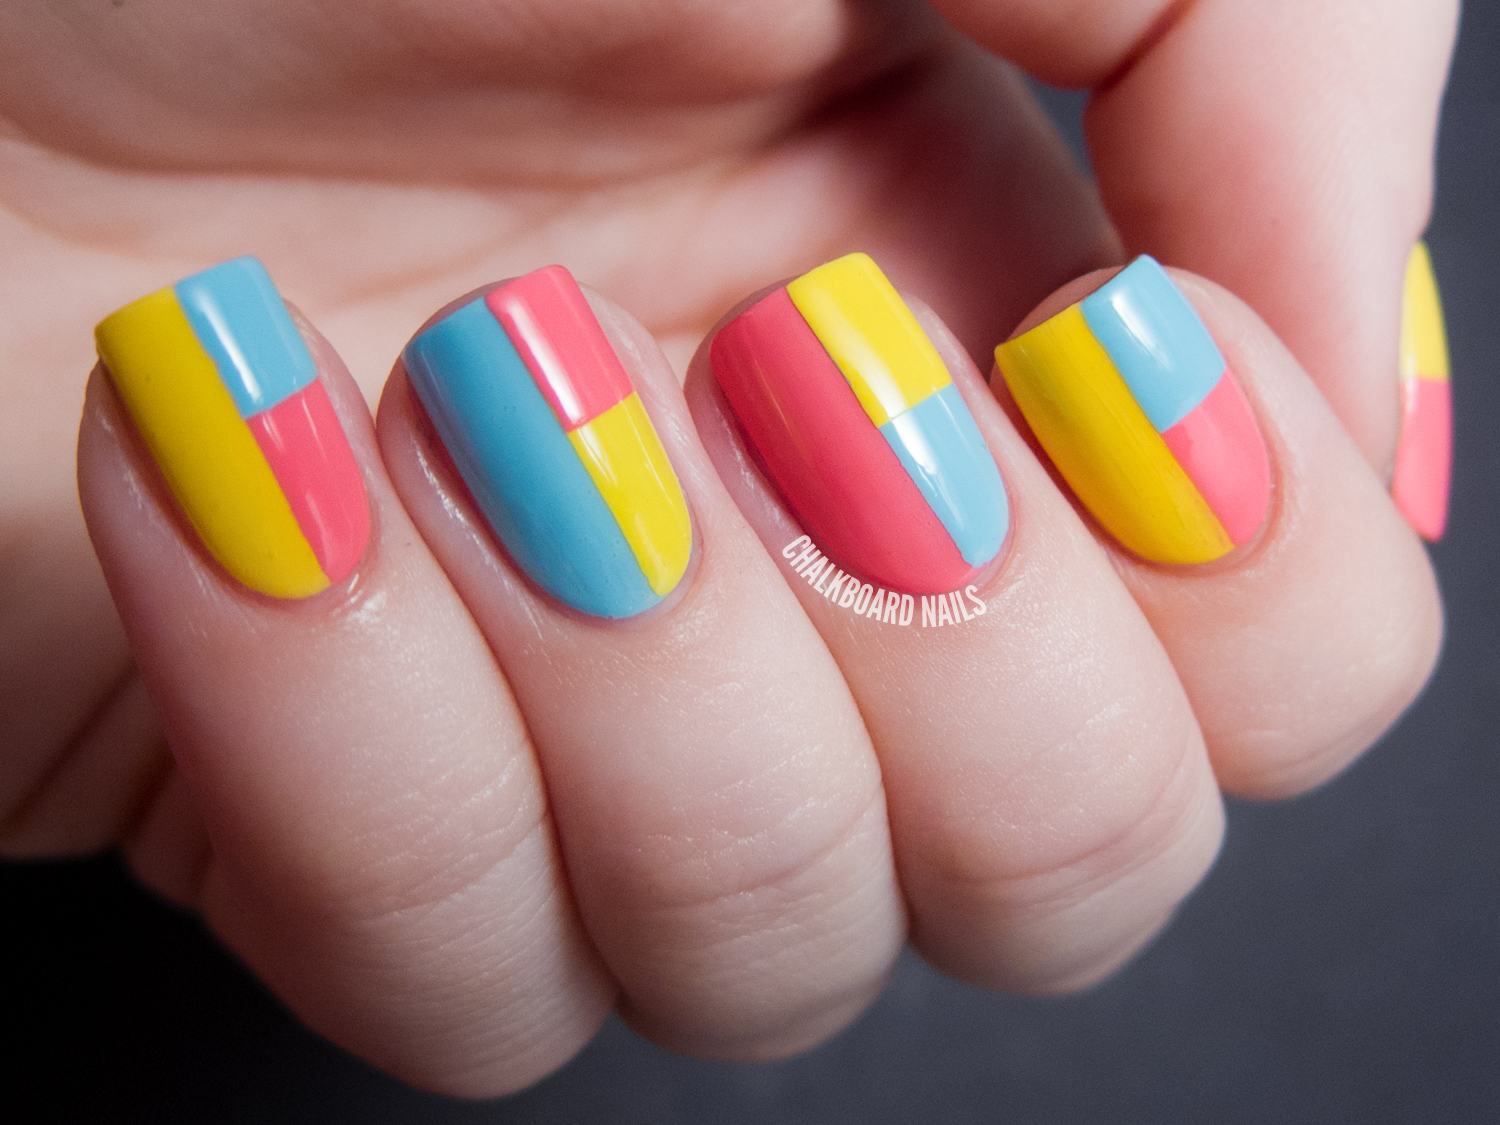
Summer is all about bright and bold colors, and what better way to show off your vibrant nails than with a color block design? This tutorial will show you how to create a summery color block look using funky and fun colors. Get ready to turn heads with your colorful manicure.10. "Color Block Nail Tutorial for Summer"
10. "Color Block Nail Tutorial for Summer"


Achieve a Bold and Eye-Catching Look with Color Block Nail Art

Step-by-Step Guide to Mastering the Trend
 If you're tired of the same old manicure routine and want to add a pop of color and creativity to your nails, then color block nail art is the perfect choice for you. This trend has taken the beauty world by storm and is a great way to make a bold statement with your nails. Not only is it easy to achieve, but it also allows you to experiment with different color combinations and designs. Follow this step-by-step tutorial to learn how to master the art of color blocking on your nails.
Step 1: Gather Your Supplies
Before you begin, make sure you have all the necessary supplies on hand. You will need at least two different nail polish colors of your choice, a clear base coat and top coat, nail tape or striping tape, and a thin nail art brush. It's important to have a steady hand and precise tools for this design, so make sure you have everything ready before you start.
Step 2: Prep Your Nails
Start by cleaning your nails and removing any old polish. Then, file and shape your nails to your desired length and shape. Apply a clear base coat to protect your nails and allow it to dry completely before moving on to the next step.
Step 3: Choose Your Colors
The key to achieving a striking color block design is choosing the right color combination. You can go for bold and contrasting colors or stick to a more monochromatic look. The choice is yours, so have fun and experiment with different shades.
Step 4: Create Your Base Color
Using one of your chosen nail polish colors, paint your nails and allow them to dry completely. If you want a more opaque look, apply a second coat and let it dry before moving on to the next step.
Step 5: Apply Nail Tape
Once your base color is dry, it's time to add the nail tape. Cut small strips of tape and carefully place them on your nails to create the desired design. You can go for horizontal, vertical, or diagonal lines, or even create geometric shapes like triangles or squares.
Step 6: Paint Over the Tape
Using your second nail polish color, carefully paint over the areas where the tape is placed. Make sure to fully cover the tape and let the polish dry completely before removing it.
Step 7: Remove the Tape
Once the second color is dry, gently remove the tape to reveal clean and crisp lines. If you have any mistakes or smudges, use a thin nail art brush dipped in nail polish remover to clean up the edges.
Step 8: Seal the Design
To make your color block nail art last longer, apply a clear top coat over your nails. This will not only protect the design but also give it a glossy finish.
With these simple steps, you can achieve a bold and eye-catching look with color block nail art. It's a fun and easy way to add some personality to your nails and stay on-trend. So go ahead and try it out for yourself, and be prepared to receive compliments on your fabulous nail design.
If you're tired of the same old manicure routine and want to add a pop of color and creativity to your nails, then color block nail art is the perfect choice for you. This trend has taken the beauty world by storm and is a great way to make a bold statement with your nails. Not only is it easy to achieve, but it also allows you to experiment with different color combinations and designs. Follow this step-by-step tutorial to learn how to master the art of color blocking on your nails.
Step 1: Gather Your Supplies
Before you begin, make sure you have all the necessary supplies on hand. You will need at least two different nail polish colors of your choice, a clear base coat and top coat, nail tape or striping tape, and a thin nail art brush. It's important to have a steady hand and precise tools for this design, so make sure you have everything ready before you start.
Step 2: Prep Your Nails
Start by cleaning your nails and removing any old polish. Then, file and shape your nails to your desired length and shape. Apply a clear base coat to protect your nails and allow it to dry completely before moving on to the next step.
Step 3: Choose Your Colors
The key to achieving a striking color block design is choosing the right color combination. You can go for bold and contrasting colors or stick to a more monochromatic look. The choice is yours, so have fun and experiment with different shades.
Step 4: Create Your Base Color
Using one of your chosen nail polish colors, paint your nails and allow them to dry completely. If you want a more opaque look, apply a second coat and let it dry before moving on to the next step.
Step 5: Apply Nail Tape
Once your base color is dry, it's time to add the nail tape. Cut small strips of tape and carefully place them on your nails to create the desired design. You can go for horizontal, vertical, or diagonal lines, or even create geometric shapes like triangles or squares.
Step 6: Paint Over the Tape
Using your second nail polish color, carefully paint over the areas where the tape is placed. Make sure to fully cover the tape and let the polish dry completely before removing it.
Step 7: Remove the Tape
Once the second color is dry, gently remove the tape to reveal clean and crisp lines. If you have any mistakes or smudges, use a thin nail art brush dipped in nail polish remover to clean up the edges.
Step 8: Seal the Design
To make your color block nail art last longer, apply a clear top coat over your nails. This will not only protect the design but also give it a glossy finish.
With these simple steps, you can achieve a bold and eye-catching look with color block nail art. It's a fun and easy way to add some personality to your nails and stay on-trend. So go ahead and try it out for yourself, and be prepared to receive compliments on your fabulous nail design.