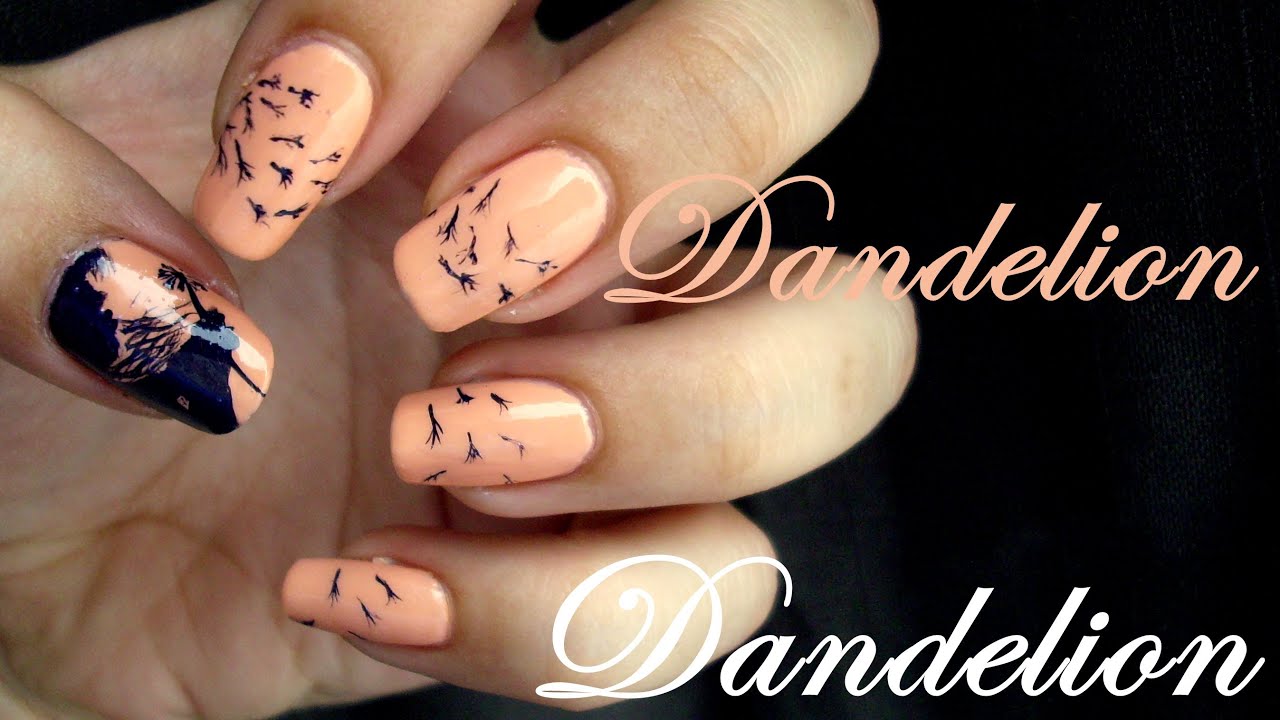
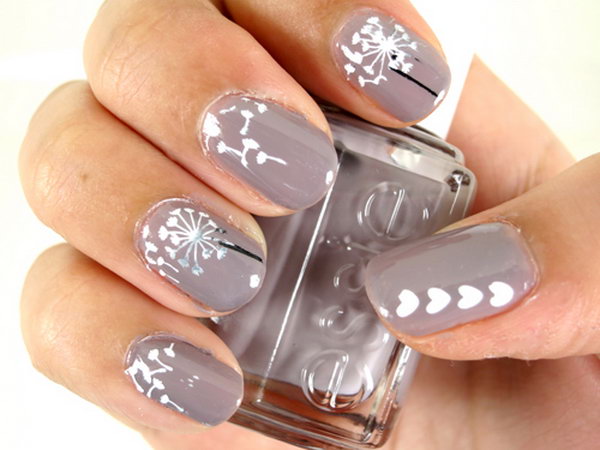
Are you looking for a unique and eye-catching nail design? Look no further than dandelion gel nails! This delicate and whimsical design is perfect for any occasion and can be easily achieved with gel nail polish. Follow along with this step-by-step tutorial to create your own dandelion gel nail design. To start, you will need a base coat, gel polish in dandelion yellow, black, and white, a dotting tool, and a gel top coat. Begin by applying a thin layer of base coat to your nails and curing it under a LED lamp for 30 seconds. This will help your gel polish adhere to your nails and last longer. Next, apply two coats of dandelion yellow gel polish to all of your nails, curing each coat under the LED lamp for 30 seconds between coats. This will create a solid base for your dandelion design. Now it's time to create the dandelion petals. Dip your dotting tool into black gel polish and gently dot it onto your nails to create small circles. These will be the centers of your dandelion flowers. Use a light touch to create varying sizes of circles for a more natural look. Once you have your black dots, clean off your dotting tool and dip it into white gel polish. Use the dotting tool to create thin lines coming out from the black dots, resembling the petals of a dandelion. Vary the length and thickness of the lines for a more realistic effect. Continue this process on all of your nails, creating multiple dandelion flowers on each one. Once you're happy with the look, cure your nails under the LED lamp for 60 seconds. Finally, seal in your design with a gel top coat. This will not only give your nails a beautiful shine, but also protect your dandelion design from chipping or peeling. Cure your top coat under the LED lamp for 60 seconds and your dandelion gel nail design is complete!1. Dandelion Gel Nail Design Tutorial


1. Dandelion Gel Nail Design Tutorial


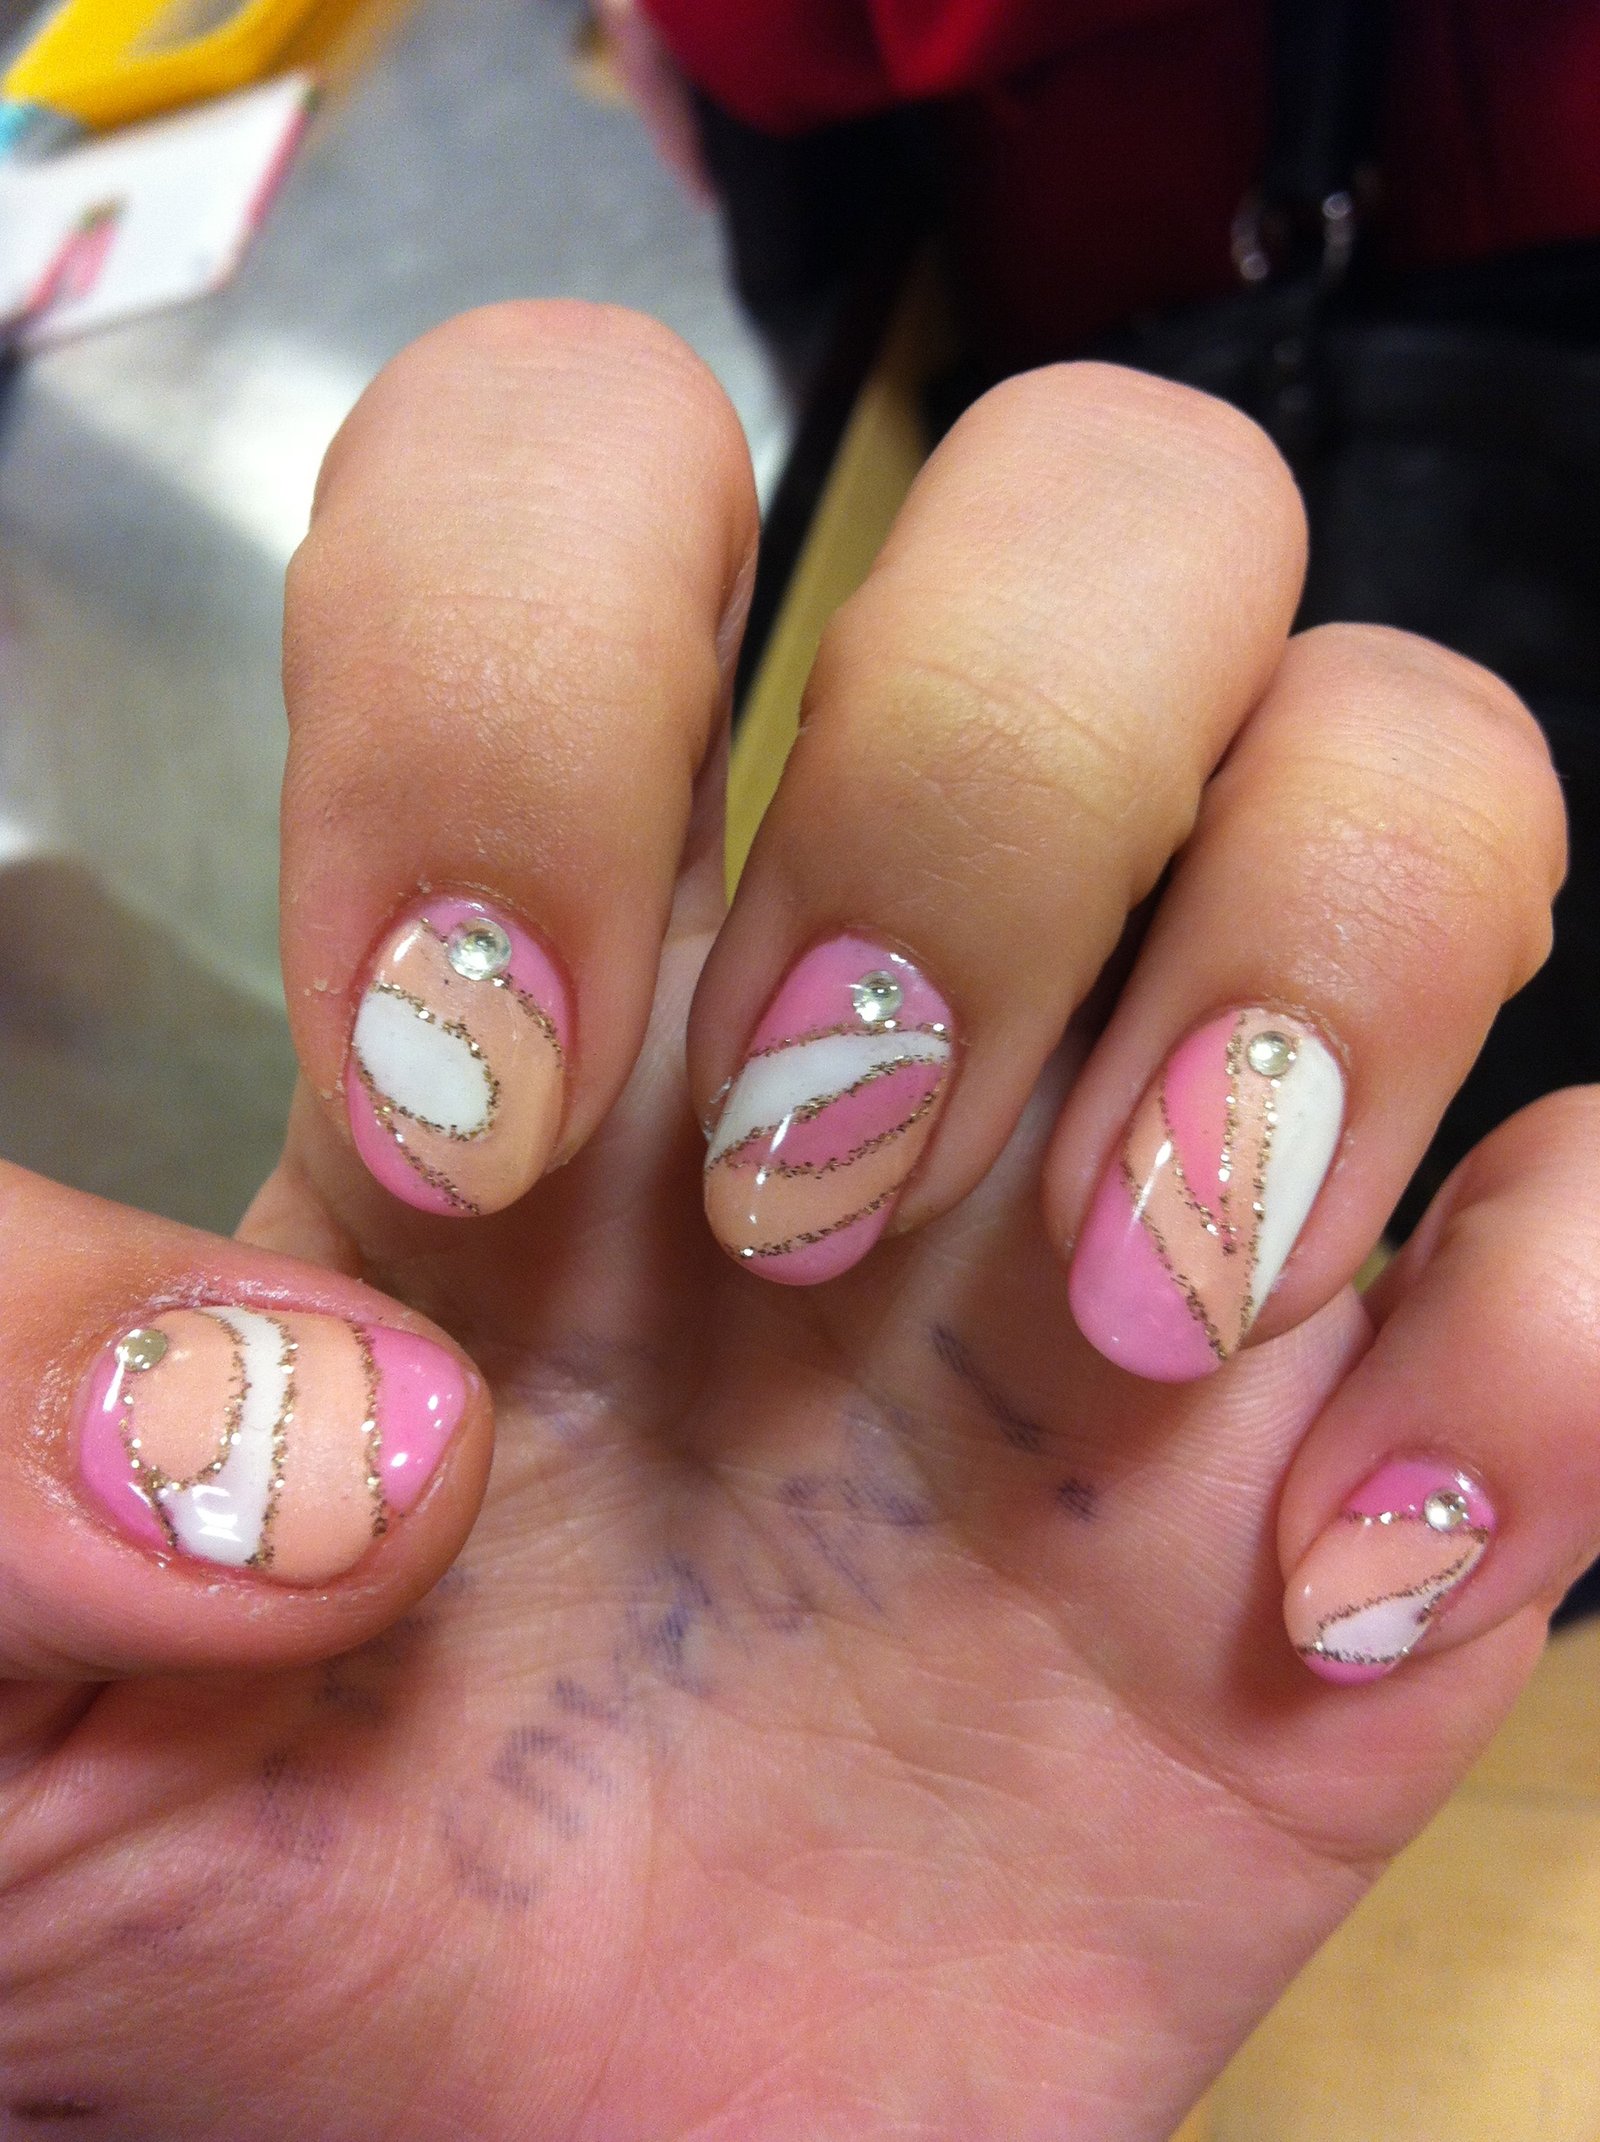
Looking for more inspiration for your dandelion gel nail design? There are endless possibilities when it comes to incorporating dandelions into your nail art. Here are a few ideas to get you started: 1. Dandelion French tips: Create a traditional French manicure with white tips, then add dandelion designs to each nail using the tutorial above. 2. Dandelion ombre: Use a blend of yellow and white gel polish to create an ombre effect on your nails, then add dandelion designs on top for a dreamy and ethereal look. 3. Dandelion accent nail: Paint all of your nails a solid color and add a single dandelion design to one nail for a subtle yet stunning accent. 4. Dandelion negative space: Use a clear or nude base for your dandelion design, leaving negative space on your nails for a modern and minimalist take on the dandelion trend. With these ideas and your own creativity, the possibilities for dandelion gel nail art are endless!2. Dandelion Gel Nail Art Ideas

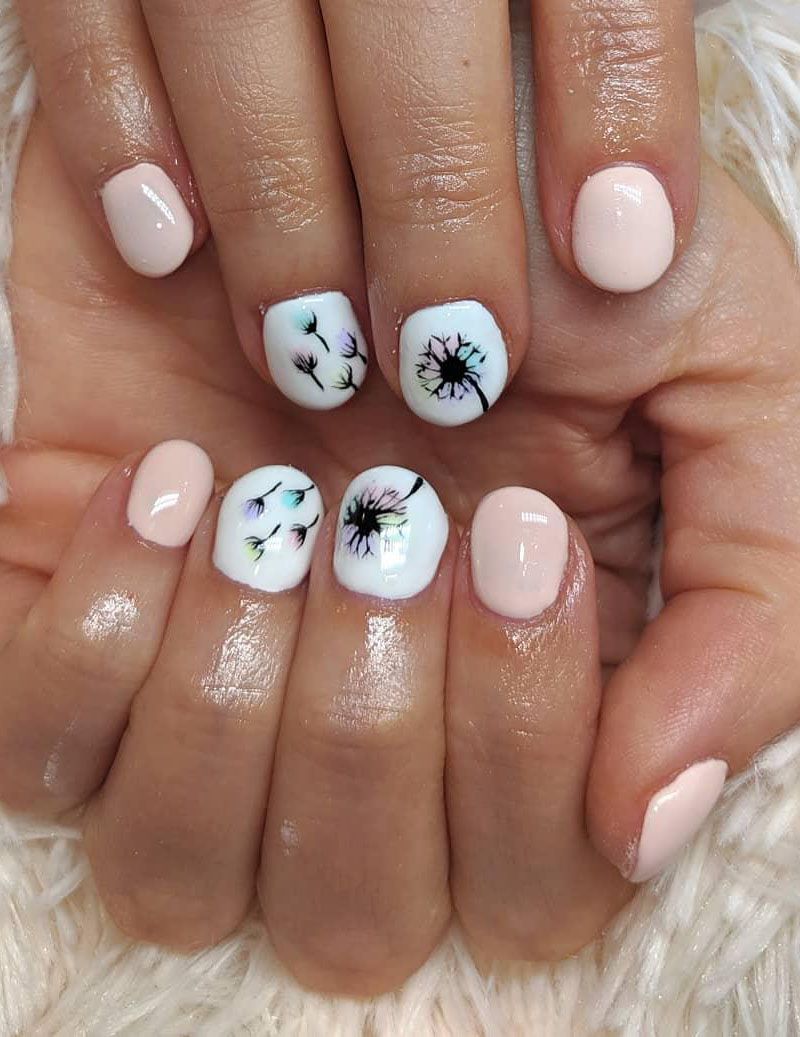
2. Dandelion Gel Nail Art Ideas
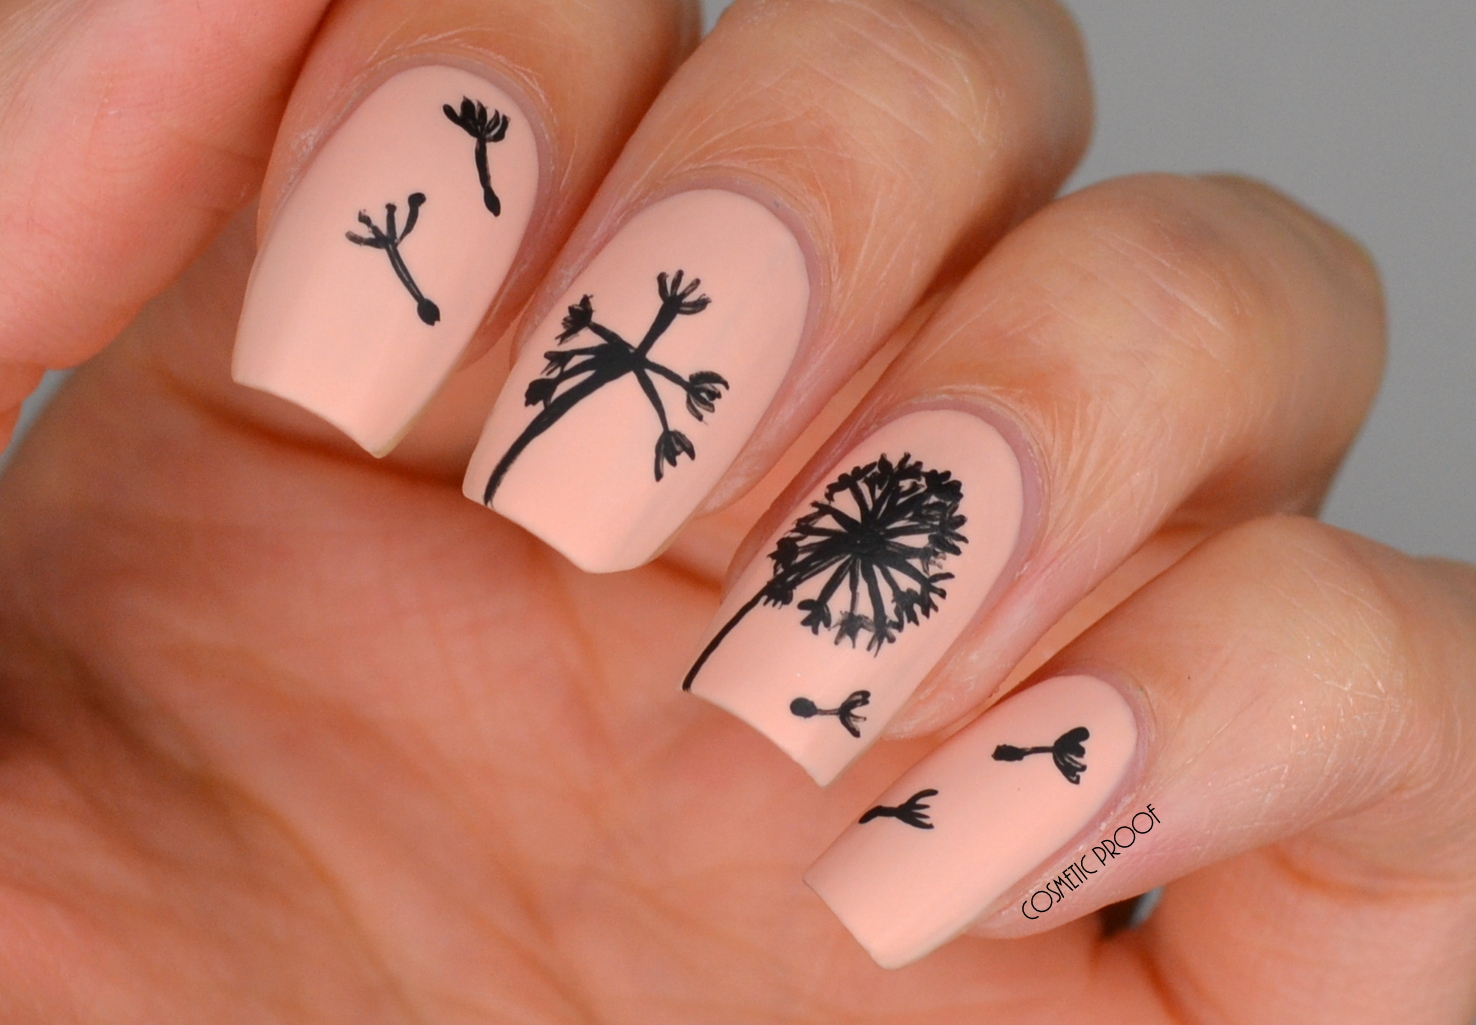


Are you new to gel nails and looking for a design that is easy to recreate? Dandelion gel nail designs are perfect for beginners, as they require minimal tools and can be achieved with basic techniques. Follow these tips for a foolproof dandelion gel nail design: 1. Use a gel polish kit: Gel polish kits often come with all the necessary tools and products for a gel manicure, making it easier for beginners to get started. Look for a kit that includes gel base and top coat, as well as a variety of gel colors. 2. Practice your dotting technique: The key to a successful dandelion gel nail design is mastering the dotting technique. Practice on a piece of paper or a plastic surface before attempting it on your nails to get comfortable with the technique. 3. Keep a steady hand: When creating the dandelion petals, it's important to keep a steady hand to create clean and precise lines. If you find that your hand is shaking, try resting your elbow on a flat surface for added stability. 4. Be patient: Gel nails require a bit more patience than regular nail polish, as each layer needs to be cured under a LED lamp. Take your time and don't rush through the process to ensure a long-lasting dandelion gel nail design. With these tips in mind, even beginners can achieve a beautiful dandelion gel nail design.3. Dandelion Gel Nail Designs for Beginners


3. Dandelion Gel Nail Designs for Beginners

For a detailed and easy-to-follow guide on creating a dandelion gel nail design, follow these step-by-step instructions: Step 1: Prep your nails by pushing back your cuticles and shaping your nails with a nail file. Apply a base coat and cure it under a LED lamp for 30 seconds. Step 2: Apply two coats of dandelion yellow gel polish, curing each coat under the LED lamp for 30 seconds between coats. Step 3: Using a dotting tool, create black dots on your nails to resemble the center of a dandelion. Cure under the LED lamp for 60 seconds. Step 4: Clean off your dotting tool and use it to create thin white lines coming out from the black dots, resembling the petals of a dandelion. Vary the length and thickness of the lines for a more natural look. Cure under the LED lamp for 60 seconds. Step 5: Seal in your design with a gel top coat and cure under the LED lamp for 60 seconds. And that's it – your dandelion gel nail design is complete!4. Dandelion Gel Nail Design Step by Step

4. Dandelion Gel Nail Design Step by Step


Add a touch of sparkle to your dandelion gel nail design by incorporating glitter into the design. Here's how: Step 1: Apply a base coat and two coats of dandelion yellow gel polish, curing each coat under the LED lamp for 30 seconds between coats. Step 2: Use a dotting tool to create black dots on your nails and cure under the LED lamp for 60 seconds. Step 3: Apply a thin layer of clear gel polish over your entire nail, avoiding the dandelion design. Sprinkle gold or silver glitter onto your nails and gently press it in with a clean finger or a brush. Cure under the LED lamp for 60 seconds. Step 4: Using a dotting tool, create white lines coming out from the black dots to resemble the dandelion petals. Cure under the LED lamp for 60 seconds. Step 5: Seal in your design with a gel top coat and cure under the LED lamp for 60 seconds. Your dandelion gel nail design with glitter is now complete!5. Dandelion Gel Nail Design with Glitter


5. Dandelion Gel Nail Design with Glitter

Stamping is a popular nail art technique that can add intricate and detailed designs to your nails with ease. Here's how to incorporate stamping into your dandelion gel nail design: Step 1: Apply a base coat and two coats of dandelion yellow gel polish, curing each coat under the LED lamp for 30 seconds between coats. Step 2: Use a stamping plate with a dandelion design and a black stamping polish to transfer the design onto your nails. If you're new to stamping, be sure to practice on a piece of paper or a plastic surface before attempting it on your nails. Step 3: Cure your nails under the LED lamp for 60 seconds. Step 4: Seal in your design with a gel top coat and cure under the LED lamp for 60 seconds. Your dandelion gel nail design with stamping is now complete!6. Dandelion Gel Nail Design with Stamping


6. Dandelion Gel Nail Design with Stamping

Foil is a fun and easy way to add a metallic element to your dandelion gel nail design. Here's how to do it: Step 1: Apply a base coat and two coats of dandelion yellow gel polish, curing each coat under the LED lamp for 30 seconds between coats. Step 2: Use a dotting tool to create black dots on your nails and cure under the LED lamp for 60 seconds. Step 3: Apply a thin layer of clear gel polish over your entire nail, avoiding the dandelion design. Cut small pieces of gold or silver foil and gently press them onto your nails with a clean finger or a brush. Cure under the LED lamp for 60 seconds. Step 4: Using a dotting tool, create white lines coming out from the black dots to resemble the dandelion petals. Cure under the LED lamp for 60 seconds. Step 5: Seal in your design with a gel top coat and cure under the LED lamp for 60 seconds. Your dandelion gel nail design with foil is now complete!7. Dandelion Gel Nail Design with Foil


7. Dandelion Gel Nail Design with Foil


Add some bling to your dandelion gel nail design by incorporating rhinestones. Here's how: Step 1: Apply a base coat and two coats of dandelion yellow gel polish, curing each coat under the LED lamp for 30 seconds between coats. Step 2: Use a dotting tool to create black dots on your nails and cure under the LED lamp for 60 seconds. Step 3: Apply a thin layer of clear gel polish over your entire nail, avoiding the dandelion design. Use a pair of tweezers to place small rhinestones onto your nails in a dandelion shape. Cure under the LED lamp for 60 seconds. Step 4: Using a dotting tool, create white lines coming out from the black dots to resemble the dandelion petals. Cure under the LED lamp for 60 seconds. Step 5: Seal in your design with a gel top coat and cure under the LED lamp for 60 seconds. Your dandelion gel nail design with rhinestones is now complete!8. Dandelion Gel Nail Design with Rhinestones


8. Dandelion Gel Nail Design with Rhinestones
Combine two popular nail trends – dandelions and ombre – with this stunning dandelion gel nail design: Step 1: Apply a base coat and two coats of dandelion yellow gel polish, curing each coat under the LED lamp for 30 seconds between coats. Step 2: Use a blend of yellow and white gel polish to create an ombre effect on your nails, starting with the yellow at the base and gradually blending into white at the tips. Cure under the LED lamp for 60 seconds. Step 3: Use a dotting tool to create black dots on your nails and cure under the LED lamp for 60 seconds. Step 4: Clean off your dotting tool and use it to create thin white lines coming out from the black dots to resemble the dandelion petals. Cure under the LED lamp for 60 seconds. Step 5: Seal in your design with a gel top coat and cure under the LED lamp for 60 seconds. Your dandelion gel nail design with ombre is now complete!9. Dandelion Gel Nail Design with Ombre

9. Dandelion Gel Nail Design with Ombre
For a modern and minimalist take on the dandelion gel nail trend, try incorporating negative space into your design:10. Dandelion Gel Nail Design with Negative Space

10. Dandelion Gel Nail Design with Negative Space

The Versatility of Dandelion Gel Nail Design

How to Incorporate this Trend into Your Home
 Dandelions are more than just a common weed found in lawns and fields. With their delicate yellow petals and fluffy white seed heads, these flowers have been a source of inspiration for fashion, art, and now, home design. The dandelion gel nail design is a unique and versatile trend that can add a touch of whimsy and elegance to any home. In this article, we will explore the beauty and charm of dandelion gel nail design and how you can incorporate it into your house.
Why Choose Dandelion Gel Nail Design?
Gel nail designs have become increasingly popular in recent years due to their durability and long-lasting shine. With dandelion gel nail design, you can take your nail game to the next level by incorporating intricate and detailed designs of dandelions onto your gel nails. These designs can range from simple and minimalistic to bold and eye-catching, making them suitable for any occasion and personal style.
The Beauty of Dandelion Gel Nail Design
Dandelions have long been associated with wishes and dreams, making them a symbol of hope and positivity. The delicate petals and wispy seed heads of this flower make for a stunning design on gel nails. The bright yellow color of the petals and the white fluff of the seed heads add a pop of color and texture to any nail design. Plus, the intricate details of a dandelion can showcase the skill and creativity of your nail technician.
Incorporating Dandelion Gel Nail Design into Your Home
The versatility of dandelion gel nail design extends beyond just your nails. These designs can also be incorporated into your home decor to add a touch of charm and whimsy. You can opt for dandelion wall decals, throw pillows, or even dandelion-shaped light fixtures to bring this trend into your living space. The best part? Dandelion designs can complement any interior style, whether it be modern, bohemian, or farmhouse.
Conclusion
In conclusion, dandelion gel nail design is not just a passing trend, but a versatile and timeless addition to your home. From adding a touch of nature and positivity to your nails to incorporating it into your home decor, this trend offers endless possibilities. So why not give dandelion gel nail design a try and see the beauty and charm it can bring to your house.
Dandelions are more than just a common weed found in lawns and fields. With their delicate yellow petals and fluffy white seed heads, these flowers have been a source of inspiration for fashion, art, and now, home design. The dandelion gel nail design is a unique and versatile trend that can add a touch of whimsy and elegance to any home. In this article, we will explore the beauty and charm of dandelion gel nail design and how you can incorporate it into your house.
Why Choose Dandelion Gel Nail Design?
Gel nail designs have become increasingly popular in recent years due to their durability and long-lasting shine. With dandelion gel nail design, you can take your nail game to the next level by incorporating intricate and detailed designs of dandelions onto your gel nails. These designs can range from simple and minimalistic to bold and eye-catching, making them suitable for any occasion and personal style.
The Beauty of Dandelion Gel Nail Design
Dandelions have long been associated with wishes and dreams, making them a symbol of hope and positivity. The delicate petals and wispy seed heads of this flower make for a stunning design on gel nails. The bright yellow color of the petals and the white fluff of the seed heads add a pop of color and texture to any nail design. Plus, the intricate details of a dandelion can showcase the skill and creativity of your nail technician.
Incorporating Dandelion Gel Nail Design into Your Home
The versatility of dandelion gel nail design extends beyond just your nails. These designs can also be incorporated into your home decor to add a touch of charm and whimsy. You can opt for dandelion wall decals, throw pillows, or even dandelion-shaped light fixtures to bring this trend into your living space. The best part? Dandelion designs can complement any interior style, whether it be modern, bohemian, or farmhouse.
Conclusion
In conclusion, dandelion gel nail design is not just a passing trend, but a versatile and timeless addition to your home. From adding a touch of nature and positivity to your nails to incorporating it into your home decor, this trend offers endless possibilities. So why not give dandelion gel nail design a try and see the beauty and charm it can bring to your house.


