Acrylic nail art is one of the most popular and widely used types of nail art. It involves using a mixture of acrylic powder and liquid to create a hard and durable layer on top of your natural nails. The procedure for getting acrylic nail art starts with preparing your natural nails by cleaning, shaping, and buffing them. Then, the acrylic mixture is applied on top of the nails using a brush and allowed to dry. Once dried, the nails can be filed, shaped, and polished to create the desired design. Acrylic nail art, popular, widely used, mixture, acrylic powder, liquid, hard, durable, natural nails, cleaning, shaping, buffing, applied, brush, dried, filed, shaped, polished, desired design.1. Acrylic Nail Art Design and Procedure

1. Acrylic Nail Art Design and Procedure


Gel nail art is similar to acrylic nail art, but instead of using a mixture of powder and liquid, it uses a gel polish that is cured under a UV or LED light. The procedure for getting gel nail art starts with preparing the natural nails by cleaning, shaping, and buffing them. Then, the gel polish is applied and cured under the light. Once cured, the nails can be filed, shaped, and polished to create the desired design. Gel nail art is known for its long-lasting and shiny finish. Gel nail art, similar, acrylic nail art, gel polish, cured, UV, LED light, cleaning, shaping, buffing, applied, cured, filed, shaped, polished, long-lasting, shiny finish.2. Gel Nail Art Design and Procedure


2. Gel Nail Art Design and Procedure


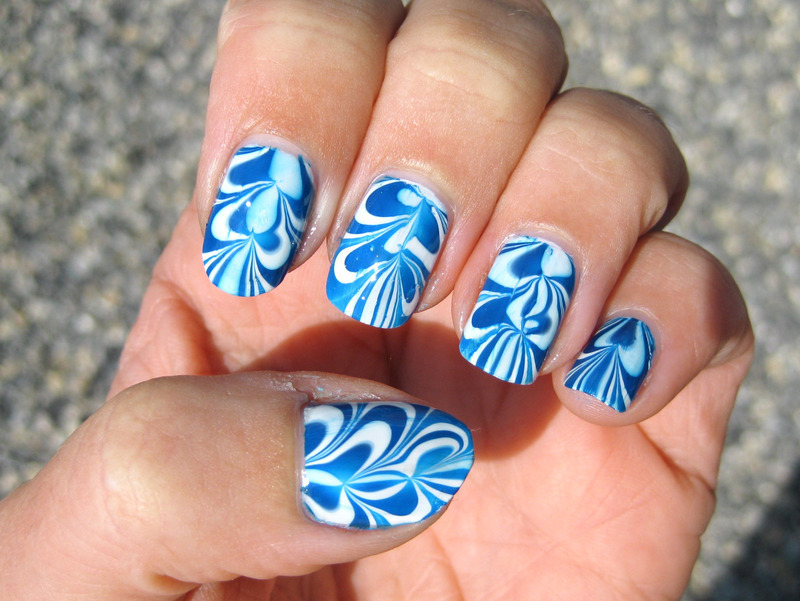
Water marble nail art is a unique and creative way of designing your nails. It involves creating a marble-like design on the nails using water and different colored nail polishes. The procedure for getting water marble nail art starts with applying a base coat on the nails and letting it dry. Then, drops of different colored nail polishes are dropped on the surface of the water, and a design is created using a toothpick or needle. The nail is then dipped into the water, and the design is transferred onto the nail. The excess polish is removed, and a top coat is applied to seal the design. Water marble nail art, unique, creative, marble-like design, water, different colored nail polishes, base coat, dry, drops, toothpick, needle, design, dipped, excess polish, removed, top coat, seal.3. Water Marble Nail Art Design and Procedure


3. Water Marble Nail Art Design and Procedure


:quality(85):upscale()/2023/09/05/968/n/1922153/deeab3bb64f7a856b38ef3.89488489_.jpg)

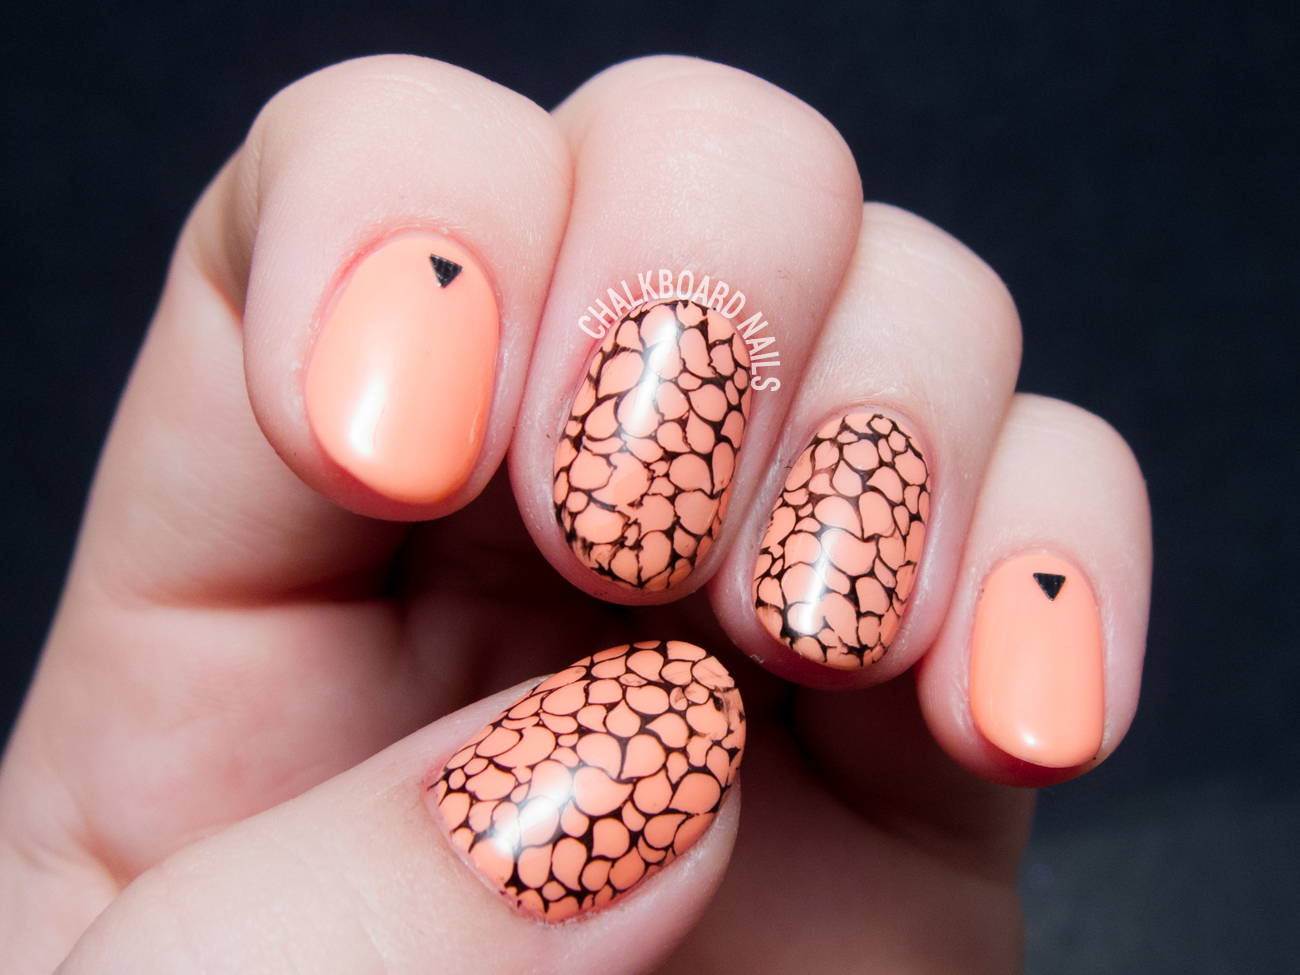
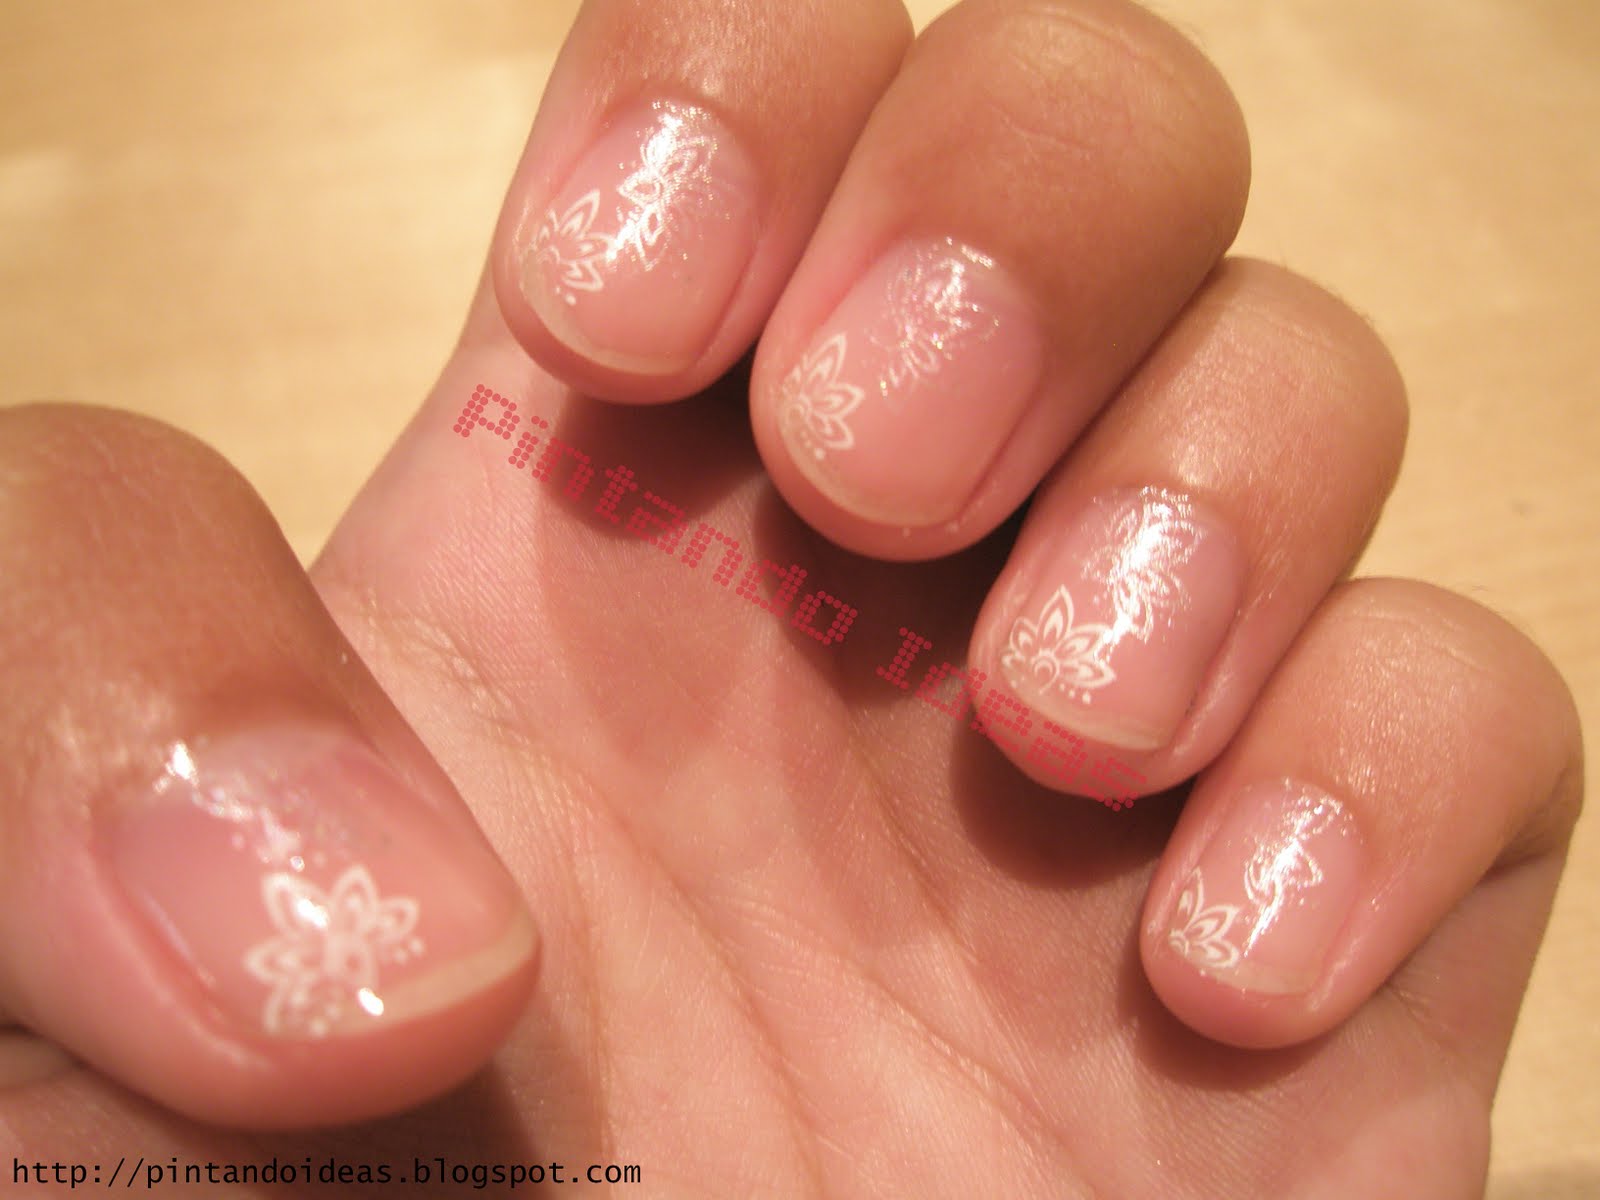
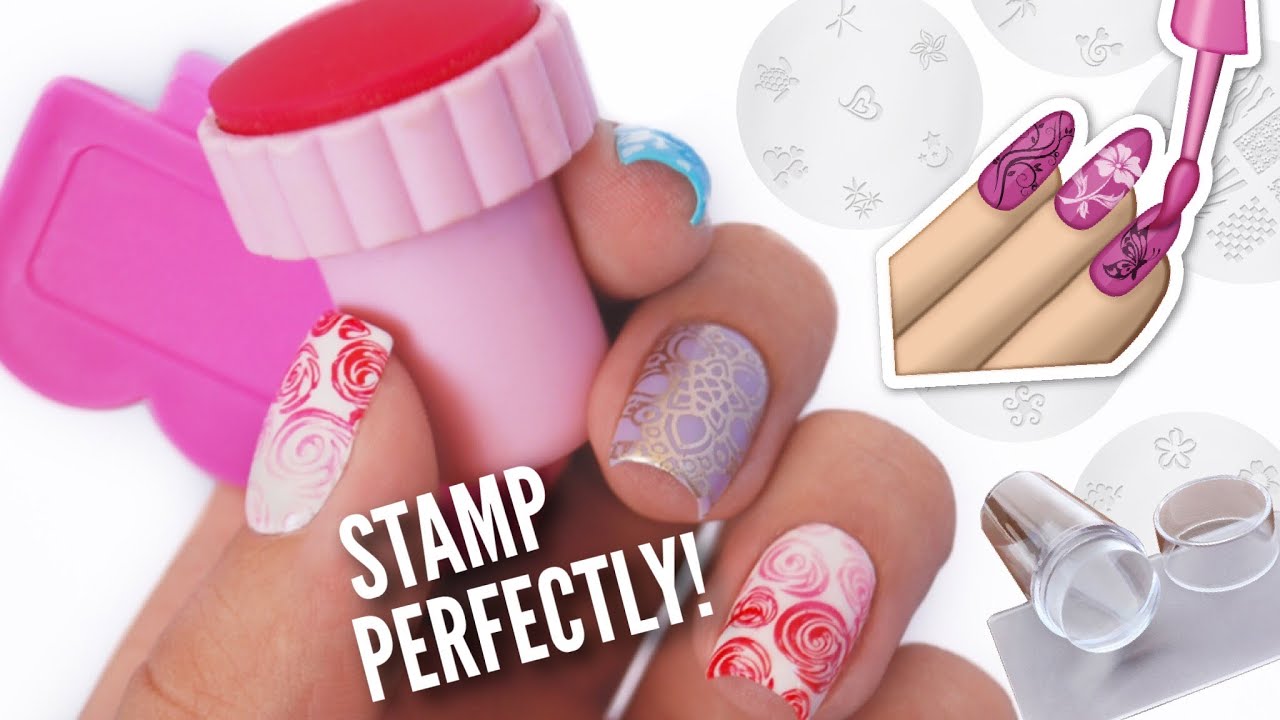
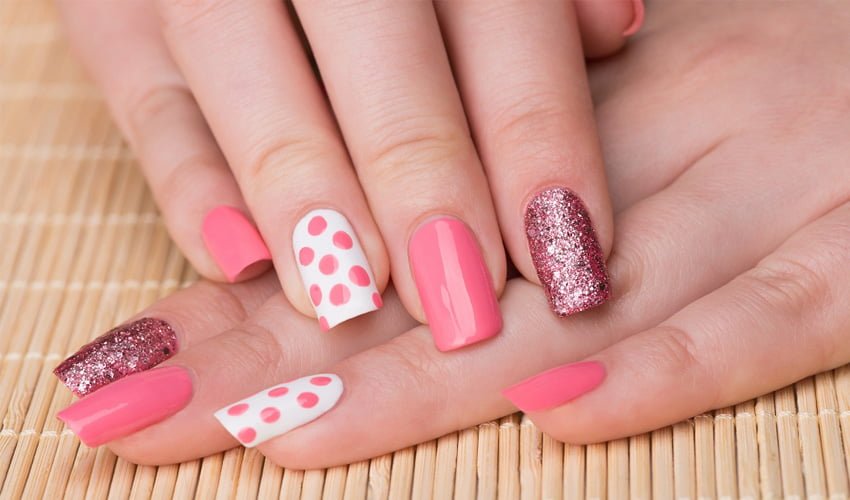
Stamping nail art is a simple and easy way to create intricate designs on your nails. It involves using a stamping plate with pre-designed patterns and a stamping tool to transfer the design onto the nail. The procedure for getting stamping nail art starts with cleaning, shaping, and buffing the natural nails. Then, a base coat is applied and allowed to dry. The desired design is selected from the stamping plate, and the stamping tool is used to transfer the design onto the nail. A top coat is then applied to seal the design. Stamping nail art, simple, easy, intricate designs, stamping plate, pre-designed patterns, stamping tool, transfer, cleaning, shaping, buffing, natural nails, base coat, dry, desired design, selected, top coat, seal.4. Stamping Nail Art Design and Procedure


4. Stamping Nail Art Design and Procedure


3D nail art is one of the most creative and eye-catching types of nail art. It involves creating 3D designs on the nails using various materials like clay, rhinestones, glitter, and more. The procedure for getting 3D nail art starts with preparing the natural nails by cleaning, shaping, and buffing them. Then, a base coat is applied and allowed to dry. The 3D design is then created using the chosen materials, and it is attached to the nail using nail glue. A top coat is applied to seal the design and add shine. 3D nail art, creative, eye-catching, 3D designs, materials, clay, rhinestones, glitter, preparing, natural nails, cleaning, shaping, buffing, base coat, dry, 3D design, attached, nail glue, top coat, seal, shine.5. 3D Nail Art Design and Procedure


5. 3D Nail Art Design and Procedure

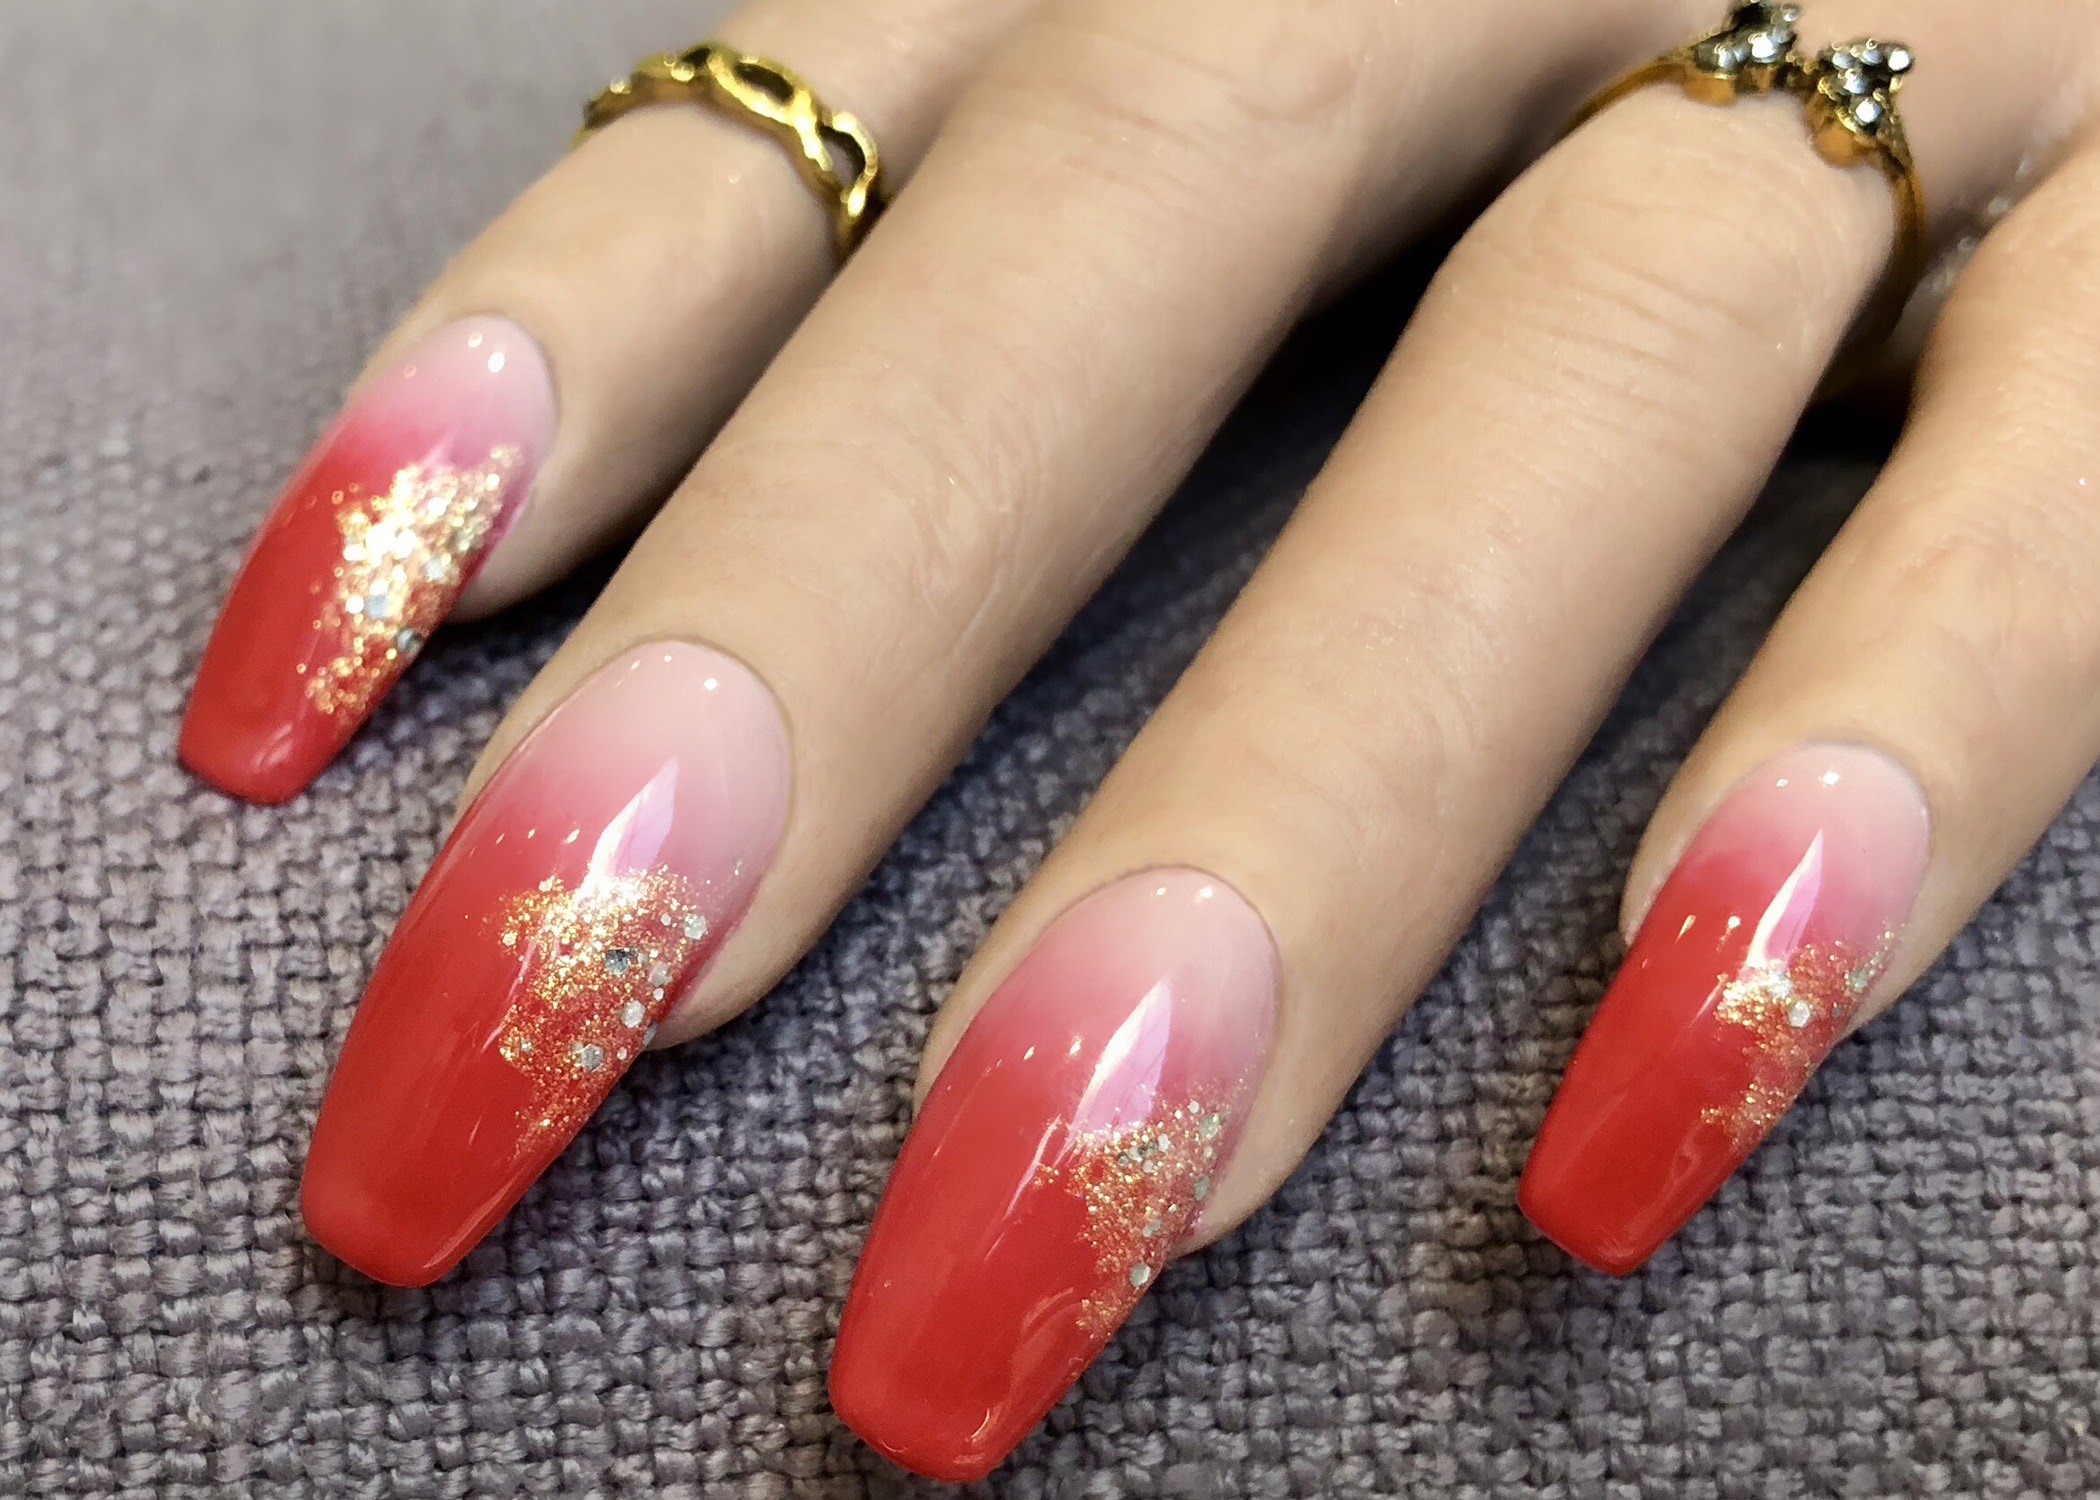
Ombre nail art is a trendy and stylish way to add a gradient effect to your nails. It involves blending two or more colors seamlessly on the nails to create a gradient effect. The procedure for getting ombre nail art starts with preparing the natural nails by cleaning, shaping, and buffing them. Then, a base coat is applied and allowed to dry. The chosen colors are then applied on a sponge and dabbed onto the nails to create the gradient effect. A top coat is applied to seal the design. Ombre nail art, trendy, stylish, gradient effect, blending, two or more colors, seamless, natural nails, cleaning, shaping, buffing, base coat, dry, chosen colors, sponge, dabbed, gradient effect, top coat, seal.6. Ombre Nail Art Design and Procedure

6. Ombre Nail Art Design and Procedure


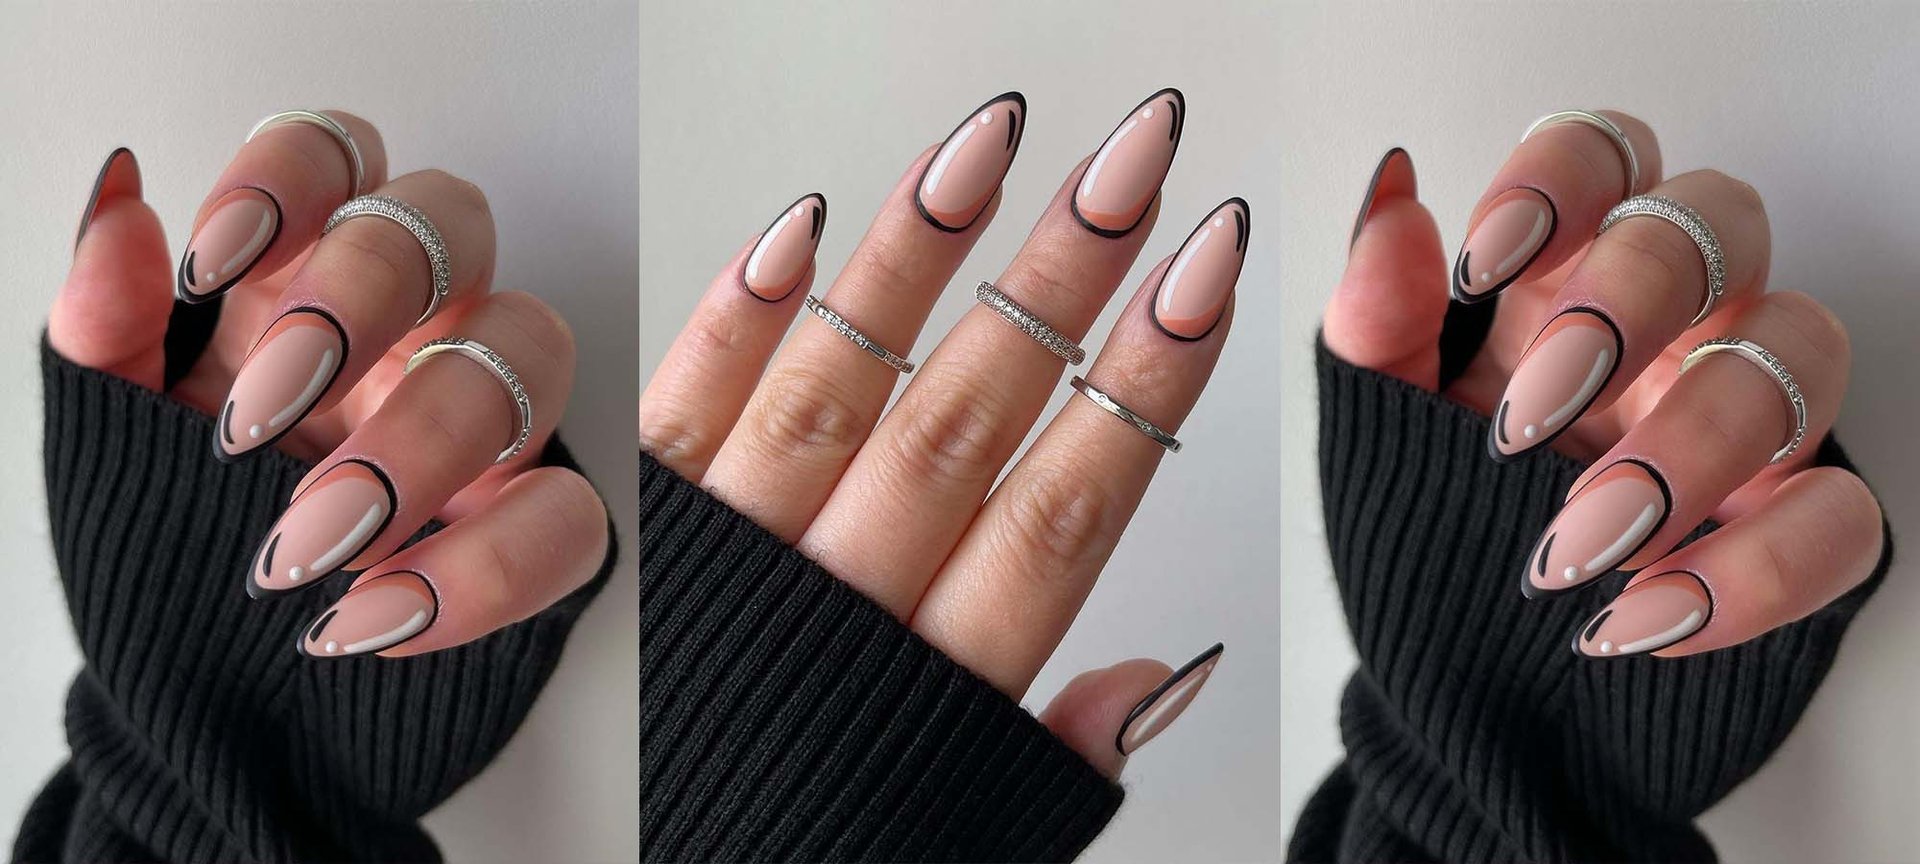
French tip nail art is a classic and sophisticated design that involves adding a white tip on the edge of the nails. It can be done with natural nails or with the help of tips or stickers. The procedure for getting French tip nail art starts with preparing the natural nails by cleaning, shaping, and buffing them. Then, a base coat is applied and allowed to dry. The white tip is then added using a brush or tip, and a top coat is applied to seal the design and add shine. French tip nail art, classic, sophisticated, white tip, edge, natural nails, tips, stickers, cleaning, shaping, buffing, base coat, dry, white tip, added, brush, tip, top coat, seal, shine.7. French Tip Nail Art Design and Procedure
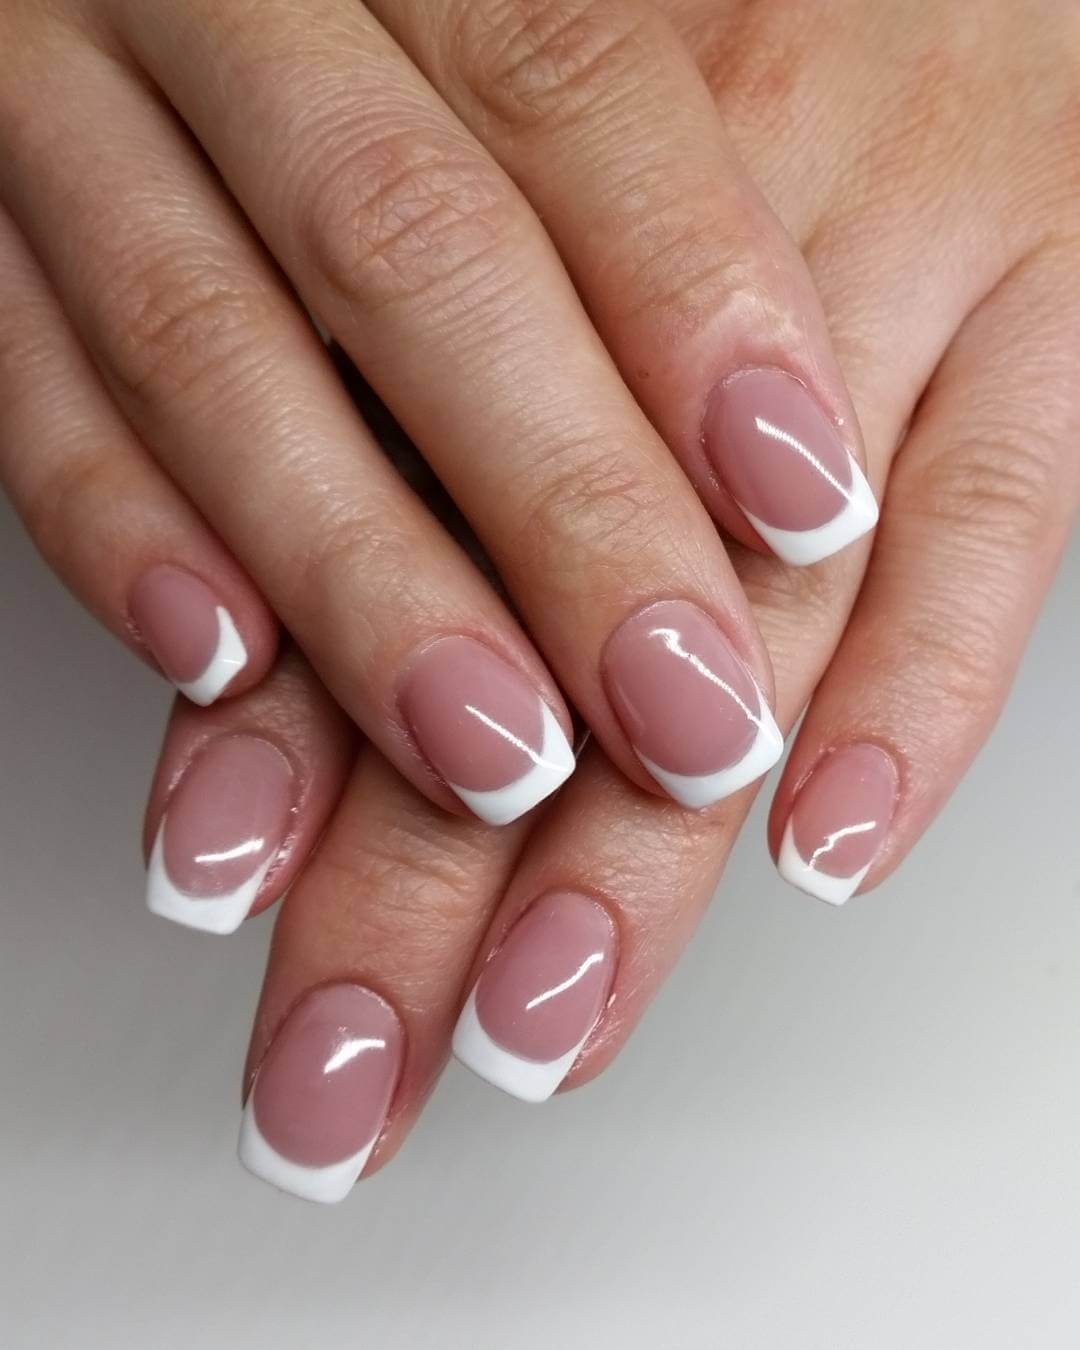


7. French Tip Nail Art Design and Procedure


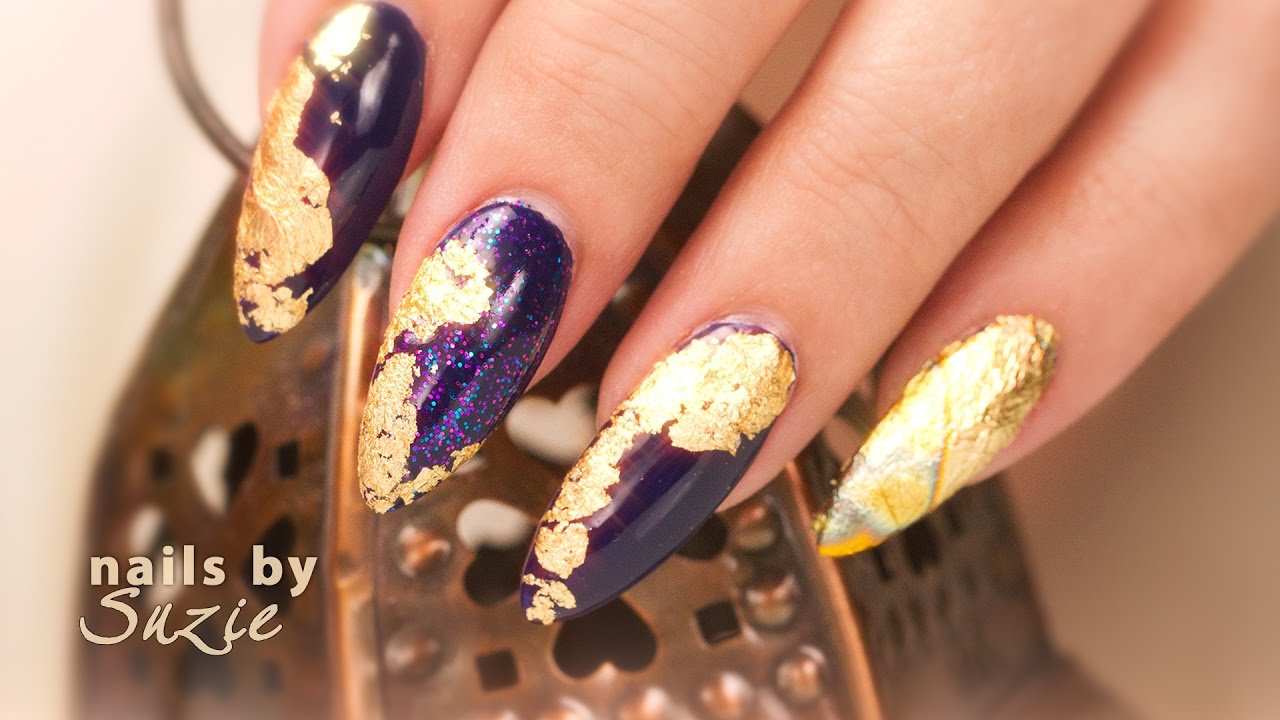
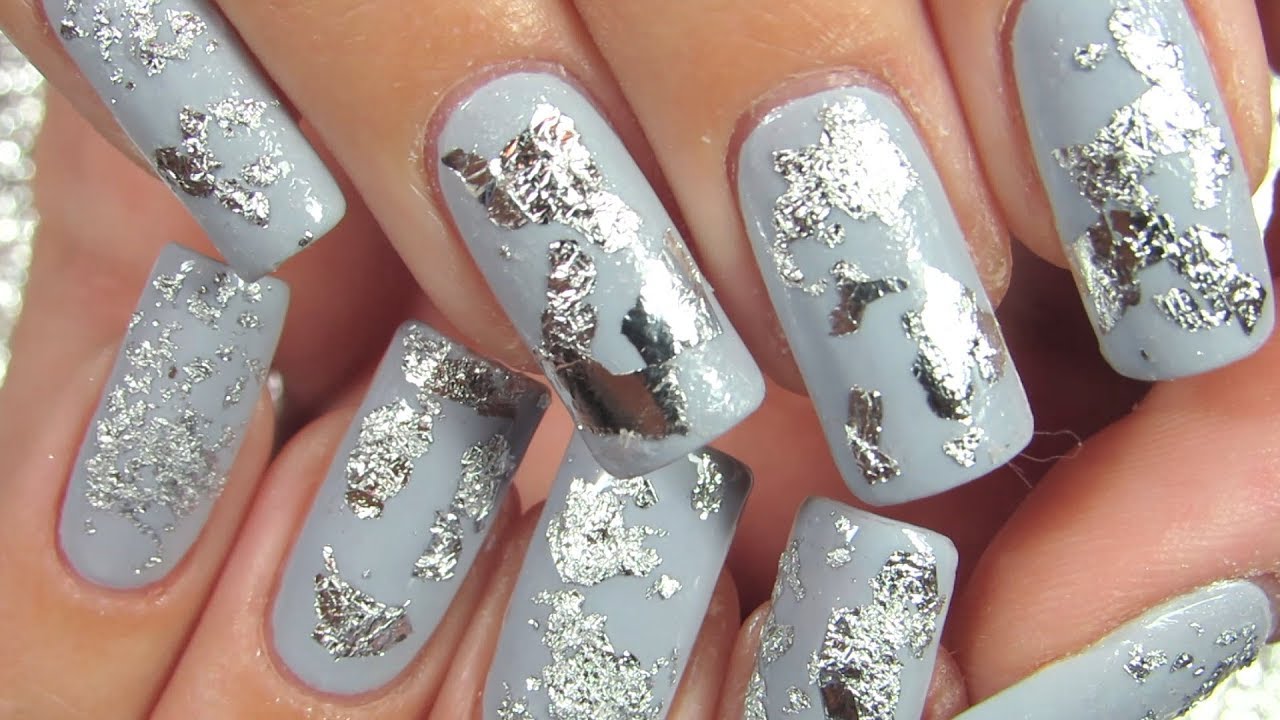
Foil nail art is a glamorous and eye-catching design that involves using metallic foil to create designs on the nails. The procedure for getting foil nail art starts with preparing the natural nails by cleaning, shaping, and buffing them. Then, a base coat is applied and allowed to dry. The metallic foil is then cut into small pieces and pressed onto the nail using a foil adhesive. The excess foil is removed, and a top coat is applied to seal the design and add shine. Foil nail art, glamorous, eye-catching, metallic foil, designs, natural nails, cleaning, shaping, buffing, base coat, dry, cut, small pieces, pressed, foil adhesive, excess foil, removed, top coat, seal, shine.8. Foil Nail Art Design and Procedure


8. Foil Nail Art Design and Procedure


Matte nail art is a sleek and modern design that involves creating a matte finish on the nails. It can be done with any nail polish color to give it a unique and edgy look. The procedure for getting matte nail art starts with preparing the natural nails by cleaning, shaping, and buffing them. Then, a base coat is applied and allowed to dry. The chosen nail polish is then applied and allowed to dry naturally, giving it a matte finish. A top coat can be applied to seal the design and add shine. Matte nail art, sleek, modern, matte finish, nail polish color, unique, edgy look, natural nails, cleaning, shaping, buffing, base coat, dry, chosen nail polish, applied, allowed to dry, matte finish, top coat, seal, shine.9. Matte Nail Art Design and Procedure


9. Matte Nail Art Design and Procedure

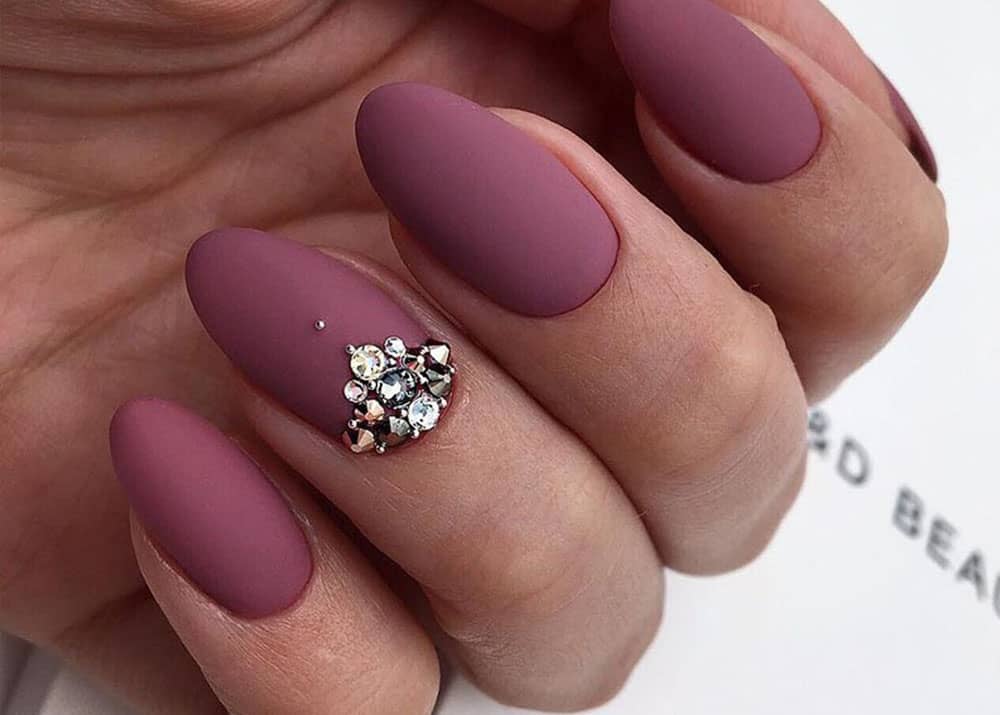
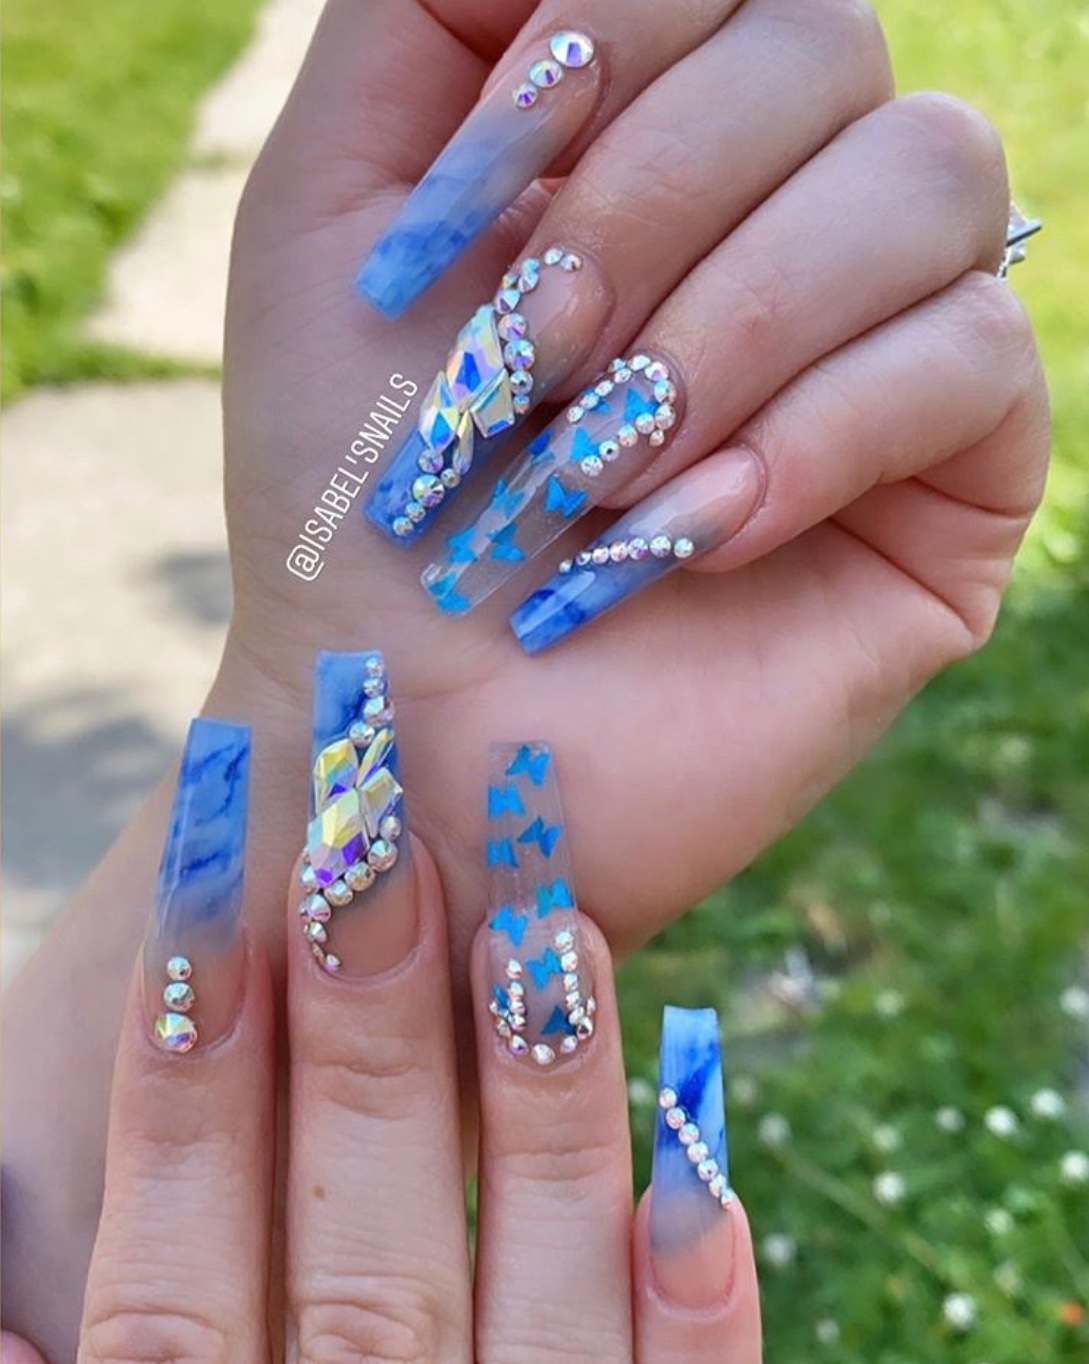
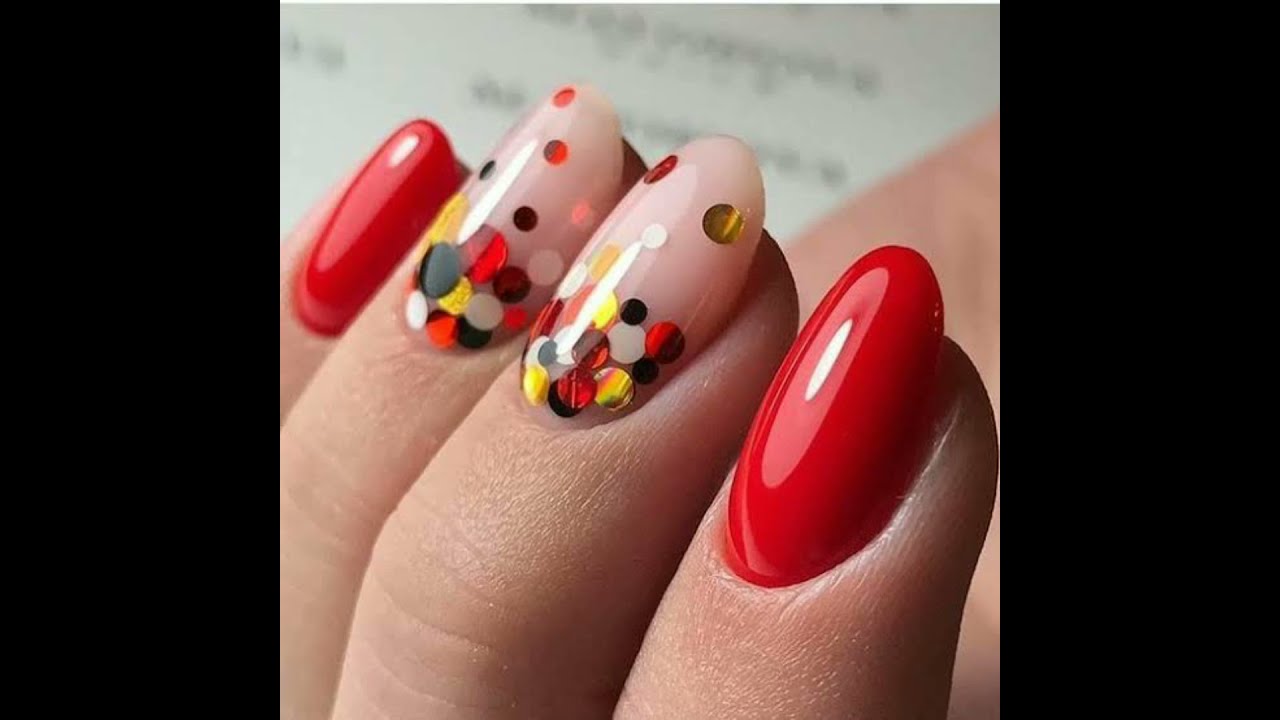
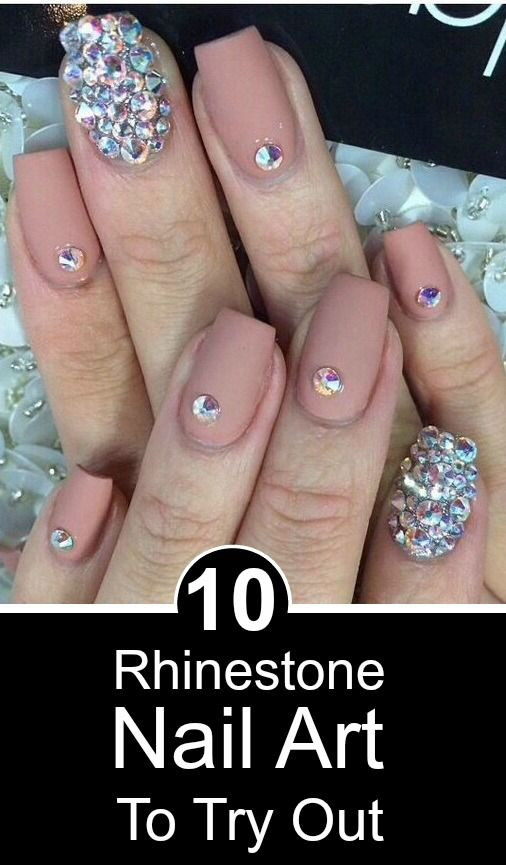
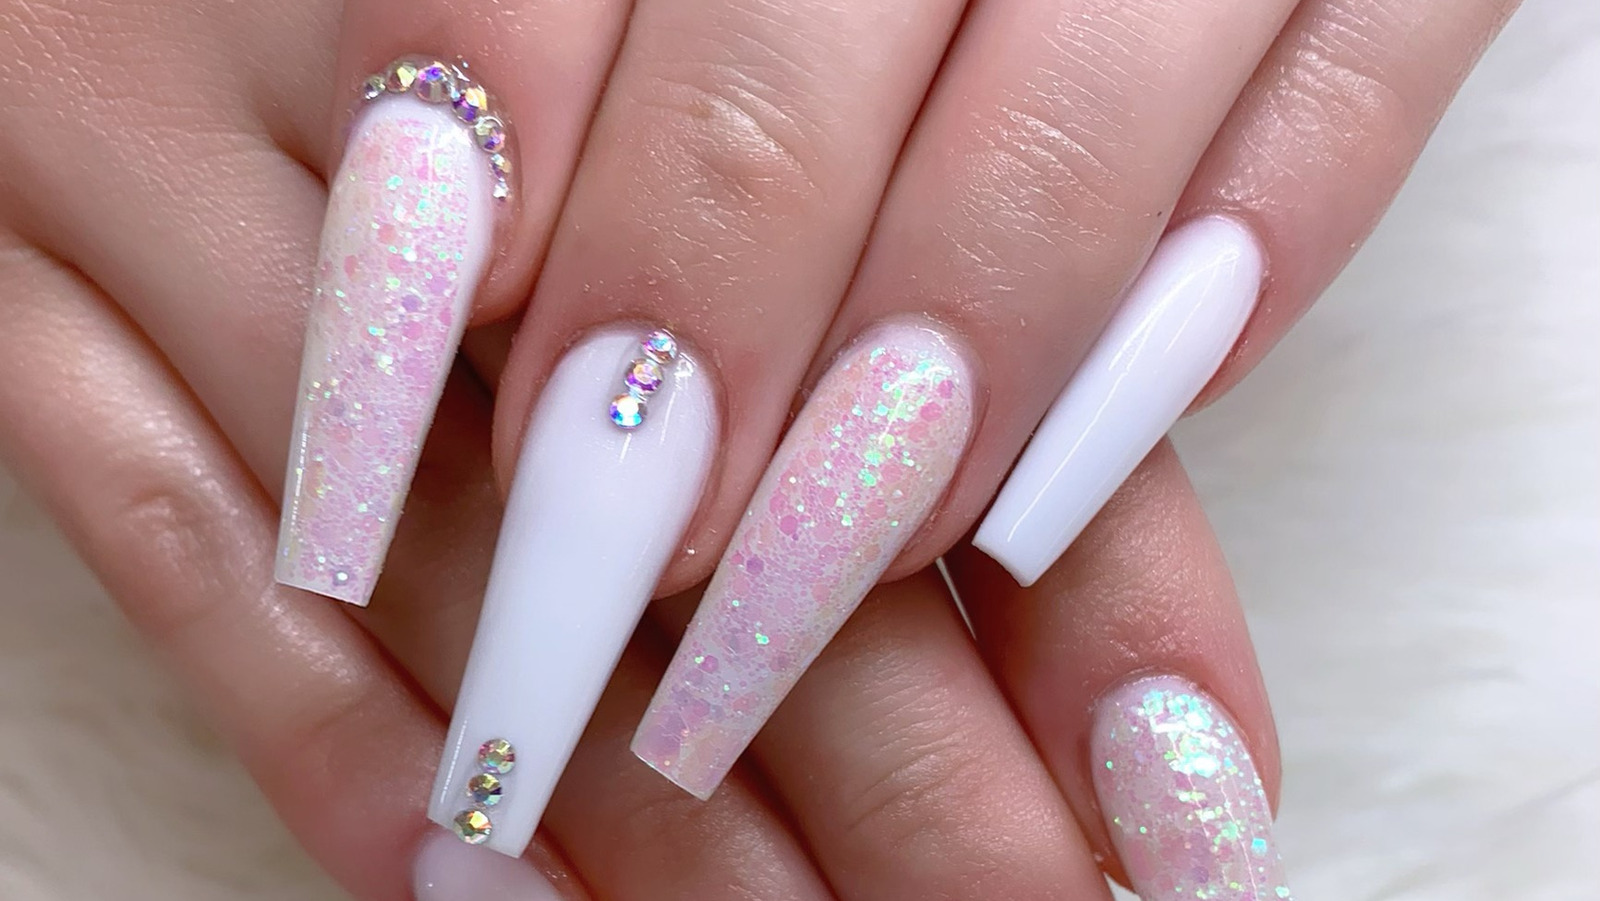
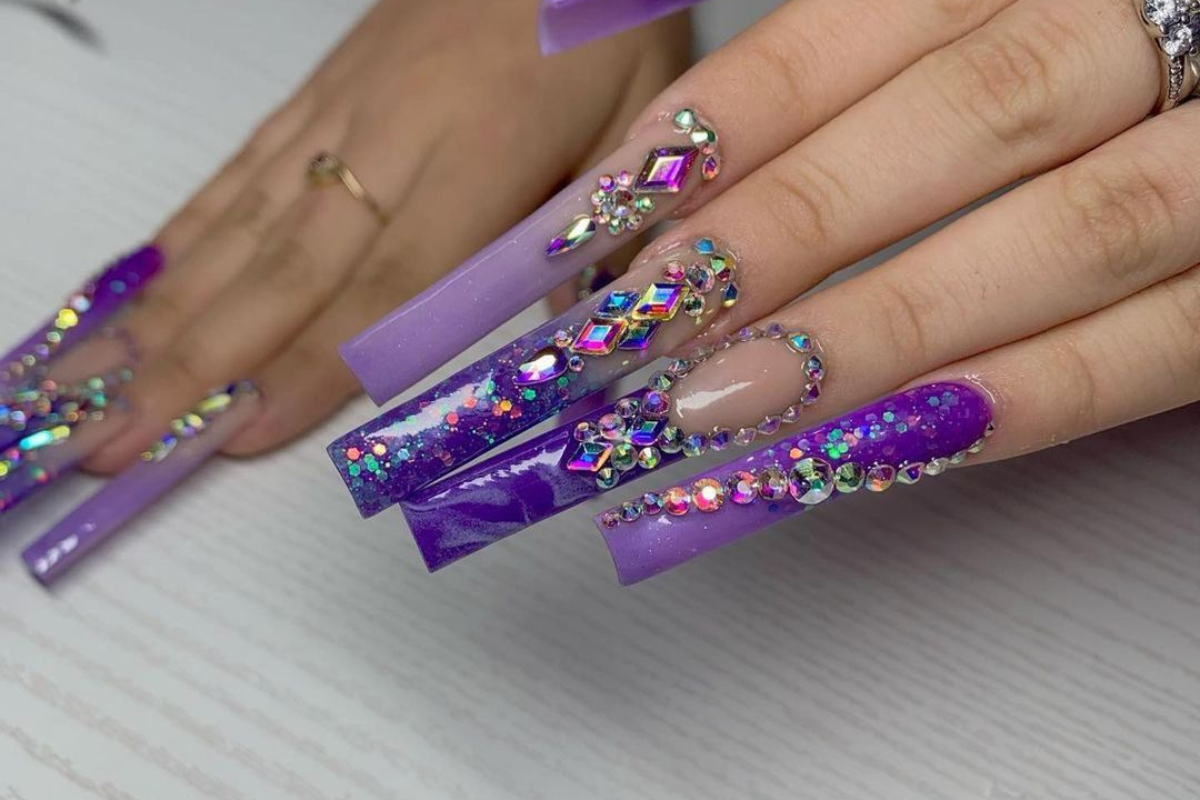
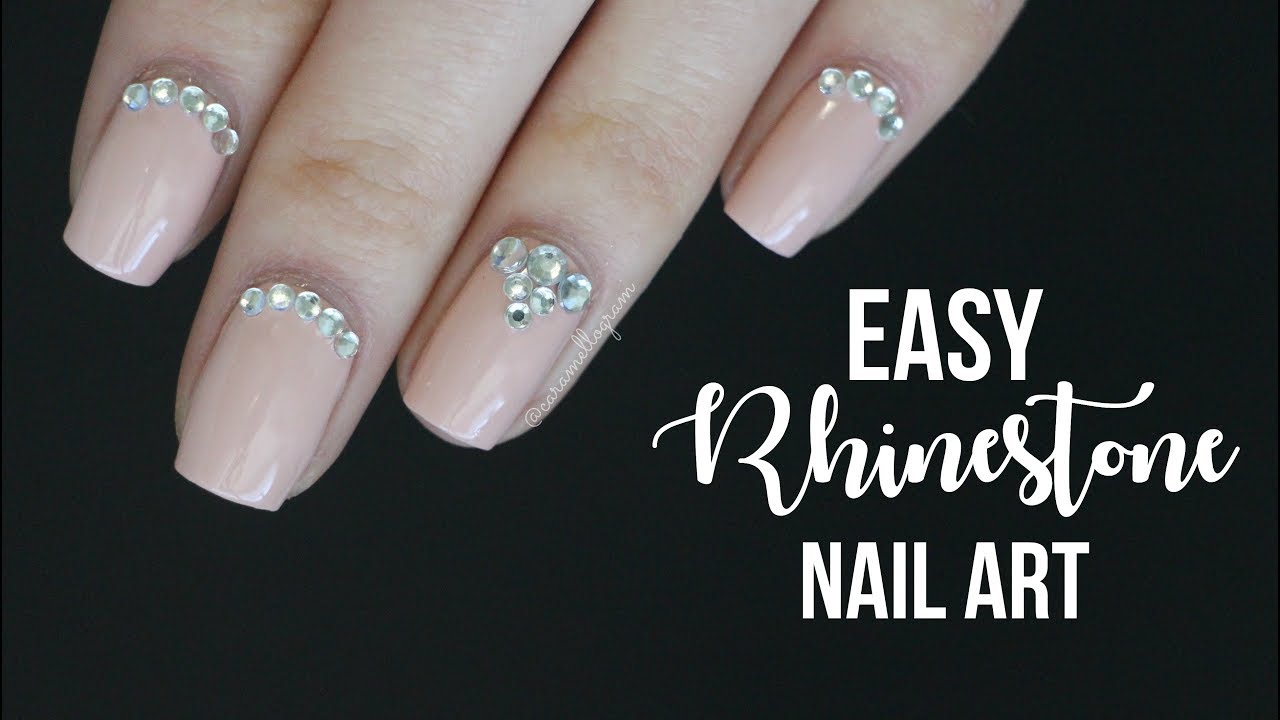
Rhinestone nail art is a glamorous and sparkly design that involves adding rhinestones to the nails. It can be done in various designs and patterns to create a unique and eye-catching look. The procedure for getting rhinestone nail art starts with preparing the natural nails by cleaning, shaping, and buffing them. Then, a base coat is applied and allowed to dry. The rhinestones are then added onto the nails using a tweezer and nail glue. A top coat is applied to seal the design and add shine. Rhinestone nail art, glamorous, sparkly, rhinestones, natural nails, cleaning, shaping, buffing, base coat, dry, added, tweezer, nail glue, top coat, seal, shine.10. Rhinestone Nail Art Design and Procedure


10. Rhinestone Nail Art Design and Procedure
Different Types of Nail Art Design and its Procedure
Abstract Nail Art
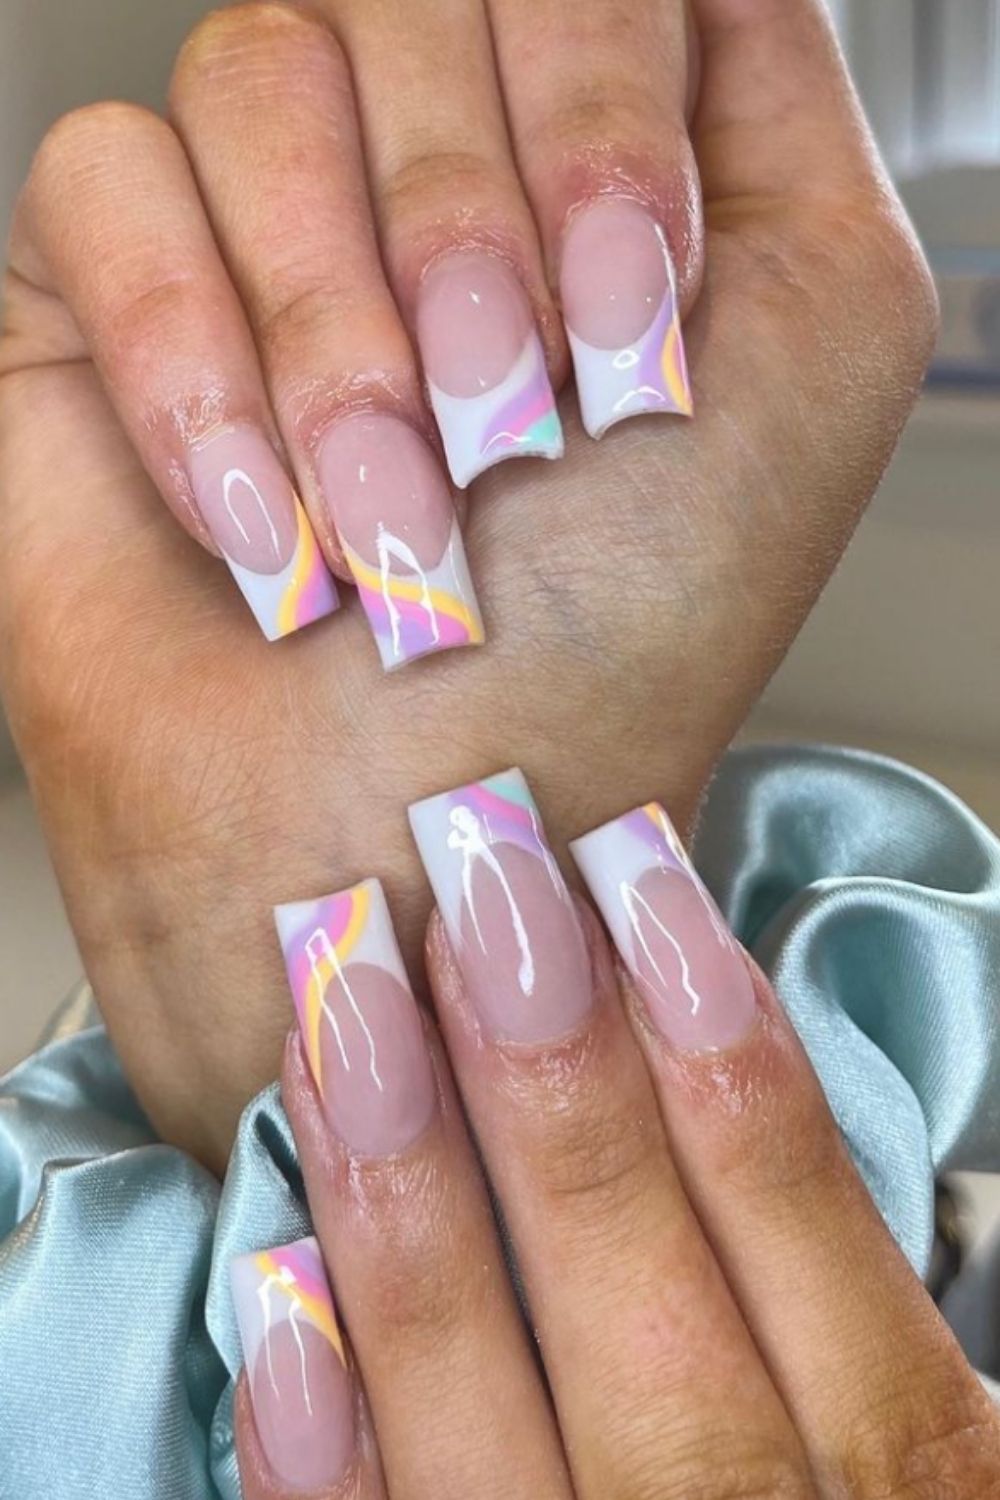
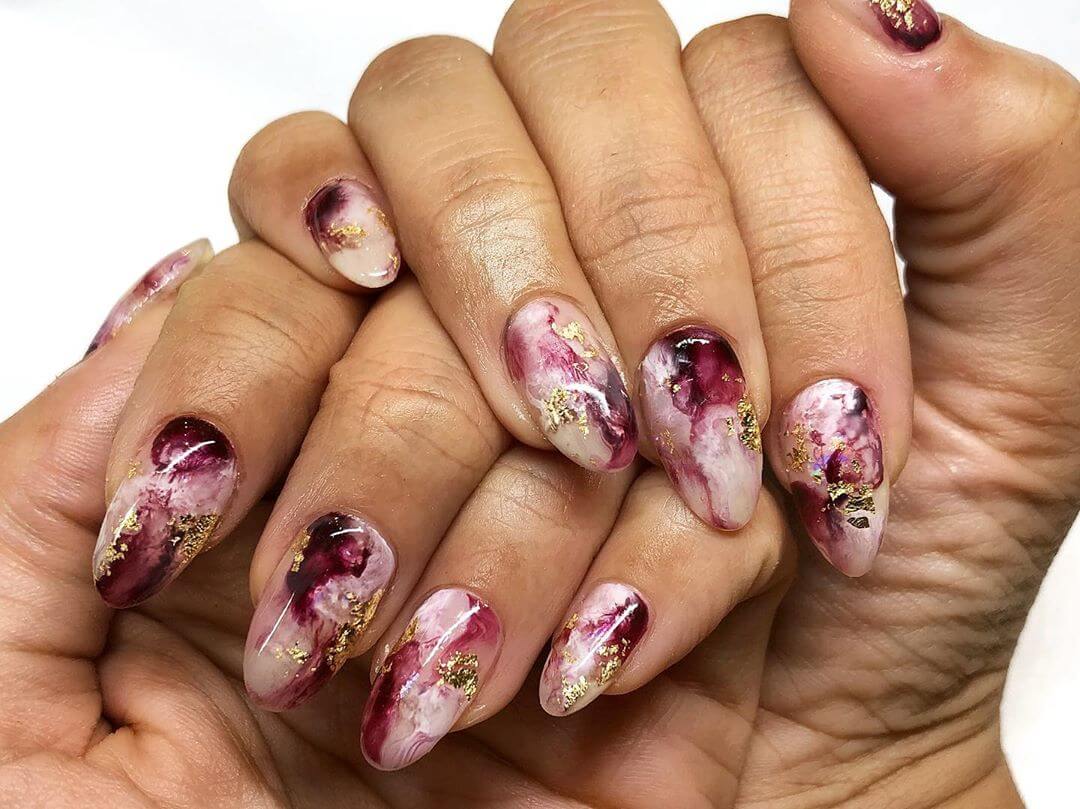
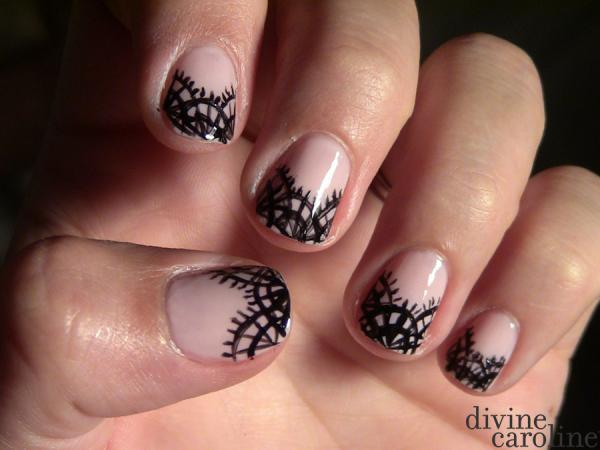
 Abstract nail art is a unique and creative way to express yourself through your nails. This type of nail design often involves using a variety of colors, patterns, and textures to create a one-of-a-kind look. The procedure for creating abstract nail art can vary, but it typically involves using a thin brush or nail art tools to create free-flowing shapes and lines on the nails. Some popular techniques for abstract nail art include marbling, splatter painting, and striping. This type of nail art is perfect for those who want to make a bold statement and stand out from the crowd.
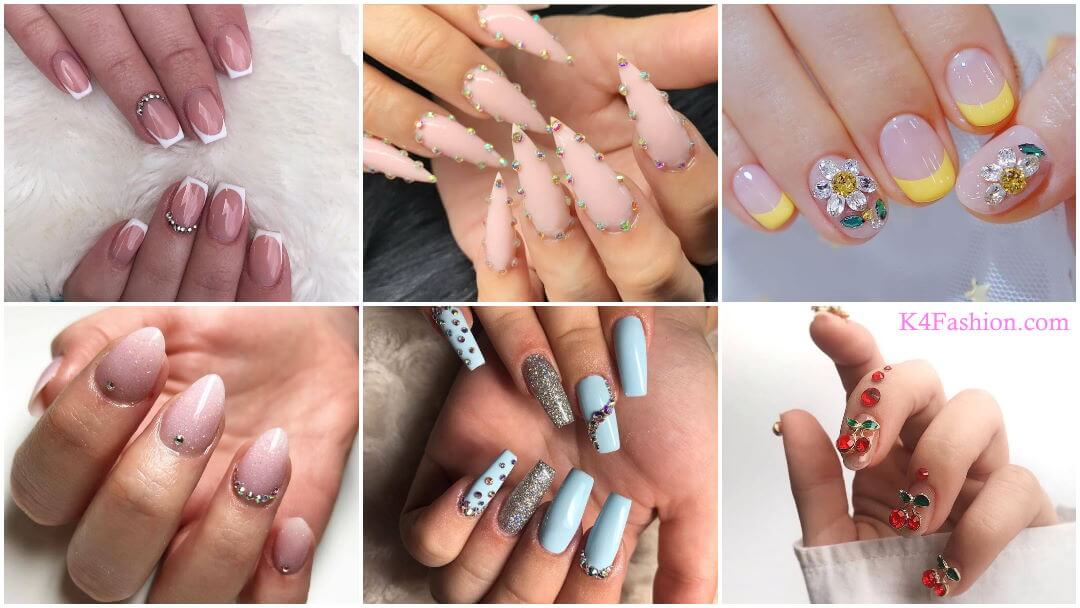
French Manicure
 The French manicure is a classic and timeless nail design that never goes out of style. This type of nail art is characterized by a natural-looking base color with a white tip, giving the illusion of longer and more elegant nails. The procedure for a French manicure involves painting the entire nail with a sheer or nude color and then using a white polish or nail art pen to create a clean and precise line at the tip of the nail. This type of nail art is perfect for those who prefer a more subtle and sophisticated look.
3D Nail Art
 For those who want to take their nail game to the next level, 3D nail art is the way to go. This type of nail design involves adding three-dimensional elements to the nails, such as gems, studs, beads, and even small charms. The procedure for 3D nail art can be time-consuming and requires a steady hand, but the end result is truly stunning. Nail technicians often use nail glue or gel to secure the 3D elements onto the nail, creating a unique and eye-catching design.
Nail Stamping
 Nail stamping is a popular nail art technique that involves using pre-designed patterns or images on a stamping plate to transfer onto the nails. This type of nail art is perfect for those who want to achieve intricate designs without having to hand-paint them. The procedure for nail stamping involves applying a base color on the nail, then using a stamper and scraper to transfer the desired design onto the nail. This type of nail art allows for endless possibilities and is a great option for those who are new to nail art.
In conclusion, nail art is a fun and creative way to express your personal style and add a touch of flair to your nails. With so many different types of nail art designs and procedures to choose from, there is something for everyone. Whether you prefer a bold and abstract look or a classic and elegant French manicure, there is no limit to the creativity and artistry that can be achieved through nail art. So go ahead and experiment with different designs and techniques to find the perfect nail art for you!
Nail stamping is a popular nail art technique that involves using pre-designed patterns or images on a stamping plate to transfer onto the nails. This type of nail art is perfect for those who want to achieve intricate designs without having to hand-paint them. The procedure for nail stamping involves applying a base color on the nail, then using a stamper and scraper to transfer the desired design onto the nail. This type of nail art allows for endless possibilities and is a great option for those who are new to nail art.
In conclusion, nail art is a fun and creative way to express your personal style and add a touch of flair to your nails. With so many different types of nail art designs and procedures to choose from, there is something for everyone. Whether you prefer a bold and abstract look or a classic and elegant French manicure, there is no limit to the creativity and artistry that can be achieved through nail art. So go ahead and experiment with different designs and techniques to find the perfect nail art for you!


