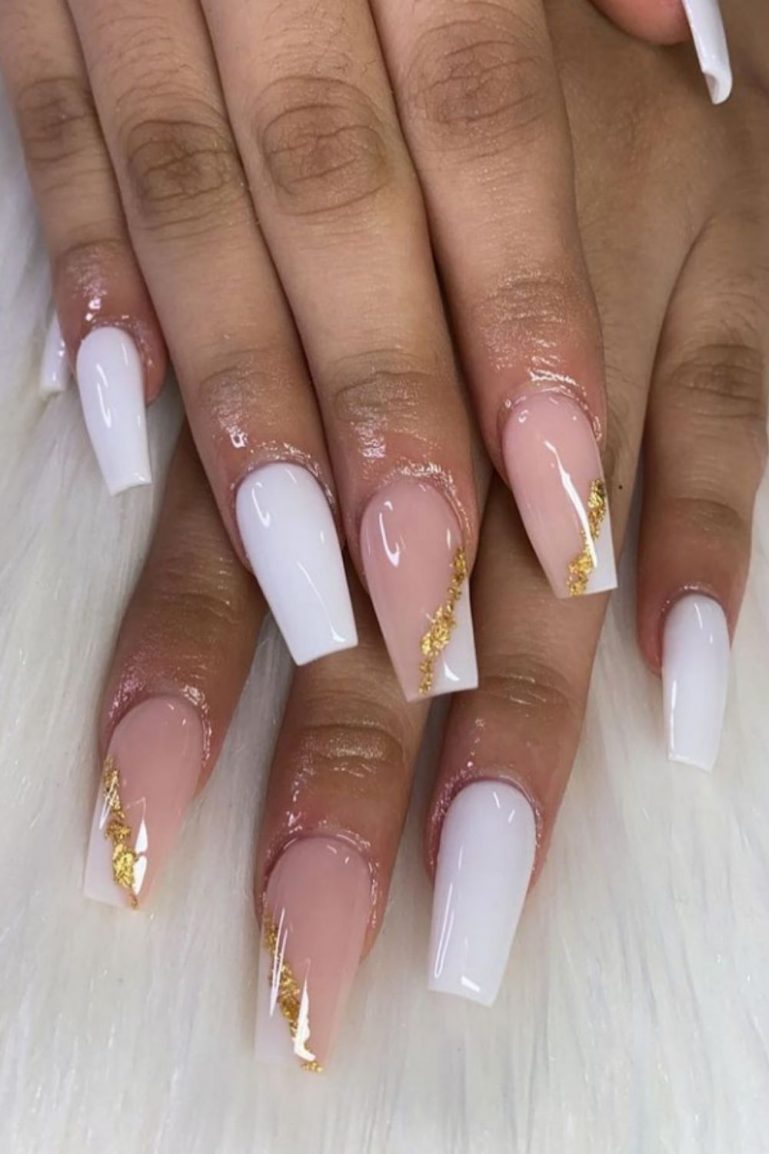
Are you tired of the same old nail designs and looking for something new and elegant? Look no further! With this DIY elegant stone nail design tutorial, you can easily create a stunning and unique look for your nails at home. No need to spend a fortune at the salon, just follow these simple steps and get ready to flaunt your beautiful nails.DIY Elegant Stone Nail Design Tutorial


DIY Elegant Stone Nail Design Tutorial


Creating an elegant stone nail design at home is easier than you think. All you need are a few simple tools and materials, and you are good to go. The best part? You can customize the design according to your preference and make it your own. So, let's get started with this step-by-step tutorial.How to Create an Elegant Stone Nail Design at Home


How to Create an Elegant Stone Nail Design at Home


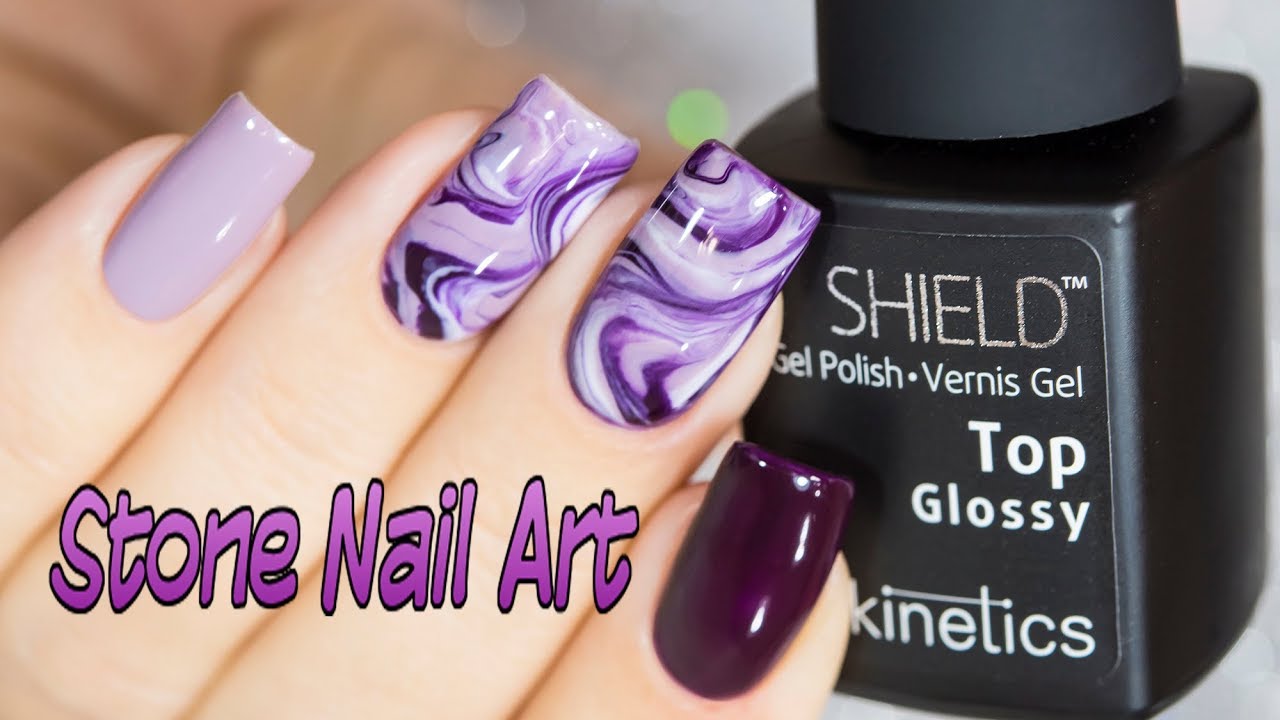
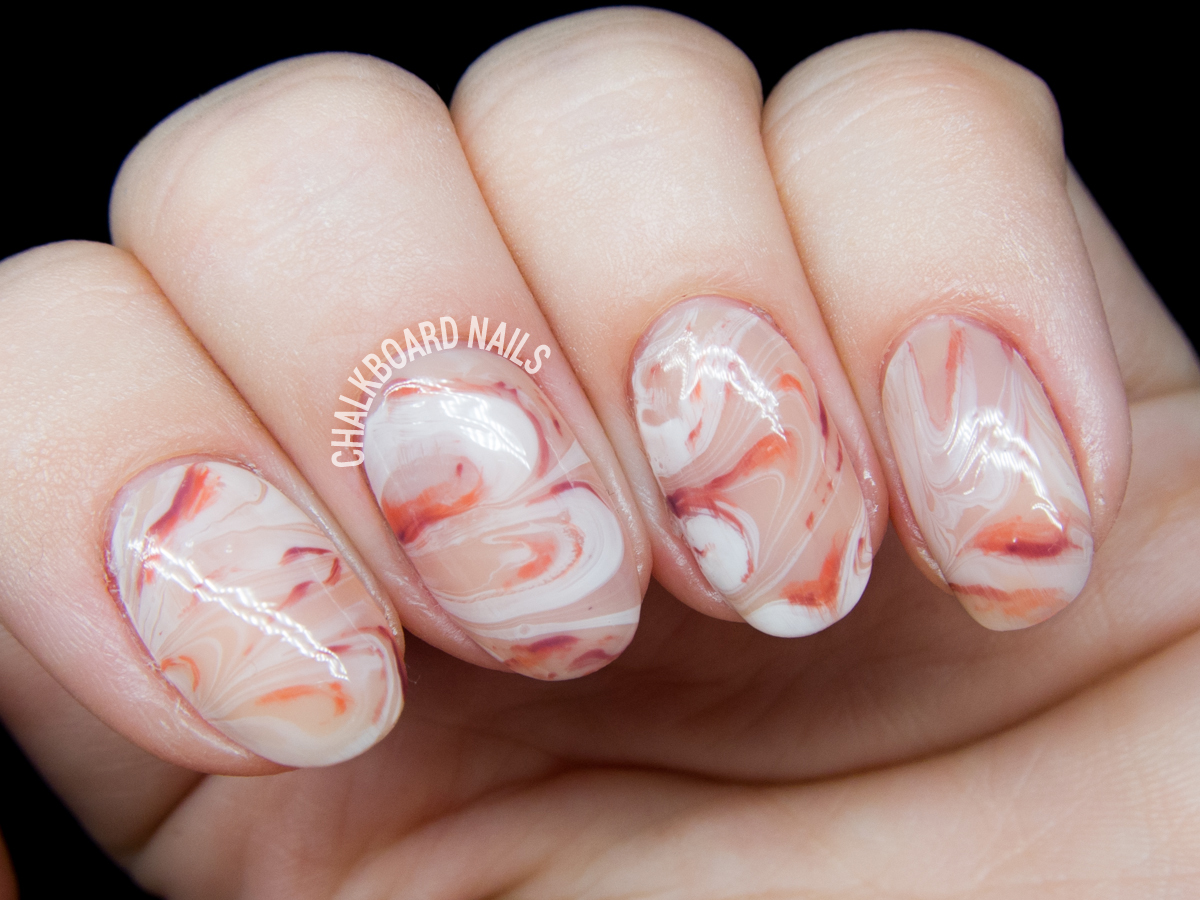
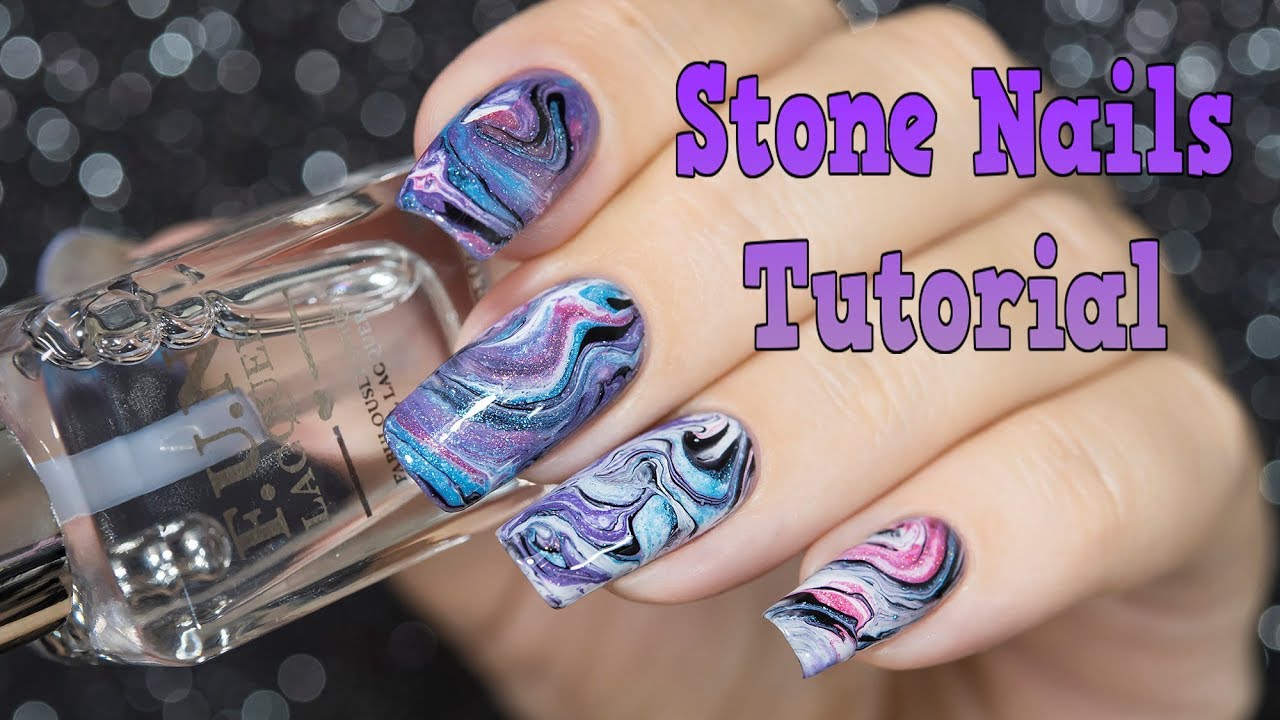
Step 1: Start by gathering all the materials you will need for this DIY stone nail design. These include a base coat, top coat, your choice of nail polish color, a small container of water, nail glue, toothpick, tweezers, and small rhinestones or pearls. Step 2: Apply a base coat on your nails and let it dry completely. Step 3: Apply two coats of your chosen nail polish color and let it dry completely. Step 4: Take a small container of water and drop a few drops of nail polish in a contrasting color onto the surface of the water. Step 5: Use a toothpick to create a marble effect by swirling the colors together. Step 6: Dip your nail into the water, making sure to cover the entire nail with the marble design. Step 7: Use a toothpick to clean up any excess nail polish from around your nail. Step 8: Repeat this process for all your nails and let them dry completely. Step 9: Once dry, apply a top coat to seal in the design and let it dry. Step 10: Use tweezers to carefully pick up small rhinestones or pearls and place them onto your nails while the top coat is still wet. Step 11: Use a toothpick to adjust the stones into your desired pattern. Step 12: Seal the design with another layer of top coat and let it dry completely.Step-by-Step Tutorial for a DIY Stone Nail Design


Step-by-Step Tutorial for a DIY Stone Nail Design


This DIY stone nail design tutorial is not only easy but also budget-friendly. You can find most of the materials needed at your local drugstore or beauty supply store at an affordable price. This means you can create this elegant look without breaking the bank.Easy and Affordable DIY Stone Nail Design Tutorial


Easy and Affordable DIY Stone Nail Design Tutorial


If you want to add some glamour to your nails, then this DIY elegant stone nail design is perfect for you. The combination of marbled nails and delicate rhinestones or pearls will give your nails a luxurious and sophisticated look. You can recreate this look for a special occasion or simply to elevate your everyday look.Get the Look: DIY Elegant Stone Nail Design

Get the Look: DIY Elegant Stone Nail Design


With this DIY stone nail design tutorial, you can easily transform your nails into a work of art. This unique and elegant look will surely make your nails stand out and receive compliments from everyone around you. So, why settle for plain nails when you can add some stones and pearls and take your nails to the next level?Transform Your Nails with This DIY Stone Nail Design Tutorial


Transform Your Nails with This DIY Stone Nail Design Tutorial


If you are a fan of elegant and chic nail designs, then this DIY stone nail design tutorial is a must-try for you. The combination of soft marbled nails and delicate stones or pearls will create a stunning and eye-catching look that will make your nails the center of attention.Create a Stunning Stone Nail Design with This DIY Tutorial


Create a Stunning Stone Nail Design with This DIY Tutorial


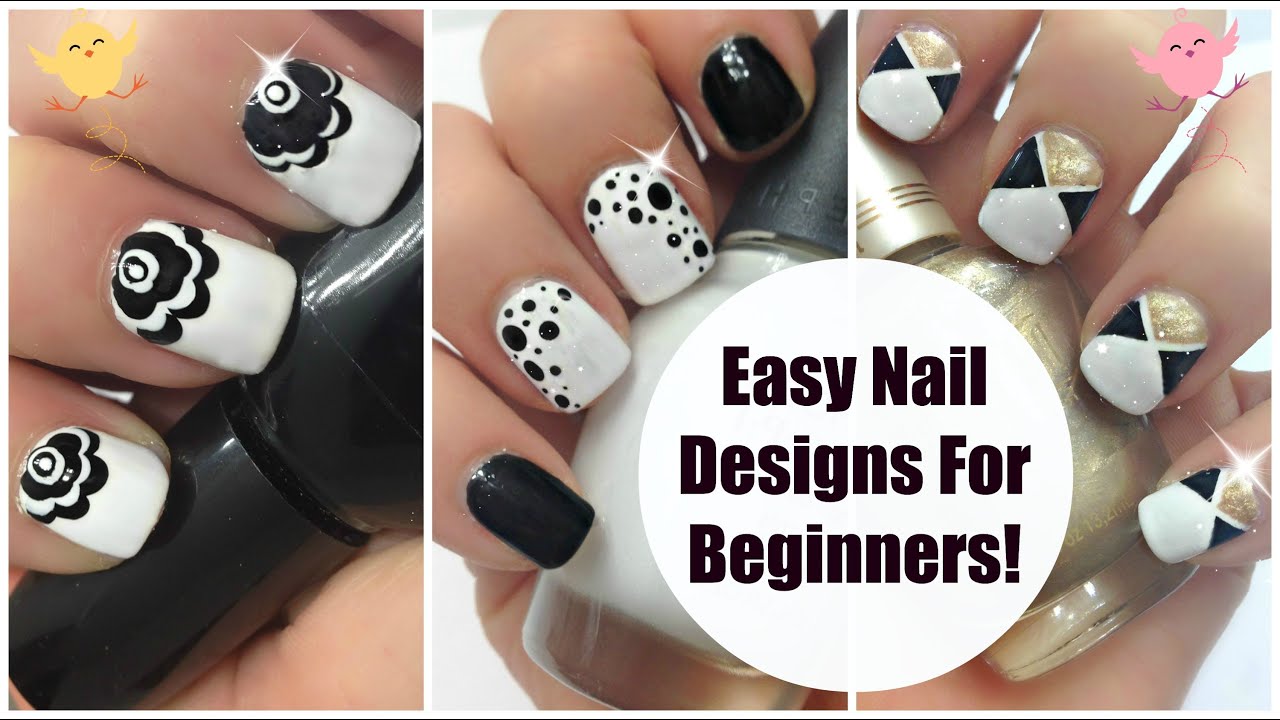
If you are new to nail art and want to try something simple yet elegant, then this DIY stone nail design tutorial is perfect for you. The step-by-step instructions make it easy for beginners to recreate this look and achieve salon-worthy nails at home.DIY Stone Nail Design Tutorial for Beginners


DIY Stone Nail Design Tutorial for Beginners


Take your nails to the next level with this DIY elegant stone nail design. You don't need to be a nail artist to create this beautiful and sophisticated look. Just follow the simple steps and get ready to elevate your nails and make a statement.Elevate Your Nails with This DIY Elegant Stone Nail Design


Elevate Your Nails with This DIY Elegant Stone Nail Design

With this DIY stone nail design tutorial, you will not only learn how to create a beautiful and elegant look for your nails, but you will also gain some basic skills in nail art. This tutorial is perfect for those who want to learn new techniques and experiment with their nail designs. So, what are you waiting for? Get your tools and materials ready and try out this DIY elegant stone nail design tutorial. You will be amazed at how easy and affordable it is to achieve salon-worthy nails at home. Happy crafting!Learn How to Do a DIY Stone Nail Design with This Tutorial

Learn How to Do a DIY Stone Nail Design with This Tutorial


Create an Elegant Stone Nail Design for a Sophisticated Look
Unleash Your Creativity with a DIY Stone Nail Design
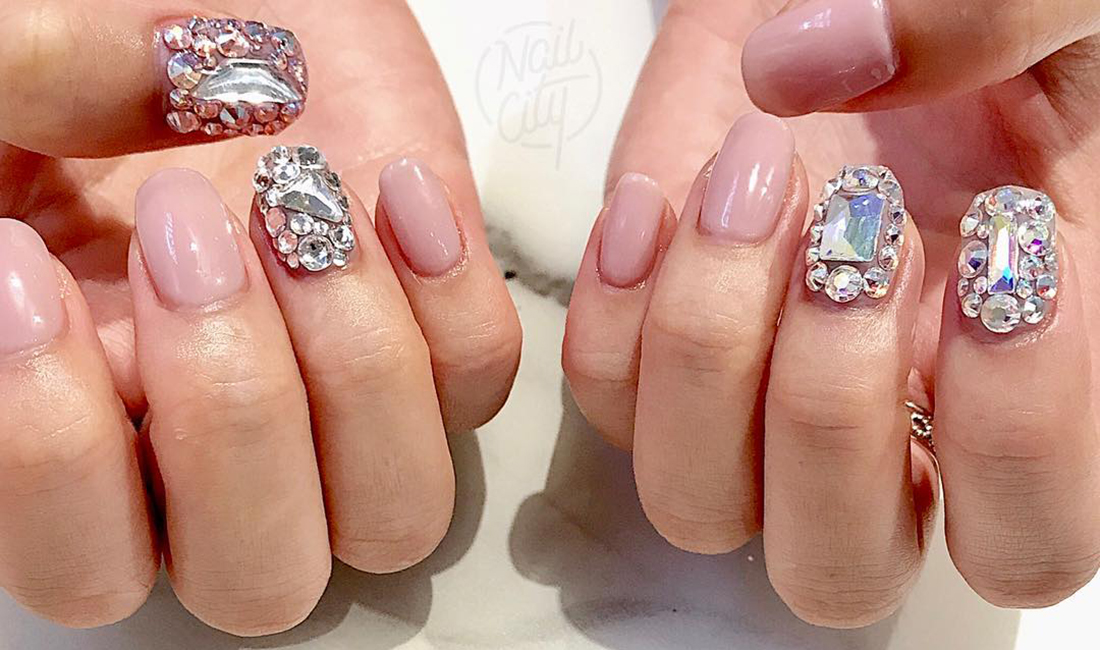
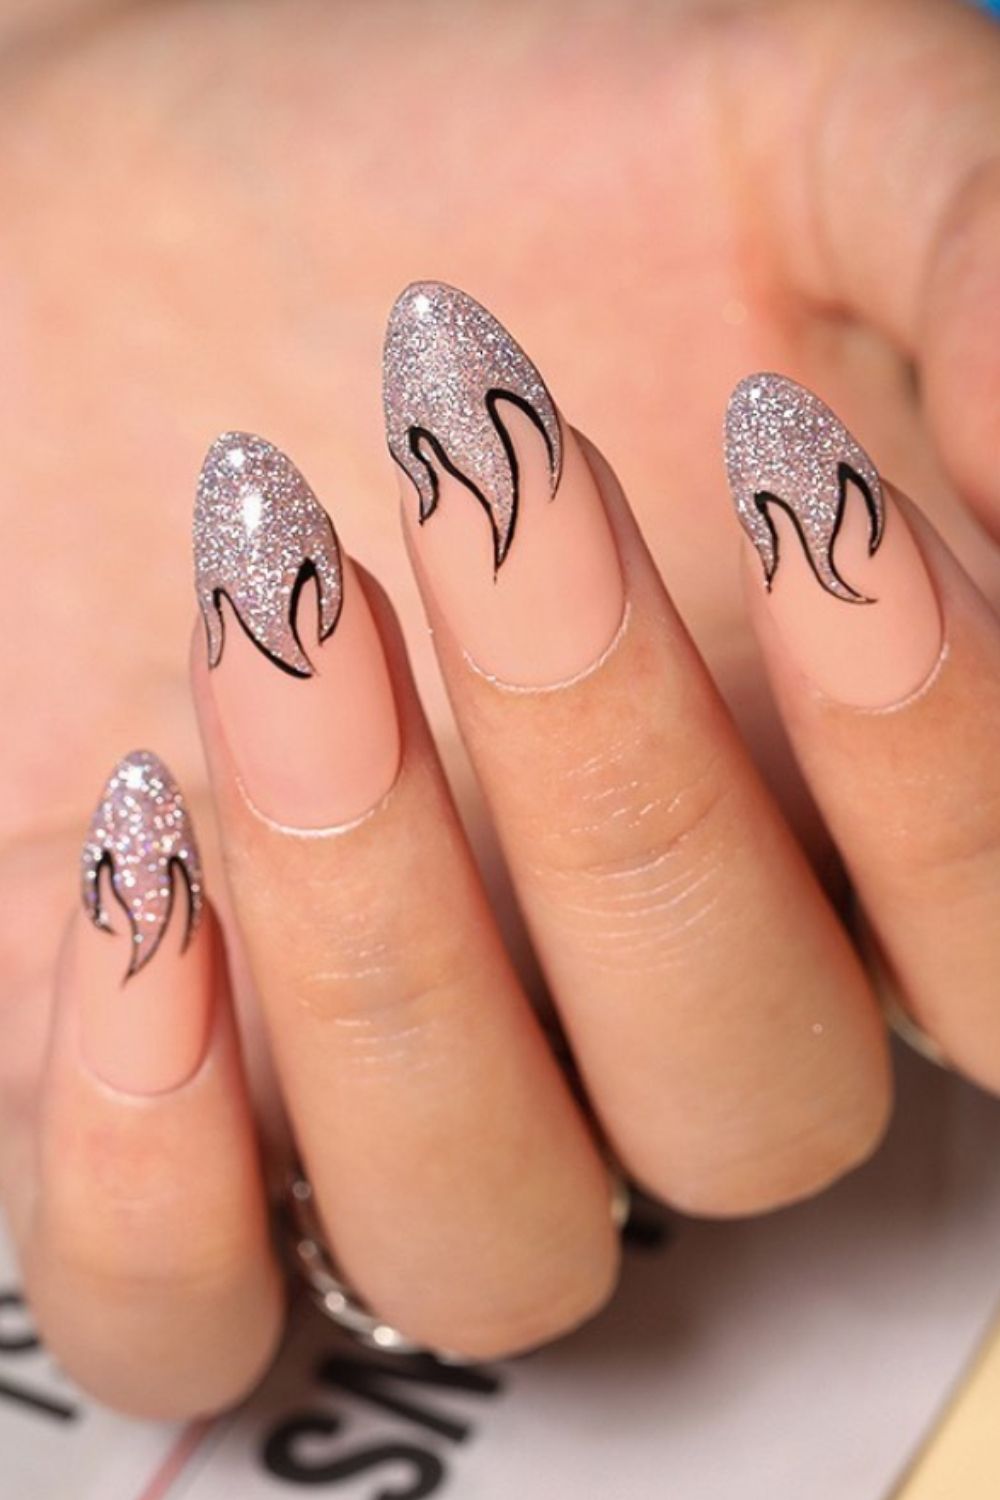
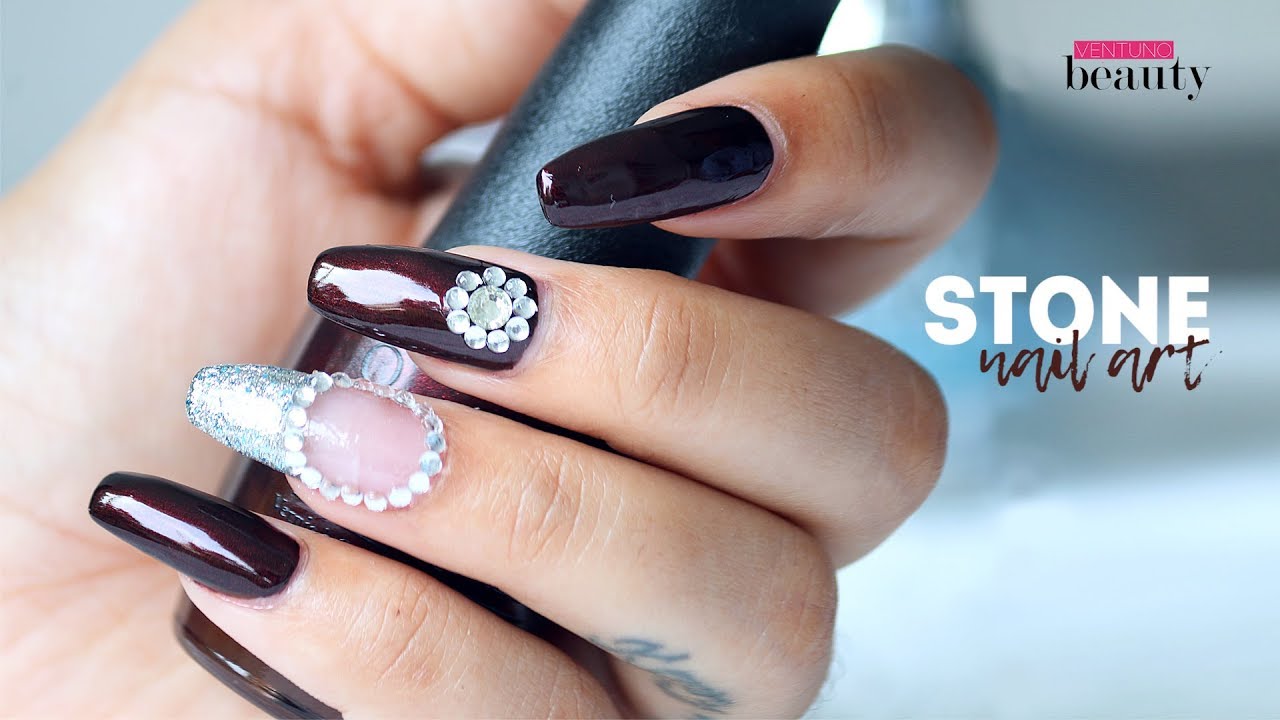 Are you tired of the same old nail designs and looking for something unique and sophisticated? Look no further than a DIY elegant stone nail design. Not only will it give your nails a stunning and luxurious look, but it is also easy to do at home. All you need is a few basic tools and some creativity to achieve this elegant look.
Gather Your Materials
 To create your elegant stone nail design, you will need the following materials:
- Base coat
- Neutral nail polish
- Tweezers
- Small stones or gems
- Clear top coat
- Nail glue (optional)
To create your elegant stone nail design, you will need the following materials:
- Base coat
- Neutral nail polish
- Tweezers
- Small stones or gems
- Clear top coat
- Nail glue (optional)
Prep Your Nails
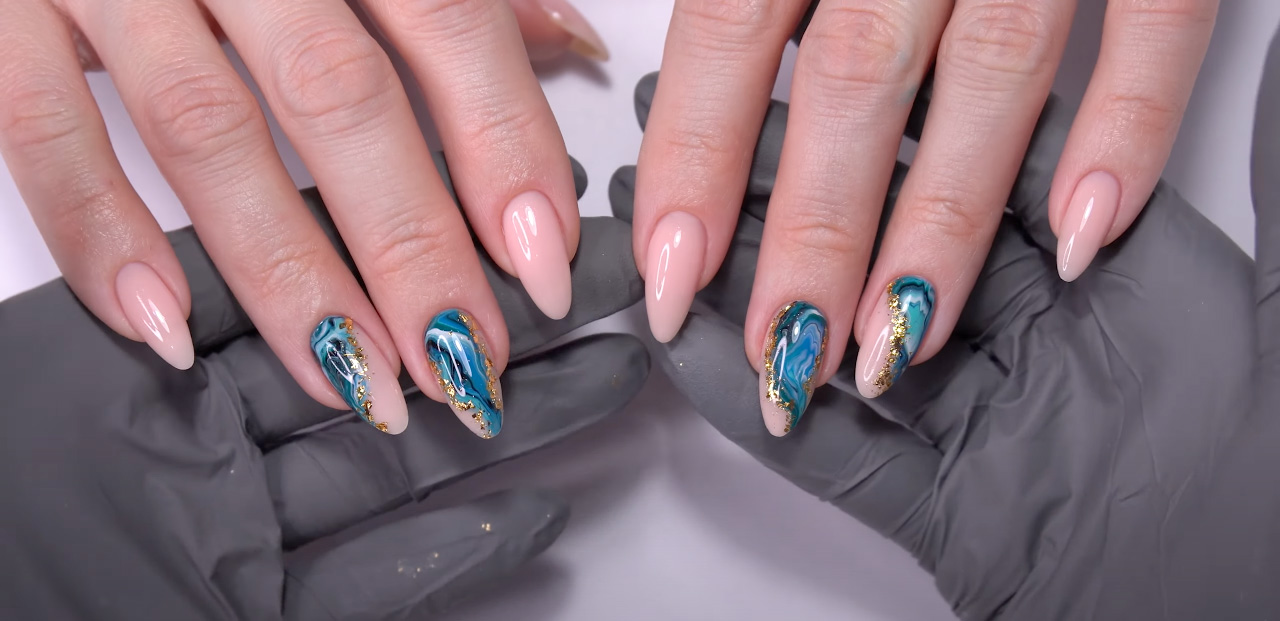
 Before starting the design, make sure your nails are clean and trimmed. Apply a base coat to protect your nails and allow it to dry completely. Next, apply a neutral nail polish to create a solid base for the stones. You can choose any color you like, but for an elegant look, opt for nude or pastel shades.
Place the Stones
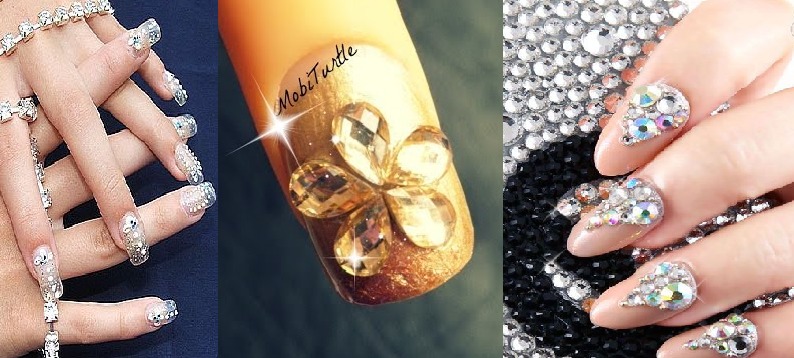
 Using tweezers, carefully pick up the stones and place them on your nails while the polish is still wet. You can create any pattern or design you desire, from a single stone on each nail to a full bedazzled look. For a more secure hold, you can also use nail glue to attach the stones.
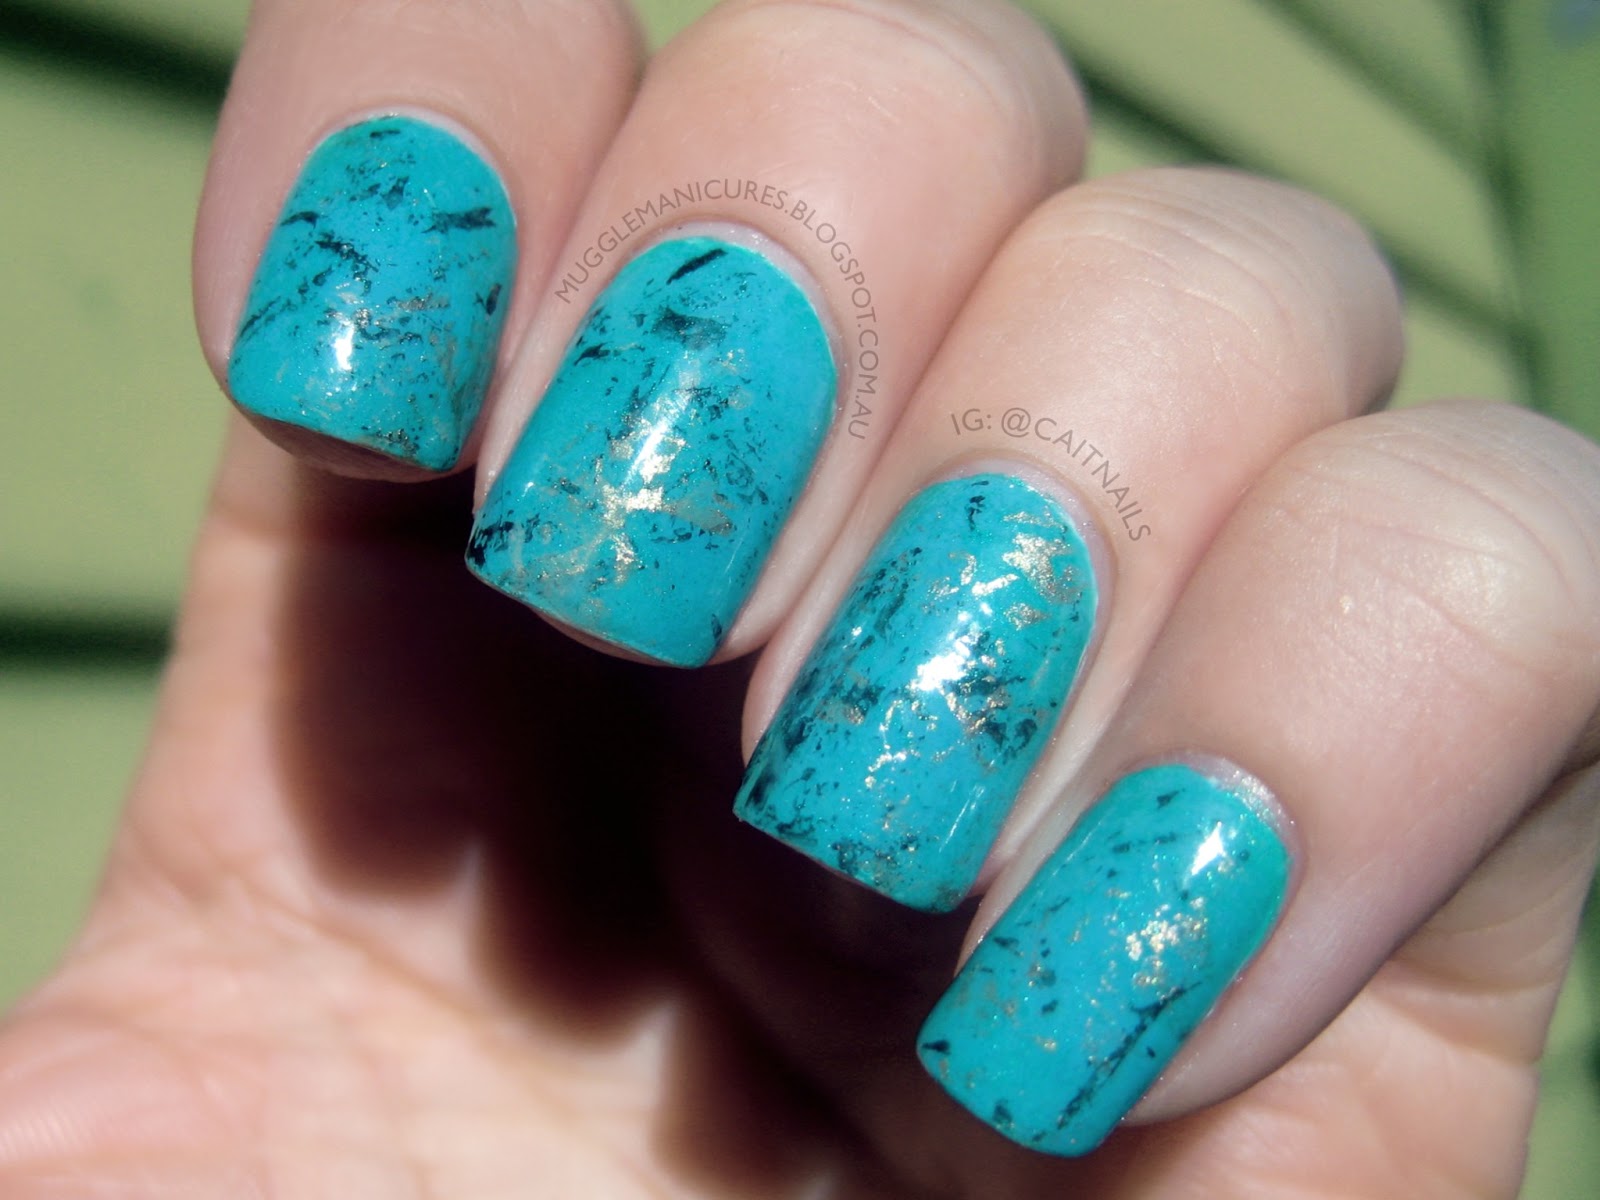
Seal with a Top Coat
 Once you have placed all the stones, wait for the polish to dry completely. Then, seal your design with a clear top coat to give it a glossy finish and ensure the stones stay in place. Allow the top coat to dry before using your hands.
Elevate Your Nail Game with an Elegant Stone Design
With this DIY stone nail design, you can add a touch of luxury and sophistication to your nails without breaking the bank. Experiment with different colors and stone sizes to create a unique and personalized look. So go ahead and unleash your creativity, and rock those elegant stone nails with confidence!
Once you have placed all the stones, wait for the polish to dry completely. Then, seal your design with a clear top coat to give it a glossy finish and ensure the stones stay in place. Allow the top coat to dry before using your hands.
Elevate Your Nail Game with an Elegant Stone Design
With this DIY stone nail design, you can add a touch of luxury and sophistication to your nails without breaking the bank. Experiment with different colors and stone sizes to create a unique and personalized look. So go ahead and unleash your creativity, and rock those elegant stone nails with confidence!


