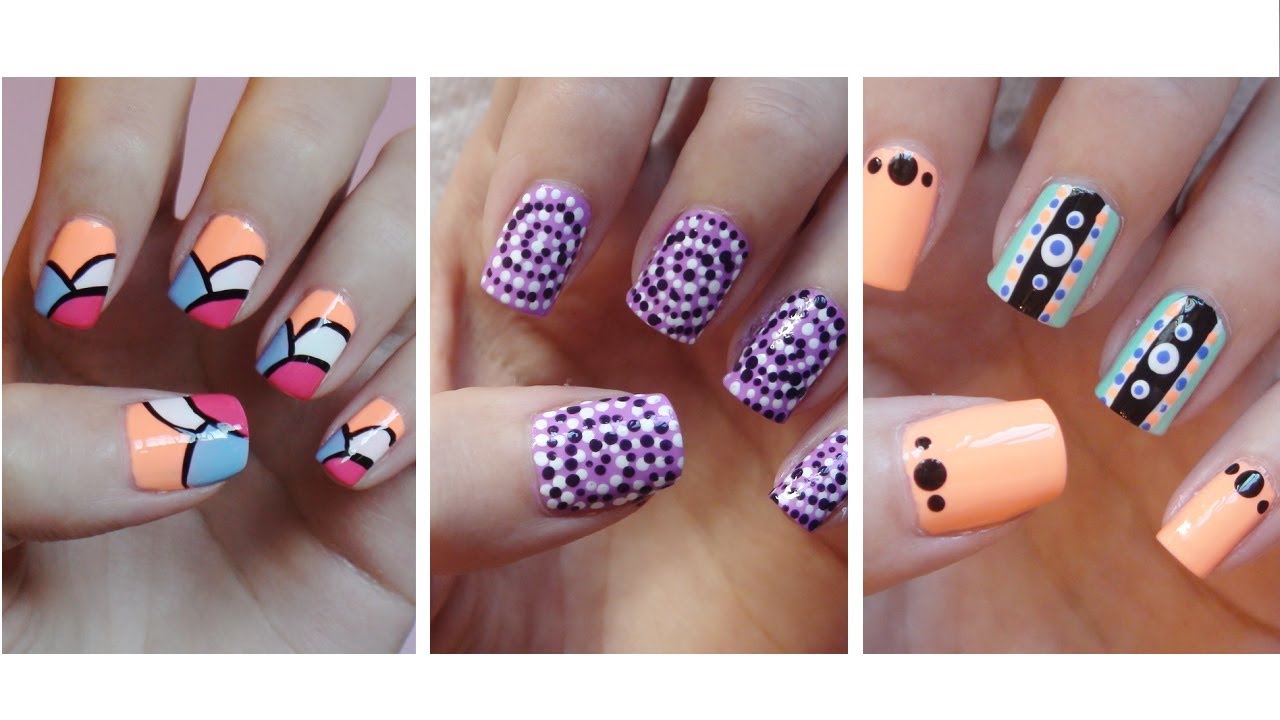
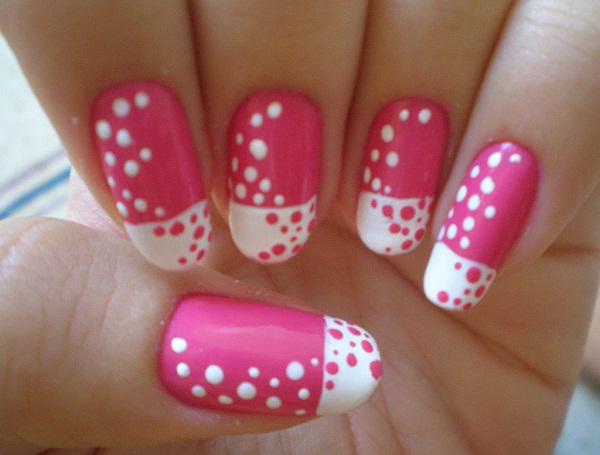
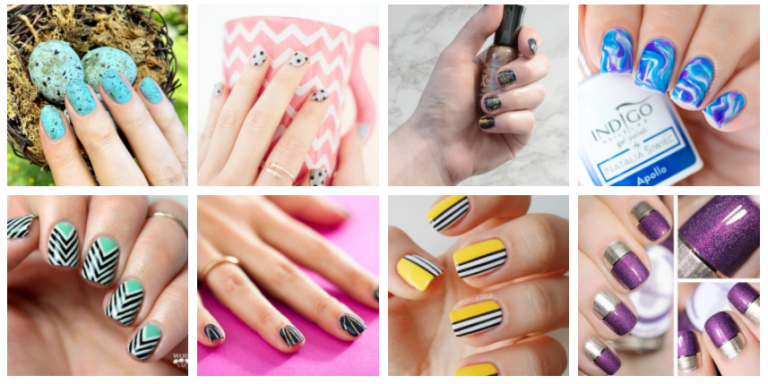
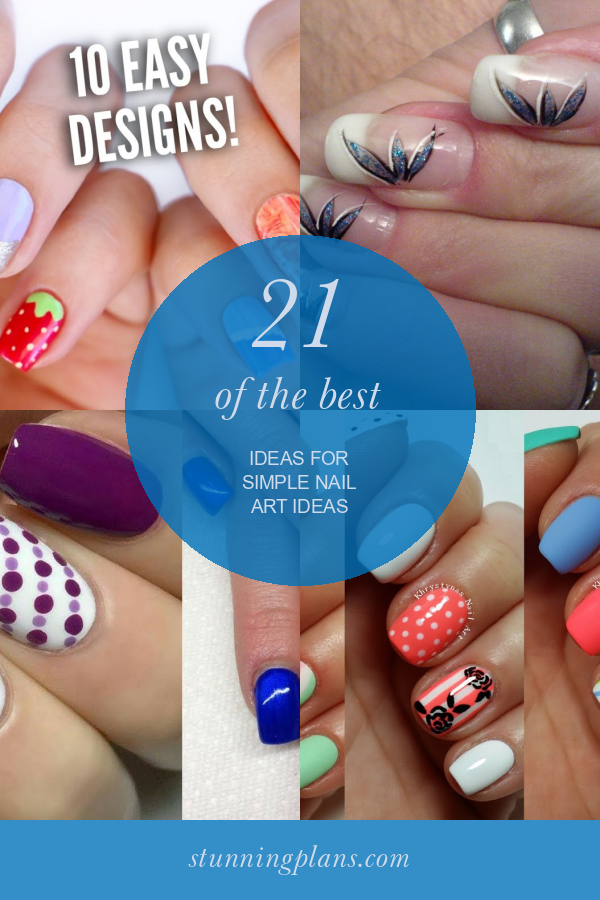
Are you looking to up your nail game but don't know where to start? Look no further, because we've got you covered with these easy nail art designs for beginners. Whether you're a complete novice or just looking for some simple and quick designs, these ideas are perfect for you. Start off with a base coat to protect your natural nails and create a smooth surface for your nail art. Then, choose a featured color for your design, such as a bright pink or a classic red. You can also mix it up and use multiple colors for a fun and playful look. Next, try a simple nail art design like polka dots. Use a dotting tool or a bobby pin dipped in nail polish to create evenly spaced dots on your nails. This design works on any color and is a great way to add some interest to your nails without too much effort.1. Easy Nail Art Designs for Beginners


1. Easy Nail Art Designs for Beginners


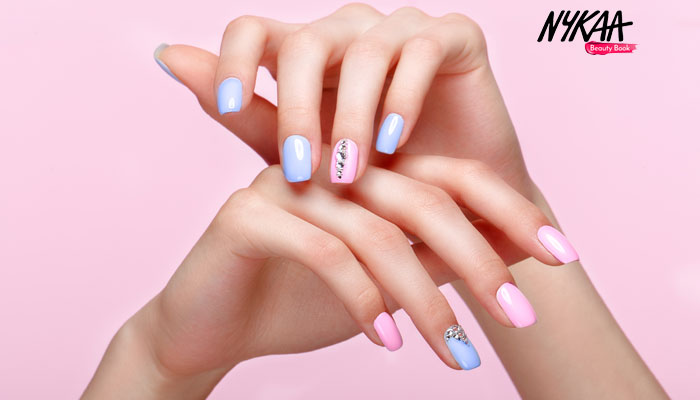
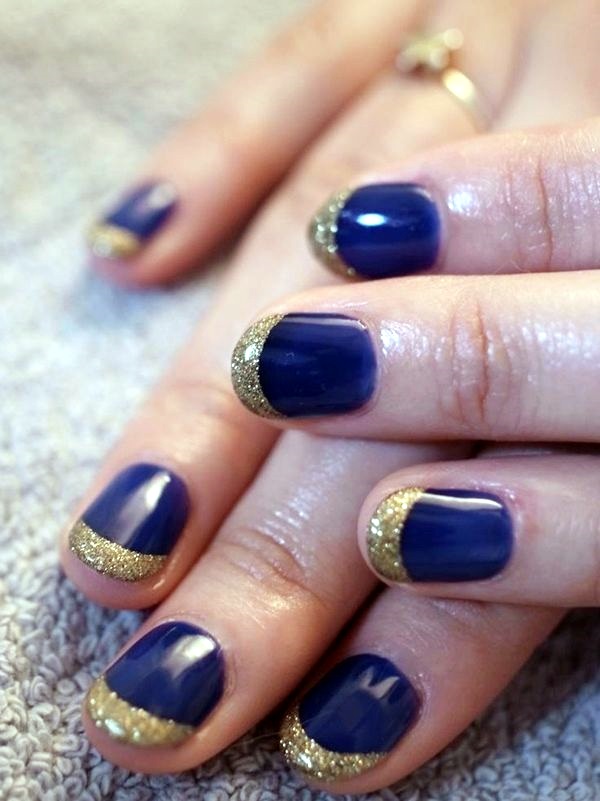
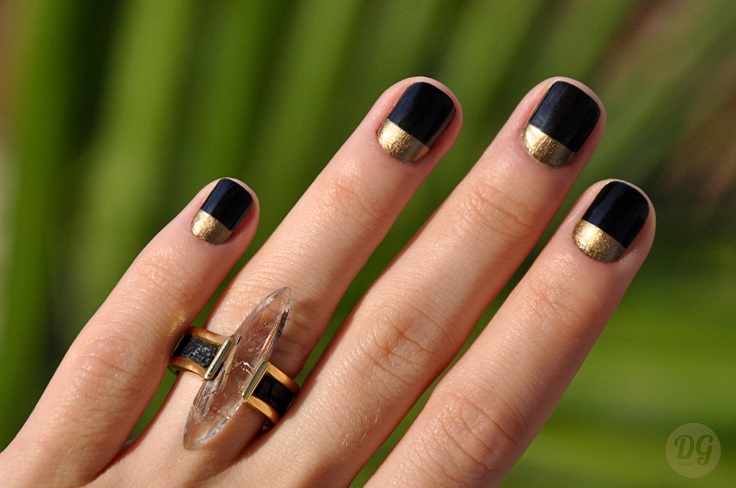
If you're feeling a little more adventurous, try out some of these simple nail art ideas. Start by painting your nails with a light featured color, such as a pale blue or a soft peach. Then, using a thin brush or a toothpick, create a simple design on one or two of your nails. This could be a heart, a star, or even a simple geometric pattern. Another easy idea for beginners is to use a nail stencil. Simply place the stencil on your painted nail and fill in the design with a different nail polish color. This is a great way to achieve a professional-looking design without having to have steady hands. For a more elegant look, try a half-moon design. Paint your nails with a featured color and let them dry completely. Then, use a hole reinforcement sticker to create a half-moon shape at the base of your nail. Fill in the rest of your nail with a different nail polish color and remove the sticker to reveal a clean and polished design.2. Simple Nail Art Ideas


2. Simple Nail Art Ideas


/ScreenShot2020-01-13at1.02.35PM-f3cc8a0d04b748e9ab7aaa185aab409b.png)


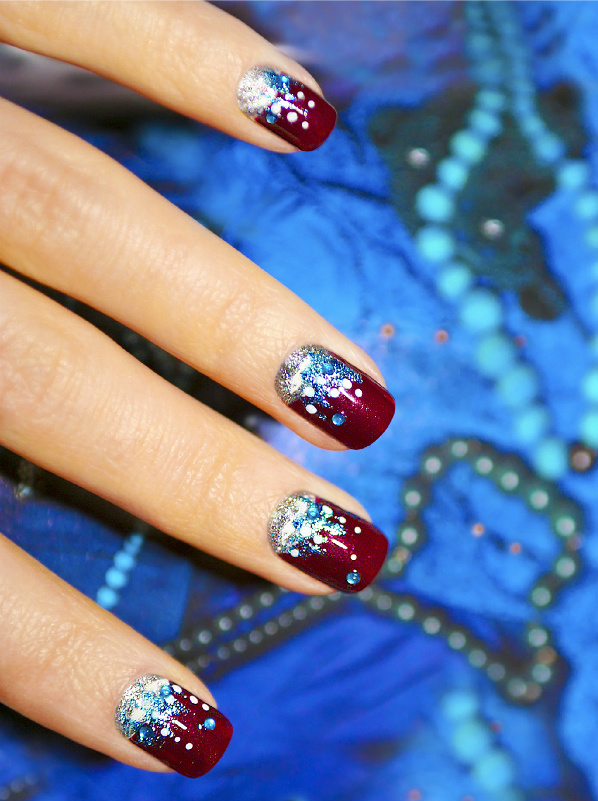
If you're on a budget or just love getting creative, these DIY nail art designs are perfect for you. For a fun and playful look, try a newspaper print design. Paint your nails with a light featured color and let them dry completely. Then, dip a small piece of newspaper in rubbing alcohol and press it onto your nail for a few seconds. Peel it off to reveal a unique and newspaper-inspired design. Another easy DIY design is a glitter gradient. Start by painting your nails with a featured color and let it dry completely. Then, using a makeup sponge, apply a thin layer of glitter polish to the tips of your nails and gently dab it upwards for a gradient effect. Seal it in with a top coat for a sparkly and eye-catching design. For a more edgy look, try a distressed design. Paint your nails with a featured color and let it dry completely. Then, using a toothpick or a small brush, create small scratches or lines on your nails with a darker nail polish. This may take some practice, but the end result is a cool and textured design.3. DIY Nail Art Designs


3. DIY Nail Art Designs


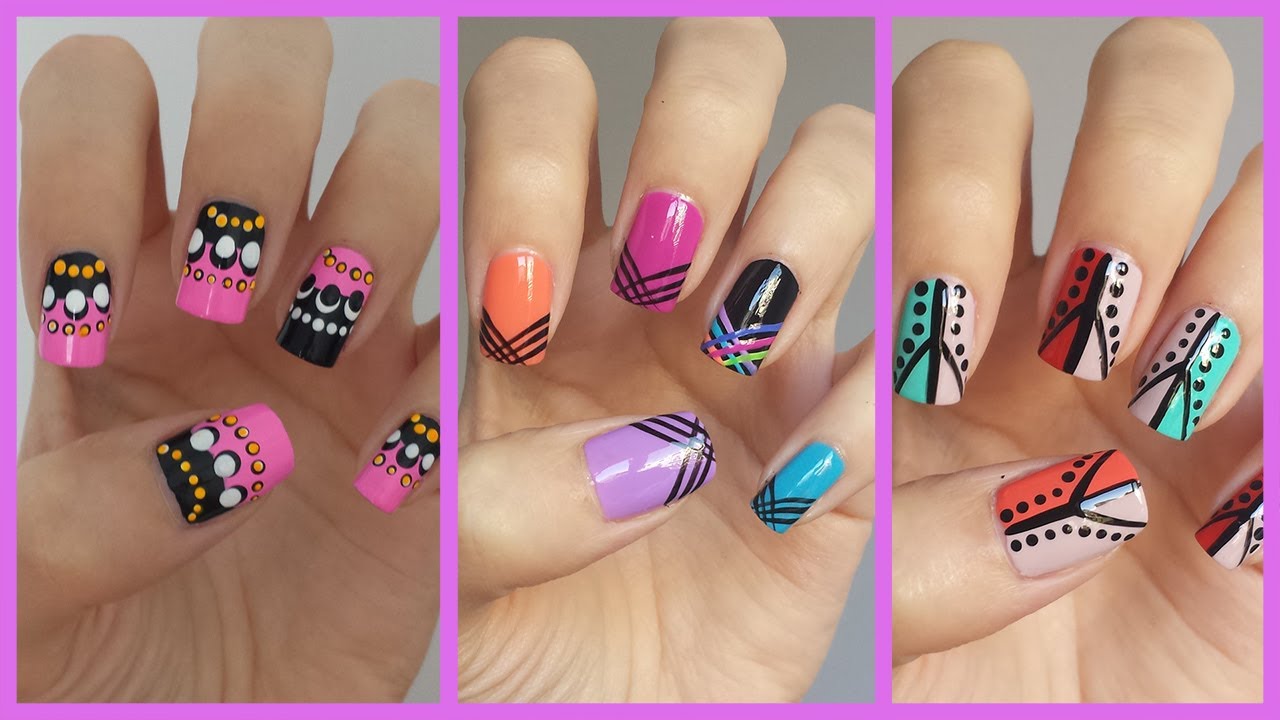
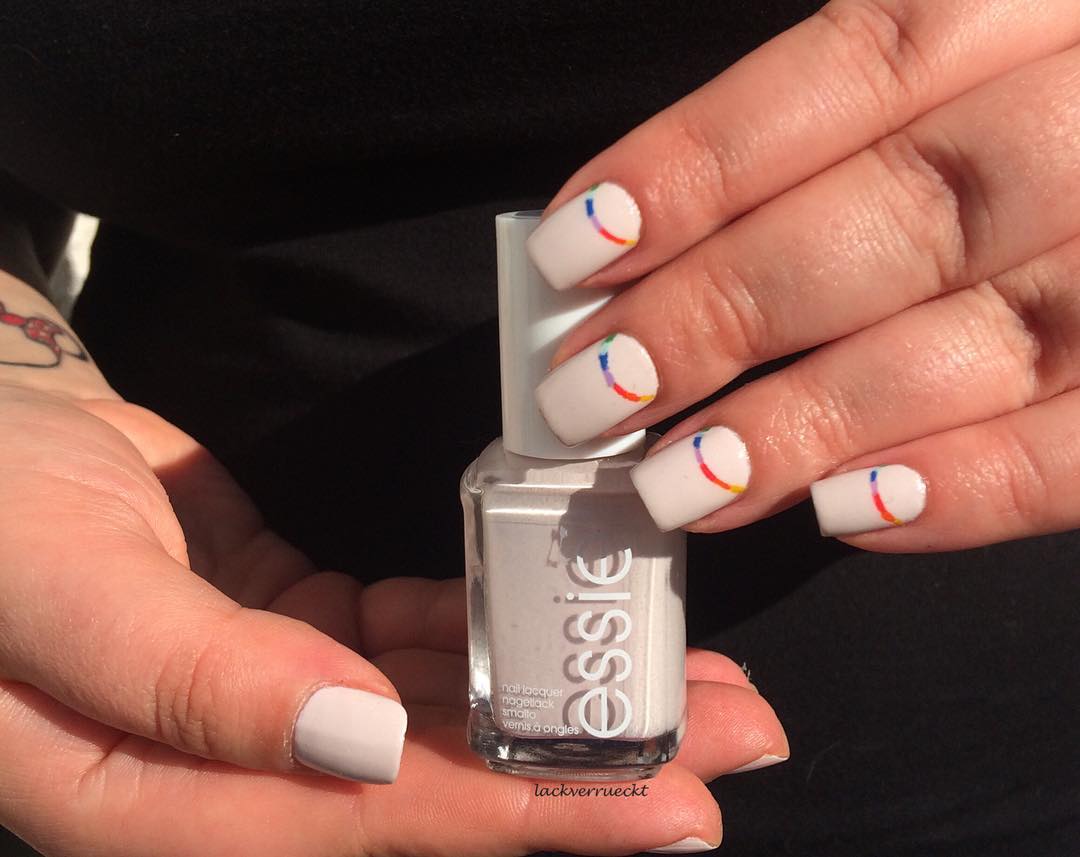
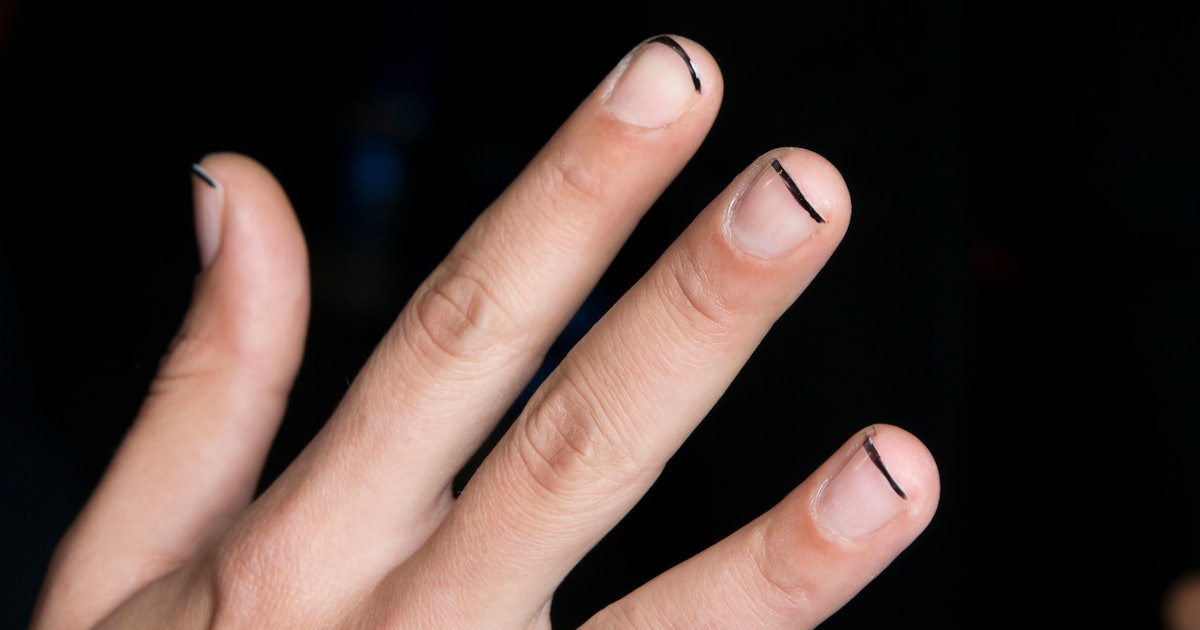
Short on time? These quick and easy nail art designs are perfect for when you're in a rush. For a simple and chic look, try a diagonal French tip. Paint your nails with a light featured color and let it dry completely. Then, using a thin brush or a striping tape, create a diagonal line across your nail with a different nail polish color. Another quick and easy design is a simple stripe. Start off with a featured color as your base and let it dry completely. Then, using a striping brush or a toothpick, create a thin stripe along one side of your nail with a different nail polish color. This design works well with contrasting colors or different shades of the same color. If you want a more playful design, try a dotticure. Start off with a featured color as your base and let it dry completely. Then, using a dotting tool or a bobby pin, create small dots in a random pattern on your nails with different nail polish colors. This design is perfect for when you can't decide on just one color.4. Quick and Easy Nail Art

4. Quick and Easy Nail Art


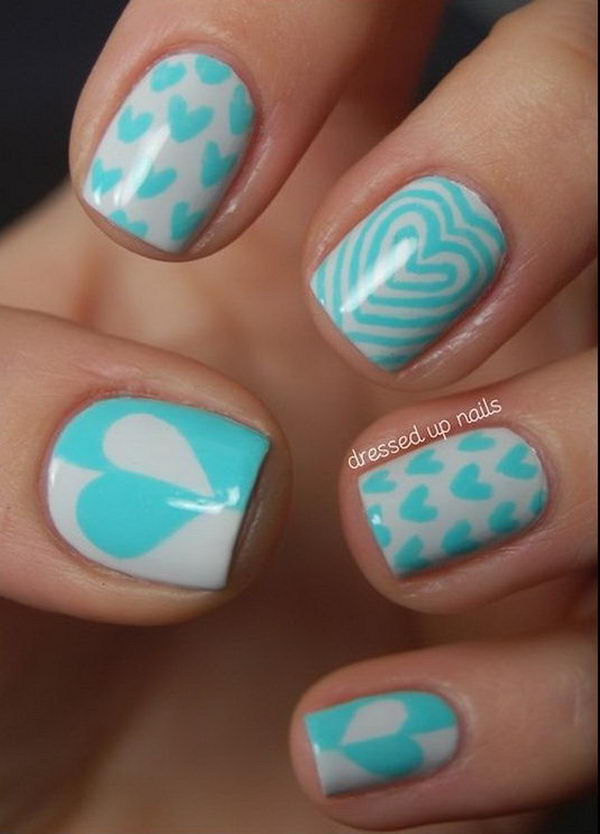
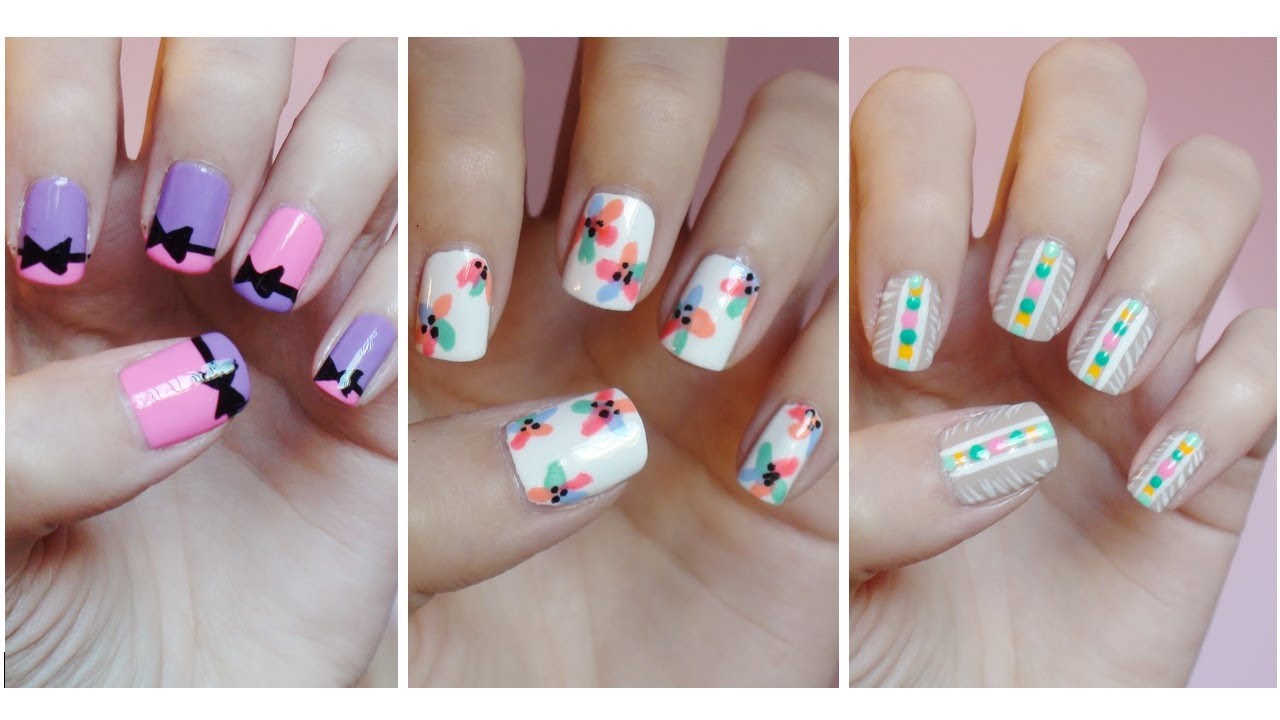
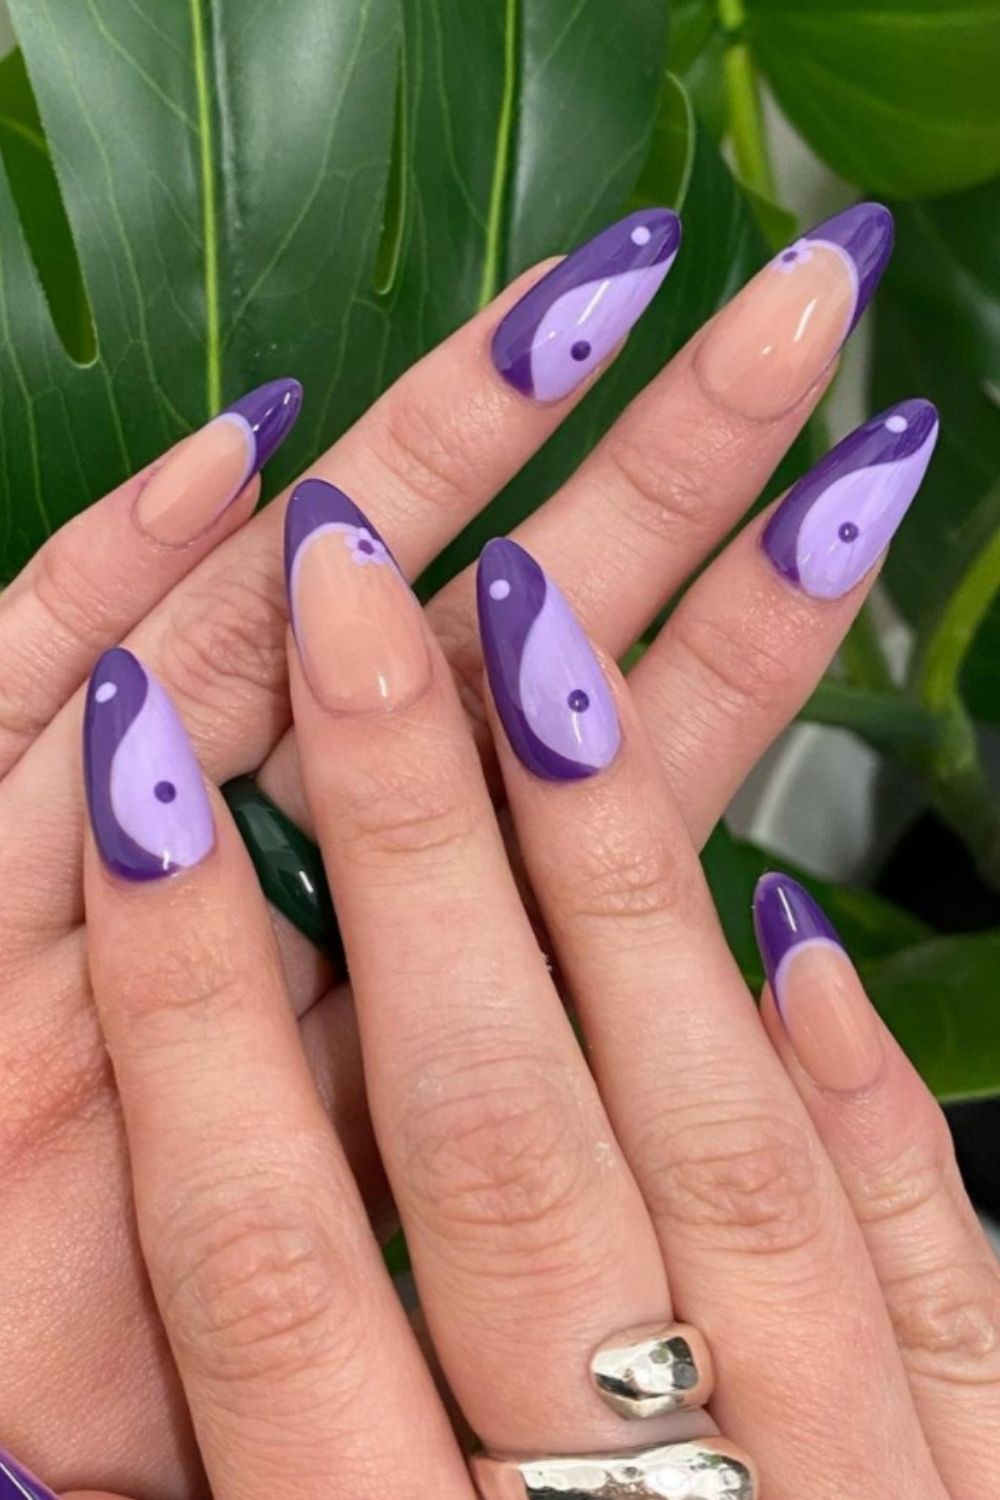
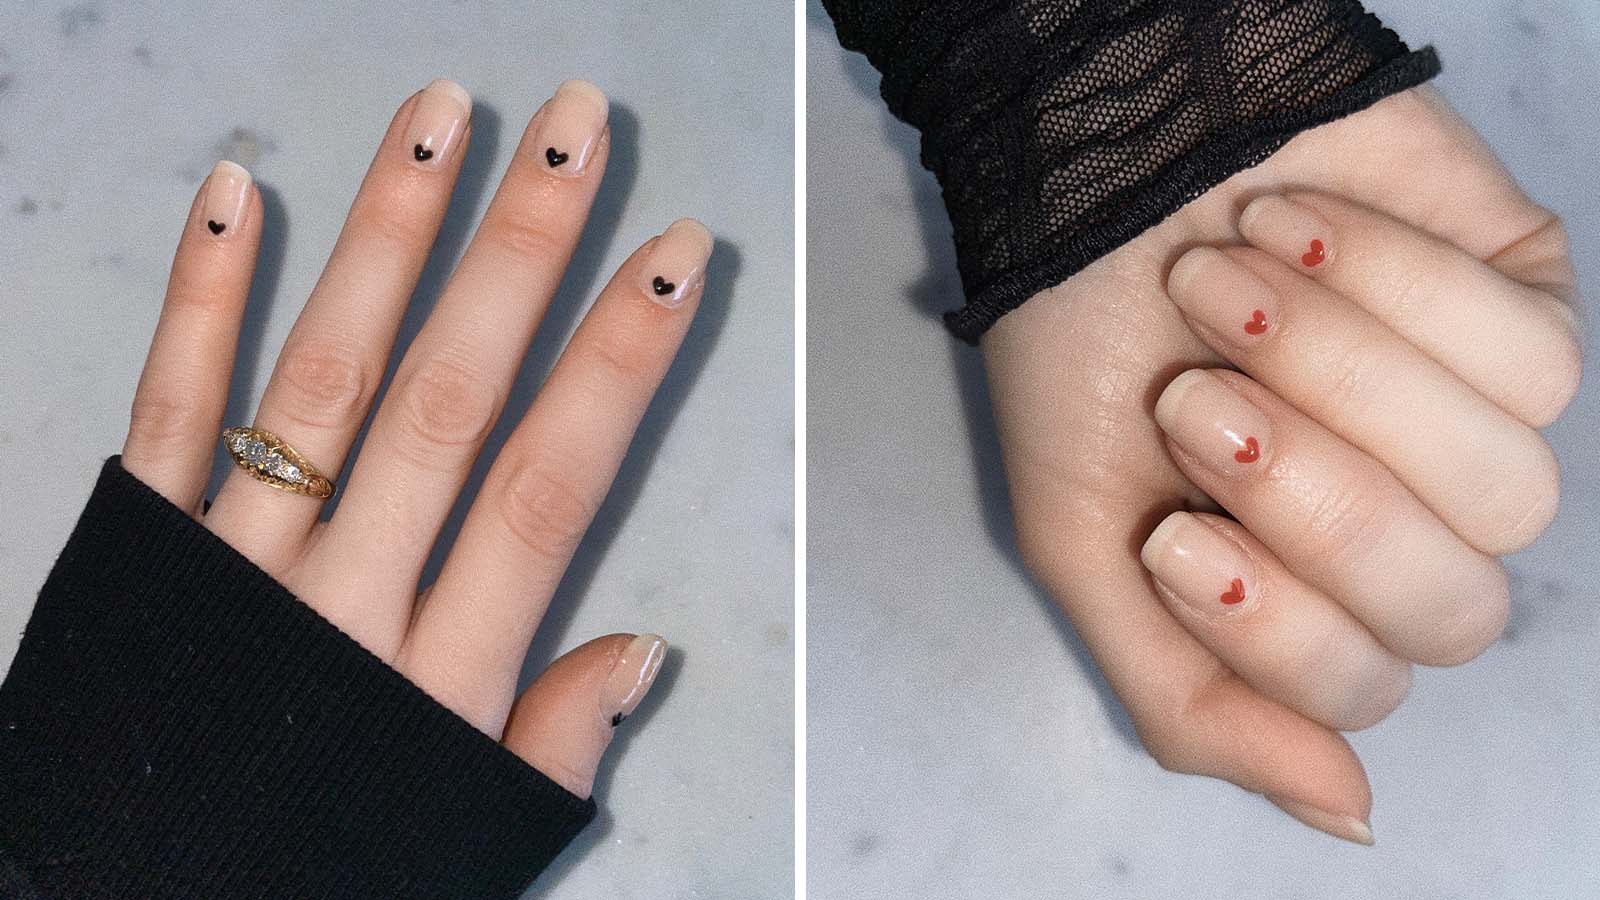
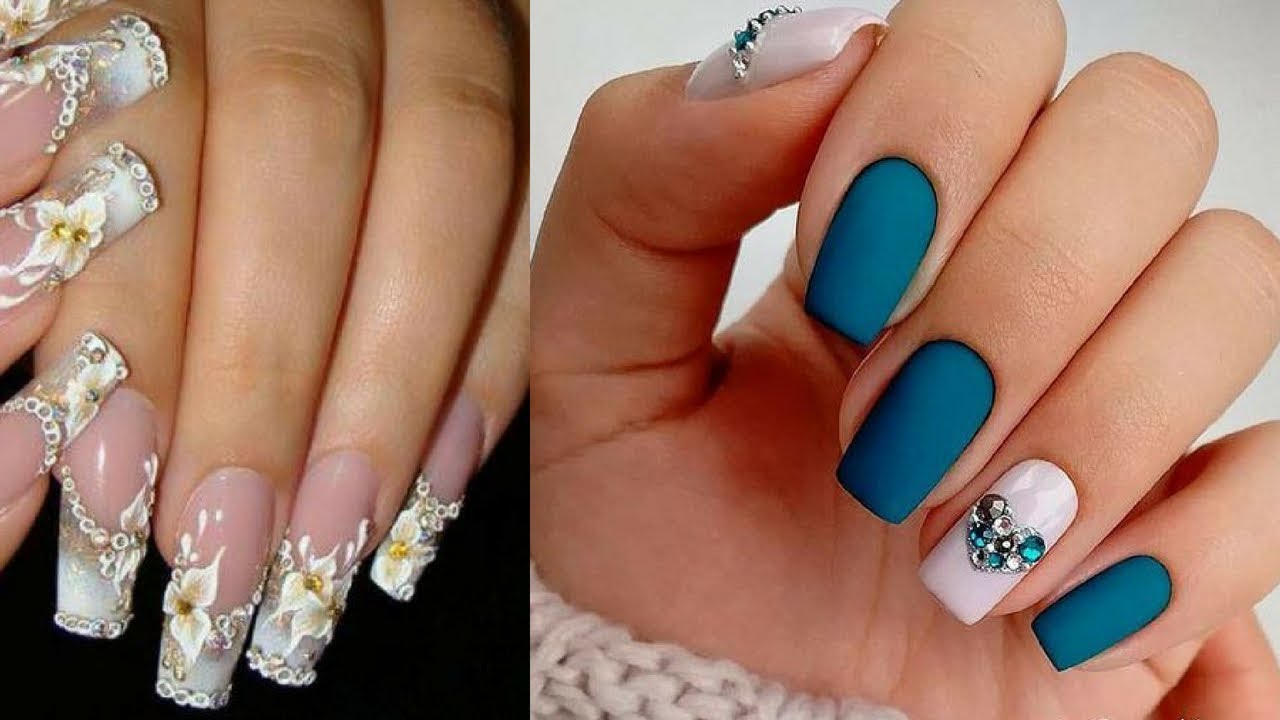
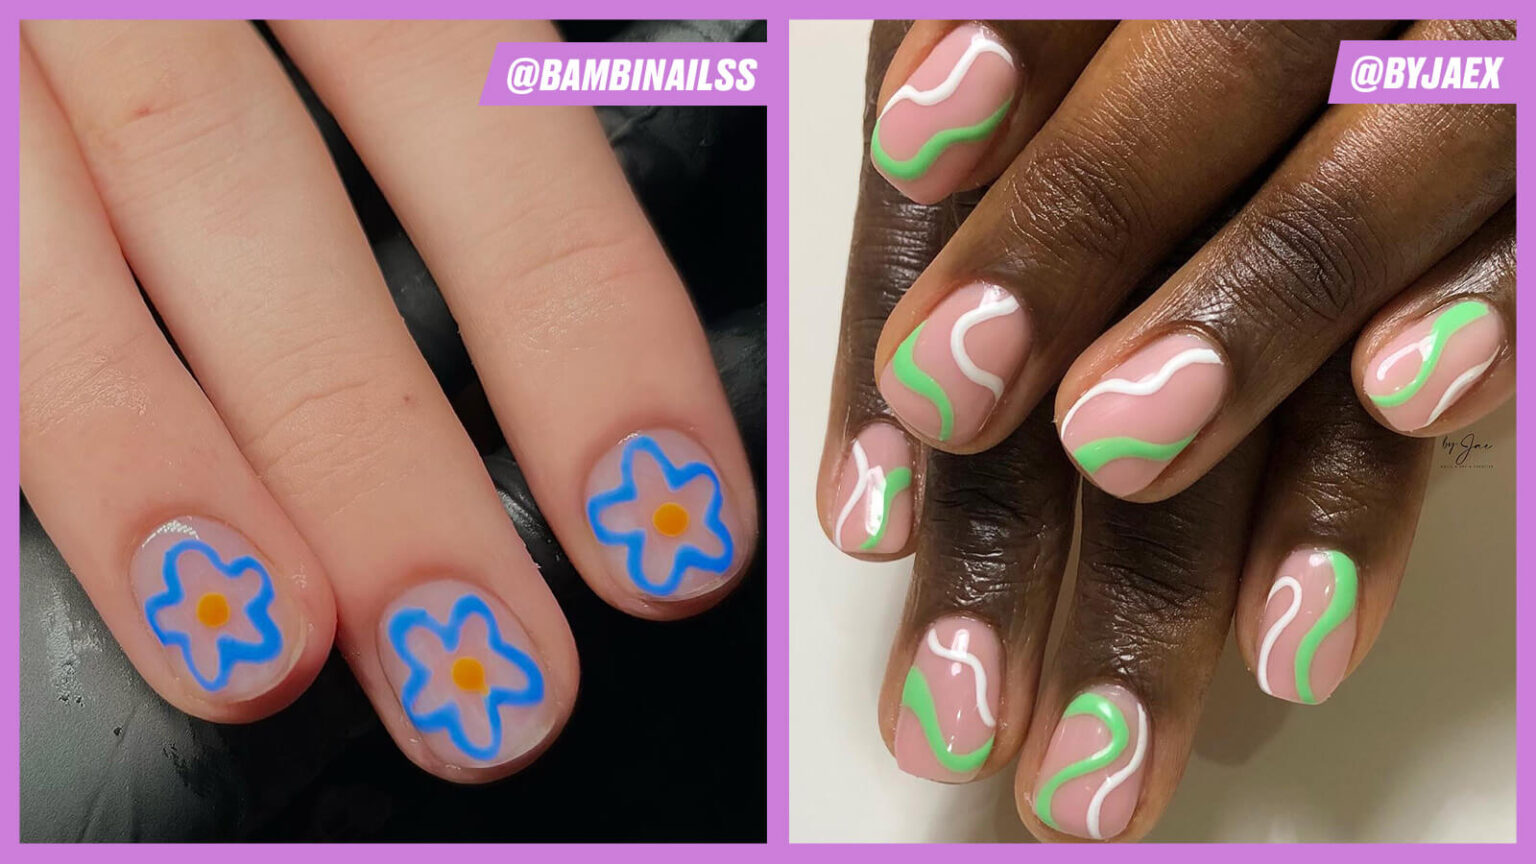
For a cute and feminine look, try these simple nail art designs. Start off with a featured color as your base and let it dry completely. Then, using a small brush or a toothpick, create a small heart on one or two of your nails with a different nail polish color. This is a sweet and subtle design that is perfect for any occasion. Another cute and simple design is a flower accent nail. Start off with a featured color as your base and let it dry completely. Then, using a small brush or a dotting tool, create a small flower on one of your nails with different nail polish colors. This design is perfect for spring and adds a pop of color to your nails. For a fun and whimsical look, try a cloud design. Paint your nails with a light featured color and let it dry completely. Then, using a small brush or a toothpick, create small clouds on your nails with a different nail polish color. This design is perfect for those who love cute and playful nail art.5. Cute and Simple Nail Art

5. Cute and Simple Nail Art
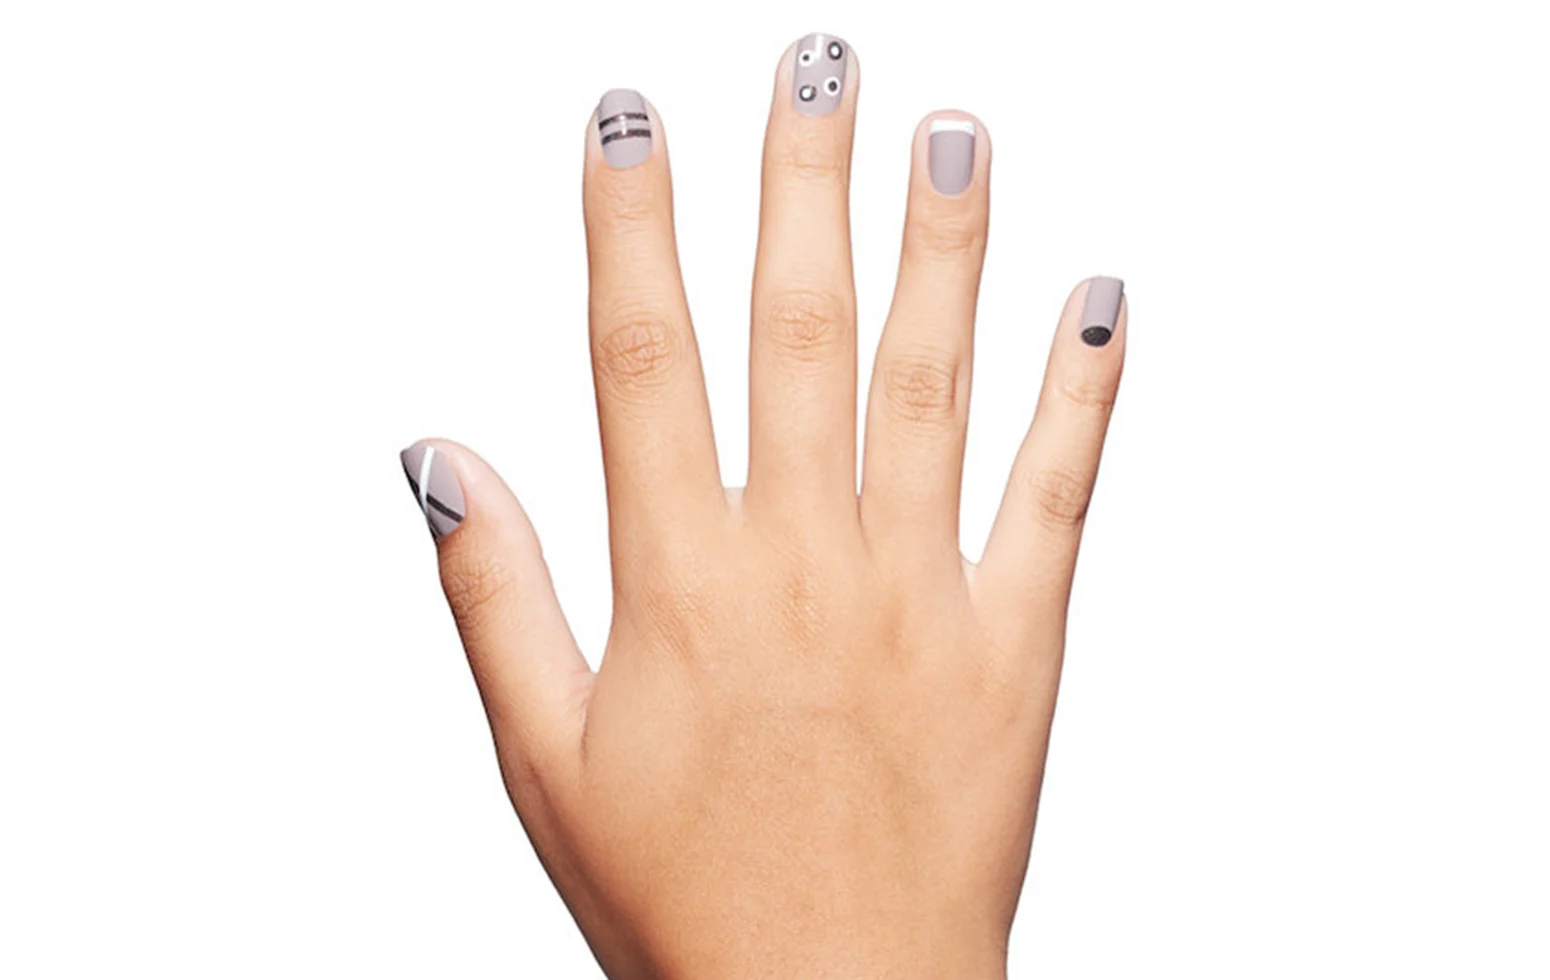

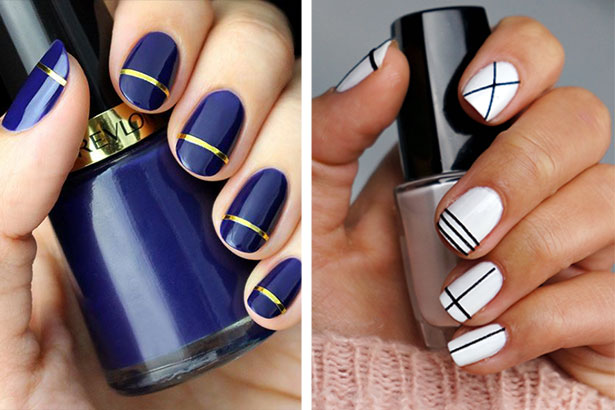
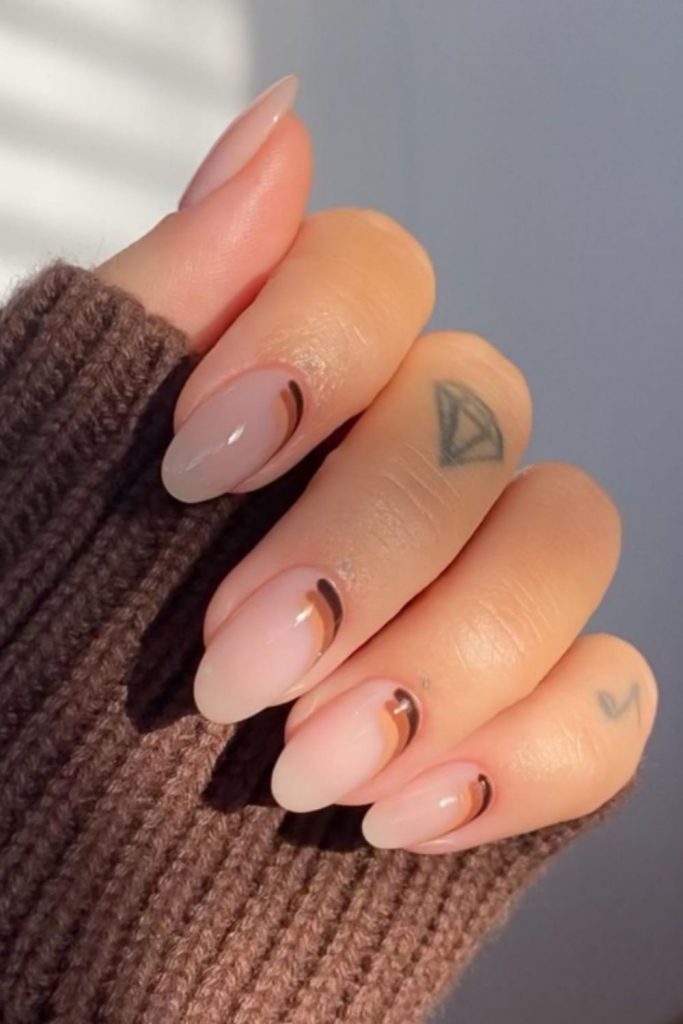
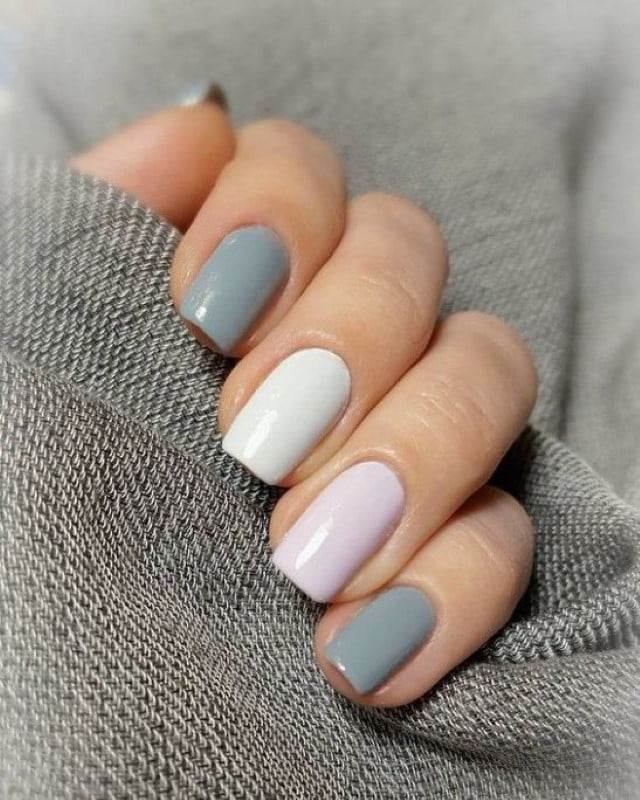
If you prefer a more understated look, these minimalist nail art designs are perfect for you. Start off with a featured color as your base and let it dry completely. Then, using a thin brush or a striping tape, create a simple diagonal line across your nail with a different nail polish color. This design is subtle yet chic. Another minimalist design is a negative space manicure. Start off with a featured color as your base and let it dry completely. Then, using a small brush or a striping tape, create a simple geometric pattern on one or two of your nails with a different nail polish color. This design is perfect for those who love clean and modern looks. For a more abstract look, try a splatter design. Paint your nails with a featured color and let it dry completely. Then, using a straw or a toothbrush, dip it in a different nail polish color and blow or flick it onto your nails for a splattered effect. This design is unique and adds a touch of creativity to your nails.6. Minimalist Nail Art Designs


6. Minimalist Nail Art Designs


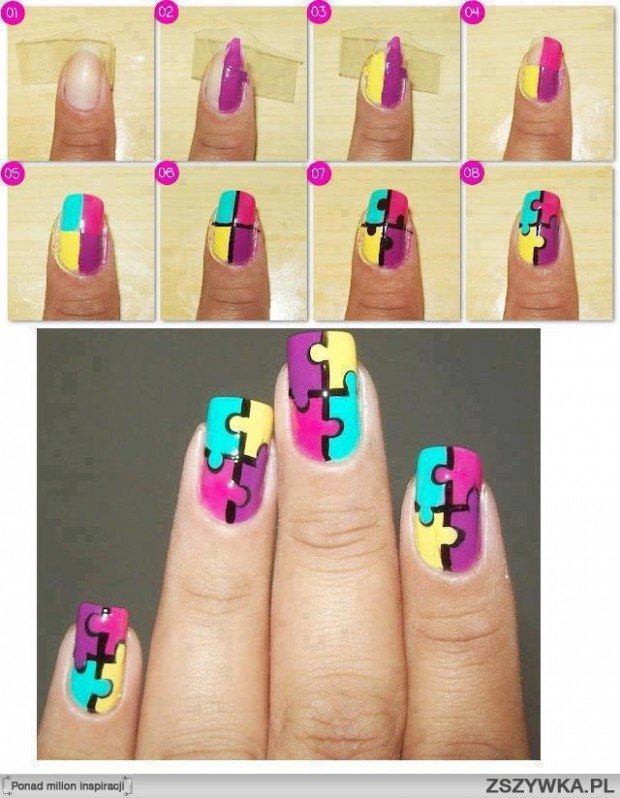
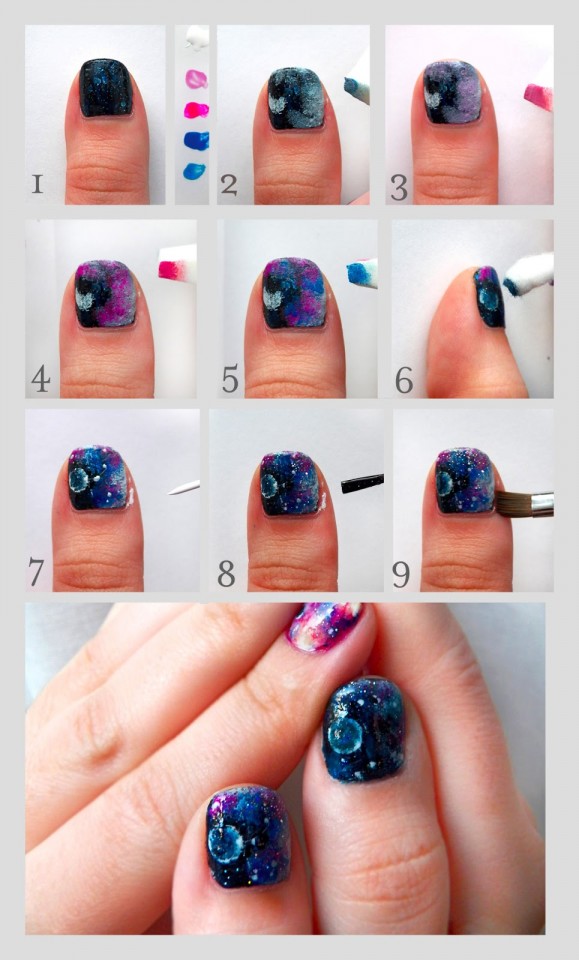
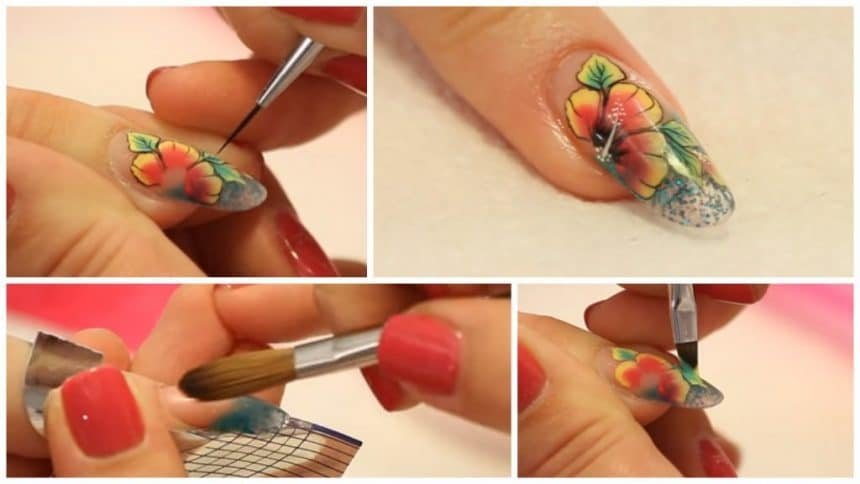
If you're a visual learner, these step-by-step nail art tutorials are perfect for you. Start off with a featured color as your base and let it dry completely. Then, using a small brush or a dotting tool, create small flowers on your nails with different nail polish colors. This design is perfect for spring and adds a feminine touch to your nails. Another easy tutorial is a marble effect. Start off with a featured color as your base and let it dry completely. Then, using a few drops of different nail polish colors, swirl them together on a piece of plastic wrap or a plastic bag. Gently press the plastic onto your nails and peel it off to reveal a unique and abstract design. For a fun and playful look, try a candy cane design. Paint your nails with a featured color and let it dry completely. Then, using a thin brush or a striping tape, create diagonal stripes on your nails with a different nail polish color. This design is perfect for the holiday season and adds a festive touch to your nails.7. Step-by-Step Nail Art Tutorials

7. Step-by-Step Nail Art Tutorials


Just because you have short nails, doesn't mean you can't rock some fun and simple nail art. Start off with a featured color as your base and let it dry completely. Then, using a small brush or a toothpick, create small hearts on your nails with a different nail polish color. This design is perfect for those with shorter nails and adds a cute and feminine touch. Another easy design for short nails is a diagonal stripe. Start off with a featured color as your base and let it dry completely. Then, using a thin brush or a striping tape, create a diagonal line across your nail with a different nail polish color. This design is simple yet eye-catching. For a more minimalist look, try a half-moon design. Paint your nails with a featured color and let it dry completely. Then, use a hole reinforcement sticker to create a half-moon shape at the base of your nail. Fill in the rest of your nail with a different nail polish color and remove the sticker to reveal a clean and polished design.8. Simple Nail Art for Short Nails


8. Simple Nail Art for Short Nails
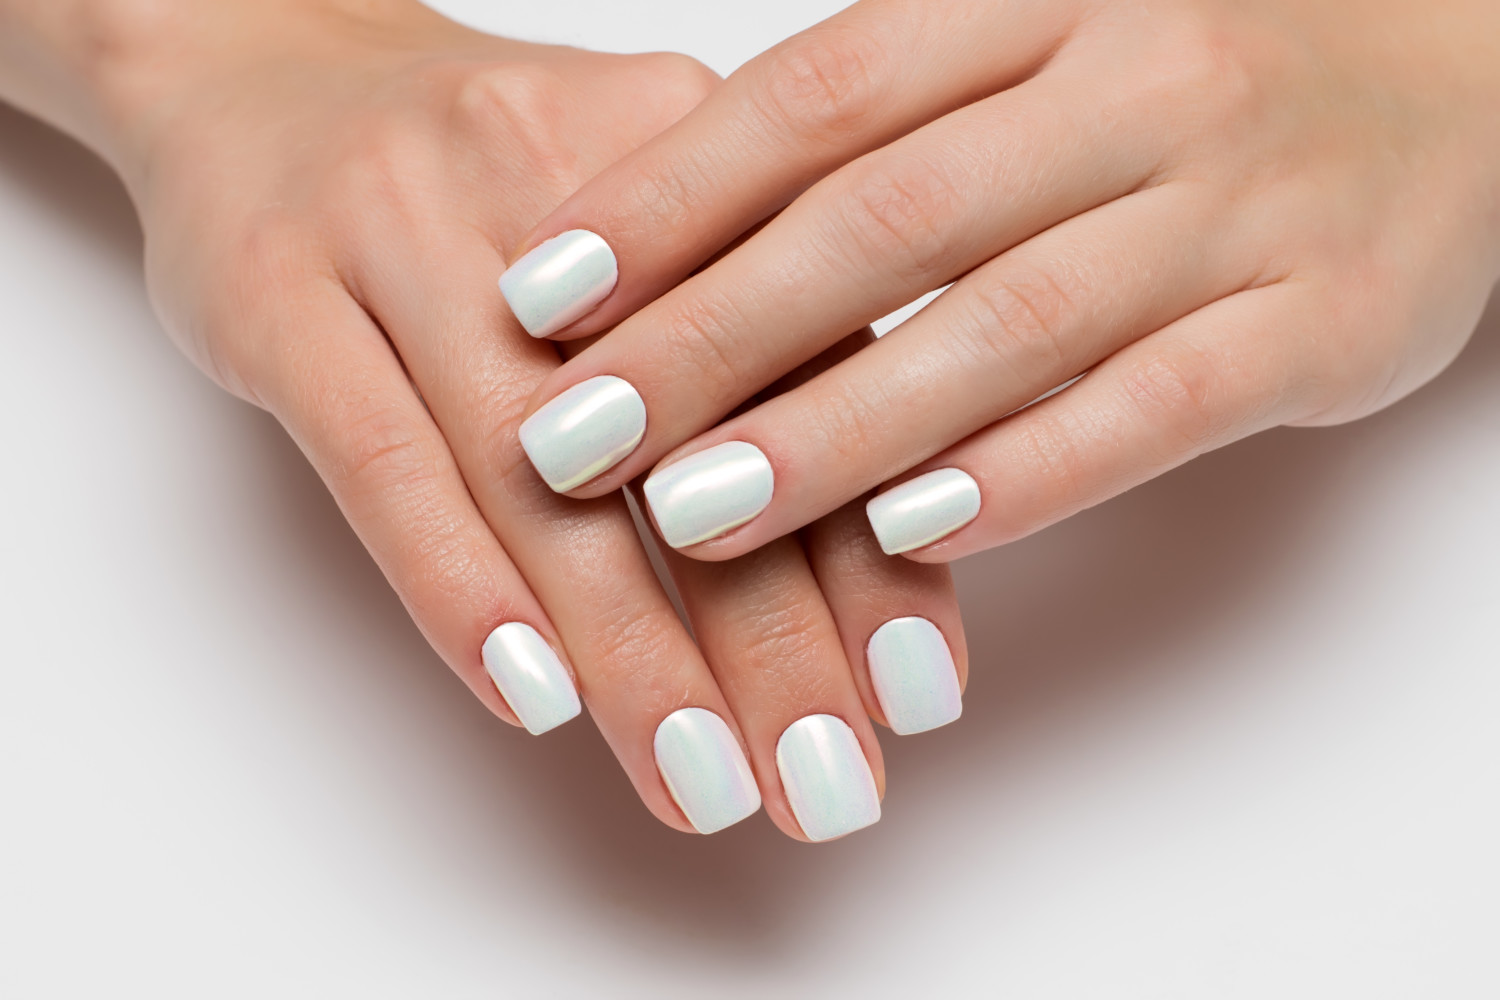

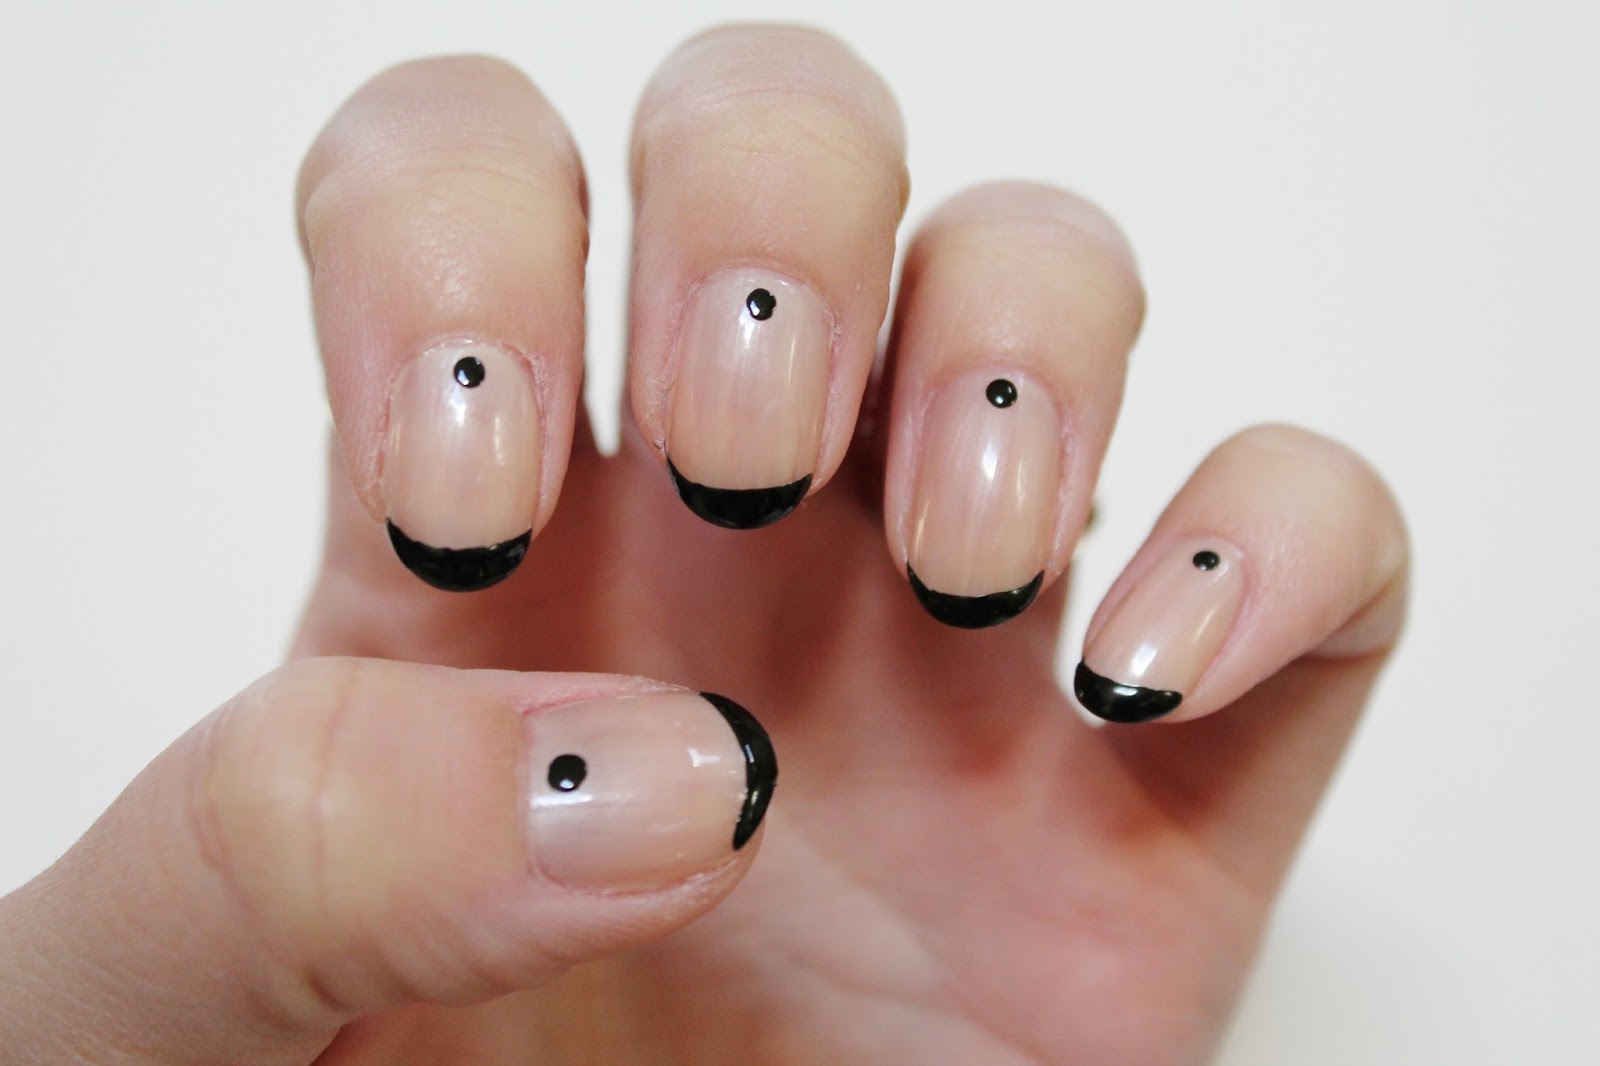
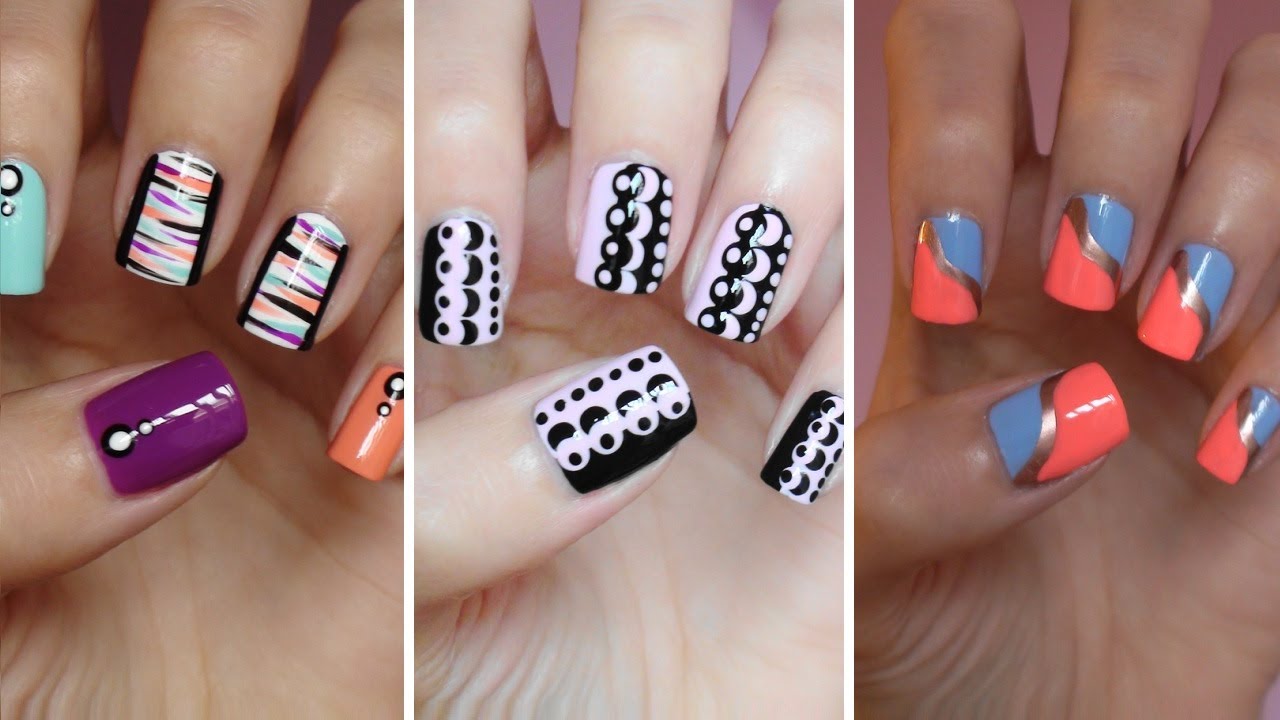
If you're just starting out with nail art, these beginner-friendly designs are perfect for you. Start off with a featured color as your base and let it dry completely. Then, using a small brush or a dotting tool, create small dots in a random pattern on your nails with different nail polish colors. This design is easy yet fun, and you can experiment with different color combinations. Another easy design is a geometric pattern. Start off with a featured color as your base and let it dry completely. Then, using a striping brush or a toothpick, create simple lines and shapes on your nails with a different nail polish color. This design is perfect for those who want to try something new but aren't quite ready for more intricate designs. If you're feeling a little more confident, try a gradient design. Start off with a featured color as your base and let it dry completely. Then, using a makeup sponge, apply a thin layer of a different nail polish color to the tips of your nails and gently dab it upwards for a gradient effect. Seal it in with a top coat for a colorful and trendy look.9. Beginner-Friendly Nail Art Designs


9. Beginner-Friendly Nail Art Designs
:max_bytes(150000):strip_icc()/072922-beauty-nail-art-lead-2000-21de3481261e48a995c855269f9846ad.jpg)

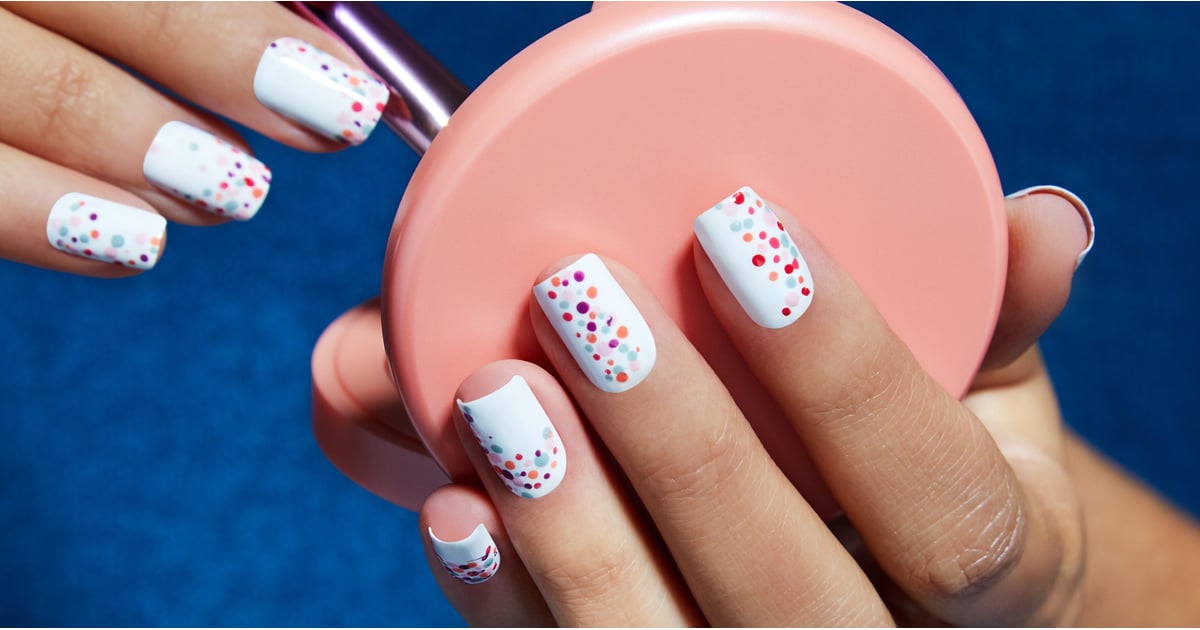
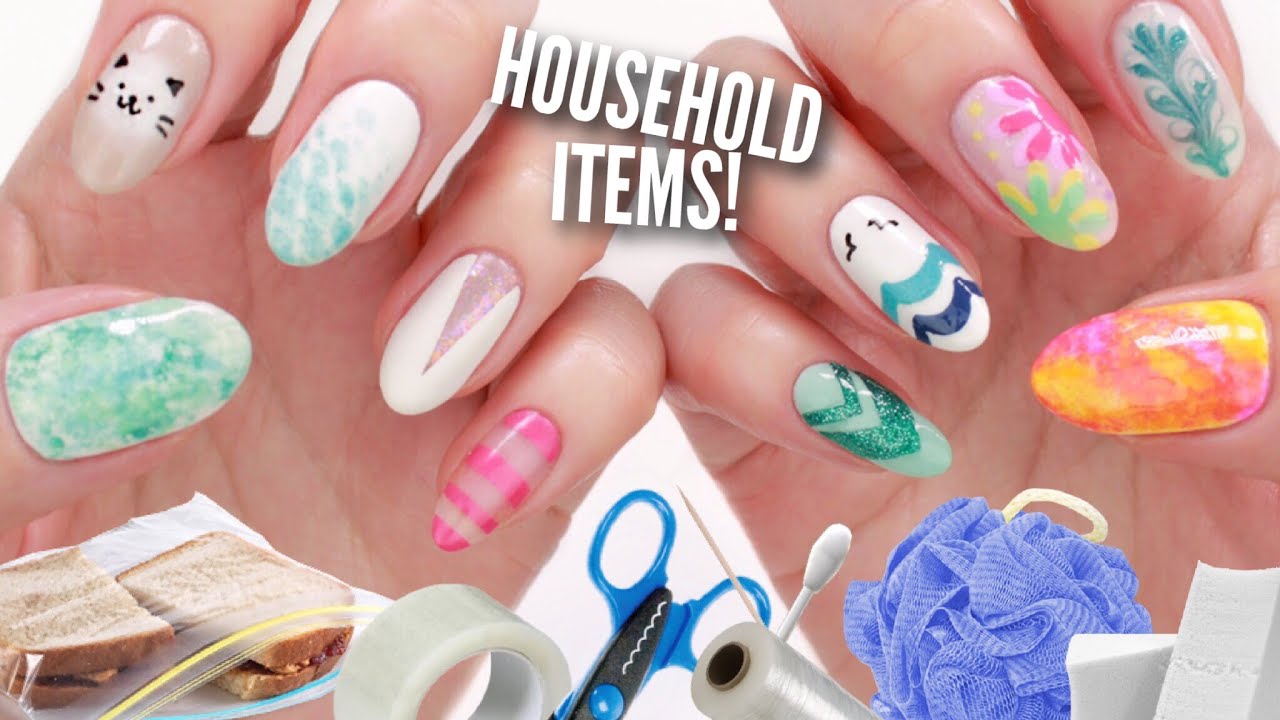
Don't have any fancy nail art tools? No problem! You can create some amazing nail art designs with items you already have at home. For a fun and colorful look, try a splatter design. Paint your nails with a featured color and let it dry completely. Then, using a straw or a toothbrush, dip it in a different nail polish color and blow or flick it onto your nails for a splattered effect. Another household item that works great for nail art is a bobby pin. Use the rounded end to create simple dots on your nails with different nail polish colors. You can also use the bobby pin to create small swirls or lines for a more intricate design. For a textured look, try using salt. Paint your nails with a featured color and let it dry completely. Then, while your nails are still wet, sprinkle a small amount of salt onto your nails. Let it sit for a few minutes, then gently brush off the salt to reveal a unique and textured design. Now that you have some easy and simple nail art designs to try, it's time to get creative and have fun with your nails. Remember to always start with a base coat and seal in your design with a top coat to make it last longer. With these ideas, you can have beautiful and unique nails in no time!10. Easy Nail Art Designs with Household Items

10. Easy Nail Art Designs with Household Items


Simple Nail Art Design: How To Create Stunning Designs At Home

Introduction
 Nail art has become a popular trend in recent years, with people of all ages and backgrounds experimenting with different designs and colors to express their creativity. While there are many intricate and complex nail designs out there, sometimes all you need is a simple yet eye-catching design to elevate your overall look. This article will guide you on how to create
simple nail art designs
at home, using basic tools and techniques.
Nail art has become a popular trend in recent years, with people of all ages and backgrounds experimenting with different designs and colors to express their creativity. While there are many intricate and complex nail designs out there, sometimes all you need is a simple yet eye-catching design to elevate your overall look. This article will guide you on how to create
simple nail art designs
at home, using basic tools and techniques.
Gather Your Tools
 Before getting started, make sure you have all the necessary tools for creating
simple nail art designs
. These include a base coat, top coat, your desired nail polish colors, a fine-tipped nail brush, a toothpick, and a small cup of water. You can also use
nail art stickers
or
stencils
for more intricate designs.
Before getting started, make sure you have all the necessary tools for creating
simple nail art designs
. These include a base coat, top coat, your desired nail polish colors, a fine-tipped nail brush, a toothpick, and a small cup of water. You can also use
nail art stickers
or
stencils
for more intricate designs.
Prep Your Nails
 To ensure a smooth and long-lasting finish, start by prepping your nails. Begin by filing them into your desired shape and pushing back your cuticles. Next, apply a base coat to protect your nails and allow it to dry completely before moving on to the next step.
Get Creative
 Now comes the fun part - creating your
simple nail art design
. The key to achieving a professional-looking design is to start with a simple pattern and build on it. For example, you can create a
polka dot
design by dipping a toothpick into your chosen nail polish color and dotting it onto your nails. You can also create a
striped
design using a fine-tipped brush and alternating between two colors.
Now comes the fun part - creating your
simple nail art design
. The key to achieving a professional-looking design is to start with a simple pattern and build on it. For example, you can create a
polka dot
design by dipping a toothpick into your chosen nail polish color and dotting it onto your nails. You can also create a
striped
design using a fine-tipped brush and alternating between two colors.
Experiment with Colors
 Don't be afraid to get creative with your color choices. You can mix and match colors to create a unique and eye-catching design. For a
gradation
effect, apply a lighter shade of nail polish at the base of your nails and gradually add a darker shade towards the tips. You can also create
ombre
designs by blending two different colors together.
Don't be afraid to get creative with your color choices. You can mix and match colors to create a unique and eye-catching design. For a
gradation
effect, apply a lighter shade of nail polish at the base of your nails and gradually add a darker shade towards the tips. You can also create
ombre
designs by blending two different colors together.
Finish with a Top Coat
 Once you are satisfied with your design, let it dry completely before applying a top coat. This will seal in your design and add a glossy finish. You can also add
nail art stickers
or
glitter
for an extra pop of color and sparkle.
Once you are satisfied with your design, let it dry completely before applying a top coat. This will seal in your design and add a glossy finish. You can also add
nail art stickers
or
glitter
for an extra pop of color and sparkle.
In Conclusion
 Creating
simple nail art designs
at home is an easy and fun way to express your creativity and elevate your overall look. With the right tools and techniques, you can achieve professional-looking designs without breaking the bank. So next time you want to add a touch of flair to your nails, try out these simple and easy
nail art ideas
and watch as your nails become your new favorite accessory.
Creating
simple nail art designs
at home is an easy and fun way to express your creativity and elevate your overall look. With the right tools and techniques, you can achieve professional-looking designs without breaking the bank. So next time you want to add a touch of flair to your nails, try out these simple and easy
nail art ideas
and watch as your nails become your new favorite accessory.


