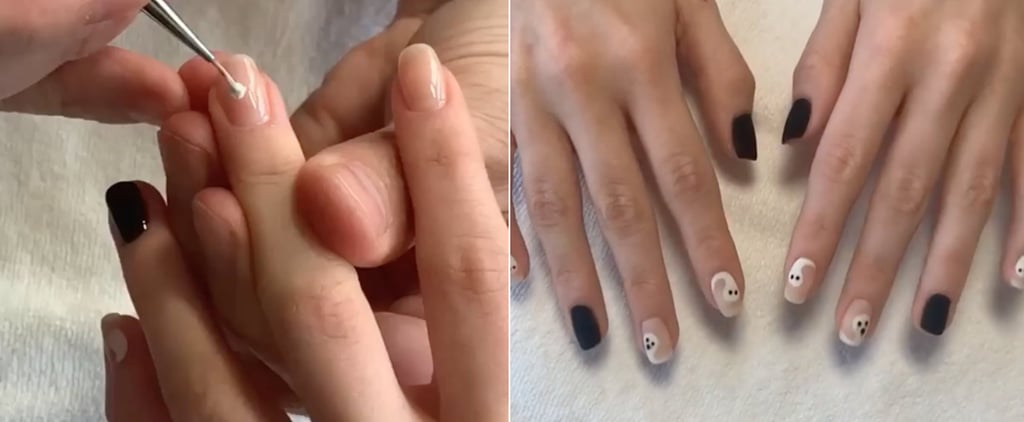
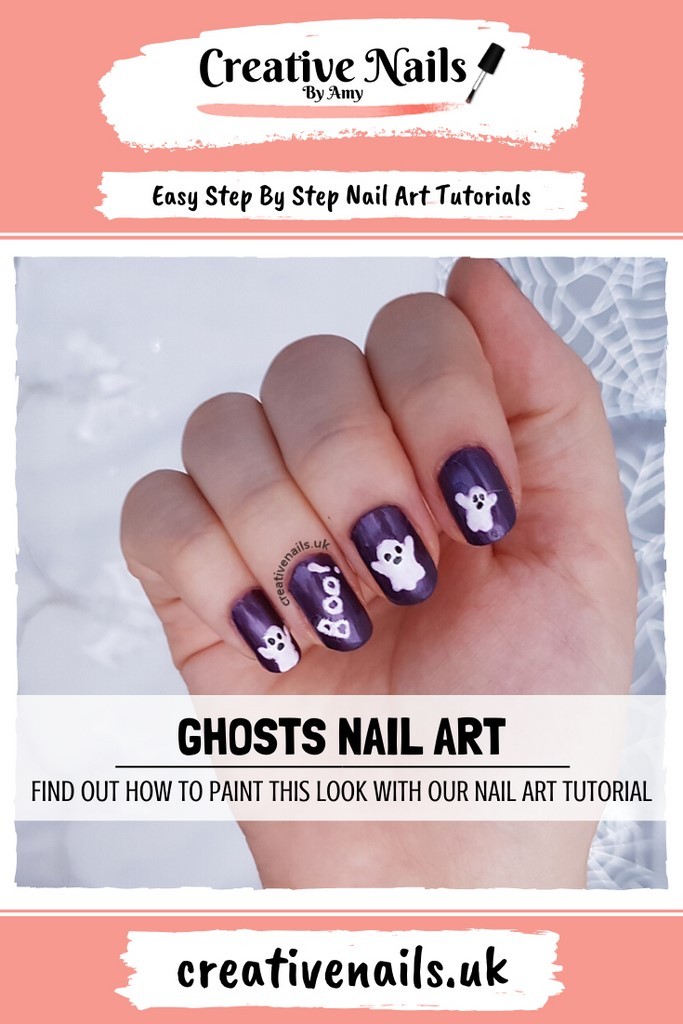
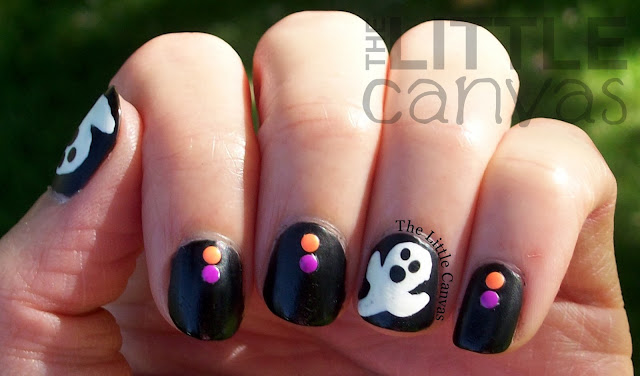
If you're looking for a fun and spooky nail design for Halloween, look no further than this easy ghost nail design tutorial. With just a few simple steps, you can create a hauntingly cute manicure that is perfect for the season. To start, paint your nails with a white base coat. This will serve as the canvas for your ghost design. Once the base coat is dry, use a small detailing brush to create a ghost shape using black nail polish. Start with a small circle at the top for the head, and then create a larger oval shape for the body. Don't worry about making the lines too perfect, as a slightly messy look will add to the ghostly effect. Next, use a dotting tool to create two eyes and a mouth for your ghost. You can also use a toothpick or the end of a bobby pin if you don't have a dotting tool. Once your ghost face is complete, use the same tool to add two small dots for the pupils of the eyes. For an extra touch, you can add a small bow tie or a tiny top hat to your ghost using a fine tipped brush and black nail polish. This will give your ghost some personality and make it stand out even more.1. Easy Halloween Ghost Nail Design Tutorial


1. Easy Halloween Ghost Nail Design Tutorial


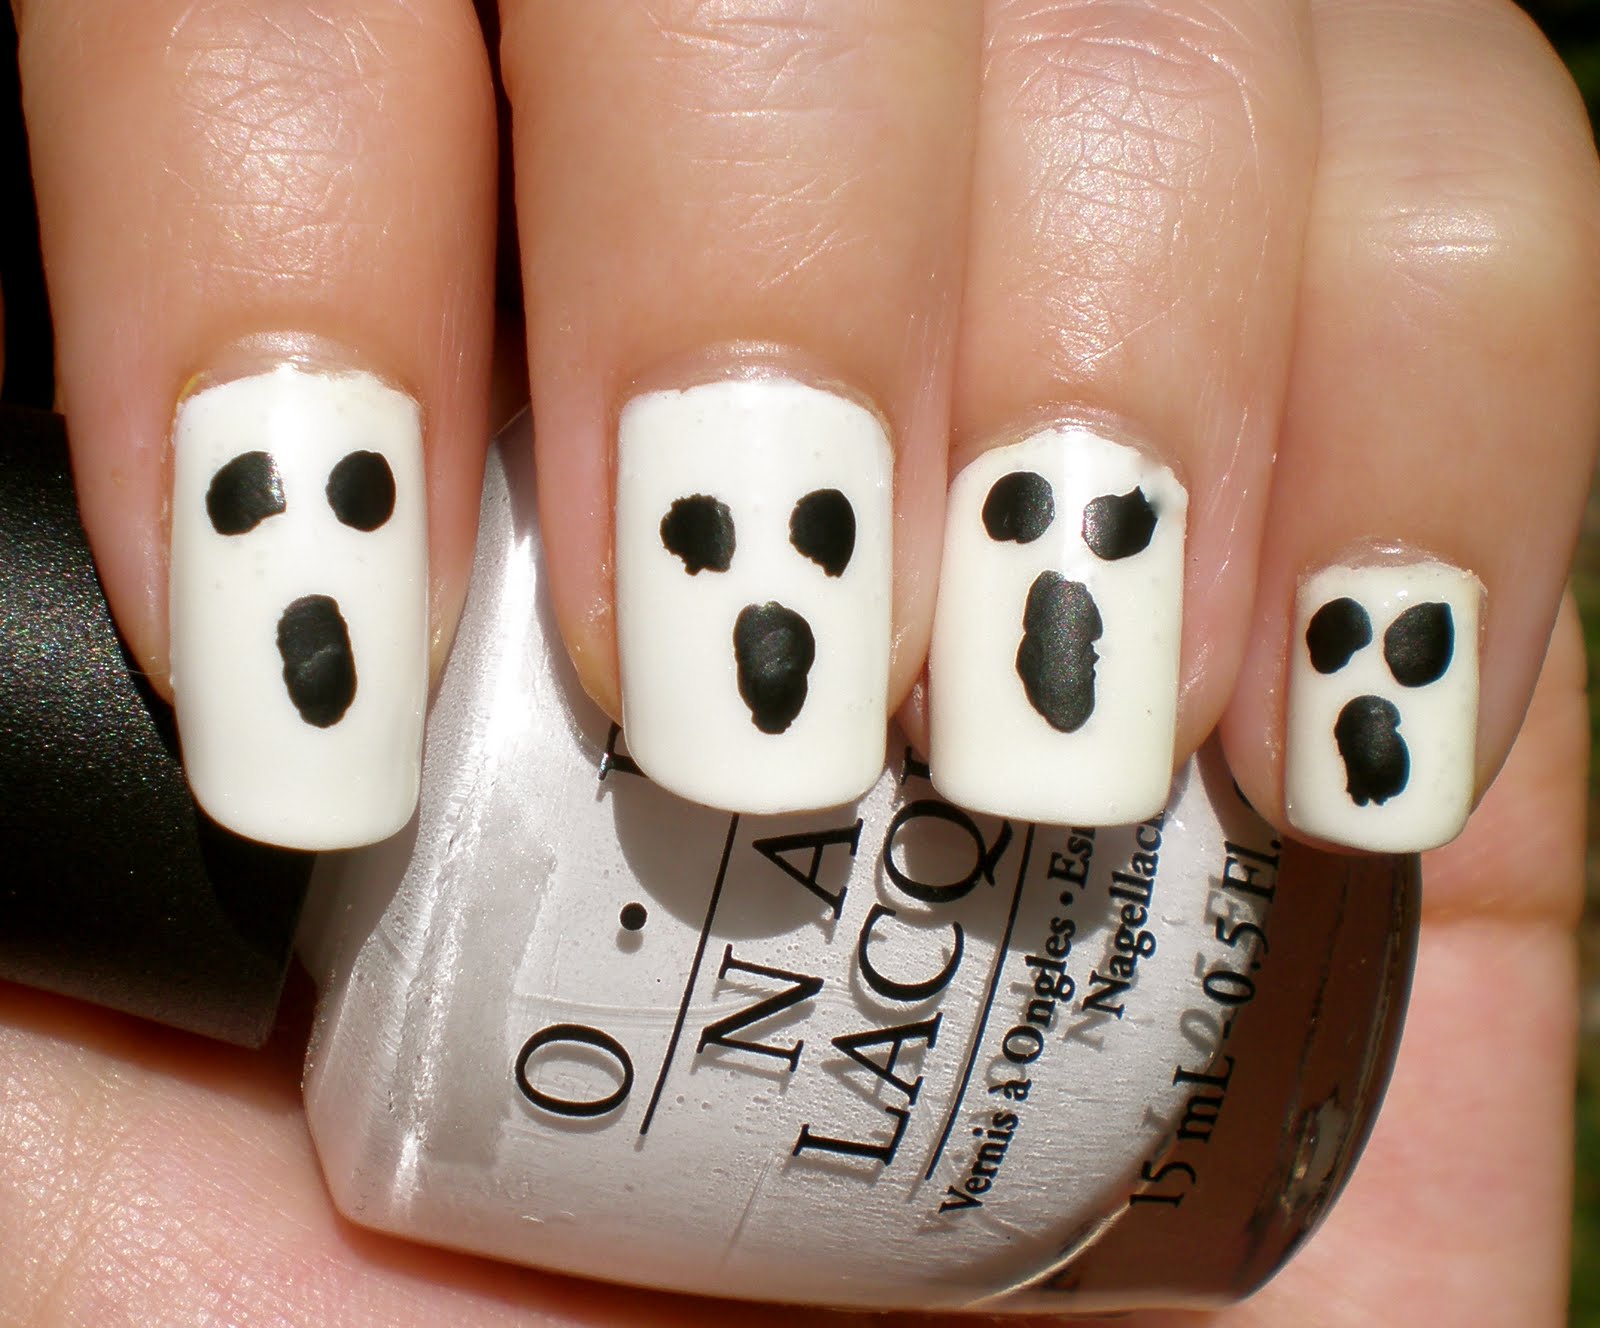
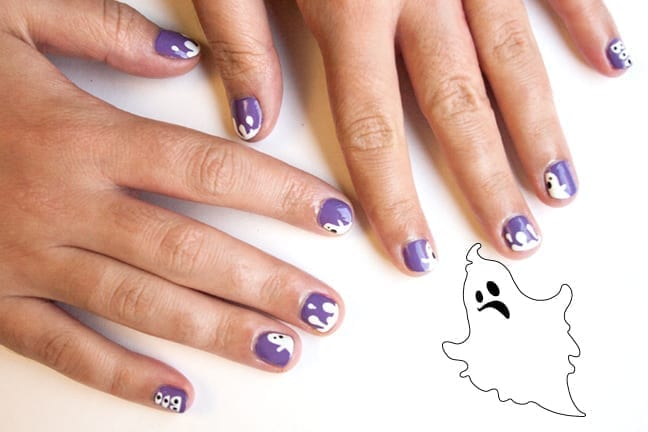
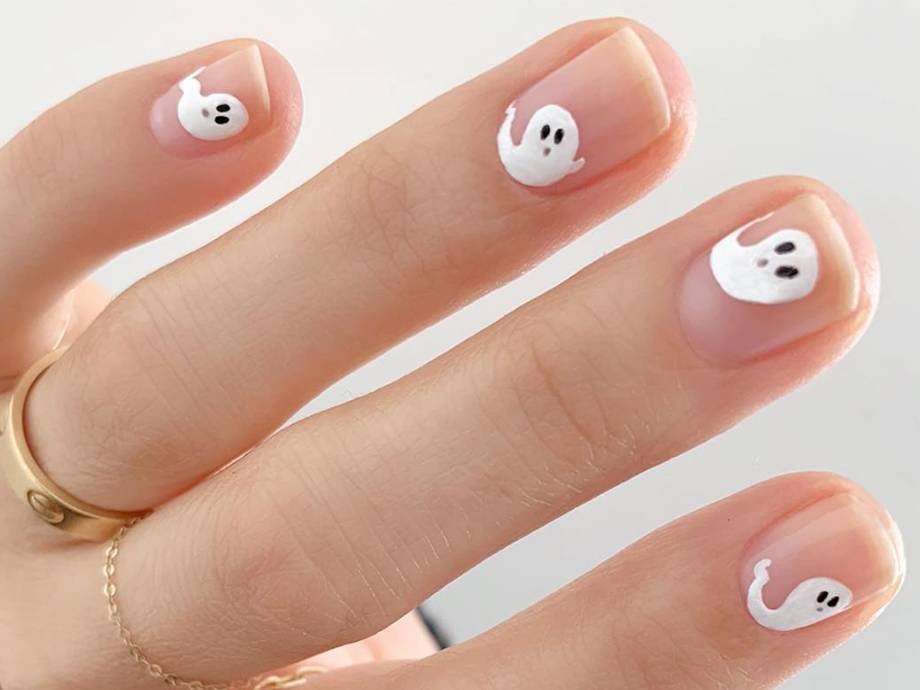
If you're new to nail art and want to try your hand at creating a ghost design, this simple tutorial is perfect for beginners. All you need is a white nail polish, a dotting tool, and black nail polish. Start by painting your nails with the white polish and allow it to dry completely. Then, using the dotting tool, create three small dots in a triangular shape near the tip of your nail. These will serve as the eyes and mouth of your ghost. Next, use the dotting tool to create a small circle at the top of your nail for the ghost's head. Extend the circle down into a larger oval shape for the body. You can also add some small wispy lines around the edges of the ghost's body to give it a more ethereal appearance. Once the design is complete, allow it to dry and seal it in with a clear top coat. This simple ghost nail art is perfect for those who want to add a touch of Halloween to their manicure without going over the top.2. Simple Ghost Nail Art for Beginners


2. Simple Ghost Nail Art for Beginners


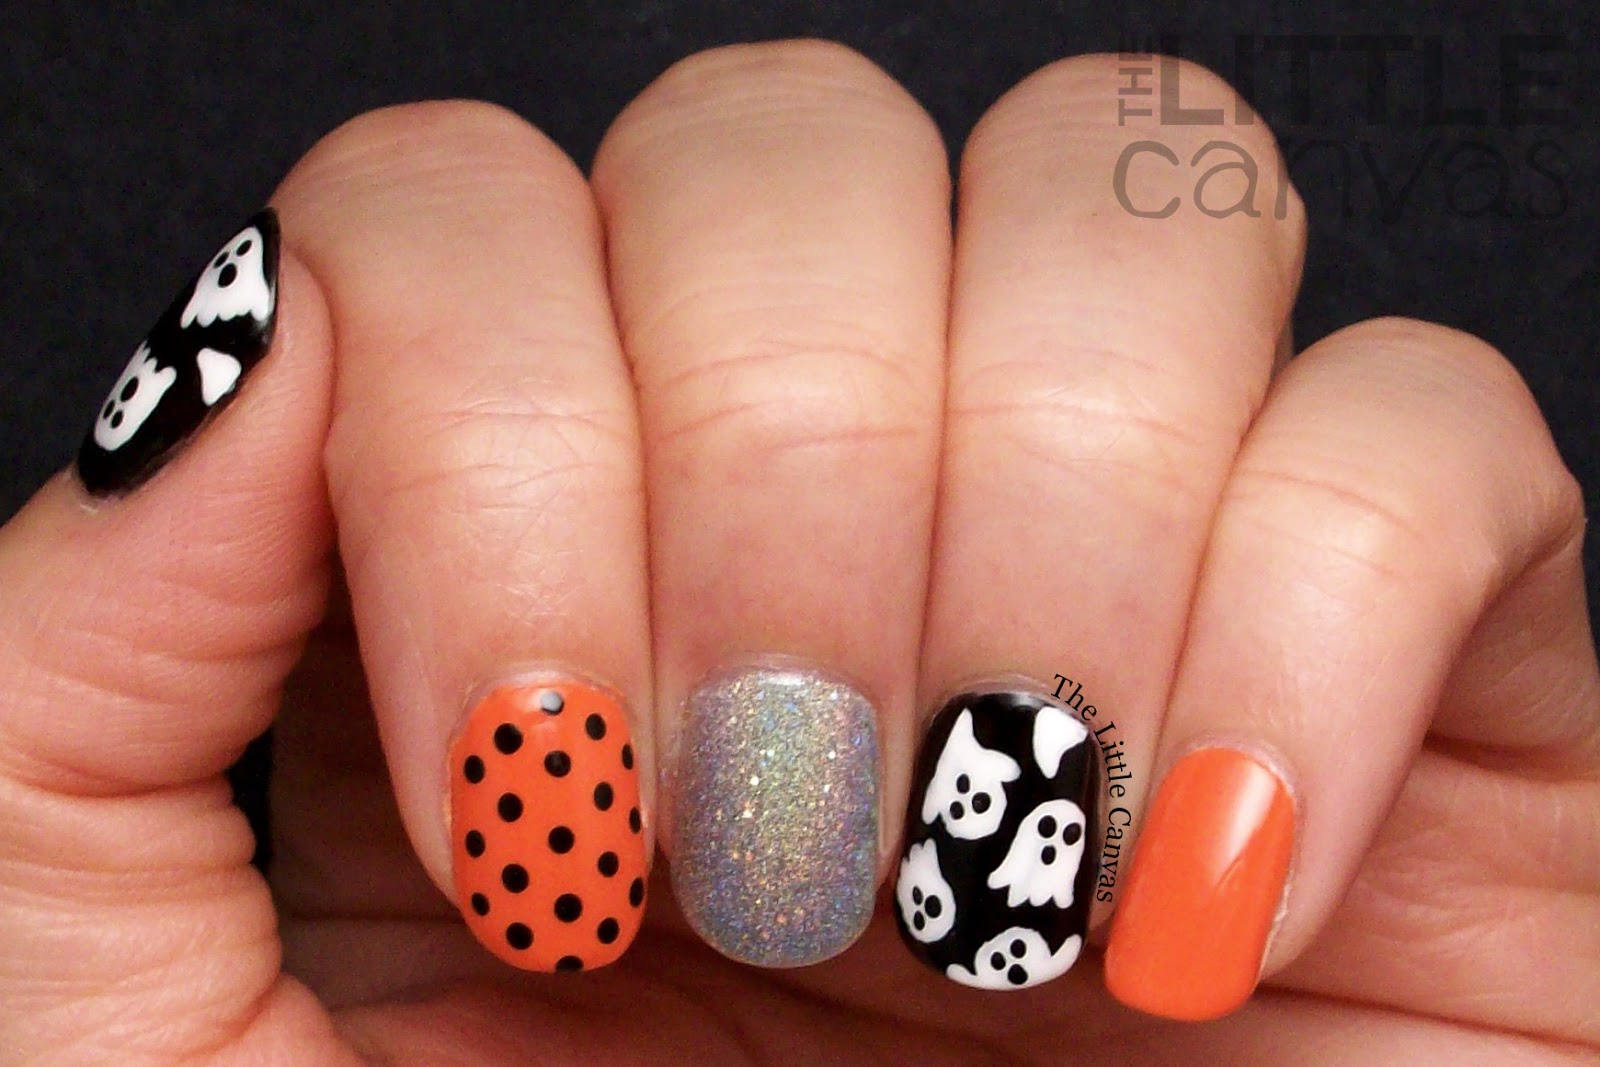
If you want a ghost nail design that is both cute and easy to create, this tutorial is for you. It incorporates fun elements like glitter and rhinestones to give your ghost a little extra sparkle. Start by painting your nails with a white base coat and allow it to dry completely. Then, using a fine tipped brush and black nail polish, create a ghost shape on each nail. You can make them all the same size or mix it up with some larger and smaller ghosts. Next, add some glitter to your design by dipping a q-tip into some clear nail polish and then into a container of glitter. Dab the glitter onto the ghost's body to give it a sparkly effect. You can also use glitter nail polish for an easier application. For an extra touch, add a rhinestone to the ghost's head using a small dot of clear nail polish. This will give your ghost some dimension and make it stand out even more. Finish with a clear top coat to seal in your design.3. Cute and Easy Ghost Nail Design

3. Cute and Easy Ghost Nail Design


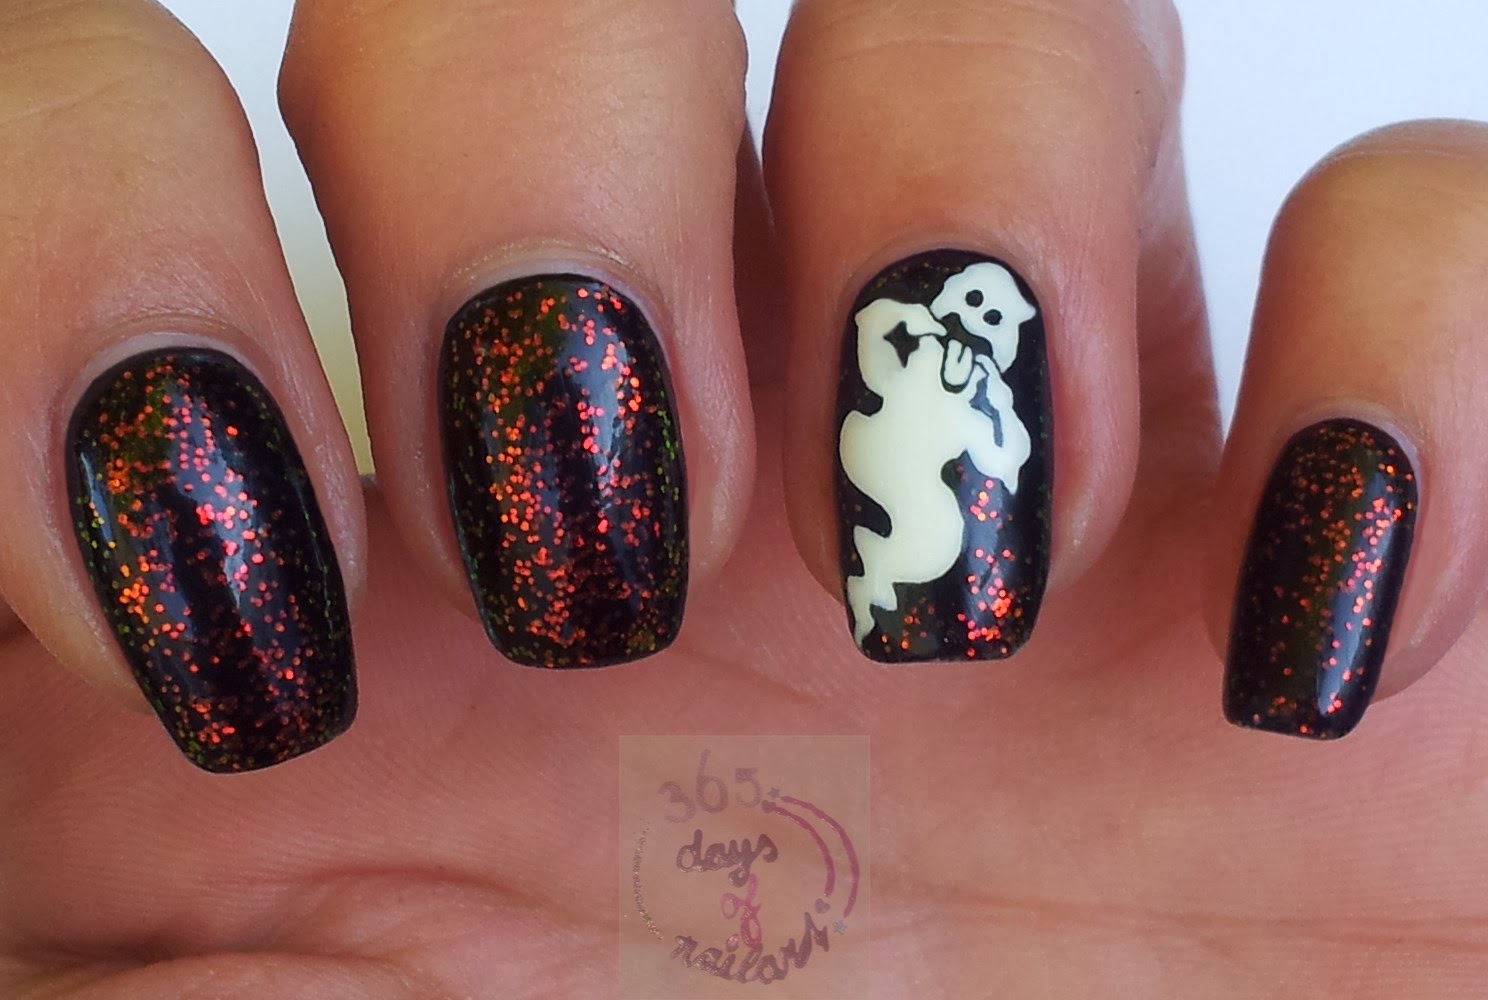
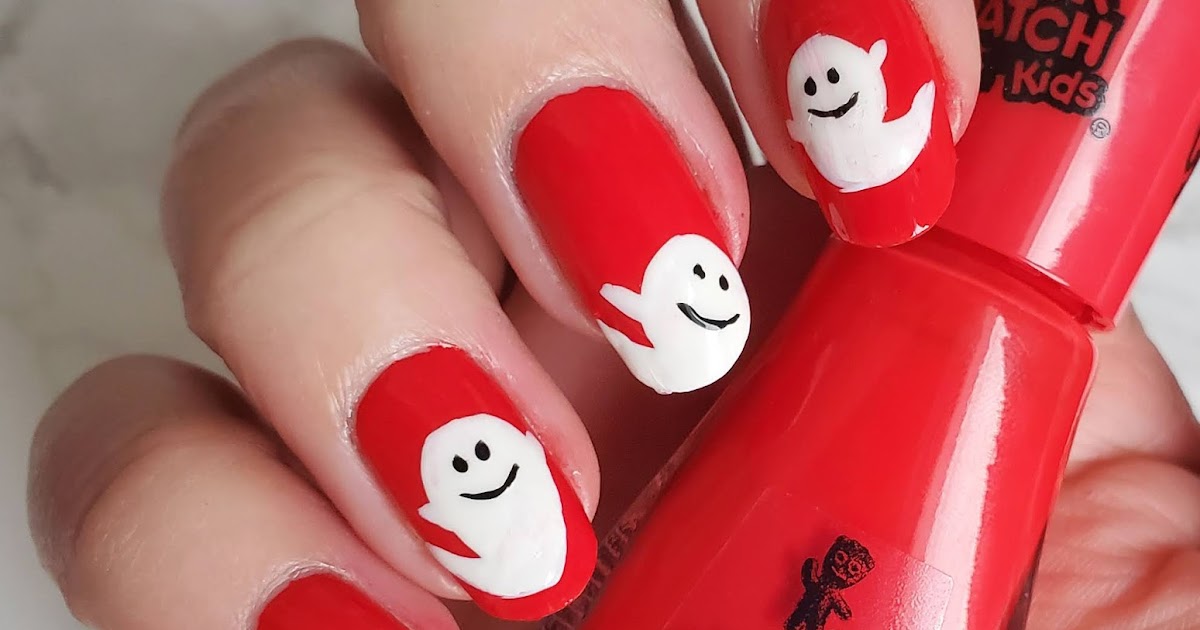
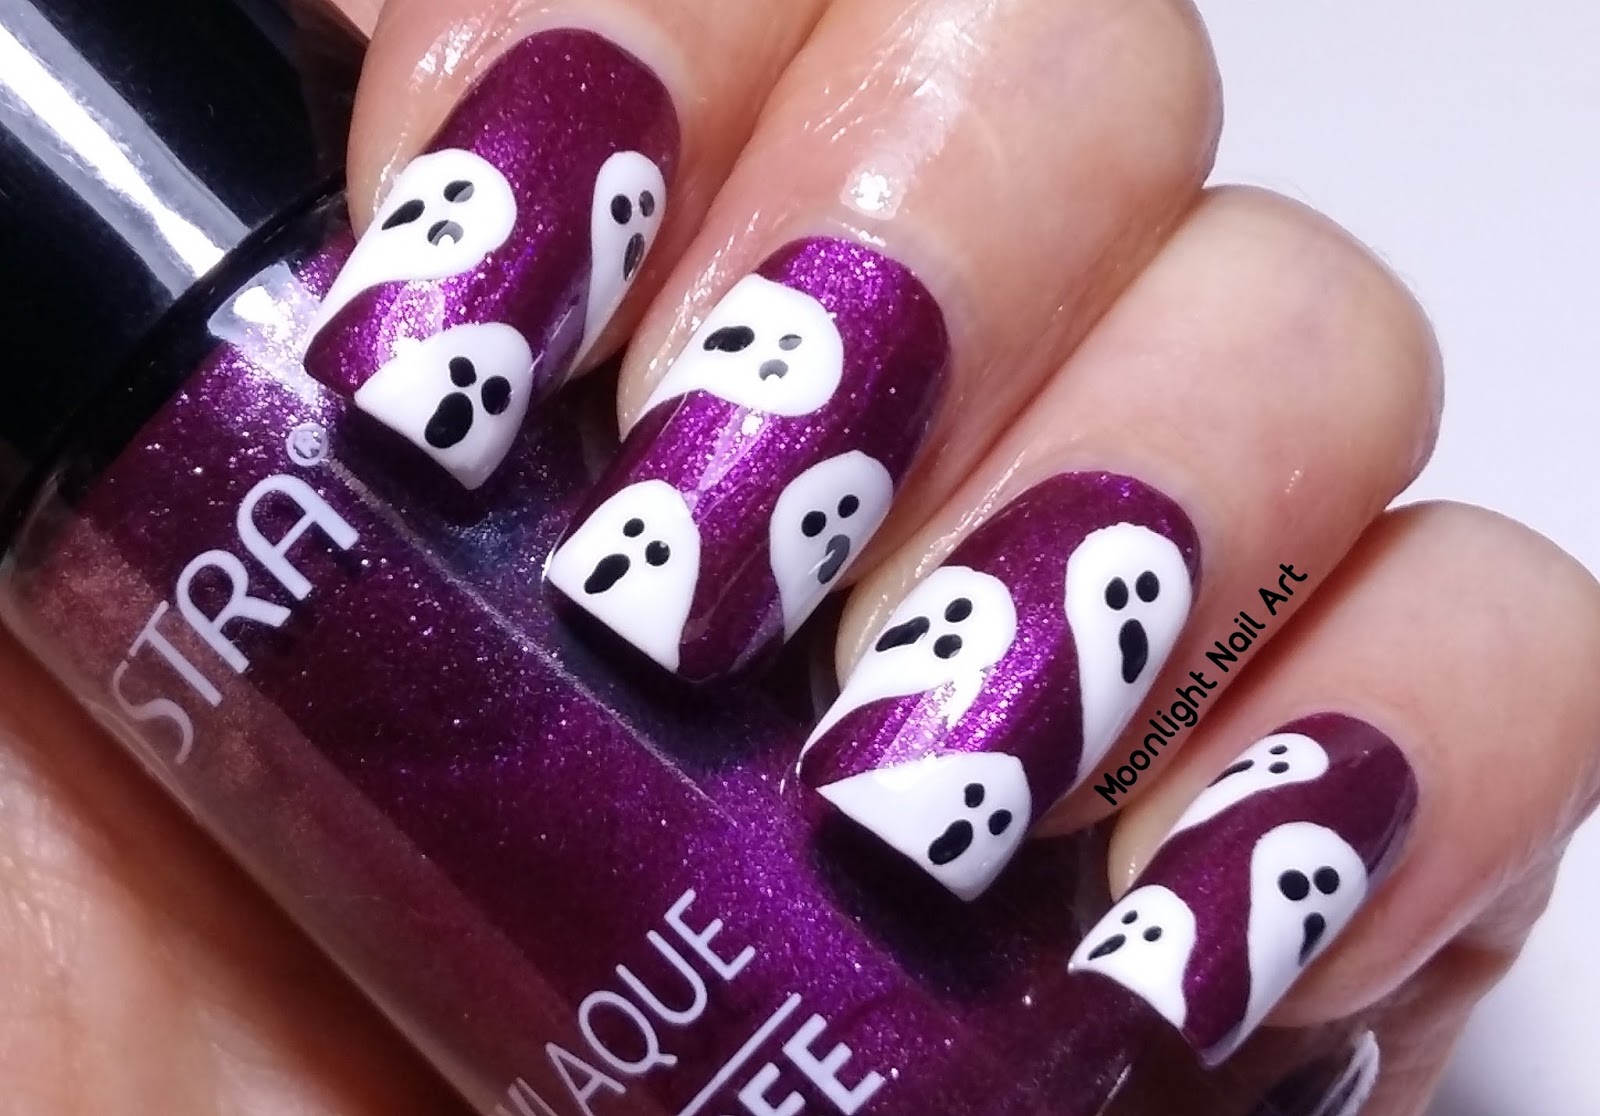
If you're short on time but still want to rock a fun and spooky nail design, this quick and easy ghost nail art is perfect for you. It only requires two nail polish colors and can be done in a matter of minutes. Start by painting your nails with a black base coat. Once it's dry, take a makeup sponge and use it to dab on a white nail polish in a diagonal line across your nail. This will create a gradient effect, with the black showing through at the top and the white becoming more opaque towards the tip. Next, use a dotting tool to create two small dots for the ghost's eyes and a slightly larger dot for the mouth. You can also use a fine tipped brush and black nail polish to create these shapes if you don't have a dotting tool. Seal in your design with a clear top coat and you're done! This quick and easy ghost nail art is perfect for those who want a Halloween-inspired look without putting in too much effort.4. Quick and Easy Ghost Nail Art

4. Quick and Easy Ghost Nail Art

If you're a fan of nail stamping, you can create a ghost nail design using stamping plates. This method allows you to easily transfer intricate designs onto your nails, making it perfect for those who struggle with freehand nail art. Start by painting your nails with a white base coat and allow it to dry completely. Then, choose a Halloween-themed stamping plate with a ghost design and use a nail stamping kit to transfer the design onto your nails. If you don't have a nail stamping kit, you can also use a makeup sponge to lightly dab on some black nail polish over the ghost design on the stamping plate. Carefully press the sponge onto your nail to transfer the design. Finish with a clear top coat to seal in your ghost nail design.5. Ghost Nail Design Using Stamping Plates

5. Ghost Nail Design Using Stamping Plates

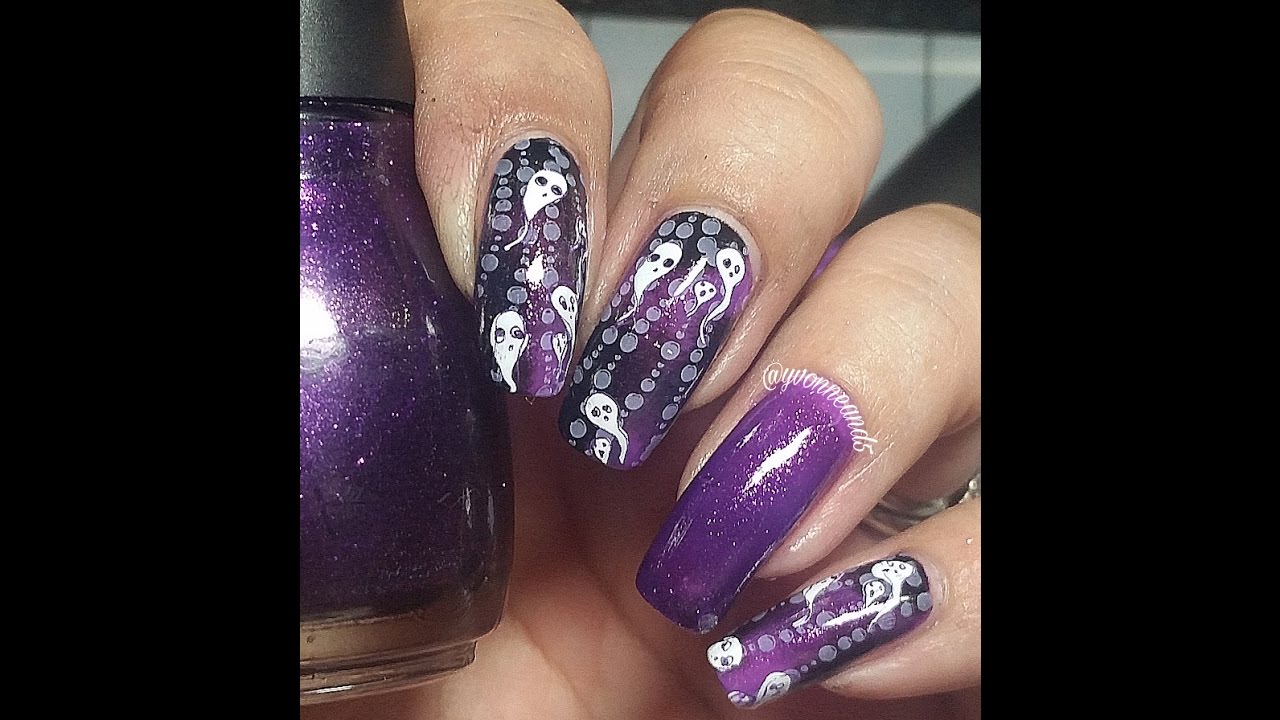
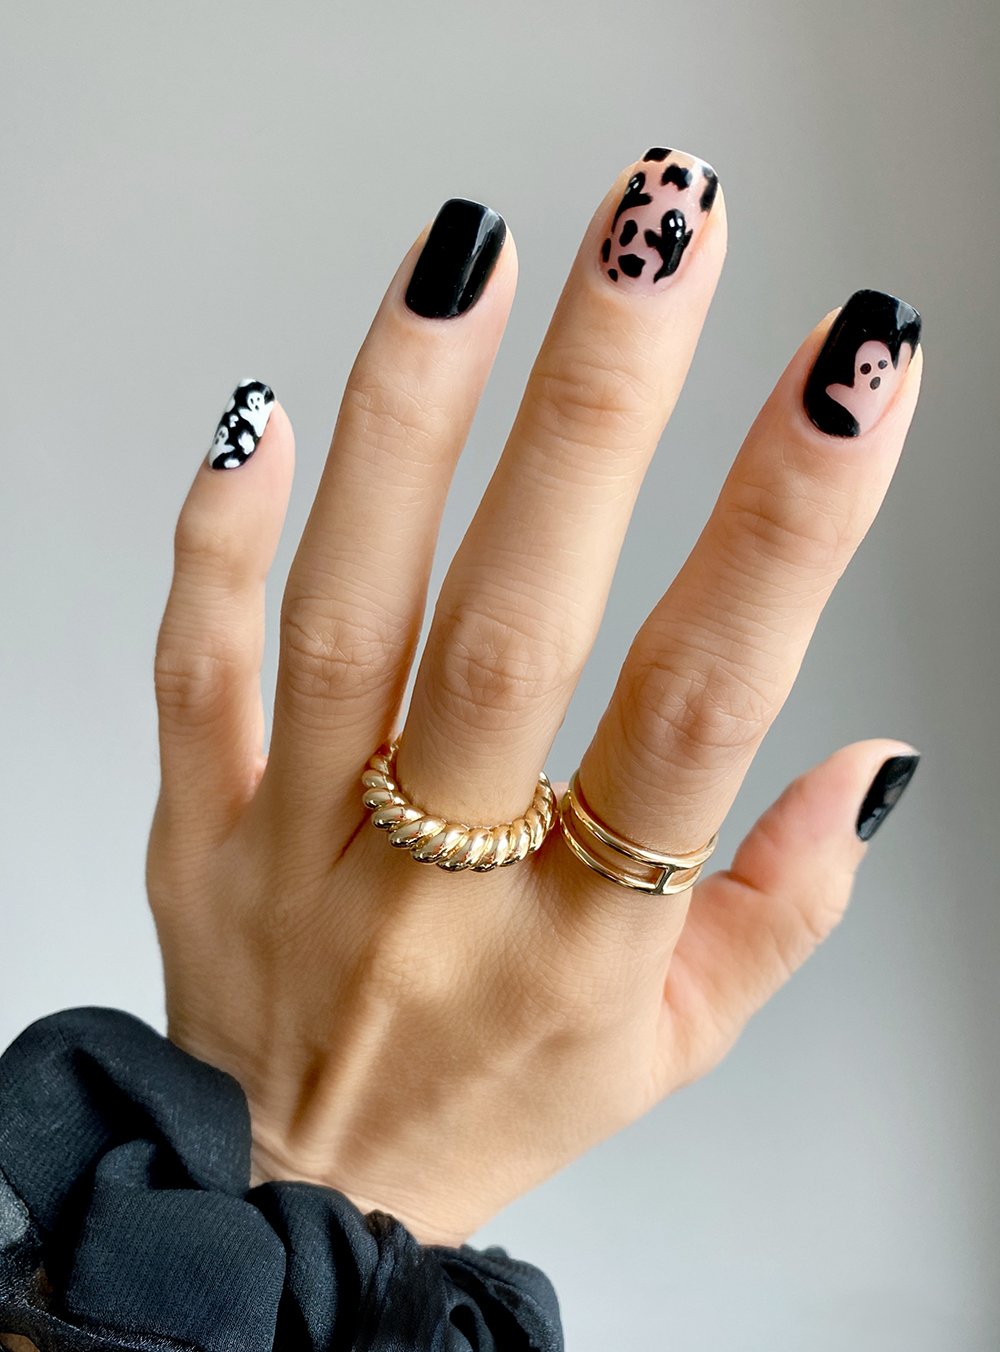
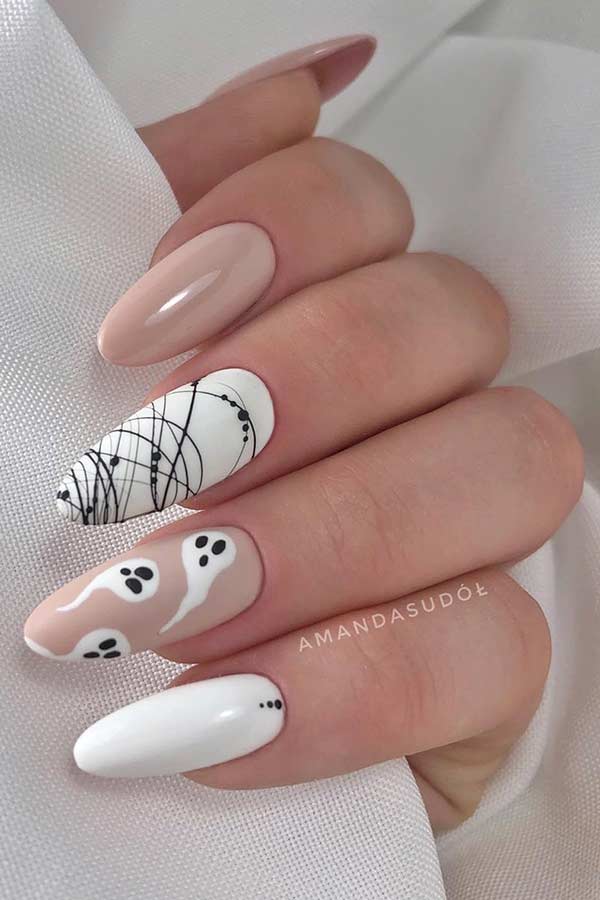
If you prefer a more subtle and minimalist approach to your nail art, this ghost nail design is perfect for you. It incorporates negative space and a simple ghost outline for a chic and understated look. Start by painting your nails with a clear or nude base coat. Once it's dry, use a fine tipped brush and black nail polish to create a small ghost outline on each nail. You can also use a nail art pen for an easier application. Next, using the same nail art pen or fine tipped brush, create some small dots around the ghost's body to represent floating ghosts. You can also use white nail polish to create these dots for a reverse effect. Finish with a clear top coat to seal in your design. This minimalist ghost nail design is perfect for those who want a subtle nod to Halloween without going over the top.6. Minimalist Ghost Nail Design

6. Minimalist Ghost Nail Design
Add some extra sparkle to your ghost nail design with this tutorial that incorporates glitter accents. It's perfect for those who want to take their ghost nails to the next level. Start by painting your nails with a white base coat and allow it to dry completely. Then, using a fine tipped brush and black nail polish, create a ghost shape on each nail. You can also use a nail art pen for a more precise application. Next, add some glitter to your design by using a makeup sponge to lightly dab on some clear nail polish and then onto a container of glitter. Dab the glitter onto the ghost's body to give it a sparkly effect. For an extra touch, add some small rhinestones to the ghost's head using a small dot of clear nail polish. This will add some dimension and make your ghost design stand out even more. Finish with a clear top coat to seal it all in.7. Ghost Nail Design with Glitter Accents

7. Ghost Nail Design with Glitter Accents
If you want a simple and easy ghost nail design, this tutorial using a dotting tool is perfect for you. It's quick, easy, and doesn't require any fancy nail art tools. Start by painting your nails with a white base coat and allow it to dry completely. Then, using a dotting tool or a toothpick, create two small dots for the ghost's eyes and a slightly larger dot for the mouth. You can also use a fine tipped brush and black nail polish to create these shapes if you don't have a dotting tool. Next, use the dotting tool to create a small circle at the top of your nail for the ghost's head. Extend the circle down into a larger oval shape for the body. You can also add some small wispy lines around the edges of the ghost's body to give it a more ethereal appearance. Finish with a clear top coat to seal in your design. This easy ghost nail design is perfect for those who want a simple and cute Halloween-inspired manicure.8. Easy Ghost Nail Design with Dotting Tool


8. Easy Ghost Nail Design with Dotting Tool
For a unique and modern take on a ghost nail design, try incorporating negative space into your manicure. This tutorial will show you how to create a ghost design using negative space for a chic and minimalist look. Start by painting your nails with a clear or nude base coat. Once it's dry, use a fine tipped brush and black nail polish to create a small ghost outline on each nail. You can also use a nail art pen for an easier application. Using the fine tipped brush, create some small dots around the ghost's body to represent floating ghosts. You can also use white nail polish to create these dots for a reverse effect. Finish with a clear top coat to seal in your design. This ghost nail design with negative space is perfect for those who want a modern and chic interpretation of the classic Halloween ghost.9. Ghost Nail Design with Negative Space

9. Ghost Nail Design with Negative Space
To take your ghost nail design to the next level, add some 3D embellishments for a fun and unique look. This tutorial will show you how to incorporate rhinestones and studs into your ghost nails for a fun and edgy manicure. Start by painting your nails with a white base coat and allow it to dry completely. Then, using a fine tipped brush or a nail art pen, create a ghost shape on each nail. You can also use a dotting tool for a simpler design. Next, use a small dot of clear nail polish to adhere rhinestones or studs to the ghost's head. You can also add them around the ghost's body for a fun and edgy look. Finish with a clear top coat to seal in your design. This ghost nail design with 3D embellishments is perfect for those who want to add a little edge to their Halloween manicure.10. Ghost Nail Design with 3D Embellishments


10. Ghost Nail Design with 3D Embellishments

Creating a Spooky Yet Simple Ghost Nail Design

Why Choose Ghost Nails?
 If you're someone who loves Halloween or just enjoys a good scare, then ghost nails are the perfect choice for your next nail design. Not only are they a fun and festive option for the holiday, but they can also be worn year-round for those who love all things spooky.
Ghost nail designs
are also a great way to express your creativity and add a unique touch to your overall look.
If you're someone who loves Halloween or just enjoys a good scare, then ghost nails are the perfect choice for your next nail design. Not only are they a fun and festive option for the holiday, but they can also be worn year-round for those who love all things spooky.
Ghost nail designs
are also a great way to express your creativity and add a unique touch to your overall look.
What You'll Need
 Before you begin, gather all the necessary supplies for
this easy ghost nail design
. You'll need a base coat, a white nail polish, a black nail polish, a top coat, a thin brush, and a dotting tool. You can also use nail stickers or decals if you prefer a quicker and simpler method.
Before you begin, gather all the necessary supplies for
this easy ghost nail design
. You'll need a base coat, a white nail polish, a black nail polish, a top coat, a thin brush, and a dotting tool. You can also use nail stickers or decals if you prefer a quicker and simpler method.
Step-by-Step Guide
 Now, let's get to the fun part – creating your ghost nail design! Follow these simple steps for a hauntingly beautiful look:
Step 1:
Start off by applying a base coat to protect your nails and create a smooth canvas for the polish to adhere to.
Step 2:
Next, apply two coats of white nail polish to each nail. Make sure to let each coat dry completely before moving on to the next step.
Step 3:
Using a thin brush and black nail polish, create two small dots for the eyes towards the top of each nail.
Step 4:
Using the dotting tool and the black polish, create a mouth by making a small curved line under the eyes.
Step 5:
For a more detailed look, you can use the thin brush to add some swirls or lines to represent the ghost's flowing sheet.
Step 6:
Let your nails dry completely and then finish off with a top coat to seal in your design and add shine.
Now, let's get to the fun part – creating your ghost nail design! Follow these simple steps for a hauntingly beautiful look:
Step 1:
Start off by applying a base coat to protect your nails and create a smooth canvas for the polish to adhere to.
Step 2:
Next, apply two coats of white nail polish to each nail. Make sure to let each coat dry completely before moving on to the next step.
Step 3:
Using a thin brush and black nail polish, create two small dots for the eyes towards the top of each nail.
Step 4:
Using the dotting tool and the black polish, create a mouth by making a small curved line under the eyes.
Step 5:
For a more detailed look, you can use the thin brush to add some swirls or lines to represent the ghost's flowing sheet.
Step 6:
Let your nails dry completely and then finish off with a top coat to seal in your design and add shine.
Final Thoughts
 With just a few simple steps, you can achieve a
spooky and cute ghost nail design
that is perfect for any Halloween party or just for a fun everyday look. Remember, don't be afraid to get creative and add your own twist to this design. Experiment with different colors or patterns to make it your own. Now, go ahead and show off your ghostly nails!
With just a few simple steps, you can achieve a
spooky and cute ghost nail design
that is perfect for any Halloween party or just for a fun everyday look. Remember, don't be afraid to get creative and add your own twist to this design. Experiment with different colors or patterns to make it your own. Now, go ahead and show off your ghostly nails!


