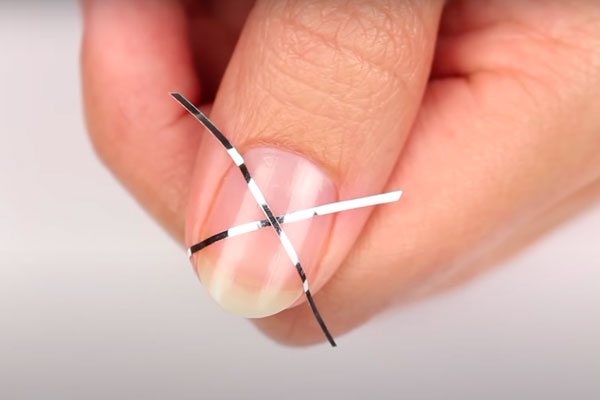
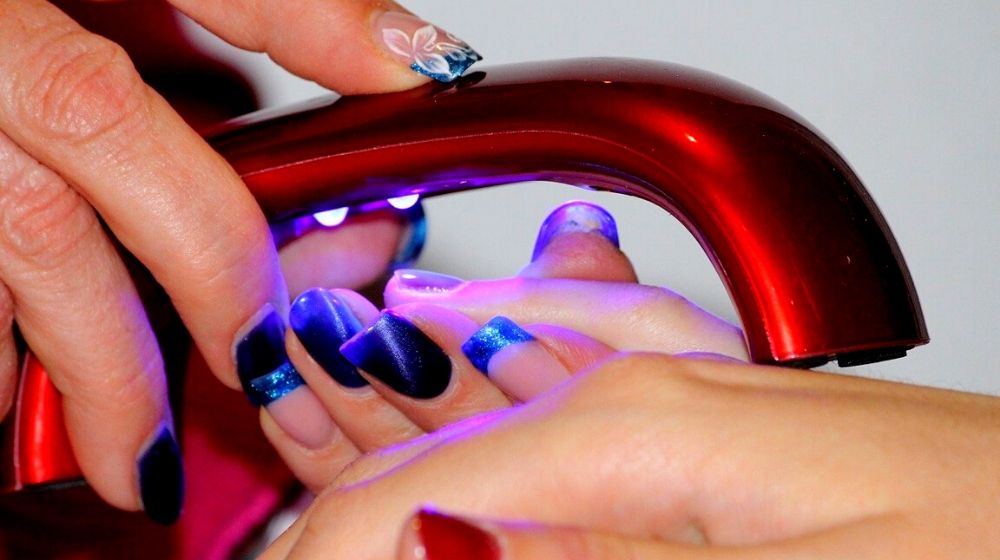
If you're tired of the same old solid color gel manicures, why not try a geometric design with tape? This modern and edgy look is perfect for those who love clean lines and bold shapes. Plus, using tape makes it easy to achieve precise and symmetrical designs. To create this design, start by applying a base coat and two coats of your desired gel color. Once dry, cut small pieces of tape and place them on your nails in a geometric pattern. You can create triangles, squares, diamonds, or any other shape that you desire. Then, using a different gel color, paint over the tape and your entire nail. Carefully remove the tape while the gel polish is still wet to reveal your clean and crisp geometric design. Finish with a top coat for long-lasting wear. This design is not only trendy and eye-catching, but it also allows you to get creative with different color combinations and patterns. You can also experiment with using different widths of tape for a more intricate design. With this gel nail design, the possibilities are endless.1. Geometric Gel Nail Design with Tape


1. Geometric Gel Nail Design with Tape


If you're new to gel nail art and still getting the hang of it, using tape is a great way to create a stunning design without too much effort. This easy gel nail design with tape is perfect for beginners and requires minimal tools. To create this look, start by applying a base coat and two coats of your desired gel color. Once dry, cut thin strips of tape and place them on your nails in a criss-cross pattern. Then, paint over the tape and your entire nail with a different gel color. Carefully remove the tape while the gel polish is still wet to reveal your clean and simple design. Finish with a top coat for a professional and glossy finish. This design is not only easy to achieve, but it also looks chic and stylish. You can also experiment with different color combinations and patterns to make it your own. Don't be afraid to get creative with this simple and effective gel nail design.2. Easy Gel Nail Design with Tape


2. Easy Gel Nail Design with Tape


For a feminine and elegant gel nail design, try incorporating tape into a floral pattern. This design is perfect for special occasions or for those who love a touch of nature on their nails. To create this look, start by applying a base coat and two coats of your desired gel color. Once dry, cut small pieces of tape and place them on your nails in a floral pattern. You can create roses, daisies, or any other flower that you desire. Then, using a different gel color, paint over the tape and your entire nail. Carefully remove the tape while the gel polish is still wet to reveal your beautiful floral design. Finish with a top coat for a long-lasting and glossy finish. This gel nail design with tape adds a delicate and intricate touch to your nails. You can also add glitter or rhinestones to enhance the design even further. With this design, you'll have a bouquet of flowers on your fingertips.3. Floral Gel Nail Design with Tape


3. Floral Gel Nail Design with Tape
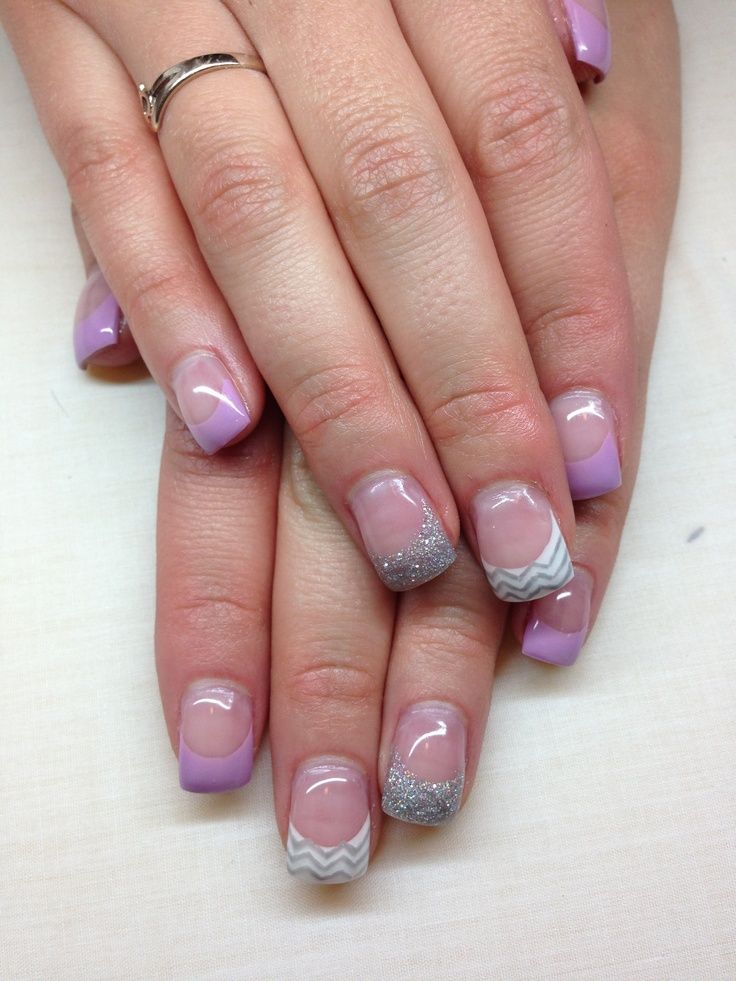
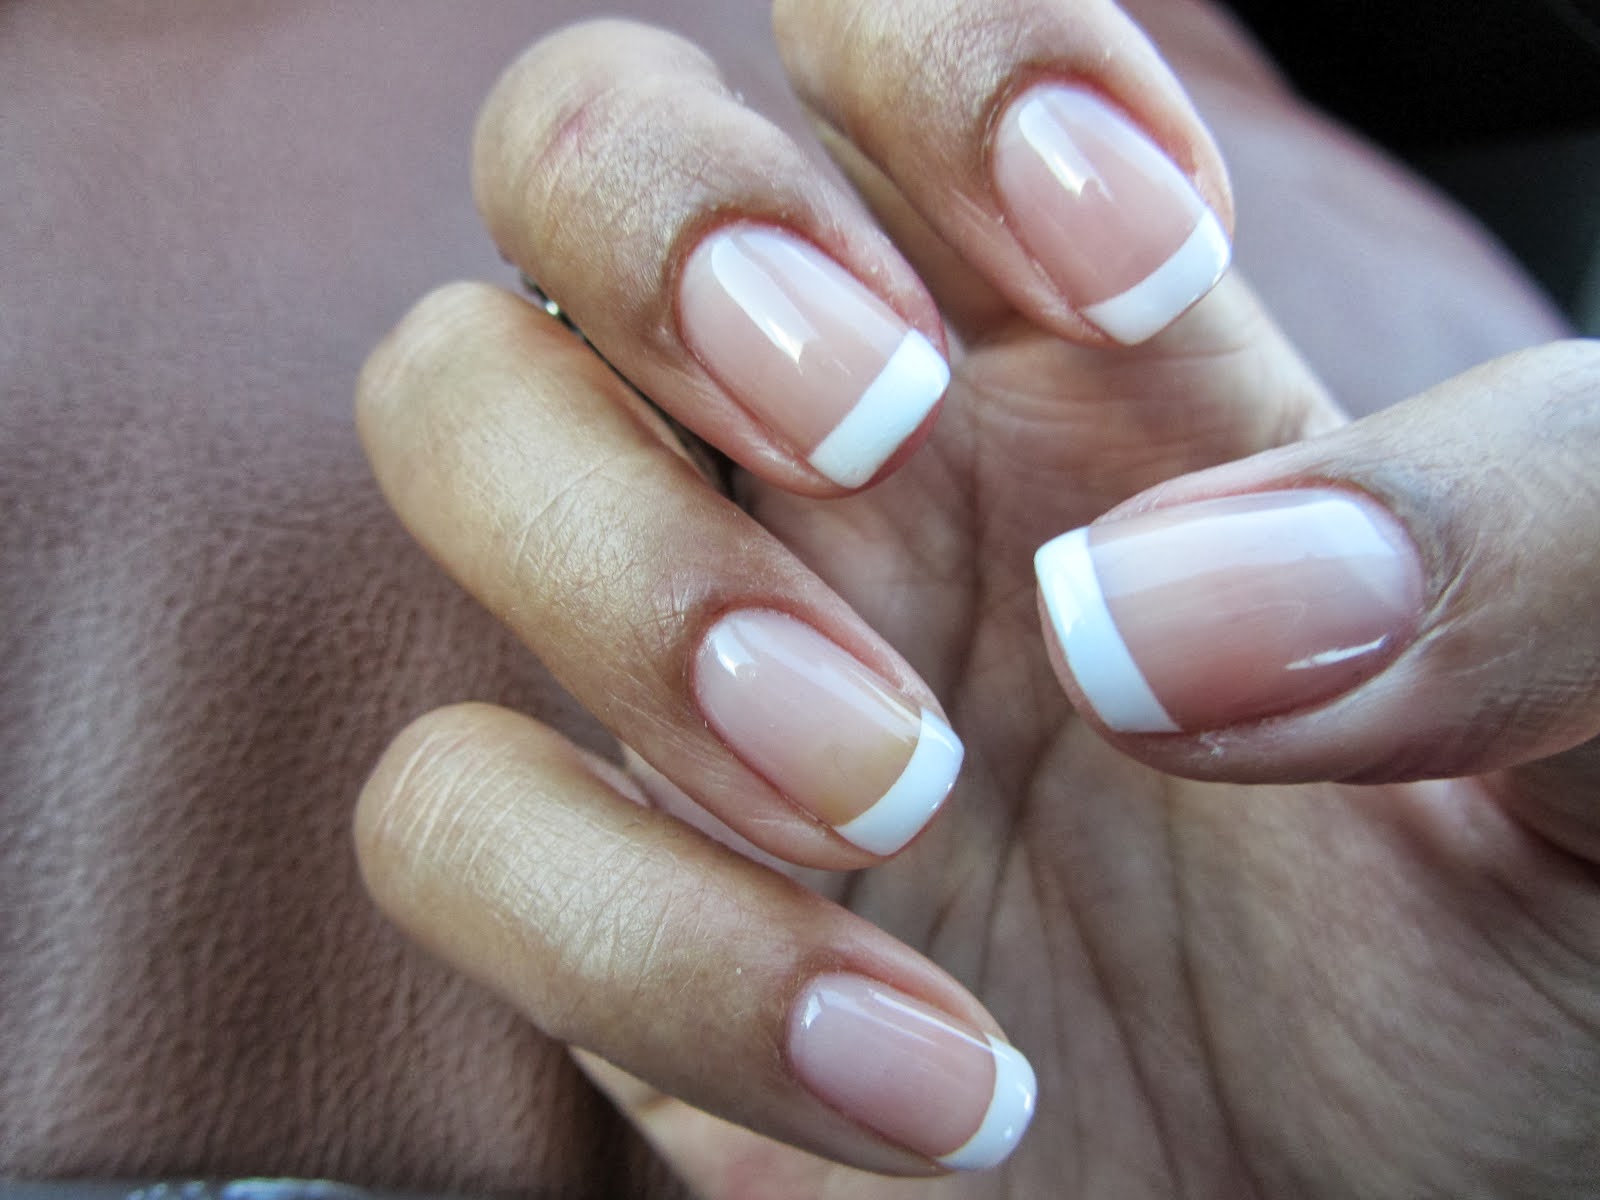
The French tip manicure is a timeless and classic look that never goes out of style. With the help of tape, you can achieve a perfect and precise French tip gel nail design in no time. To create this look, start by applying a base coat and two coats of a light pink or nude gel color. Once dry, cut thin strips of tape and place them at the tip of your nails. Then, using a white gel polish, paint over the tip of your nails and the tape. Carefully remove the tape while the gel polish is still wet to reveal your clean and crisp French tip. Finish with a top coat for a flawless and elegant finish. This gel nail design is perfect for any occasion and goes well with any outfit. You can also experiment with different colors for the tip to add a unique twist to the classic French tip manicure.4. French Tip Gel Nail Design with Tape


4. French Tip Gel Nail Design with Tape


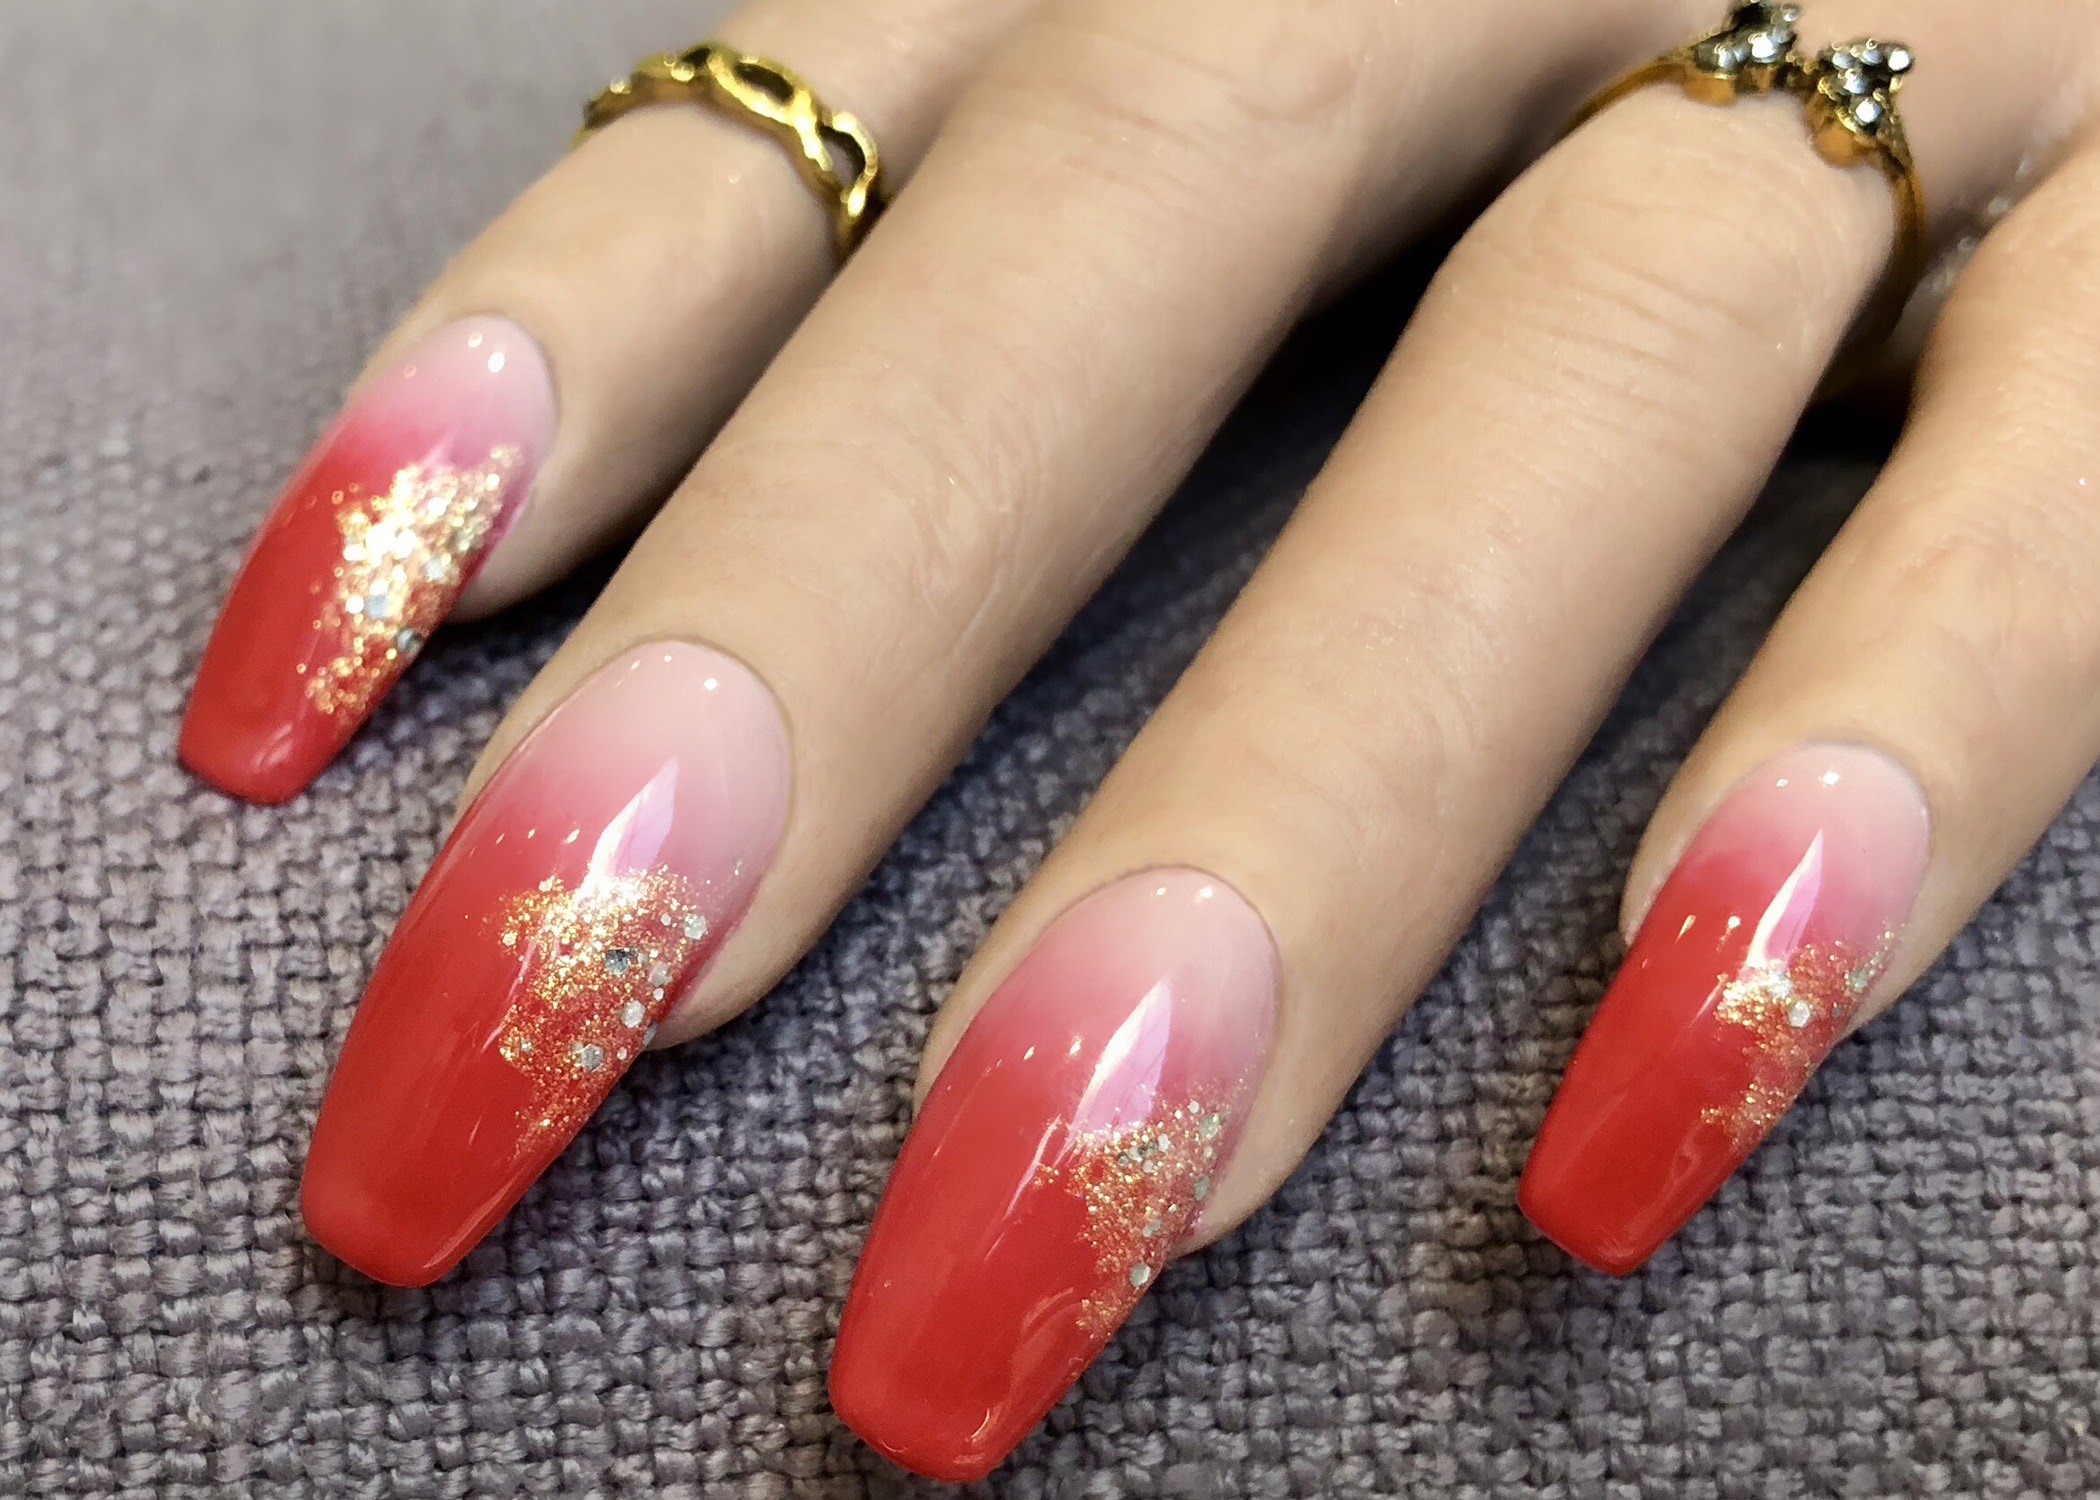
The ombre trend has taken over the world of beauty, and it's no surprise that it has also made its way to gel nail designs. Using tape, you can create a stunning ombre effect that will make your nails stand out. To achieve this look, start by applying a base coat and two coats of a light color gel polish. Once dry, cut small pieces of tape and place them on your nails in a diagonal pattern. Then, using a sponge, dab on a darker gel color on the bottom half of your nail. Carefully remove the tape while the gel polish is still wet to reveal your gradient ombre design. Finish with a top coat for a flawless and smooth finish. This gel nail design is perfect for those who love a subtle yet trendy look. You can also experiment with different color combinations to create a unique ombre design.5. Ombre Gel Nail Design with Tape


5. Ombre Gel Nail Design with Tape


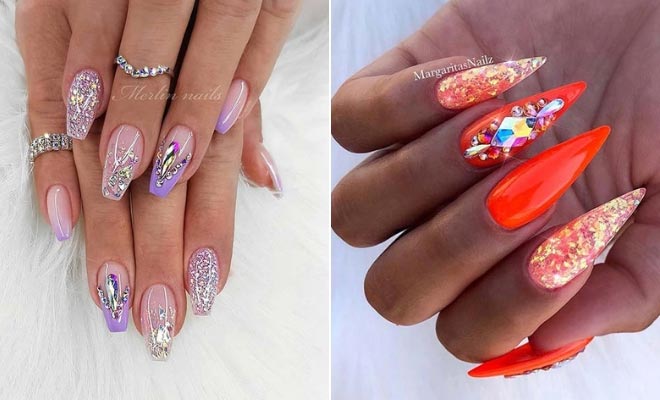
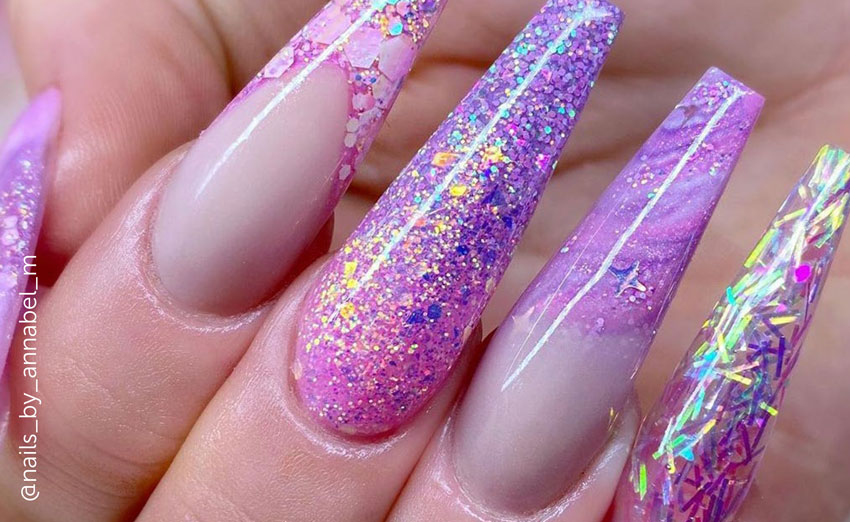
For a glamorous and sparkly gel nail design, try using tape to create a glittery accent. This design is perfect for a night out or for those who love a bit of bling on their nails. To create this look, start by applying a base coat and two coats of your desired gel color. Once dry, cut small pieces of tape and place them in a diagonal pattern on your nails. Then, using a glitter gel polish, paint over the tape and your entire nail. Carefully remove the tape while the gel polish is still wet to reveal your glittery accent. Finish with a top coat for a dazzling and glittery finish. This gel nail design with tape adds a touch of glamour and sparkle to any manicure. You can also experiment with different types of glitter, such as chunky or fine, to create different looks.6. Glitter Gel Nail Design with Tape


6. Glitter Gel Nail Design with Tape


Stripes are a classic and versatile design that can be incorporated into any gel manicure. With the help of tape, you can achieve perfectly straight and even stripes on your nails. To create this look, start by applying a base coat and two coats of your desired gel color. Once dry, cut thin strips of tape and place them on your nails in a vertical or horizontal pattern. Then, using a different gel color, paint over the tape and your entire nail. Carefully remove the tape while the gel polish is still wet to reveal your clean and crisp stripes. Finish with a top coat for a sleek and stylish finish. This gel nail design with tape is perfect for those who love a minimalist and modern look. You can also experiment with different color combinations and patterns for a unique design.7. Striped Gel Nail Design with Tape

7. Striped Gel Nail Design with Tape

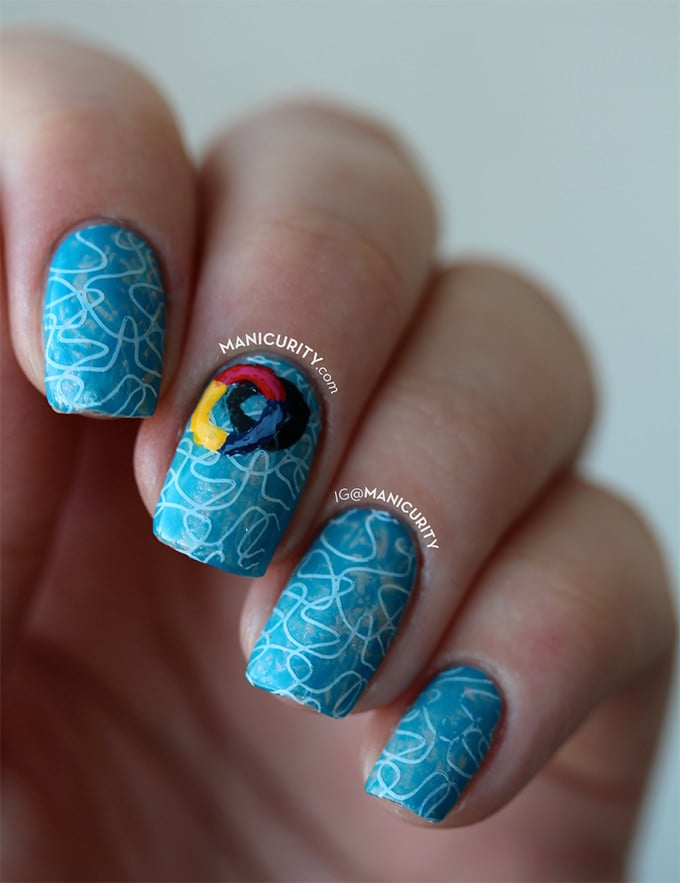
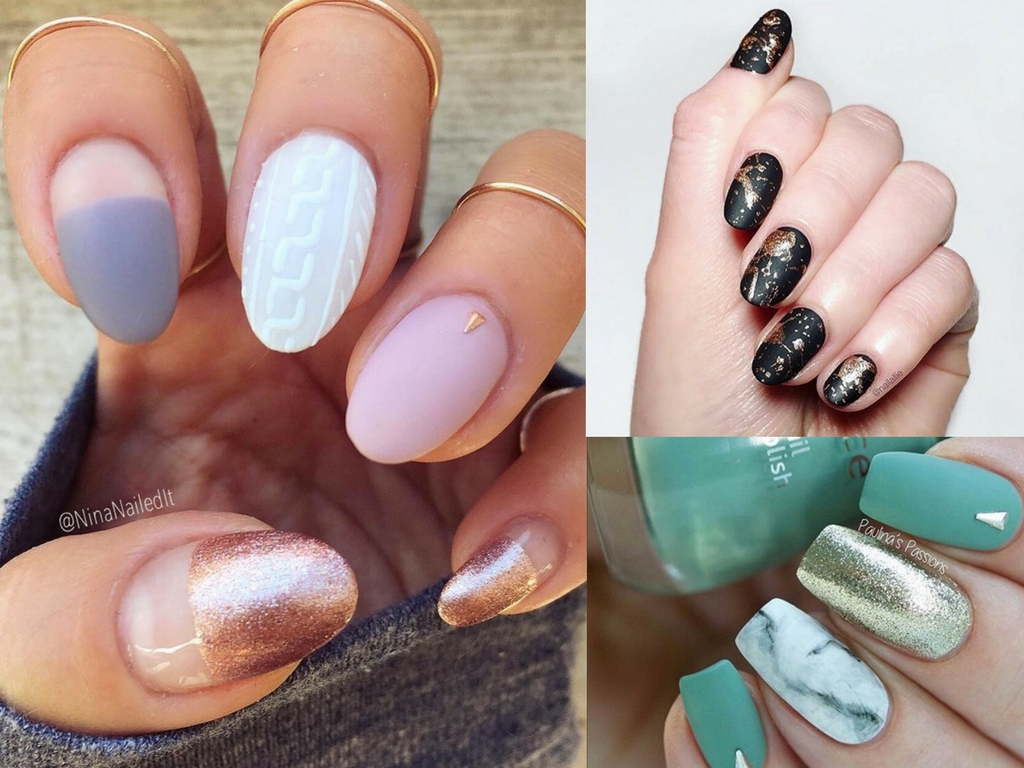
If you're feeling artsy and want to try something different, an abstract gel nail design with tape is the way to go. This design allows you to get creative and create a unique and eye-catching look. To achieve this look, start by applying a base coat and two coats of your desired gel color. Once dry, cut small pieces of tape and place them on your nails in a random pattern. Then, using a different gel color, paint over the tape and your entire nail. Carefully remove the tape while the gel polish is still wet to reveal your abstract design. Finish with a top coat for a glossy and one-of-a-kind finish. This gel nail design is perfect for those who love to experiment with different colors and patterns. You can also add rhinestones or glitter to enhance the abstract design even further.8. Abstract Gel Nail Design with Tape


8. Abstract Gel Nail Design with Tape
A negative space design is a chic and trendy way to show off your natural nails while still incorporating gel polish. With the help of tape, you can create a negative space design that looks clean and modern. To achieve this look, start by applying a base coat and two coats of a light color gel polish. Once dry, cut small pieces of tape and place them in a diagonal or horizontal pattern on your nails, leaving some areas of your natural nail exposed. Then, using a different gel color, paint over the tape and your entire nail. Carefully remove the tape while the gel polish is still wet to reveal your negative space design. Finish with a top coat for a sleek and edgy finish. This gel nail design with tape allows you to show off your natural nails while still having a pop of color. You can also experiment with different patterns and colors for a unique negative space design.9. Negative Space Gel Nail Design with Tape
9. Negative Space Gel Nail Design with Tape

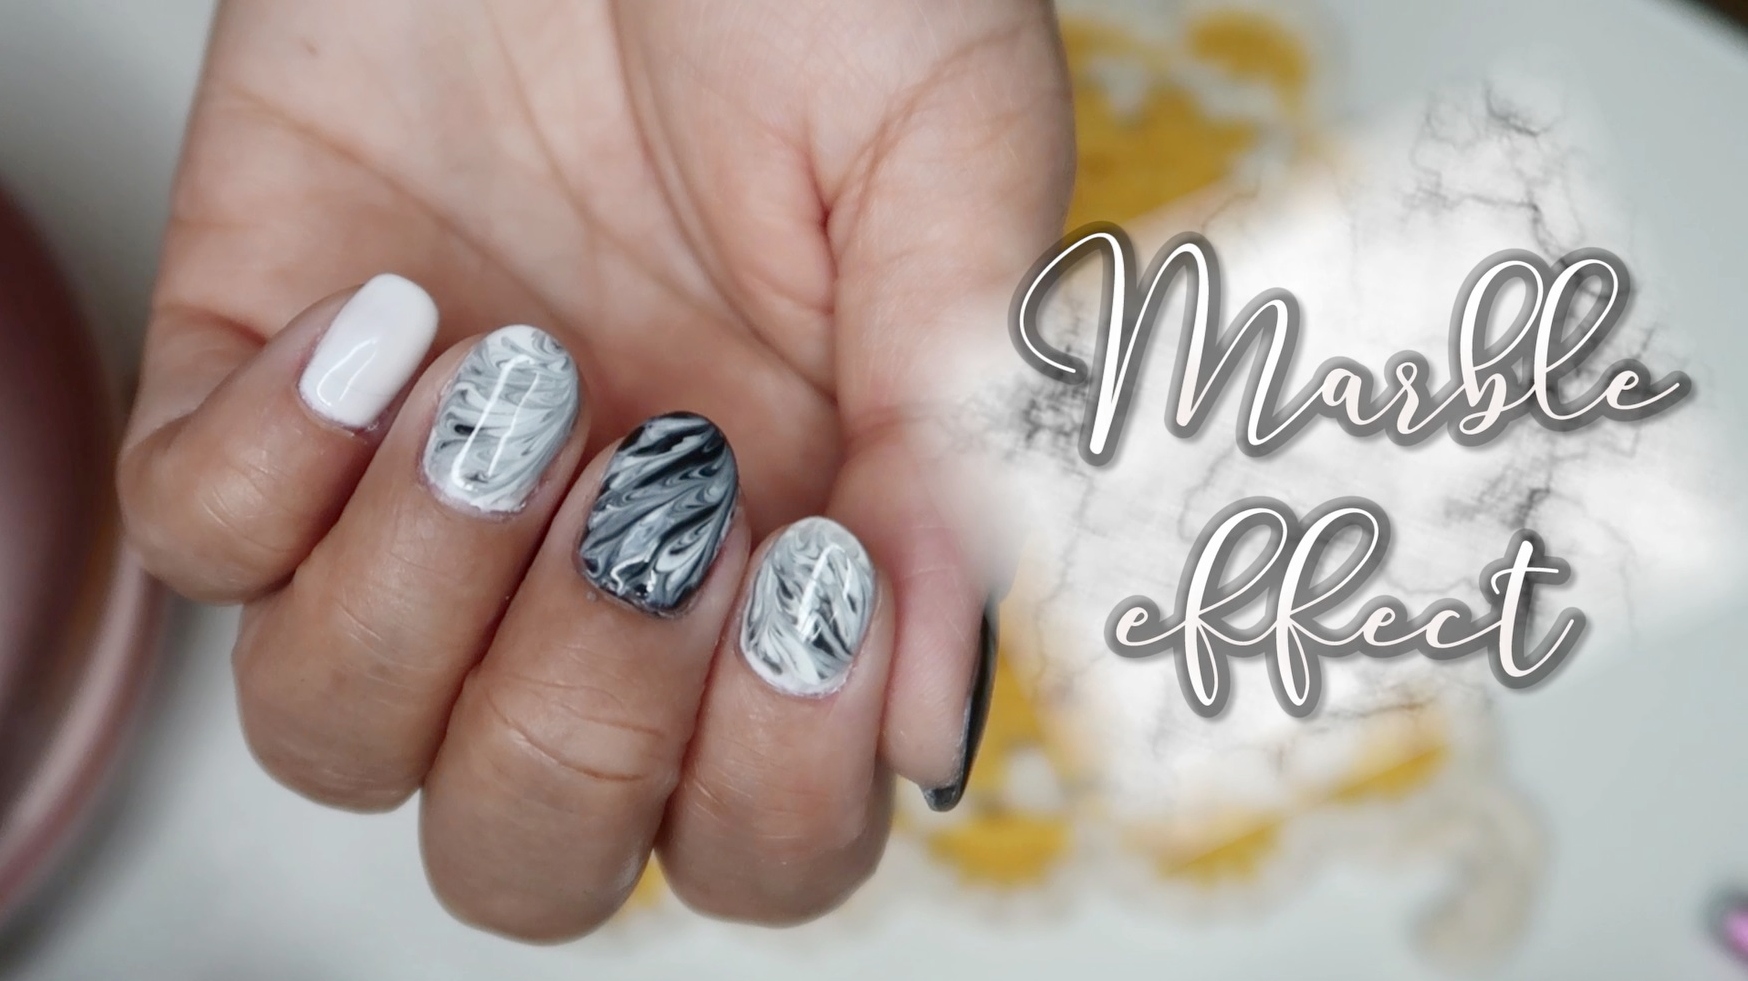
Marble is a popular and elegant design that can be incorporated into gel nails with the help of tape. This design is perfect for special occasions or for those who want a sophisticated and chic look. To create this look, start by applying a base coat and two coats of a light color gel polish. Once dry, cut small pieces of tape and place them in a random pattern on your nails. Then, using a sponge, dab on a darker gel color on your nails. Carefully remove the tape while the gel polish is still wet to reveal your marble design. Finish with a top coat for a polished and luxurious finish. This gel nail design with tape adds a touch of elegance and luxury to any manicure. You can also experiment with different colors and patterns to create a unique marble design. With these top 10 gel nail designs with tape, you can elevate your gel manicures and create unique and eye-catching looks. Don't be afraid to get creative and experiment with different colors, patterns, and techniques to make these designs your own. With the help of tape, you can achieve precise and professional-looking nail art without having to spend hours in the salon. So grab your favorite gel polishes and tapes, and get ready to create some stunning gel nail designs.10. Marble Gel Nail Design with Tape

10. Marble Gel Nail Design with Tape


Gel Nail Design with Tape: The Latest Trend in House Design

Why Gel Nails are the New Must-Have for Your House
 Gel nails have been a popular trend in the fashion world for years, but did you know they can also be used as a design element in your house? Gel nail design with tape is the latest craze in house design, and for good reason. Not only does it add a unique and eye-catching touch to any space, but it is also a cost-effective and easy way to elevate your home's style. In this article, we will explore the benefits and techniques of using gel nail design with tape to transform your home into a modern and chic oasis.
The Benefits of Gel Nail Design with Tape
 Gel nails are known for their durability and long-lasting wear
, making them the perfect material to use in house design. Unlike traditional paint or wallpaper, gel nails can withstand wear and tear from daily activities, making them ideal for high-traffic areas such as hallways, kitchens, and bathrooms. Additionally, gel nails are easy to clean and maintain, making them a practical choice for busy homeowners.
But the benefits of gel nail design with tape go beyond just practicality.
Gel nails come in a wide range of colors, patterns, and textures
, allowing for endless possibilities in house design. Whether you want a subtle and elegant look or a bold and statement-making design, gel nails can help you achieve your desired aesthetic. Furthermore, gel nails can be easily removed or changed, making them a great option for those who like to switch up their home decor frequently.
Gel nails are known for their durability and long-lasting wear
, making them the perfect material to use in house design. Unlike traditional paint or wallpaper, gel nails can withstand wear and tear from daily activities, making them ideal for high-traffic areas such as hallways, kitchens, and bathrooms. Additionally, gel nails are easy to clean and maintain, making them a practical choice for busy homeowners.
But the benefits of gel nail design with tape go beyond just practicality.
Gel nails come in a wide range of colors, patterns, and textures
, allowing for endless possibilities in house design. Whether you want a subtle and elegant look or a bold and statement-making design, gel nails can help you achieve your desired aesthetic. Furthermore, gel nails can be easily removed or changed, making them a great option for those who like to switch up their home decor frequently.
How to Incorporate Gel Nail Design with Tape in Your House
 Now that you know the benefits of gel nail design with tape, let's explore some ways you can incorporate it into your house design. One popular technique is to use gel nail strips to create an accent wall in a room. This is a great way to add a pop of color or pattern to a space without overwhelming the entire room. Another idea is to use gel nail strips to create a unique backsplash in your kitchen or bathroom. This not only adds a stylish touch but also protects your walls from splashes and stains.
For those who are feeling more adventurous,
gel nails can also be used to create intricate and detailed designs on furniture or home accessories
. This technique is perfect for those looking to add a personalized and creative touch to their home. From tables and chairs to picture frames and vases, the possibilities are endless with gel nail design.
In conclusion, gel nail design with tape is a versatile and affordable way to enhance the look and feel of your house. With its durability, wide range of options, and easy application, it is no wonder why it has become the latest trend in house design. So why not give it a try and add a little bit of flair to your home? Your guests will be impressed, and you'll have a one-of-a-kind space that reflects your unique style.
Now that you know the benefits of gel nail design with tape, let's explore some ways you can incorporate it into your house design. One popular technique is to use gel nail strips to create an accent wall in a room. This is a great way to add a pop of color or pattern to a space without overwhelming the entire room. Another idea is to use gel nail strips to create a unique backsplash in your kitchen or bathroom. This not only adds a stylish touch but also protects your walls from splashes and stains.
For those who are feeling more adventurous,
gel nails can also be used to create intricate and detailed designs on furniture or home accessories
. This technique is perfect for those looking to add a personalized and creative touch to their home. From tables and chairs to picture frames and vases, the possibilities are endless with gel nail design.
In conclusion, gel nail design with tape is a versatile and affordable way to enhance the look and feel of your house. With its durability, wide range of options, and easy application, it is no wonder why it has become the latest trend in house design. So why not give it a try and add a little bit of flair to your home? Your guests will be impressed, and you'll have a one-of-a-kind space that reflects your unique style.


