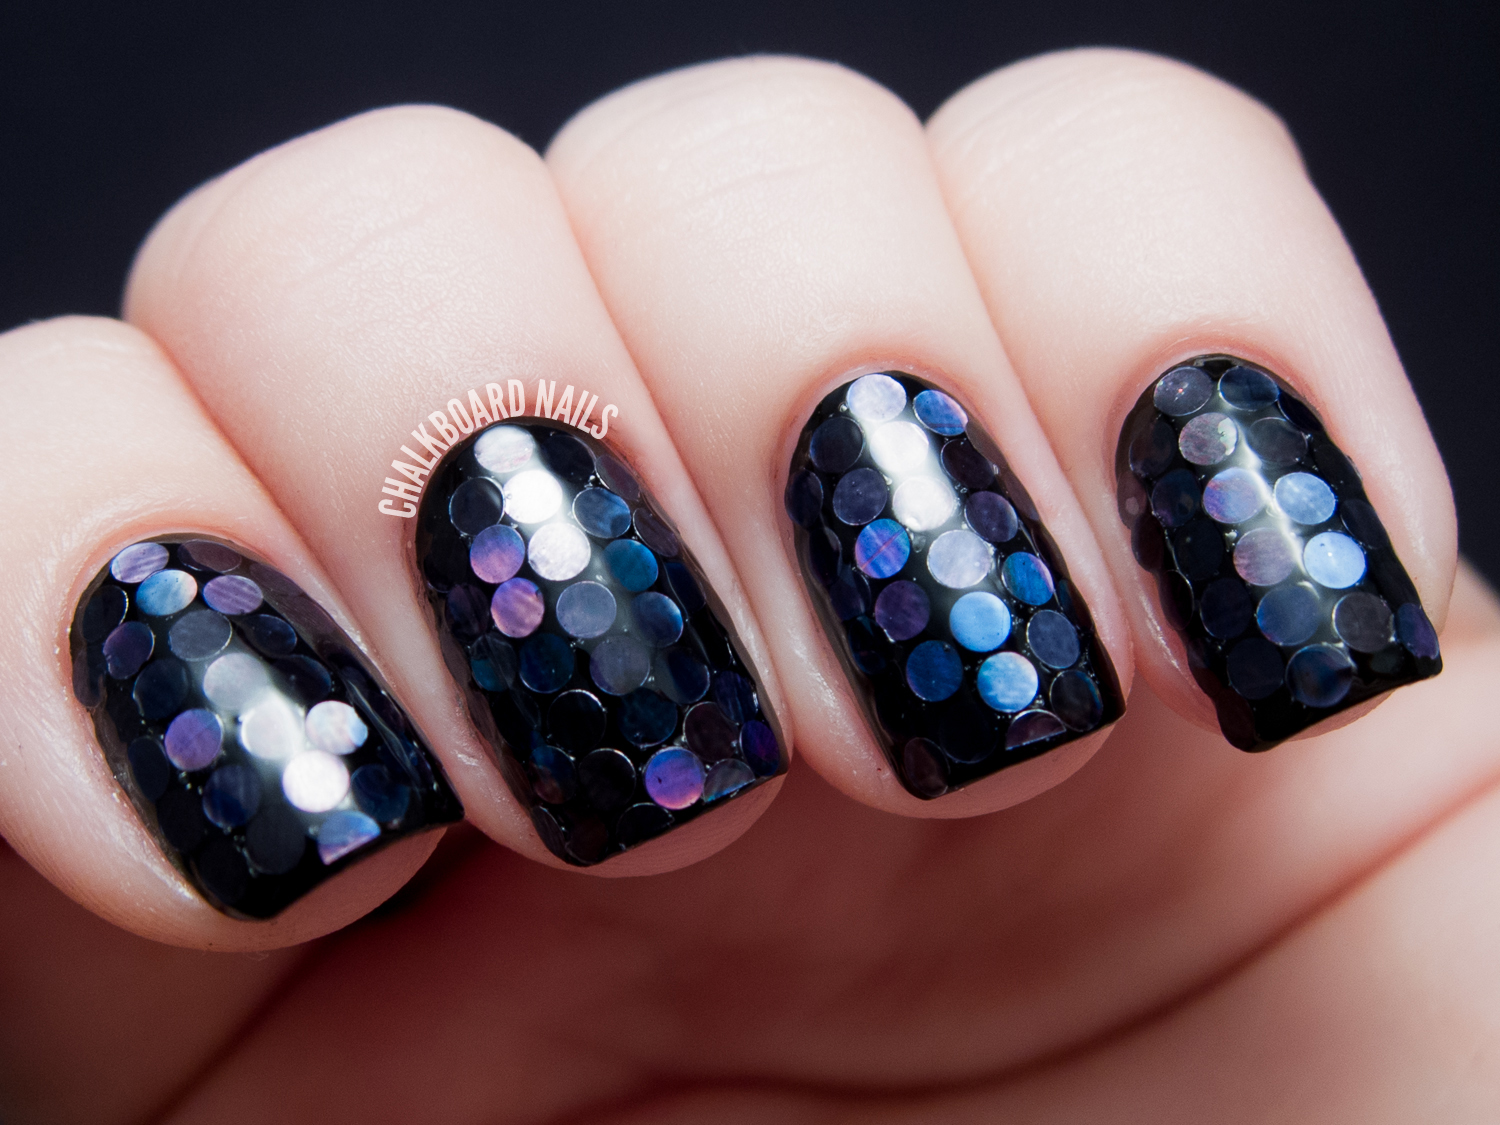
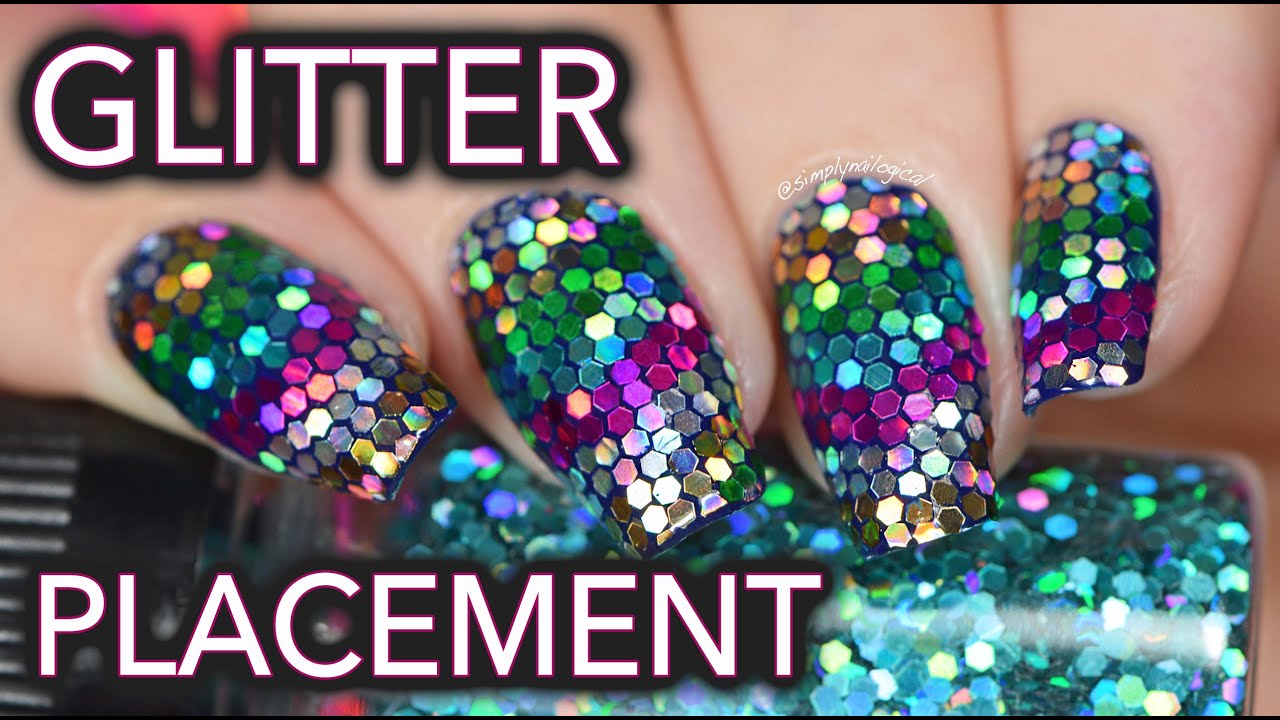
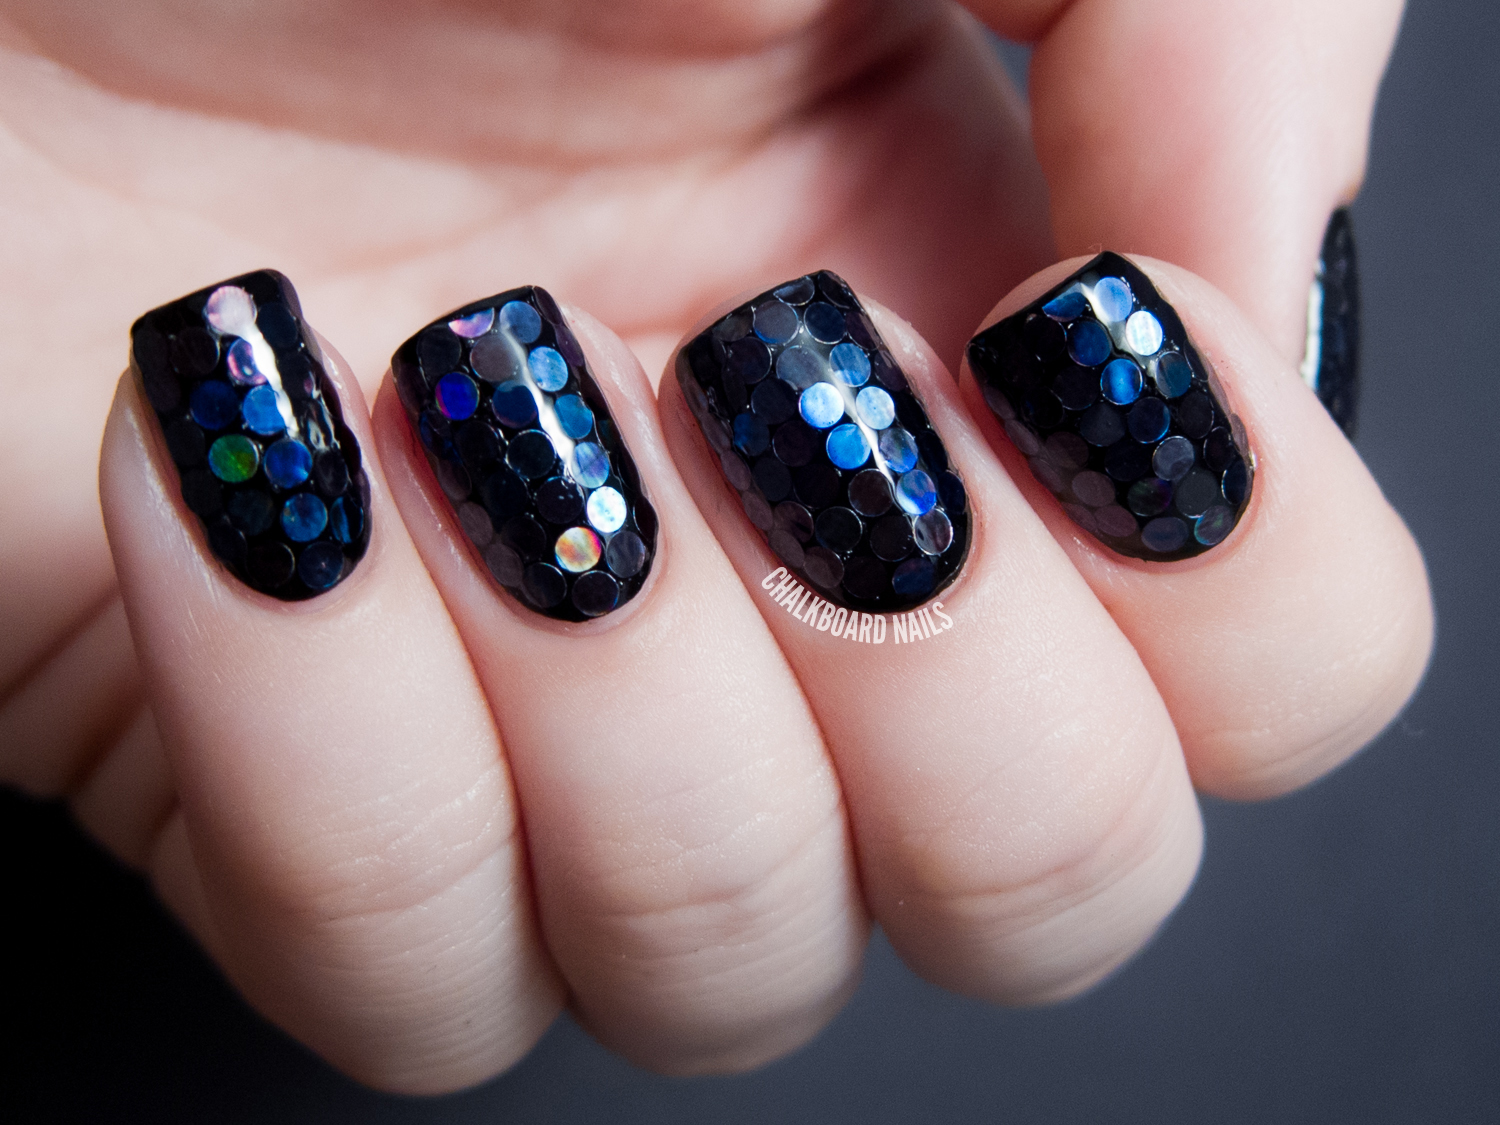
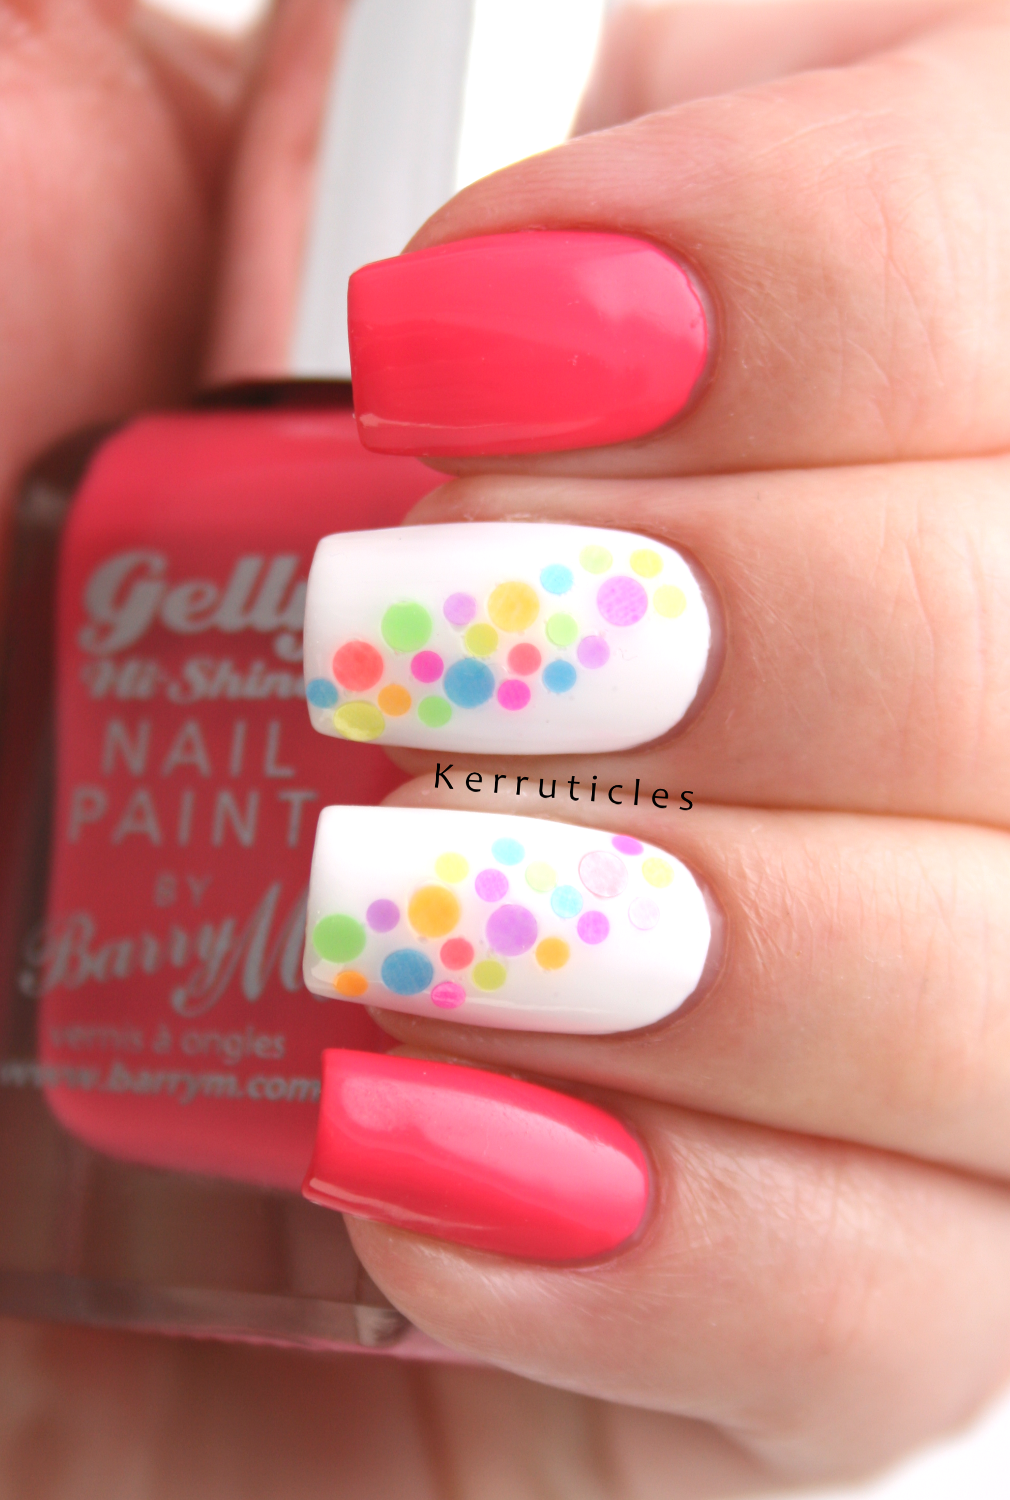
Creating beautiful and intricate nail designs has never been easier with glitter placement nail art. This trendy technique allows you to add a touch of sparkle to your manicure by strategically placing glitter on your nails. In this tutorial, we will guide you step-by-step on how to achieve a stunning glitter placement nail design. First, start by prepping your nails. Remove any old polish and shape your nails to your desired length and shape. Apply a base coat to protect your natural nails and allow it to dry completely. This will also help the glitter to adhere better to your nails. Next, choose your desired glitter color and size. You can opt for a fine glitter for a more subtle look, or go bold with chunky glitter. Gold and silver are classic choices, but don't be afraid to experiment with other colors such as pink, blue, or purple. Take a small amount of glitter and pour it onto a clean surface, such as a piece of paper or foil. Using a small brush or toothpick, carefully pick up the glitter and place it onto your nail. You can create various patterns and designs, such as a glitter ombre or glitter gradient. Be creative and have fun with it! Once you have placed the glitter on your nail, gently press it down with your finger or a clean brush to ensure it sticks to the base coat. Repeat this process on all your nails and let the glitter set for a few minutes before moving onto the next step. Once the glitter is completely dry, carefully apply a top coat over your nails. This will seal in the glitter and prevent it from rubbing off. Allow the top coat to dry completely before using your hands. And voila, you now have a gorgeous glitter placement nail design!1. Glitter Placement Nail Art Tutorial


1. Glitter Placement Nail Art Tutorial


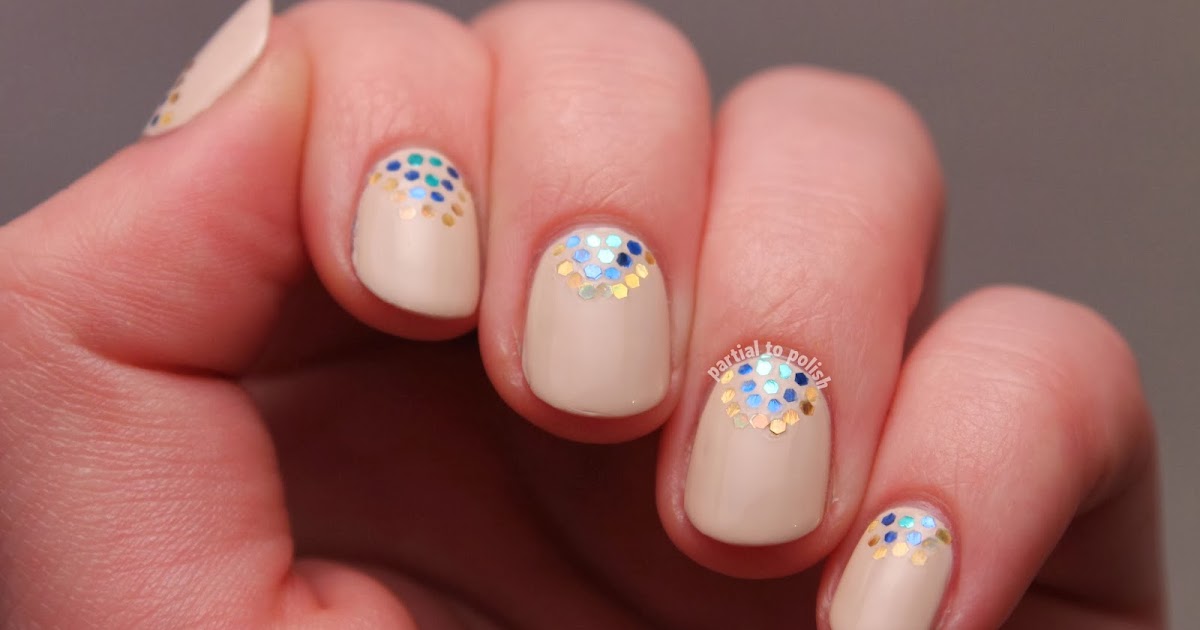
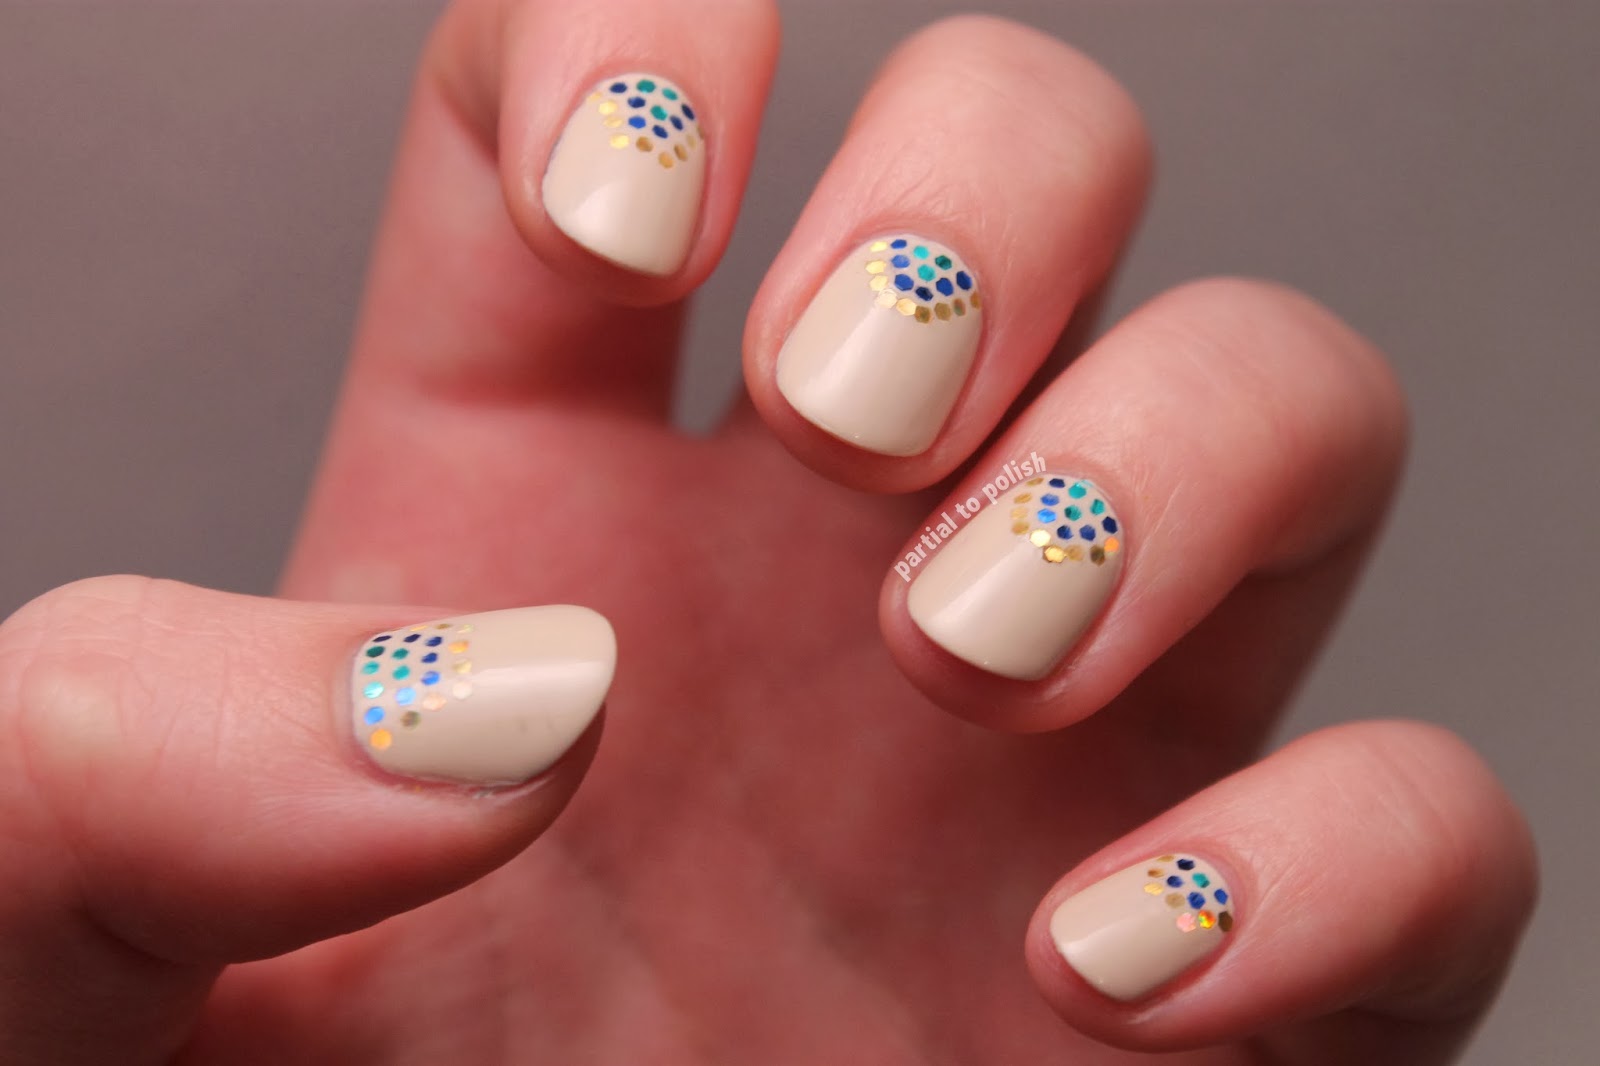
If you're new to nail art, don't worry, glitter placement designs can be easy to achieve. Here's a simple yet stunning design that anyone can do at home. Start by painting your nails with a base color of your choice. A light color, such as white or soft pink, works best to make the glitter pop. Let the base color dry completely. Next, take a small amount of chunky glitter and place it on the base of your nail, near the cuticle. Using a toothpick or small brush, gently spread the glitter towards the tip of your nail, creating a glitter gradient. You can add more or less glitter depending on your preference. For an extra touch of glam, you can also add small rhinestones or jewels on top of the glitter. Once you're happy with the placement, seal it in with a top coat and let it dry completely. And there you have it, an easy but eye-catching glitter placement nail design.2. Easy Glitter Placement Nail Design

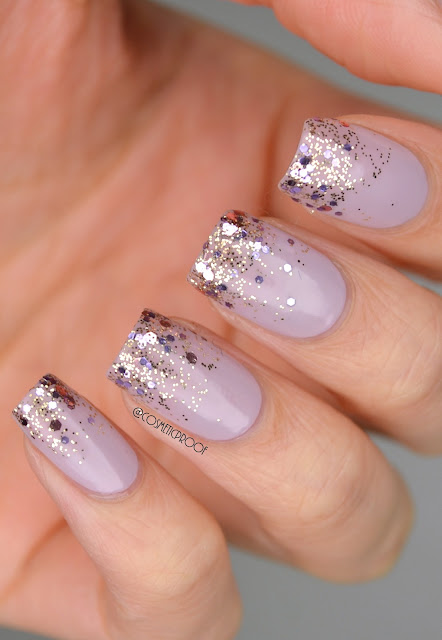

2. Easy Glitter Placement Nail Design
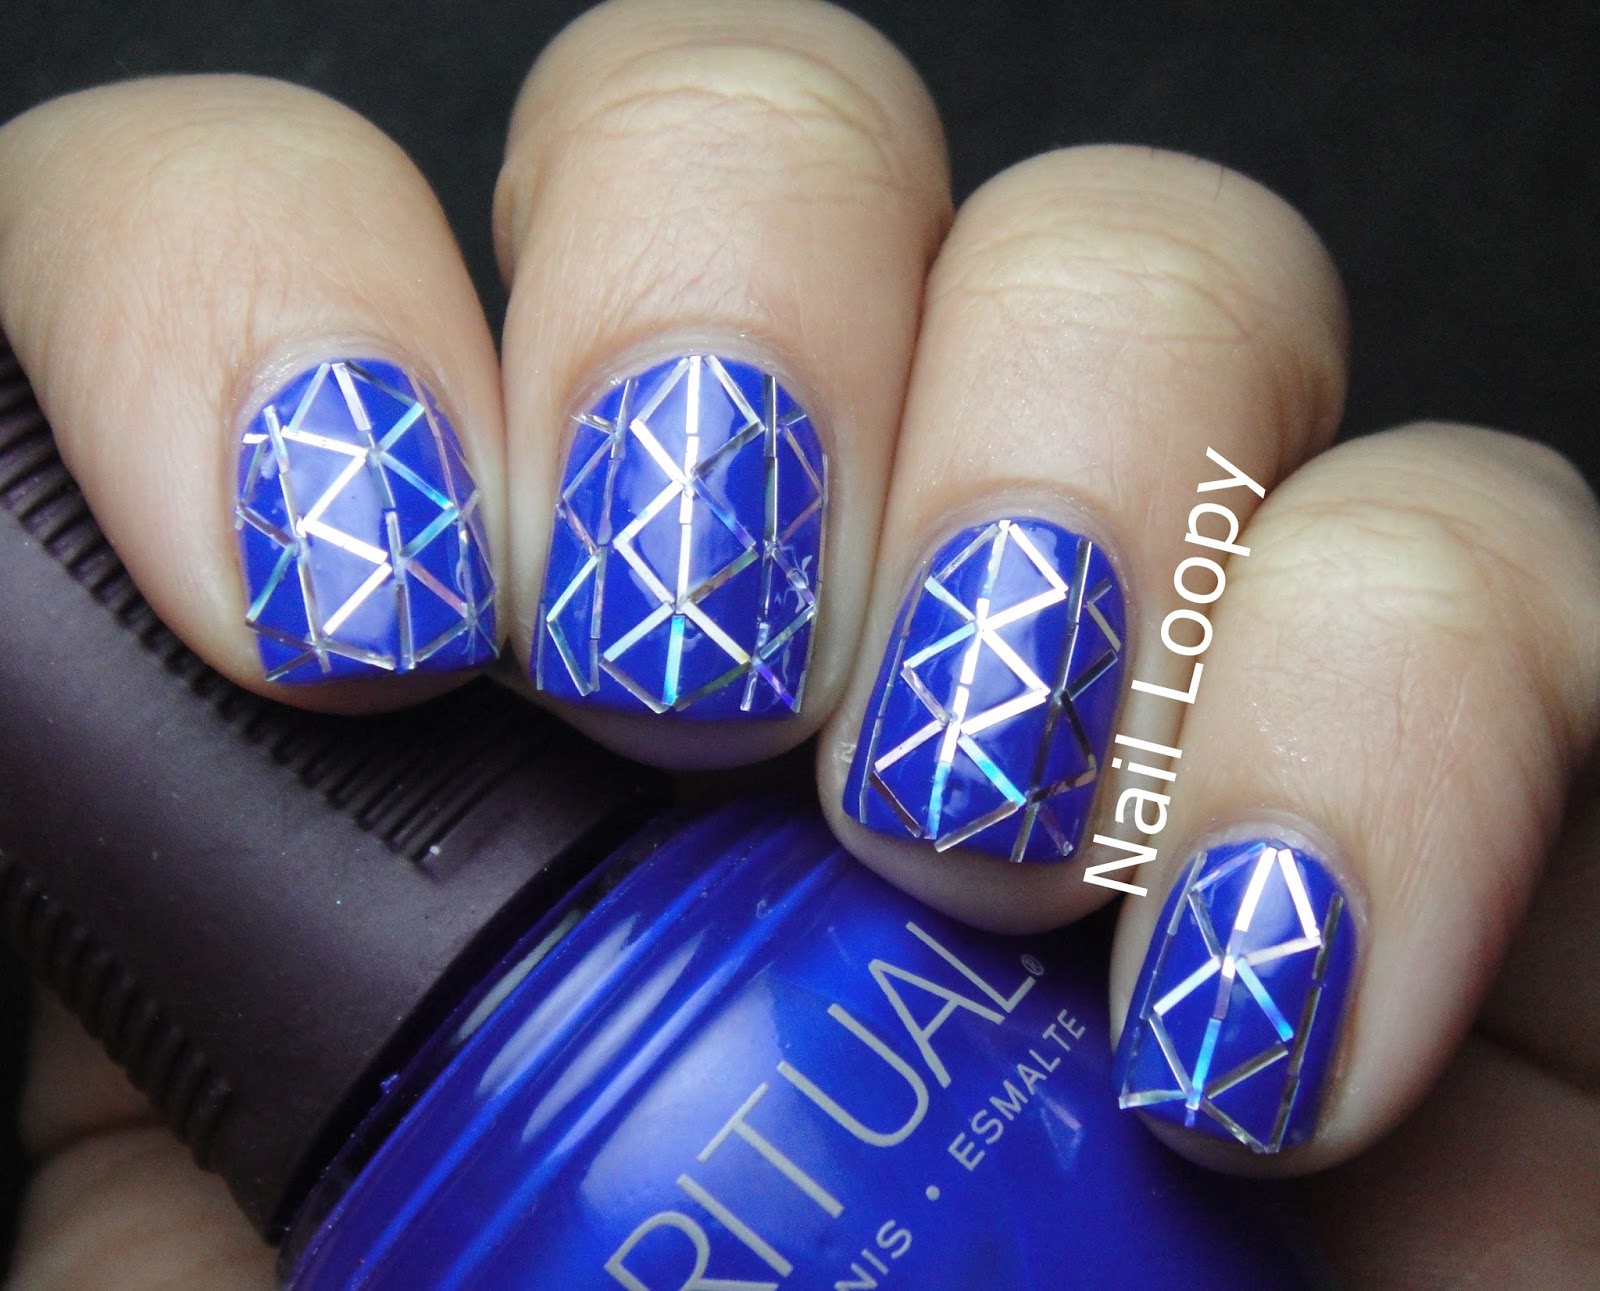

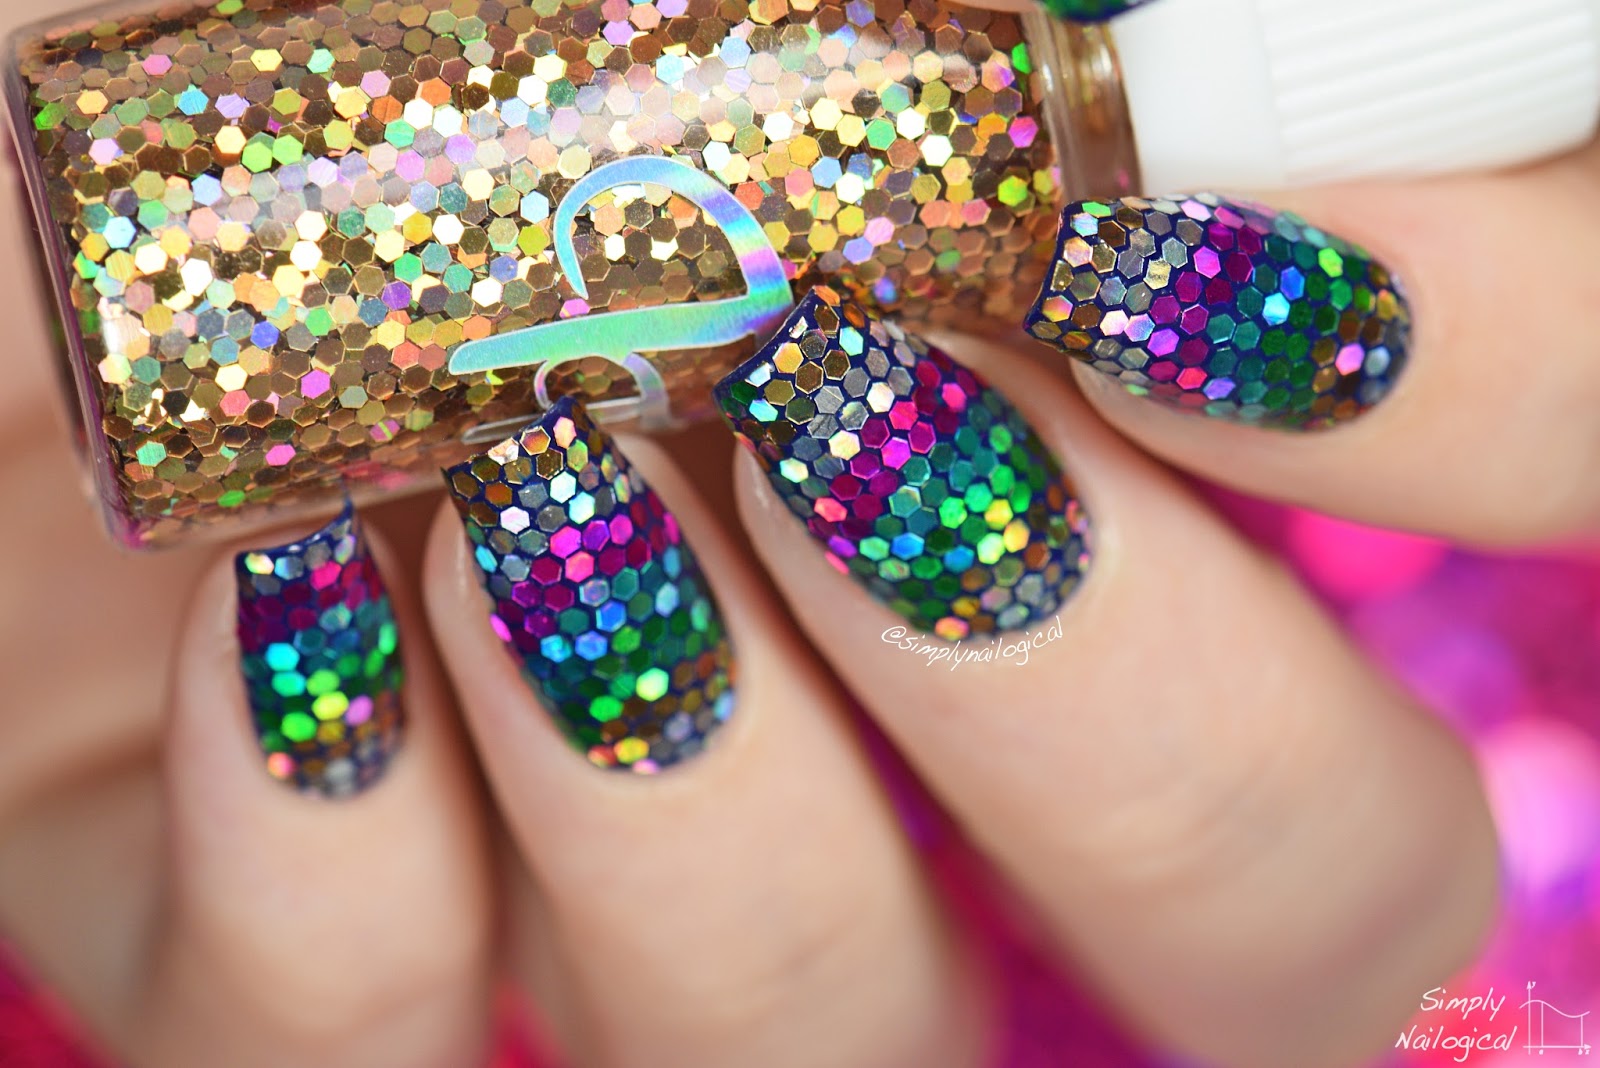
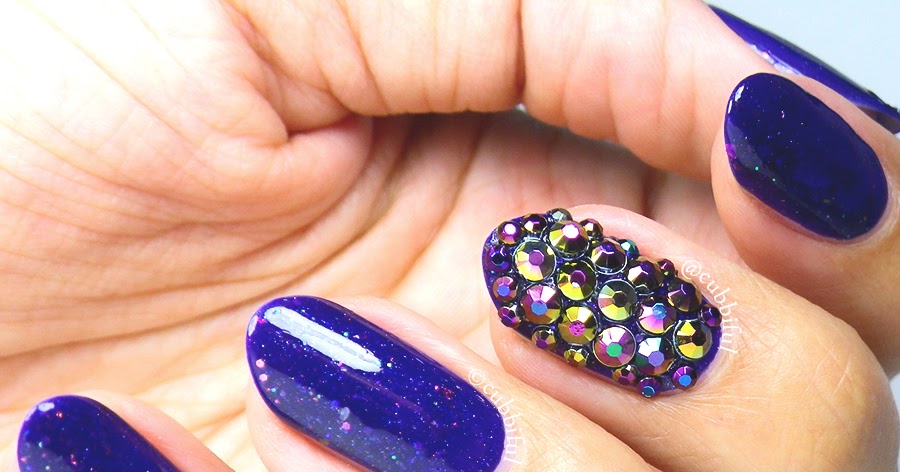
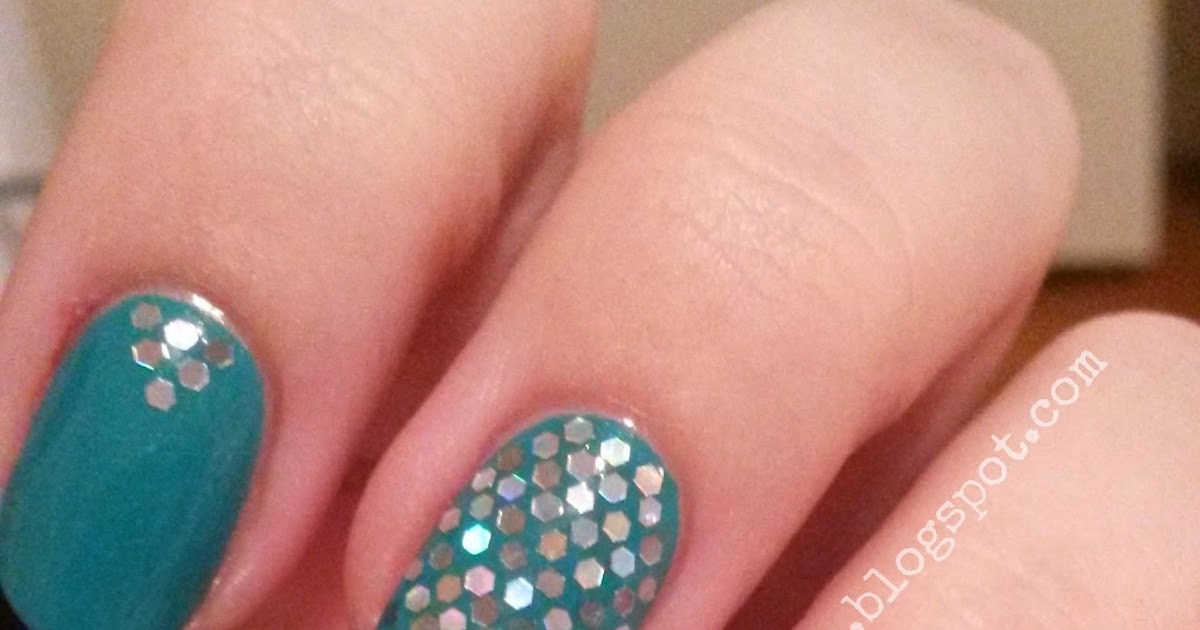
The possibilities are endless when it comes to glitter placement nail designs. Here are a few ideas to get you inspired. - Glitter French Tips: Give the classic French manicure a twist by adding glitter to the tips of your nails. You can opt for a subtle glitter or go all out with chunky glitter for a statement look. - Geometric Glitter: Create a modern and edgy look by placing glitter in geometric shapes on your nails. You can use tape or nail vinyls to achieve clean and precise lines. - Glitter Cuticle Accent: For a unique and subtle touch, try placing glitter near your cuticles instead of all over your nails. This will give a negative space effect that is both elegant and fun. - Glitter Fade: Similar to a glitter gradient, a glitter fade starts with a heavy concentration of glitter near the base of the nail and fades out towards the tip. This creates a waterfall effect that is mesmerizing. - Glitter Ombré: Ombré is a popular nail trend, and adding glitter takes it to the next level. Choose two or more colors of glitter and gradually blend them together on your nails for a stunning glitter ombré design.3. Glitter Placement Nail Design Ideas


3. Glitter Placement Nail Design Ideas


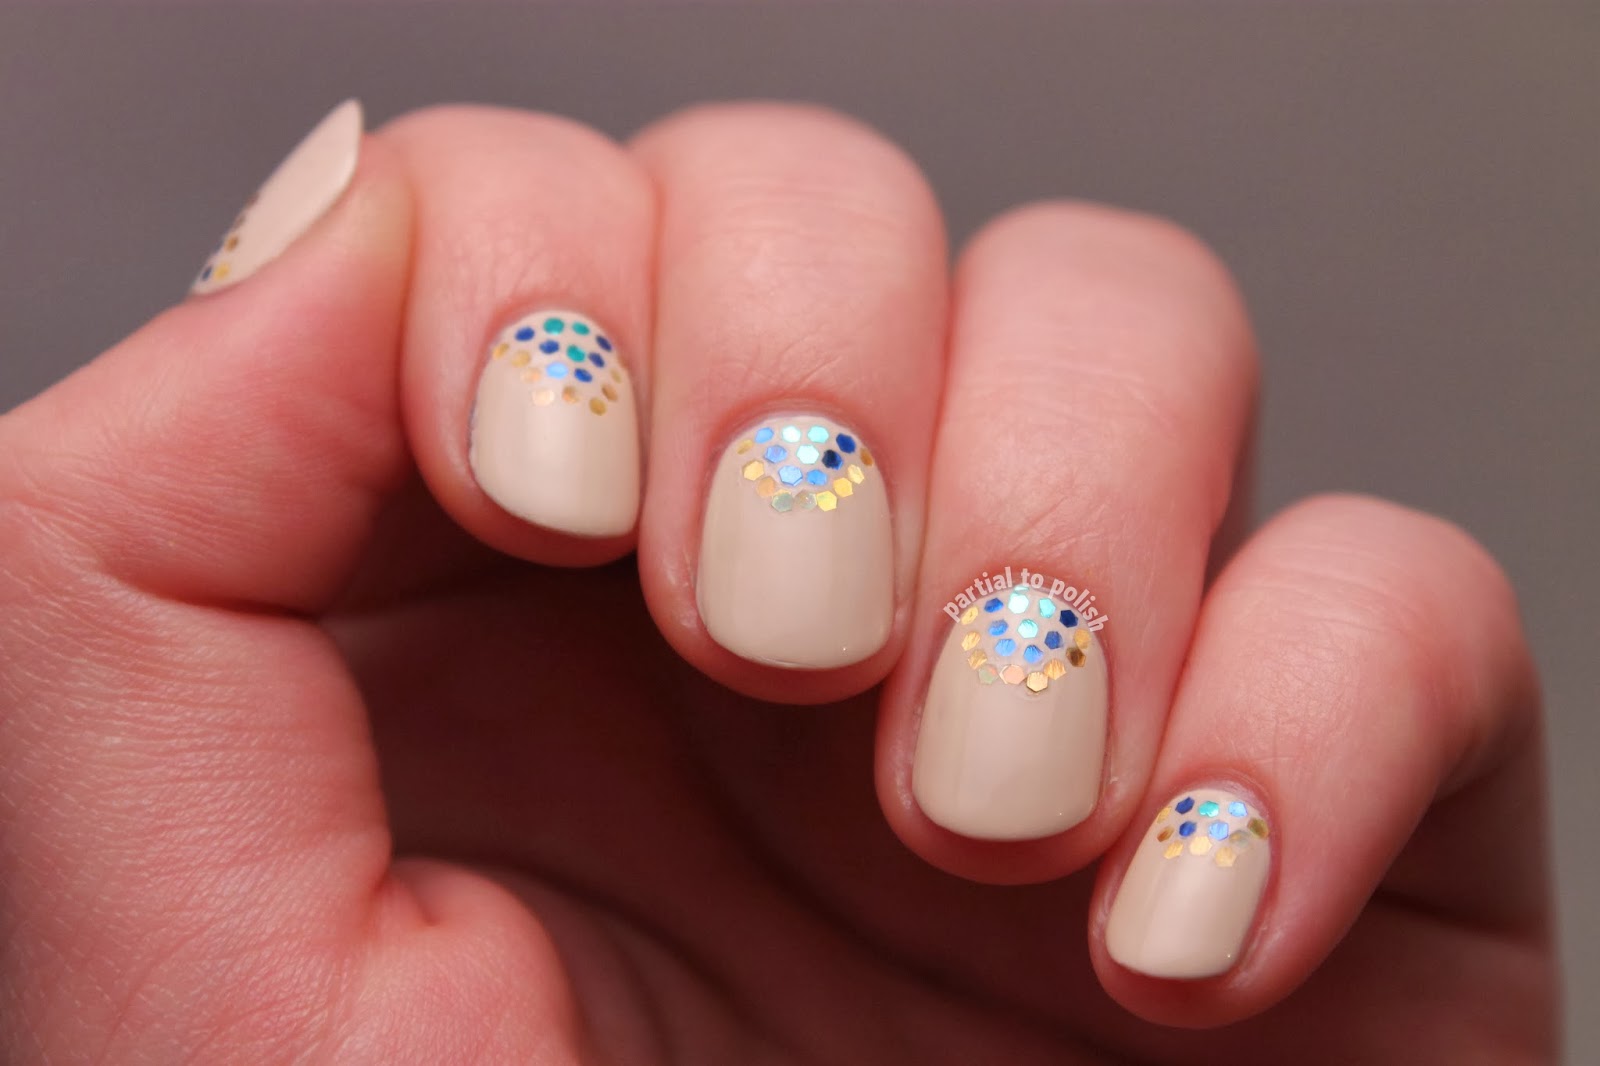
If you prefer a more detailed tutorial, here's a step-by-step guide to achieving a dazzling glitter placement nail design. Step 1: Prep your nails by removing any old polish and shaping them to your desired length and shape. Apply a base coat and let it dry completely. Step 2: Choose your base color and apply two coats, letting each coat dry in between. Step 3: Take a small amount of fine glitter and pour it onto a clean surface. Using a small brush, pick up the glitter and place it on your nail in a random pattern. You can also use different colors of glitter for a confetti effect. Step 4: Once you're happy with the placement, lightly press the glitter down with your finger or a clean brush. Step 5: Take a larger chunky glitter and place it on your nail, creating a glitter gradient. Use a toothpick or small brush to spread the glitter towards the tip of your nail. Step 6: Allow the glitter to dry for a few minutes before sealing it in with a top coat. Let the top coat dry completely before using your hands.4. Step-by-Step Glitter Placement Nail Tutorial


4. Step-by-Step Glitter Placement Nail Tutorial


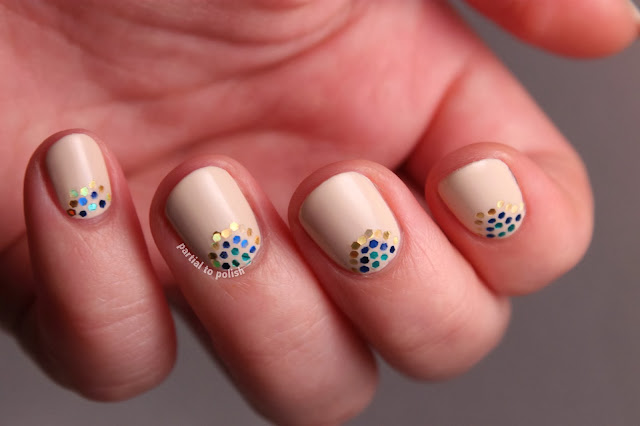
If you're new to nail art and feeling intimidated by glitter placement designs, don't worry, this design is perfect for beginners. Start by painting your nails with a base color of your choice. Let it dry completely. Next, take a small amount of chunky glitter and place it on the base of your nail, near the cuticle. Using a toothpick or small brush, gently spread the glitter towards the tip of your nail, creating a glitter gradient. You can add more or less glitter depending on your preference. Once you're happy with the placement, add a layer of top coat to seal in the glitter. And that's it, a simple but stunning glitter placement nail design that anyone can do.5. Glitter Placement Nail Design for Beginners


5. Glitter Placement Nail Design for Beginners
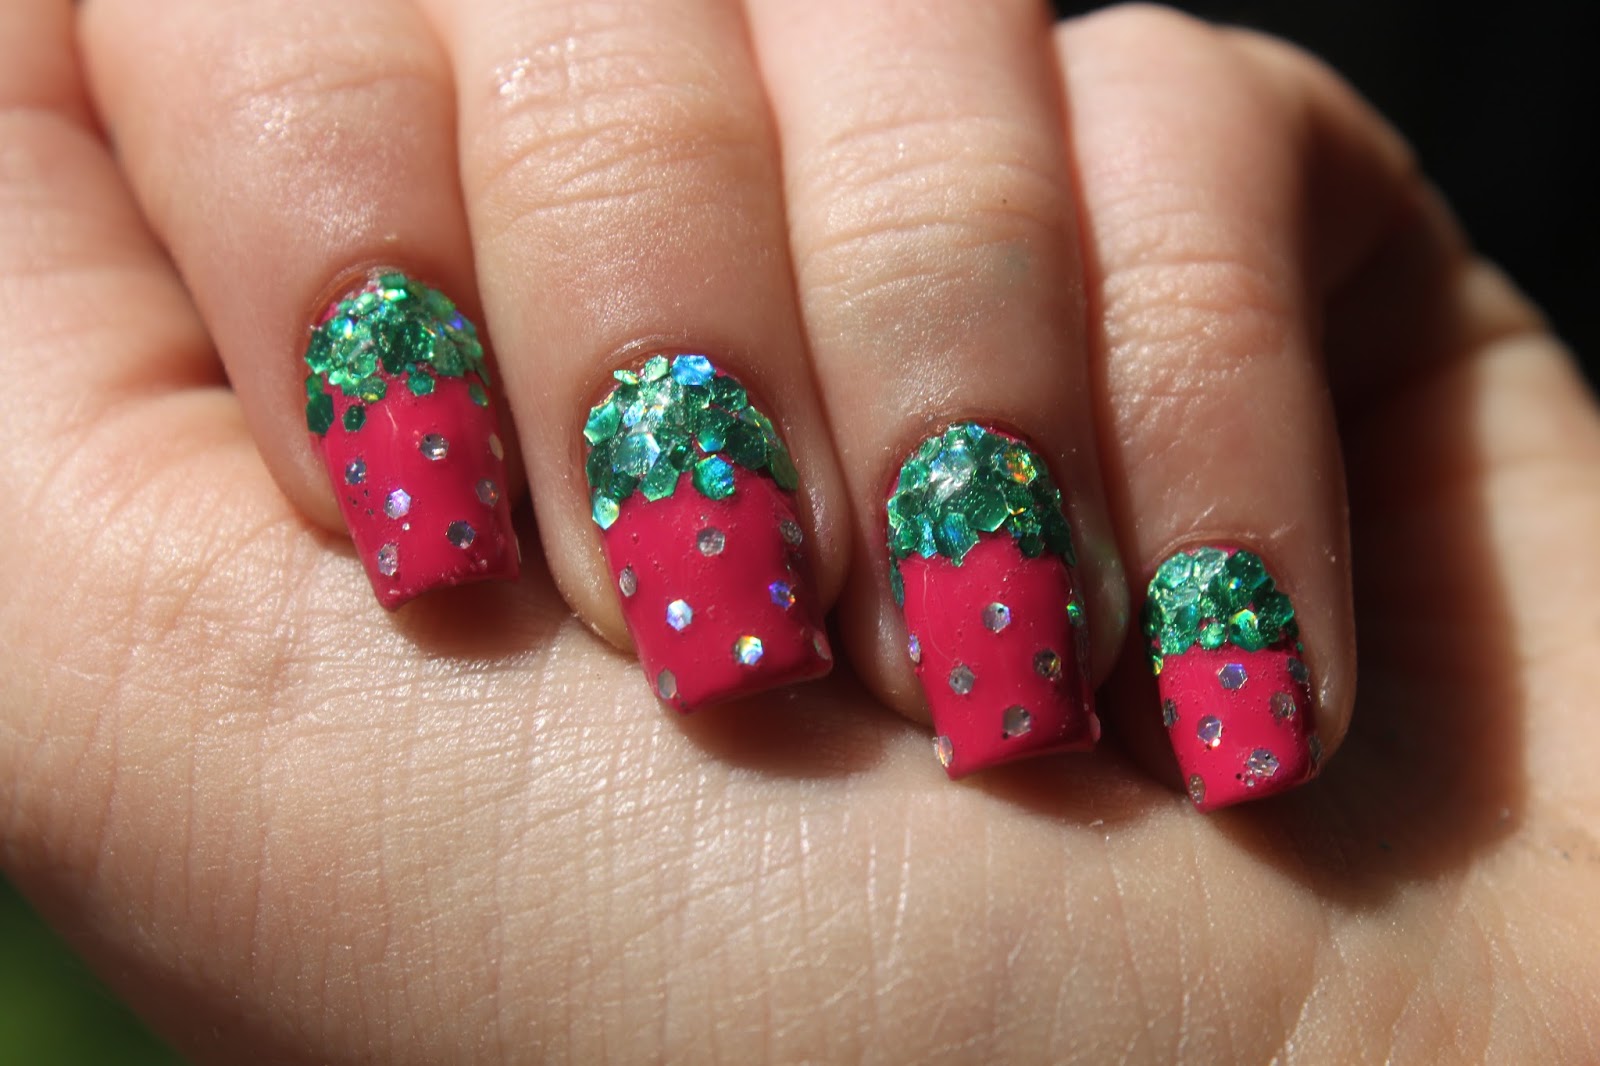
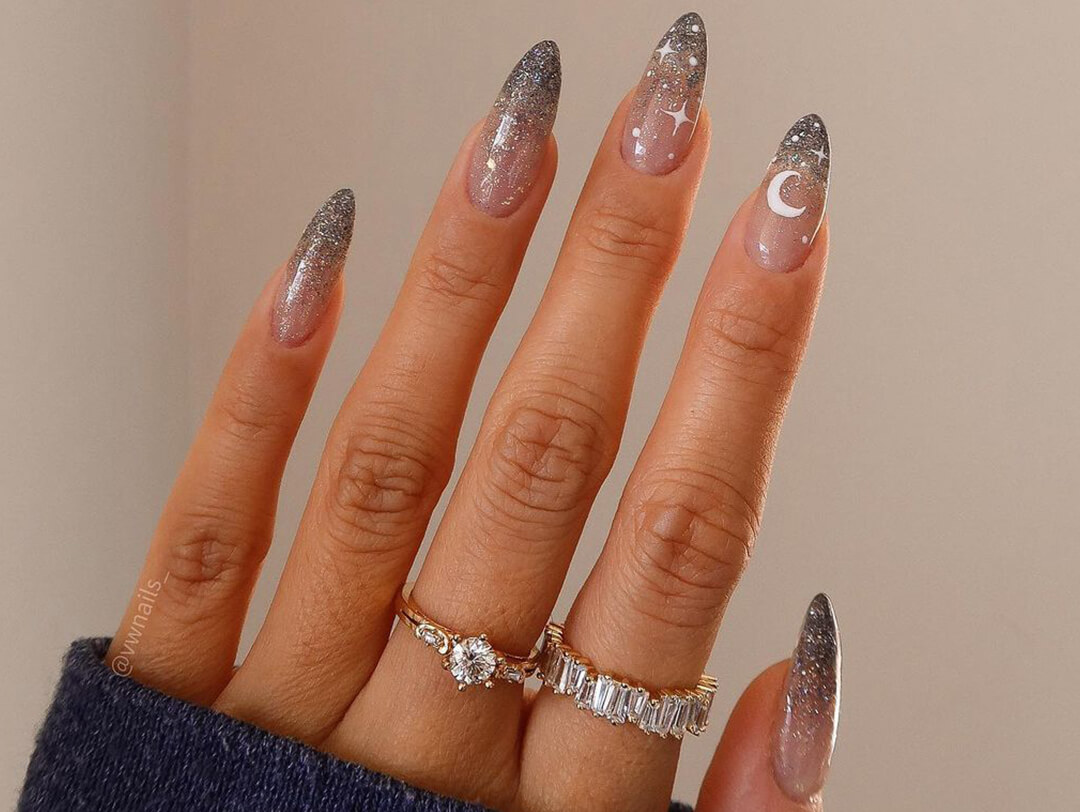
Don't be afraid to get creative with your glitter placement designs. Here are a few ideas to spark your imagination. - Glitter Stripes: Create bold and eye-catching stripes on your nails using glitter. You can use different widths and colors of glitter to achieve a unique look. - Glitter Galaxies: For a whimsical and celestial look, use glitter to create galaxy-inspired designs on your nails. Think stars, moons, and sparkly skies. - Glitter Animal Print: Animal print is a popular nail trend, and adding glitter makes it even more fun. Use glitter to create the spots or stripes of your favorite animal print. - Glitter Letters or Numbers: Spell out a word or create a special date on your nails with glitter placement. This is a fun and personal way to add a unique touch to your manicure.6. Creative Glitter Placement Nail Designs


6. Creative Glitter Placement Nail Designs


If you're still unsure about which glitter placement design to try, here are some Instagram accounts to follow for inspiration: - @nailartbyqueenie - @naildecor - @nailsbycambria - @celinaryden - @naildecorvideos7. Glitter Placement Nail Design Inspiration


7. Glitter Placement Nail Design Inspiration
Like any other beauty trend, glitter placement nail designs are constantly evolving. Here are some current and upcoming trends to keep on your radar: - Holographic Glitter: This trend takes glitter to a whole new level with its multi-dimensional and iridescent effect. - Glitter Negative Space: This trend combines two popular nail techniques - negative space and glitter placement. It creates a chic and modern look with hints of glitter peeking through. - Glitter Drips: This trend involves creating a 3D effect with glitter, making it look like it's dripping off your nails. It's a fun and unique way to add some sparkle to your manicure. - Glitter Half-Moons: A twist on the classic half-moon manicure, this trend involves placing glitter in a half-moon shape on the base of your nails.8. Glitter Placement Nail Design Trends


8. Glitter Placement Nail Design Trends

Here are some additional tips and tricks to help you achieve the perfect glitter placement nail design: - Use a Toothpick: Instead of a brush, use a toothpick to place the glitter on your nails. This will give you more precision and control over the placement. - Clean Up: Glitter can be messy, so make sure to have a clean-up brush or cotton swab on hand to remove any excess glitter around your nails. - Use a Peel-Off Base Coat: If you don't want to deal with the hassle of removing glitter, try using a peel-off base coat. This will make removing your glitter placement design a breeze. - Experiment with Different Glitter Sizes: Don't be afraid to mix and match different sizes of glitter to create a unique and textured look.9. Glitter Placement Nail Design Tips and Tricks

9. Glitter Placement Nail Design Tips and Tricks

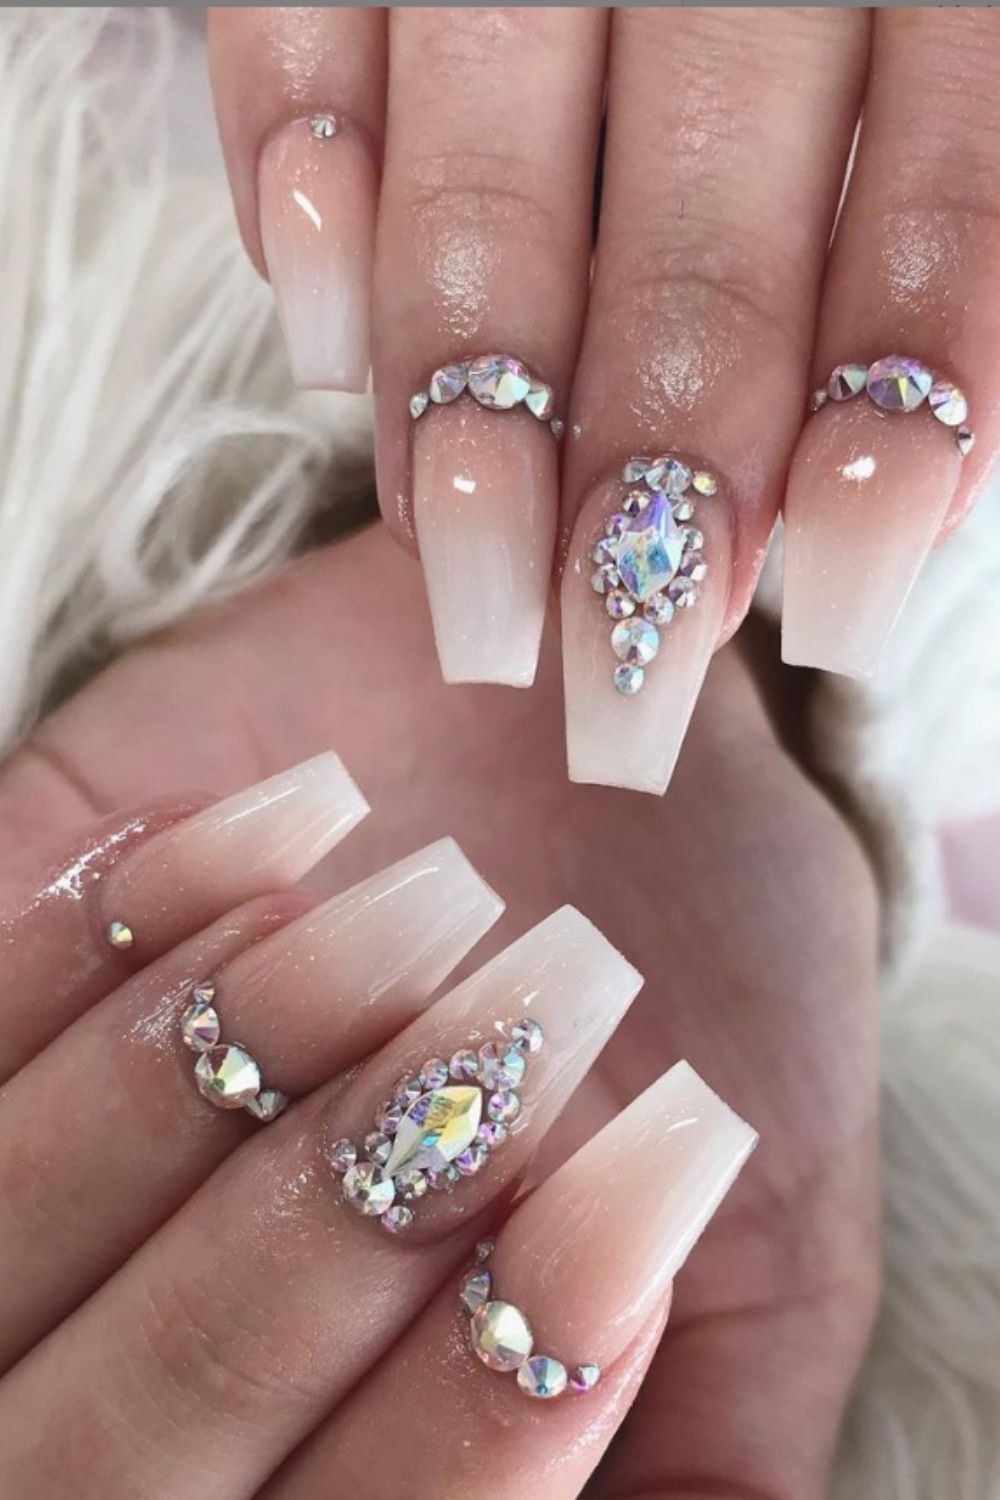
Glitter placement nail designs are perfect for adding some extra glam to special occasions such as weddings, prom, or holidays. Here are some ideas for different occasions: - Wedding: For a classic and elegant look, opt for a glitter French tip or glitter half-moon design in white or soft pink. You can also incorporate pearls or rhinestones for added sophistication. - Prom: Make a statement with a bold and sparkly glitter ombré or glitter fade design. You can also add sequins or metallic studs for a fun and edgy look. - Holidays: Embrace the festive season with glitter placement designs in red, green, or gold. You can also create holiday-themed designs such as Christmas trees or Hanukkah dreidels. In conclusion, glitter placement nail designs are a fun and creative way to elevate your manicure. From simple and easy designs to more complex and intricate ones, there's a glitter placement design for everyone. So grab your glitter and get ready to sparkle!10. Glitter Placement Nail Design for Special Occasions

10. Glitter Placement Nail Design for Special Occasions
The Importance of Glitter Placement in Nail Design

Creating Dimension and Sparkle
 When it comes to
nail design
, there are endless possibilities to choose from, but one trend that has been gaining popularity is glitter placement. This technique involves carefully placing small
glitter
particles on the nails to create a unique and eye-catching design. With the right placement, these tiny specks of glitter can add
dimension
and
sparkle
to any nail look.
When it comes to
nail design
, there are endless possibilities to choose from, but one trend that has been gaining popularity is glitter placement. This technique involves carefully placing small
glitter
particles on the nails to create a unique and eye-catching design. With the right placement, these tiny specks of glitter can add
dimension
and
sparkle
to any nail look.
Enhancing Nail Shape and Length
 One of the main benefits of glitter placement is its ability to enhance the shape and length of your nails. By strategically placing glitter on certain areas of the nail, you can create the illusion of longer or more slender nails. For example, placing glitter in a diagonal line across the nail can make it appear longer, while placing it on the tip can give the illusion of a longer nail bed. This technique is especially useful for those with shorter or smaller nails, as it can instantly make them appear more elegant and elongated.
Personalized and Versatile Designs
 The beauty of glitter placement is that it allows for endless creativity and personalization. You can choose from a variety of glitter sizes, shapes, and colors to create a design that is uniquely yours. You can also experiment with different placement techniques, such as creating an ombre effect or a glitter gradient. With glitter placement, the possibilities are endless, and you can easily switch up your design for any occasion.
Long-Lasting and Low Maintenance
 Another advantage of glitter placement is its durability. Unlike traditional nail polish, which can chip and fade easily, glitter placement tends to last longer and is less prone to damage. This is because the glitter particles are securely adhered to the nail, creating a more resilient and long-lasting design. Additionally, glitter placement requires minimal maintenance. You don't have to worry about constantly touching up your nails or worrying about smudging, making it a perfect choice for those with busy lifestyles.
In conclusion,
glitter placement nail design
is a fun and versatile trend that can add dimension, sparkle, and personalization to your nails. Whether you're looking to enhance the shape and length of your nails or simply want a low-maintenance yet eye-catching design, glitter placement is the perfect choice. So, why not give it a try and add some shine to your next nail look?
Another advantage of glitter placement is its durability. Unlike traditional nail polish, which can chip and fade easily, glitter placement tends to last longer and is less prone to damage. This is because the glitter particles are securely adhered to the nail, creating a more resilient and long-lasting design. Additionally, glitter placement requires minimal maintenance. You don't have to worry about constantly touching up your nails or worrying about smudging, making it a perfect choice for those with busy lifestyles.
In conclusion,
glitter placement nail design
is a fun and versatile trend that can add dimension, sparkle, and personalization to your nails. Whether you're looking to enhance the shape and length of your nails or simply want a low-maintenance yet eye-catching design, glitter placement is the perfect choice. So, why not give it a try and add some shine to your next nail look?


