If you're looking to add a touch of tropical beauty to your nails, then hibiscus flower nail art is the perfect choice. These stunning flowers are not only aesthetically pleasing but also hold symbolic meanings in different cultures. With this step-by-step hibiscus nail art tutorial, you'll be able to create a stunning and vibrant look that will make your nails stand out. To start, apply a base coat to your nails to protect them and provide a smooth surface for the nail polish to adhere to. Once dry, use a light pink or coral nail polish as the base color for your hibiscus design. Hibiscus nail art often incorporates bright and bold colors, so don't be afraid to experiment with different shades. Next, using a dotting tool or a toothpick, create the center of the hibiscus flower with a yellow or white nail polish. Make a small dot in the center of your nail, and then add a few lines radiating outwards to create the stamen of the flower. Now, for the petals, use a small brush or a thin nail art brush to create five curved lines around the center of the flower. These lines should be slightly longer than the stamen and can be slightly curved to give the petals a more natural look. Easy hibiscus nail designs often use only one flower per nail, but you can also create a cluster of flowers for a more intricate look. Once the petals are dry, add some depth to your design by using a darker shade of the base color to create thin lines in between the petals. This step is optional, but it will make your hibiscus design look more realistic and three-dimensional. Finally, add a top coat to seal in your design and give your nails a glossy finish. You can also add some rhinestones or glitter for some extra sparkle, or leave them as they are for a more subtle look. And there you have it, a beautiful hibiscus flower nail art design that will transport you to a tropical paradise every time you look at your nails.1. Hibiscus Flower Nail Art Tutorial


1. Hibiscus Flower Nail Art Tutorial
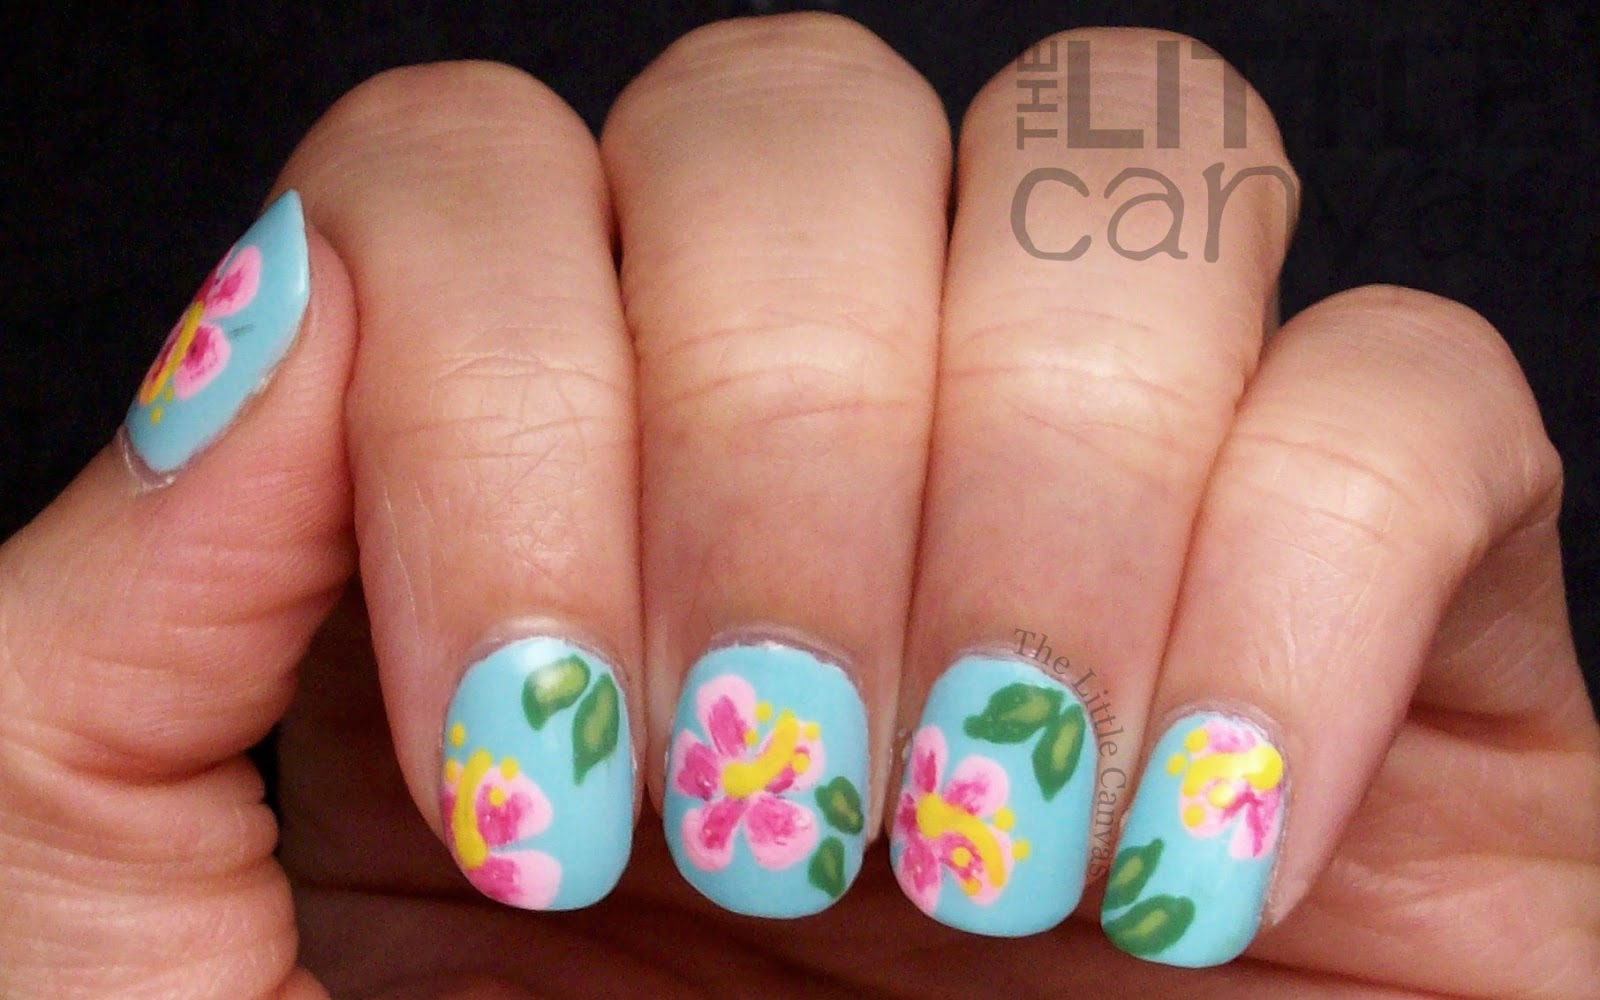


Bring a piece of the tropics to your nails with this stunning tropical hibiscus nail design. This look is perfect for summer, beach vacations, or for anyone who wants to add a pop of color to their nails. The best part about this design is that it's easy to create and doesn't require any special tools. Start by painting your nails with a light blue or green nail polish to represent the ocean or lush greenery. Once dry, use a small brush or a nail art pen to create hibiscus flowers in various colors on your nails. You can use the same technique as mentioned in the previous tutorial, or you can also try creating different types of hibiscus flowers for a more diverse look. For example, you can create a hibiscus flower with a gradient effect by using a sponge to dab on different shades of pink or red nail polish onto the petals. You can also try creating a hibiscus flower with a white or black outline for a unique look. To make your tropical hibiscus design even more vibrant, add some palm tree silhouettes using a black nail polish and a small brush. This will add some contrast to your design and make it look more complete. Finish off with a top coat to seal in your design and give your nails a glossy finish. With this tropical hibiscus nail design, you'll feel like you're on a tropical island every time you look at your nails. It's the perfect way to add some sunshine and warmth to your day.2. Tropical Hibiscus Nail Design


2. Tropical Hibiscus Nail Design


Creating a beautiful hibiscus nail art design may seem daunting, especially if you're new to nail art. But don't worry, this step-by-step guide will walk you through the process, making it easy for you to create a stunning hibiscus design on your nails. Step 1: Start by applying a base coat to your nails to protect them and provide a smooth surface for the nail polish to adhere to. You can also use a white or light pink base color to make your hibiscus design stand out. Step 2: Using a dotting tool or a toothpick, create the center of the hibiscus flower with a yellow or white nail polish. Make a small dot in the center of your nail, and then add a few lines radiating outwards to create the stamen of the flower. Step 3: Next, use a small brush or a thin nail art brush to create five curved lines around the center of the flower for the petals. These lines should be slightly longer than the stamen and can be slightly curved to give the petals a more natural look. Step 4: Once the petals are dry, add some depth to your design by using a darker shade of the base color to create thin lines in between the petals. This step is optional, but it will make your hibiscus design look more realistic and three-dimensional. Step 5: Add some leaves to your design by using a green nail polish and a small brush. Hibiscus flowers typically have large, glossy leaves, so make sure to create the leaves in a similar shape. Step 6: Finally, add a top coat to seal in your design and give your nails a glossy finish. You can also add some rhinestones or glitter for some extra sparkle, or leave them as they are for a more subtle look. There you have it, a stunning hibiscus nail art design that you can recreate with ease. With practice, you'll be able to create more intricate and detailed designs to show off your nail art skills.3. Hibiscus Nail Art Step by Step


3. Hibiscus Nail Art Step by Step


If you're new to nail art or simply don't have a lot of time to spend on creating elaborate designs, then this easy hibiscus nail design is perfect for you. With just a few simple steps, you'll have a beautiful and eye-catching hibiscus design on your nails. Start by applying a base coat to your nails to protect them and provide a smooth surface for the nail polish to adhere to. Once dry, use a light pink or coral nail polish as the base color for your hibiscus design. Next, use a small brush or a thin nail art brush to create five curved lines in the shape of a hibiscus flower. You can also use a stamping plate to create the flower outline for a more precise design. Once the flower outline is dry, use a darker shade of the base color to create thin lines in between the petals for depth and dimension. You can also add some leaves using a green nail polish and a small brush. Finish off with a top coat to seal in your design and give your nails a glossy finish. And there you have it, an easy hibiscus nail design that looks stunning and took minimal effort to create.4. Easy Hibiscus Nail Design

4. Easy Hibiscus Nail Design

Are you new to the world of nail art and feeling a little intimidated by the intricate designs? Don't worry, this hibiscus nail art for beginners is perfect for you. With a few basic tools and techniques, you'll be able to create a beautiful hibiscus design on your nails. Start by applying a base coat to your nails to protect them and provide a smooth surface for the nail polish to adhere to. You can also use a white or light pink base color to make your hibiscus design stand out. Next, use a nail art pen or a small brush to create the center of the hibiscus flower with a yellow or white nail polish. Then, create five curved lines around the center to form the petals. Once the petals are dry, add some depth to your design by using a darker shade of the base color to create thin lines in between the petals. You can also add some leaves using a green nail polish and a small brush. Finish off with a top coat to seal in your design and give your nails a glossy finish. This hibiscus nail art for beginners may seem challenging at first, but with practice, you'll be able to create more intricate designs and impress everyone with your skills.5. Hibiscus Nail Art for Beginners

5. Hibiscus Nail Art for Beginners
Take your hibiscus nail art design to the next level by incorporating rhinestones. These tiny gems add a touch of glamour and sparkle to any design, making them the perfect addition to your hibiscus nails. Start by painting your nails with a light pink or coral nail polish as the base color for your hibiscus design. Once dry, use a small brush or a thin nail art brush to create five curved lines around the center of the flower for the petals. You can also use a stamping plate to create the flower outline for a more precise design. Next, add some depth to your design by using a darker shade of the base color to create thin lines in between the petals. Once dry, use a rhinestone picker or a pair of tweezers to place rhinestones in the center of the flower or around the petals. You can also add some smaller rhinestones on the leaves or in between the petals for some extra sparkle. Finish off with a top coat to seal in your design and give your nails a glossy finish. This hibiscus nail art with rhinestones is perfect for special occasions or when you want to add some bling to your nails.6. Hibiscus Nail Art with Rhinestones

6. Hibiscus Nail Art with Rhinestones
Add some depth and dimension to your hibiscus nail art by incorporating an ombre effect. This technique creates a gradient of colors, giving your design a unique and eye-catching look. Start by painting your nails with a light pink or coral nail polish as the base color for your hibiscus design. Once dry, use a sponge to dab on different shades of pink or red nail polish onto the petals. Start with the lightest shade on the top of the nail and gradually transition to a darker shade towards the tip. Next, use a small brush or a thin nail art brush to create five curved lines around the center of the flower for the petals. You can also use a stamping plate to create the flower outline for a more precise design. Add some depth to your design by using a darker shade of the base color to create thin lines in between the petals. Finish off with a top coat to seal in your design and give your nails a glossy finish. This hibiscus nail art with ombre effect is perfect for those who want to add a unique twist to their hibiscus design.7. Hibiscus Nail Art with Ombre Effect

7. Hibiscus Nail Art with Ombre Effect

If you're new to nail art, stamping is a great technique to try out. It involves using a stamping plate and a stamper to transfer intricate designs onto your nails. This hibiscus nail art with stamping will give your nails a professional and precise look. Start by painting your nails with a light pink or coral nail polish as the base color for your hibiscus design. Once dry, use a stamping plate with a hibiscus flower design and a stamper to transfer the design onto your nails. Next, use a small brush or a thin nail art brush to create five curved lines around the center of the flower for the petals. You can also add some leaves using a green nail polish and a small brush. Add some depth to your design by using a darker shade of the base color to create thin lines in between the petals. Finish off with a top coat to seal in your design and give your nails a glossy finish. This hibiscus nail art with stamping is perfect for those who want to achieve a professional-looking design without the skill and precision of free-hand nail art.8. Hibiscus Nail Art with Stamping
8. Hibiscus Nail Art with Stamping
If you're not confident in your nail art skills or don't have the time to create a detailed design, then water decals are the perfect solution. These stickers are easy to apply and come in various designs, including hibiscus flowers. Start by painting your nails with a light pink or coral nail polish as the base color for your hibiscus design. Once dry, cut out the hibiscus water decal and place it in a bowl of water for a few seconds. Gently slide the decal onto your nail and use a lint-free cloth to remove any excess water. Add some depth to your design by using a darker shade of the base color to create thin lines in between the petals. Finish off with a top coat to seal in your design and give your nails a glossy finish. This hibiscus nail art with water decals is perfect for those who want a quick and easy way to achieve a stunning hibiscus design on their nails.9. Hibiscus Nail Art with Water Decals
9. Hibiscus Nail Art with Water Decals
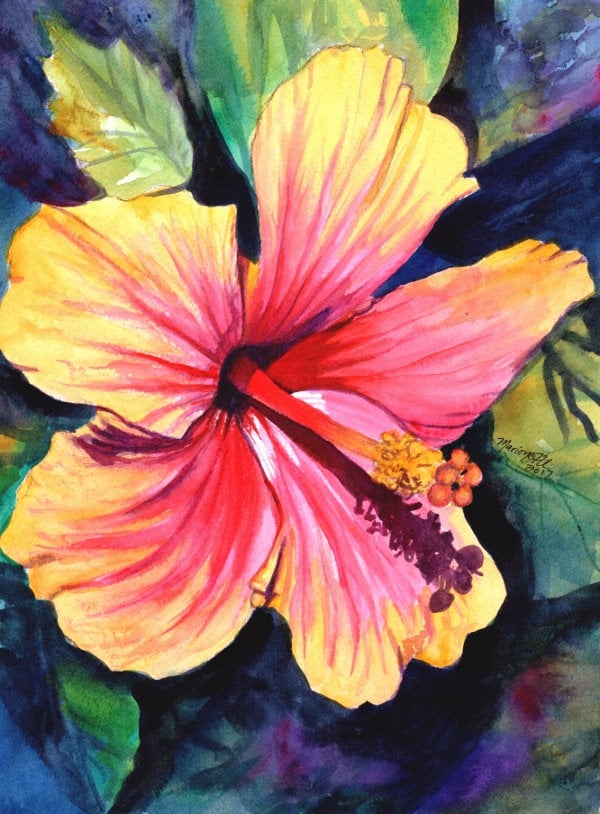
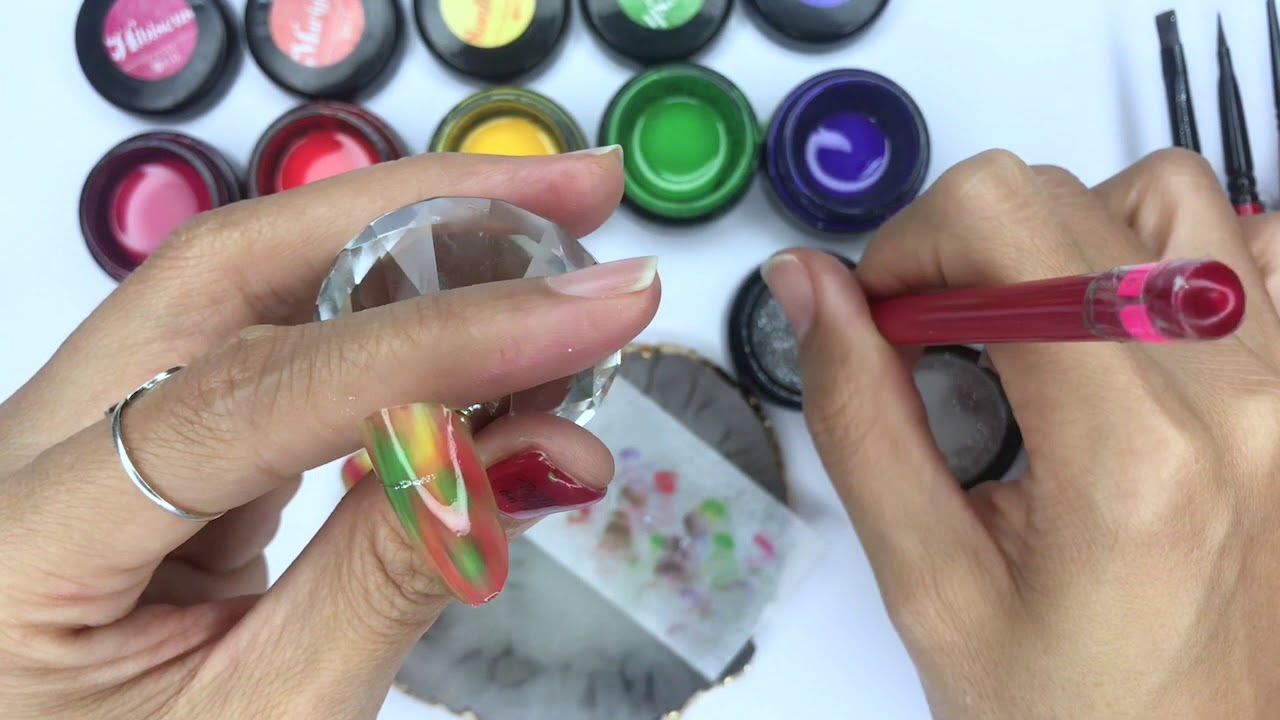
If you're feeling extra creative, try using acrylic paint to create a hibiscus nail art design. Acrylic paint is more forgiving than nail polish and allows you to make mistakes without ruining your design. Start by painting your nails with a light pink or coral base color. Once dry, use a small brush and acrylic paint to create a hibiscus flower on your nails. You can also use multiple colors to create an ombre effect or add some leaves using a green acrylic paint.10. Hibiscus Nail Art with Acrylic Paint

10. Hibiscus Nail Art with Acrylic Paint

Add a Pop of Color to Your Nails with Hibiscus Nail Art Design

Unleash Your Inner Tropical Goddess
 Are you tired of the same old boring nail designs? Looking for a way to add a touch of summer to your nails? Look no further, because hibiscus nail art design is here to give your nails a colorful and tropical makeover.
Hibiscus flowers are known for their vibrant and eye-catching colors, making them the perfect inspiration for a nail design. Whether you're heading to the beach or just want to add some fun to your everyday look, hibiscus nail art is the perfect choice.
Hibiscus
nail art can be created in a variety of ways, from hand-painted designs to nail stickers or decals. You can choose to have a single hibiscus flower as an accent nail, or go all out with a full set of hibiscus flowers on each nail. The possibilities are endless and can be customized to your personal style.
Are you tired of the same old boring nail designs? Looking for a way to add a touch of summer to your nails? Look no further, because hibiscus nail art design is here to give your nails a colorful and tropical makeover.
Hibiscus flowers are known for their vibrant and eye-catching colors, making them the perfect inspiration for a nail design. Whether you're heading to the beach or just want to add some fun to your everyday look, hibiscus nail art is the perfect choice.
Hibiscus
nail art can be created in a variety of ways, from hand-painted designs to nail stickers or decals. You can choose to have a single hibiscus flower as an accent nail, or go all out with a full set of hibiscus flowers on each nail. The possibilities are endless and can be customized to your personal style.
Make a Statement with Your Nails
 One of the best things about hibiscus nail art is that it's a statement piece. It's a fun and bold design that will definitely make your nails stand out. Plus, with its tropical vibes, it's the perfect design for summer and vacation season.
You can also switch up the colors to match your outfit or mood. Opt for bright and bold colors for a fun and playful look, or go for pastel shades for a more subtle and delicate design. The
versatility
of hibiscus nail art makes it suitable for any occasion.
One of the best things about hibiscus nail art is that it's a statement piece. It's a fun and bold design that will definitely make your nails stand out. Plus, with its tropical vibes, it's the perfect design for summer and vacation season.
You can also switch up the colors to match your outfit or mood. Opt for bright and bold colors for a fun and playful look, or go for pastel shades for a more subtle and delicate design. The
versatility
of hibiscus nail art makes it suitable for any occasion.
Easy to Achieve at Home
 You don't have to be a professional nail artist to achieve a hibiscus nail design. With a little bit of practice and the right tools, you can easily create this design at home. All you need is a few nail polishes in your desired colors, a small brush for detailing, and a dotting tool for the flower's center.
Start by painting your nails with a base color of your choice. Then, using a small brush, create the outline of the hibiscus flower with a contrasting color. Finally, use a dotting tool to add the center of the flower. You can also add some green leaves for a more realistic look.
Hibiscus
nail art is the perfect way to add a pop of color and a touch of summer to your nails. So why settle for boring nails when you can unleash your inner tropical goddess with this fun and vibrant nail design? Try it out for yourself and get ready to turn heads with your beautiful hibiscus nails.
You don't have to be a professional nail artist to achieve a hibiscus nail design. With a little bit of practice and the right tools, you can easily create this design at home. All you need is a few nail polishes in your desired colors, a small brush for detailing, and a dotting tool for the flower's center.
Start by painting your nails with a base color of your choice. Then, using a small brush, create the outline of the hibiscus flower with a contrasting color. Finally, use a dotting tool to add the center of the flower. You can also add some green leaves for a more realistic look.
Hibiscus
nail art is the perfect way to add a pop of color and a touch of summer to your nails. So why settle for boring nails when you can unleash your inner tropical goddess with this fun and vibrant nail design? Try it out for yourself and get ready to turn heads with your beautiful hibiscus nails.


