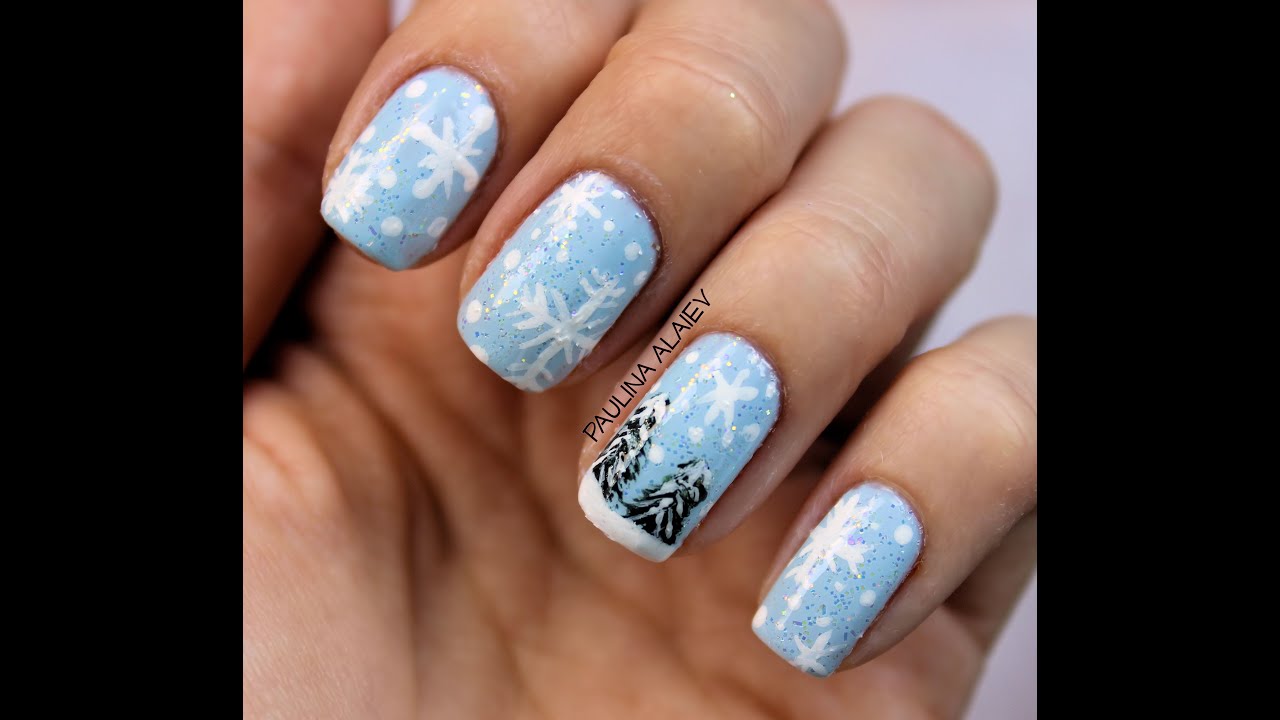
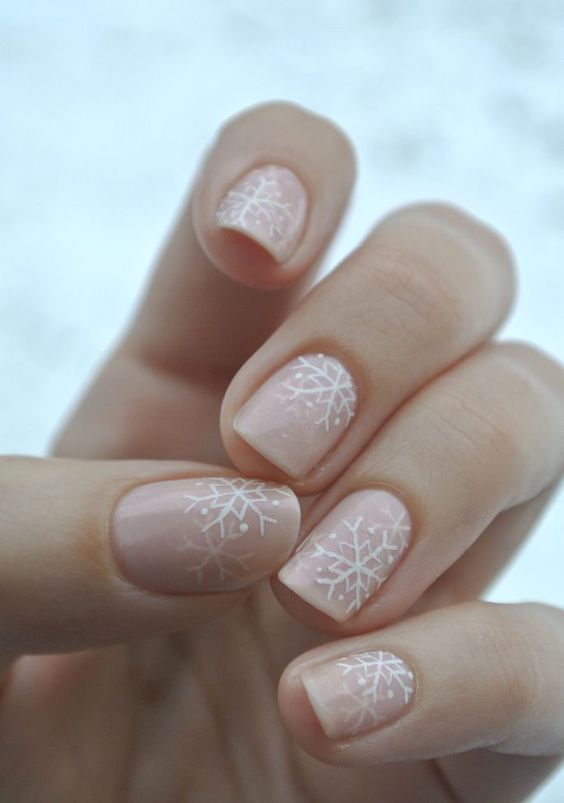
If you're looking for a festive and fun nail design to rock this winter, look no further than the "Let It Snow" nail art tutorial. This design is perfect for the holiday season and will add a touch of whimsy to any outfit. To achieve this look, start by painting your nails with a light blue polish. Once dry, use a white nail polish to create snowflake designs on each nail. You can use a nail art brush or a toothpick to create the intricate snowflake patterns. Finish off with a clear top coat for a glossy finish. This nail art is perfect for those who want to add a little sparkle to their winter look. You can add some glitter to the tips of your nails or use a glittery white polish for the snowflake designs. Get creative and make this design your own!1. "Let It Snow" Nail Art Tutorial


1. "Let It Snow" Nail Art Tutorial


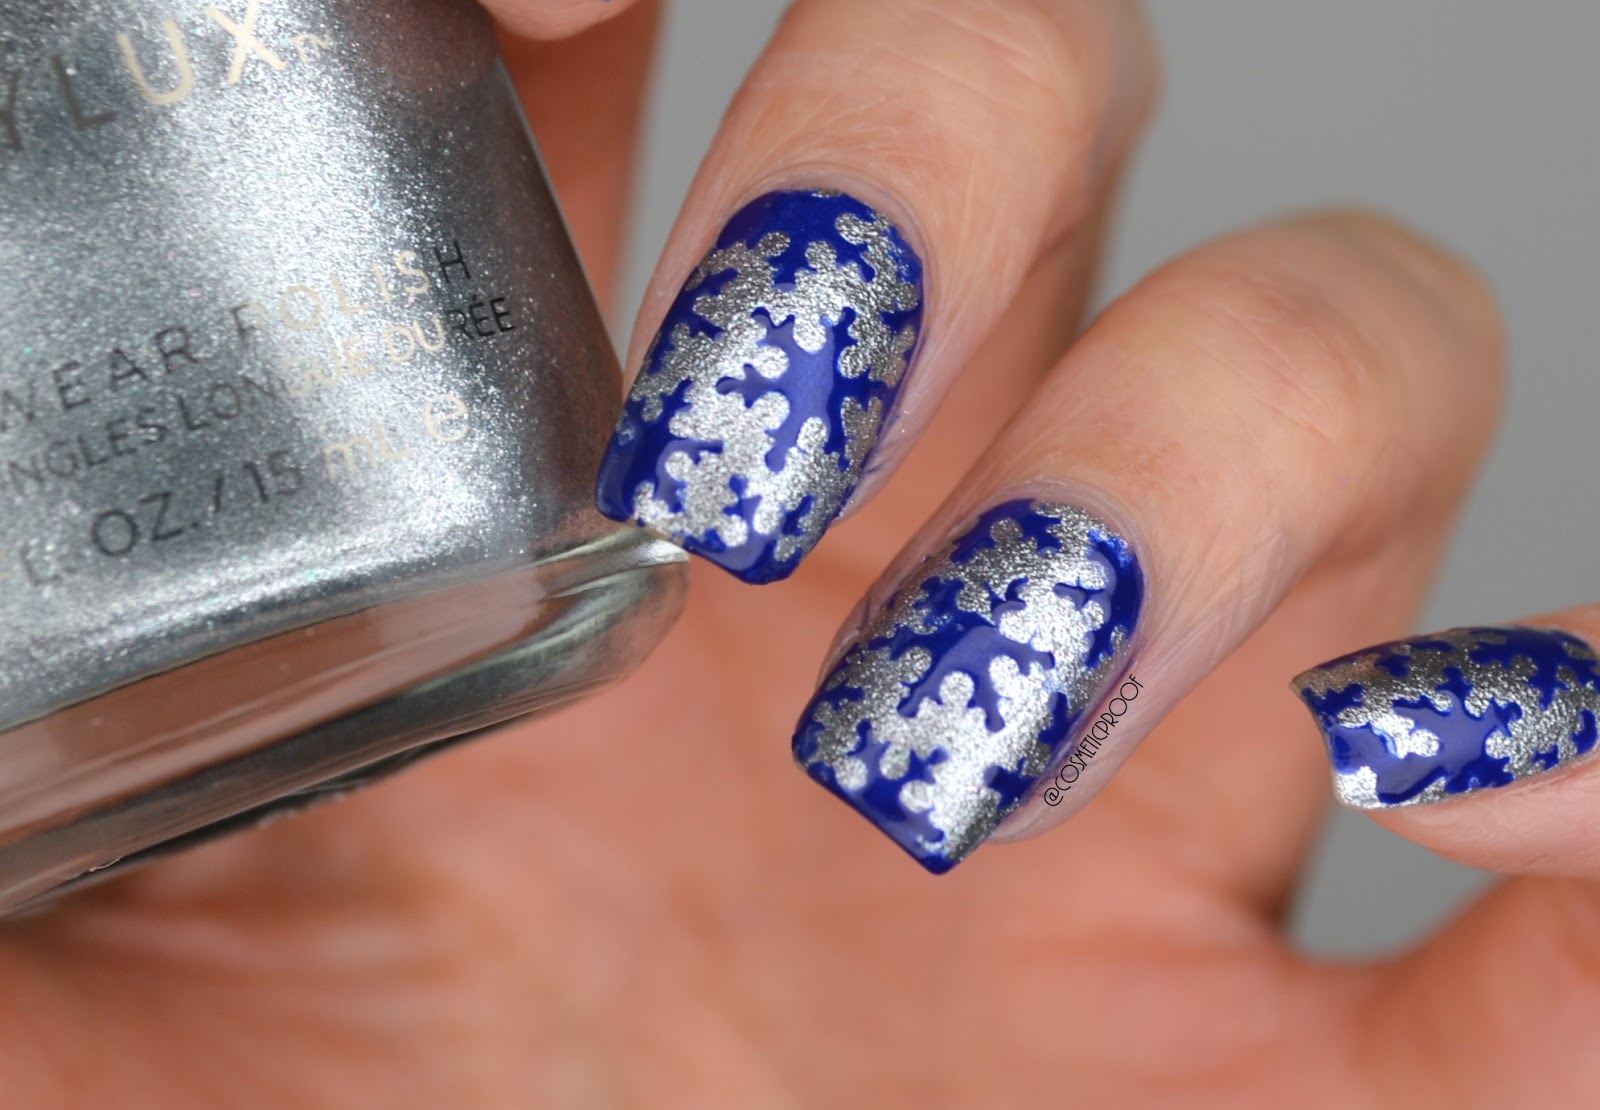
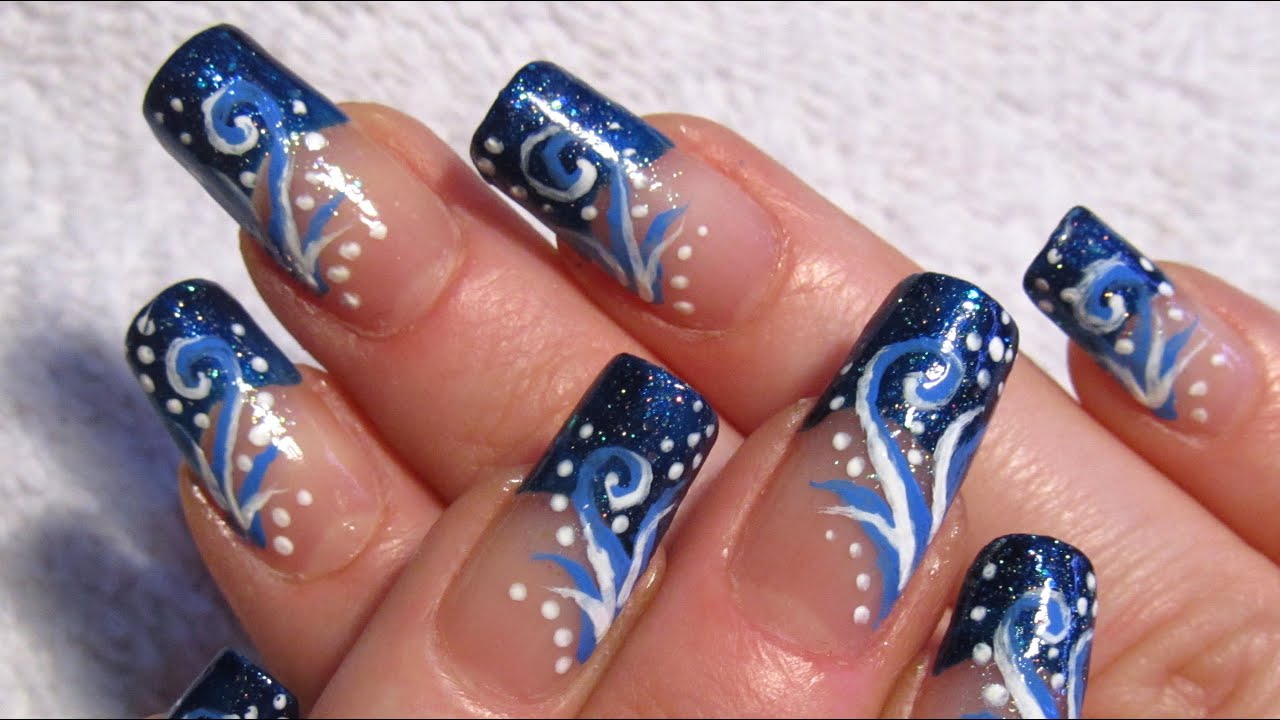
Transform your nails into a winter wonderland with this stunning nail design. This look incorporates different shades of blue and white to create a serene winter scene on your nails. Start by painting your nails with a light blue polish as the base. Then, using a darker blue polish, create a gradient effect on the tips of your nails to represent a snowy sky. Next, use a white nail polish to create snowflakes and add some silver rhinestones for a touch of sparkle. Finish off with a clear top coat to seal in your design. This nail design is perfect for those who want a subtle and elegant winter look. It's also a great option for those who may not have a steady hand for intricate nail art.2. Winter Wonderland Nail Design


2. Winter Wonderland Nail Design


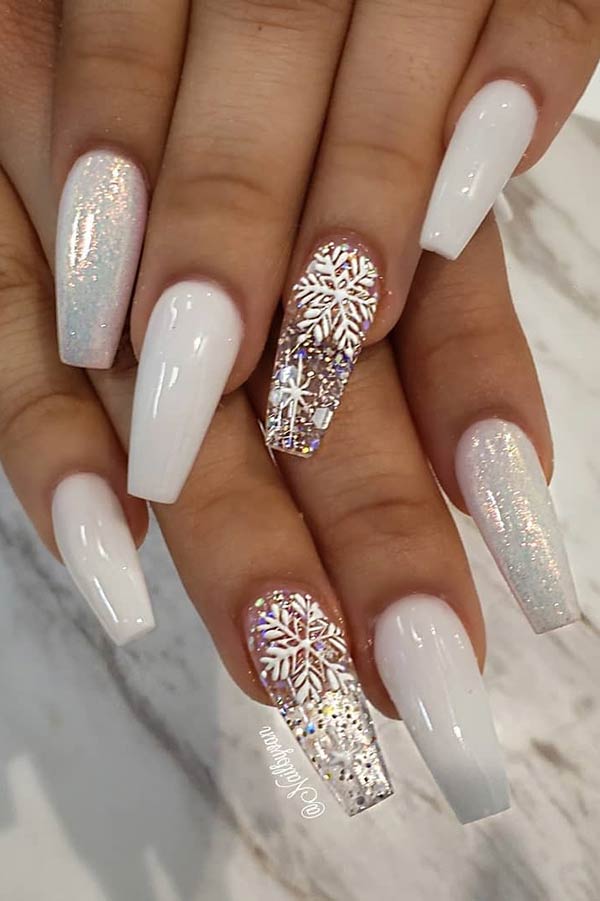
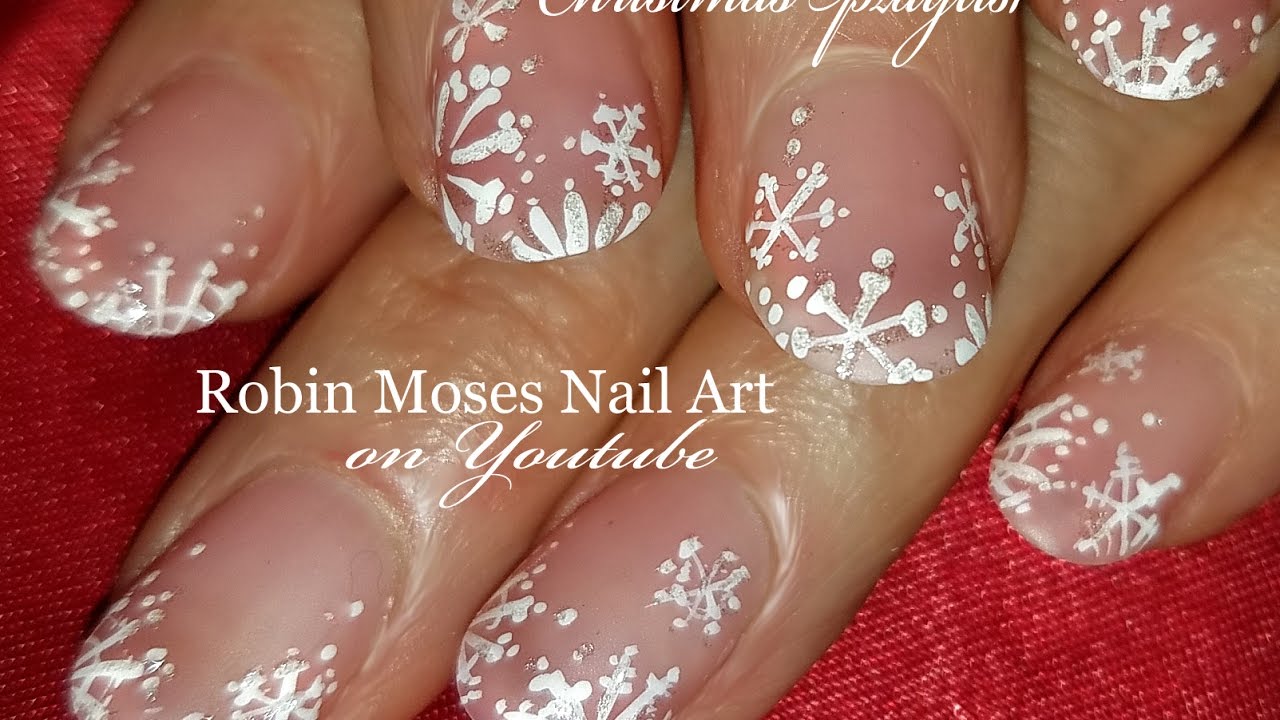
When it comes to winter nail art, snowflakes are a classic and timeless choice. There are endless possibilities for incorporating snowflakes into your nail design, from simple and minimalistic to intricate and detailed. For a simple snowflake design, paint your nails with a light blue polish and use a white nail polish to create small snowflakes on each nail. You can also add some glitter or rhinestones for some extra sparkle. For a more detailed look, try creating different snowflake designs on each nail using a toothpick or nail art brush. Snowflake nail art is not only perfect for the holiday season, but it can also be worn throughout the winter months. Get creative and experiment with different snowflake designs to find the perfect one for you.3. Snowflake Nail Art Ideas


3. Snowflake Nail Art Ideas


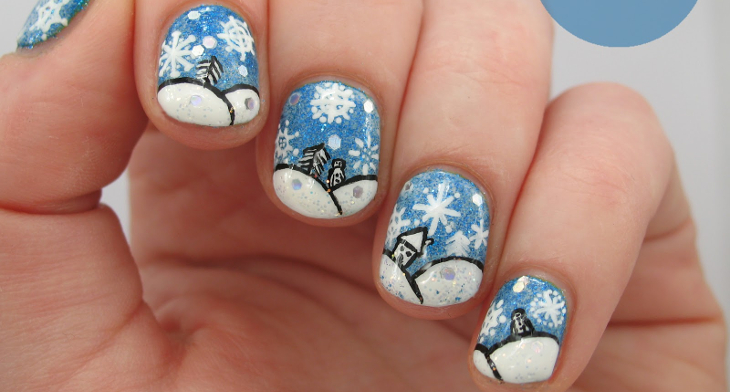
During the holiday season, it's all about being festive and embracing the holiday spirit. Your nails are the perfect canvas to show off your holiday cheer, and there are so many fun and festive designs to choose from. A classic choice for holiday nails is a red and green color scheme. You can paint your nails with alternating red and green polish, or try a candy cane-inspired design with diagonal stripes in both colors. Another option is to paint your nails with a white base and add festive holiday designs like Christmas trees, presents, or snowmen. Don't be afraid to get creative and have fun with your holiday nail designs. After all, 'tis the season to be jolly!4. Festive Holiday Nails

4. Festive Holiday Nails


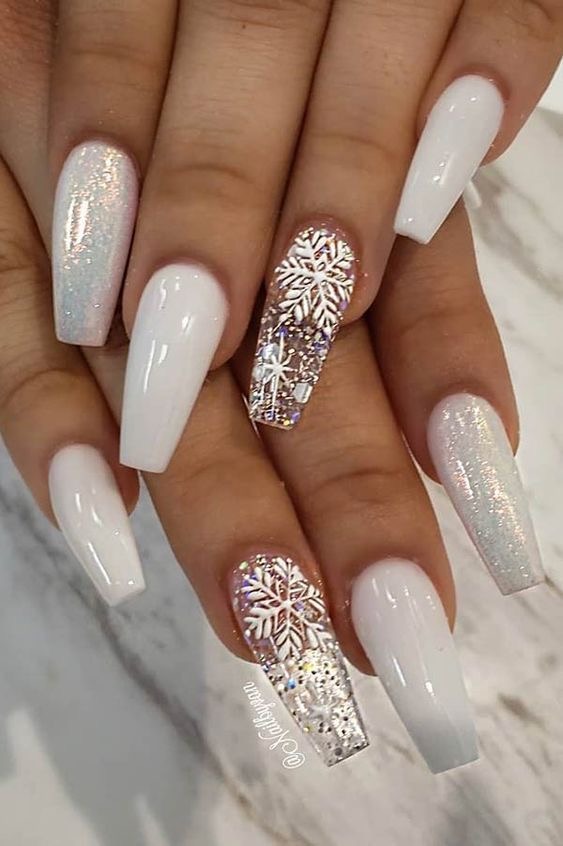
If you want to embrace the winter season in all its glory, then these snowy nail designs are perfect for you. These designs incorporate different shades of white, blue, and silver to create a frosty and wintery look. One option is to paint your nails with a white base and add some silver glitter for a snowy effect. You can also use a light blue polish to create a gradient effect on the tips of your nails to represent a snowy sky. For a more intricate design, try using a white nail polish to create snowflake patterns on your nails. These snowy nail designs are perfect for those who want a subtle and elegant winter look. You can also add some silver or blue rhinestones for some extra sparkle and glamour.5. Snowy Nail Designs for Winter


5. Snowy Nail Designs for Winter


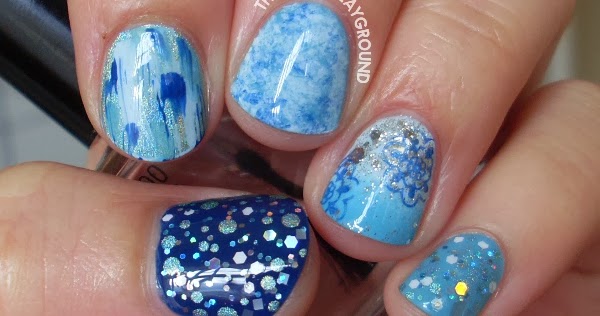
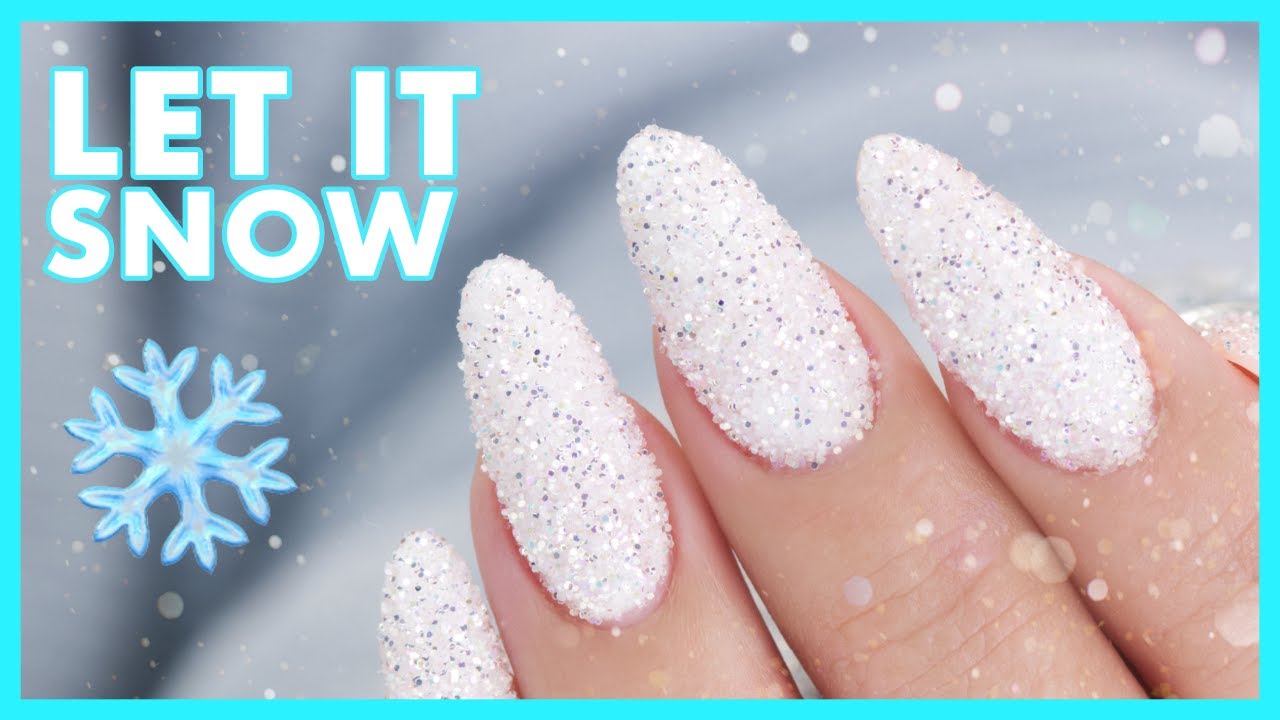
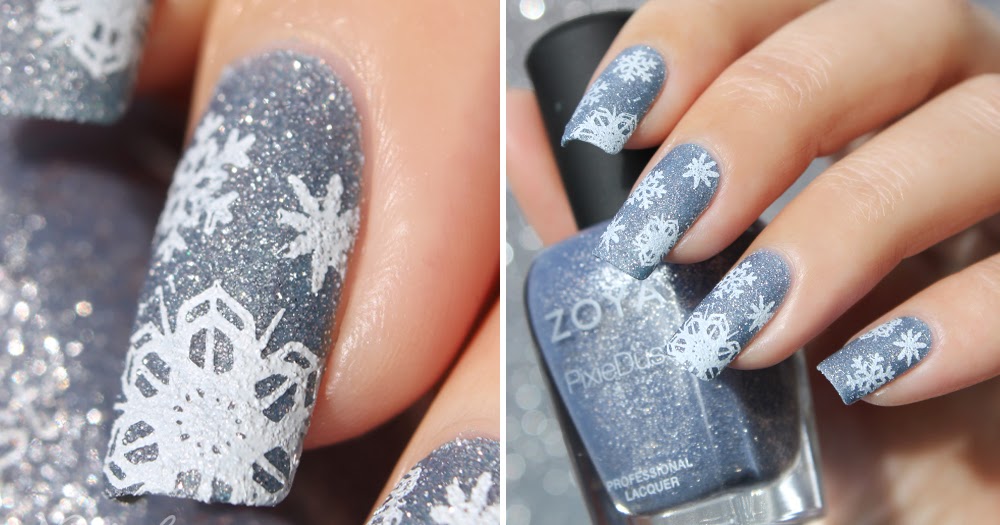
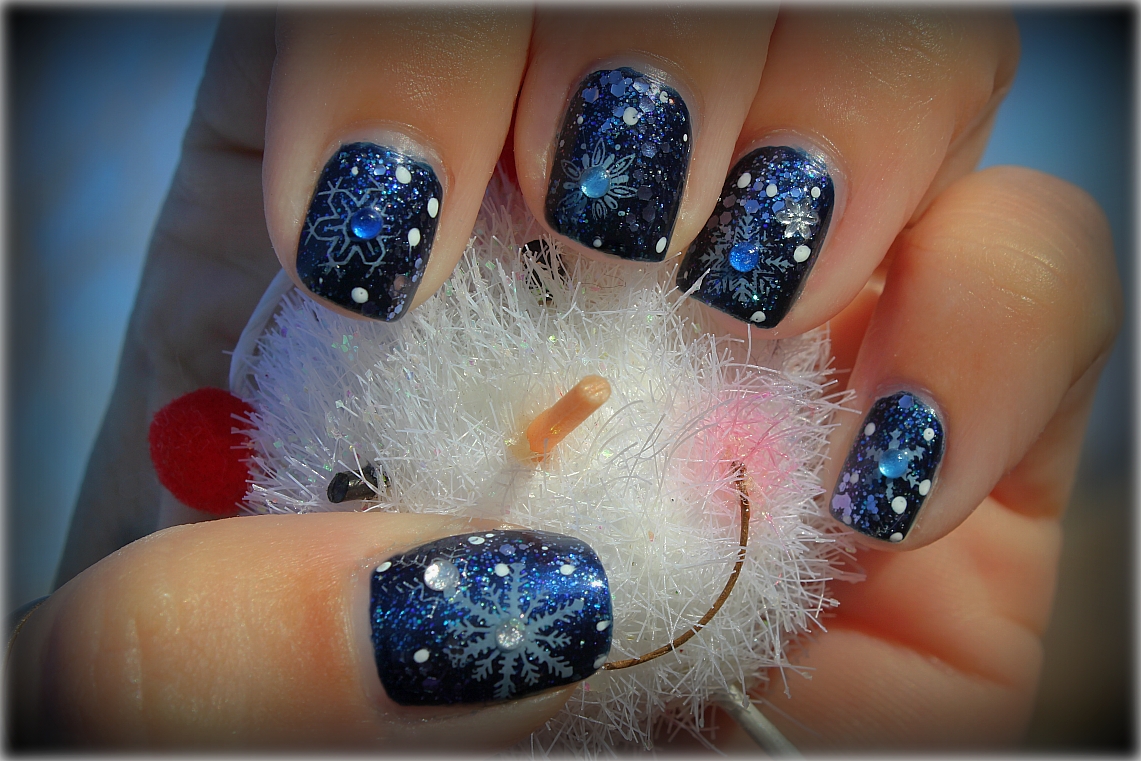
Snow and glitter go hand in hand, making this glittery snow nail art perfect for the winter season. This design adds a touch of glamour and sparkle to your nails, making them stand out in any crowd. To achieve this look, start by painting your nails with a light blue polish as the base. Then, using a glittery white polish, create snowflake patterns on each nail. You can also add some silver or white rhinestones for some extra bling. Finish off with a clear top coat to seal in your design and add some shine. This glittery snow nail art is perfect for those who want to make a statement with their nails and add some extra sparkle to their winter look.6. Glittery Snow Nail Art


6. Glittery Snow Nail Art

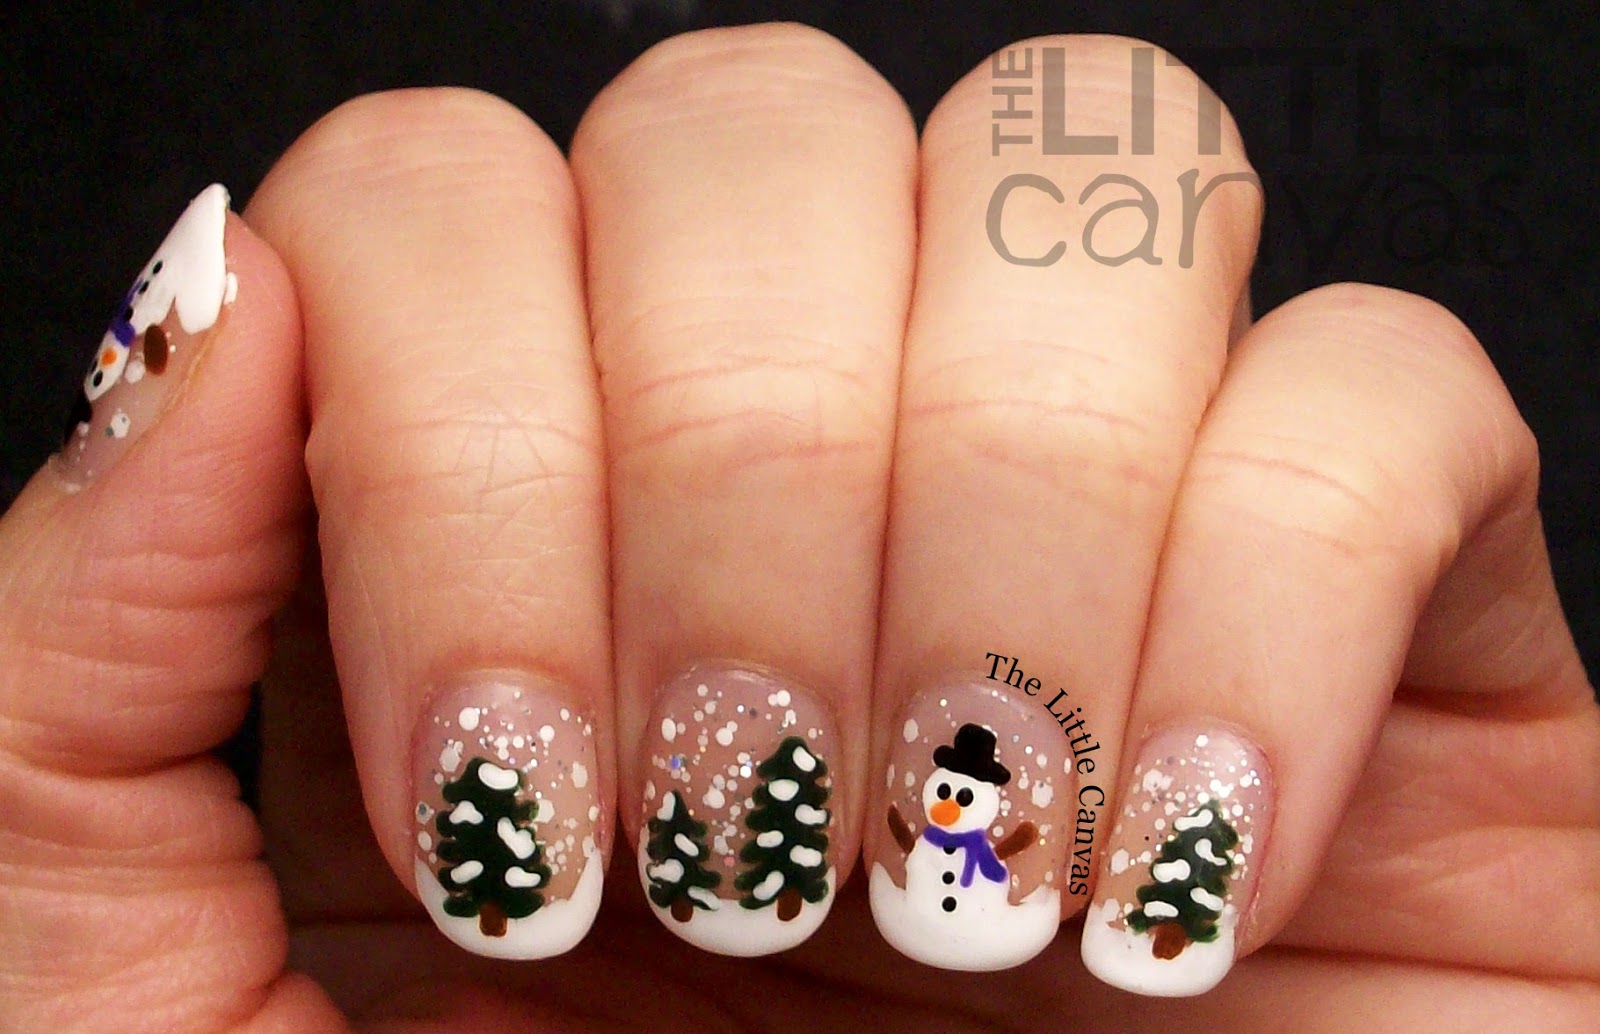
This manicure takes the "Let It Snow" theme to a whole new level. Instead of just snowflakes, this design incorporates a snowman into the mix for a fun and playful look. Start by painting your nails with a light blue polish and use a white nail polish to create snowflakes on each nail. Then, using a black and orange nail polish, create a snowman design on one of your nails. You can also add some silver or white rhinestones for some extra sparkle. Finish off with a clear top coat for a glossy finish. This adorable Let It Snow manicure is perfect for those who want a more whimsical and fun winter look. It's also a great option for those who want to switch up their usual snowflake nail designs.7. Let It Snow Manicure


7. Let It Snow Manicure
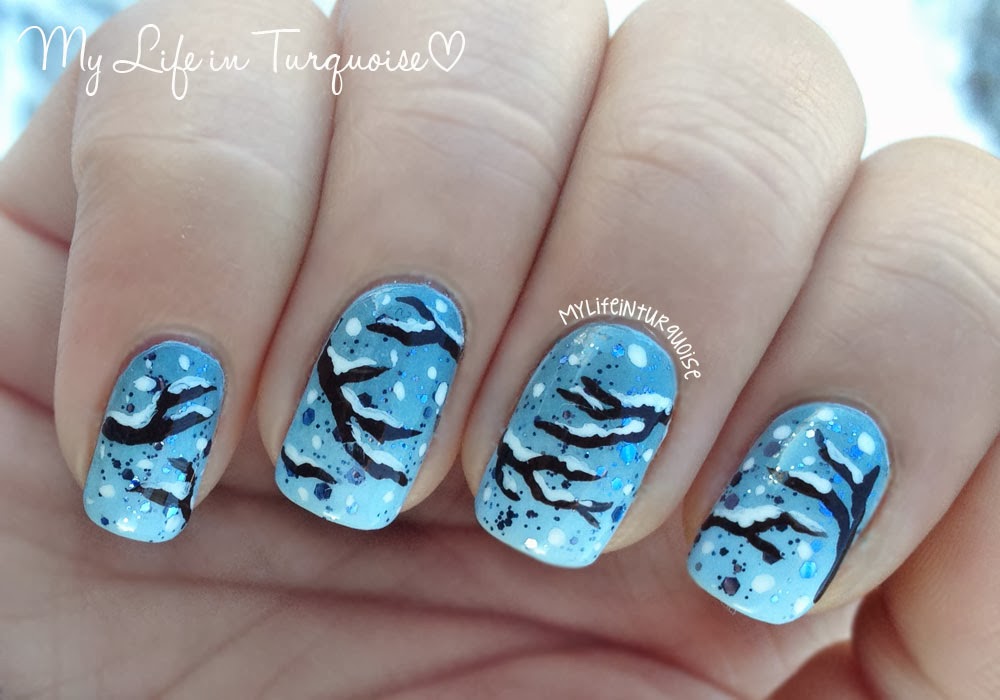
For a unique and eye-catching winter nail design, try out this snowy mountain nail art. This design incorporates different shades of blue and white to create a stunning mountain landscape on your nails. Start by painting your nails with a light blue polish and use a white nail polish to create a snowy mountain range on each nail. You can also add some silver glitter or rhinestones to represent snowfall. Finish off with a clear top coat to seal in your design. This snowy mountain nail design is perfect for those who love the winter season and want to add a touch of nature to their nail art.8. Snowy Mountain Nail Design

8. Snowy Mountain Nail Design
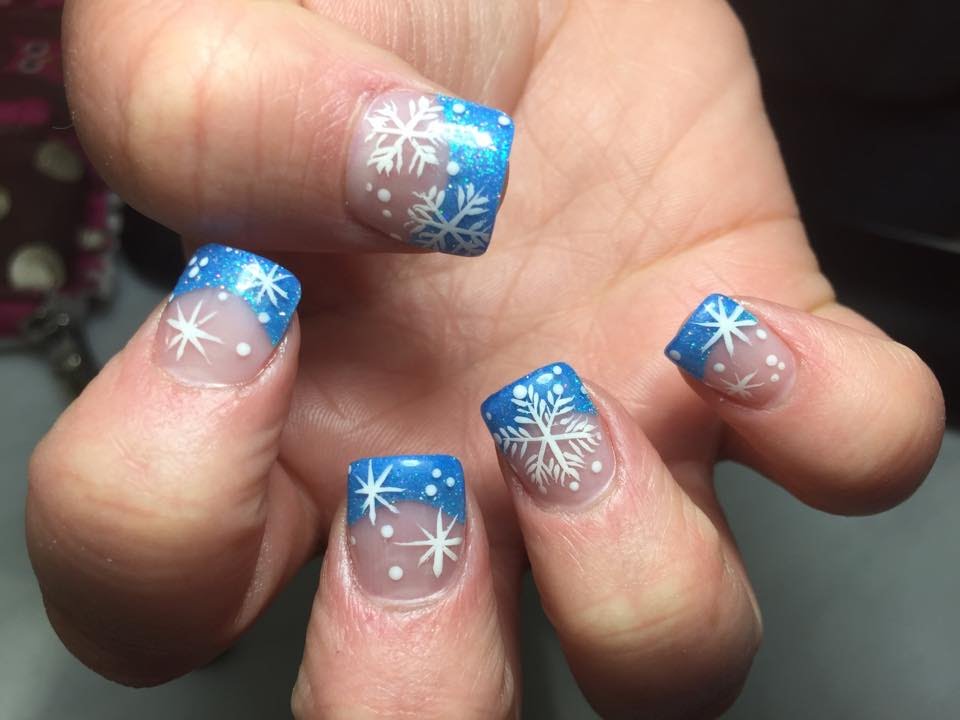
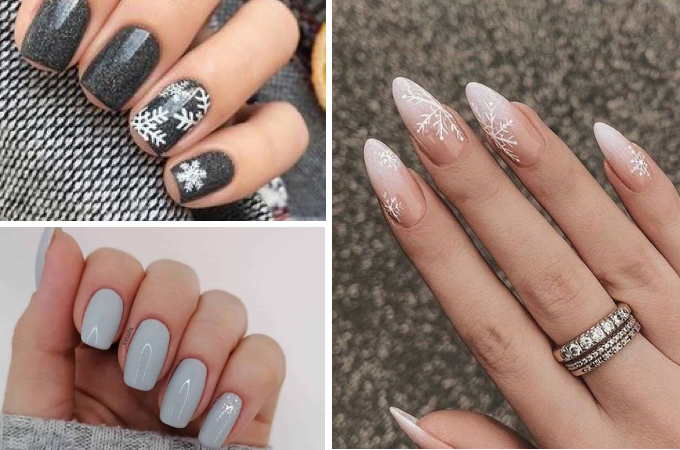
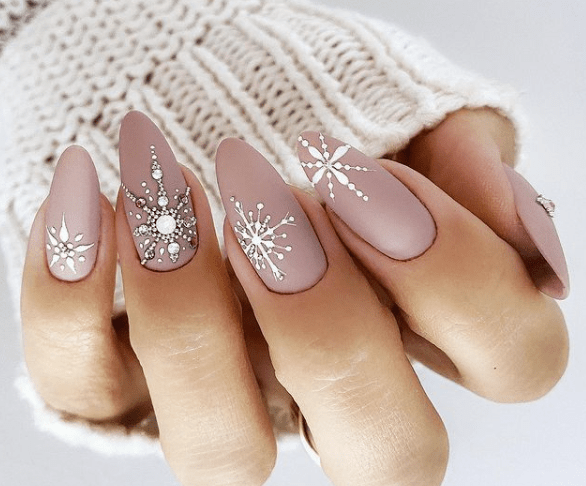
If you want to incorporate snowflakes into your winter nail design but don't want to cover all your nails with them, try out this snowflake accent nail tutorial. This design adds a subtle touch of winter to your nails while still keeping them chic and stylish. Start by painting your nails with a light blue polish and use a white nail polish to create a snowflake design on one nail. You can also add some silver or blue rhinestones for some extra sparkle. Leave the rest of your nails with just the light blue base color and finish off with a clear top coat. This snowflake accent nail tutorial is perfect for those who want a more minimalistic and understated winter look.9. Snowflake Accent Nail Tutorial

9. Snowflake Accent Nail Tutorial

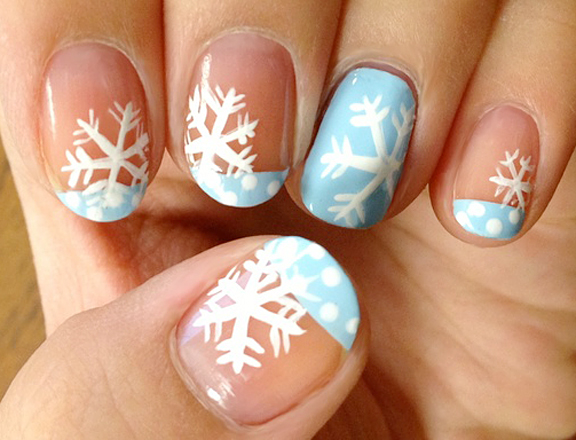
Add a twist to the classic French tip nails with this Let It Snow inspired design. This look incorporates a white tip with a snowflake design for a subtle and elegant winter look. To achieve this look, start by painting your nails with a light blue polish and use a white nail polish to create a white French tip on each nail. Then, use a toothpick or nail art brush to create a snowflake design on the white tip. Finish off with a clear top coat for a flawless finish. This Let It Snow French tip nail design is perfect for those who want a more subtle and sophisticated winter look. It's also a great option for those who want to try something different with their French tip nails.10. Let It Snow French Tip Nails

10. Let It Snow French Tip Nails

Let It Snow: The Perfect Nail Design for Winter

The Magic of Winter
 Winter is a magical time of year, with crisp air, cozy sweaters, and of course, snow. As the snowflakes fall and cover the ground in a blanket of white, it's hard not to feel the holiday spirit. And what better way to embrace the winter wonderland than with a festive and
seasonal nail design
. If you're looking to add some
holiday cheer
to your nails, then look no further than the
"Let It Snow" nail design
.
Winter is a magical time of year, with crisp air, cozy sweaters, and of course, snow. As the snowflakes fall and cover the ground in a blanket of white, it's hard not to feel the holiday spirit. And what better way to embrace the winter wonderland than with a festive and
seasonal nail design
. If you're looking to add some
holiday cheer
to your nails, then look no further than the
"Let It Snow" nail design
.
How to Achieve the Look
 To achieve the perfect "Let It Snow" nail design, start by painting your nails with a base color of your choice. Popular choices for this design include deep red, forest green, or even a glittery silver or gold. Once your base color is dry, it's time to add the snowflakes. Using a
white nail polish
and a thin brush, carefully draw snowflake shapes onto each nail. Don't worry about making them perfect, as
natural and unique snowflakes
are what make this design so charming.
Next, with a
blue nail polish
, add small dots around the snowflakes to represent falling snow. You can also add a touch of sparkle with a
silver or holographic glitter polish
. Once everything is dry, seal in your design with a clear topcoat for a shiny finish.
To achieve the perfect "Let It Snow" nail design, start by painting your nails with a base color of your choice. Popular choices for this design include deep red, forest green, or even a glittery silver or gold. Once your base color is dry, it's time to add the snowflakes. Using a
white nail polish
and a thin brush, carefully draw snowflake shapes onto each nail. Don't worry about making them perfect, as
natural and unique snowflakes
are what make this design so charming.
Next, with a
blue nail polish
, add small dots around the snowflakes to represent falling snow. You can also add a touch of sparkle with a
silver or holographic glitter polish
. Once everything is dry, seal in your design with a clear topcoat for a shiny finish.
Accessorize Your Nails
 To take your "Let It Snow" nail design to the next level, add some fun and festive accessories. You can find
snowflake nail decals
at most drugstores or online, which make for an easy and quick way to add some extra detail to your nails. You can also take a cue from nature and add small
white pearls
or
rhinestones
to represent snow on your nails.
For a more subtle look, try painting just one or two accent nails with the snowflake design and keeping the rest of your nails a solid color. You can also experiment with different color combinations and designs, such as a
red and white candy cane stripe
or a
green and gold Christmas tree
.
To take your "Let It Snow" nail design to the next level, add some fun and festive accessories. You can find
snowflake nail decals
at most drugstores or online, which make for an easy and quick way to add some extra detail to your nails. You can also take a cue from nature and add small
white pearls
or
rhinestones
to represent snow on your nails.
For a more subtle look, try painting just one or two accent nails with the snowflake design and keeping the rest of your nails a solid color. You can also experiment with different color combinations and designs, such as a
red and white candy cane stripe
or a
green and gold Christmas tree
.
Spread the Holiday Cheer
 Not only is the "Let It Snow" nail design a fun and festive way to
showcase your holiday spirit
, but it's also a great conversation starter. So whether you're heading to a holiday party or just running errands, your nails will surely catch the attention of others and spread some holiday cheer.
In conclusion, the "Let It Snow" nail design is the perfect way to embrace the magic of winter and add some holiday spirit to your nails. With a few simple steps and some fun accessories, you can achieve a unique and eye-catching look that will have everyone dreaming of a white Christmas. So go ahead, grab your favorite winter nail polish and let it snow!
Not only is the "Let It Snow" nail design a fun and festive way to
showcase your holiday spirit
, but it's also a great conversation starter. So whether you're heading to a holiday party or just running errands, your nails will surely catch the attention of others and spread some holiday cheer.
In conclusion, the "Let It Snow" nail design is the perfect way to embrace the magic of winter and add some holiday spirit to your nails. With a few simple steps and some fun accessories, you can achieve a unique and eye-catching look that will have everyone dreaming of a white Christmas. So go ahead, grab your favorite winter nail polish and let it snow!


