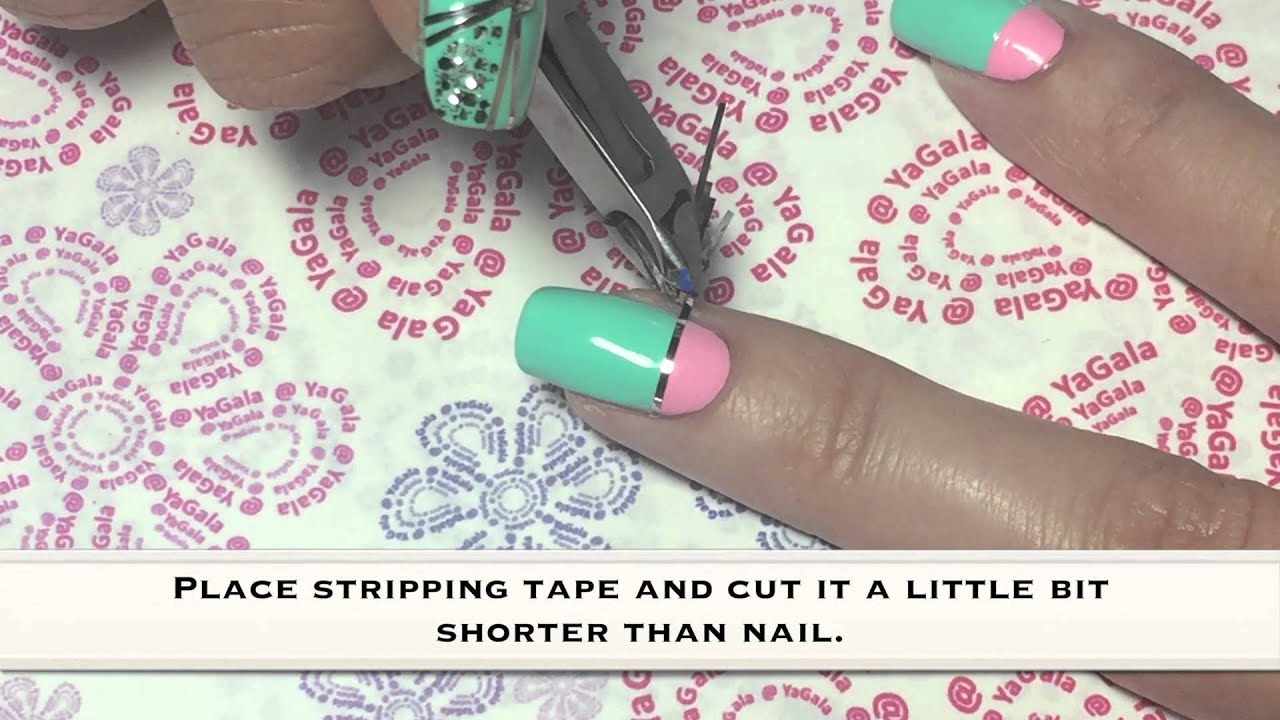
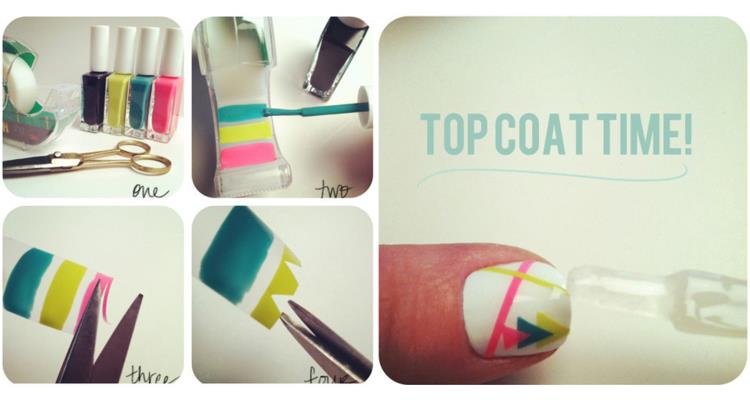
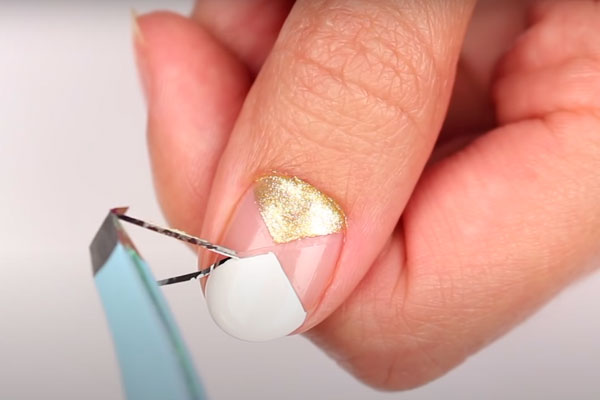
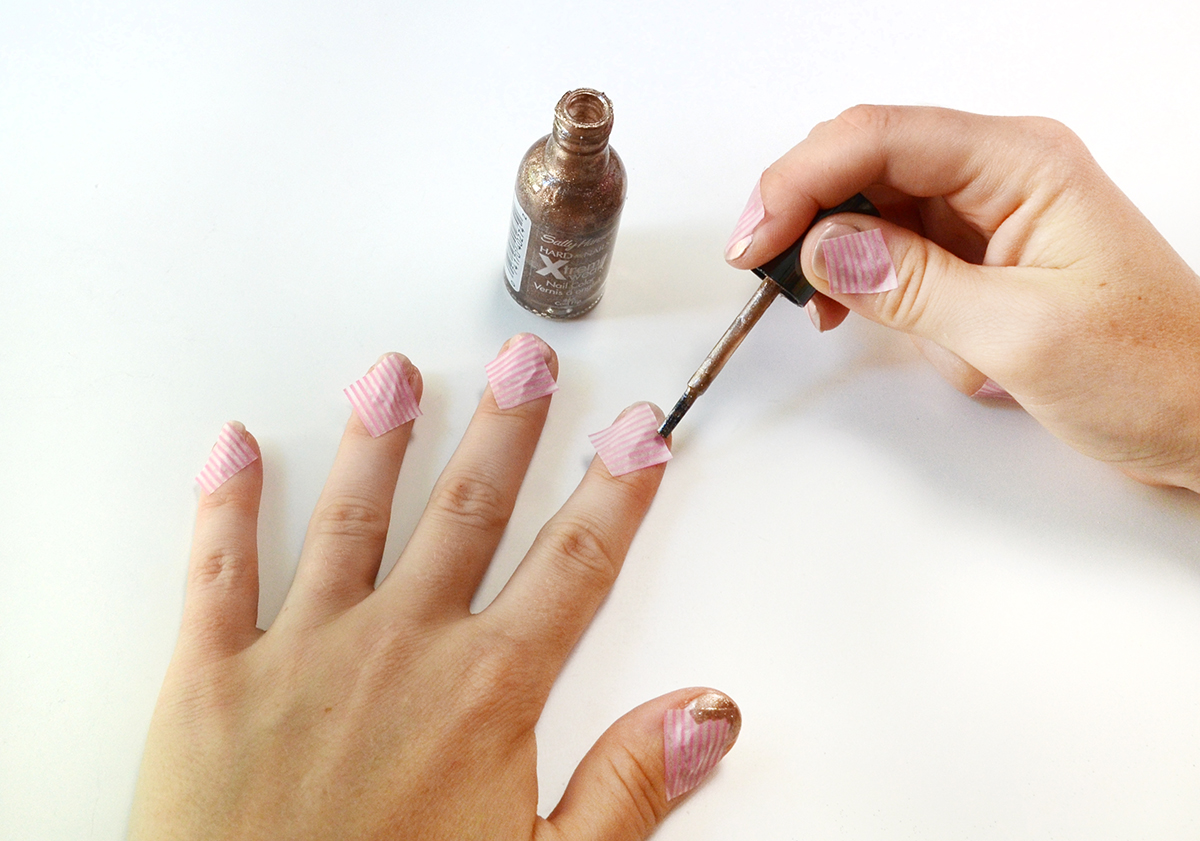
If you're looking for a fun and easy way to amp up your nail game, look no further than tape nail designs. This simple technique involves using tape as a stencil to create intricate and unique designs on your nails. First, start with a base coat of your favorite nail polish. Once dry, cut small pieces of tape and place them on your nails in the desired design. You can use scissors to create different shapes or scotch tape for straight lines. Next, apply a different color of nail polish over the tape and let it dry completely. Then, gently peel off the tape to reveal a crisp and clean design. Finish with a top coat for a long-lasting and professional look. This DIY nail design with tape is perfect for beginners and can be done with any color combination. So get creative and have fun with it!1. "Easy DIY Nail Designs Using Tape"


1. "Easy DIY Nail Designs Using Tape"


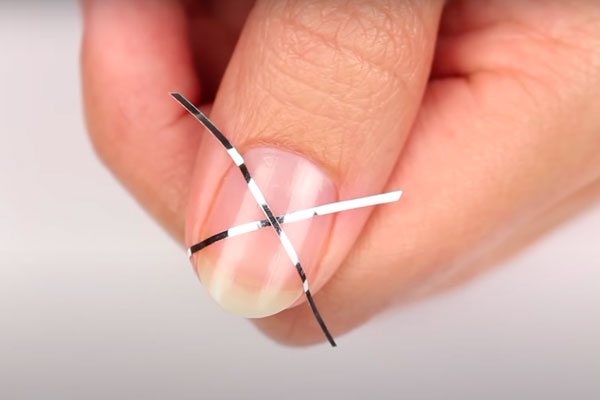
If you're new to the world of nail art, tape designs are a great place to start. They require minimal tools and can easily be done at home. Plus, the possibilities are endless when it comes to creating unique and eye-catching designs. One easy idea for beginners is to create a negative space design using tape. Simply apply a base coat, place small strips of tape in a criss-cross pattern on your nails, and then paint over it with a contrasting color. Peel off the tape to reveal a modern and trendy design. You can also use tape to create geometric patterns or ombre effects. The key is to have fun and experiment with different designs until you find one that you love.2. "Tape Nail Art Ideas for Beginners"


2. "Tape Nail Art Ideas for Beginners"


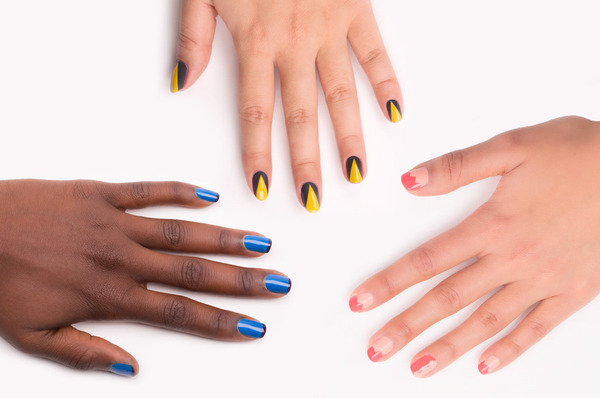
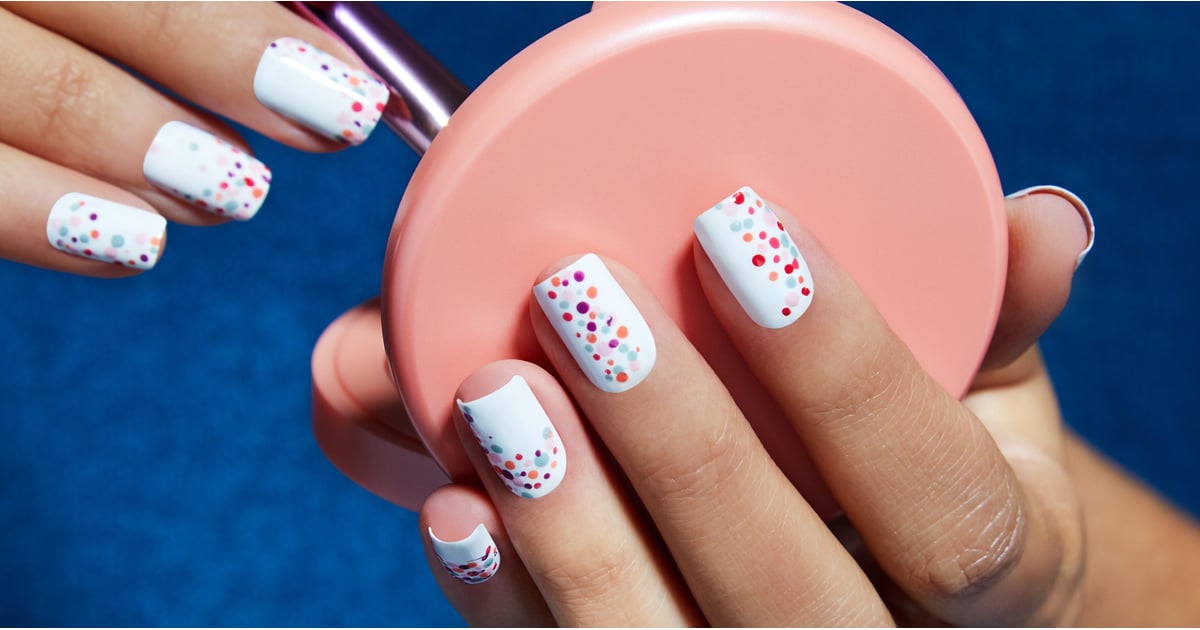
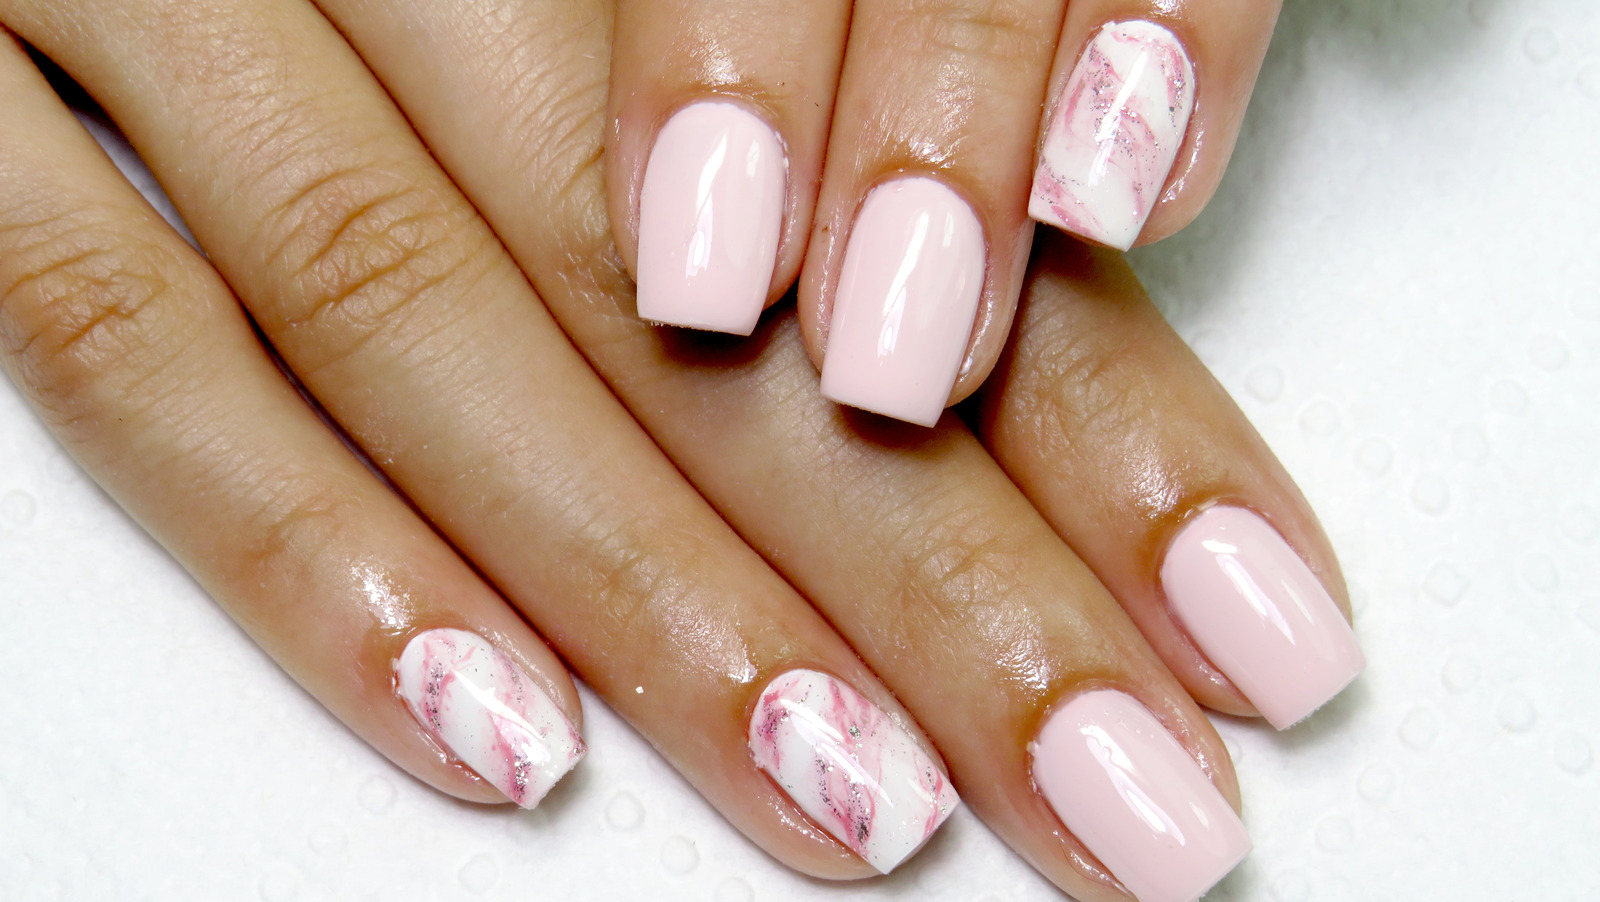
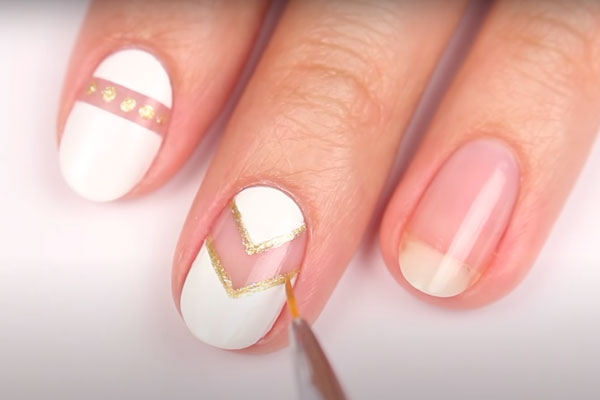
If you want to add a little something extra to your nail designs, try incorporating tape as an accent. This can be done in a variety of ways, from using tape to create stripes or borders, to adding small pieces of tape as a glitter accent. For a floral touch, try using tape to create a stencil for painting flowers on your nails. This technique is perfect for achieving a delicate and intricate design without the need for advanced nail art skills. Using tape as an accent is a simple and versatile way to elevate your nail designs and keep up with the latest trends.3. "Trendy Nail Designs with Tape Accents"


3. "Trendy Nail Designs with Tape Accents"


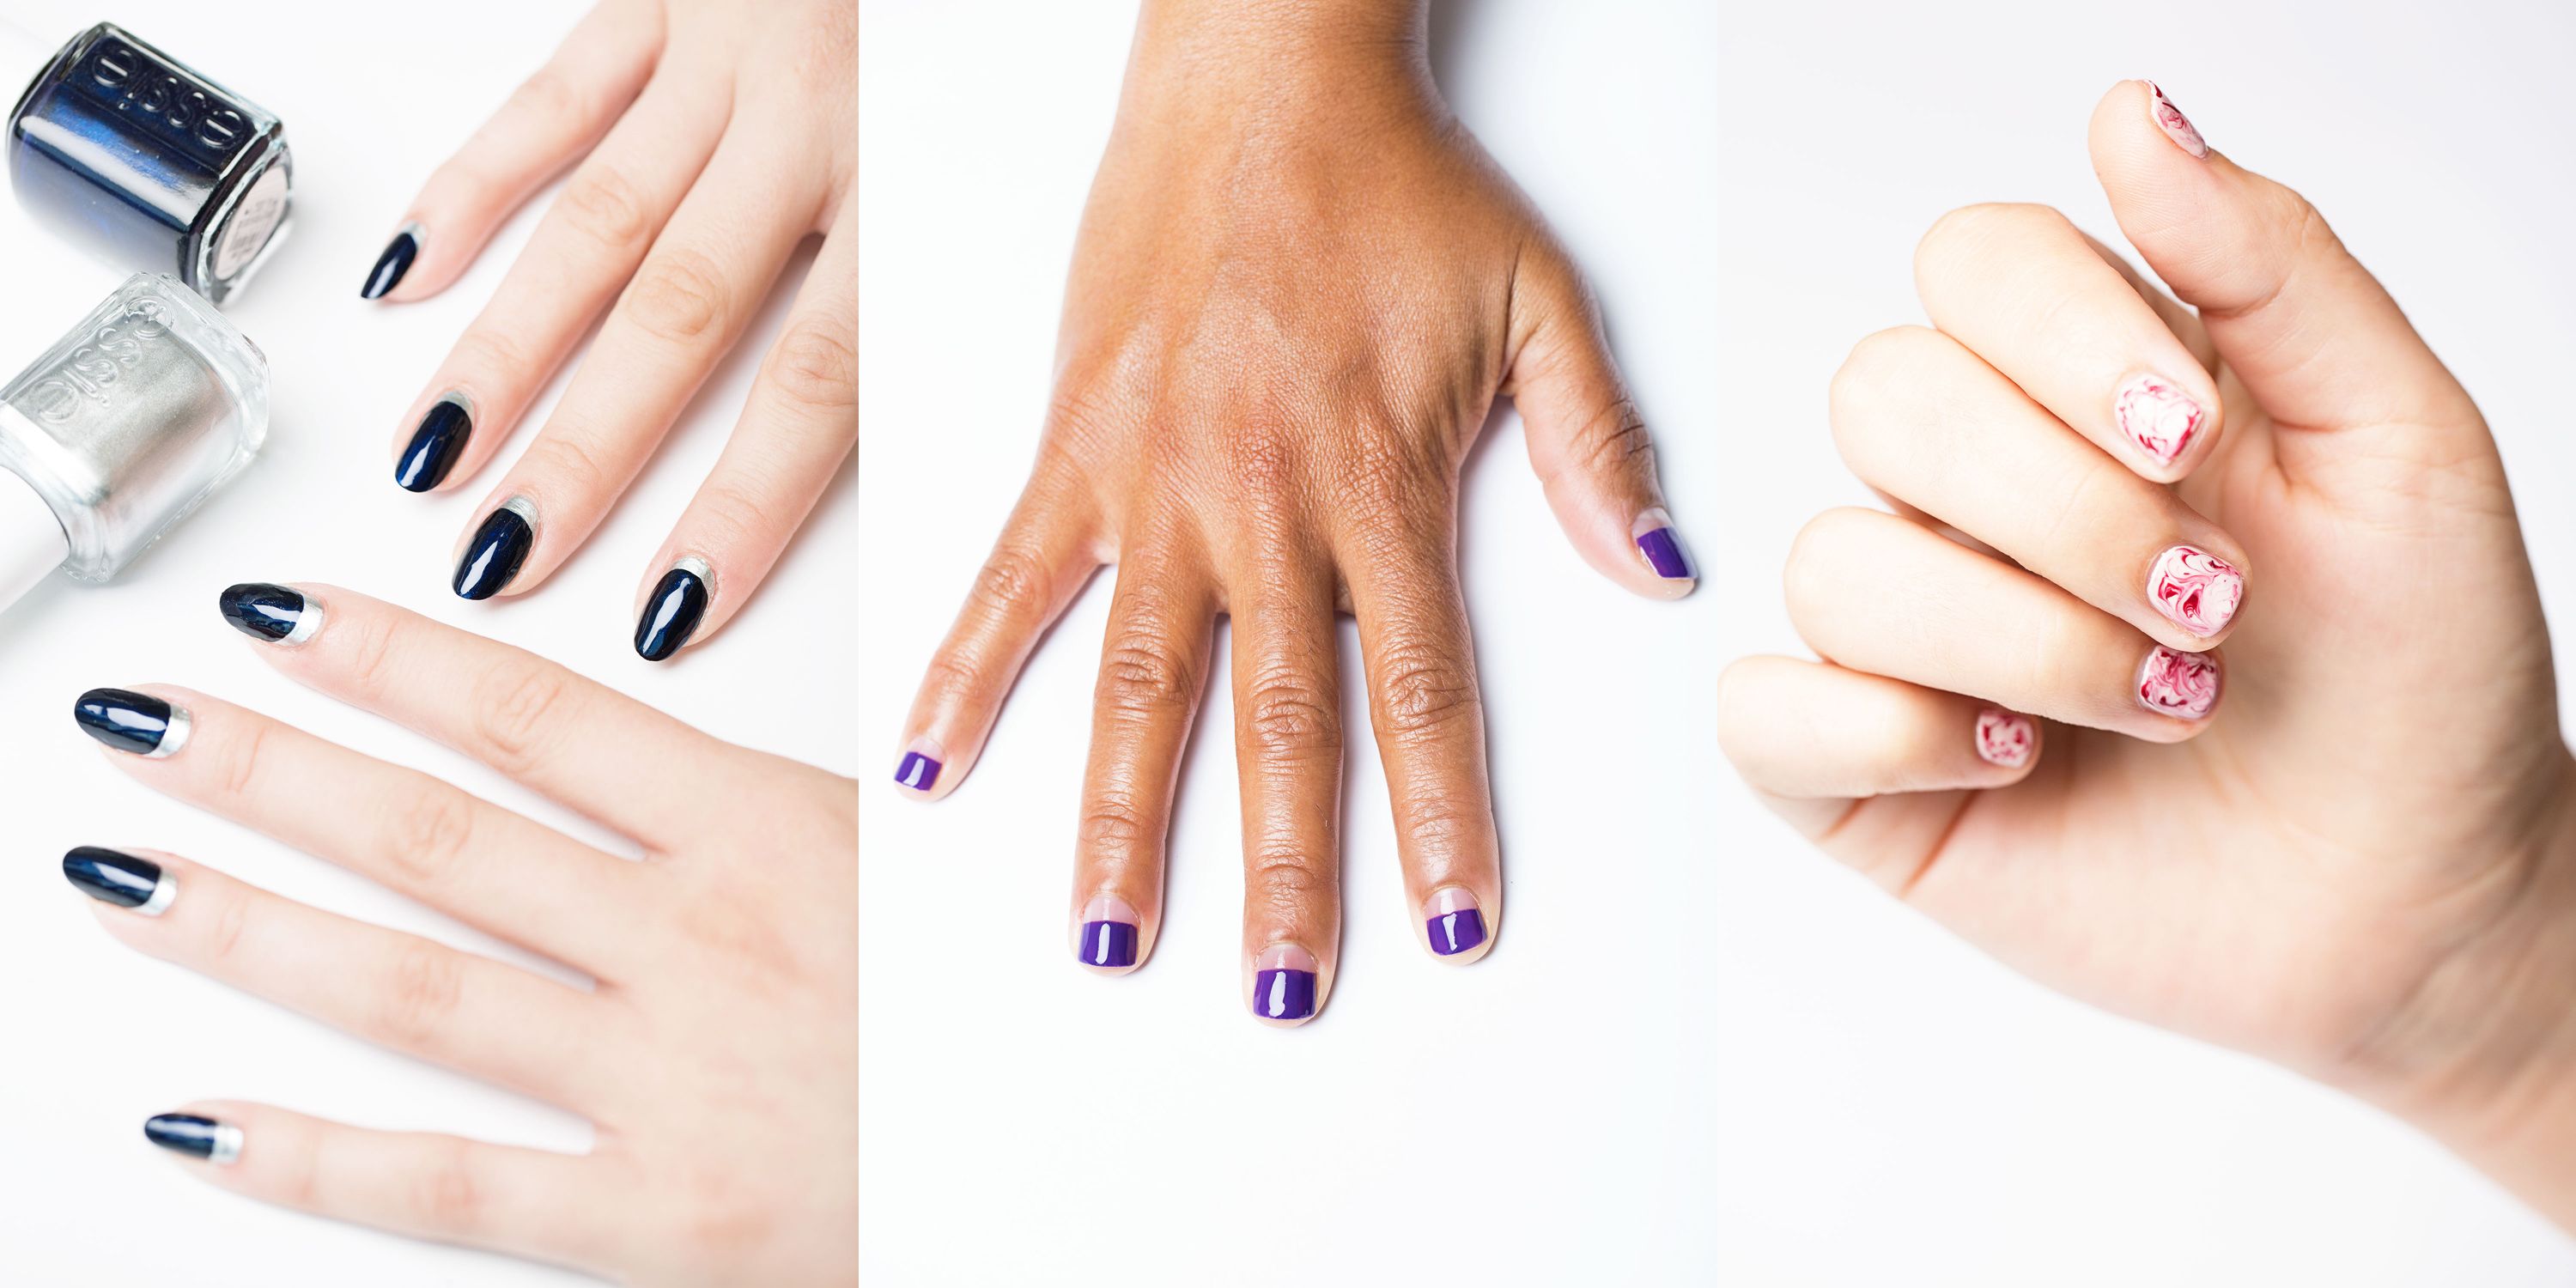
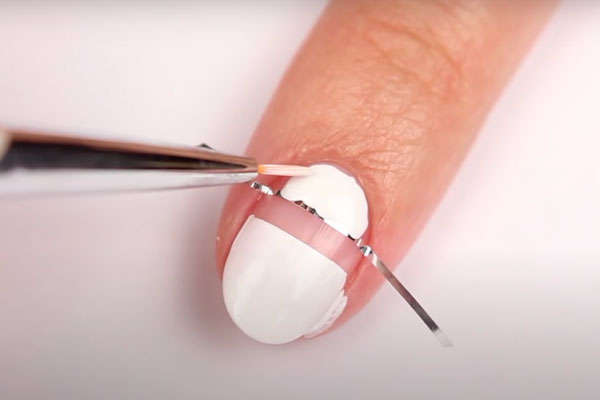
Who knew that scotch tape could be used to create cute and unique nail designs? With just a few strips of tape and some polish, you can achieve a variety of fun and playful looks. One popular design is the half-moon manicure. Simply place a small strip of tape at the base of your nail, paint the tips a different color, and remove the tape for a chic and modern look. For a more playful design, try using tape to create chevron stripes or a checkerboard pattern. The possibilities are endless when it comes to using tape to create cute nail designs.4. "Cute Nail Designs with Scotch Tape"


4. "Cute Nail Designs with Scotch Tape"


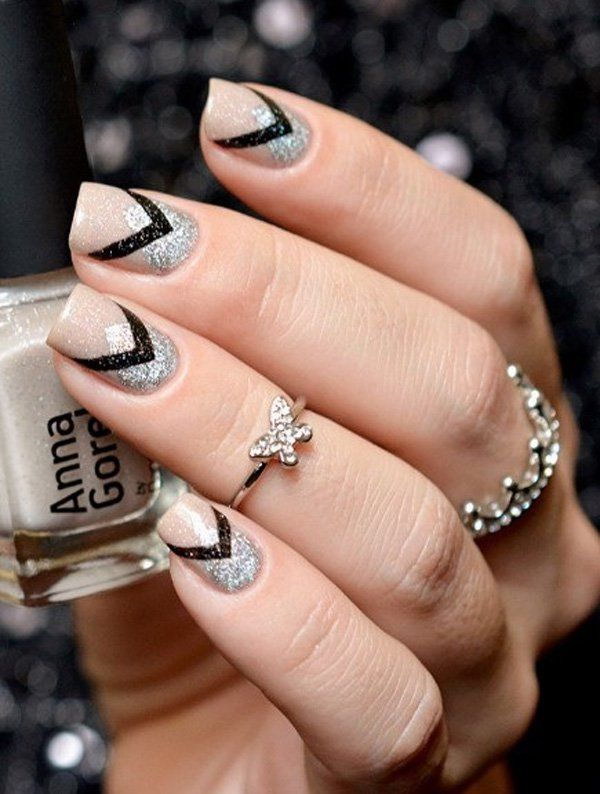
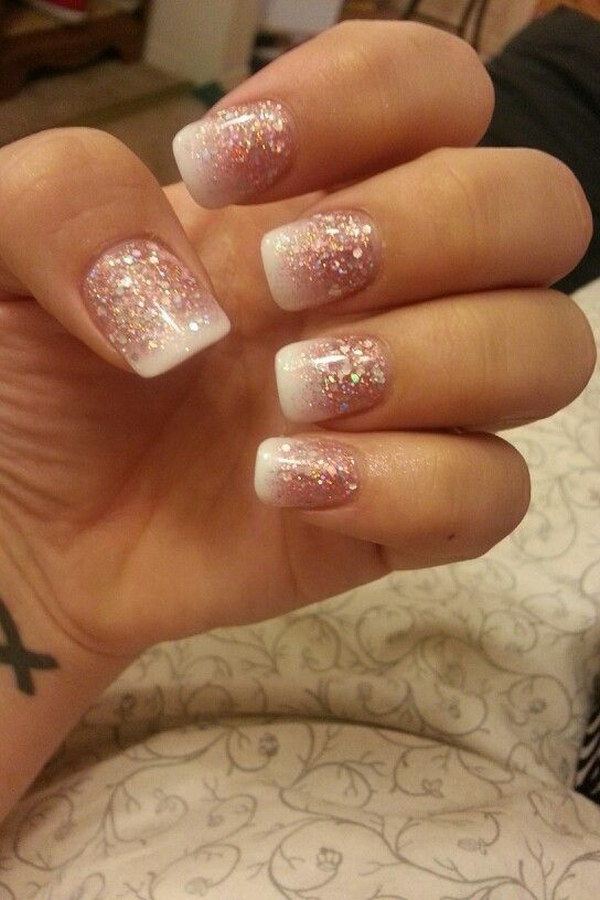
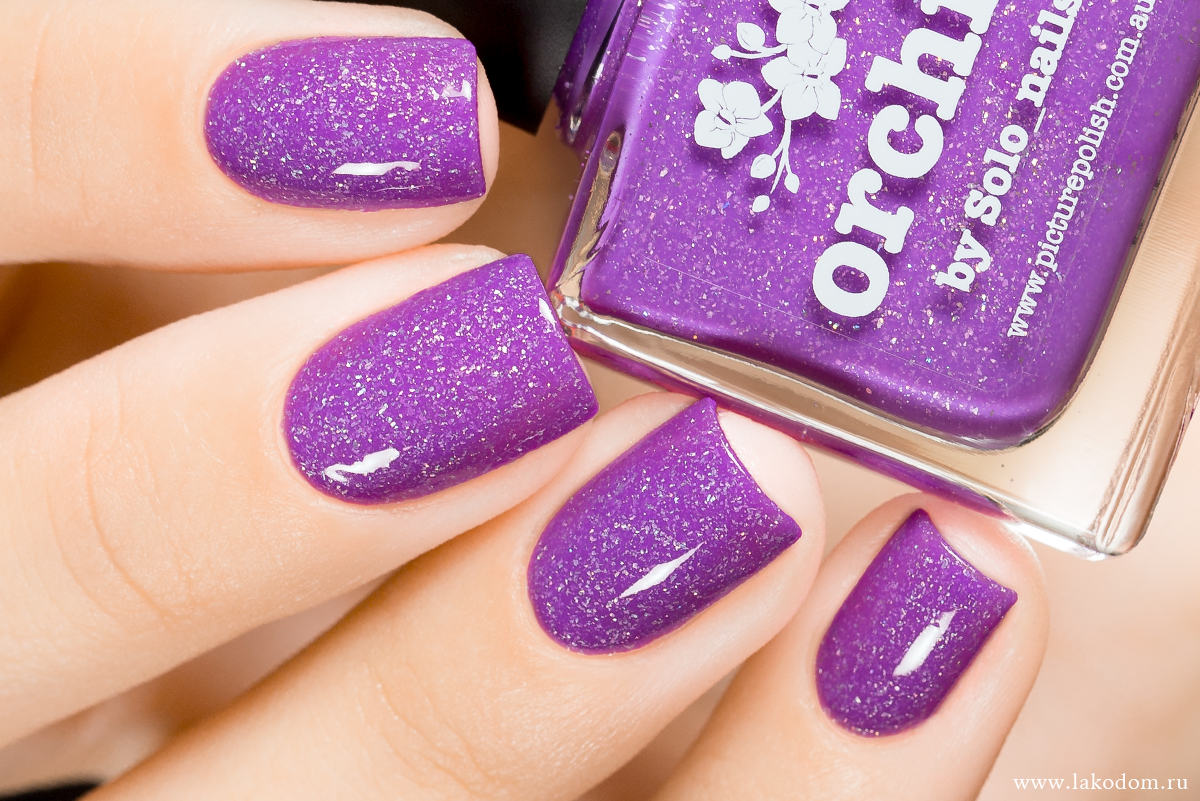
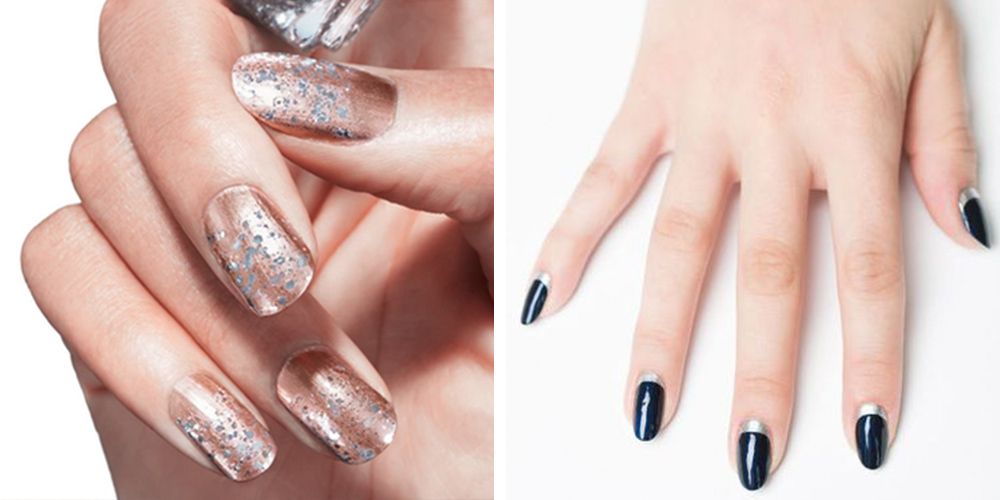
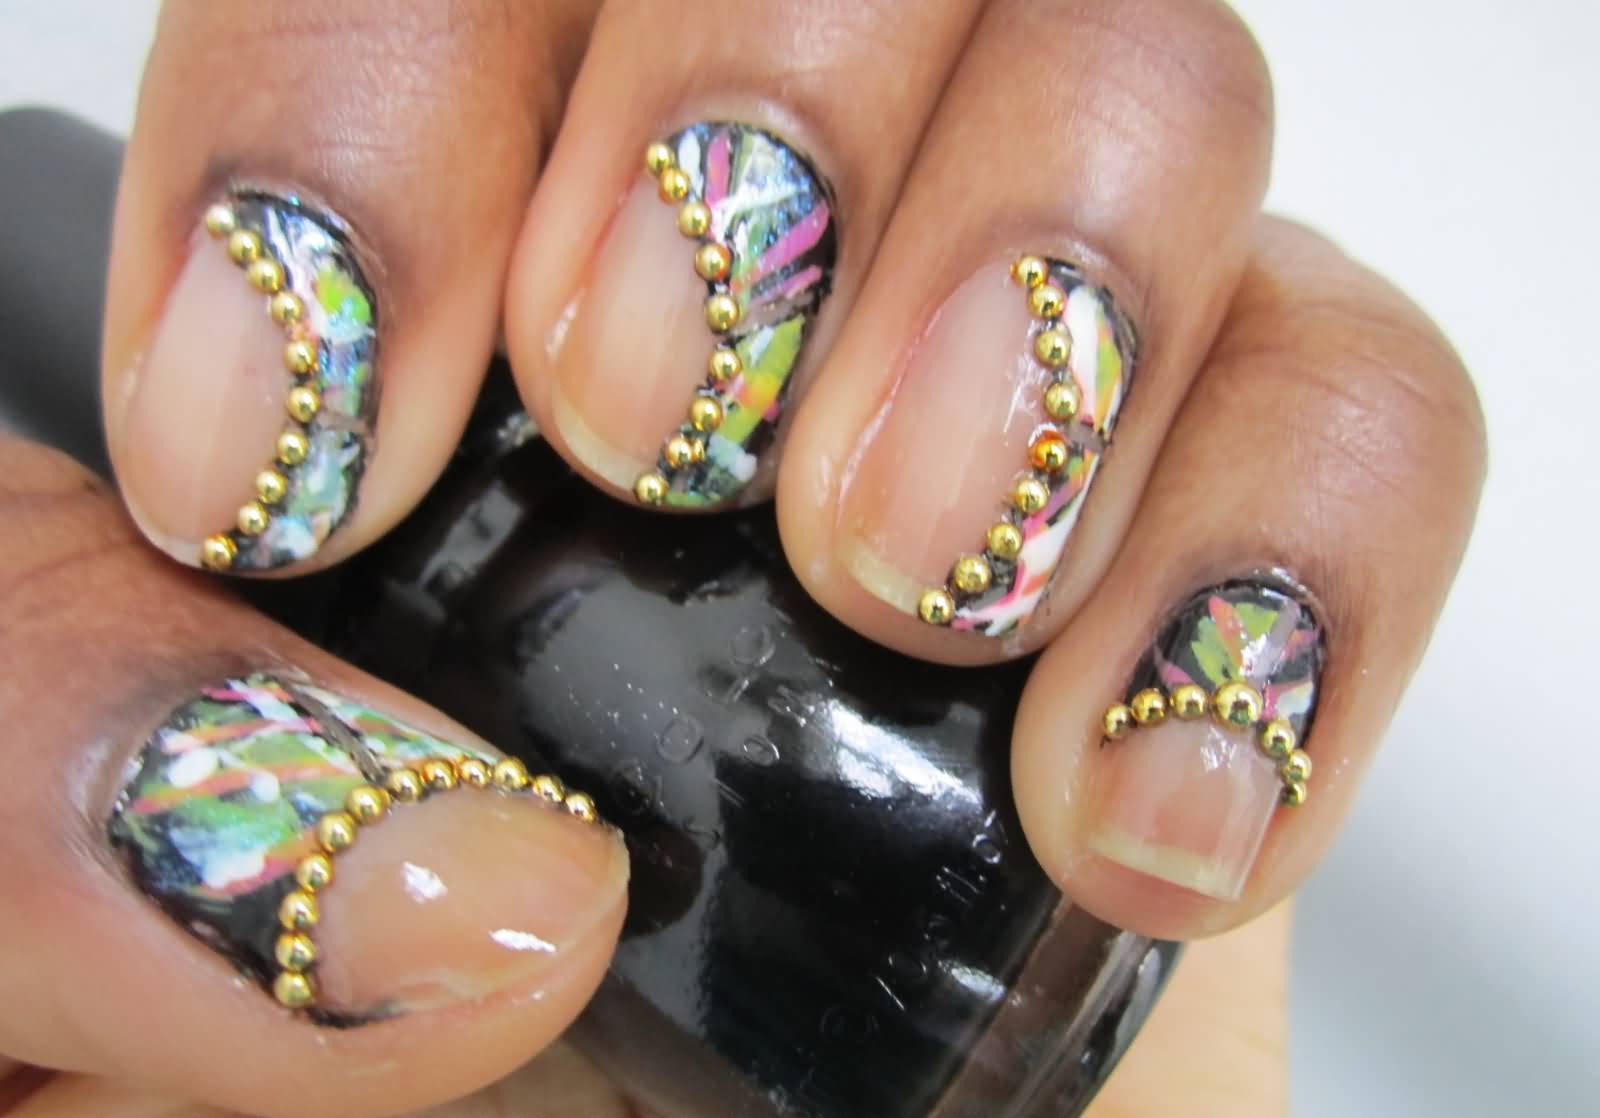
For a glamorous and sparkly nail design, try incorporating tape and glitter. This combination is perfect for adding a touch of glam to any manicure. One idea is to use tape as a guide for creating a gradient effect with glitter. Simply paint the base of your nail with a glitter polish, and then use tape to create a diagonal line for a gradient effect. You can also use tape to create a glitter accent on your nails. This can be done by placing small strips of tape in a desired shape, and then pressing glitter onto the exposed part of your nail. Remove the tape and voila, a glittery accent.5. "Nail Designs with Tape and Glitter"

5. "Nail Designs with Tape and Glitter"

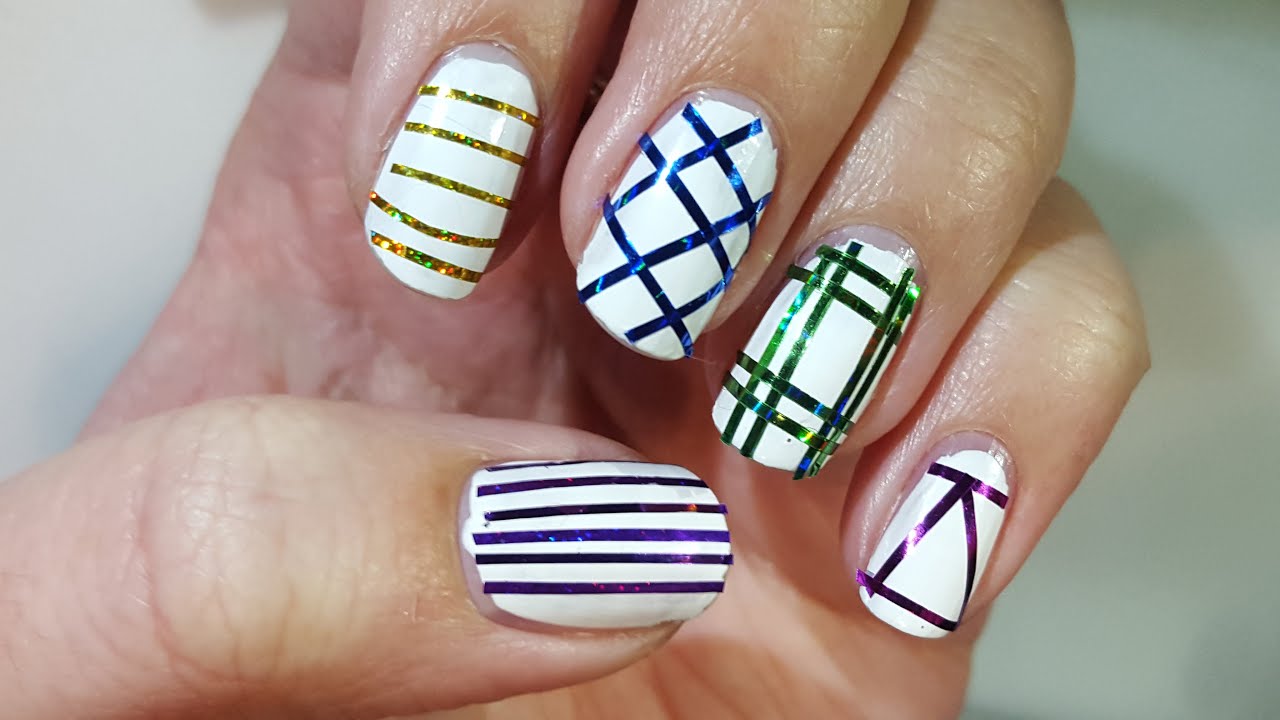
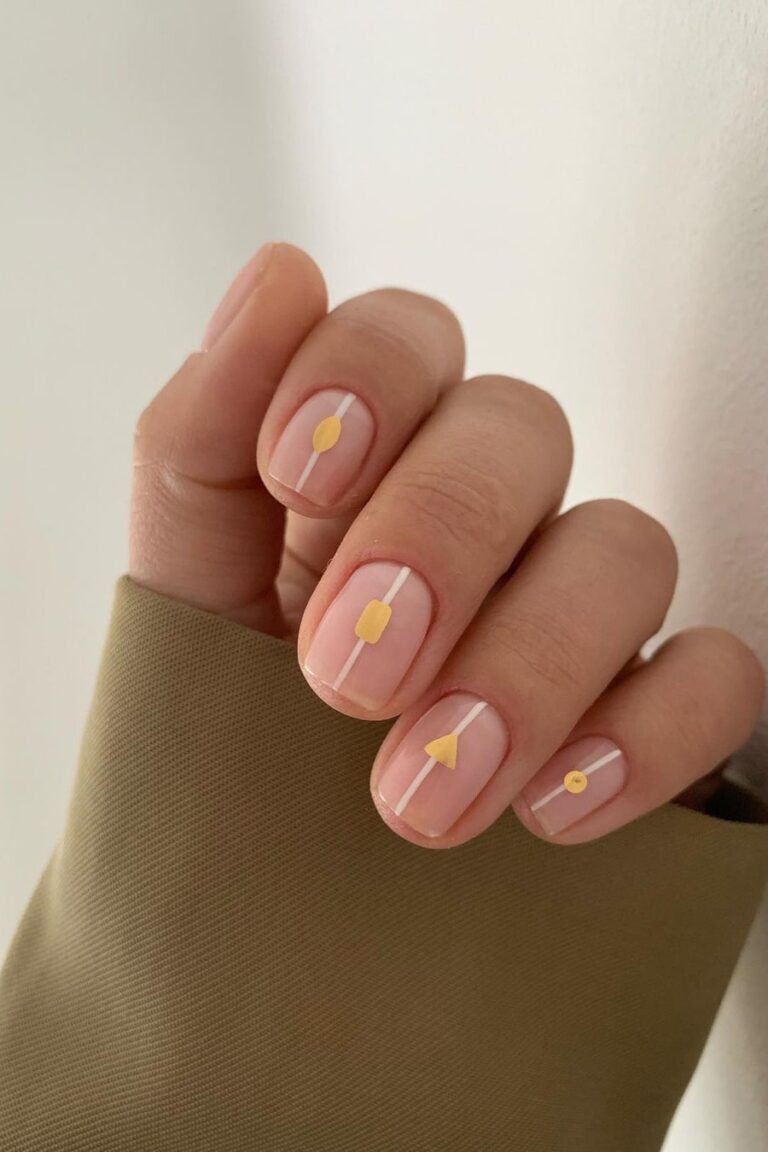
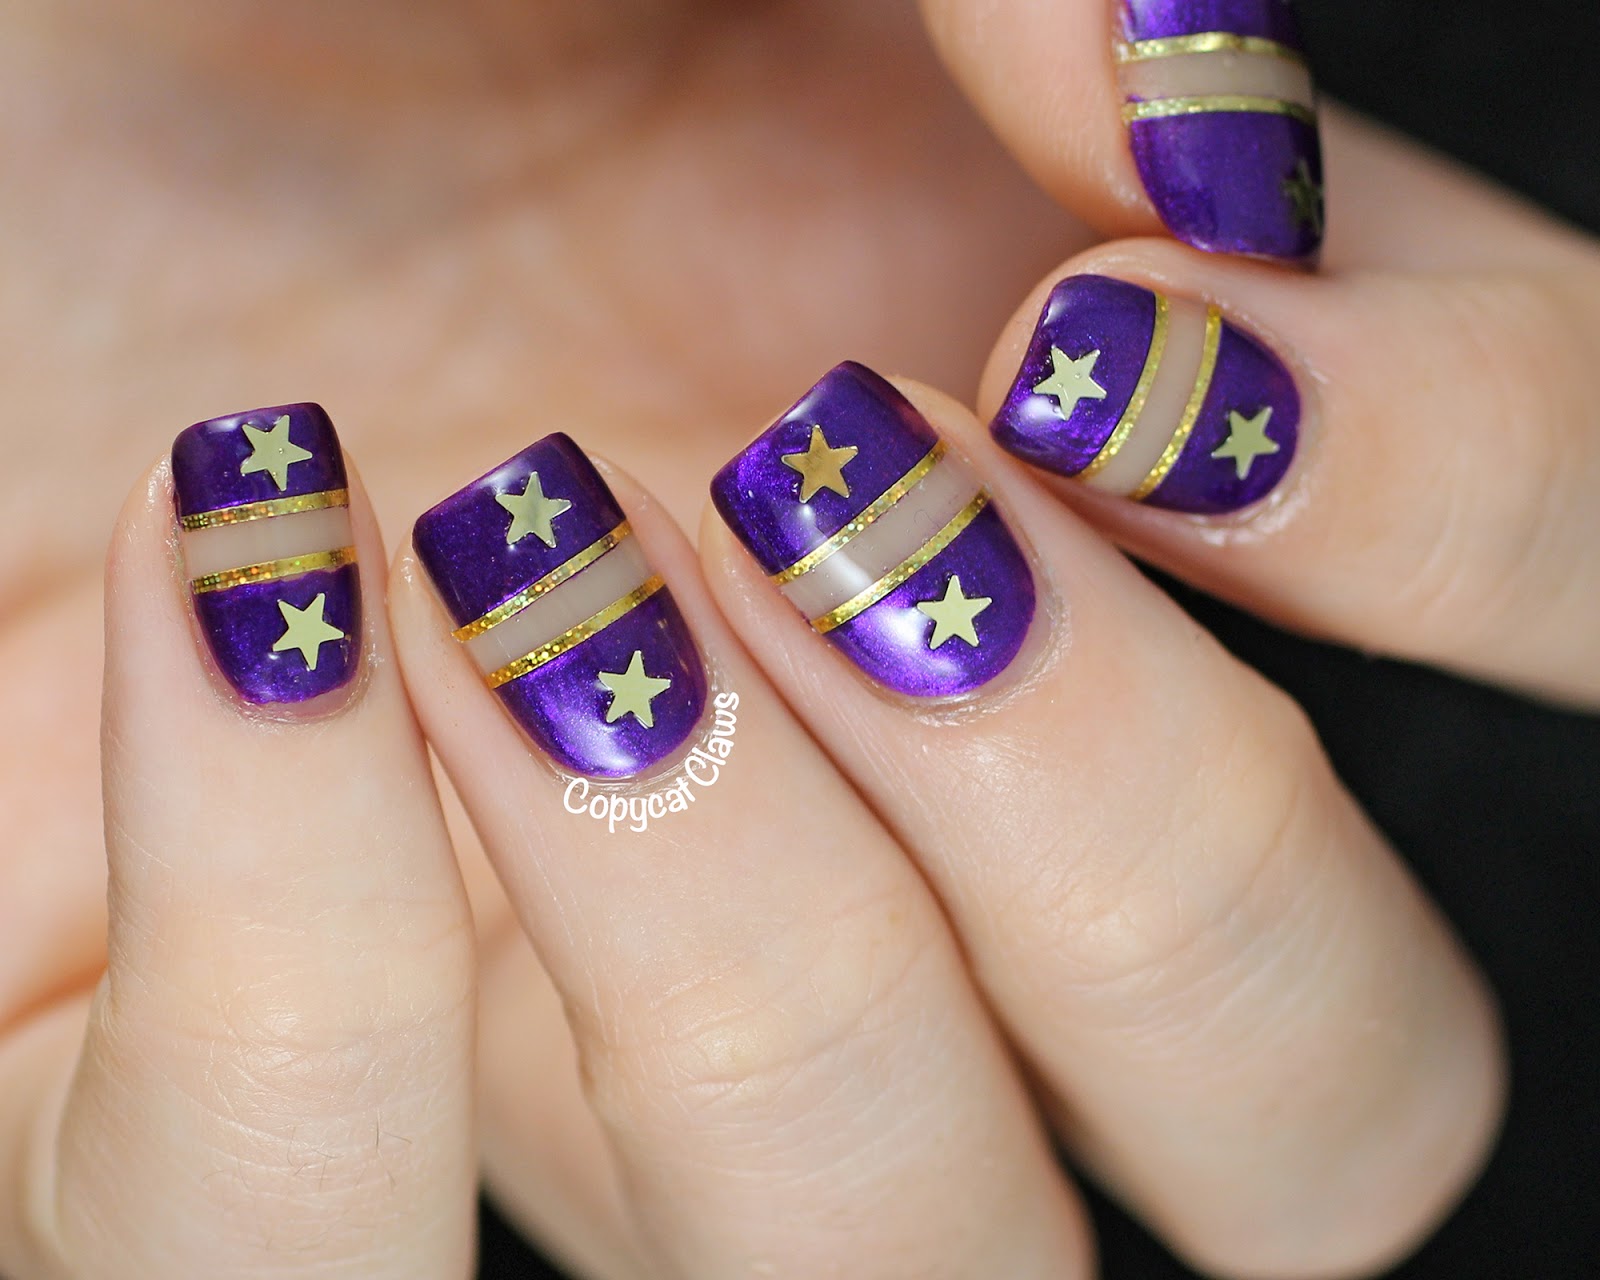
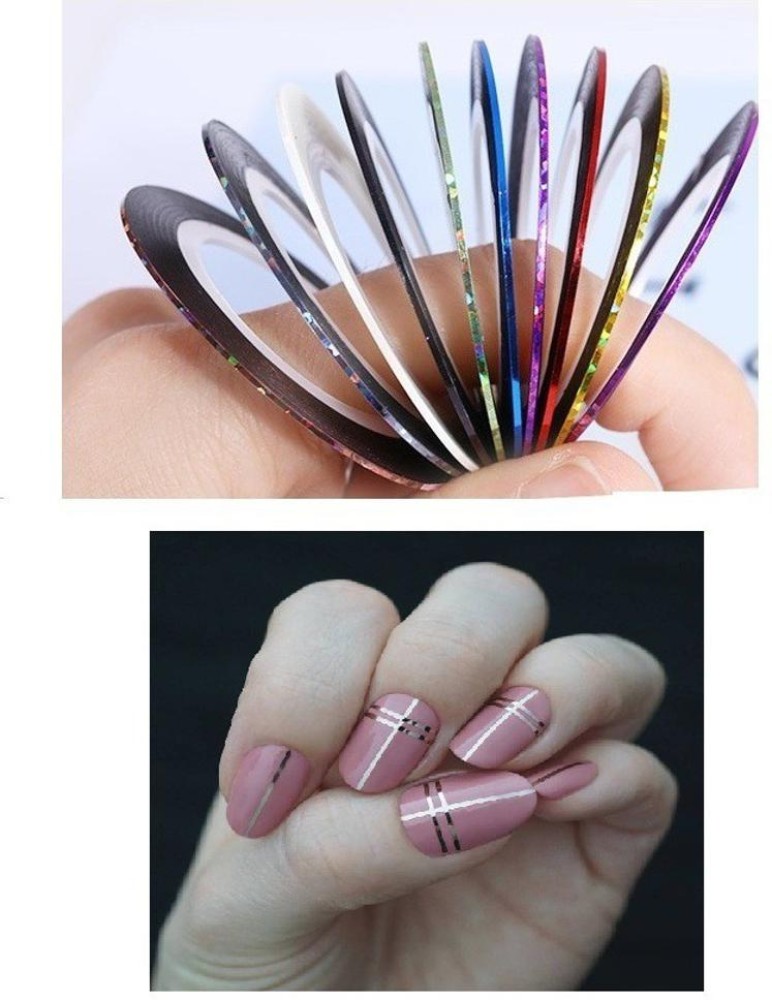
Stripes are a classic and timeless design that can easily be achieved with the help of tape. You can use tape to create horizontal, vertical, or even diagonal stripes on your nails. For a modern twist, try using tape to create multicolored stripes. Simply paint your nails with a base color, let it dry, and then use tape to create stripes in different colors. This is a fun and colorful design that is perfect for any occasion. If you're feeling bold, you can even use tape to create zig-zag or curved stripes for a unique and eye-catching look.6. "Nail Designs with Tape and Stripes"


6. "Nail Designs with Tape and Stripes"


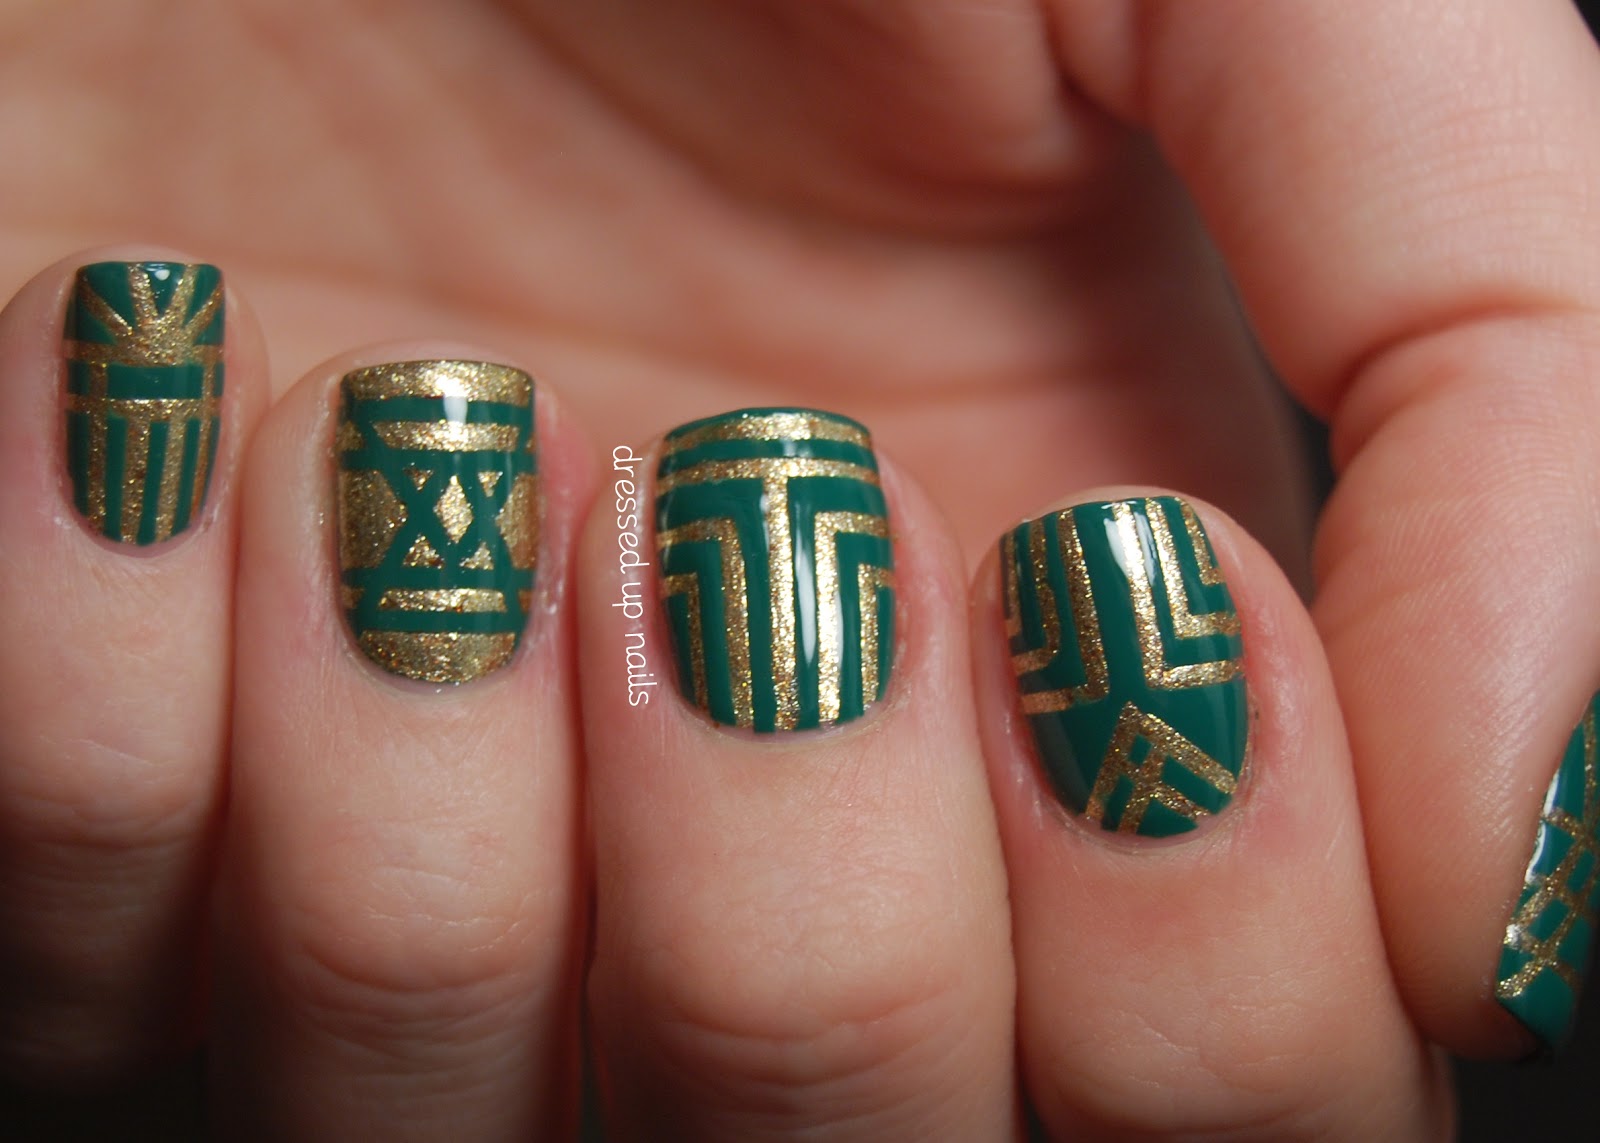
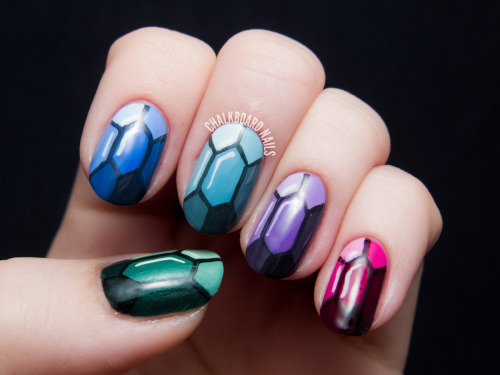
Geometric patterns are a popular and sophisticated design choice for nails. And with the help of tape, achieving these patterns is easier than ever. You can use tape to create triangles, circles, diamonds, or any other geometric shape you desire. Simply place strips of tape in the desired shape, paint over it with a contrasting color, and remove the tape to reveal a clean and precise design. This design is perfect for those who love a minimalist look, or for those who want to add a touch of modern and edgy to their manicure.7. "Nail Designs with Tape and Geometric Patterns"

7. "Nail Designs with Tape and Geometric Patterns"
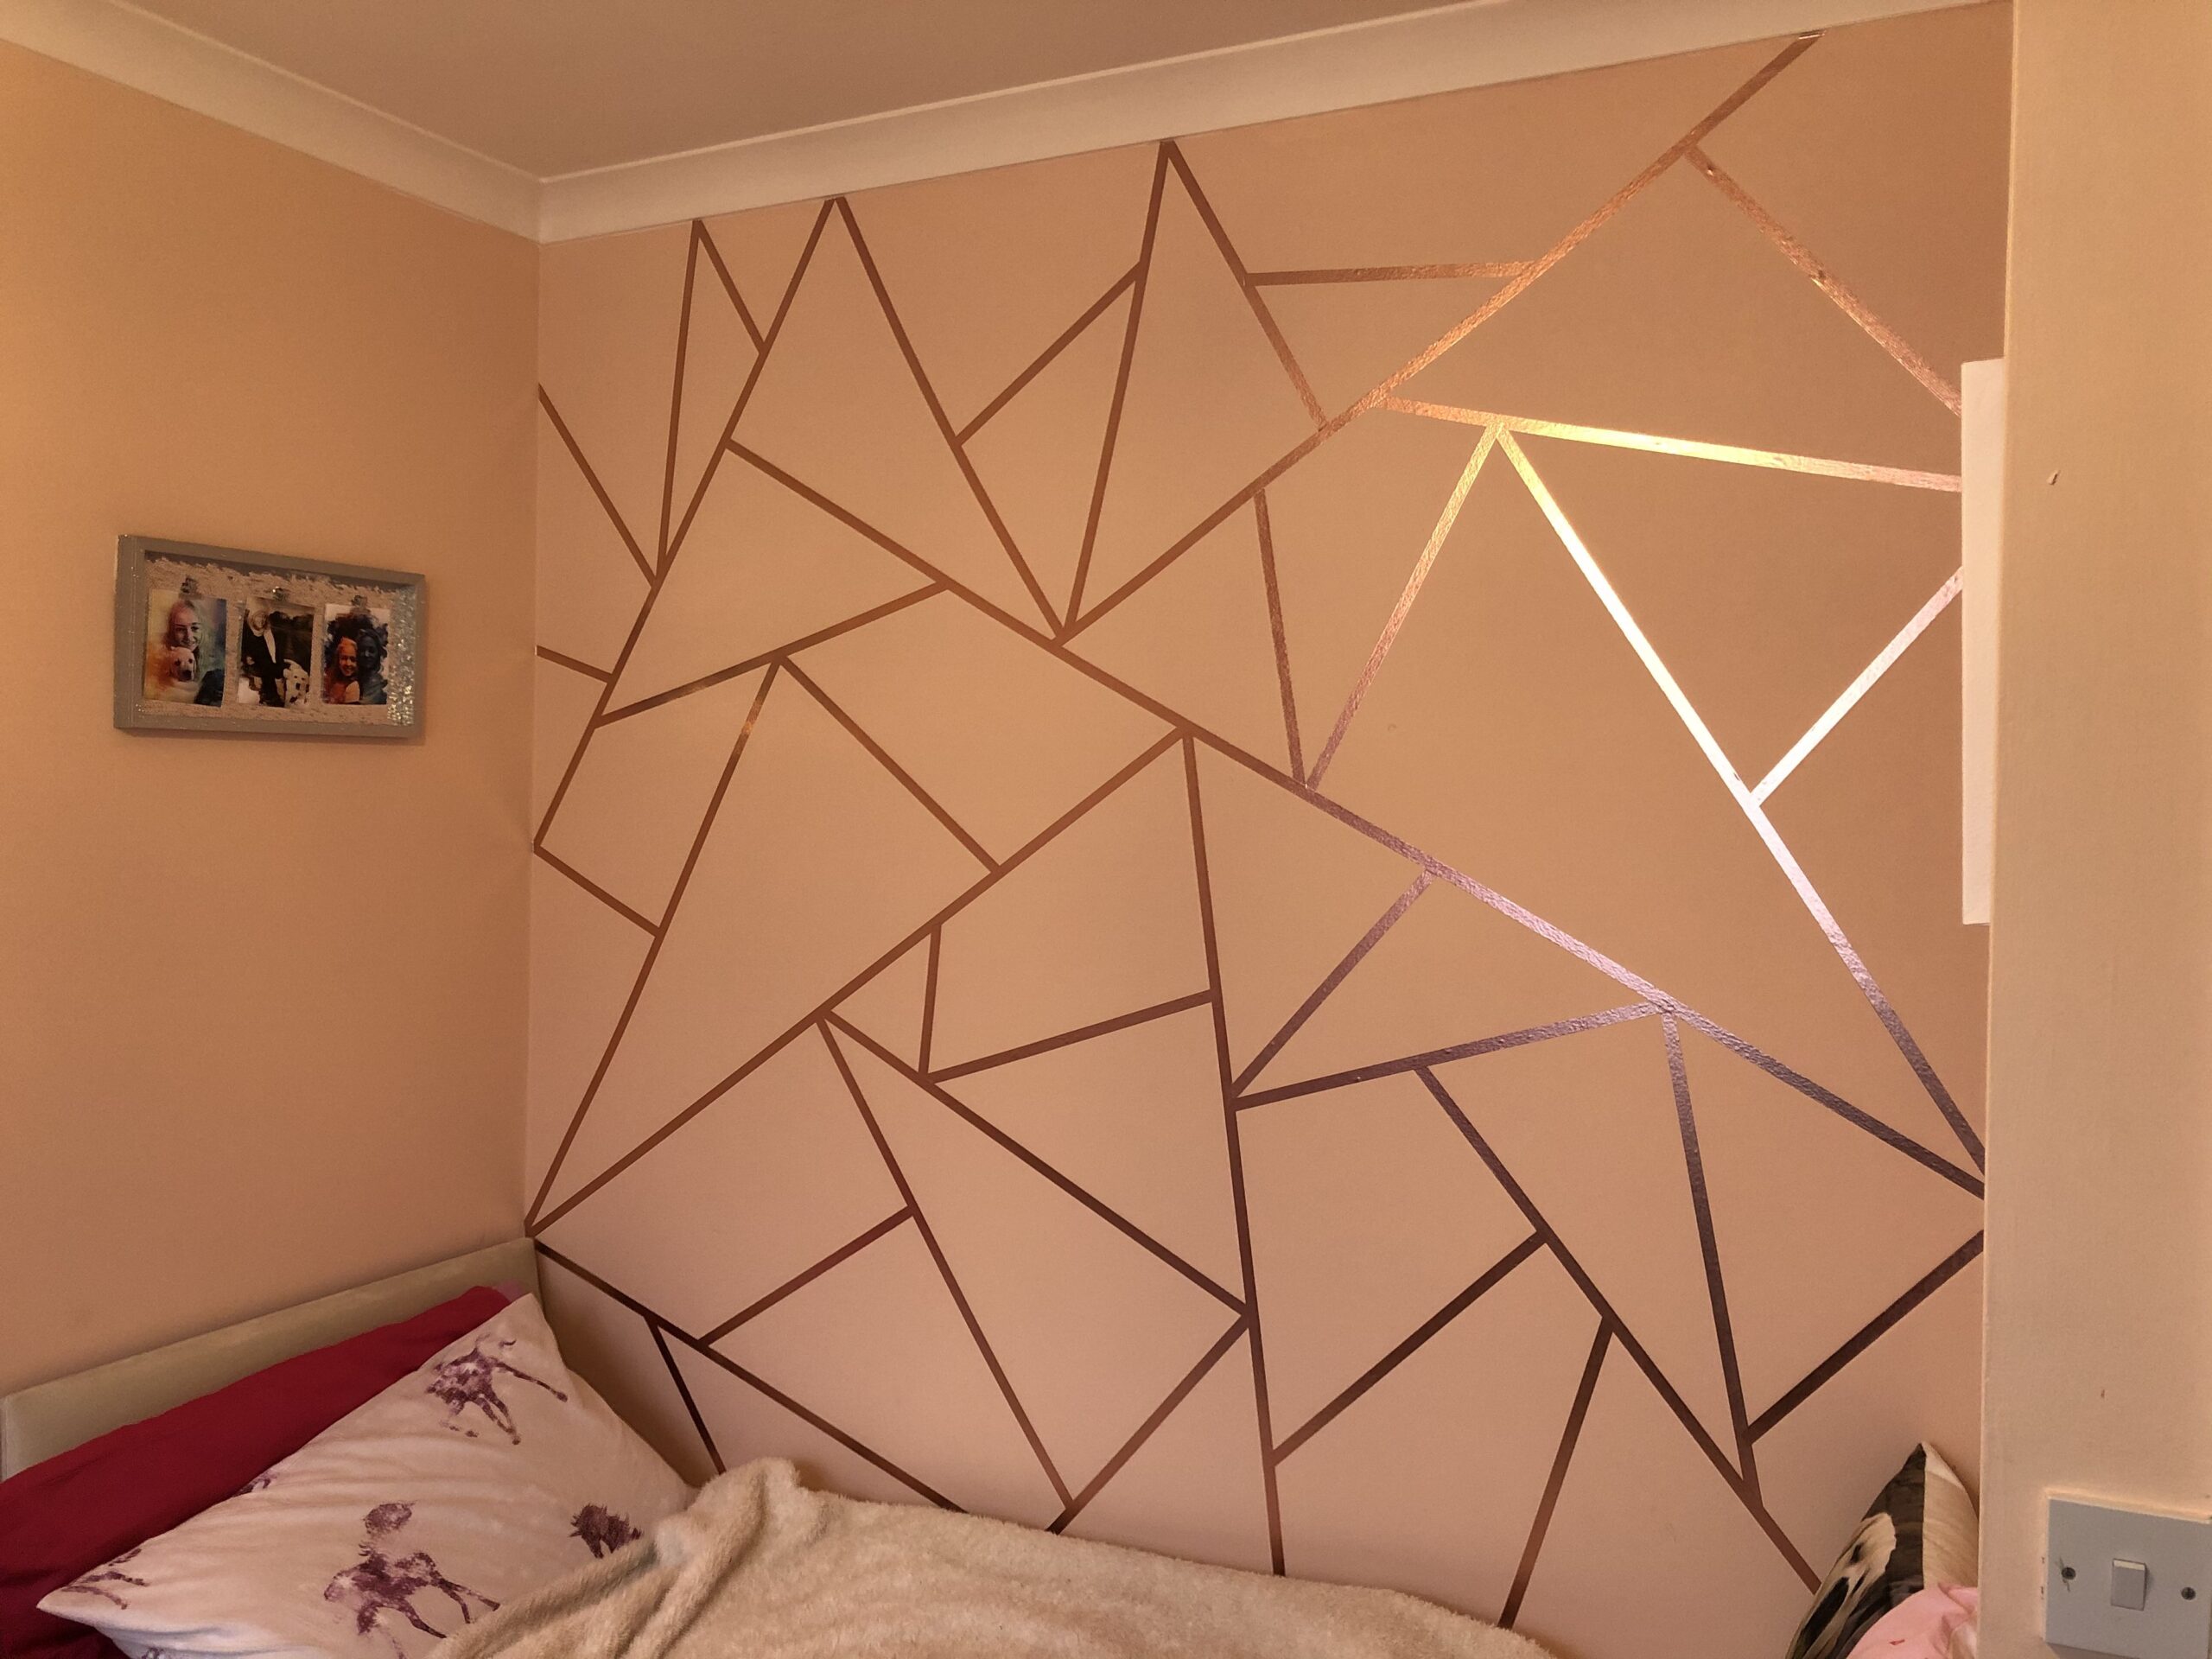


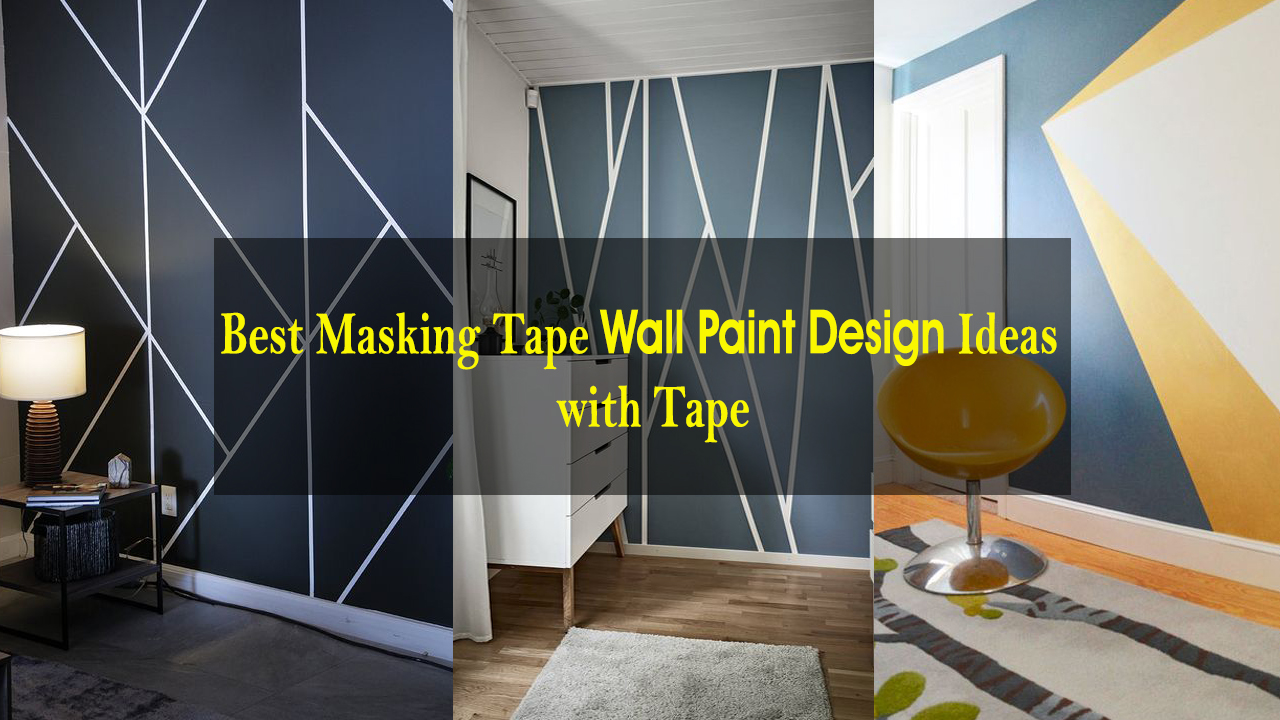


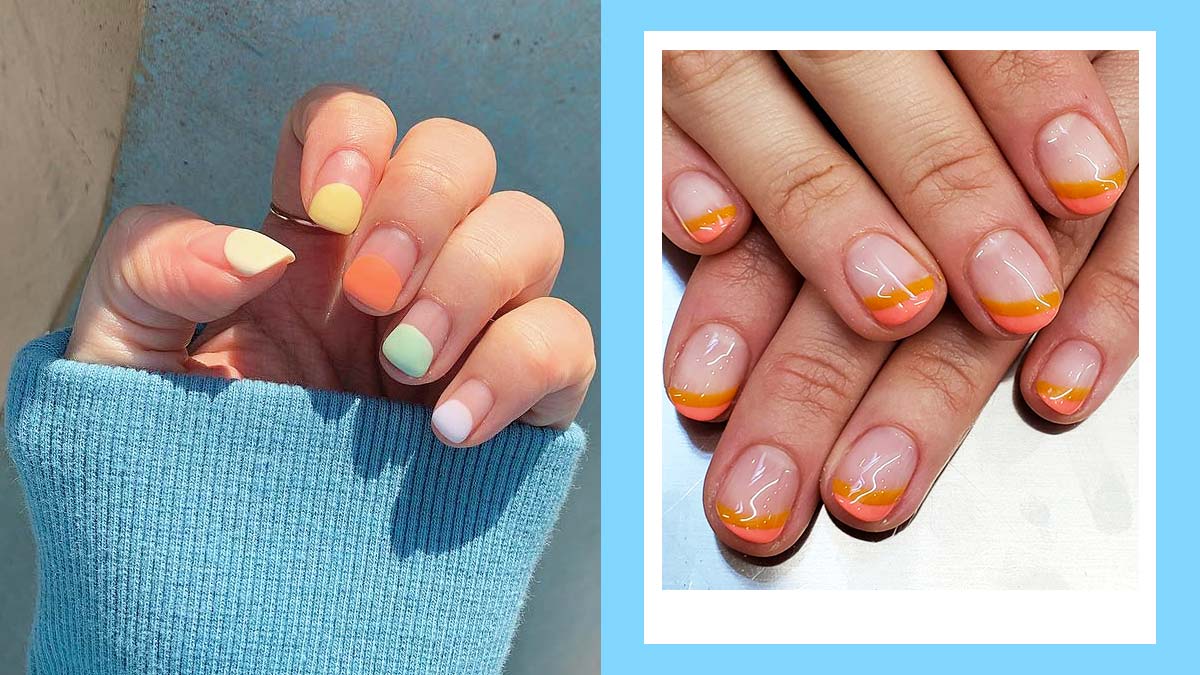
Negative space nail designs are a popular trend that involves leaving parts of the nail bare for a simple and modern look. And with the help of tape, you can easily achieve this trendy design. Using tape, you can create strips, shapes, or patterns on your nails, and leave the rest bare. This is a great way to add a touch of interest and texture to your manicure without using a lot of polish. For a more dramatic look, you can also use tape to create cut-out designs on your nails. Simply place tape in a desired shape, paint over it, and then remove the tape to reveal the negative space design.8. "Nail Designs with Tape and Negative Space"


8. "Nail Designs with Tape and Negative Space"

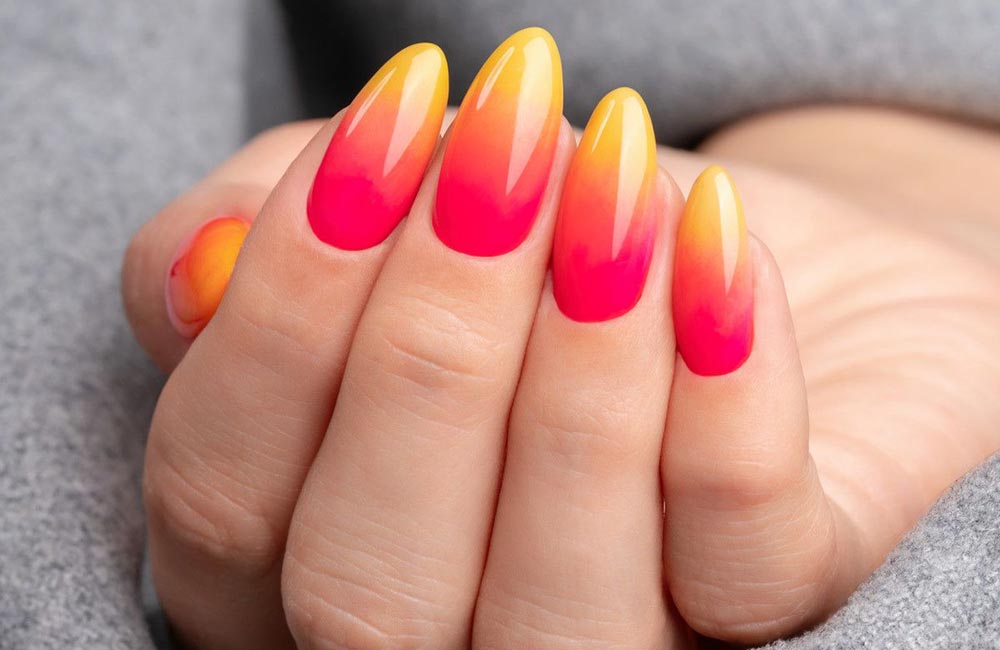
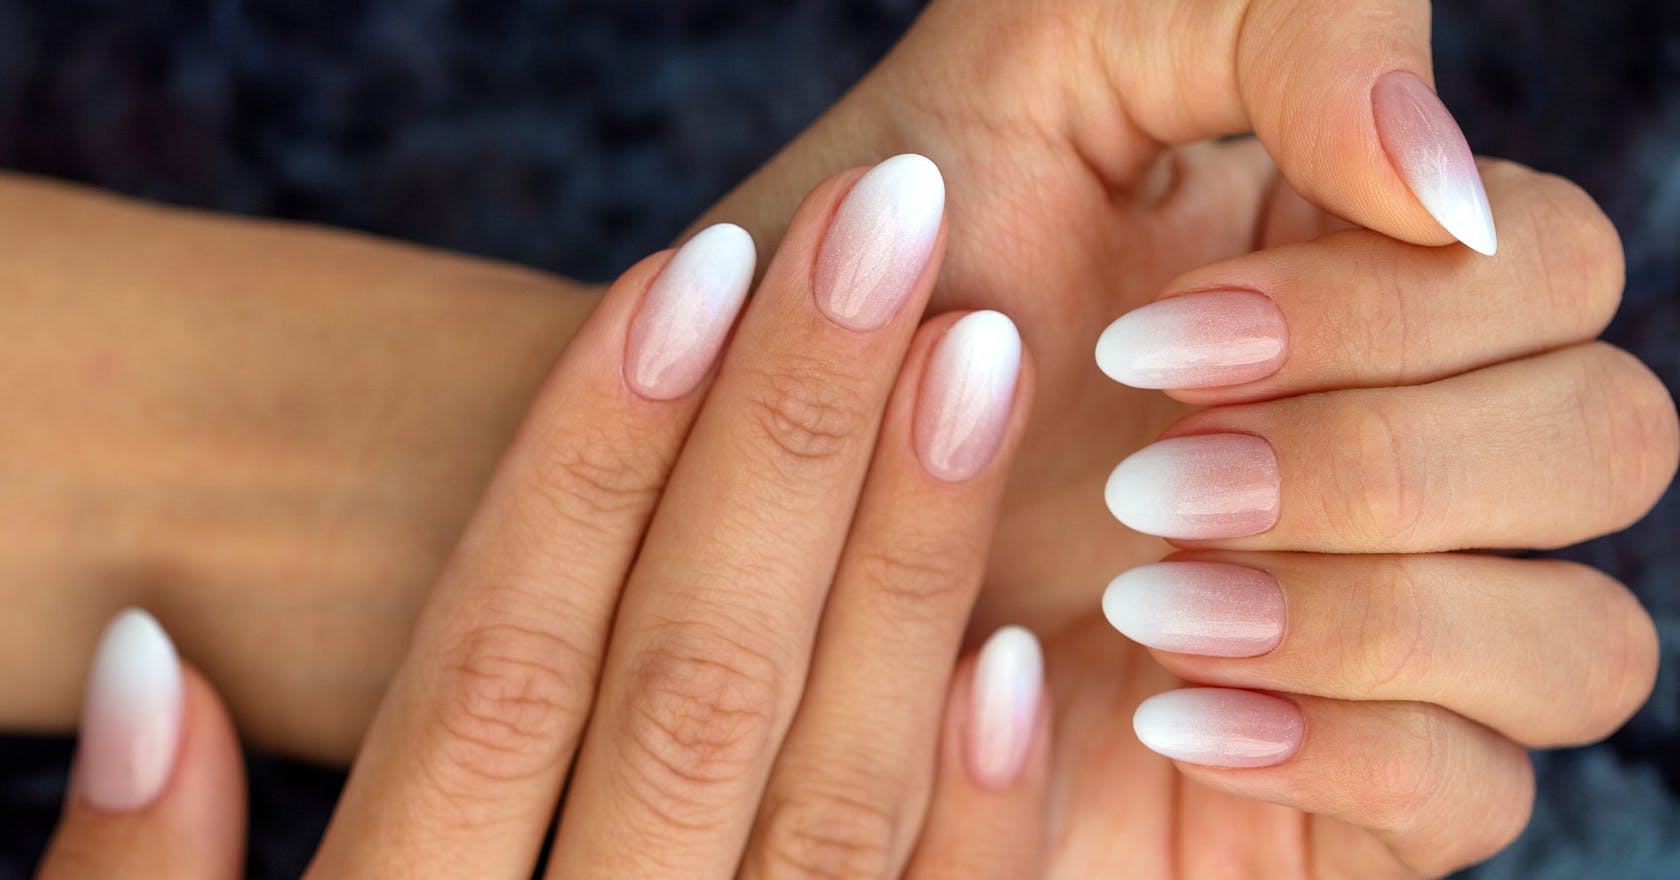
Ombre nails are a popular and versatile design that can be achieved with the help of tape. This design involves blending two or more colors together to create a gradient effect. To achieve an ombre look with tape, start by painting your nails with a base color. Once dry, place strips of tape in a desired pattern, and then paint over it with a different color. Remove the tape to reveal a smooth and seamless ombre design. You can also use tape to create a vertical ombre effect, or to create a ombre accent on one or two nails.9. "Nail Designs with Tape and Ombre"


9. "Nail Designs with Tape and Ombre"


Floral accents are a classic and feminine design choice for nails. And with the help of tape, you can easily create beautiful and delicate flower designs. One idea is to use tape as a stencil to paint flowers on your nails. Simply place tape in the desired shape of a flower, paint over it, and then remove the tape to reveal a floral design. You can also use tape to create strips or patterns on your nails and then add small flower accents using a dotting tool or toothpick. This is a subtle and sophisticated way to incorporate flowers into your nail designs. With these 10 nail designs using tape, you'll never have a boring manicure again. Get creative and have fun with different colors, patterns, and techniques to achieve the perfect nail design for any occasion. And don't forget to share your creations on tumblr for all your followers to see!10. "Nail Designs with Tape and Floral Accents"


10. "Nail Designs with Tape and Floral Accents"


The Versatility of Nail Design with Tape on Tumblr

Unleash Your Creativity
 When it comes to nail design, there are endless possibilities and techniques to experiment with. However, one trend that has taken the nail art world by storm is using tape to create unique and intricate designs. And where better to find inspiration for these designs than Tumblr? This popular microblogging platform is a hub for all things creative and artistic, making it the perfect place to explore the versatility of nail design with tape.
Tape
is not just a simple household item, but a
powerful tool
in the hands of a nail artist. With the use of tape, you can achieve precise lines, geometric shapes, and intricate patterns that would otherwise be difficult to create. The best part? You don't need any fancy tools or skills to achieve these looks. All you need is tape, nail polish, and a steady hand.
When it comes to nail design, there are endless possibilities and techniques to experiment with. However, one trend that has taken the nail art world by storm is using tape to create unique and intricate designs. And where better to find inspiration for these designs than Tumblr? This popular microblogging platform is a hub for all things creative and artistic, making it the perfect place to explore the versatility of nail design with tape.
Tape
is not just a simple household item, but a
powerful tool
in the hands of a nail artist. With the use of tape, you can achieve precise lines, geometric shapes, and intricate patterns that would otherwise be difficult to create. The best part? You don't need any fancy tools or skills to achieve these looks. All you need is tape, nail polish, and a steady hand.
Creating Stunning Designs
 One of the most popular ways to use tape in nail design is to create
negative space
designs. This involves using tape to create a barrier on your nail, leaving certain areas unpainted for a clean and modern look. You can play around with different shapes, such as triangles, chevrons, or even letters and symbols. The possibilities are endless, and the results are sure to make a statement.
Another technique that has gained popularity on Tumblr is
layering
tape to achieve complex designs. This involves using multiple pieces of tape to create a pattern, which is then painted over with different colors. The tape acts as a stencil, creating a unique and multi-dimensional design that is sure to catch the eye.
One of the most popular ways to use tape in nail design is to create
negative space
designs. This involves using tape to create a barrier on your nail, leaving certain areas unpainted for a clean and modern look. You can play around with different shapes, such as triangles, chevrons, or even letters and symbols. The possibilities are endless, and the results are sure to make a statement.
Another technique that has gained popularity on Tumblr is
layering
tape to achieve complex designs. This involves using multiple pieces of tape to create a pattern, which is then painted over with different colors. The tape acts as a stencil, creating a unique and multi-dimensional design that is sure to catch the eye.
Express Yourself
 One of the best things about nail design with tape is that it allows you to
express yourself
in a unique and personal way. You can use different colors, patterns, and shapes to create a design that reflects your personality and style. And with the endless inspiration available on Tumblr, you can keep experimenting and creating new looks that are sure to turn heads.
In conclusion, nail design with tape on Tumblr is a
creative and accessible
way to elevate your nail game. It allows you to experiment with different techniques and designs, and express yourself in a unique and personal way. So why not give it a try and see where your creativity takes you?
One of the best things about nail design with tape is that it allows you to
express yourself
in a unique and personal way. You can use different colors, patterns, and shapes to create a design that reflects your personality and style. And with the endless inspiration available on Tumblr, you can keep experimenting and creating new looks that are sure to turn heads.
In conclusion, nail design with tape on Tumblr is a
creative and accessible
way to elevate your nail game. It allows you to experiment with different techniques and designs, and express yourself in a unique and personal way. So why not give it a try and see where your creativity takes you?


