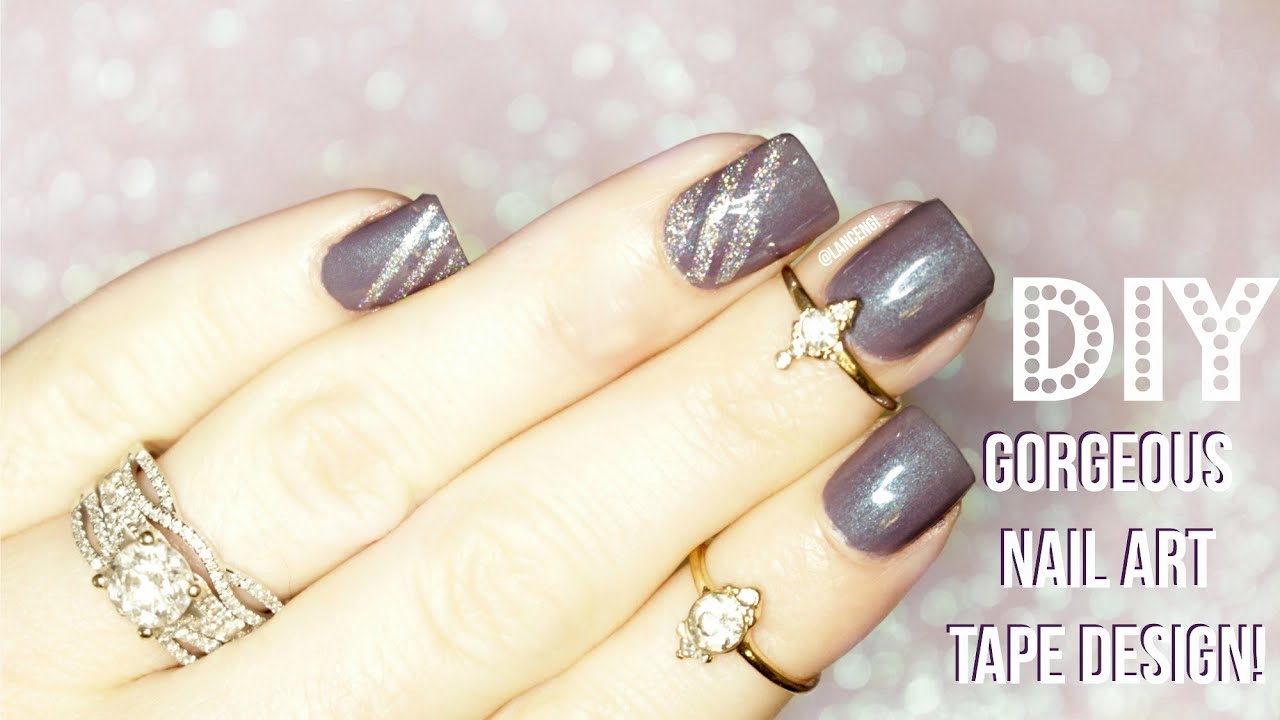
Looking for a quick and easy way to add some pizzazz to your nails? Look no further than nail tape! This versatile tool allows you to create endless designs and patterns on your nails with minimal effort. In this tutorial, we'll show you how to achieve an easy and stunning nail tape design in just a few simple steps.1. Easy Nail Tape Design Tutorial


1. Easy Nail Tape Design Tutorial
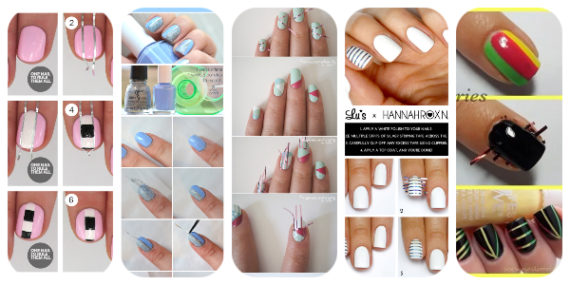


Why spend money at the salon when you can create stunning nail designs right at home? With this DIY nail tape design tutorial, you'll be able to achieve professional-looking nails without breaking the bank. All you need is a few basic materials and a little bit of creativity.2. DIY Nail Tape Design Tutorial


2. DIY Nail Tape Design Tutorial

For those who are new to using nail tape, a step-by-step tutorial can be incredibly helpful. In this tutorial, we'll break down the process of creating a nail tape design into easy-to-follow steps, making it simple for beginners to achieve beautiful results. Follow along and you'll have gorgeous nails in no time!3. Step-by-Step Nail Tape Design Tutorial


3. Step-by-Step Nail Tape Design Tutorial


Ready to take your nail tape designs to the next level? Get creative with this tutorial, where we'll show you how to incorporate different colors, shapes, and patterns to create a unique and eye-catching look. Don't be afraid to let your imagination run wild and have fun with your nail tape designs!4. Creative Nail Tape Design Tutorial


4. Creative Nail Tape Design Tutorial


If you're new to using nail tape, it's important to start with a simple design to get the hang of it. This beginner nail tape design tutorial will introduce you to the basics and give you the confidence to try more intricate designs in the future. Don't worry, even beginners can achieve amazing results with nail tape!5. Beginner Nail Tape Design Tutorial
5. Beginner Nail Tape Design Tutorial


Who says you need long nails to rock a stylish nail design? With this tutorial, we'll show you how to create a stunning nail tape design that's perfect for short nails. You'll be surprised at how much you can do with a little bit of nail tape and some creativity!6. Nail Tape Design Tutorial for Short Nails


6. Nail Tape Design Tutorial for Short Nails


For those blessed with long nails, this tutorial will show you how to take full advantage of your extra canvas. We'll guide you through a nail tape design that will make your long nails stand out in the best way possible. Get ready to turn heads with this stunning design!7. Nail Tape Design Tutorial for Long Nails

7. Nail Tape Design Tutorial for Long Nails


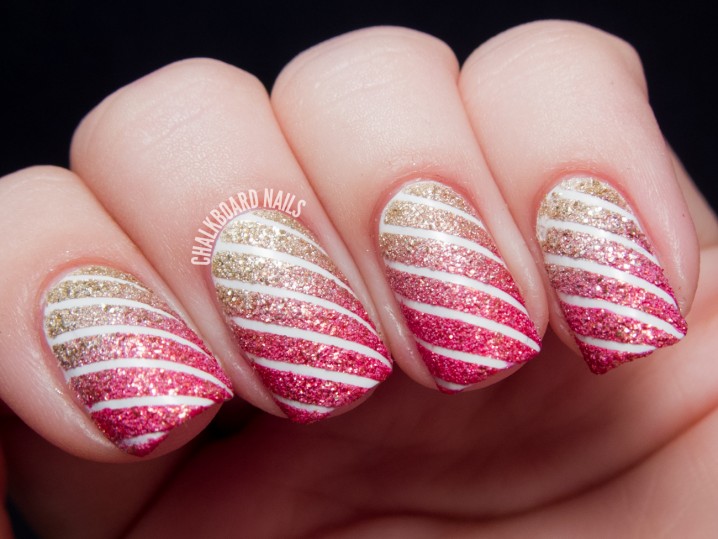
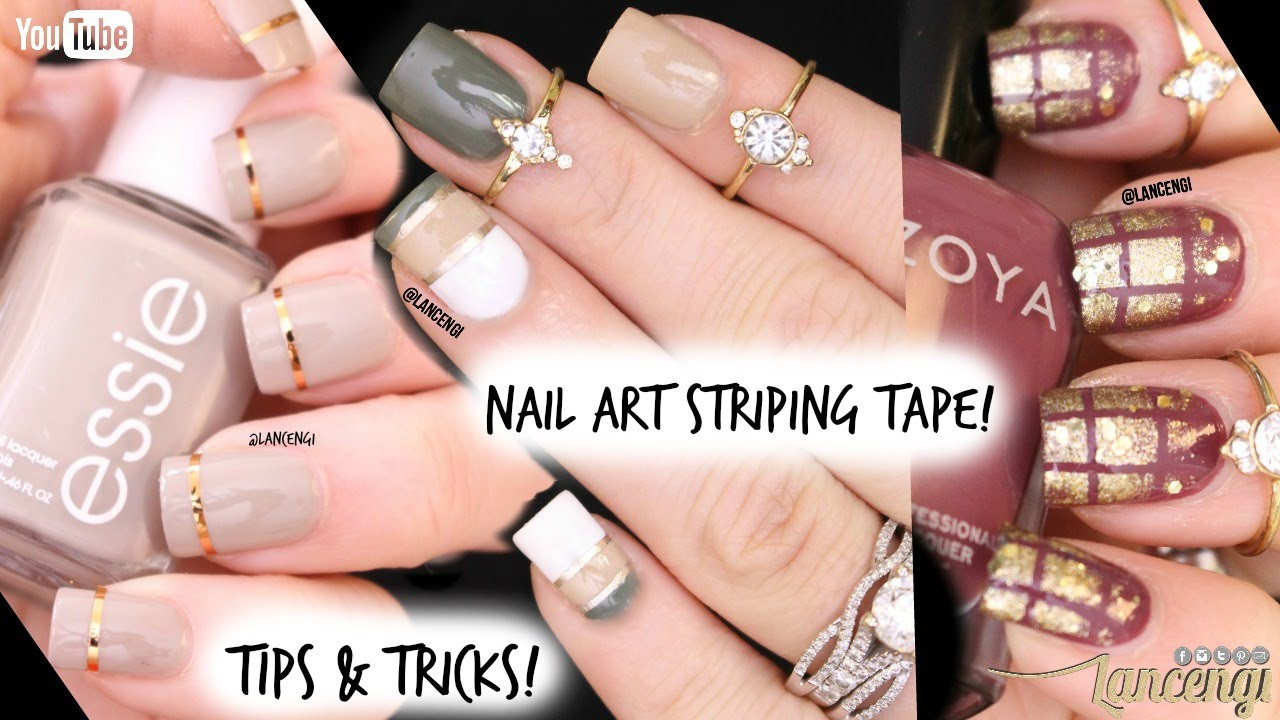
Add a pop of color to your nails with this colorful nail tape design tutorial. We'll show you how to use different shades and hues of nail tape to create a fun and vibrant design. Say goodbye to boring monochromatic nails and hello to a rainbow of colors!8. Colorful Nail Tape Design Tutorial


8. Colorful Nail Tape Design Tutorial
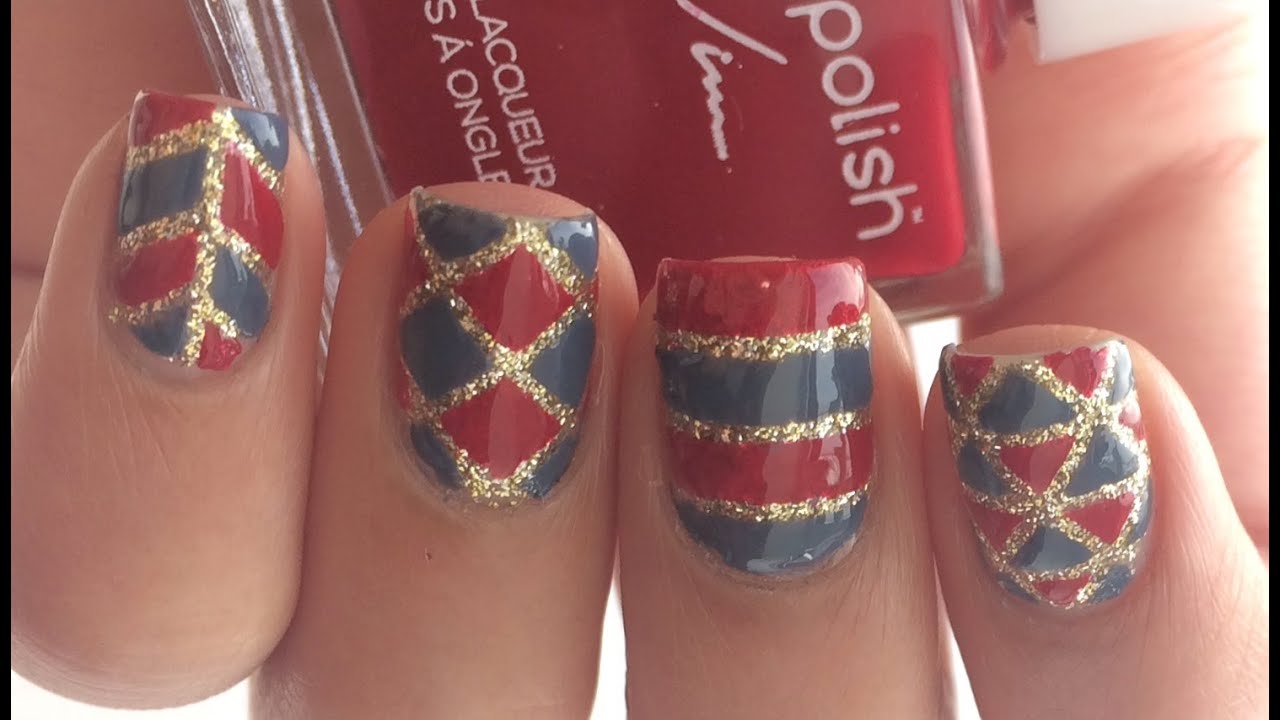
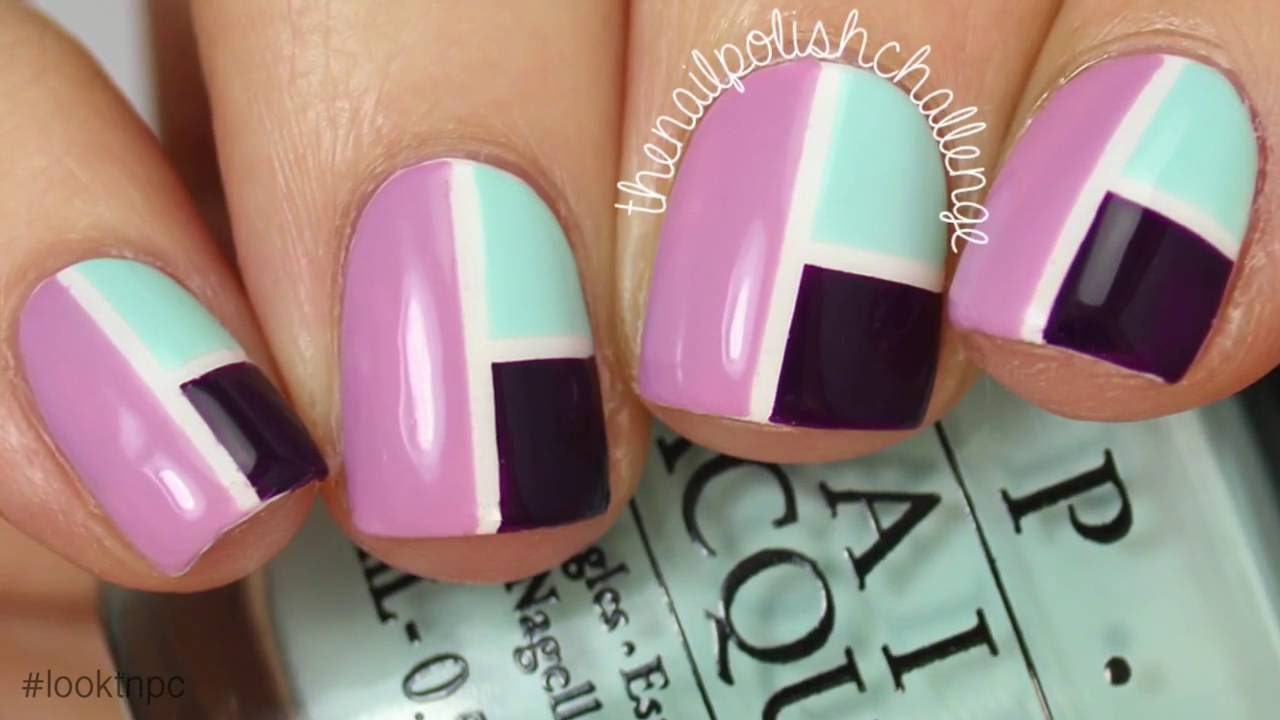
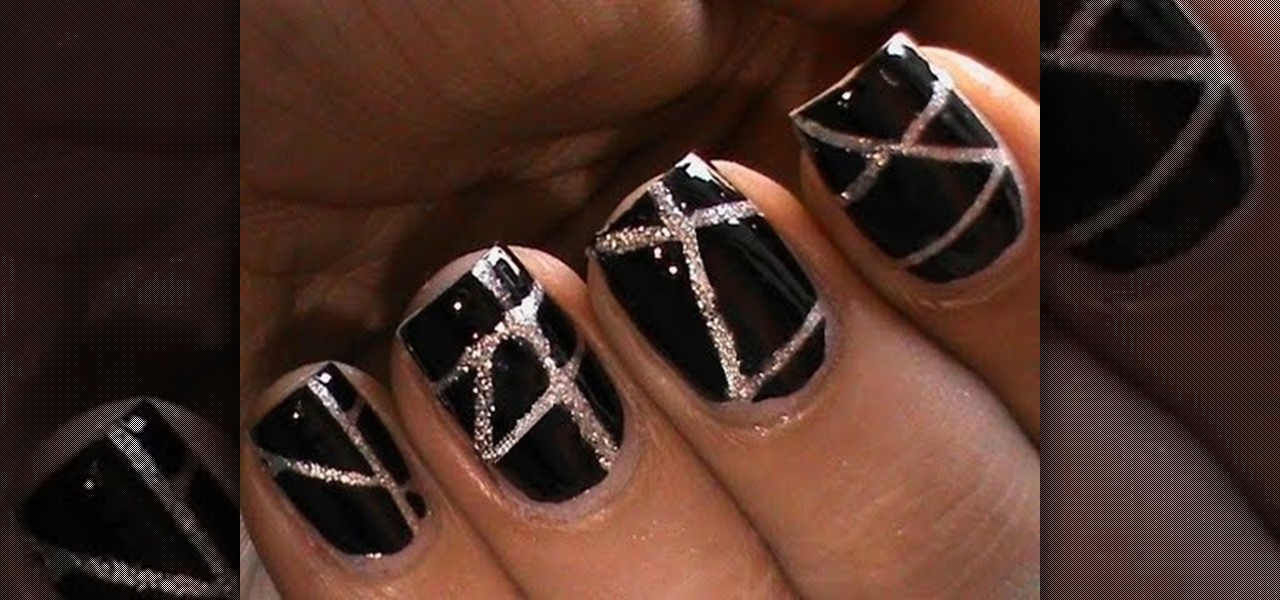
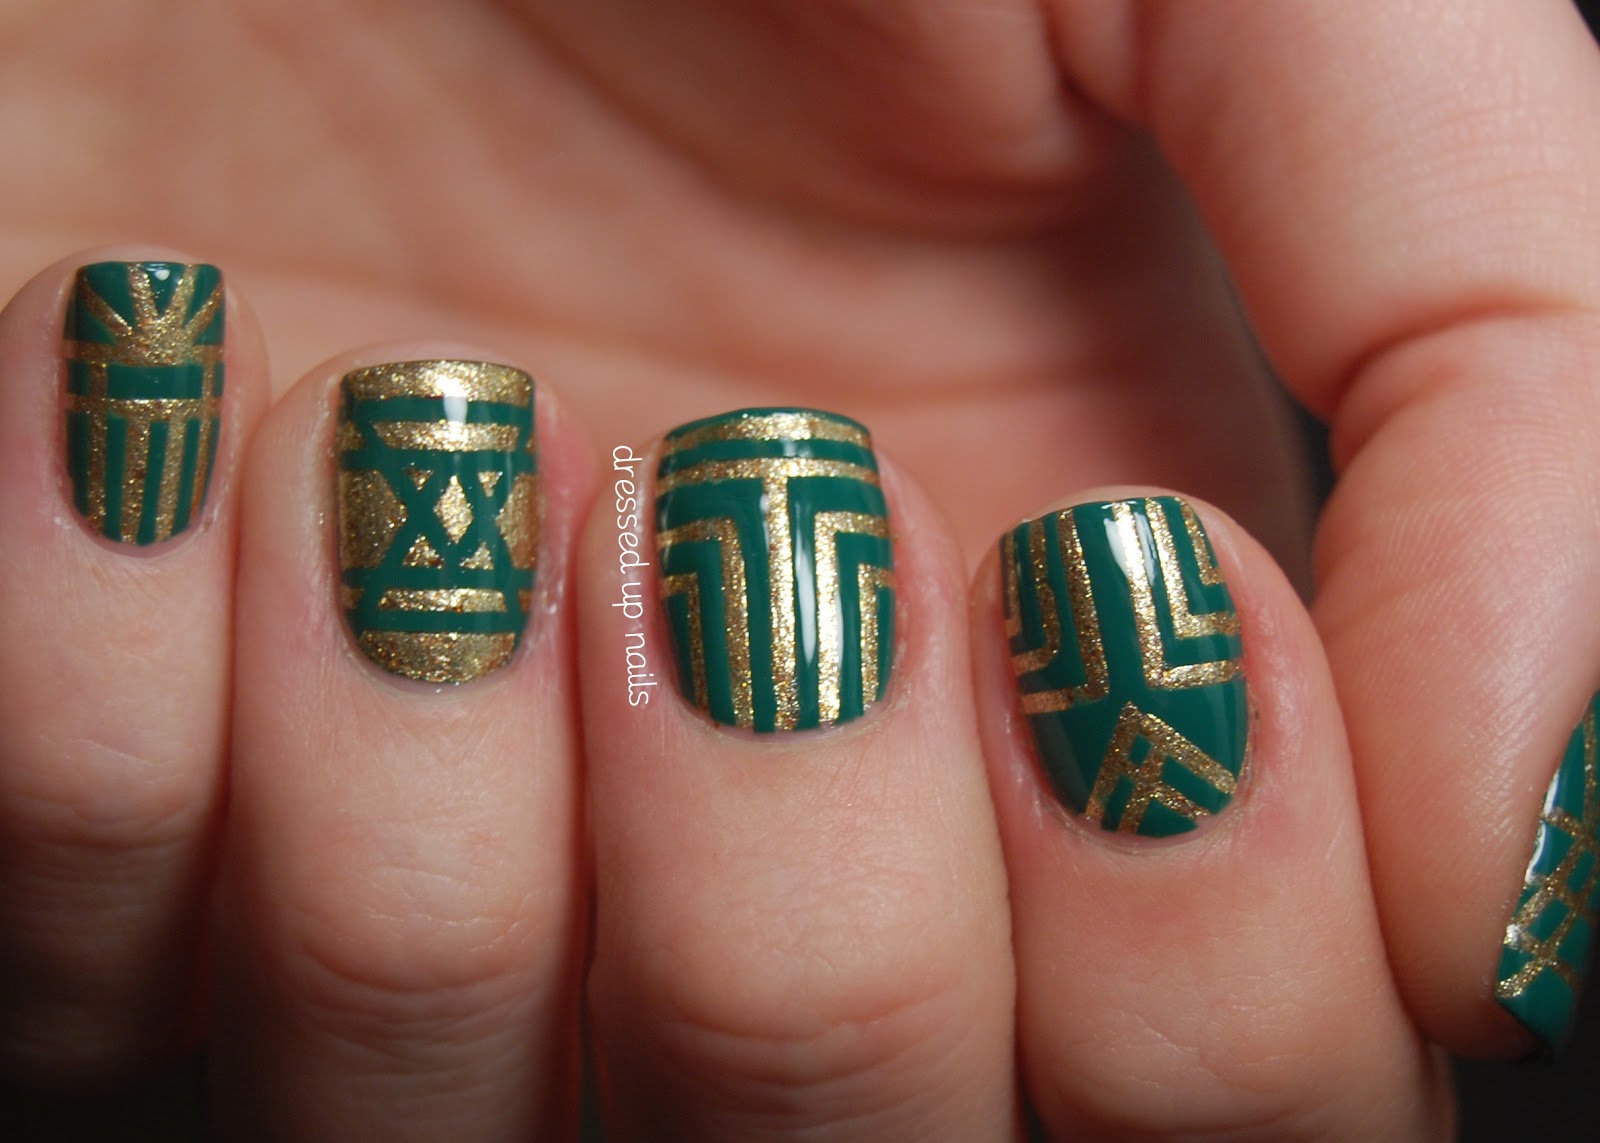
Love clean lines and geometric shapes? This nail tape design tutorial is perfect for you. Learn how to use nail tape to create a sleek and modern design that will make your nails look like a work of art. Get ready to impress with your precise and eye-catching nails!9. Geometric Nail Tape Design Tutorial

9. Geometric Nail Tape Design Tutorial


Florals are always a great choice for nail designs, and with this tutorial, you can achieve a delicate and elegant floral design using nail tape. We'll show you how to create intricate floral patterns that will make your nails look like a beautiful garden. Perfect for any season or occasion! With these 10 nail tape design tutorials, you'll have endless options for creating stunning and unique nail looks. So go ahead and grab your nail tape and let your creativity run wild! Don't forget to share your beautiful nail designs with us. Happy taping!10. Floral Nail Tape Design Tutorial


10. Floral Nail Tape Design Tutorial
Creative and Professional Nail Tape Design Tutorial for the Perfect House Design
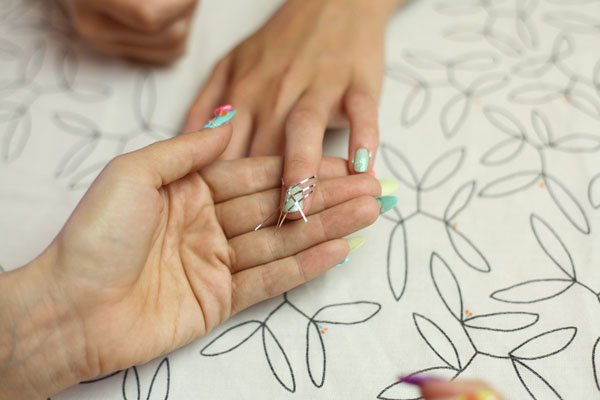
 If you're looking to elevate your house design and add a unique touch to your nails, look no further than nail tape designs. This simple yet effective technique allows you to create intricate and eye-catching designs on your nails with ease. In this tutorial, we'll walk you through the steps to achieve the perfect nail tape design and give your house design the extra wow factor it deserves.
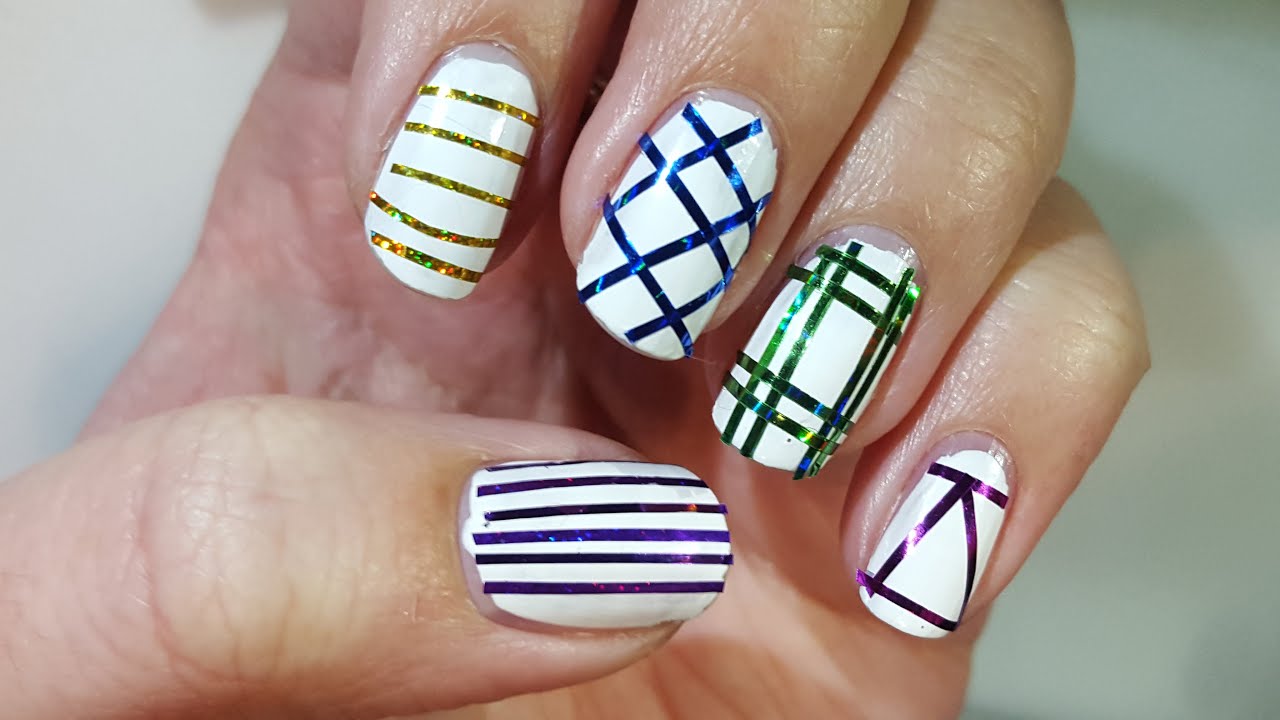
What is Nail Tape Design?
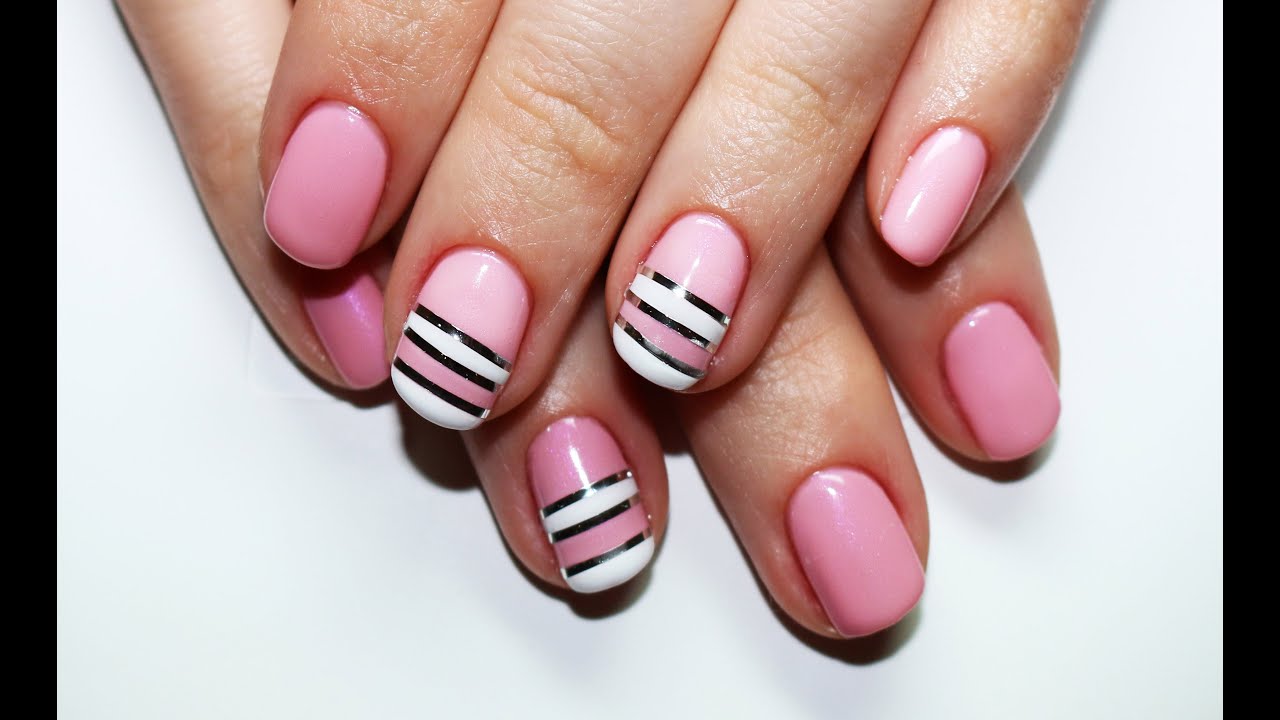
 Nail tape design involves using thin strips of adhesive tape to create clean and precise lines on your nails. These tapes come in a variety of colors and widths, allowing you to get creative with your designs. From geometric patterns to intricate designs, nail tape is a versatile tool that can add a touch of elegance to your house design.
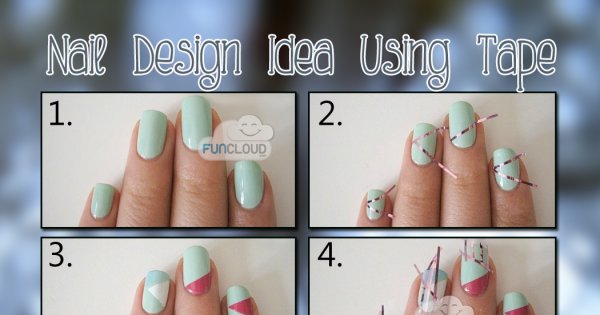
Step-by-Step Tutorial
 Now, let's dive into the step-by-step process of creating your very own nail tape design.
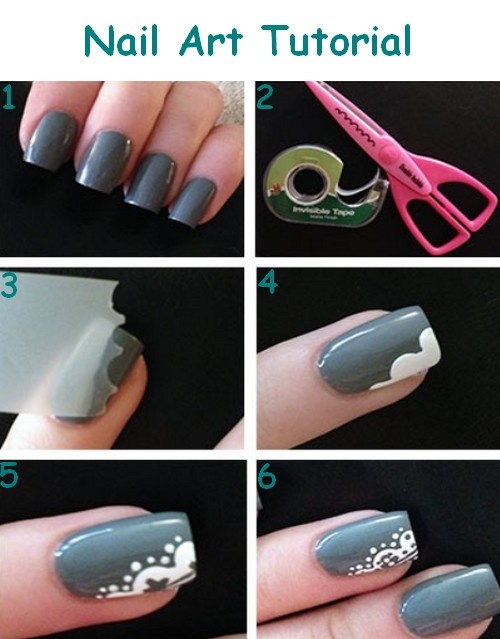
Step 1: Prep Your Nails
Start by prepping your nails for the design. This includes filing, shaping, and buffing your nails to create a smooth surface. Apply a base coat to protect your nails and allow it to dry completely.
Step 2: Choose Your Tape
Select the nail tape of your choice. You can opt for a single color or mix and match different colors for a more dynamic design. Cut the tape into small strips or shapes, depending on the design you have in mind.
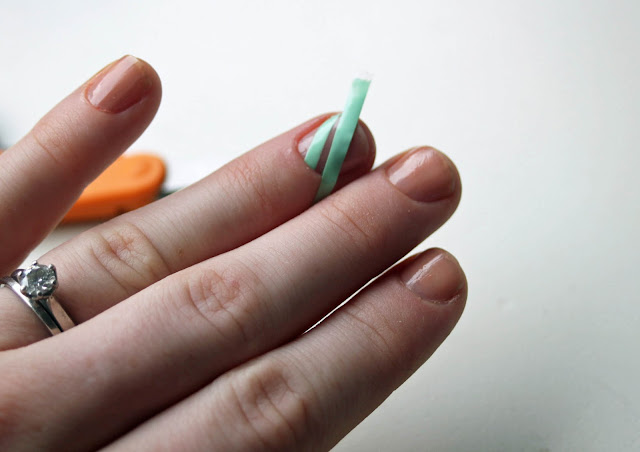
Step 3: Apply the Tape
Carefully apply the tape onto your nails, making sure to press down firmly. You can use tweezers to help with precision and avoid any air bubbles. Trim any excess tape with a nail scissor.
Step 4: Add Nail Polish
Apply your desired nail polish over the tape and onto your nails. Make sure to cover the entire nail, including the tape. You can use multiple colors for a more intricate design.
Step 5: Remove the Tape
Once the nail polish is dry, gently peel off the tape to reveal the clean lines and design underneath. You can use a Q-tip and nail polish remover to clean up any smudges or mistakes.
Step 6: Seal with Top Coat
Finish off your nail tape design with a layer of top coat to seal in the design and add shine. This will also help the design last longer.
Now, let's dive into the step-by-step process of creating your very own nail tape design.
Step 1: Prep Your Nails
Start by prepping your nails for the design. This includes filing, shaping, and buffing your nails to create a smooth surface. Apply a base coat to protect your nails and allow it to dry completely.
Step 2: Choose Your Tape
Select the nail tape of your choice. You can opt for a single color or mix and match different colors for a more dynamic design. Cut the tape into small strips or shapes, depending on the design you have in mind.
Step 3: Apply the Tape
Carefully apply the tape onto your nails, making sure to press down firmly. You can use tweezers to help with precision and avoid any air bubbles. Trim any excess tape with a nail scissor.
Step 4: Add Nail Polish
Apply your desired nail polish over the tape and onto your nails. Make sure to cover the entire nail, including the tape. You can use multiple colors for a more intricate design.
Step 5: Remove the Tape
Once the nail polish is dry, gently peel off the tape to reveal the clean lines and design underneath. You can use a Q-tip and nail polish remover to clean up any smudges or mistakes.
Step 6: Seal with Top Coat
Finish off your nail tape design with a layer of top coat to seal in the design and add shine. This will also help the design last longer.
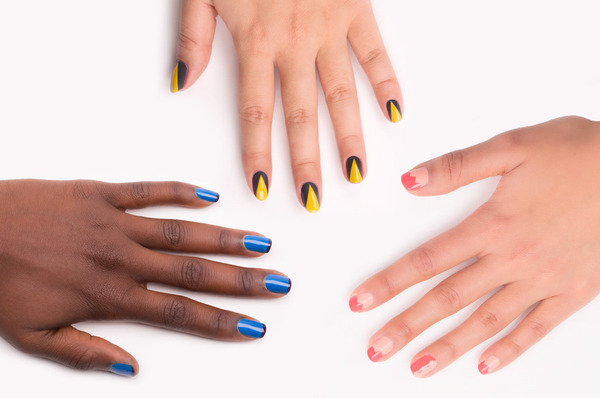
Tips and Tricks
 - Experiment with different color combinations and patterns to create unique designs.
- Make sure to wait for the nail polish to dry completely before removing the tape to avoid smudging.
- You can use nail tape to create accent nails or use it on all nails for a cohesive design.
- Don't be afraid to mix and match different nail art techniques, such as using nail stamps or glitter, with nail tape to create one-of-a-kind designs.
With this nail tape design tutorial, you can easily elevate your house design and add a fun and creative touch to your nails. So go ahead and give it a try, and let your imagination run wild with endless possibilities.
- Experiment with different color combinations and patterns to create unique designs.
- Make sure to wait for the nail polish to dry completely before removing the tape to avoid smudging.
- You can use nail tape to create accent nails or use it on all nails for a cohesive design.
- Don't be afraid to mix and match different nail art techniques, such as using nail stamps or glitter, with nail tape to create one-of-a-kind designs.
With this nail tape design tutorial, you can easily elevate your house design and add a fun and creative touch to your nails. So go ahead and give it a try, and let your imagination run wild with endless possibilities.


