If you're new to the world of nail art, creating intricate designs may seem intimidating. But fear not, with a little practice and patience, you can easily create stunning nail tip designs at home. Follow these simple steps to achieve a simple yet eye-catching nail tip design. Nail tip design: Start by applying a base coat to your nails to protect them from staining and help the nail polish last longer. Let it dry completely before moving on to the next step. Step 1: Choose two contrasting nail polish colors, one for the base and one for the tip. Lighter shades work best for the base, while a darker shade will make the tip stand out. Step 2: Apply the lighter shade to your entire nail, leaving some space at the tip. You can use a french manicure sticker to help guide you or simply freehand it. Step 3: Once the base color is dry, use the darker shade to paint the tip of your nail. You can use a nail art brush for more precision or a striping tape to create a straight line. Step 4: Let the tip dry completely before sealing it with a top coat. This will not only make your nail tip design last longer but also give it a glossy finish. Nail tip design tip: You can also use glitter or nail stickers for added glam to your nail tip design. Just make sure to apply them after the base color and before the top coat.1. How to Create a Simple Nail Tip Design Step by Step


1. How to Create a Simple Nail Tip Design Step by Step


If you're just starting out with nail art, it's best to begin with simple designs that don't require too much precision or skill. Here are a few easy nail tip designs that even beginners can master: 1. Polka dots: Use a dotting tool or the back of a bobby pin to create cute polka dots on the tips of your nails. You can use different colors for a fun and playful look. 2. Stripes: Use a striping brush to create thin stripes on the tip of your nails. You can play with different colors and even alternate the direction of the stripes for a unique look. 3. Glitter accent: Apply a glittery nail polish to just the tip of your nails for a simple yet glamorous nail tip design. You can also use glitter nail tape for a precise and mess-free application. 4. Half-moon: Use a hole punch reinforcement sticker to create a half-moon shape at the base of your nail. Then paint the tip with a different color for a chic and easy nail tip design. 5. Ombre: Use a makeup sponge to create a gradient effect on the tips of your nails. Simply apply two different shades of the same color and dab the sponge onto the tips for a beautiful ombre nail tip design.2. Easy Nail Tip Designs for Beginners

2. Easy Nail Tip Designs for Beginners


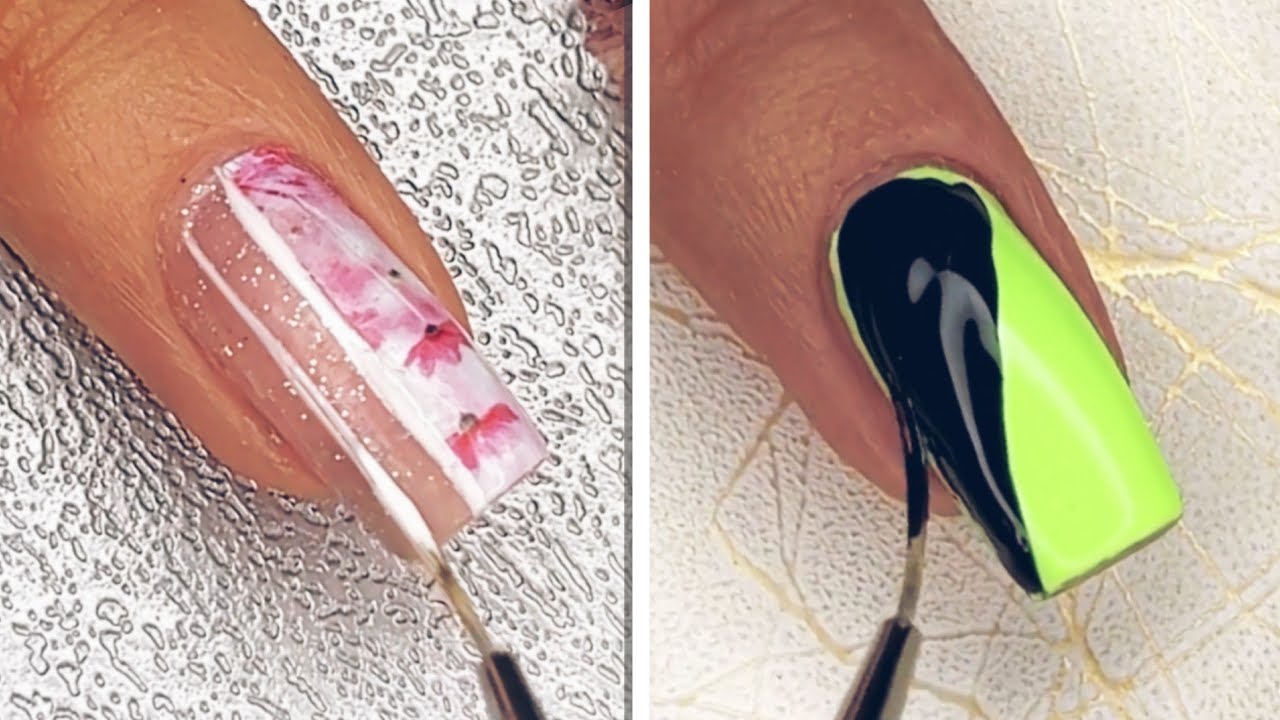
Visual aids can be incredibly helpful when trying to recreate a nail tip design. That's why we've put together a step by step guide with pictures to make it even easier for you to achieve the perfect nail tip design. Step 1: Start by preparing your nails with a base coat and letting it dry completely. Step 2: Choose your base color and apply it to your entire nail, leaving some space at the tip. Step 3: Use a nail art brush to paint the tip of your nail with a different color. Step 4: Let the tip dry completely before sealing it with a top coat. Step 5: For added detail, you can use a nail art pen to create patterns or designs on the tip of your nail. Step 6: Once your nail tip design is complete, clean up any excess polish around your nails using a angled brush dipped in nail polish remover. Nail tip design tip: If you're struggling with creating a straight line for the tip, you can use striping tape to help guide you.3. Step by Step Guide to Nail Tip Design with Pictures

3. Step by Step Guide to Nail Tip Design with Pictures


Why spend money on a professional manicure when you can achieve a perfect nail tip design at home? Follow this DIY nail tip design tutorial for flawless nails: Step 1: Start by prepping your nails with a base coat and letting it dry completely. Step 2: Choose your base color and apply it to your entire nail, leaving some space at the tip. Step 3: Use a nail art brush to paint the tip of your nail with a different color. For a more intricate design, you can also use nail art stencils or nail vinyls. Step 4: Let the tip dry completely before sealing it with a top coat. Step 5: Once the top coat is dry, you can add any additional details like glitter, rhinestones, or nail stickers. Step 6: Finish off with a cuticle oil to nourish and hydrate your nails. Nail tip design tip: Use a matte top coat for a unique and trendy look.4. DIY Nail Tip Design Tutorial for Perfect Nails

4. DIY Nail Tip Design Tutorial for Perfect Nails


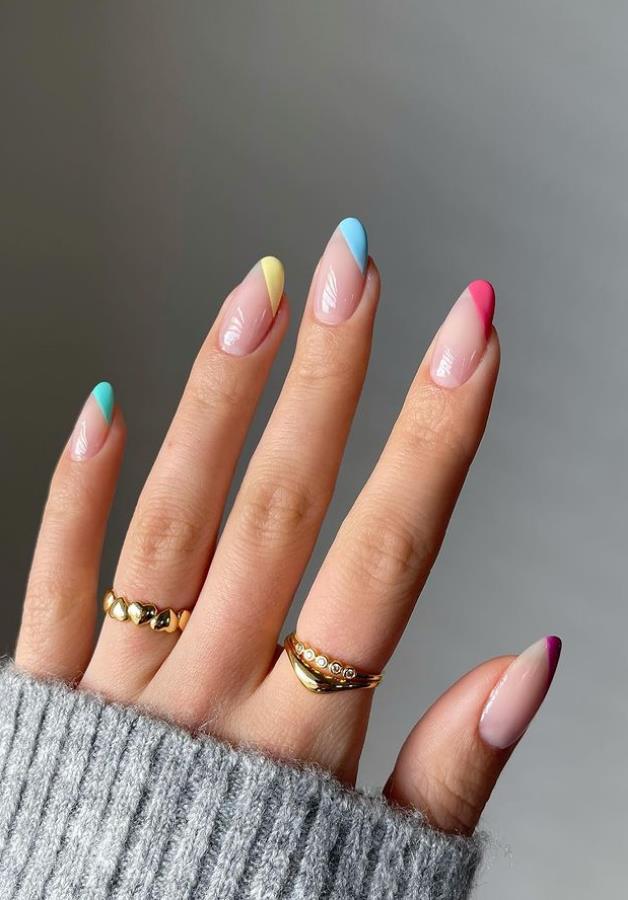
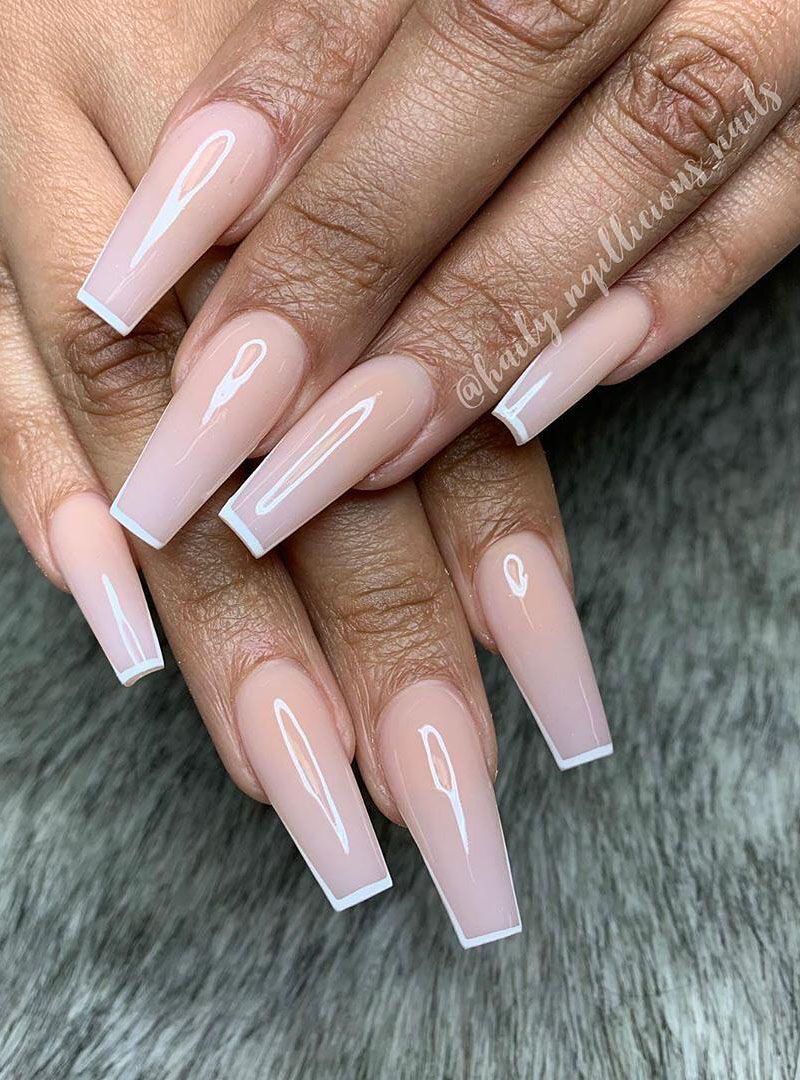
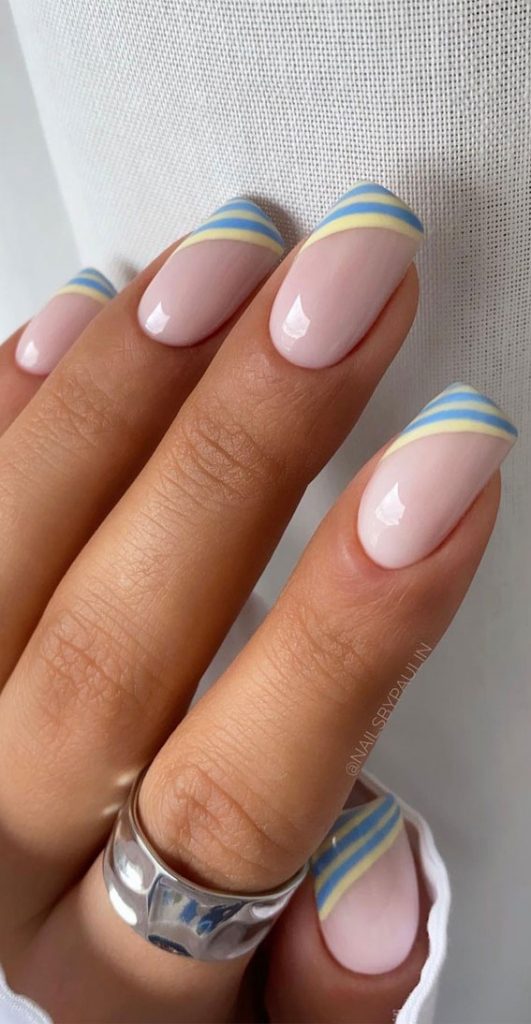
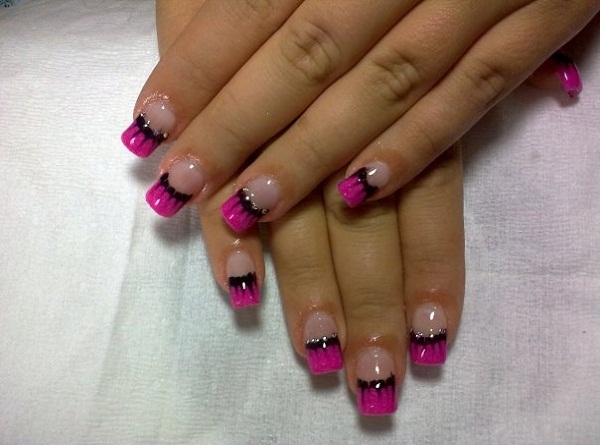
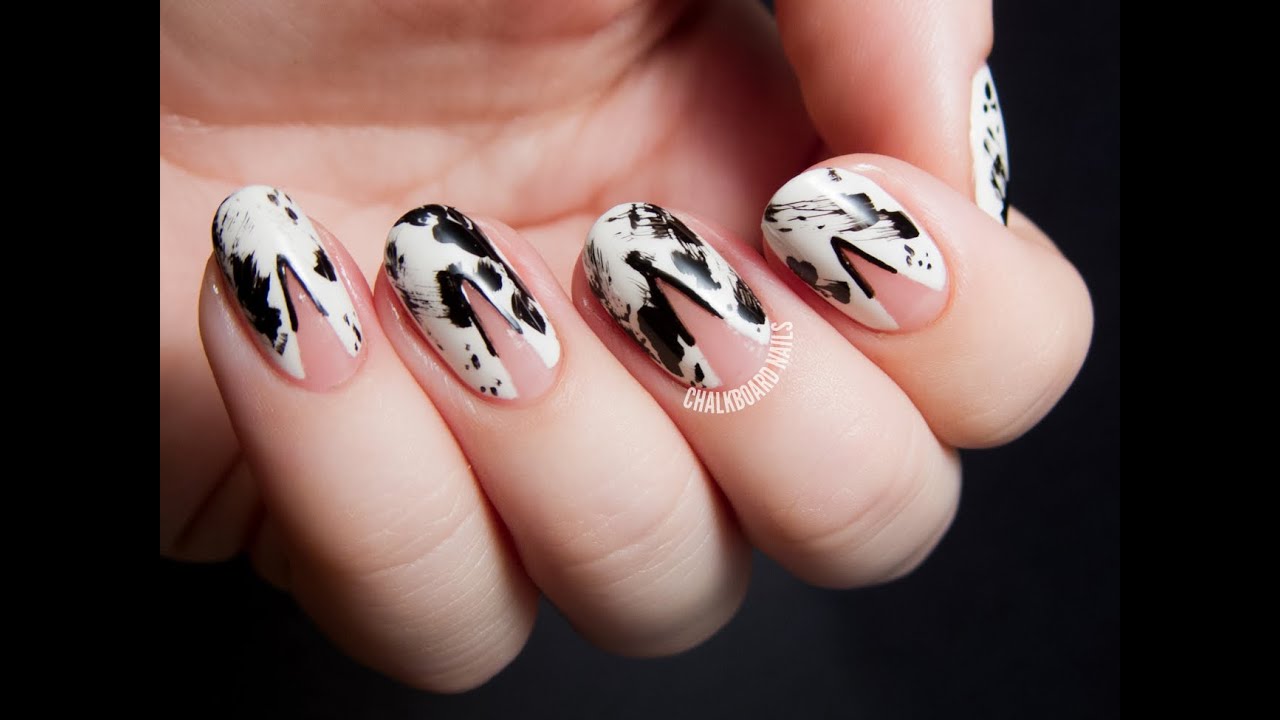
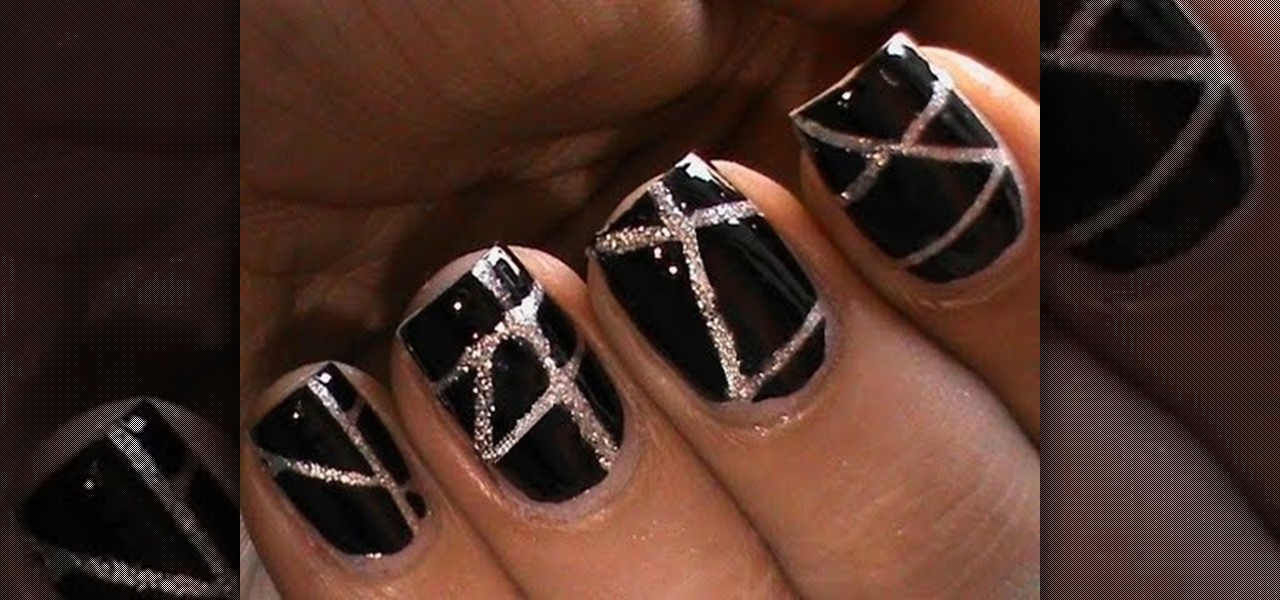
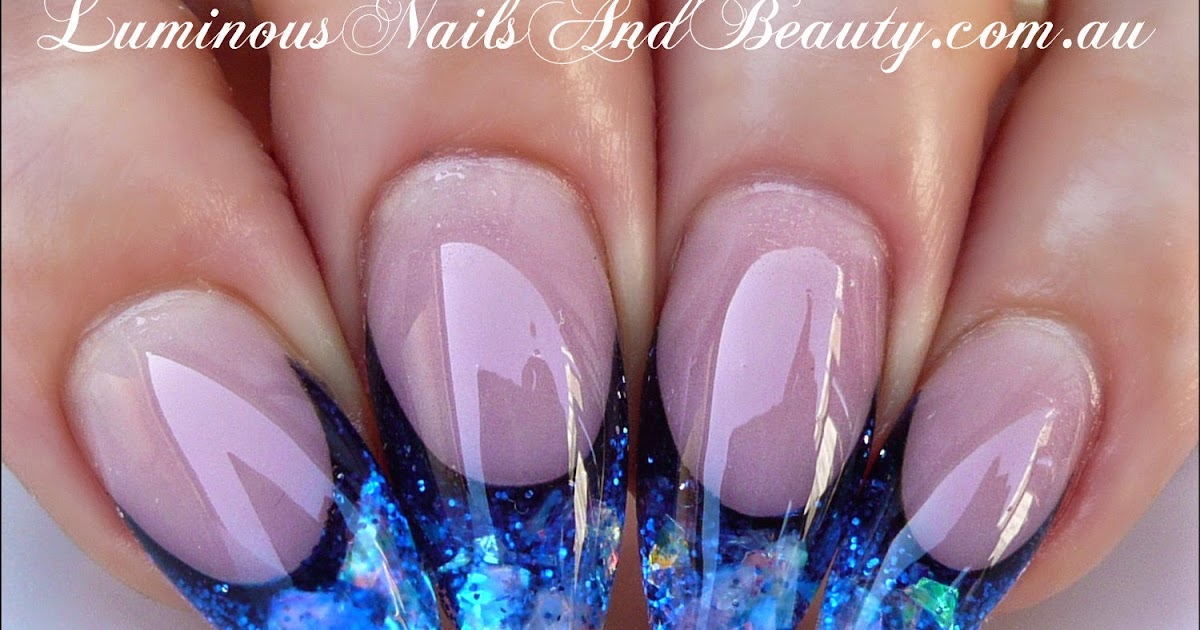
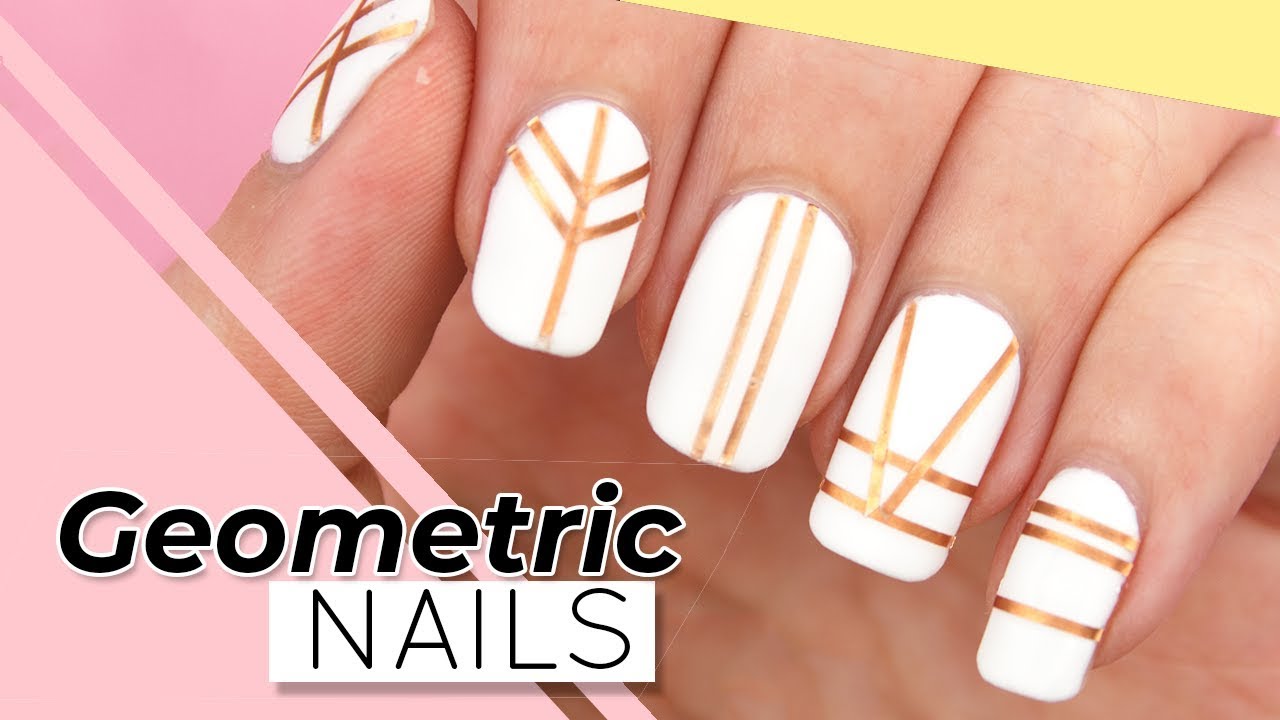
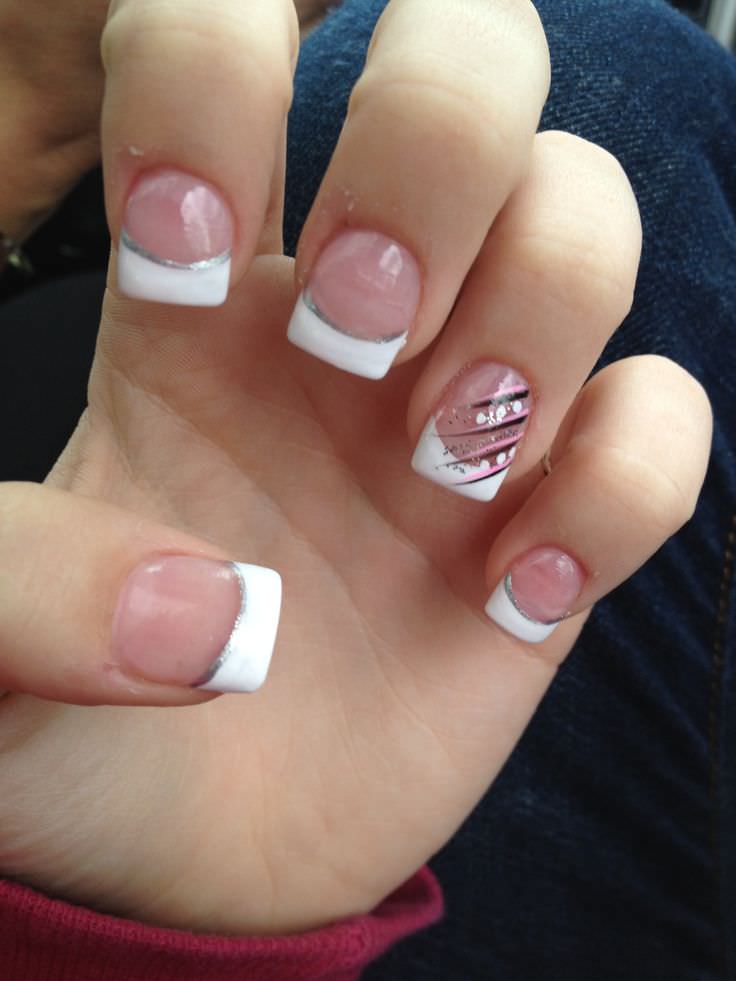
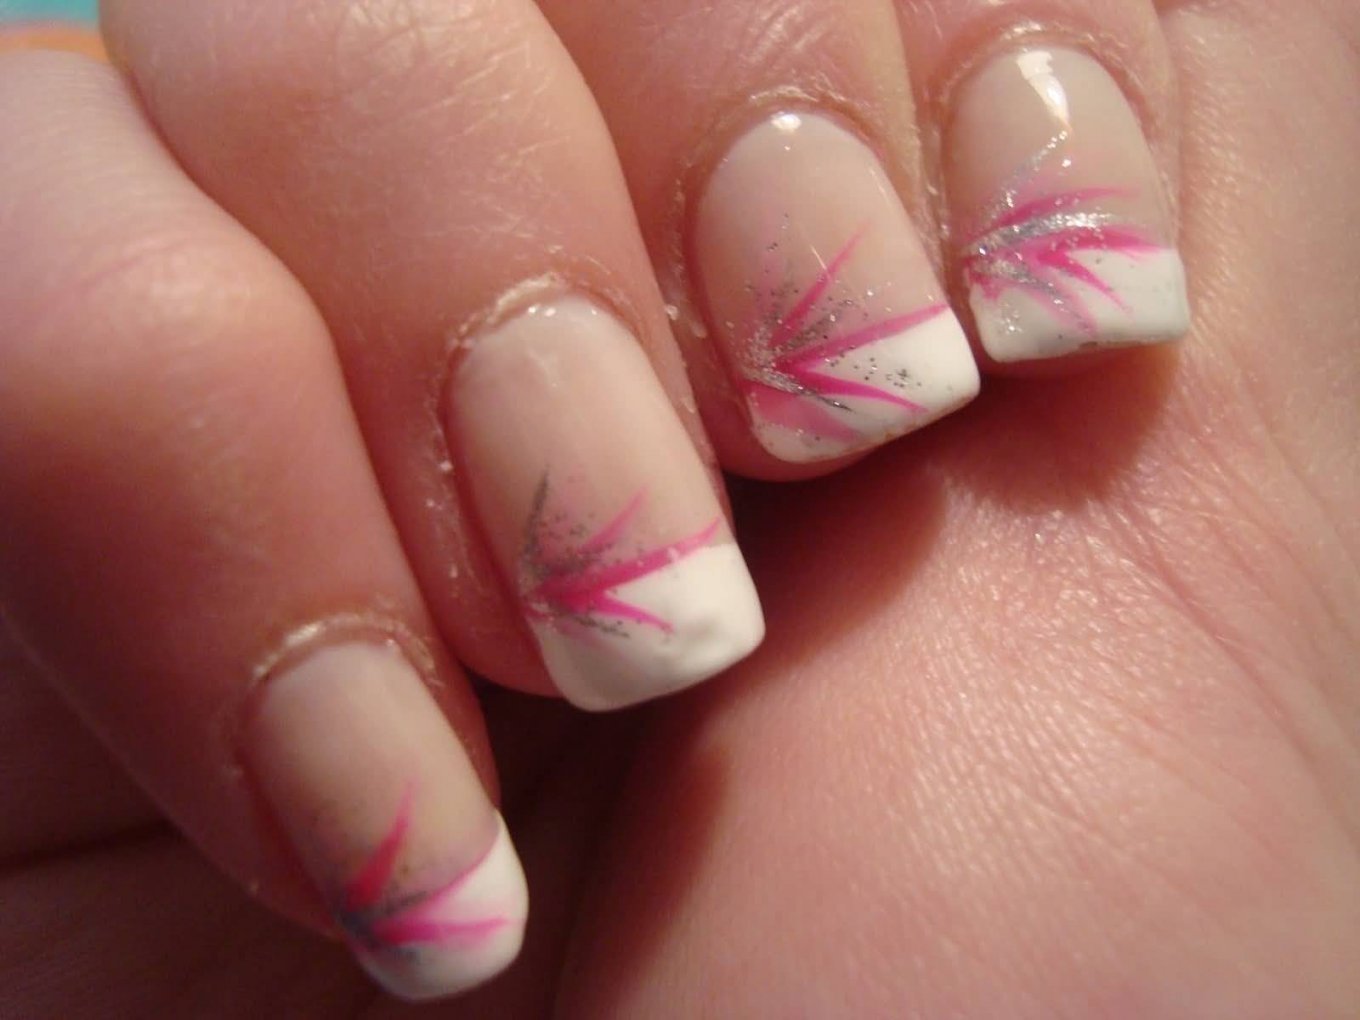
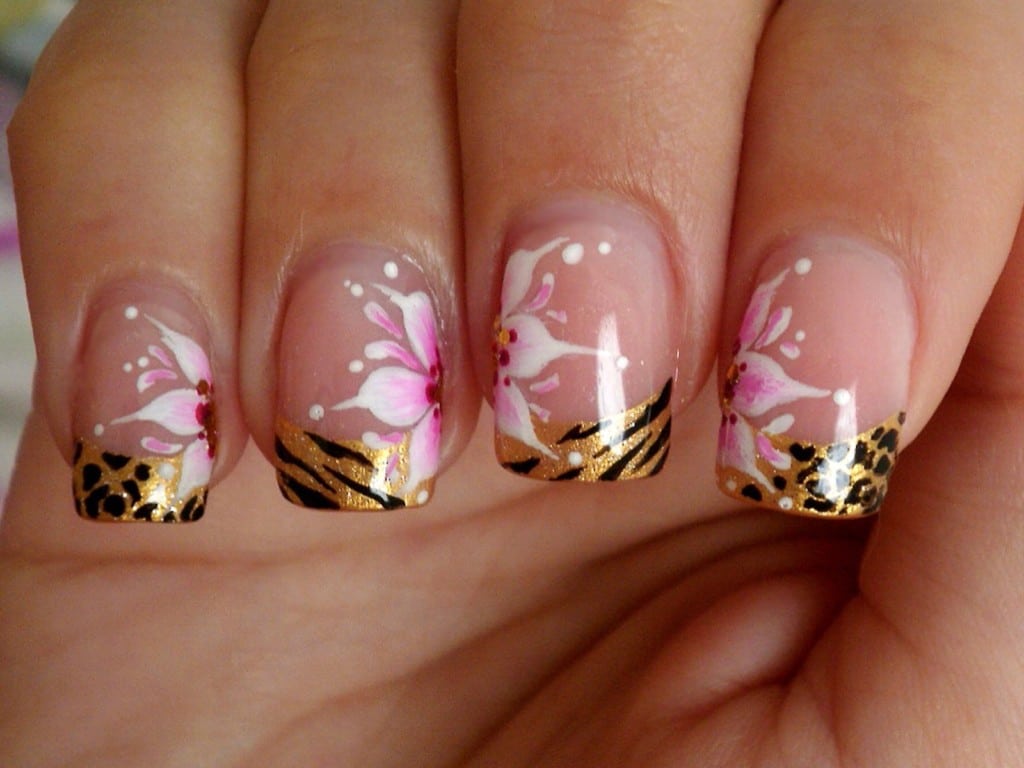
Looking for some inspiration for your next nail tip design? Here are 10 stunning designs that you can easily recreate at home: 1. Rainbow tips: Use a different color for each nail to create a rainbow effect on the tips. 2. Floral tips: Use a flower nail stamping plate to add delicate floral designs to the tips of your nails. 3. Geometric tips: Create geometric patterns on the tips of your nails using nail striping tape. 4. Negative space tips: Leave some of your natural nail showing at the tip for a chic negative space nail tip design. 5. Glitter tips: Use a glitter nail polish to add some sparkle to the tips of your nails. 6. Animal print tips: Use a leopard print nail stamping plate to add some wild and fun designs to your nail tips. 7. Marble tips: Create a marble effect on the tips of your nails using a marble nail polish or water marbling technique. 8. Dotted tips: Use a dotting tool to create cute and colorful dots on the tips of your nails. 9. Gradient tips: Use a makeup sponge to create a gradient effect on the tips of your nails with two different colors. 10. Glitter accent tips: Add a touch of glitter to just the tip of your nails for a simple and elegant nail tip design.5. 10 Stunning Nail Tip Designs You Can Do at Home

5. 10 Stunning Nail Tip Designs You Can Do at Home


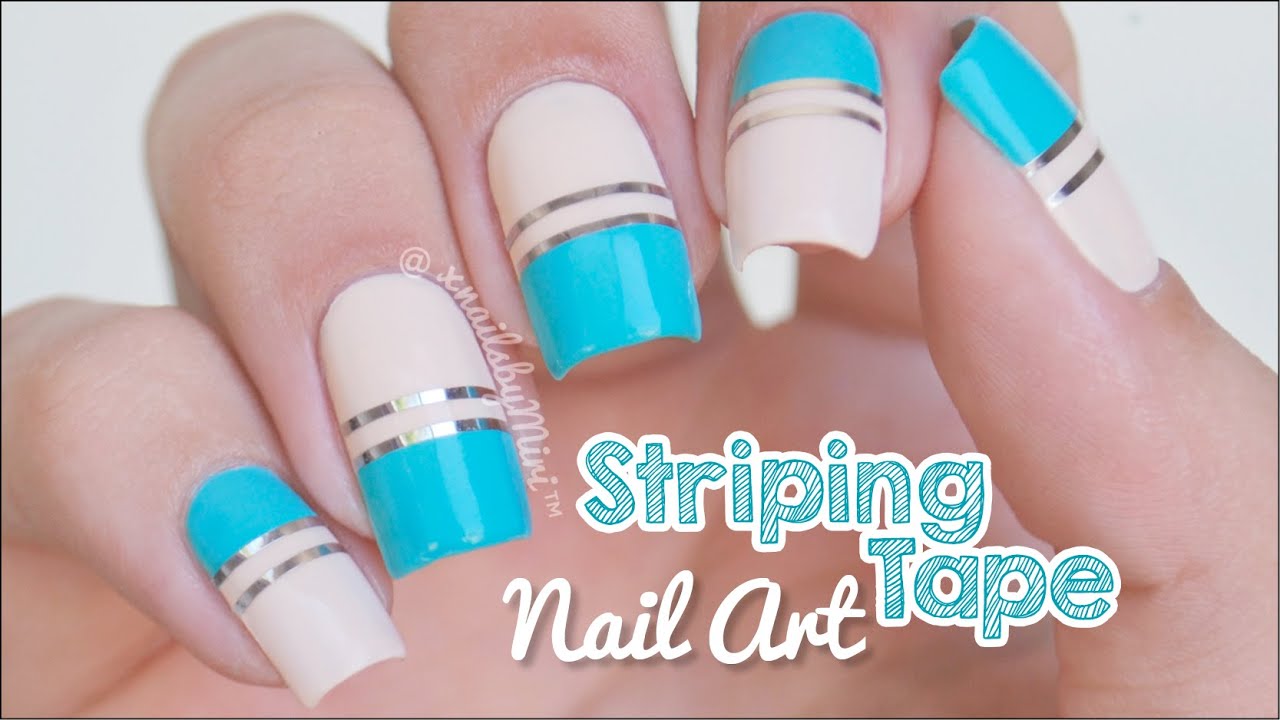
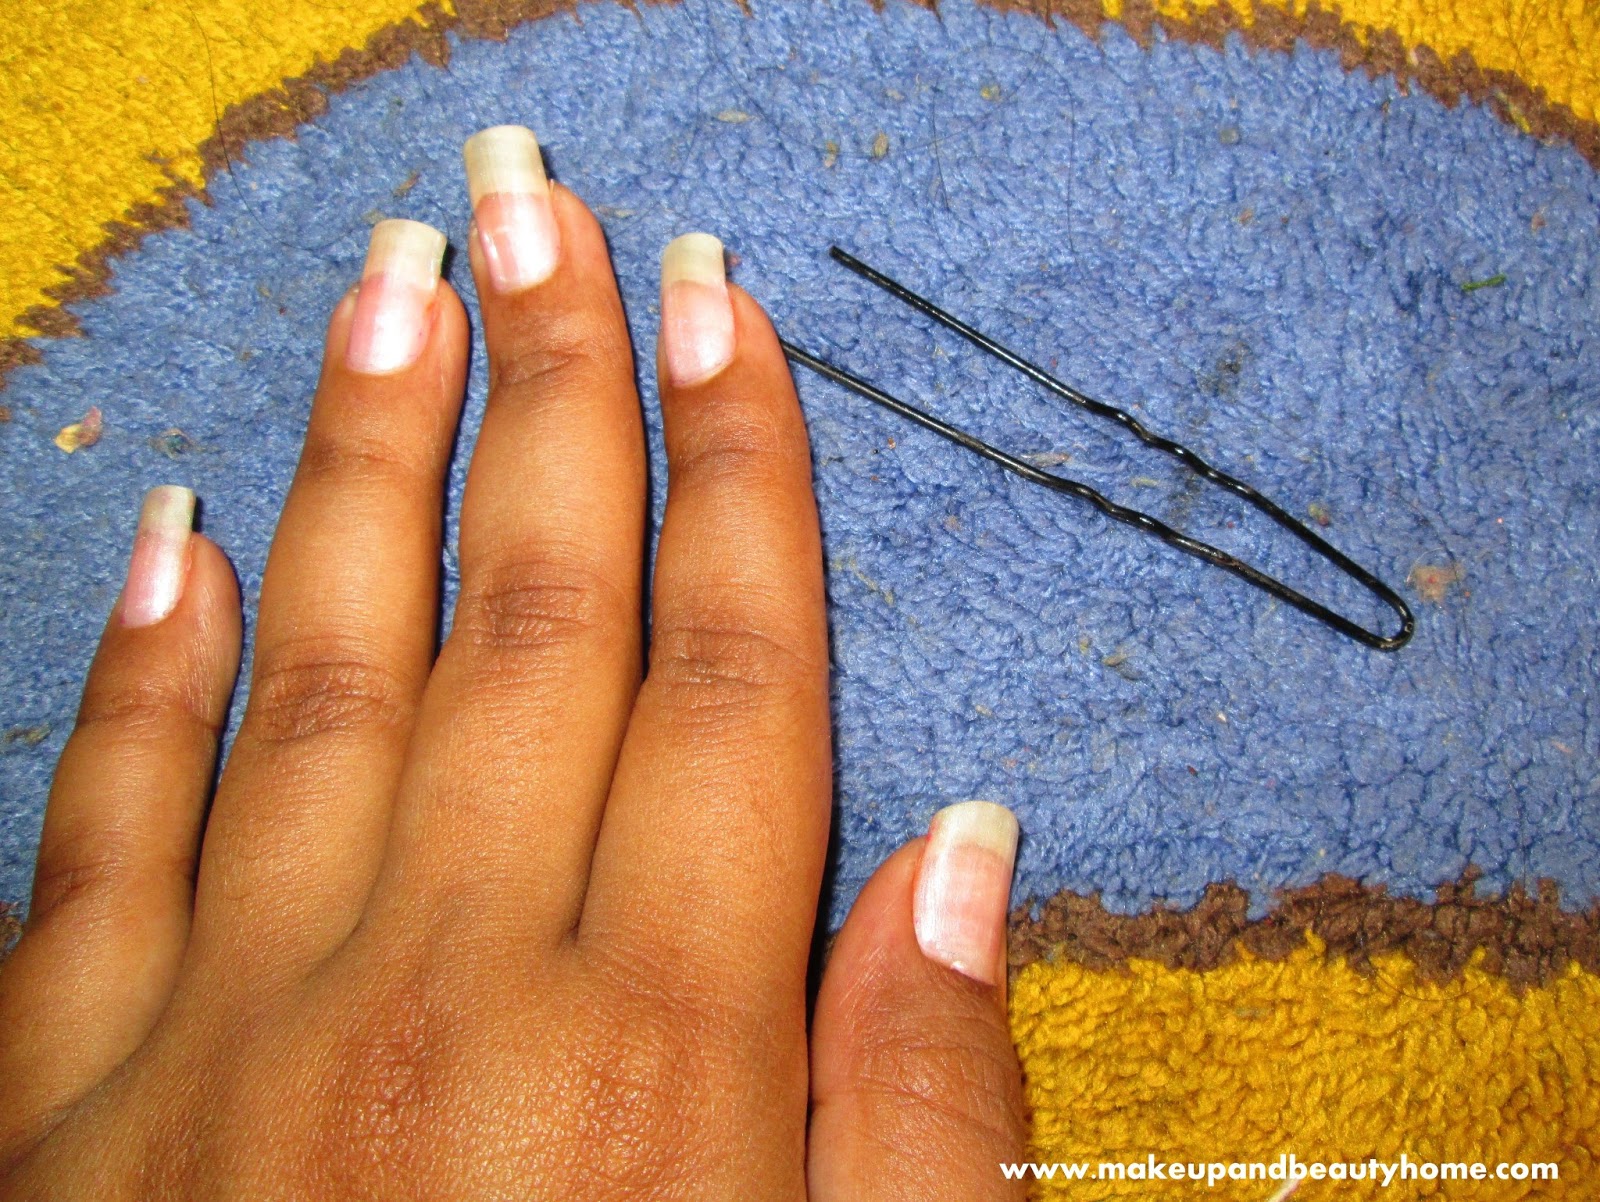
If you struggle with creating straight lines for your nail tip designs, using tape can be a lifesaver. Follow these step by step instructions for a flawless nail tip design using tape: Step 1: Start by preparing your nails with a base coat and letting it dry completely. Step 2: Choose your base color and apply it to your entire nail, leaving some space at the tip. Step 3: Once the base color is dry, cut small pieces of striping tape and place them on your nails in the desired pattern. Step 4: Use a different color to paint over the tape, covering the entire nail. Step 5: Carefully remove the tape while the polish is still wet to reveal the design underneath. Step 6: Let the tip dry completely before sealing it with a top coat. Nail tip design tip: You can also use scotch tape as a more affordable alternative.6. Step by Step Instructions for Nail Tip Design Using Tape
6. Step by Step Instructions for Nail Tip Design Using Tape


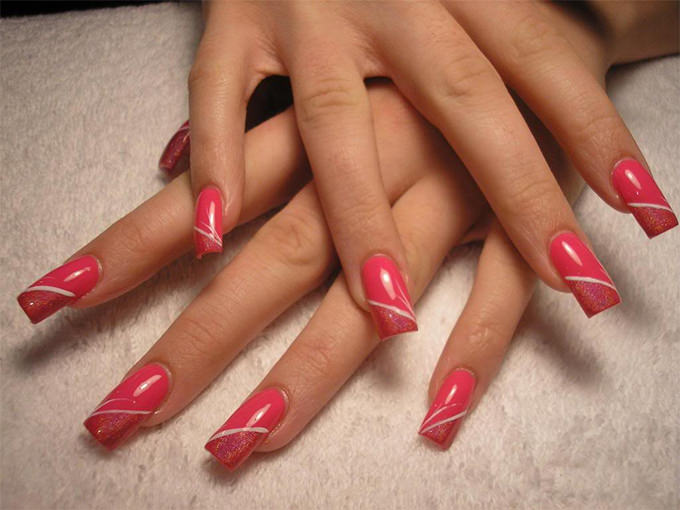
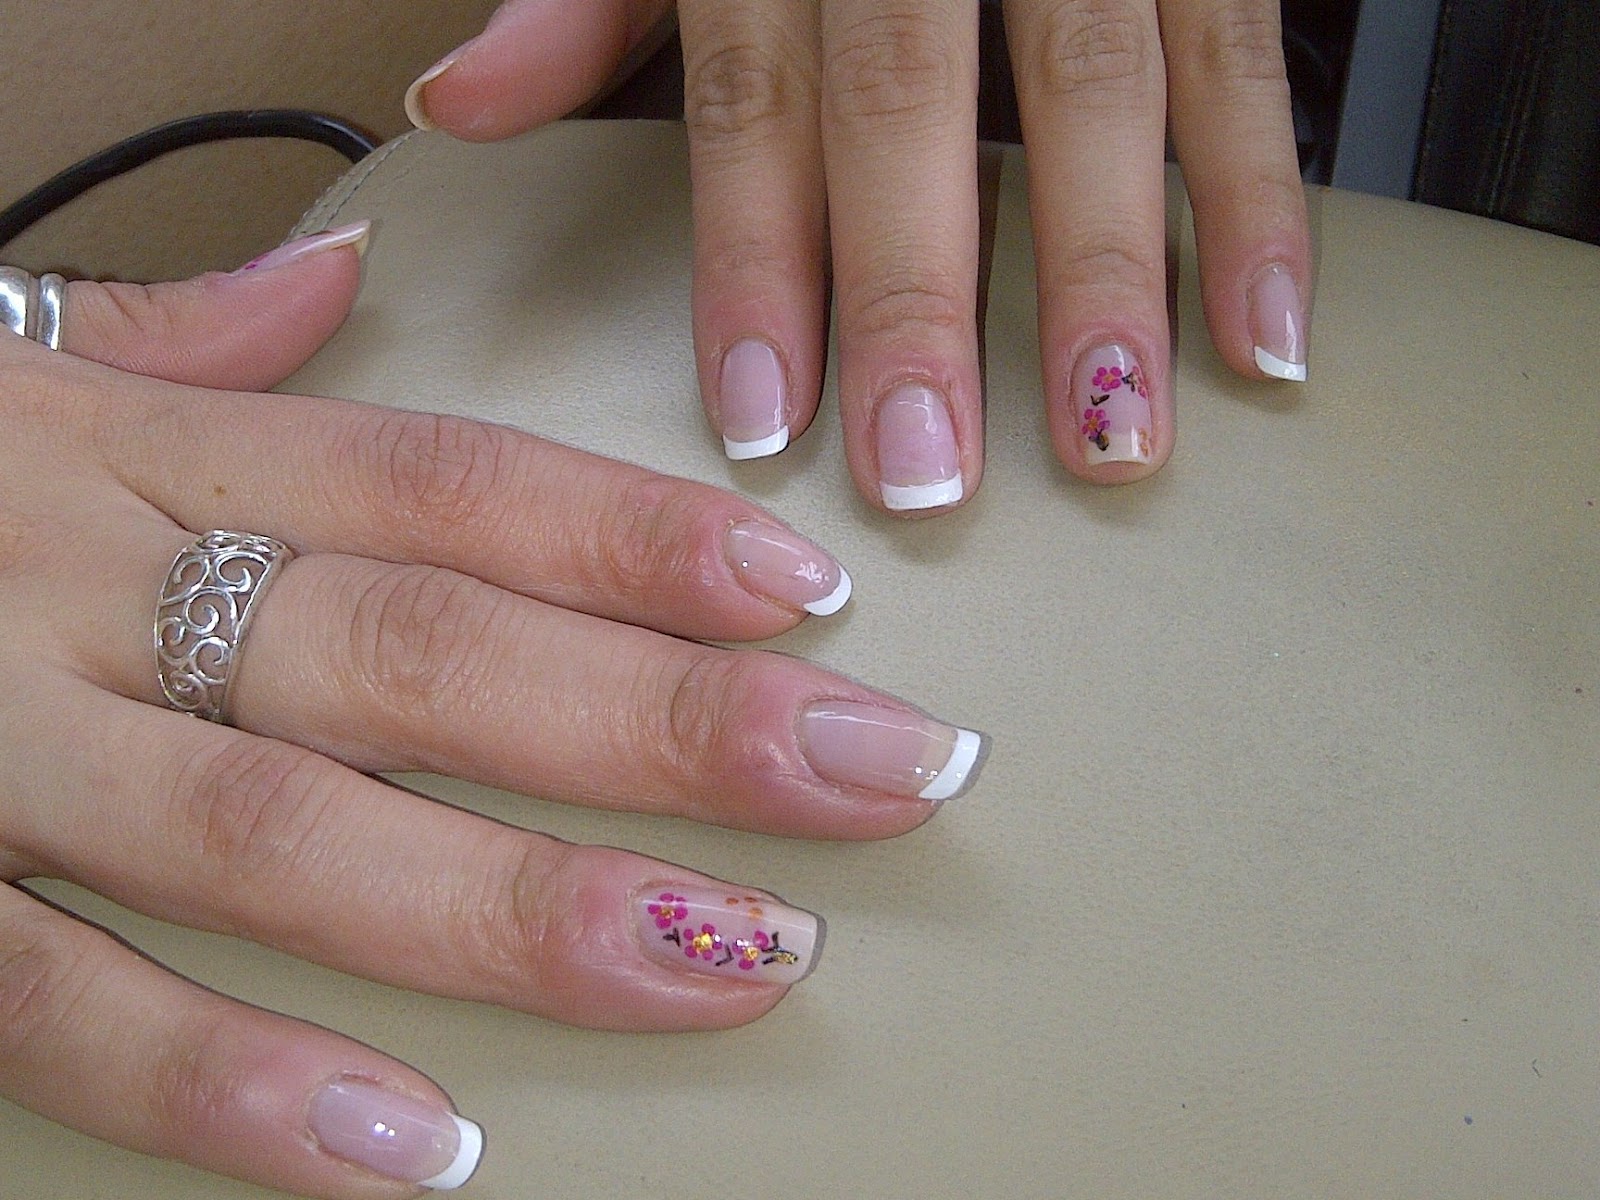
Nail tip designs are a great way to add some personality to your nails and make them stand out. Here are some nail tip design ideas for different occasions: 1. Wedding: For a classic and elegant look, opt for a french manicure with a twist by using a colored tip instead of white. 2. Holiday: Get into the festive spirit with a nail tip design featuring Christmas trees, Easter eggs, or other holiday symbols. 3. Date night: Add some glam to your nails with a glitter tip or sparkly rhinestones for a romantic date night look. 4. Girls' night out: Have some fun with your nail tip design by adding animal prints, neon colors, or geometric patterns. 5. Work/professional setting: Keep it simple and understated with a nude base and a black tip for a professional and polished look. 6. Casual day out: Experiment with different colors, patterns, and textures for a fun and laid-back nail tip design. 7. Graduation/Prom: Make a statement with a bold and intricate nail tip design featuring glitter, ombre, or rhinestone accents.7. Nail Tip Design Ideas for Every Occasion


7. Nail Tip Design Ideas for Every Occasion


With the right tools and techniques, you can achieve a professional-looking nail tip design at home. Here's how: 1. Invest in quality nail art tools: A nail art brush set, dotting tools, striping tape, and nail stencils are essential for creating intricate nail tip designs. 2. Practice makes perfect: Don't be discouraged if your first few attempts are not perfect. With practice, you'll improve and be able to create more complex designs. 3. Use a light-colored base: A light base color will make the tip stand out more and is also forgiving if you make any mistakes. 4. Clean up any mistakes: Use a angled brush dipped in nail polish remover to clean up any polish that has gotten on your skin or cuticles. 5. Seal with a top coat: A good top coat will not only make your nail tip design last longer but also give it a glossy and professional finish. Nail tip design tip: Don't be afraid to try new techniques and experiment with different colors and patterns for a unique and professional-looking nail tip design.8. How to Achieve a Professional Nail Tip Design at Home


8. How to Achieve a Professional Nail Tip Design at Home


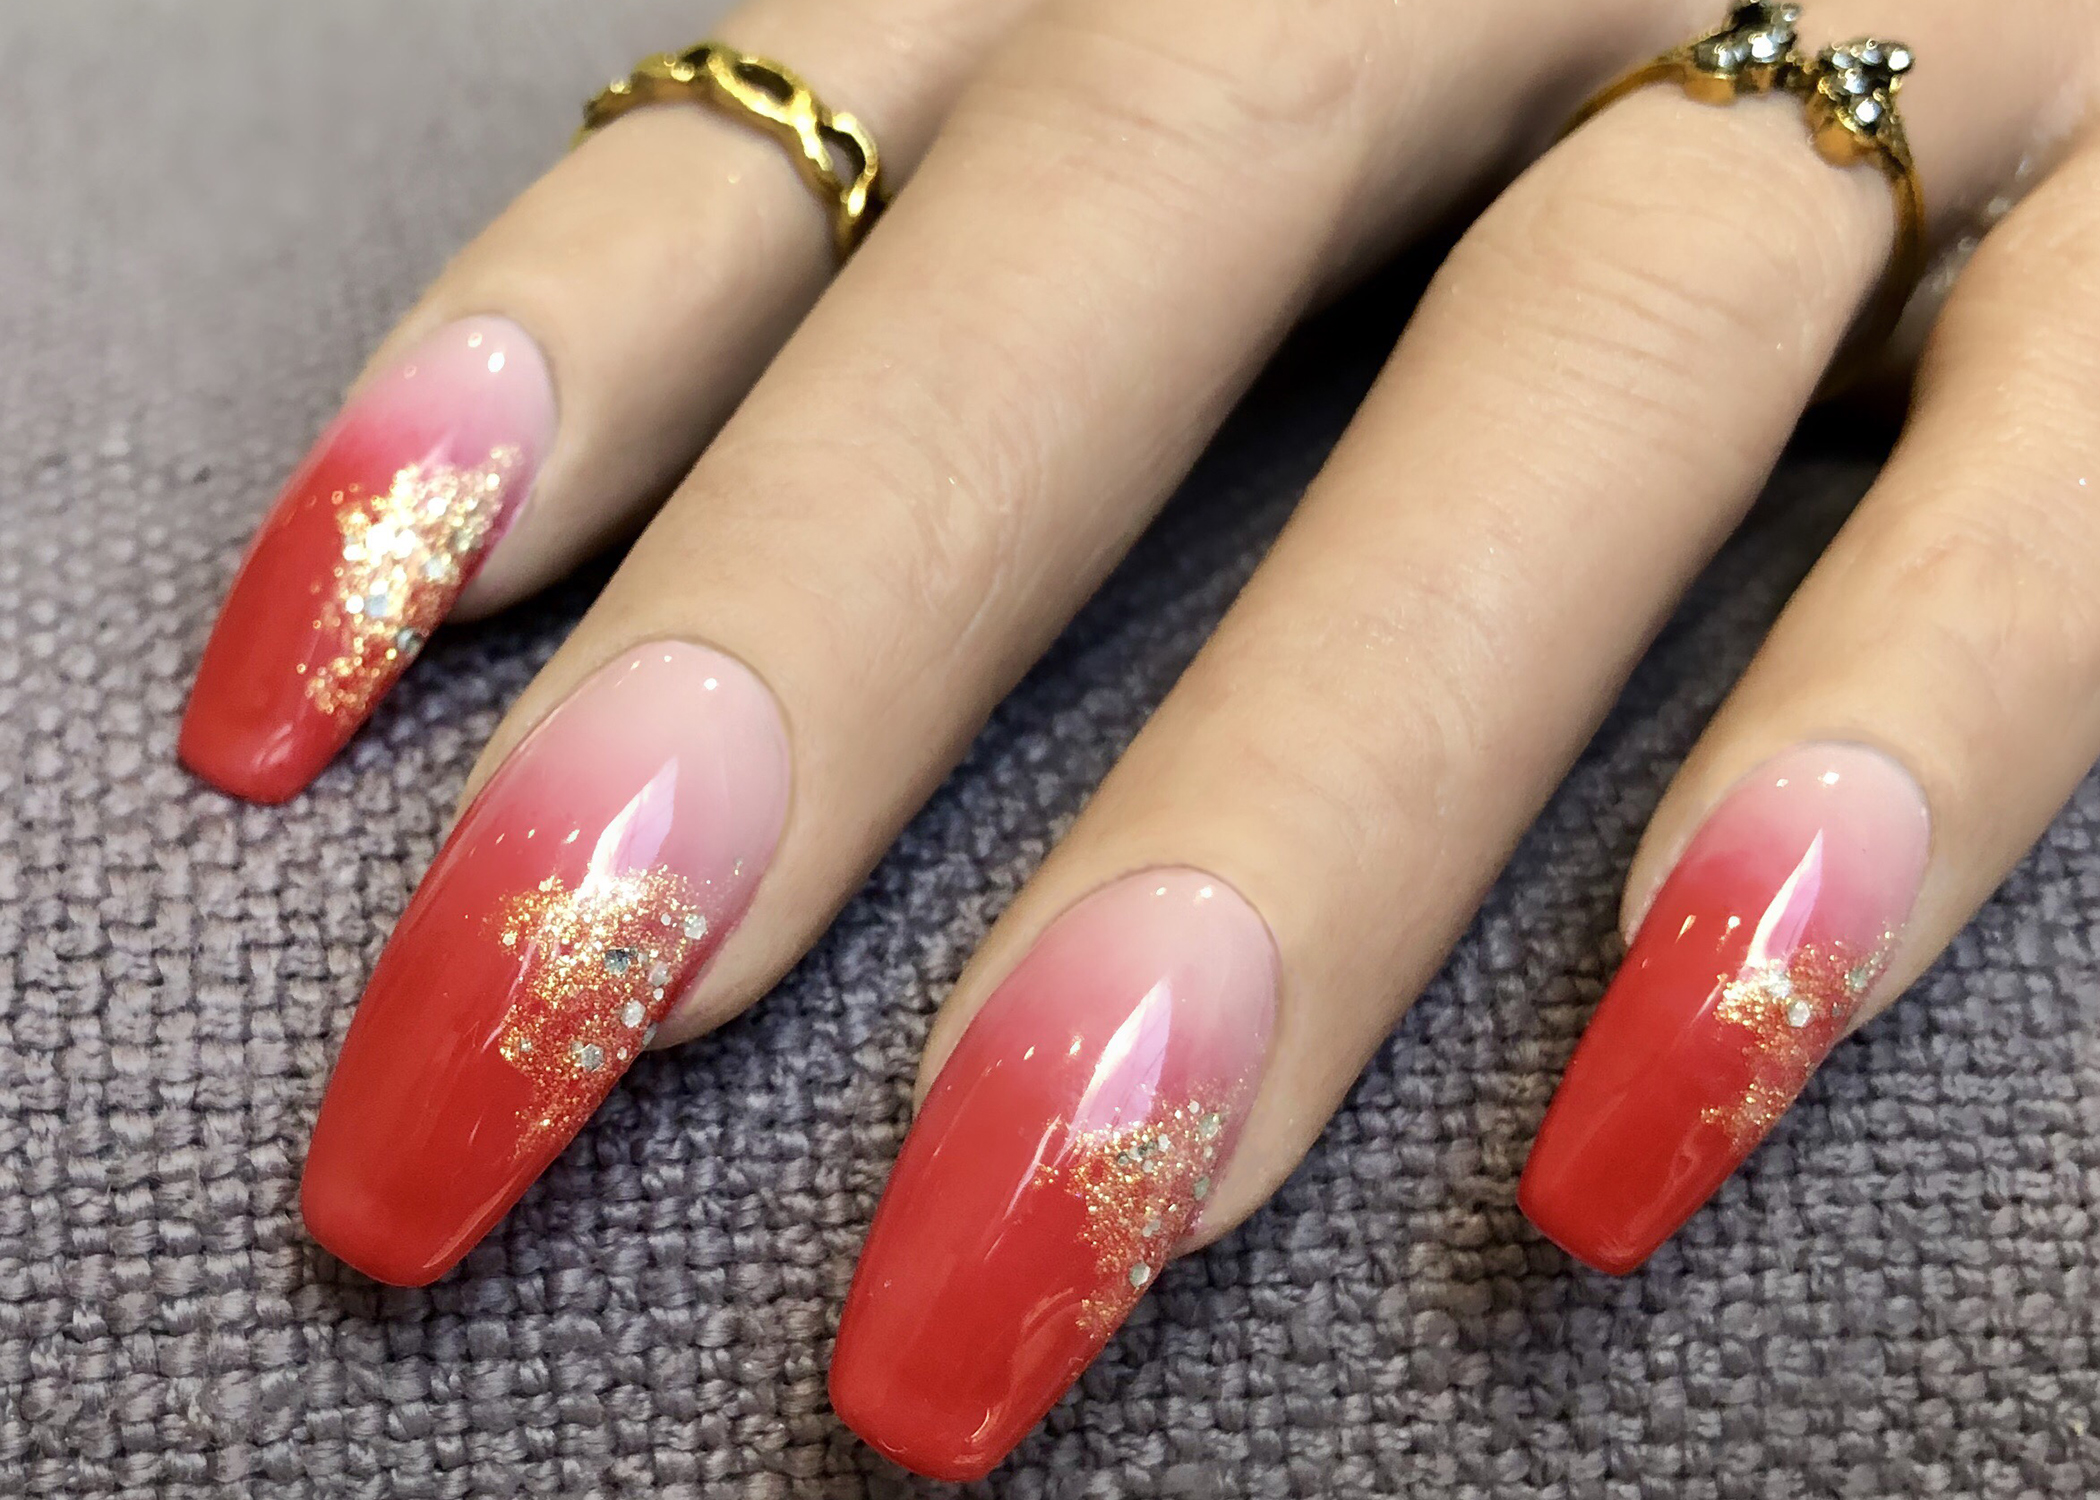
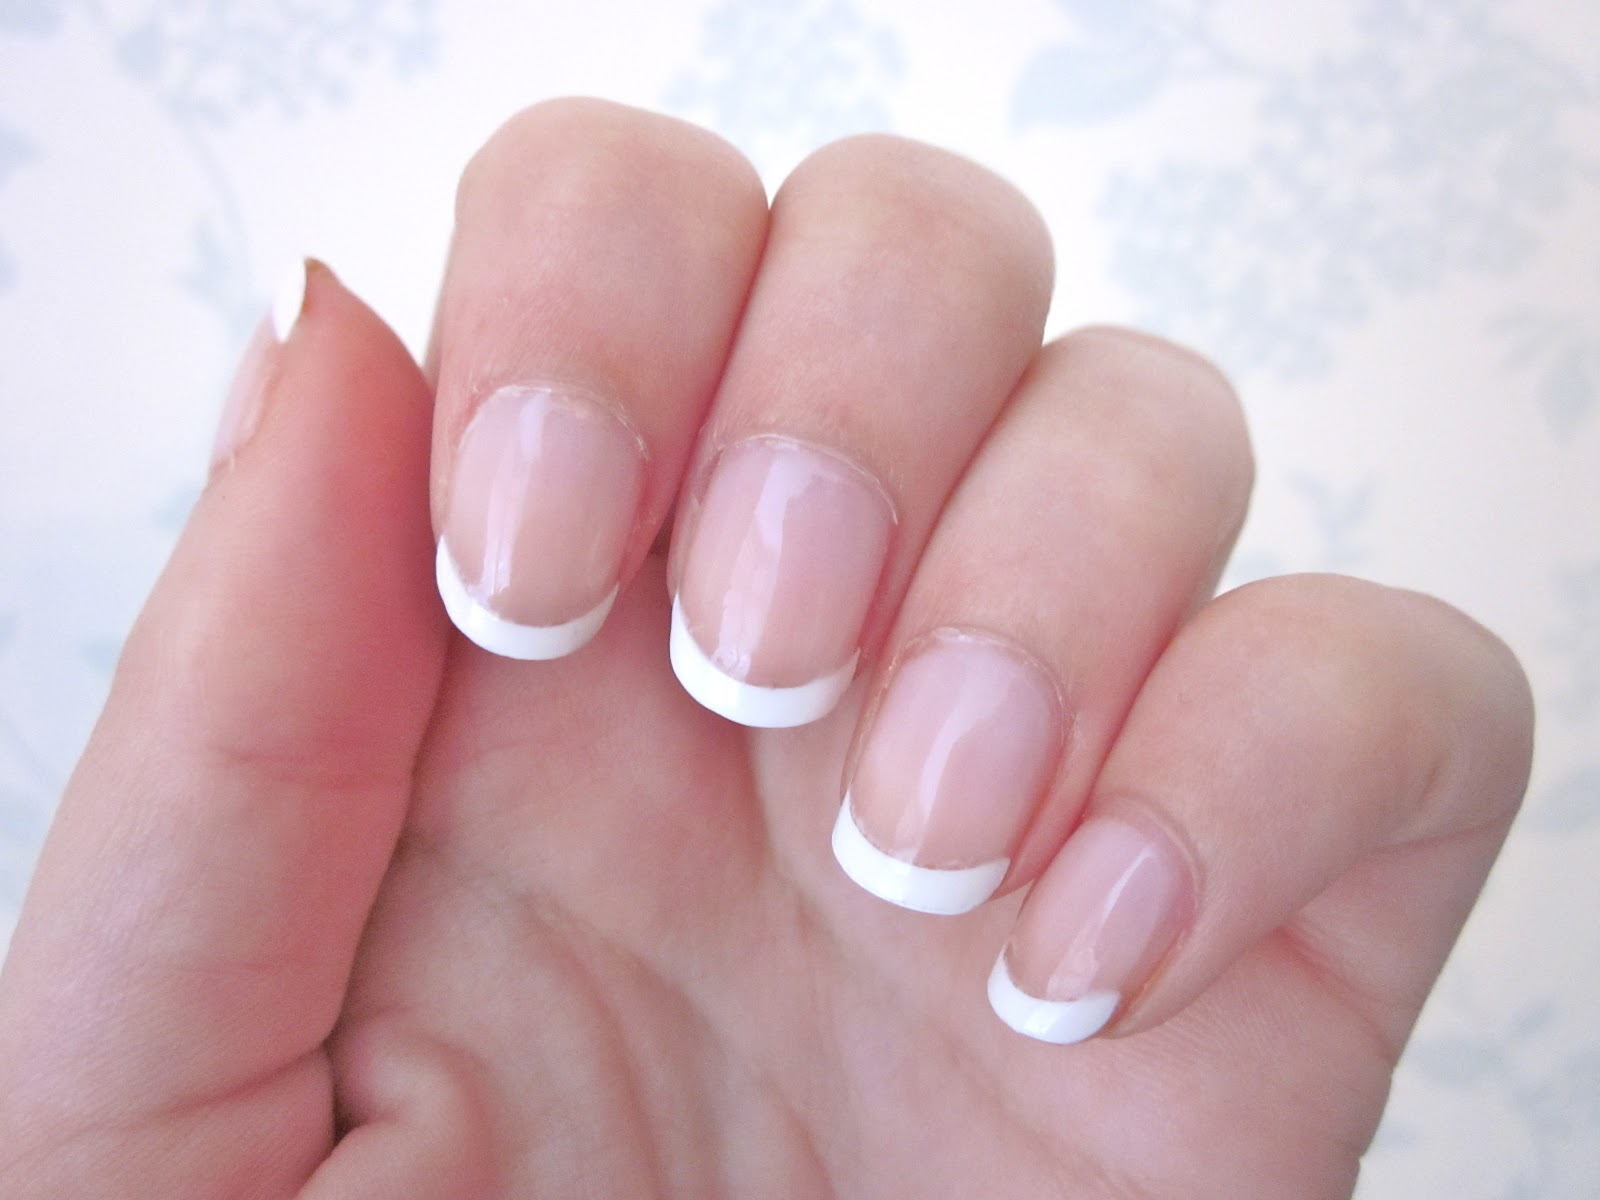
Ombre nail tips are a popular trend that can be achieved with a little bit of patience and the right tools. Follow this step by step guide to create beautiful ombre nails: Step 1: Start by preparing your nails with a base coat and letting it dry completely. Step 2: Choose two contrasting colors, one for the base and one for the tip. You can also use shades from the same color family for a more subtle ombre effect. Step 3: Apply the lighter color to your entire nail and let it dry completely. Step 4: Use a makeup sponge to apply the darker color to just the tip of your nail. Dab the sponge onto the tip multiple times for a gradual gradient effect. Step 5: Clean up any excess polish around your nails using a angled brush dipped in nail polish remover. Step 6: Seal the design with a top coat for a glossy finish. Nail tip design tip: You can also use multiple colors for a more colorful ombre effect.9. Step by Step Guide to Creating Ombre Nail Tips


9. Step by Step Guide to Creating Ombre Nail Tips


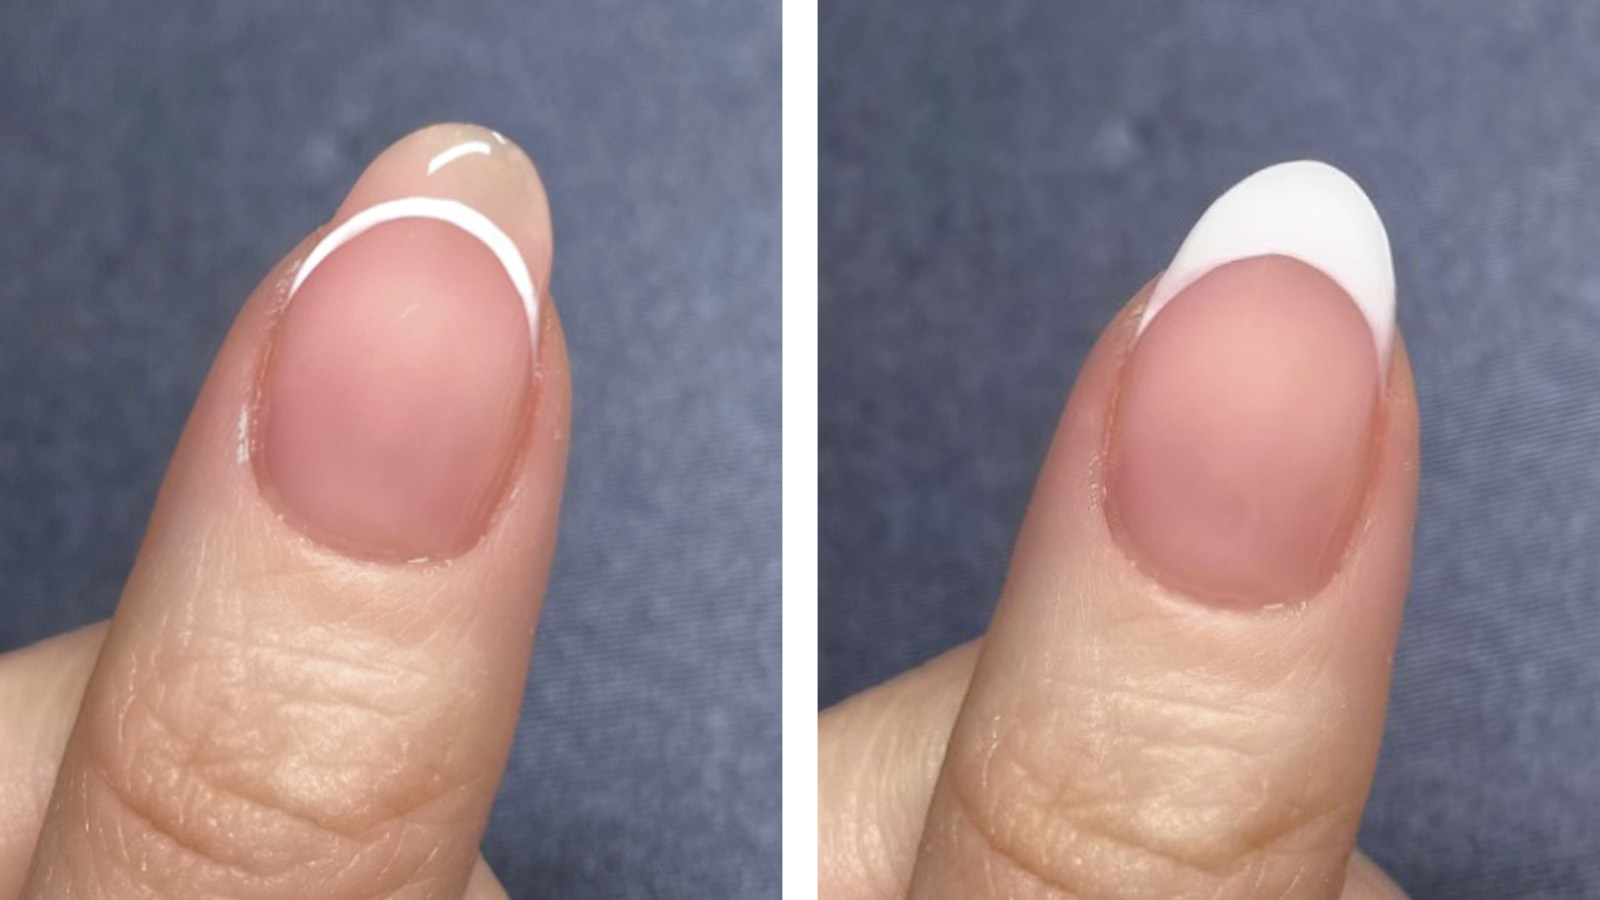
Creating a perfect nail tip design can be challenging, but with these nail tip design hacks, you'll be able to achieve a flawless manicure every time: 1. Use a white base: If you're working with bright or neon colors, applying a white base will make the colors pop and appear more vibrant. 2. Create a guide: Use a french manicure sticker or hole punch reinforcement sticker to create a guide for a precise and symmetrical nail tip design.10. Nail Tip Design Hacks for a Flawless Manicure


10. Nail Tip Design Hacks for a Flawless Manicure


Nail Tip Design: A Step-by-Step Guide
Introduction

When it comes to nail art, one of the most popular and versatile techniques is nail tip design. This involves painting or decorating the tips of your nails with different colors, patterns, and designs, creating a unique and eye-catching look. Whether you are a professional nail technician or a DIY enthusiast, learning how to create beautiful nail tip designs is a must-have skill. In this article, we will provide you with a step-by-step guide on how to achieve stunning nail tip designs.
Gather Your Supplies

The first step in creating a nail tip design is to gather all the necessary supplies. This includes your base coat, nail polish colors of your choice, top coat, nail art brushes, dotting tools, and any other decorative elements such as glitter or rhinestones. Make sure to also have some cotton pads and nail polish remover on hand for any mistakes or clean-up.
Prep Your Nails

Before starting the design, it's important to prep your nails properly. Make sure your nails are clean and free of any old polish. Trim and shape your nails as desired, and push back your cuticles. Apply a base coat to protect your natural nails and help the polish adhere better.
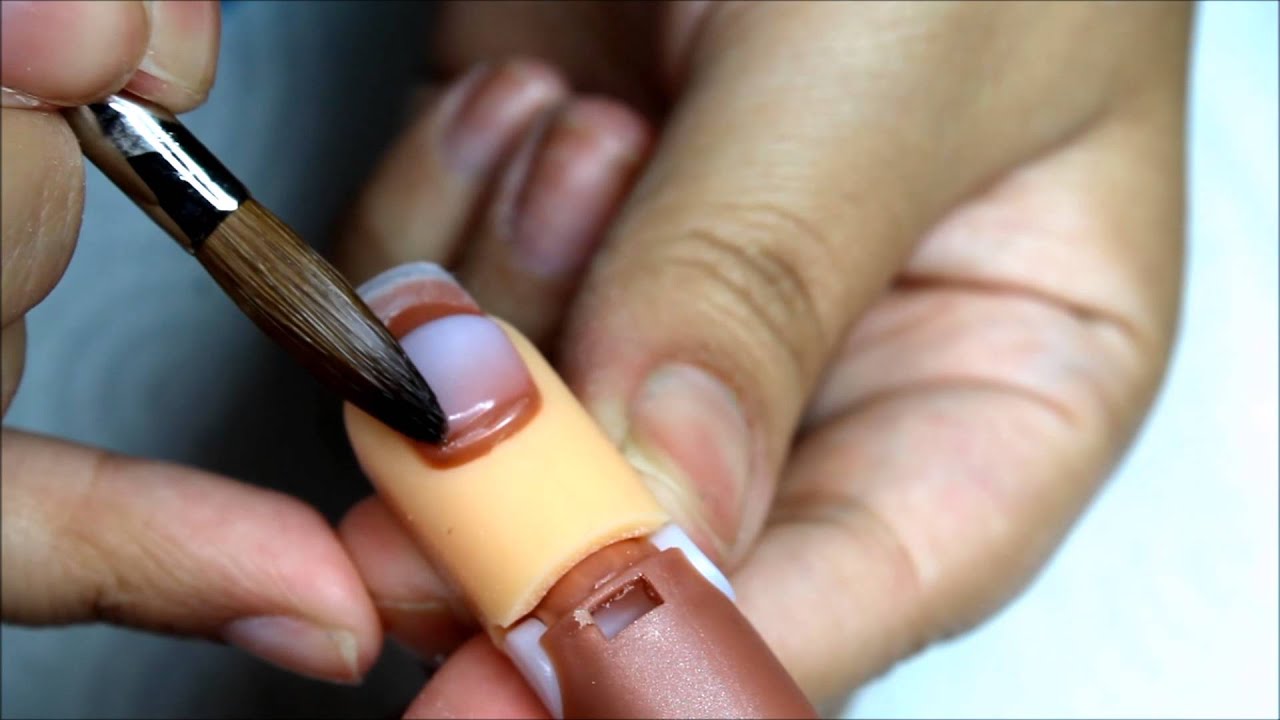
Create the Tip

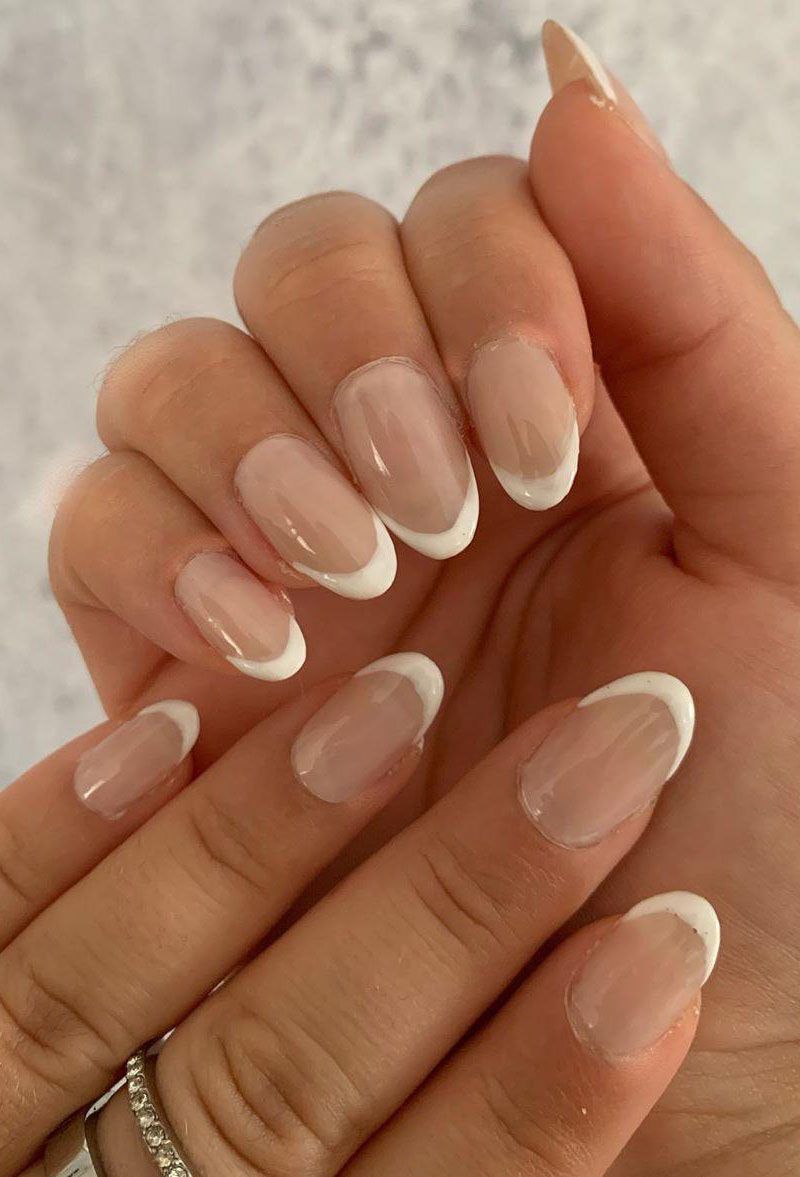
The next step is to create the tip of your nails. You can either use a French tip guide or free-hand the tip with a brush. For a classic French tip design, use a white or nude polish to paint the tips of your nails. For a more creative look, mix and match different colors for each nail, or use a nail art brush to create a unique design. Allow the polish to dry completely before moving on to the next step.
Add Details
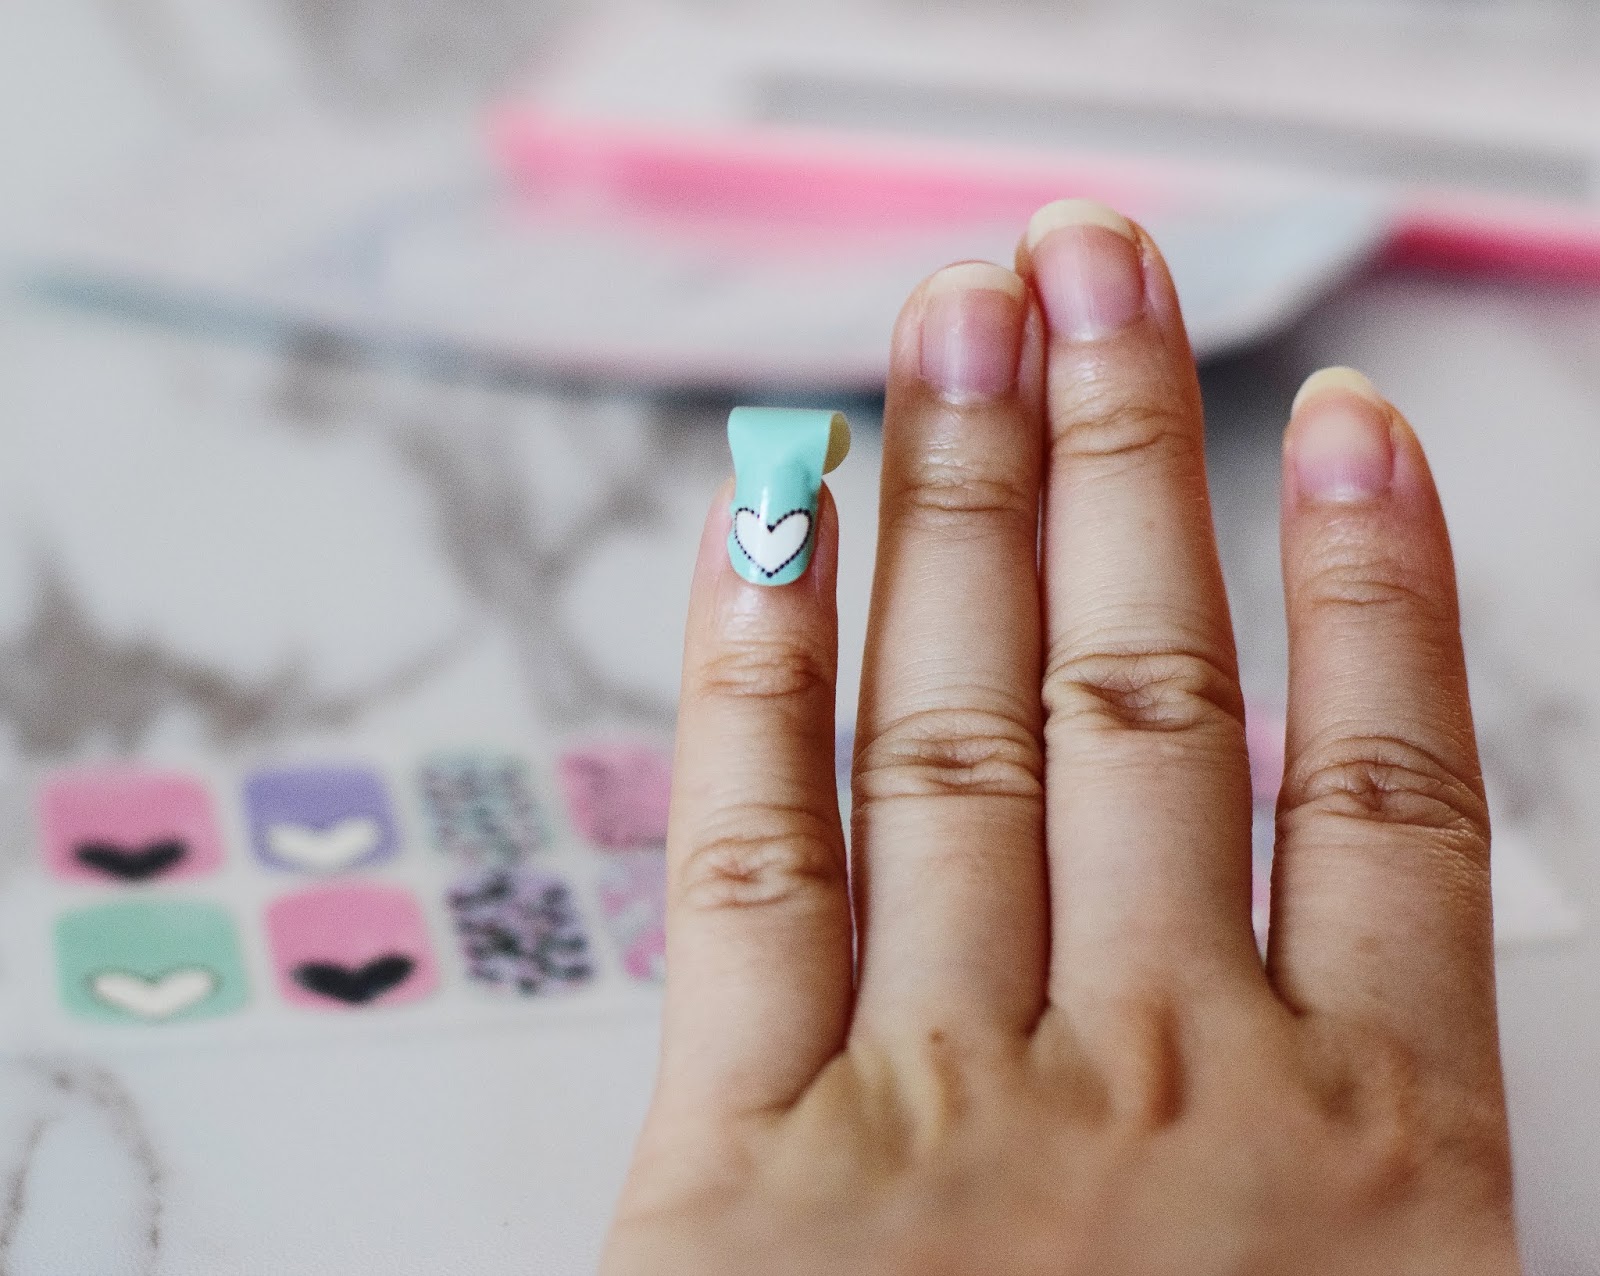
Once the tip is dry, it's time to add some details to your design. This is where you can get creative and add your personal touch. Use a dotting tool to create polka dots, stripes, or other patterns along the tip of your nails. You can also use a nail art brush to create intricate designs or add glitter for some extra sparkle. Let your imagination run wild and have fun with it!
Seal the Design
To ensure your nail tip design lasts, it's important to seal it with a top coat. This will not only protect the design but also give your nails a glossy finish. Apply a thin layer of top coat and make sure to seal the edges and tips of your nails. You can also add a layer of gel top coat for a longer-lasting design. Allow the top coat to dry completely before using your hands.
Final Thoughts
Nail tip design is a fun and creative way to elevate your manicure and express your personal style. With these simple steps, you can easily achieve beautiful and unique nail tip designs at home. Remember to practice and experiment with different colors and techniques to find your perfect nail tip design. Happy designing!


