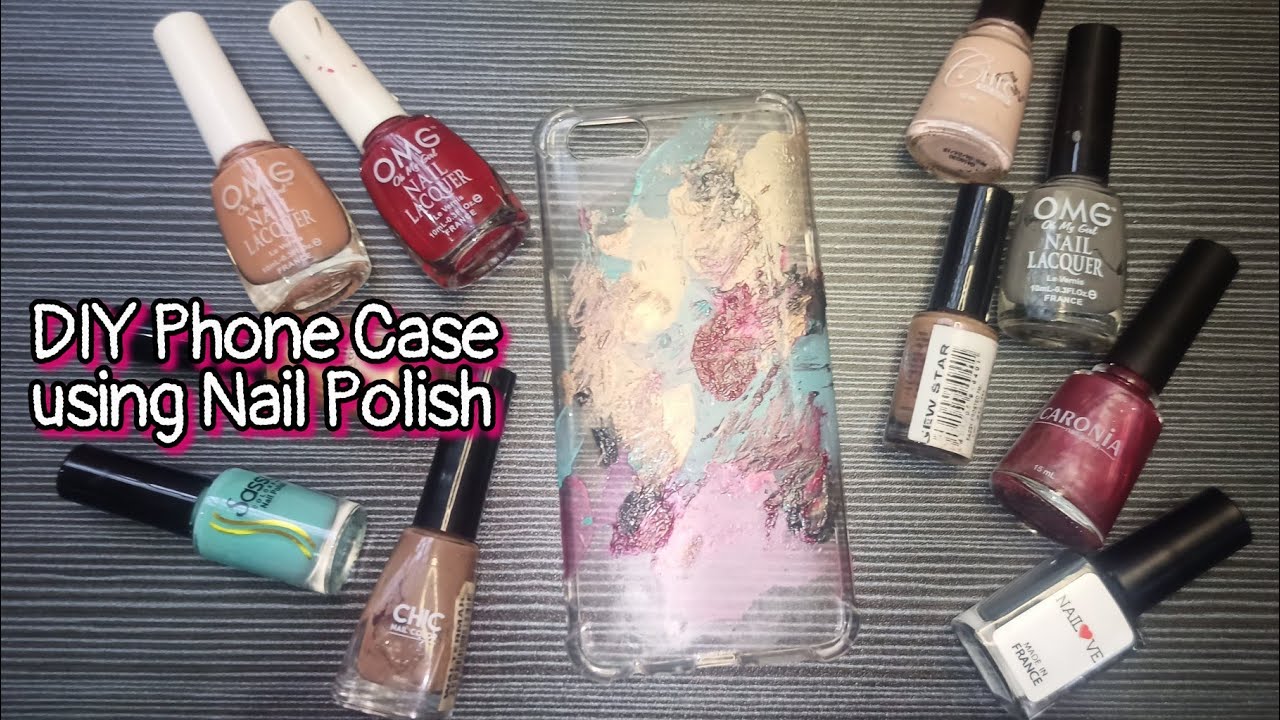
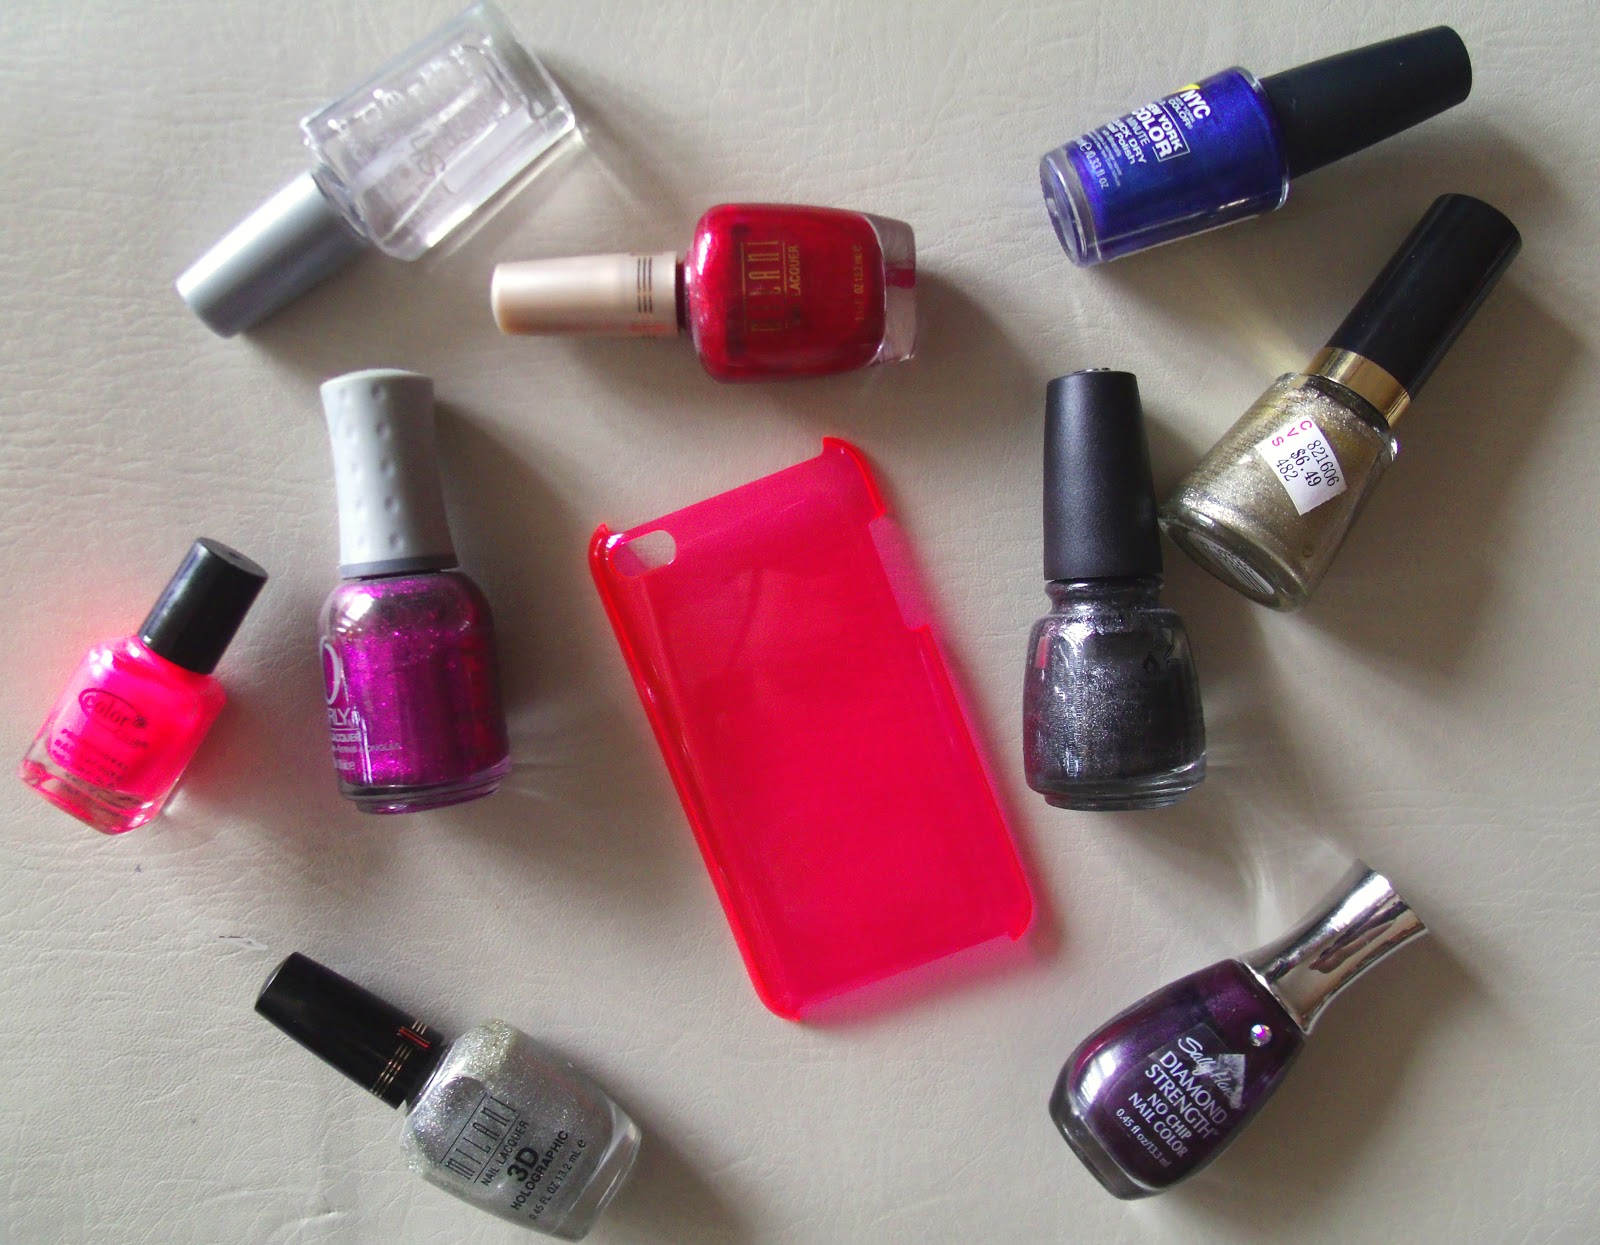
Are you tired of the same old phone case designs? Want to add a personal touch to your phone case without breaking the bank? Look no further, because we have the perfect solution for you – DIY phone case design with nail polish! Not only is this a budget-friendly option, but it also allows you to get creative and customize your phone case to your liking. Plus, you'll have a one-of-a-kind phone case that will make your friends and family envious. To get started, all you need is a clear phone case, some nail polish in your favorite colors, and a few simple tools. Let's dive into the steps for creating your own DIY phone case design with nail polish.1. DIY Phone Case Design with Nail Polish


1. DIY Phone Case Design with Nail Polish


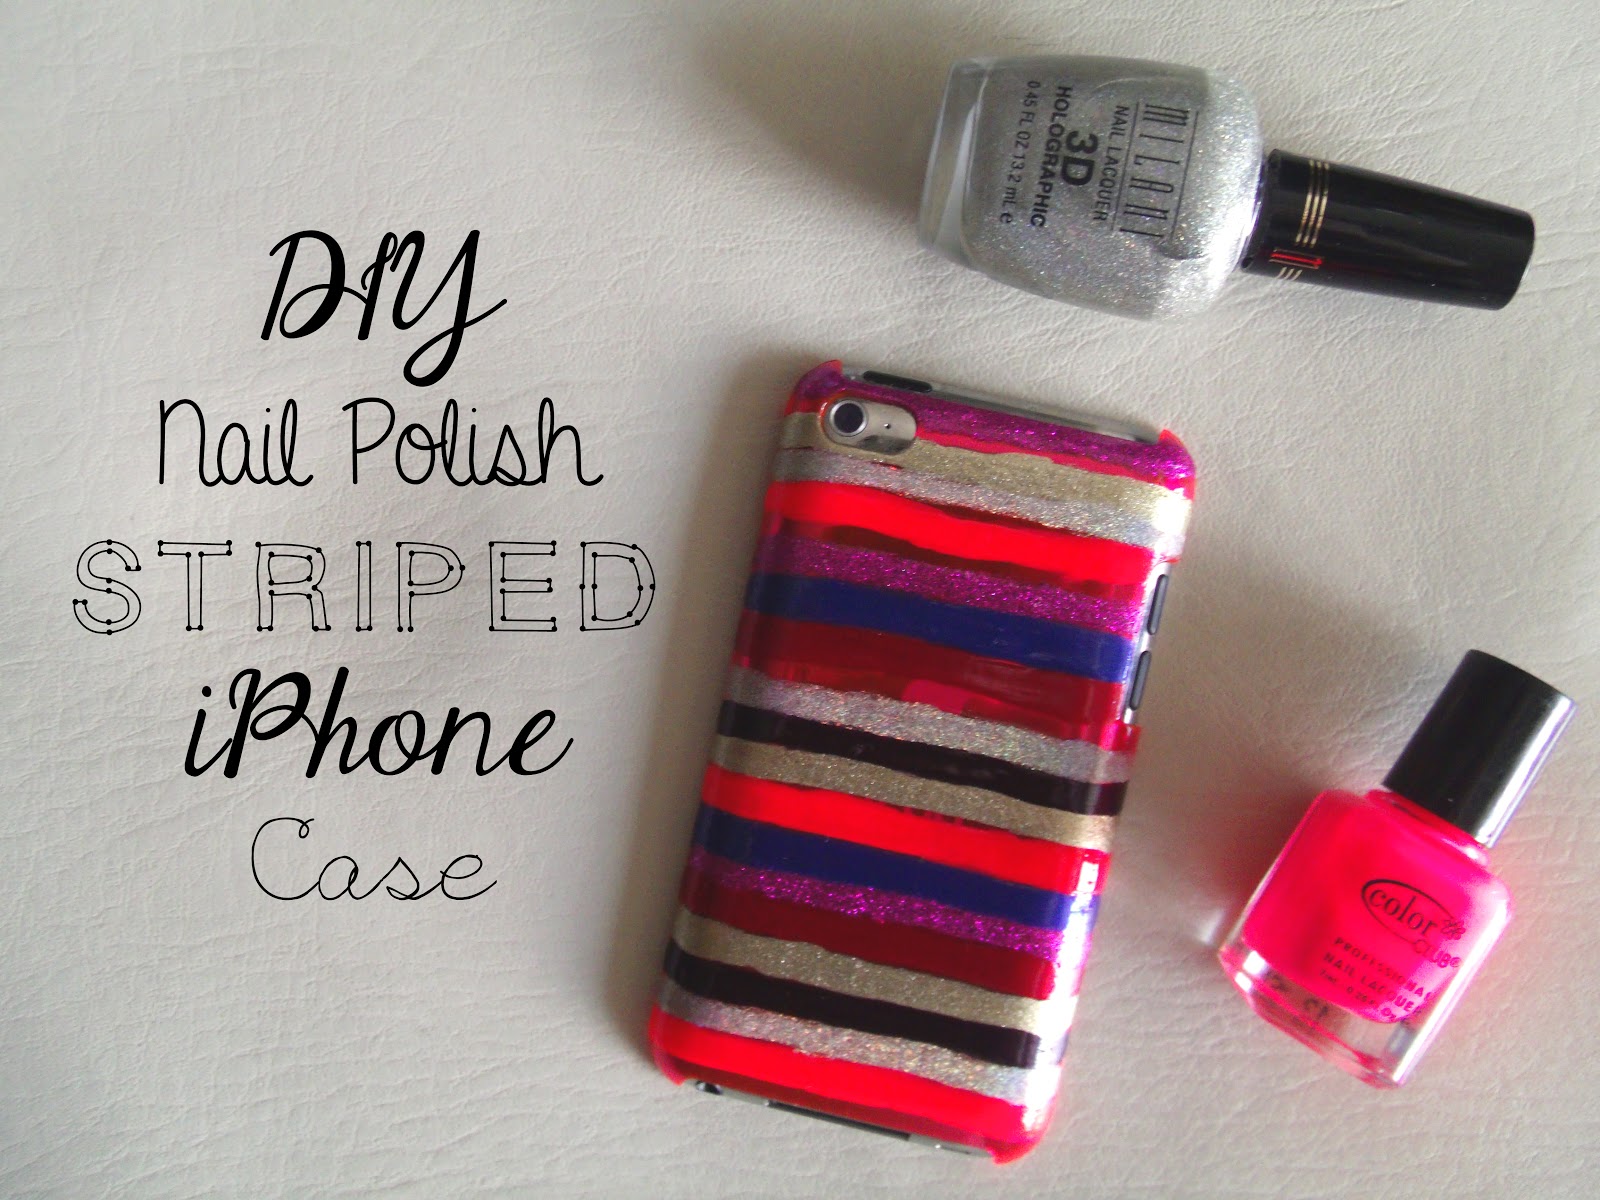

If you're new to DIY projects, don't worry – this easy nail polish phone case design is perfect for beginners. All you need is a solid-colored phone case and a few bottles of nail polish in complementary colors. Start by painting a base coat on your phone case using one of the nail polish colors. Then, use the other colors to create different designs, such as stripes, polka dots, or even a marble effect. Get creative and have fun with it! Once you're satisfied with your design, let it dry completely before using your phone case. You'll have a unique and eye-catching phone case in no time.2. Easy Nail Polish Phone Case Design


2. Easy Nail Polish Phone Case Design


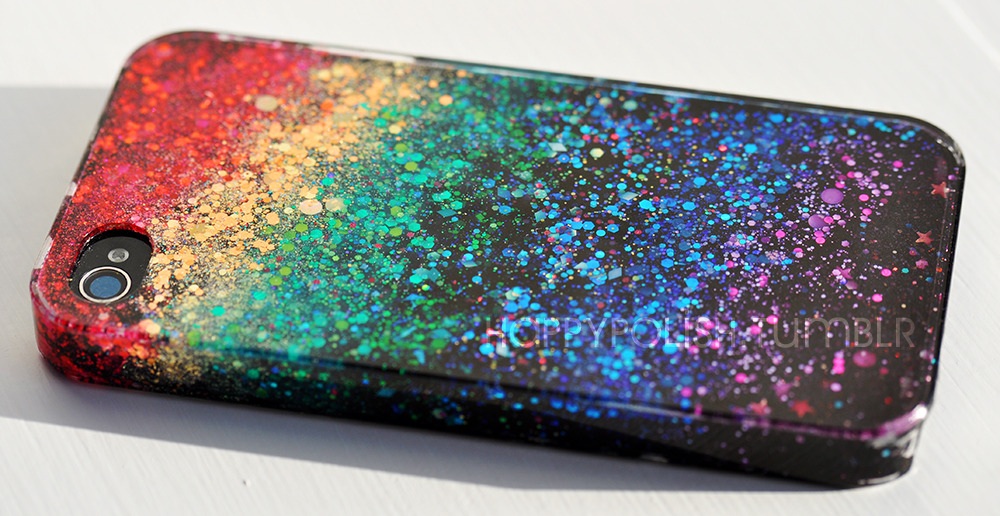
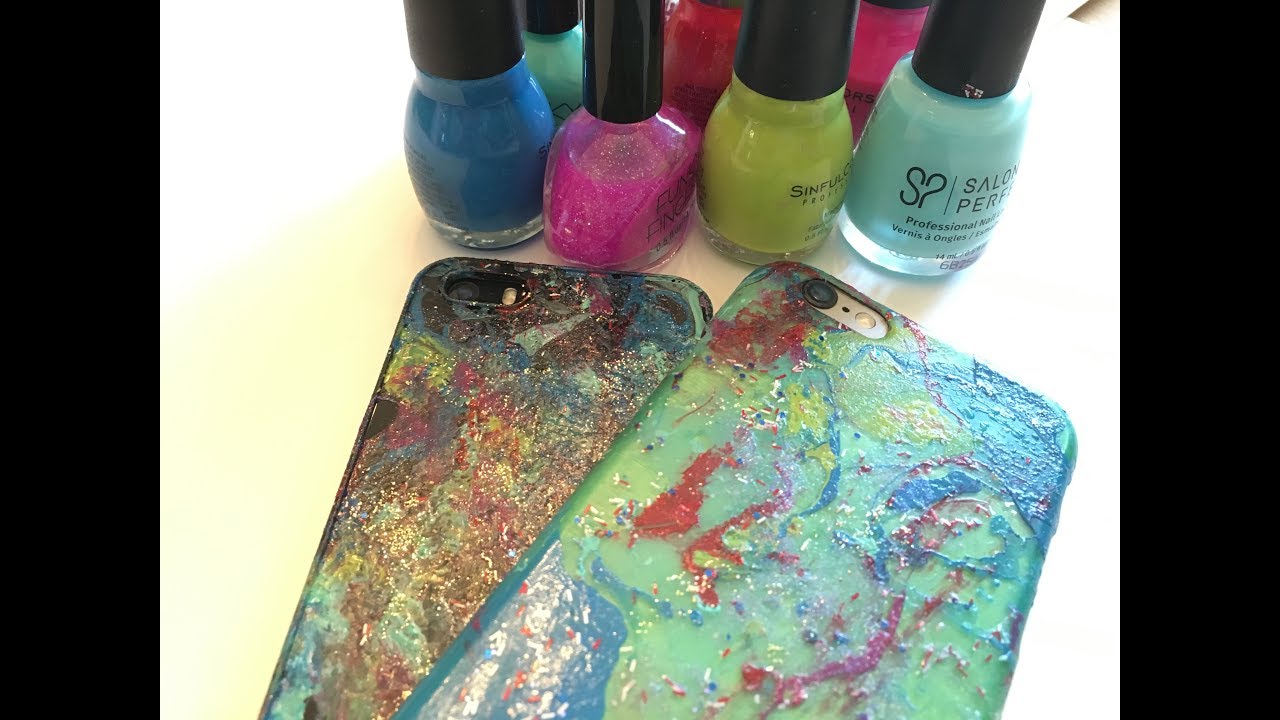
Who says you can only use nail polish to paint your phone case? Get creative and use other materials, such as glitter or rhinestones, to add some extra bling to your phone case. For a glittery phone case, mix some glitter with clear nail polish and paint it onto your phone case. You can also add rhinestones or other small embellishments using a clear nail polish as an adhesive. The possibilities are endless, and you'll have a one-of-a-kind phone case that reflects your unique style.3. Creative Phone Case Designs Using Nail Polish


3. Creative Phone Case Designs Using Nail Polish


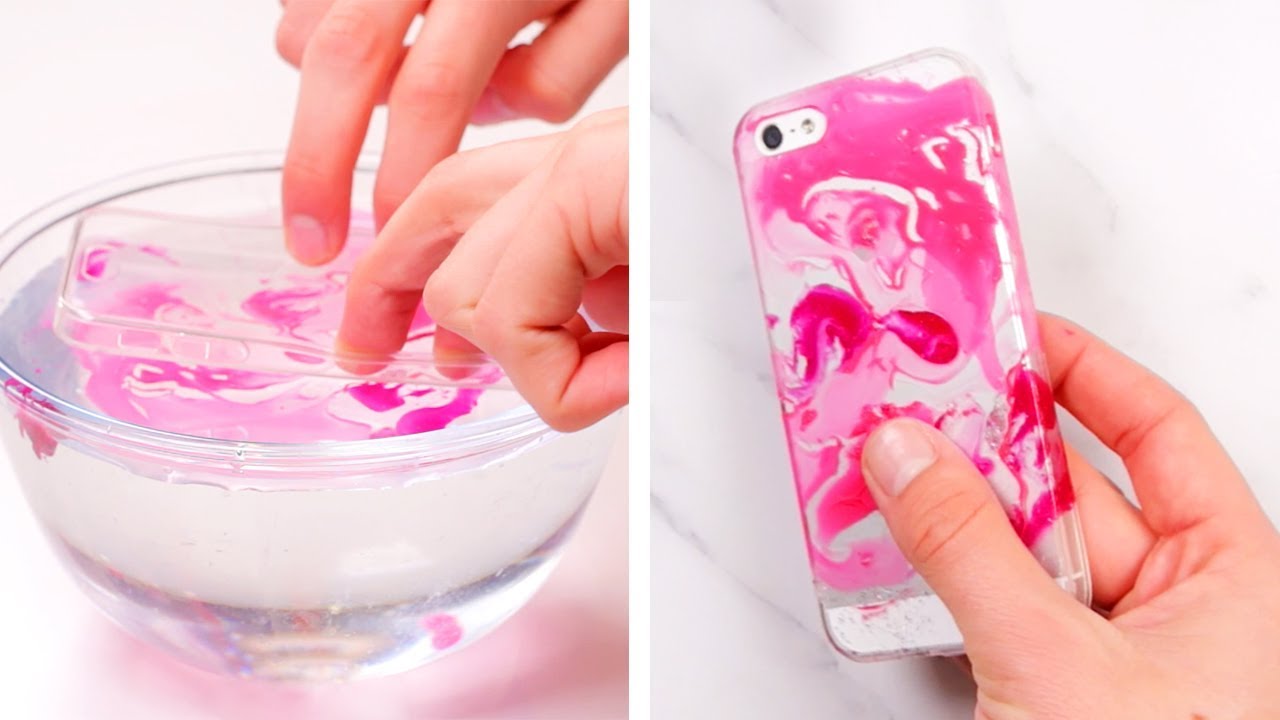
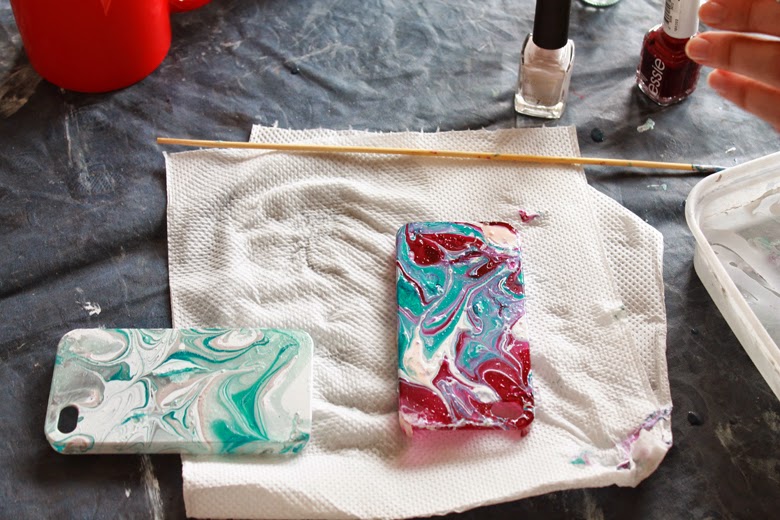
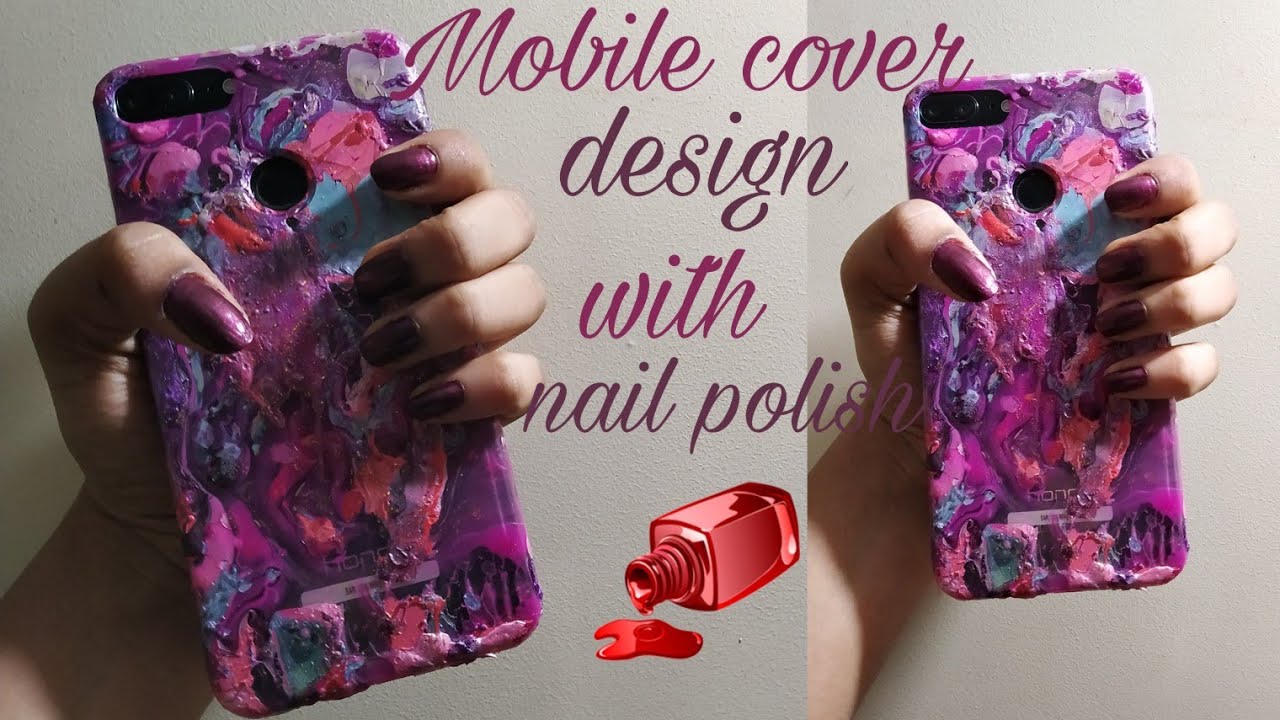
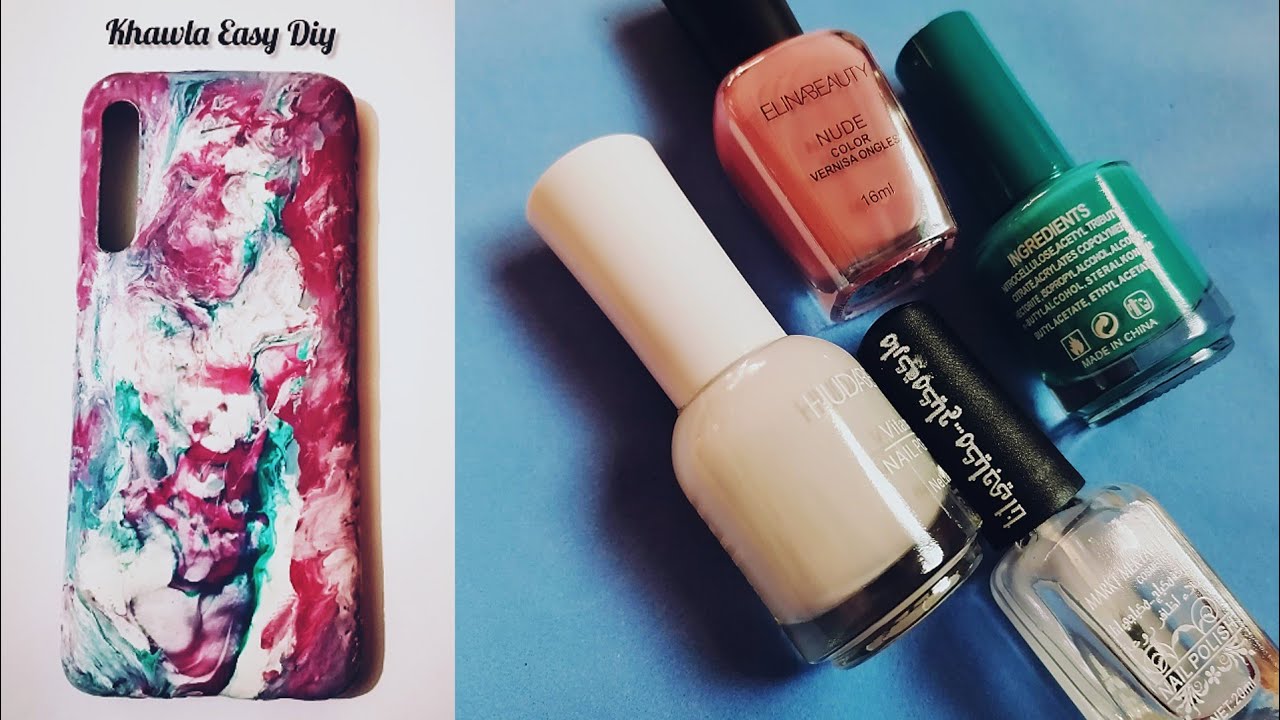
If you love the marbled look, why not create a marbled phone case using nail polish? This tutorial is simple and yields stunning results. Start by filling a container with warm water and dropping a few drops of different nail polish colors onto the surface. Then, use a toothpick or a small brush to swirl the colors around until you achieve a marbled effect. Finally, dip your phone case into the water, making sure to cover the entire case. Let it dry, and voila – you have a gorgeous marbled phone case!4. Nail Polish Marbled Phone Case Tutorial


4. Nail Polish Marbled Phone Case Tutorial


If you want to take your DIY phone case designs to the next level, try creating a phone case using only nail polish. This technique is a bit more challenging, but the end result is worth it. Start by drawing your desired design onto a piece of paper and placing it inside your clear phone case. Then, use nail polish to trace the design onto the back of the case. You can use multiple colors to create a more intricate design. Once the nail polish has dried, you'll have a unique and colorful phone case.5. How to Make a Phone Case with Nail Polish


5. How to Make a Phone Case with Nail Polish


This phone case design is perfect for those who love a pop of color. Start by painting your phone case with a light-colored base coat. Then, using a toothpick or a small brush, swirl different colors of nail polish onto the case. You can also use a clear top coat to seal in the design and add some shine. This design is easy to create and looks great on any phone case. You can also experiment with different color combinations to create a unique swirl pattern.6. Nail Polish Swirl Phone Case Design


6. Nail Polish Swirl Phone Case Design


One of the best things about DIY phone case designs with nail polish is that you can customize them to your liking. Use your favorite colors, patterns, and designs to create a phone case that reflects your personality. Add some personalized touches, such as your initials, a quote, or a symbol that holds meaning to you. With a little bit of creativity, you can turn a simple phone case into a personalized masterpiece.7. Custom Phone Case Design with Nail Polish
7. Custom Phone Case Design with Nail Polish


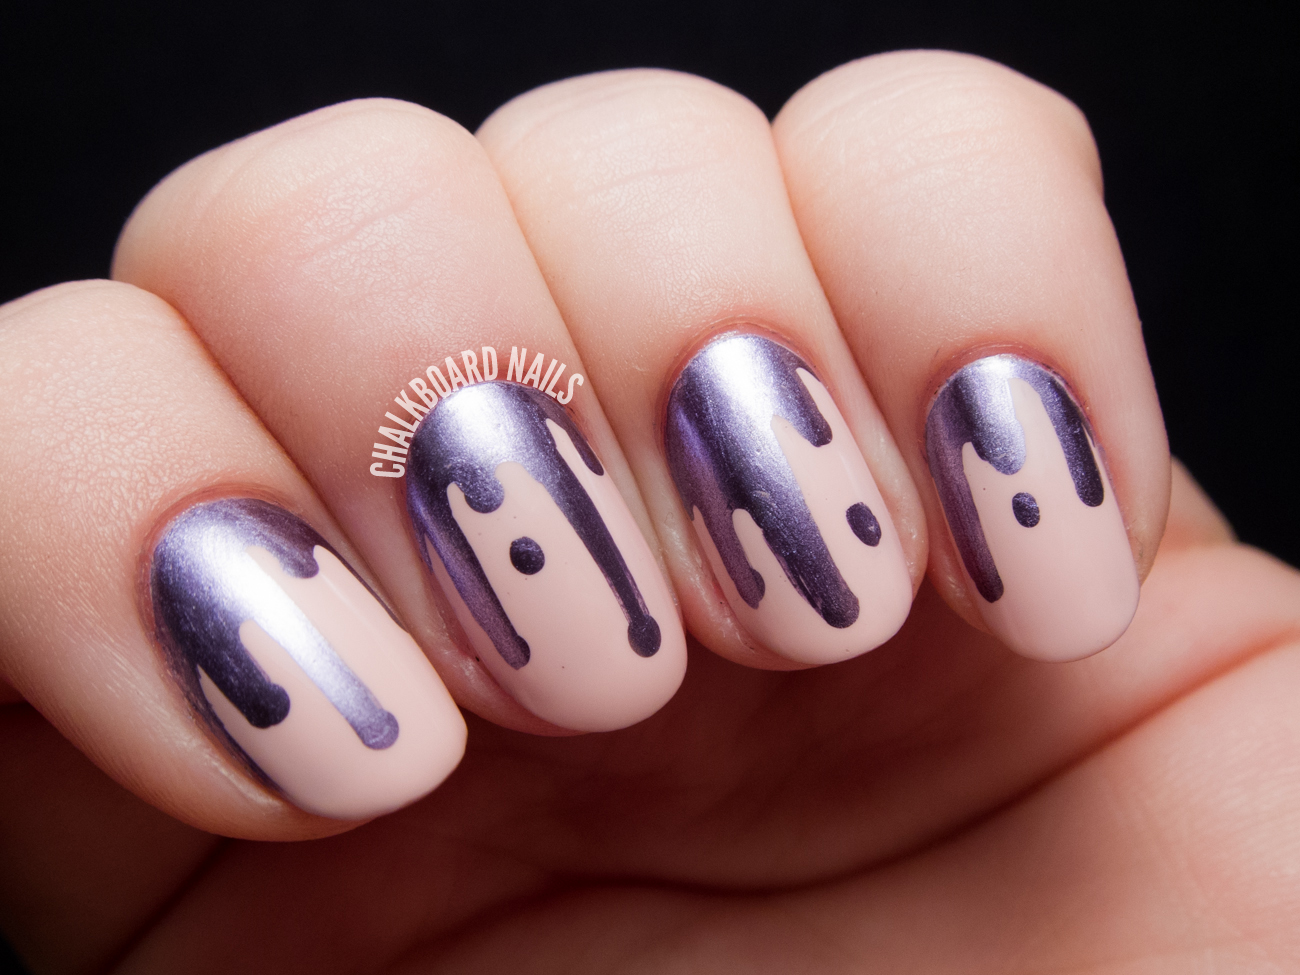
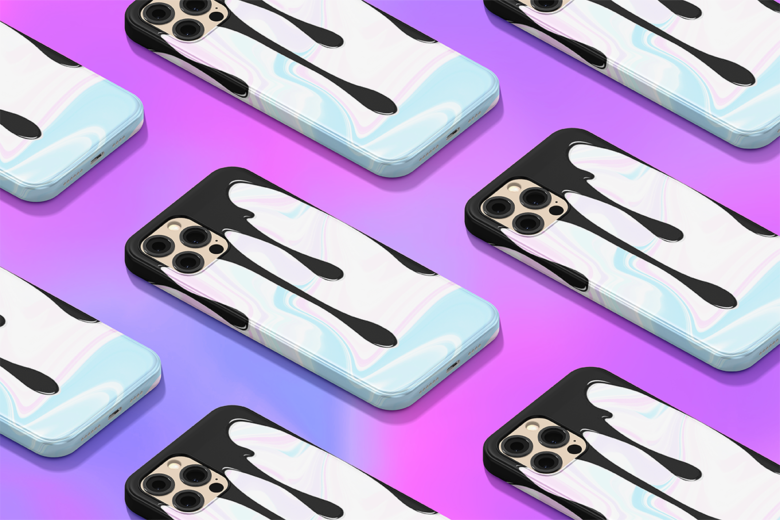
If you want to create a more abstract design, try the nail polish drip technique. This tutorial is easy and yields a unique and eye-catching phone case. Start by painting your phone case with a base color. Then, using a toothpick or a small brush, drip different colors of nail polish onto the case in a random pattern. You can also use a straw to blow the nail polish around for a more abstract look. Let it dry, and you'll have a phone case that looks like a work of art.8. Nail Polish Drip Phone Case Tutorial


8. Nail Polish Drip Phone Case Tutorial

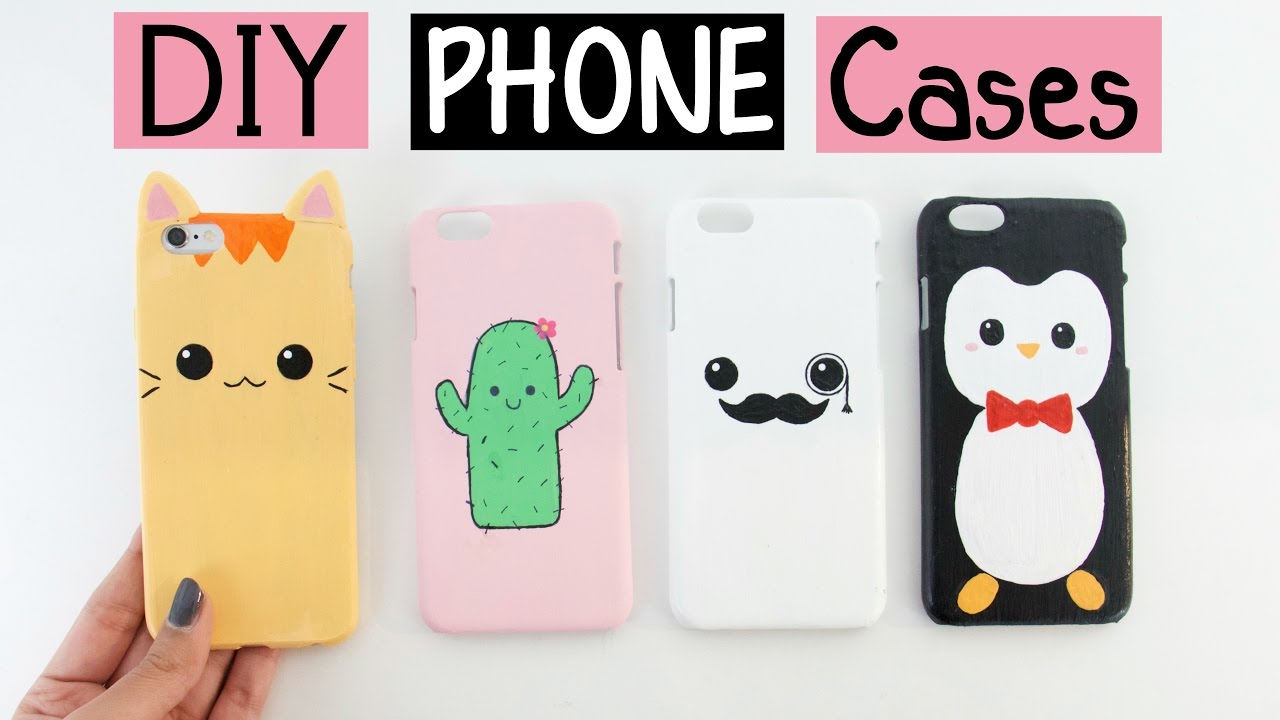
Looking for some inspiration for your next DIY phone case project? Look no further! Here are a few creative phone case design ideas using nail polish: - Ombre phone case: Use different shades of the same color to create an ombre effect on your phone case. - Floral phone case: Use nail polish to paint delicate flowers on your phone case for a pretty and feminine design. - Geometric phone case: Create a modern and edgy look by using geometric shapes and patterns on your phone case.9. Phone Case Design Ideas with Nail Polish


9. Phone Case Design Ideas with Nail Polish


If you want to add a fun and playful touch to your phone case, try the splatter technique using nail polish. This design is easy and can be done in a matter of minutes. All you need is a solid-colored phone case and some different colors of nail polish. Using a toothpick or a small brush, splatter the nail polish onto the case in a random pattern. Let it dry, and you'll have a fun and unique phone case. With these top 10 phone case designs using nail polish, you can give your phone a fashionable and personalized makeover without breaking the bank. Get creative and have fun with it – the possibilities are endless!10. Nail Polish Splatter Phone Case DIY

10. Nail Polish Splatter Phone Case DIY
Customize Your Phone Case with Nail Polish: A Unique and Personalized Design Idea
Unique and Personalized Phone Case Design
 In a world where everyone has a smartphone and similar phone cases, standing out from the crowd can be a challenge. But what if we told you that you could create a
unique
and
personalized
phone case using just nail polish? Yes, you read that correctly – nail polish can be used to design and decorate your phone case, making it one-of-a-kind and truly
unique
. It's a fun and creative way to add a personal touch to your phone case and show off your
individuality
.
In a world where everyone has a smartphone and similar phone cases, standing out from the crowd can be a challenge. But what if we told you that you could create a
unique
and
personalized
phone case using just nail polish? Yes, you read that correctly – nail polish can be used to design and decorate your phone case, making it one-of-a-kind and truly
unique
. It's a fun and creative way to add a personal touch to your phone case and show off your
individuality
.
Why Use Nail Polish?
 You may be wondering why nail polish is the perfect medium for phone case design. Well, for starters, it's readily available and comes in a wide variety of colors and finishes. Plus, it's a
versatile
and
affordable
option that allows you to experiment with different designs and patterns. You can also easily remove and change the design whenever you want, giving you the freedom to constantly refresh and update your phone case.
You may be wondering why nail polish is the perfect medium for phone case design. Well, for starters, it's readily available and comes in a wide variety of colors and finishes. Plus, it's a
versatile
and
affordable
option that allows you to experiment with different designs and patterns. You can also easily remove and change the design whenever you want, giving you the freedom to constantly refresh and update your phone case.
How to Design Your Phone Case with Nail Polish
 Designing your phone case with nail polish is
easy
and
fun
. All you need is a clear phone case, your choice of nail polish, and some creativity. You can use a variety of techniques like
marbling
,
ombre
, or
stamping
to create unique and eye-catching designs. You can also add
glitter
,
rhinestones
, or other
embellishments
to take your design to the next level.
Designing your phone case with nail polish is
easy
and
fun
. All you need is a clear phone case, your choice of nail polish, and some creativity. You can use a variety of techniques like
marbling
,
ombre
, or
stamping
to create unique and eye-catching designs. You can also add
glitter
,
rhinestones
, or other
embellishments
to take your design to the next level.
Benefits of Using Nail Polish for Phone Case Design
 Apart from being a fun and creative way to decorate your phone case, using nail polish has other
benefits
as well. Most nail polishes are waterproof and can provide an extra layer of protection for your phone. Plus, you can easily touch up any scratches or chips on your phone case by using the same nail polish color. It's a
cost-effective
and
convenient
way to keep your phone case looking like new.
Apart from being a fun and creative way to decorate your phone case, using nail polish has other
benefits
as well. Most nail polishes are waterproof and can provide an extra layer of protection for your phone. Plus, you can easily touch up any scratches or chips on your phone case by using the same nail polish color. It's a
cost-effective
and
convenient
way to keep your phone case looking like new.
Conclusion
 In conclusion, using nail polish to design your phone case is a
unique
and
personalized
way to stand out from the crowd. It's
easy
,
affordable
, and allows you to constantly refresh and update your phone case. So why settle for a generic phone case when you can
customize
and
express
your
individuality
with nail polish? Give it a try and see the
amazing
results for yourself!
In conclusion, using nail polish to design your phone case is a
unique
and
personalized
way to stand out from the crowd. It's
easy
,
affordable
, and allows you to constantly refresh and update your phone case. So why settle for a generic phone case when you can
customize
and
express
your
individuality
with nail polish? Give it a try and see the
amazing
results for yourself!


