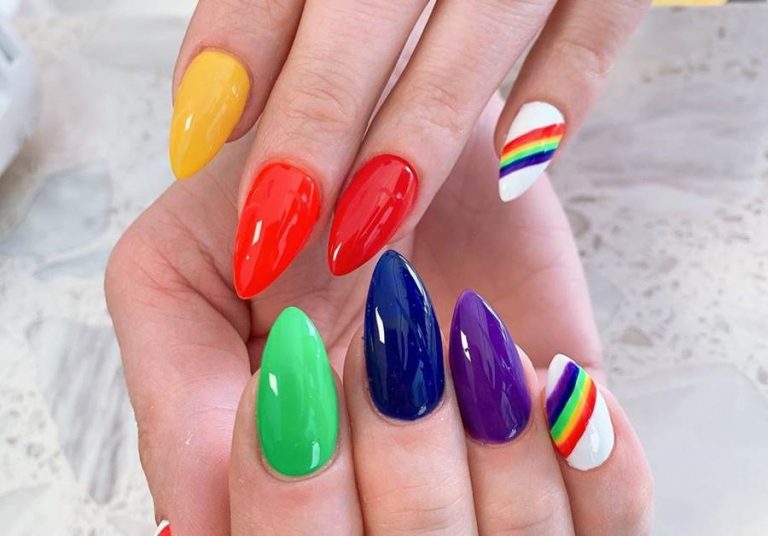
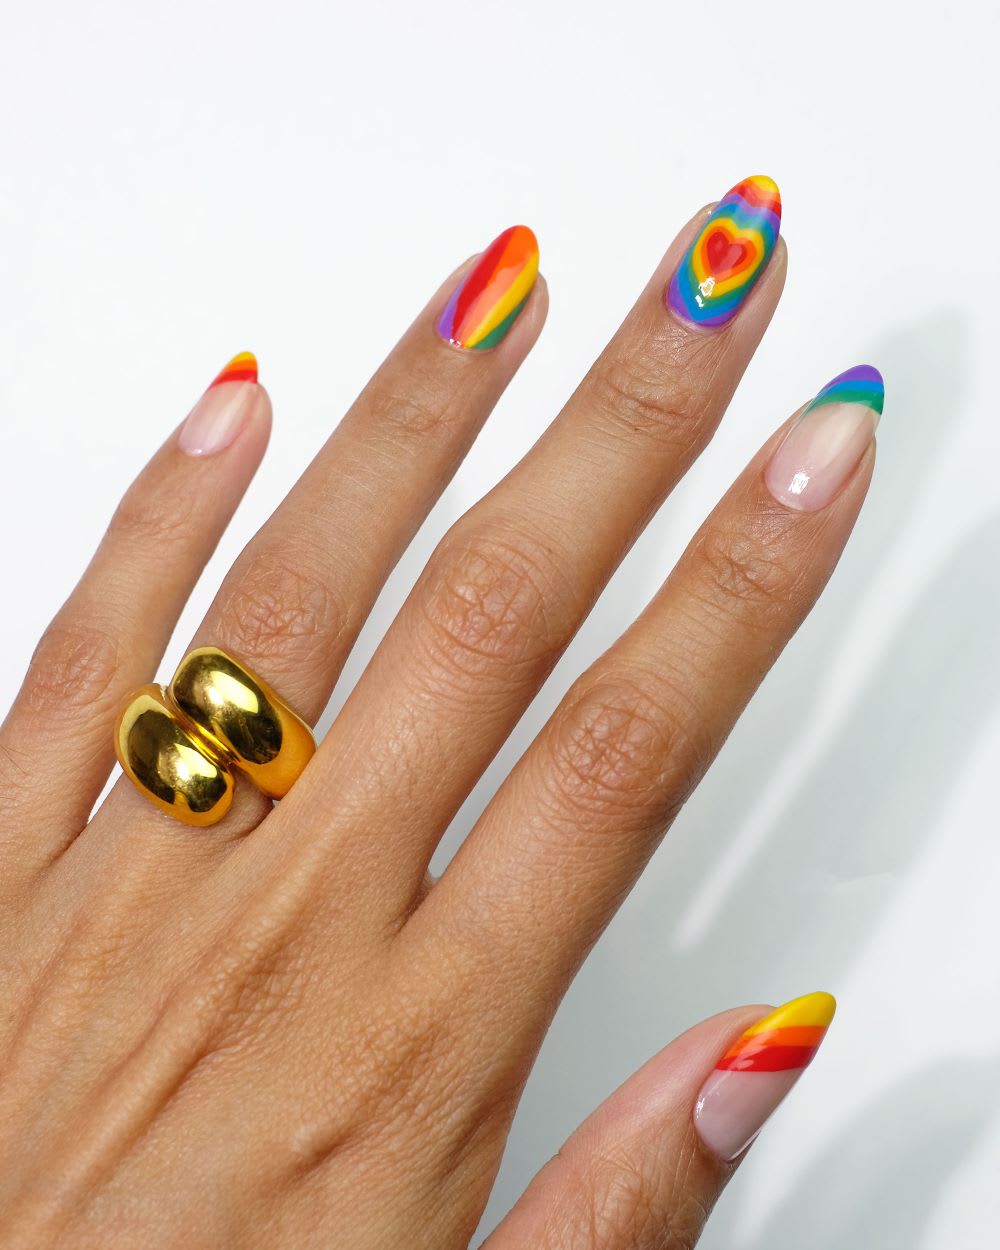
If you're new to the world of nail art, creating intricate designs can seem intimidating. But don't worry, with these 10 easy rainbow nail art designs, you'll be able to create a colorful and fun manicure in no time. From simple stripes to cute clouds, these designs are perfect for beginners to try out. For a simple yet stunning look, try a rainbow ombre design. Start by painting each nail a different color of the rainbow, and then use a makeup sponge to blend the colors together for a seamless ombre effect. This design is perfect for any occasion and is sure to make your nails stand out.1. "10 Rainbow Nail Art Designs for Beginners"


1. "10 Rainbow Nail Art Designs for Beginners"


If you're in need of some nail art inspiration, look no further than this rainbow nail art tutorial compilation. With a variety of designs to choose from, you'll be able to find the perfect rainbow design to suit your style. From bold and bright to subtle and chic, there's something for everyone in this tutorial. One standout design in this compilation is the rainbow swirl nail design. This design is created by using a thin nail art brush to swirl different colors together on each nail. The end result is a mesmerizing and unique design that will have everyone asking how you did it.2. "Rainbow Nail Art Tutorial Compilation"

2. "Rainbow Nail Art Tutorial Compilation"


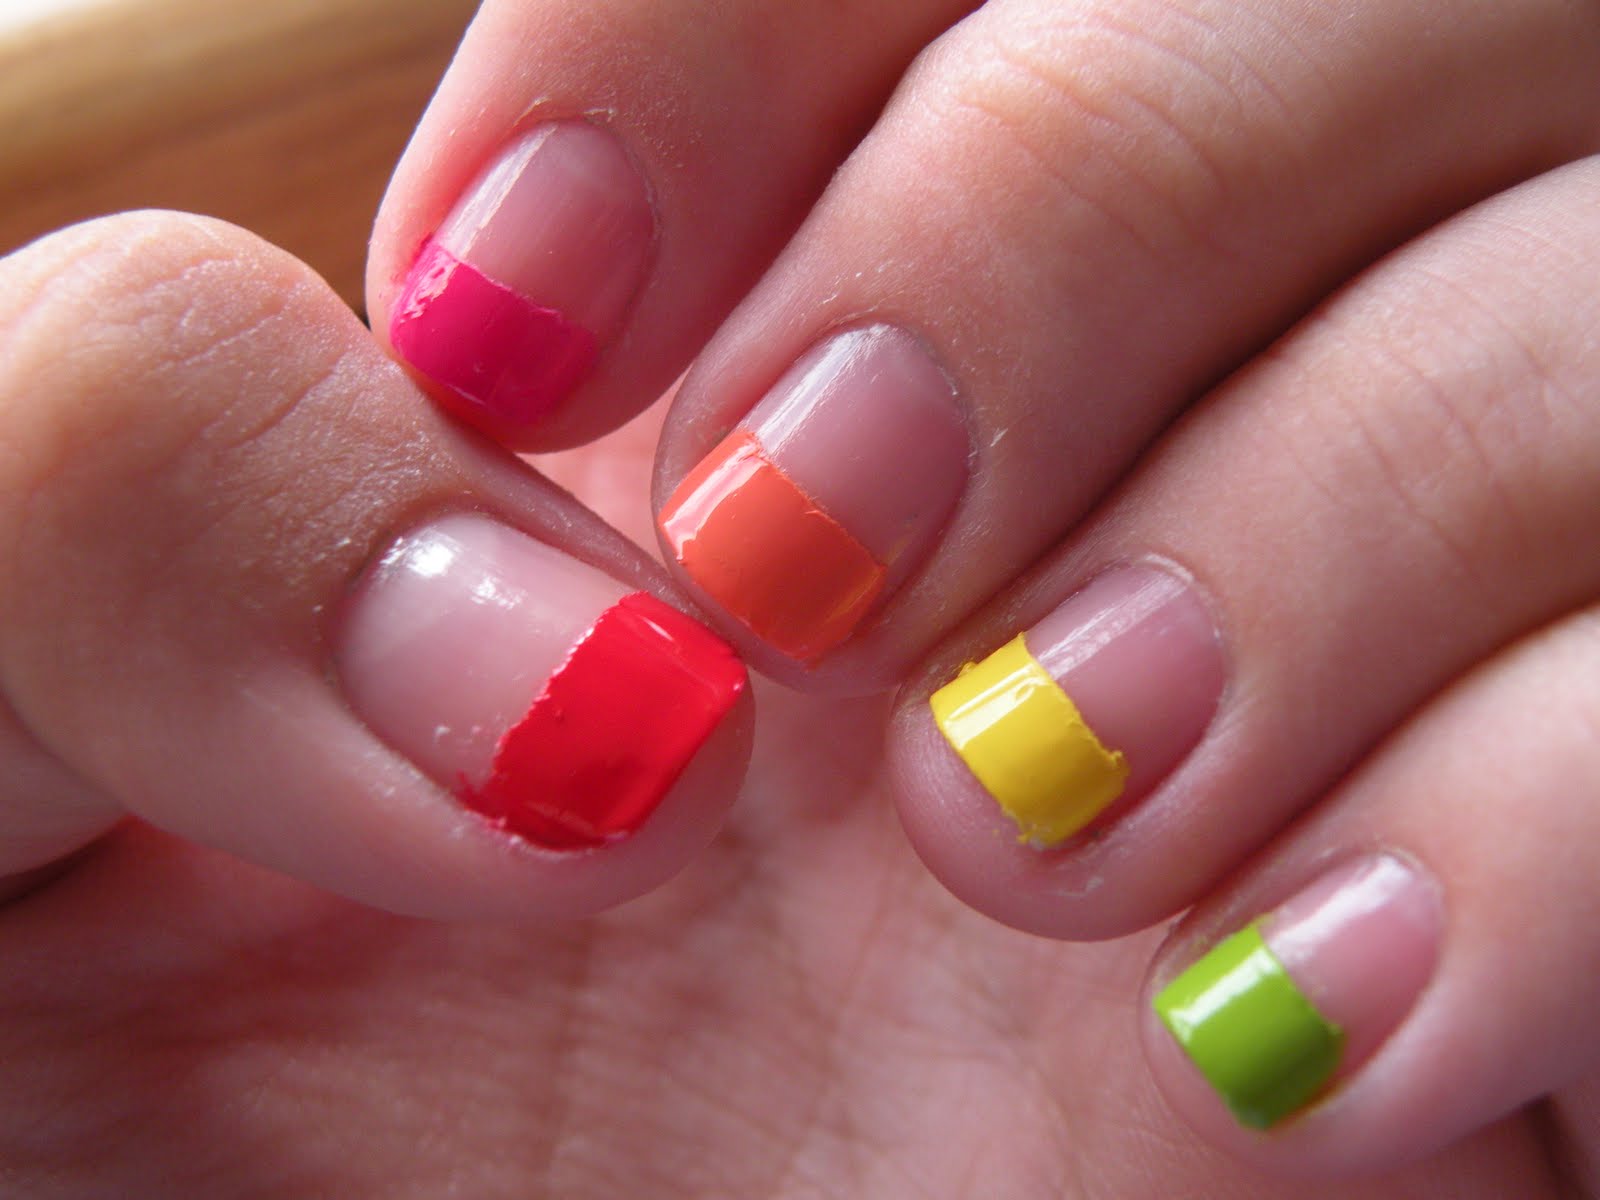
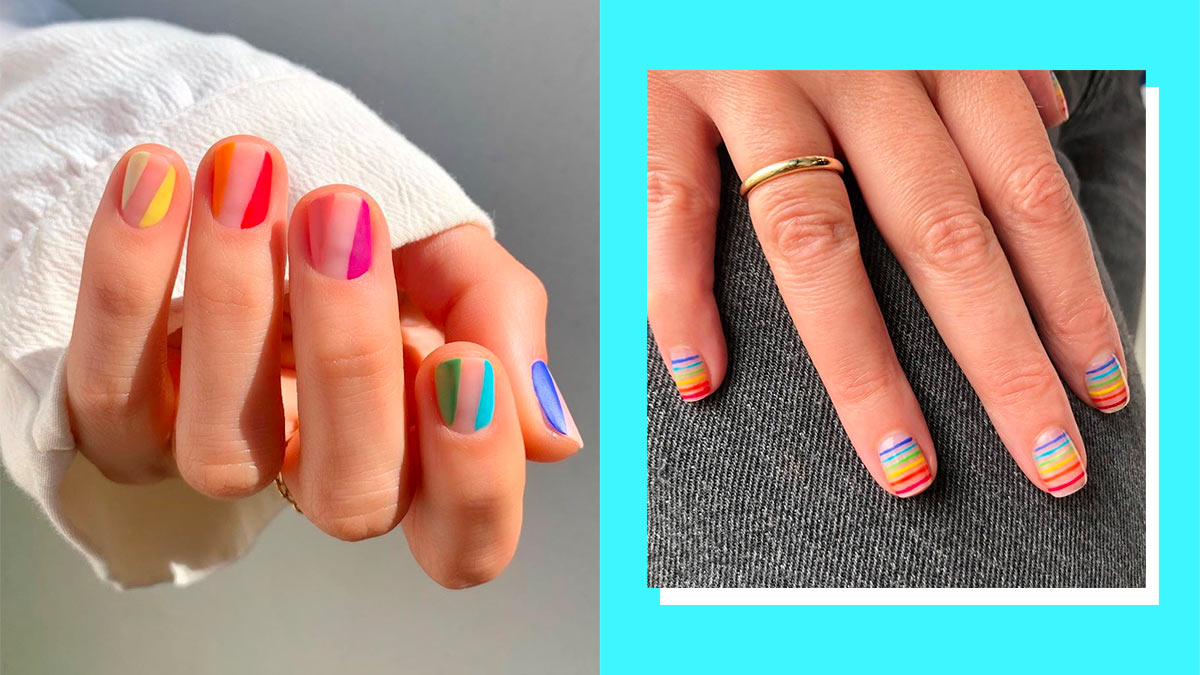
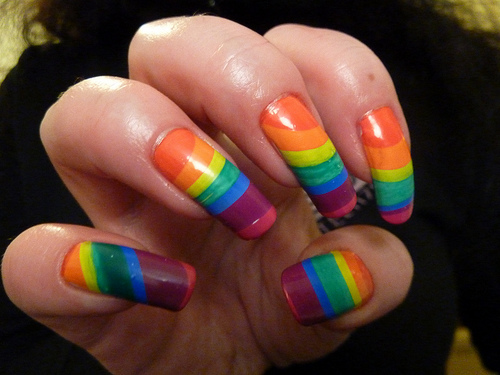
Just because you have short nails doesn't mean you can't rock a fun and colorful manicure. These easy rainbow nail designs are perfect for those with shorter nails, as they don't require a lot of space to create. You can still have a rainbow on your nails, even if they're on the shorter side. An easy but eye-catching design is the rainbow French tip. Instead of the traditional white French tip, paint each nail a different color of the rainbow for a fun twist on a classic look. This design is simple yet chic and is perfect for everyday wear.3. "Easy Rainbow Nail Designs for Short Nails"


3. "Easy Rainbow Nail Designs for Short Nails"

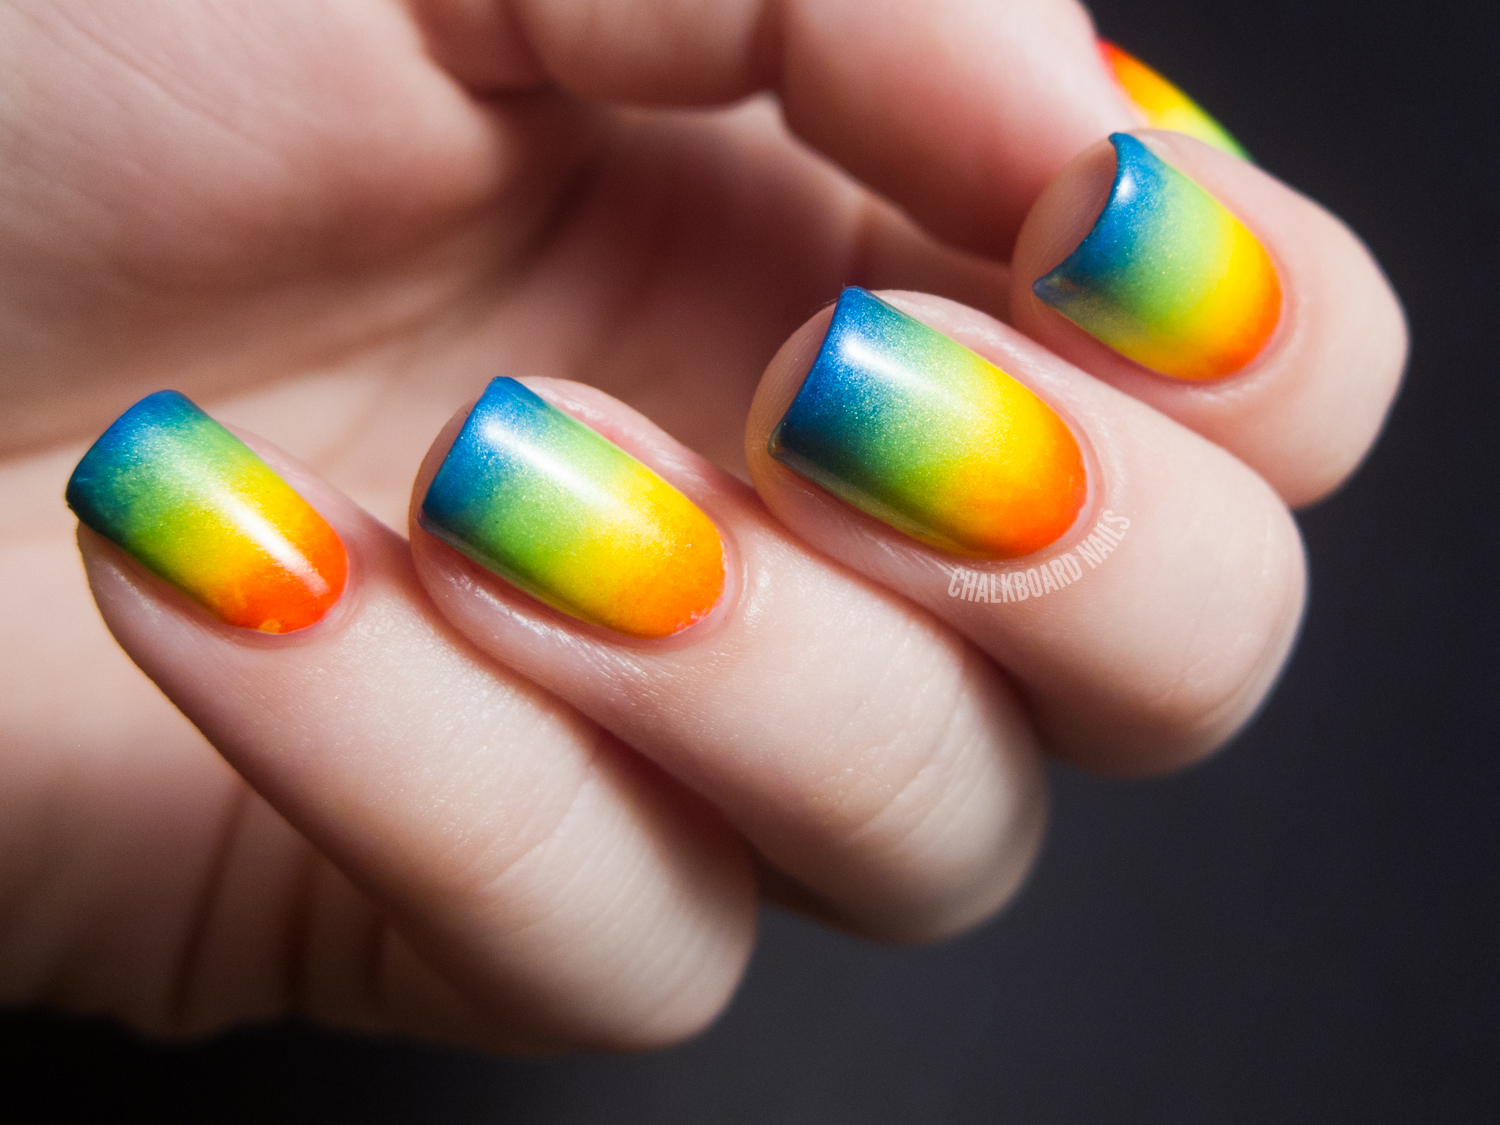
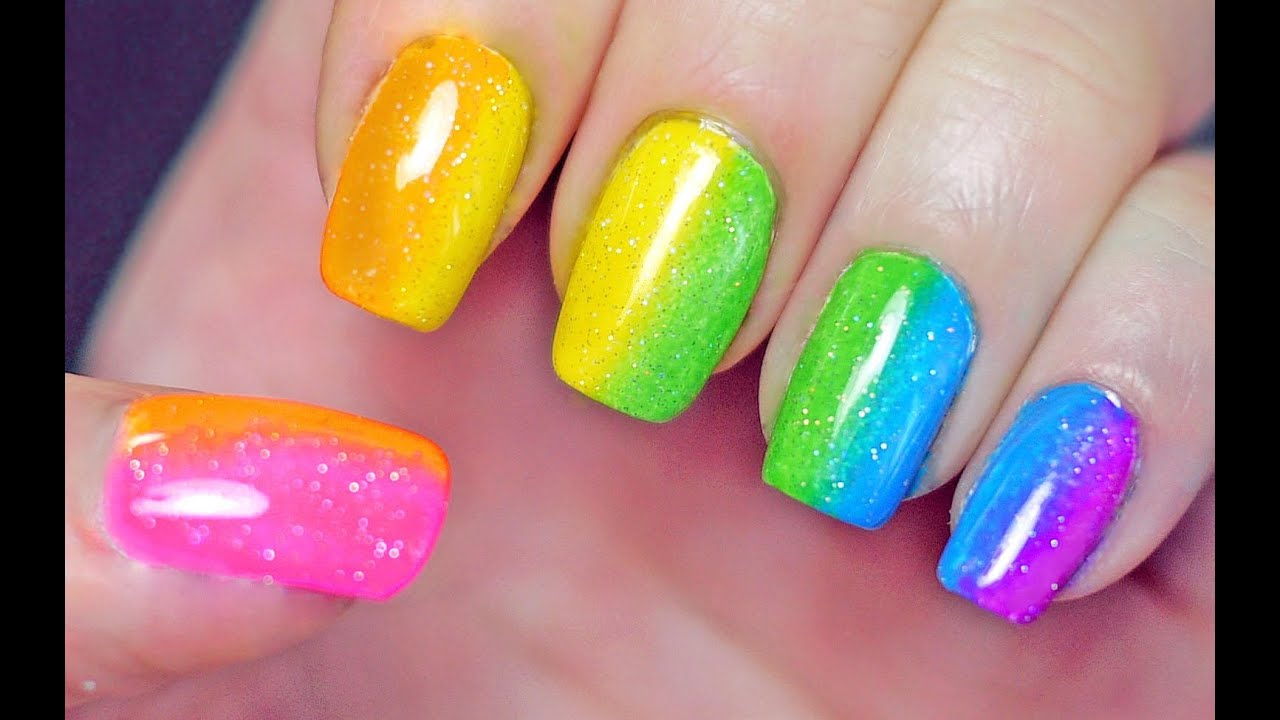
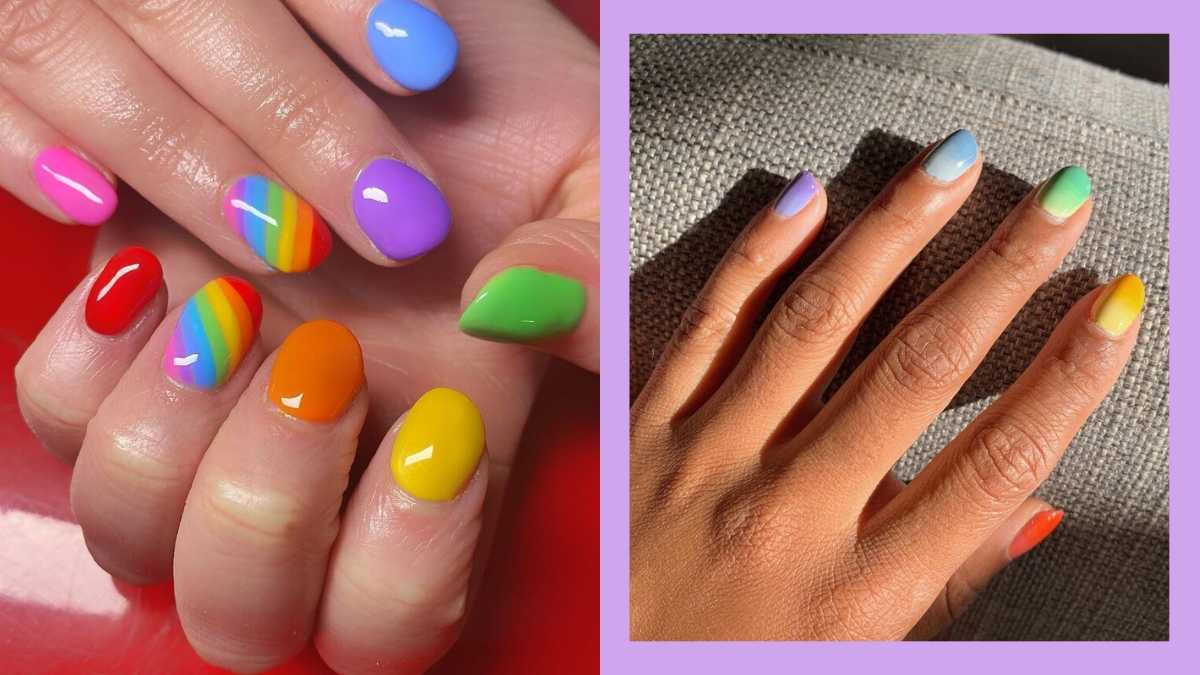
A gradient design is a popular choice for many nail art lovers, and when done in rainbow colors, it's even more eye-catching. This tutorial will show you how to create a rainbow gradient nail design using a makeup sponge and a variety of colorful polishes. The end result is a beautiful and seamless gradient that will make your nails look like a work of art. To make your gradient really pop, try using a holographic or glitter polish on top for a sparkly rainbow effect.4. "Rainbow Gradient Nail Design Tutorial"


4. "Rainbow Gradient Nail Design Tutorial"


If you don't have any fancy nail art tools, don't worry! You can still create a stunning rainbow manicure using items you probably already have at home. This DIY tutorial will show you how to create a rainbow nail art using a bobby pin and a toothpick. From simple dots to cute hearts, you'll be able to create a variety of designs using these household items. This is also a great option for those who are just starting out with nail art and don't want to invest in expensive tools.5. "DIY Rainbow Nail Art Using Household Items"

5. "DIY Rainbow Nail Art Using Household Items"

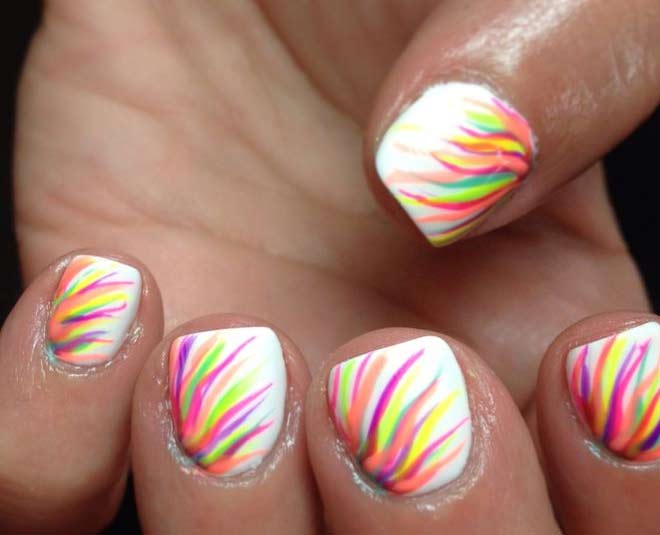
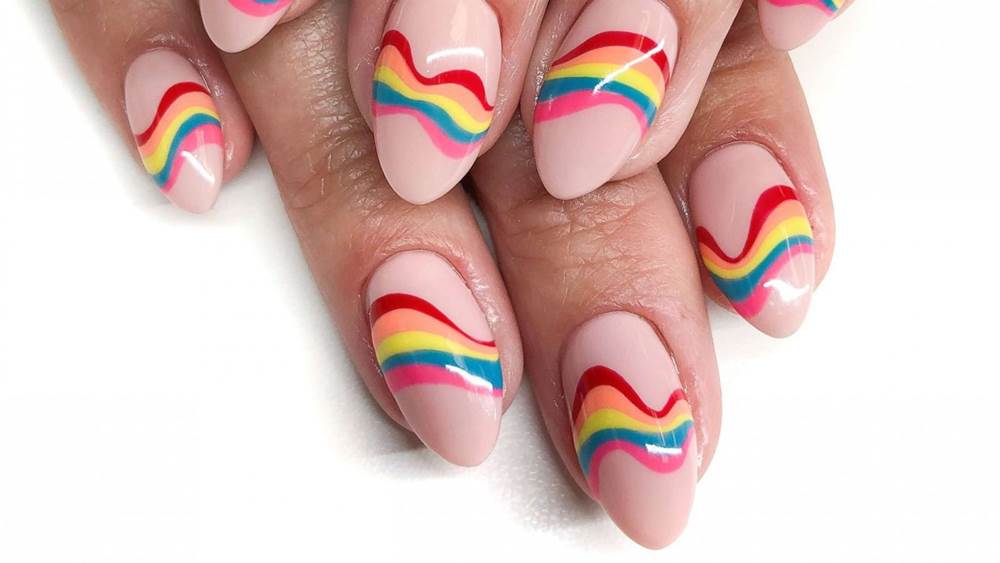
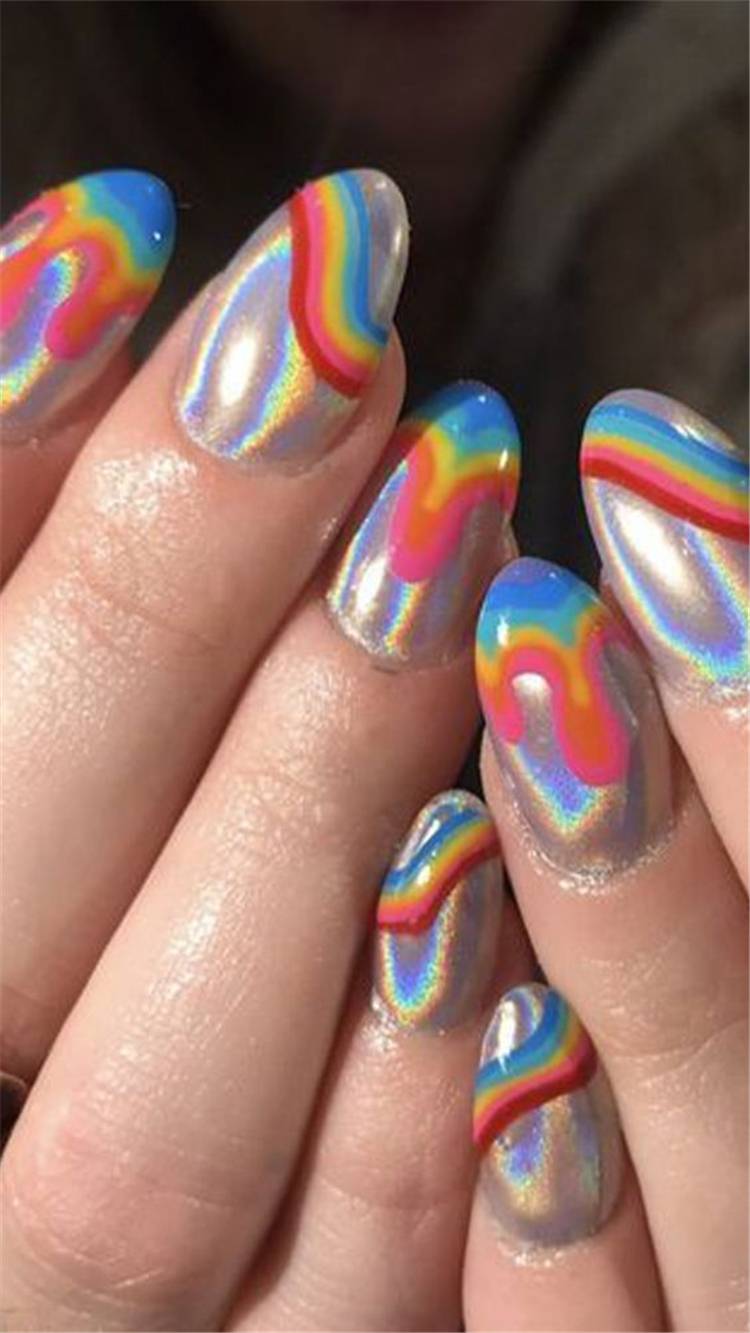
If you're looking for a fun and unique design, try out this rainbow swirl nail design. This tutorial will take you through the steps to create a colorful swirl pattern on your nails using a toothpick and a variety of colorful polishes. This design is perfect for those who want to make a statement with their nails. It's bold, bright, and sure to turn heads.6. "Rainbow Swirl Nail Design Step by Step"

6. "Rainbow Swirl Nail Design Step by Step"


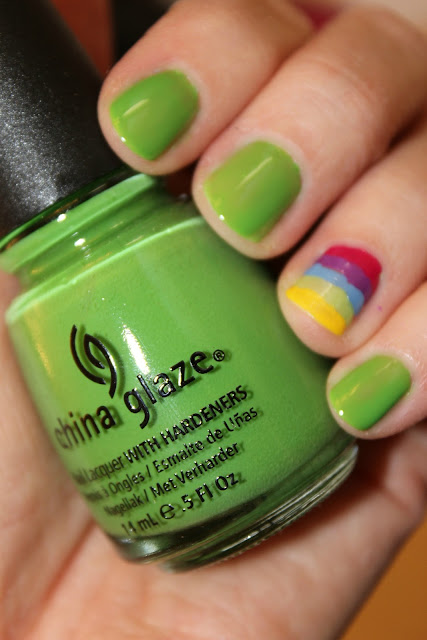
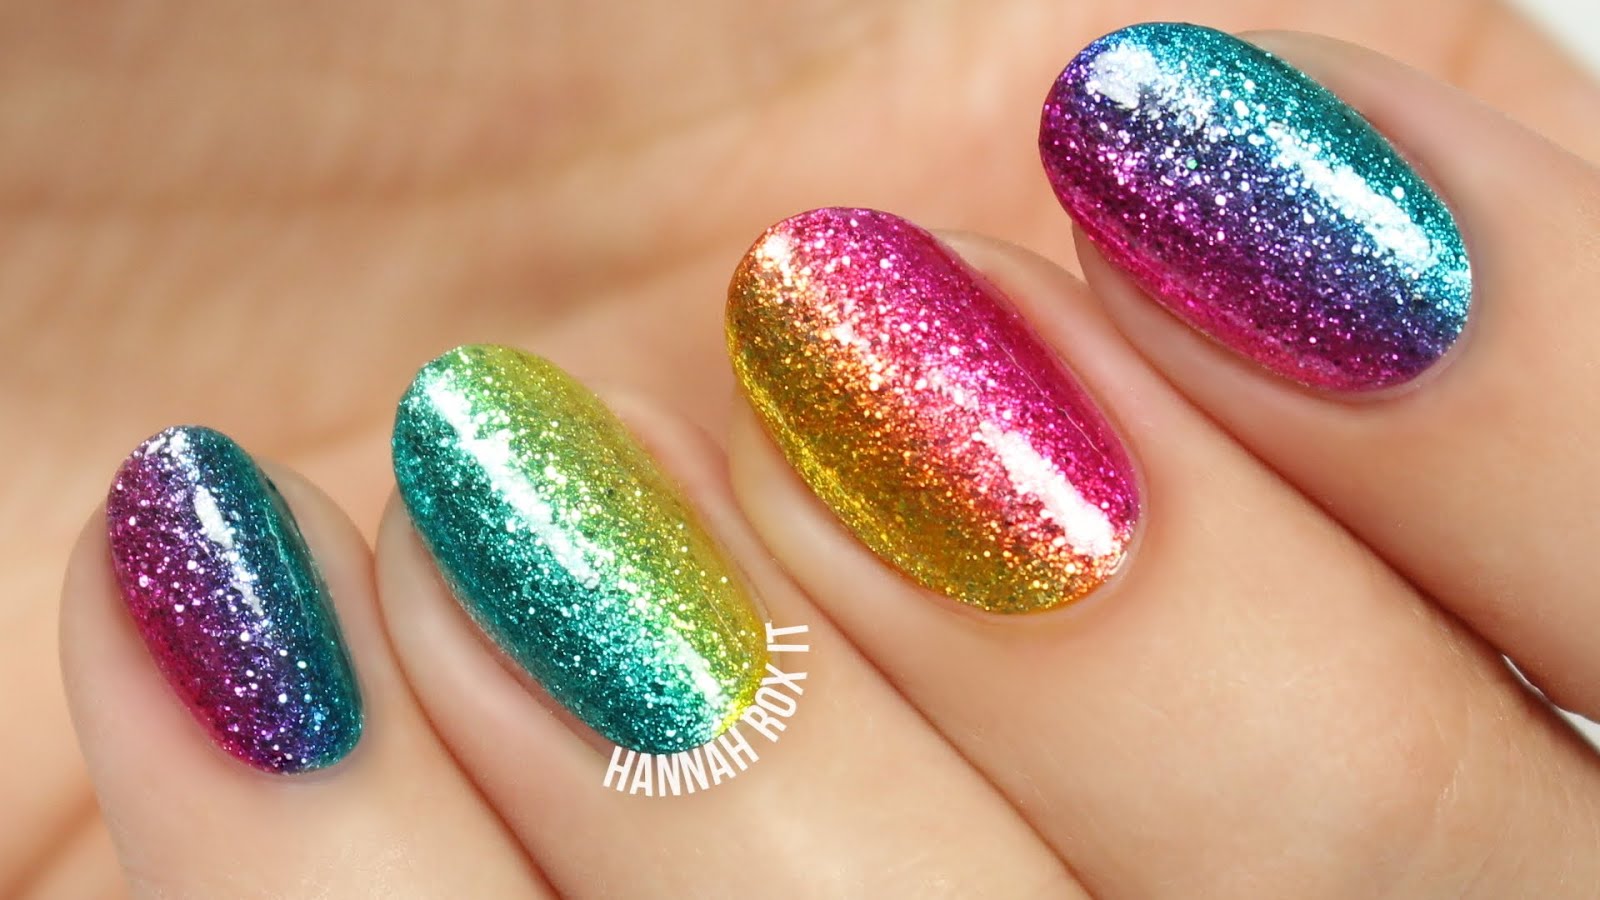
If you love a little sparkle in your life, then these rainbow glitter nail design ideas are perfect for you. From a full glitter rainbow to a subtle glitter accent nail, there are endless possibilities for incorporating glitter into your rainbow manicure. A fun and unique way to add glitter to your rainbow design is to create a rainbow water marble design and then add a coat of glitter polish on top. This will give your nails a stunning and multi-dimensional look.7. "Rainbow Glitter Nail Design Ideas"

7. "Rainbow Glitter Nail Design Ideas"


For those who love a gradient but want something a little more subtle, try out this rainbow ombre nail tutorial. Instead of blending the colors together, this design creates a gradient effect by painting each nail a different color in a specific order. This design is perfect for those who want a colorful manicure without it being too loud or over-the-top. It's also a great option for those who prefer shorter nails, as the gradient effect can be achieved with shorter nail lengths.8. "Rainbow Ombre Nail Tutorial"
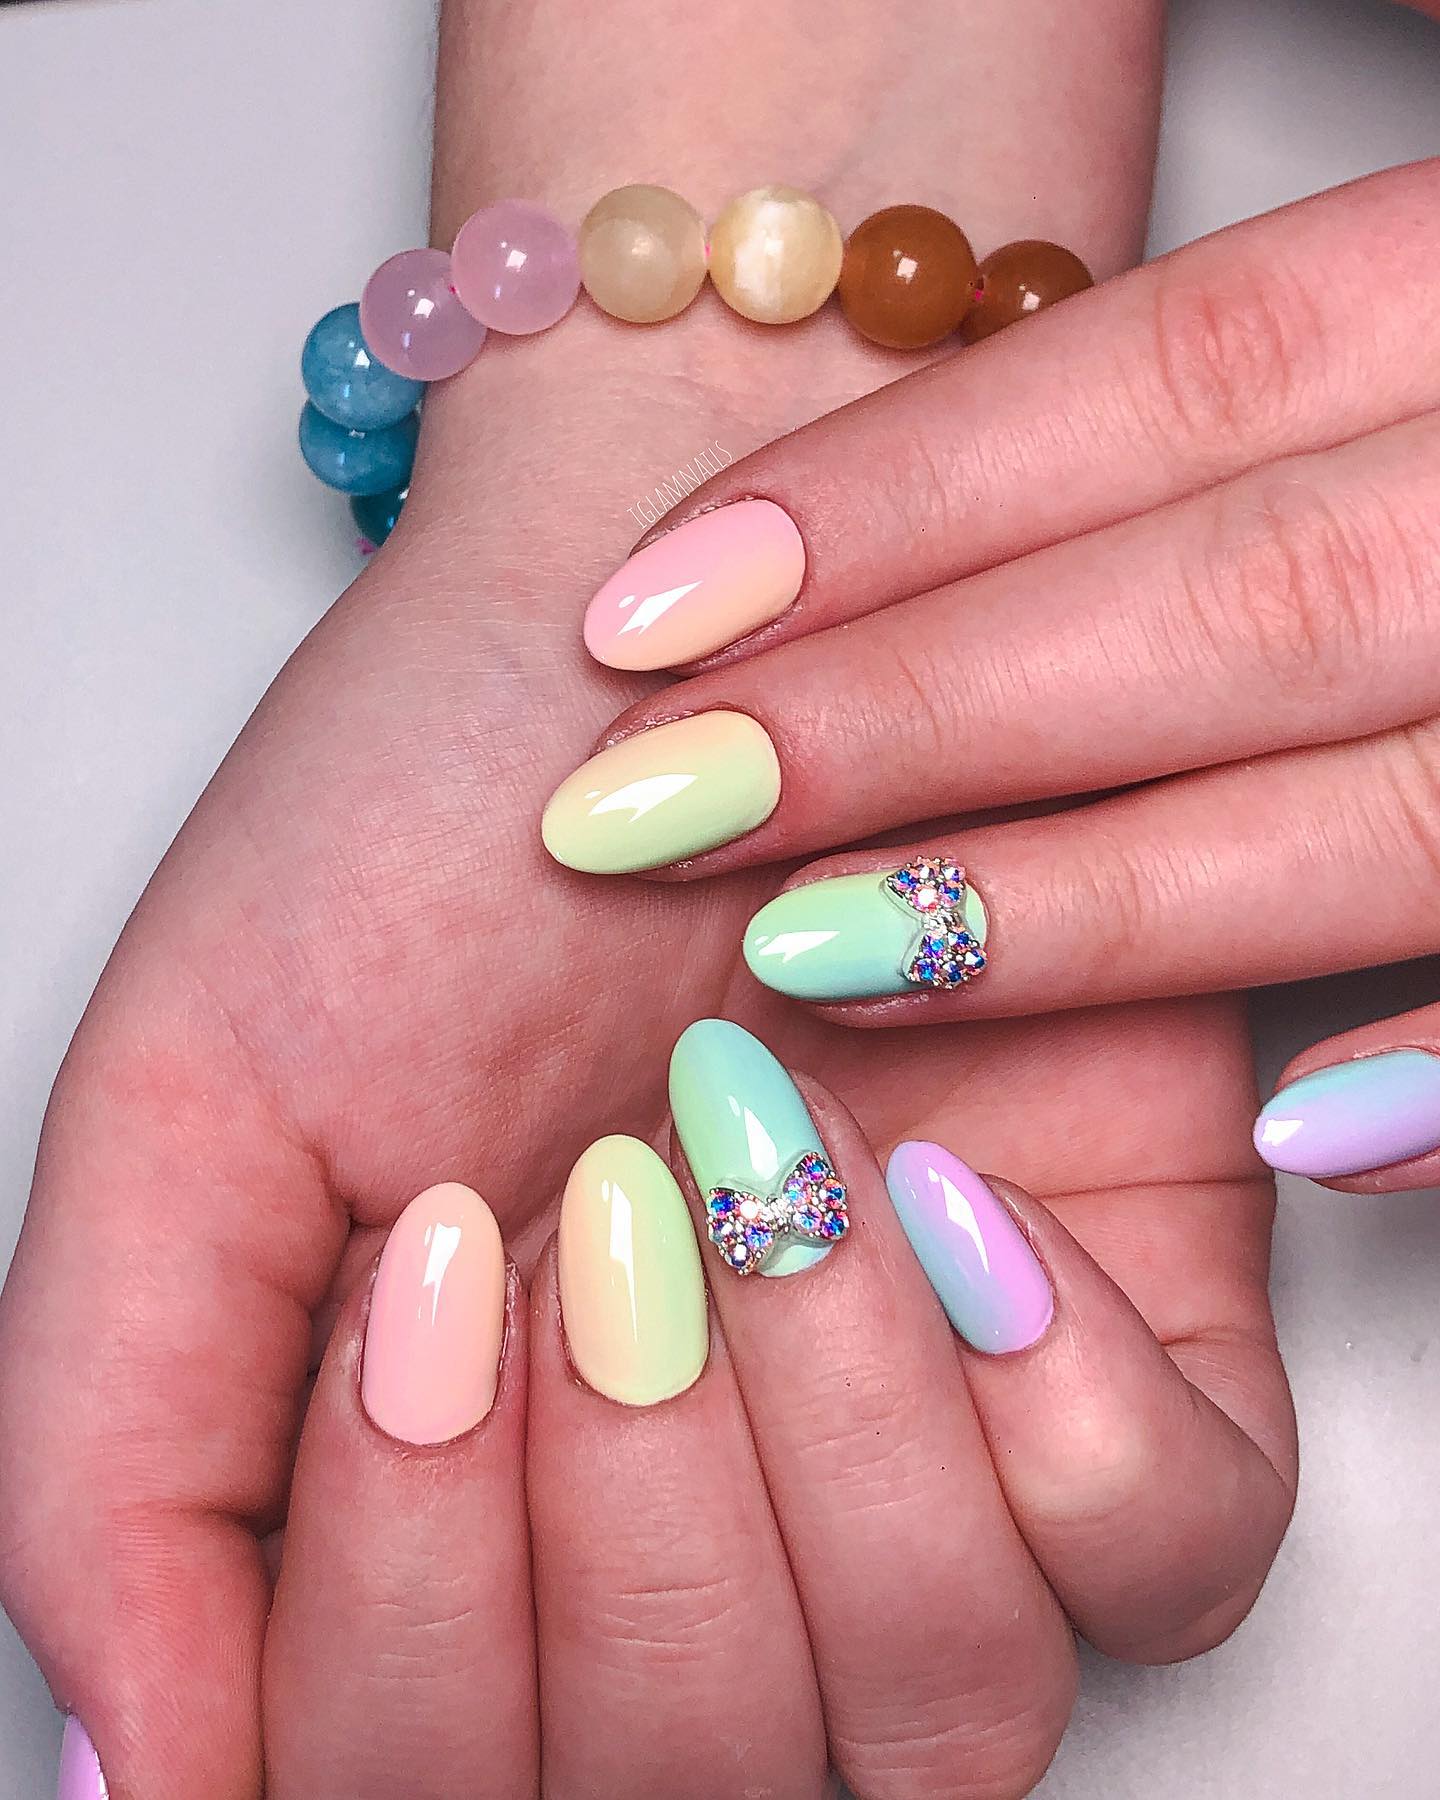
8. "Rainbow Ombre Nail Tutorial"

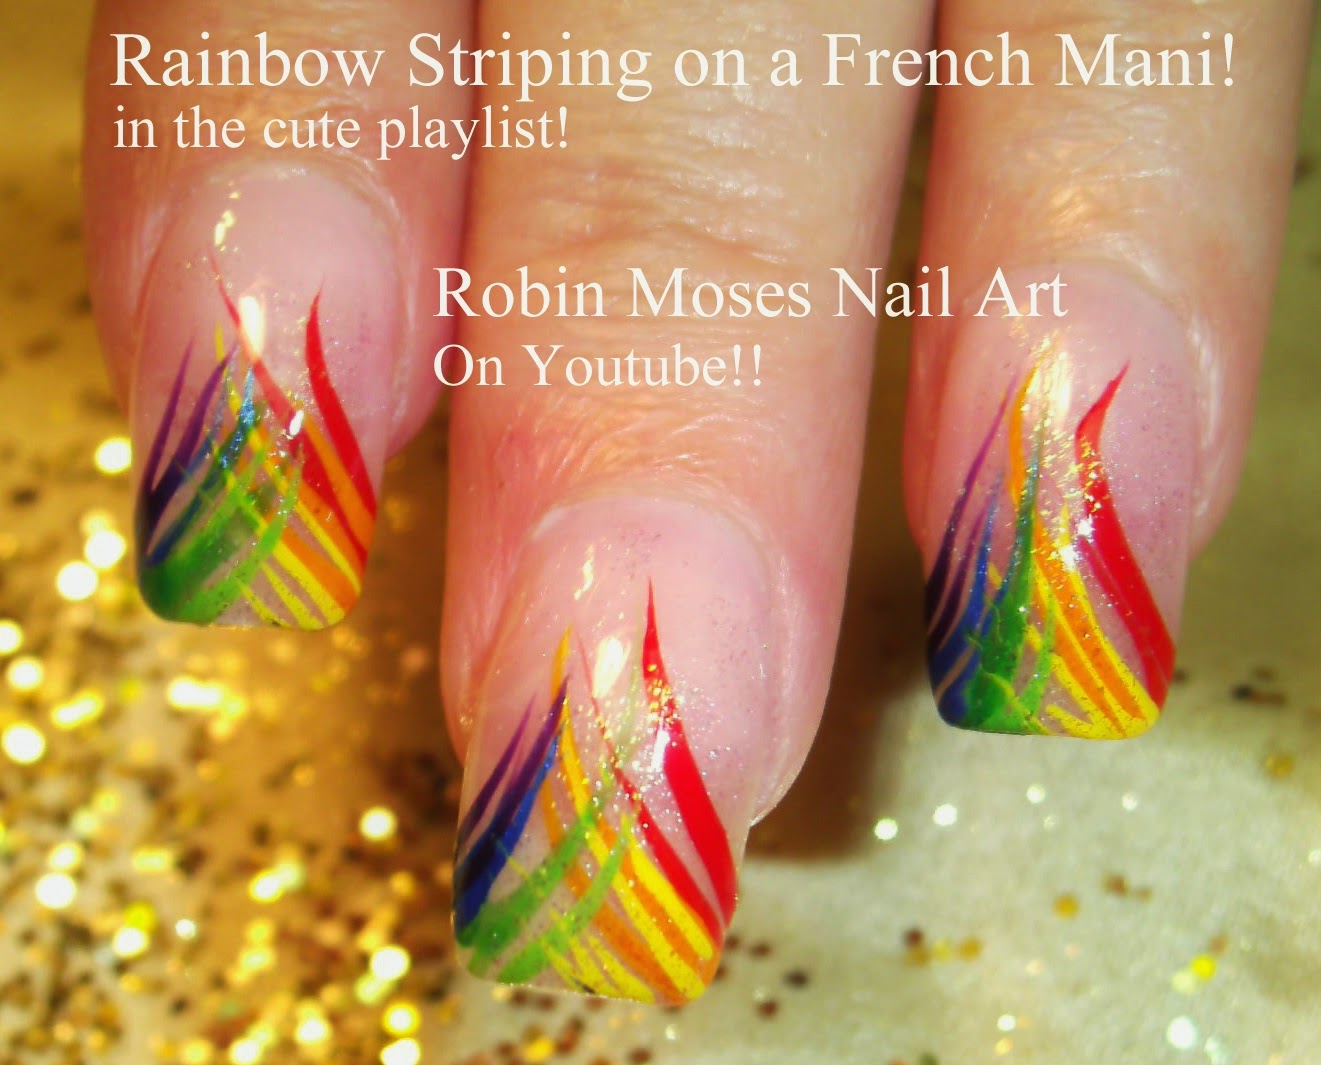
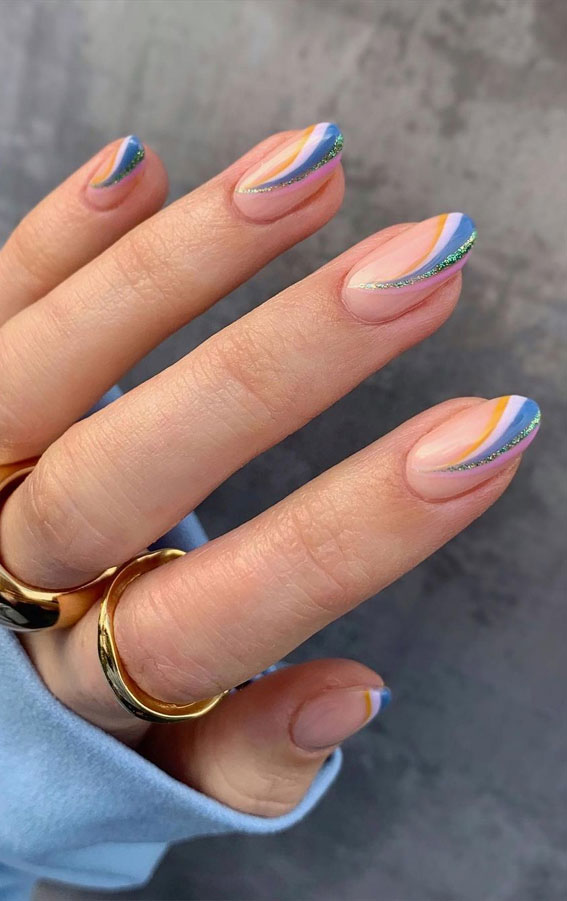
We mentioned the rainbow French tip earlier, but there are even more ways to incorporate this design into your nails. This tutorial will show you how to create a rainbow French tip using a variety of techniques, including using striping tape and creating a gradient effect. This design is perfect for those who want a little more color on their nails but still want to keep it classic and chic.9. "Rainbow French Tip Nail Design"


9. "Rainbow French Tip Nail Design"


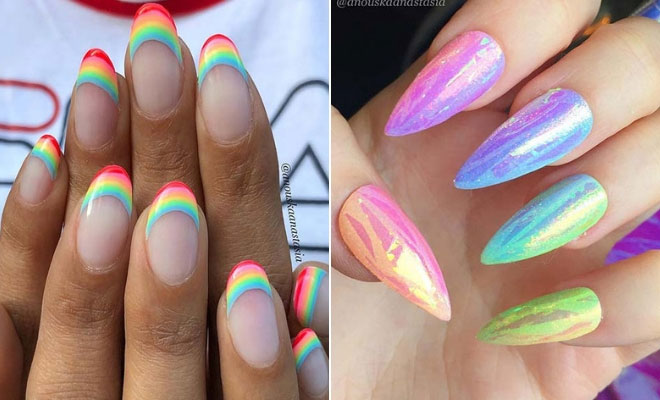
Water marbling can seem daunting, but with this tutorial, you'll be able to create a rainbow water marble nail art in no time. By using a variety of rainbow colors, you'll end up with a unique and mesmerizing design on your nails. For a twist on the traditional water marble, try using a different base color, such as black or white, and then adding your rainbow swirls on top. This will create a more dramatic and eye-catching design.10. "Rainbow Water Marble Nail Art Tutorial"
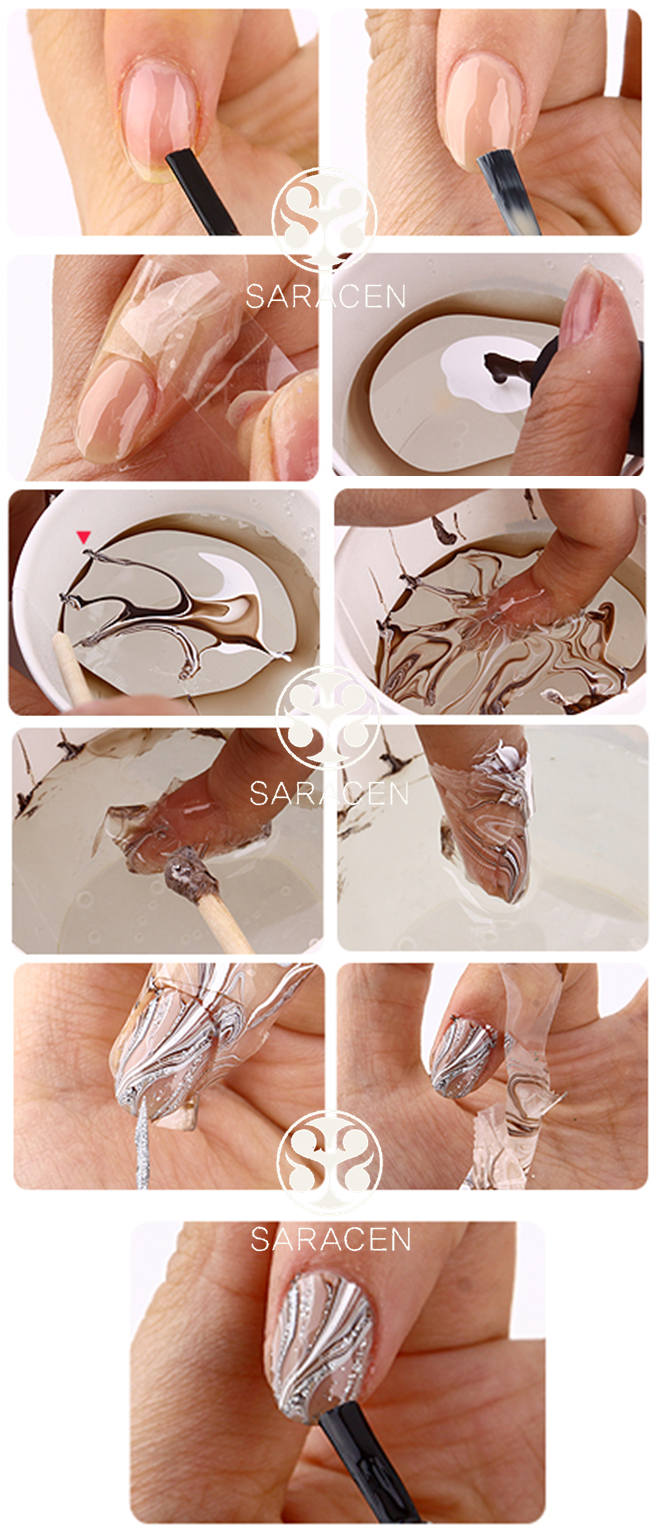
10. "Rainbow Water Marble Nail Art Tutorial"


The Latest Trend: Rainbow Nail Design Videos

Creating a Colorful Statement with Rainbow Nails
 Rainbow nail designs have become increasingly popular in recent years, and it's not hard to see why. With their vibrant and playful colors, these designs are a fun and creative way to express yourself through your nails. Not to mention, they are also a great way to add a pop of color to any outfit. If you're looking to up your nail game, then rainbow nail designs are definitely worth a try. And what better way to learn how to create these colorful designs than through
rainbow nail design videos
?
Rainbow nail designs have become increasingly popular in recent years, and it's not hard to see why. With their vibrant and playful colors, these designs are a fun and creative way to express yourself through your nails. Not to mention, they are also a great way to add a pop of color to any outfit. If you're looking to up your nail game, then rainbow nail designs are definitely worth a try. And what better way to learn how to create these colorful designs than through
rainbow nail design videos
?
Why Watch Rainbow Nail Design Videos?
 With the rise of social media and the internet, nail art tutorials and videos have become a popular way for people to learn how to create different nail designs. And
rainbow nail design videos
are no exception. These videos provide step-by-step instructions on how to create various rainbow nail designs, making it easy for anyone to recreate them at home. Whether you're a beginner or a seasoned nail artist, these videos offer something for everyone.
With the rise of social media and the internet, nail art tutorials and videos have become a popular way for people to learn how to create different nail designs. And
rainbow nail design videos
are no exception. These videos provide step-by-step instructions on how to create various rainbow nail designs, making it easy for anyone to recreate them at home. Whether you're a beginner or a seasoned nail artist, these videos offer something for everyone.
Where to Find Rainbow Nail Design Videos
 There are many platforms where you can find
rainbow nail design videos
, including YouTube, Instagram, and Pinterest. Simply search for keywords like "rainbow nail designs" or "rainbow nail tutorial" and you'll be met with a plethora of videos to choose from. You can also follow popular nail artists and influencers on these platforms to stay updated on the latest rainbow nail design trends.
There are many platforms where you can find
rainbow nail design videos
, including YouTube, Instagram, and Pinterest. Simply search for keywords like "rainbow nail designs" or "rainbow nail tutorial" and you'll be met with a plethora of videos to choose from. You can also follow popular nail artists and influencers on these platforms to stay updated on the latest rainbow nail design trends.
Benefits of Watching Rainbow Nail Design Videos
 Aside from learning how to create beautiful rainbow nail designs, watching these videos also has other benefits. For one, it's a great way to relax and unwind. With calming music and satisfying visuals, these videos can be a form of self-care. Additionally, watching
rainbow nail design videos
can also inspire you to come up with your own unique designs and unleash your creativity.
Aside from learning how to create beautiful rainbow nail designs, watching these videos also has other benefits. For one, it's a great way to relax and unwind. With calming music and satisfying visuals, these videos can be a form of self-care. Additionally, watching
rainbow nail design videos
can also inspire you to come up with your own unique designs and unleash your creativity.
In Conclusion
 Rainbow nail designs are a fun and colorful way to express yourself through your nails. And with
rainbow nail design videos
, learning how to create these designs has never been easier. So why not give it a try and add a splash of color to your everyday look? Who knows, you might just discover your new favorite hobby.
Rainbow nail designs are a fun and colorful way to express yourself through your nails. And with
rainbow nail design videos
, learning how to create these designs has never been easier. So why not give it a try and add a splash of color to your everyday look? Who knows, you might just discover your new favorite hobby.


