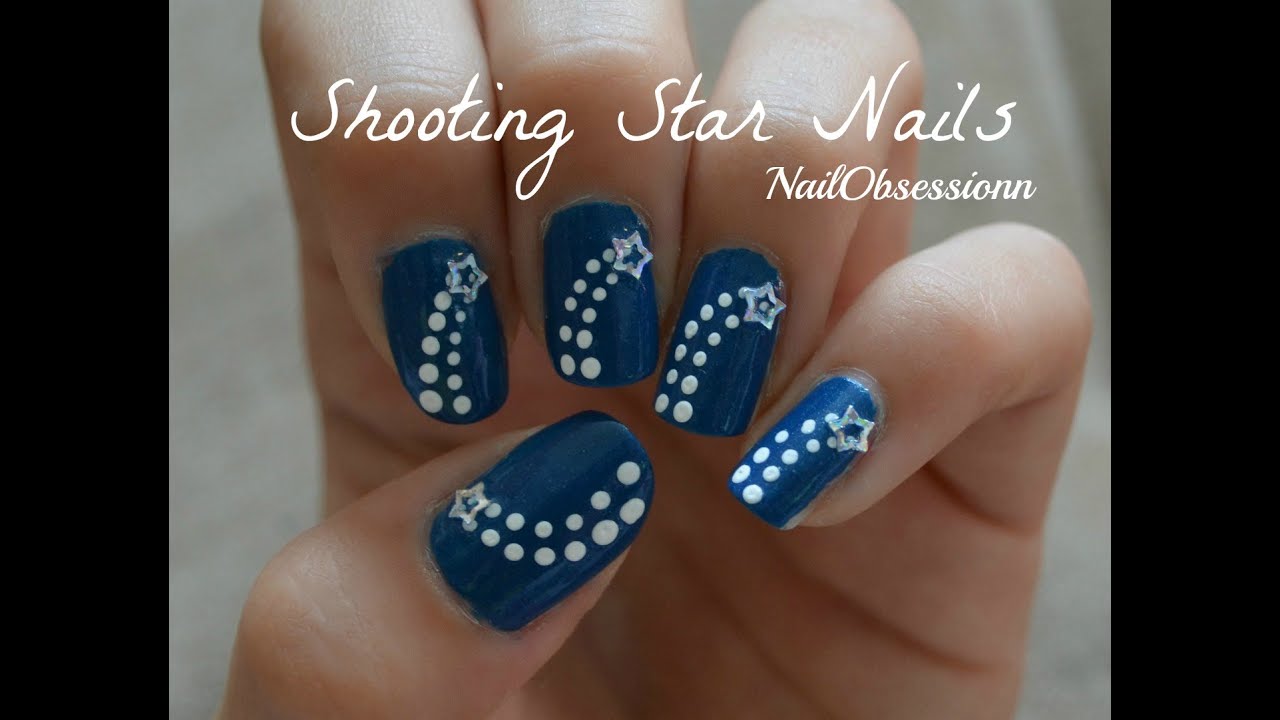
Creating a stunning shooting star nail design doesn't have to be rocket science. With this easy-to-follow tutorial, you can achieve a celestial look on your nails in no time. Start by applying a base coat to protect your nails and ensure your design lasts longer. Then, using a small nail art brush or a toothpick, dip it in white nail polish and create a small dot at the base of your nail. This will be the beginning of your shooting star. Next, draw a thin line from the dot towards the tip of your nail. This will be the tail of the star. Then, create a smaller dot at the end of the line to represent the star's head. Using a gold or silver glitter nail polish, carefully fill in the star's head to make it stand out. You can also add some glitter to the tail for an extra sparkle. Finish off the design by applying a top coat to seal the look and give it a glossy finish. And there you have it, a gorgeous shooting star nail design that will make your nails shine like the night sky.1. Shooting Star Nail Art Tutorial


1. Shooting Star Nail Art Tutorial


If you're a fan of all things celestial, then you'll love incorporating shooting stars into your nail art. This trend has been taking over social media, and for good reason – it's a beautiful and versatile design that can be customized to fit any style. For a simple yet elegant look, try a black base with gold shooting stars. This combination gives off a chic and mysterious vibe, perfect for a night out. If you want to add some color to your celestial nails, opt for a galaxy-inspired design with shooting stars scattered throughout. Use a sponge to create a gradient effect with different shades of blue, purple, and pink. Then, add some gold or silver shooting stars on top for a mesmerizing look. For a more playful and fun approach, try a rainbow shooting star nail art. You can either paint each nail a different color or use a variety of colors for the shooting stars themselves. Either way, it will be a cheerful and eye-catching design.2. Celestial Nail Designs


2. Celestial Nail Designs


:max_bytes(150000):strip_icc()/316360126_6055842657779597_8269262826958388092_n-a416ad4c30e6465fa89576bece1febf2.jpg)


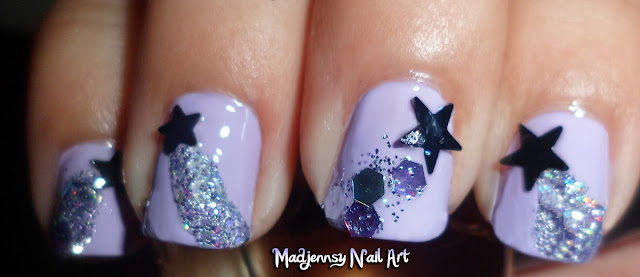
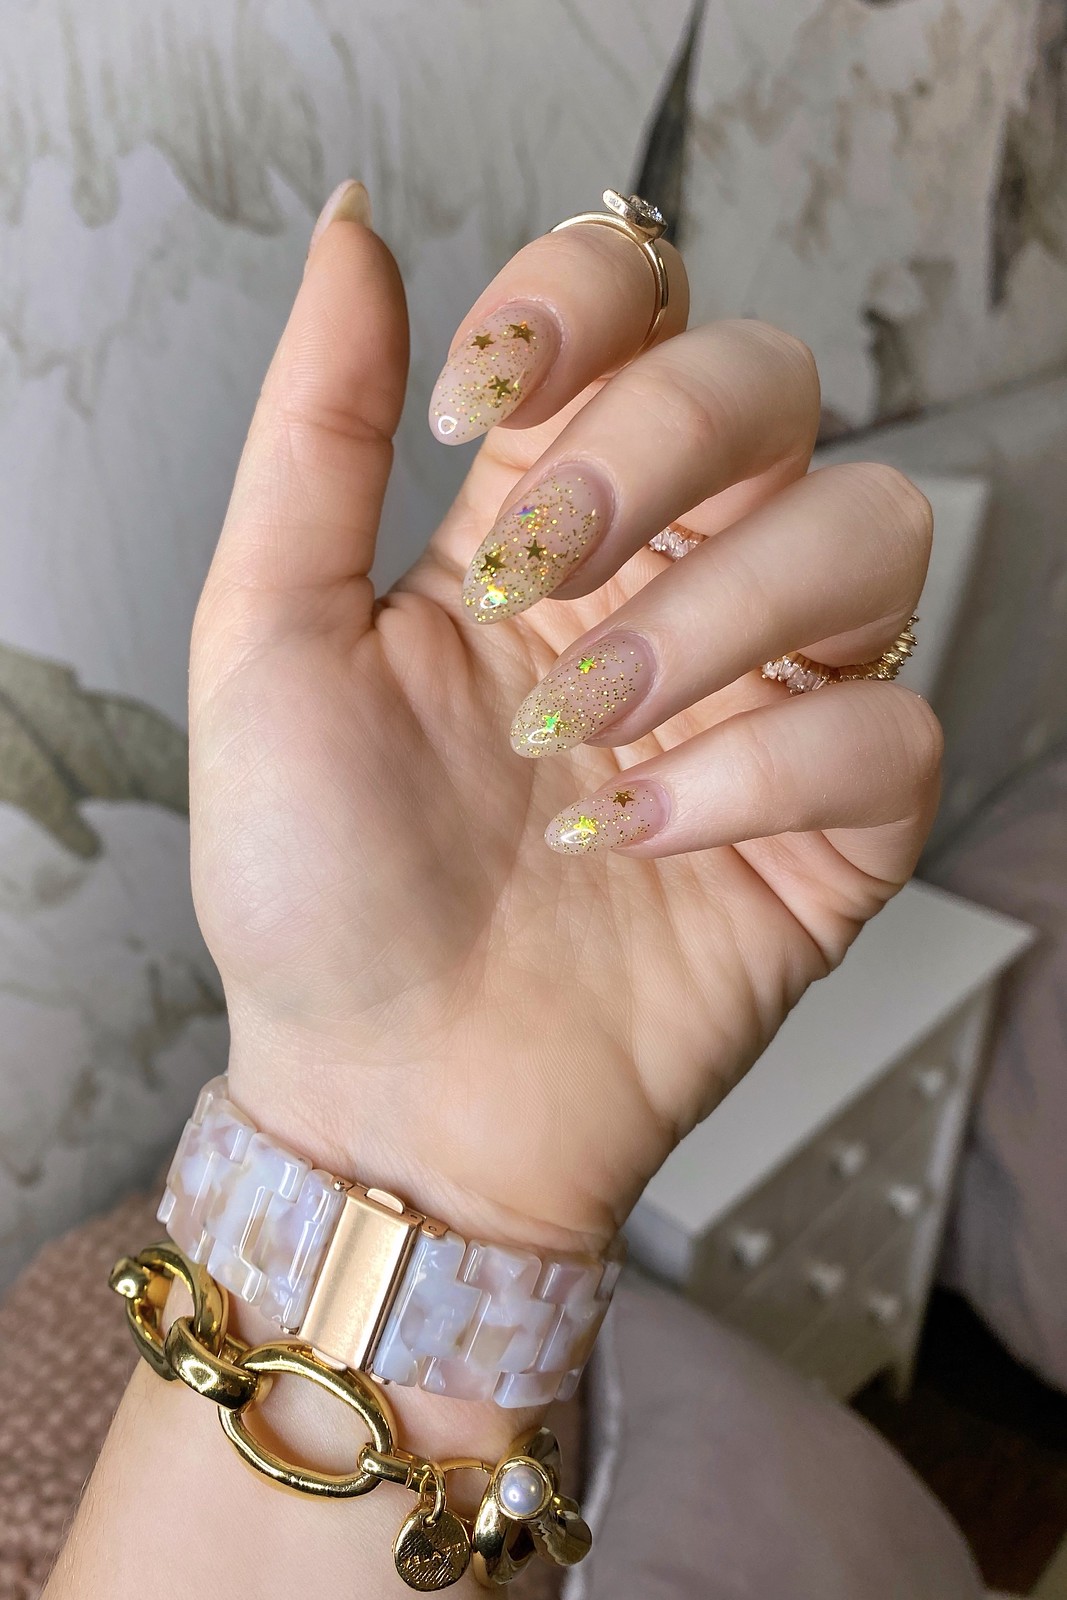
If you're a glitter lover, then this shooting star nail design is perfect for you. The glitter adds an extra touch of sparkle to your nails and makes the shooting stars stand out even more. Start by painting your nails with a clear base coat. Then, dip each nail into a container of glitter while the polish is still wet. You can use one color of glitter or mix and match for a unique and fun look. After letting the glitter dry, use a small nail art brush to create shooting stars with a white or light-colored nail polish. You can also add some small dots of glitter around the stars to add dimension to the design. Finish off with a top coat to seal the look and keep the glitter in place. You'll have a dazzling and glamorous set of nails that will make you feel like a star.3. Glitter Shooting Star Nails


3. Glitter Shooting Star Nails


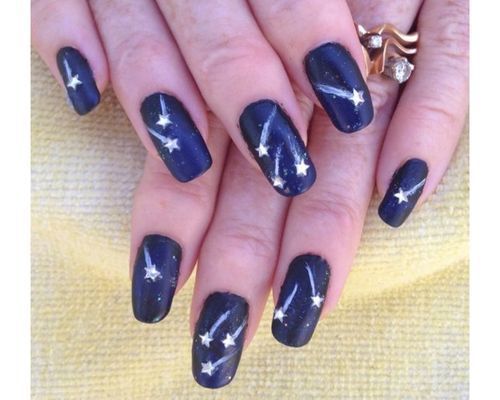
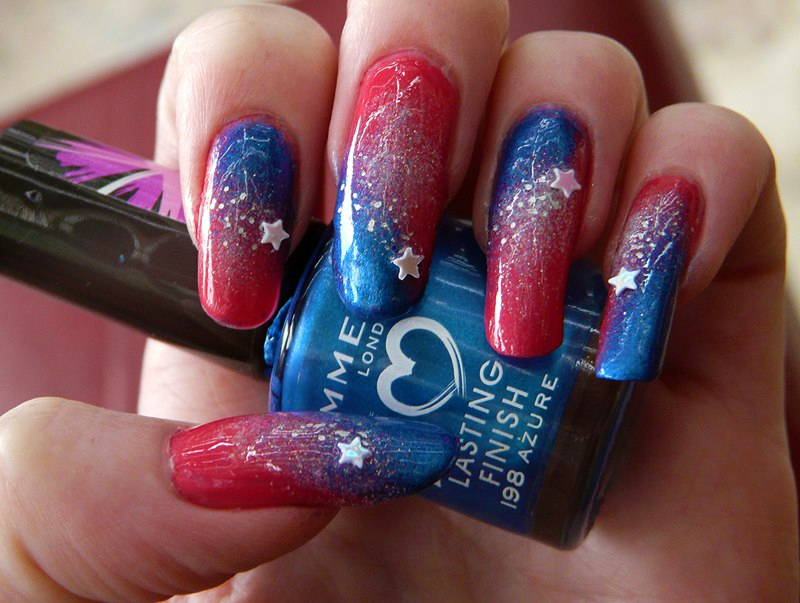
Take your shooting star nail design to the next level by incorporating a galaxy effect. This design will make your nails look like they've been plucked straight out of the night sky. Start by painting your nails with a dark blue or black base. Then, use a sponge to dab on different shades of blue, purple, and pink nail polish to create a galaxy effect. Next, create your shooting stars using a white or light-colored nail polish. You can also add some glitter or rhinestones to represent stars in the background. For an even more celestial touch, use a holographic or iridescent top coat to give your nails a shimmery and otherworldly look.4. Galaxy Nail Design with Shooting Stars

4. Galaxy Nail Design with Shooting Stars


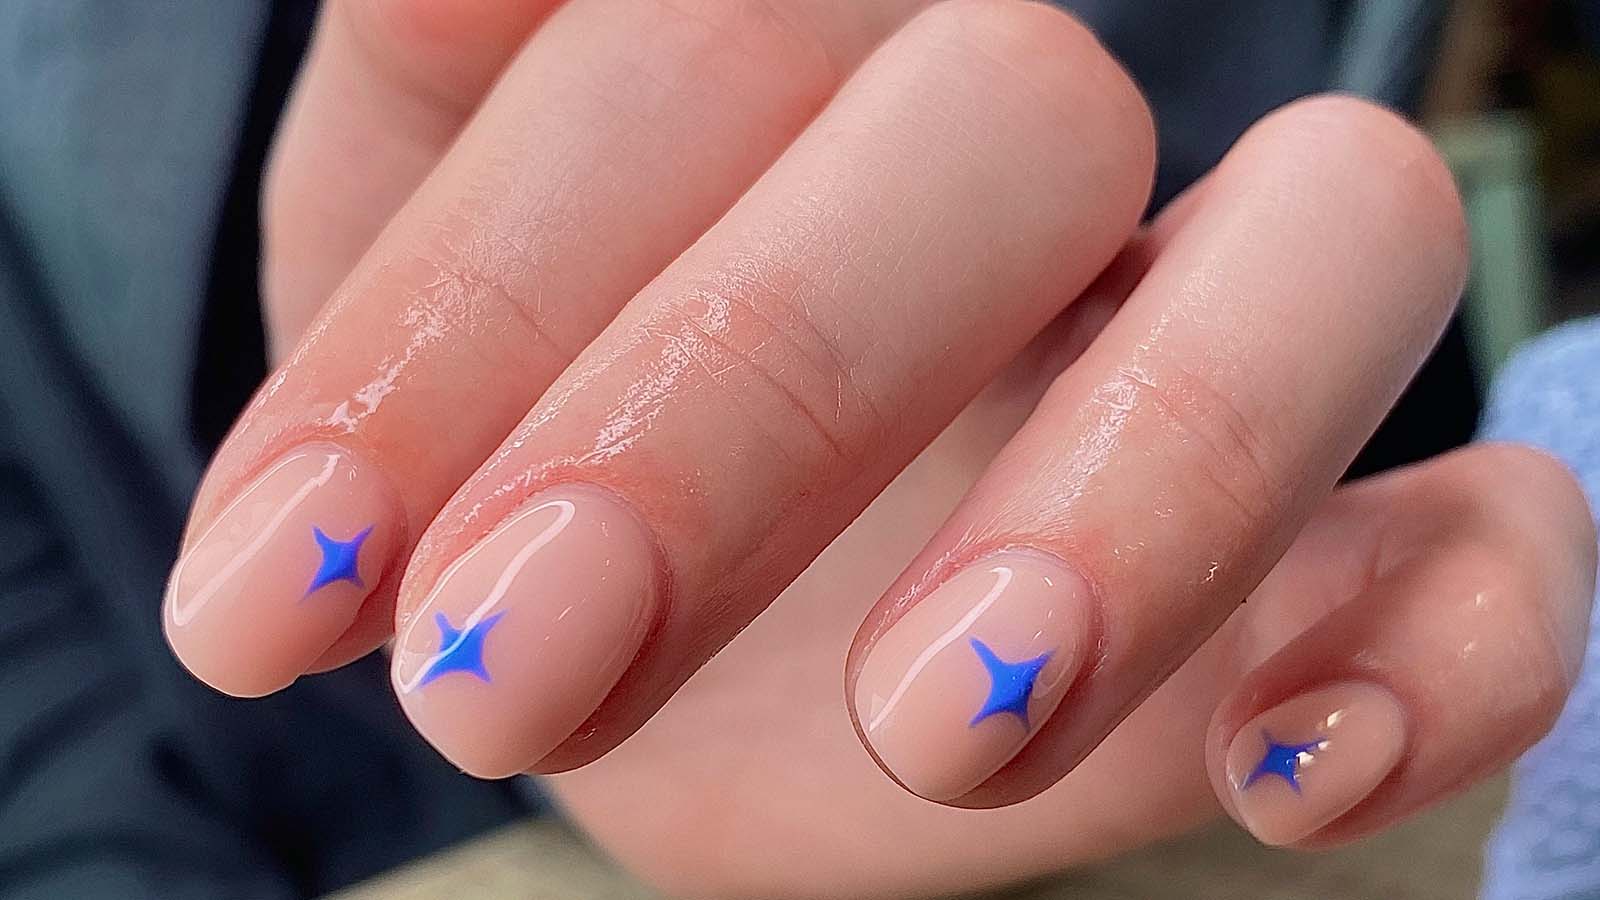
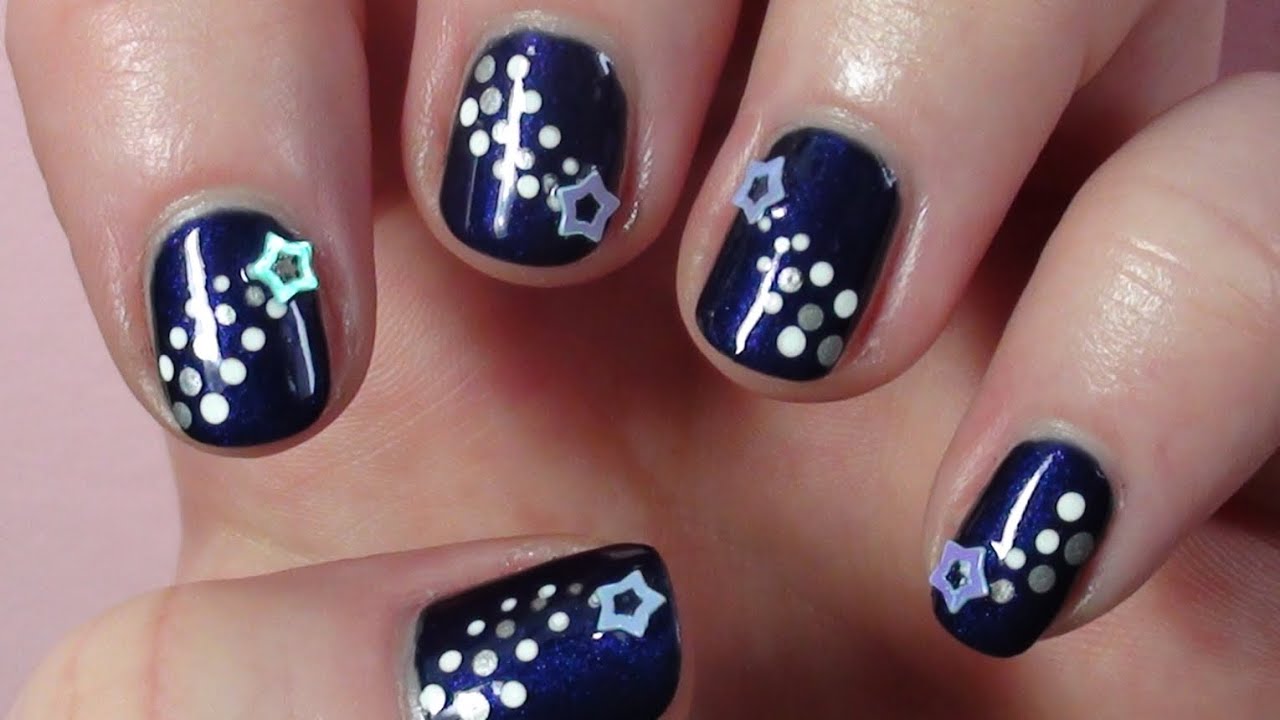
If you're new to nail art or don't have much time to spend on a complicated design, this easy shooting star nail art is perfect for you. Start by painting your nails with a light-colored base. Then, dip a toothpick or small nail art brush in a metallic nail polish and create a small dot at the base of your nail. This will be the starting point of your shooting star. Draw a thin line from the dot towards the tip of your nail, and then create a small dot at the end for the star's head. You can also add some smaller dots around the star for a starry effect. Finish off by applying a top coat, and you'll have a simple yet stunning shooting star nail design that's perfect for any occasion.5. Easy Shooting Star Nail Design


5. Easy Shooting Star Nail Design
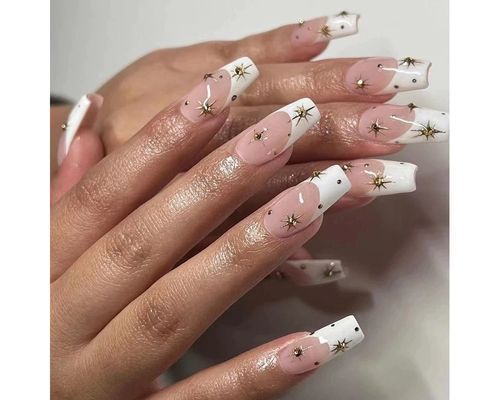
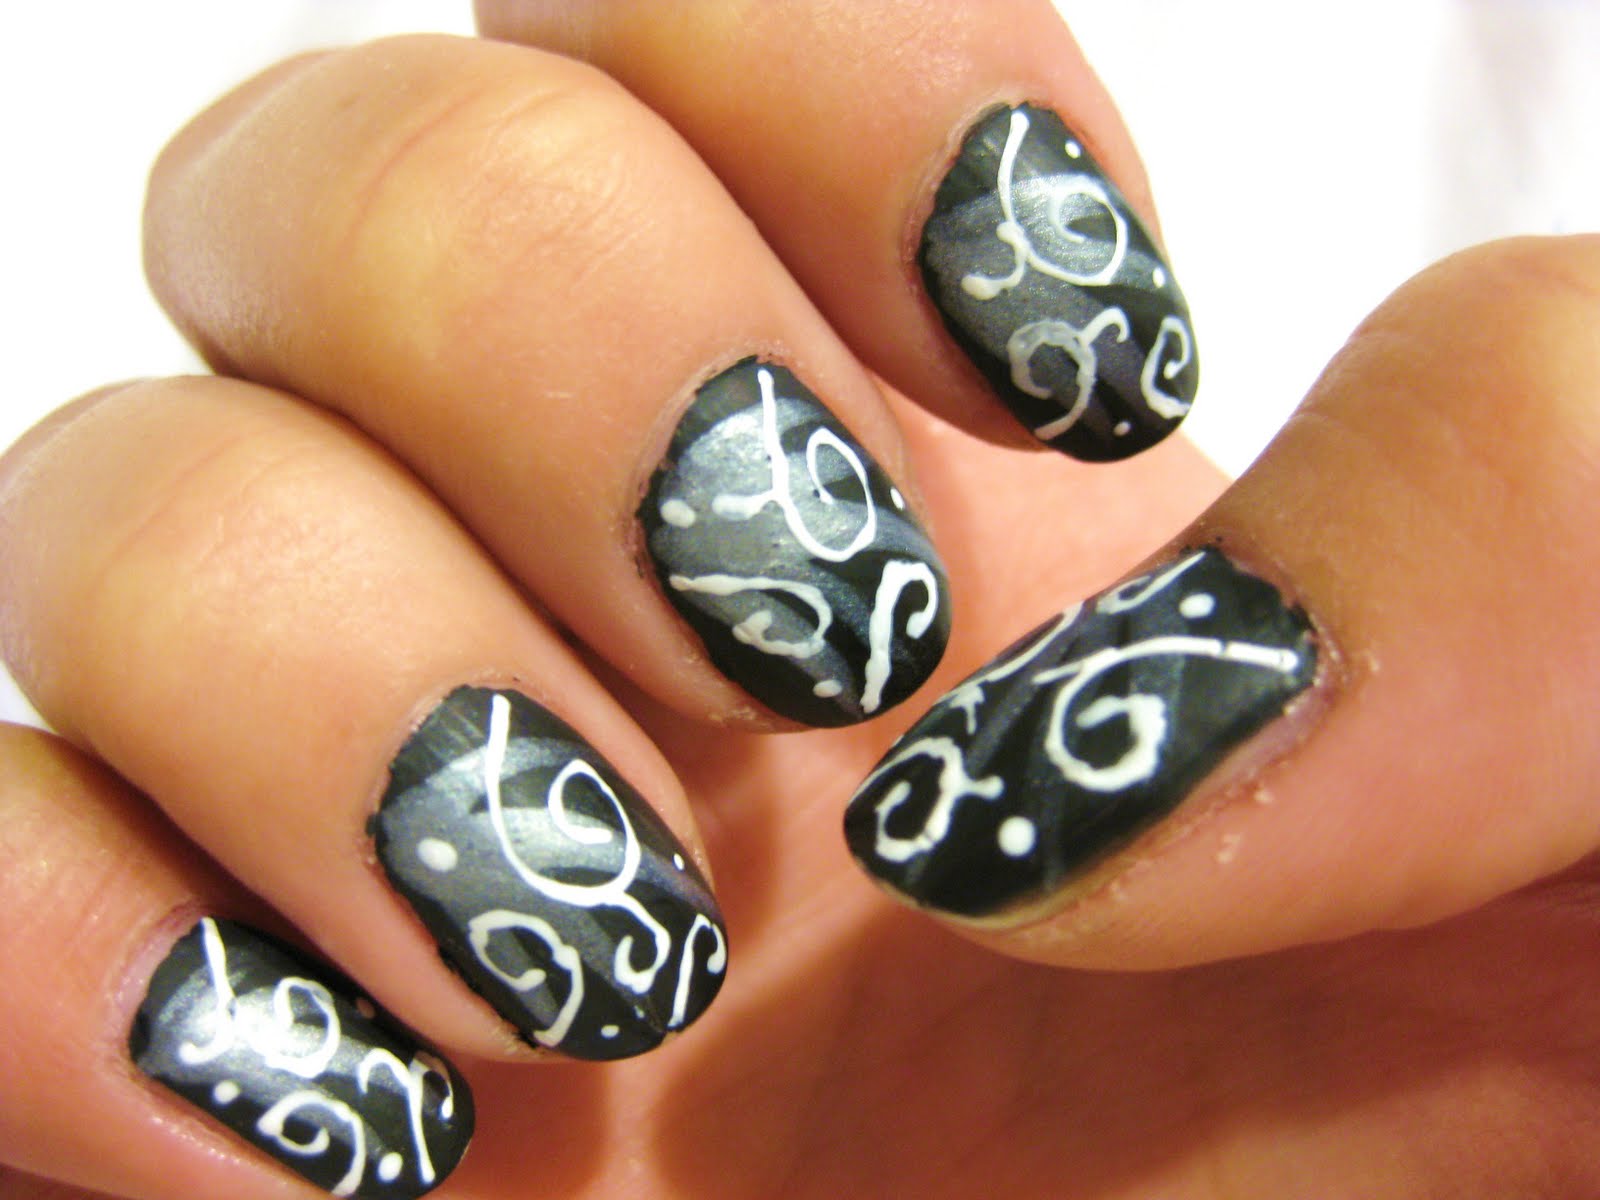
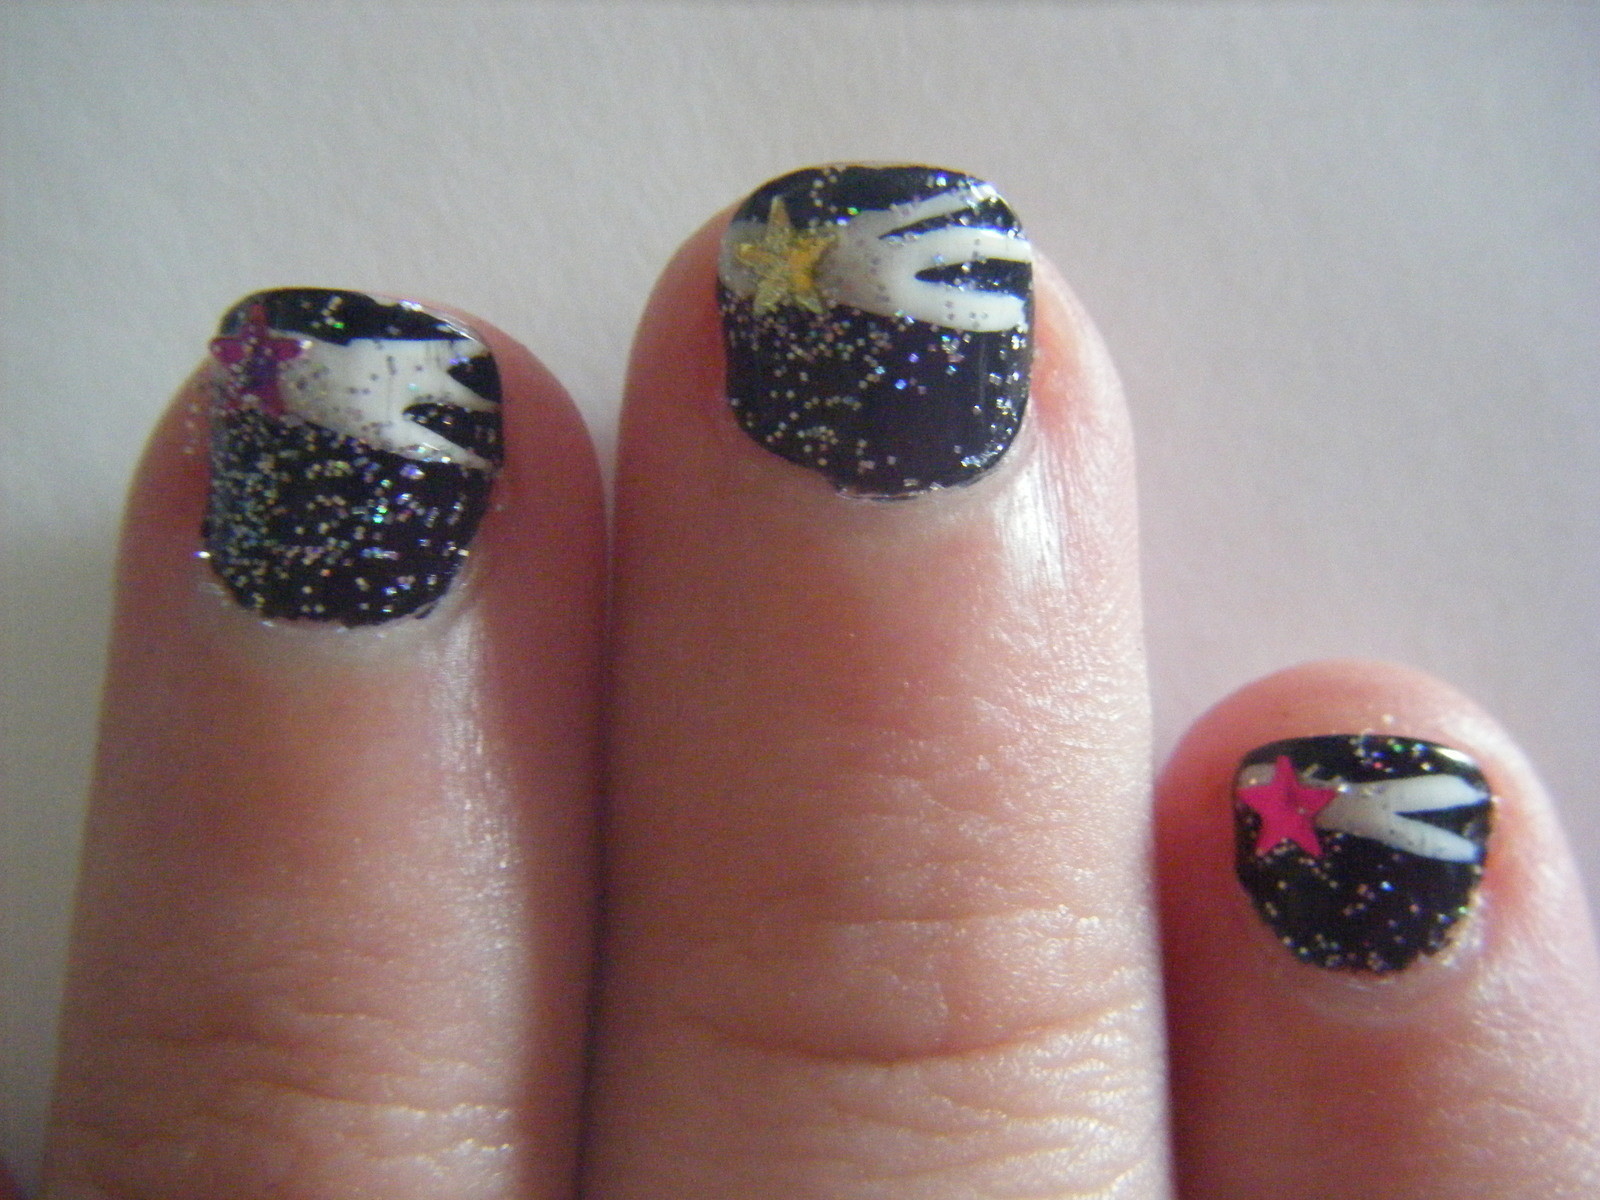
For a bold and stylish look, try a black and gold shooting star nail design. The contrast between the dark base and the metallic stars creates a striking and elegant look. Start by painting your nails with a black base. Then, use a gold nail polish to create the shooting stars. You can also add some gold glitter or rhinestones to give the design more dimension and sparkle. To add some extra flair, paint one or two nails with a gold base and black shooting stars. This will create a statement nail and make your design even more unique. Finish off with a top coat, and you'll have a chic and sophisticated shooting star nail design that will turn heads.6. Black and Gold Shooting Star Nails


6. Black and Gold Shooting Star Nails
For a fun and colorful look, try a rainbow shooting star nail art. This design is perfect for the summer months or for anyone who loves bright and cheerful colors. Start by painting each nail a different color of the rainbow. Then, create shooting stars with a white or light-colored nail polish on each nail. You can also add some glitter or rhinestones in coordinating colors for a playful touch. To make your design even more unique, you can also paint one or two nails with a black base and colorful shooting stars. This will create a statement nail and add some contrast to the design. Finish off with a top coat, and you'll have a vibrant and eye-catching shooting star nail art that will make you smile every time you look at your nails.7. Rainbow Shooting Star Nail Art


7. Rainbow Shooting Star Nail Art


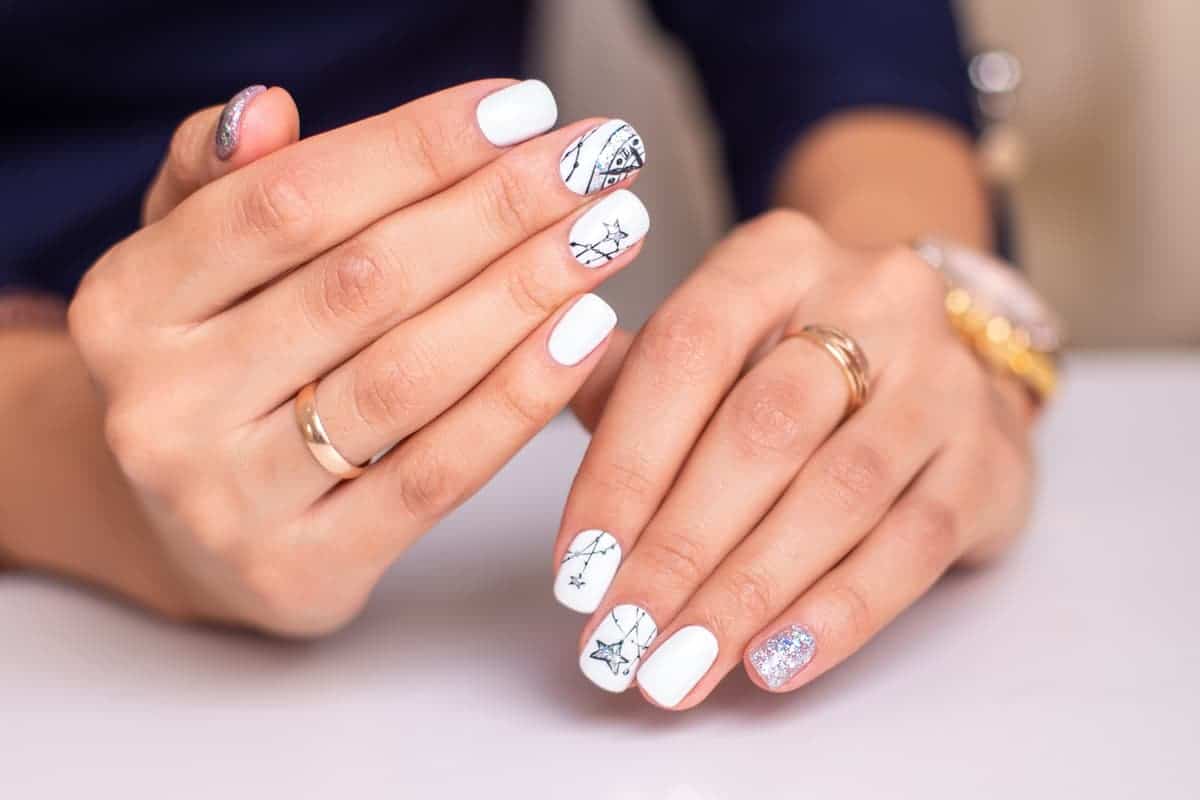
For a more subtle and understated look, try a matte shooting star nail design. This trend has been gaining popularity in recent years and is perfect for those who prefer a more muted nail look. Start by painting your nails with a matte top coat. Then, create your shooting stars with a glossy or metallic nail polish. The contrast between the matte and shiny finish will make the stars stand out even more. You can also paint a few nails with a matte base and glossy shooting stars for a unique and trendy look. Finish off with a top coat to seal the design and give it a longer-lasting finish.8. Matte Shooting Star Nails


8. Matte Shooting Star Nails
Pastel colors are a popular choice for nail designs, and they look especially beautiful when paired with shooting stars. This combination creates a dreamy and ethereal look that's perfect for any occasion. Start by painting your nails with a light-colored base, such as baby pink, lavender, or mint green. Then, create your shooting stars using a white or light-colored nail polish. You can also add some pastel glitter or rhinestones around the stars to add some extra sparkle to the design. Finish off with a top coat to seal the look and give it a glossy finish.9. Pastel Shooting Star Nail Design

9. Pastel Shooting Star Nail Design

For a futuristic and eye-catching look, try a holographic shooting star nail design. The holographic effect will give your nails a mesmerizing and multidimensional look that will make them stand out. Start by painting your nails with a clear base coat. Then, use a holographic nail polish to create your shooting stars. You can also add some holographic glitter or rhinestones for a more dramatic effect. For an even more unique look, try using a holographic top coat over a black base. This will create a galaxy-inspired look and make your shooting stars pop even more. Finish off with a top coat to seal the design and give it a glossy finish.10. Holographic Shooting Star Nails
10. Holographic Shooting Star Nails

Creating a Shooting Star Nail Design: A Step-by-Step Guide
Materials Needed:
 -
Gel or acrylic nail polish
-
Top coat and base coat
-
Nail art brushes
-
Dotting tool
-
Glitter
-
Rhinestones or studs
-
Nail polish remover
-
Gel or acrylic nail polish
-
Top coat and base coat
-
Nail art brushes
-
Dotting tool
-
Glitter
-
Rhinestones or studs
-
Nail polish remover
Shooting star nail designs have become increasingly popular in recent years, and for good reason. This whimsical and dreamy design adds a touch of magic to any manicure. With just a few simple steps, you can create your own shooting star nail design at home.
Step 1: Prepare Your Nails

Before starting any nail design, it's important to have a clean and smooth canvas. Start by removing any old nail polish and shaping your nails to your desired length and shape. Apply a base coat to protect your natural nails and allow it to dry completely.
Step 2: Apply the Base Color

For a shooting star design, a dark or glittery base color works best. Apply two coats of your chosen color and let it dry completely. This will serve as the background for your design.
Step 3: Create the Shooting Star

Using a thin nail art brush, create a diagonal line starting from the top corner of your nail. This will serve as the base for your shooting star. Next, create a smaller line branching off from the first line, resembling a star shape. Fill in the star with a different color or glitter of your choice.
Step 4: Add Details
Using a dotting tool and a contrasting color, add small dots around the shooting star to create a starry night sky effect. You can also add glitter or rhinestones to the tips of your nails for an extra touch of sparkle.
Step 5: Seal the Design
Once your design is dry, seal it with a top coat to protect it and make it last longer. This will also give your nails a glossy finish.
With these simple steps, you can achieve a stunning shooting star nail design that is sure to turn heads. Let your creativity and imagination run wild with different color combinations and designs. Have fun and enjoy your beautiful new manicure!


