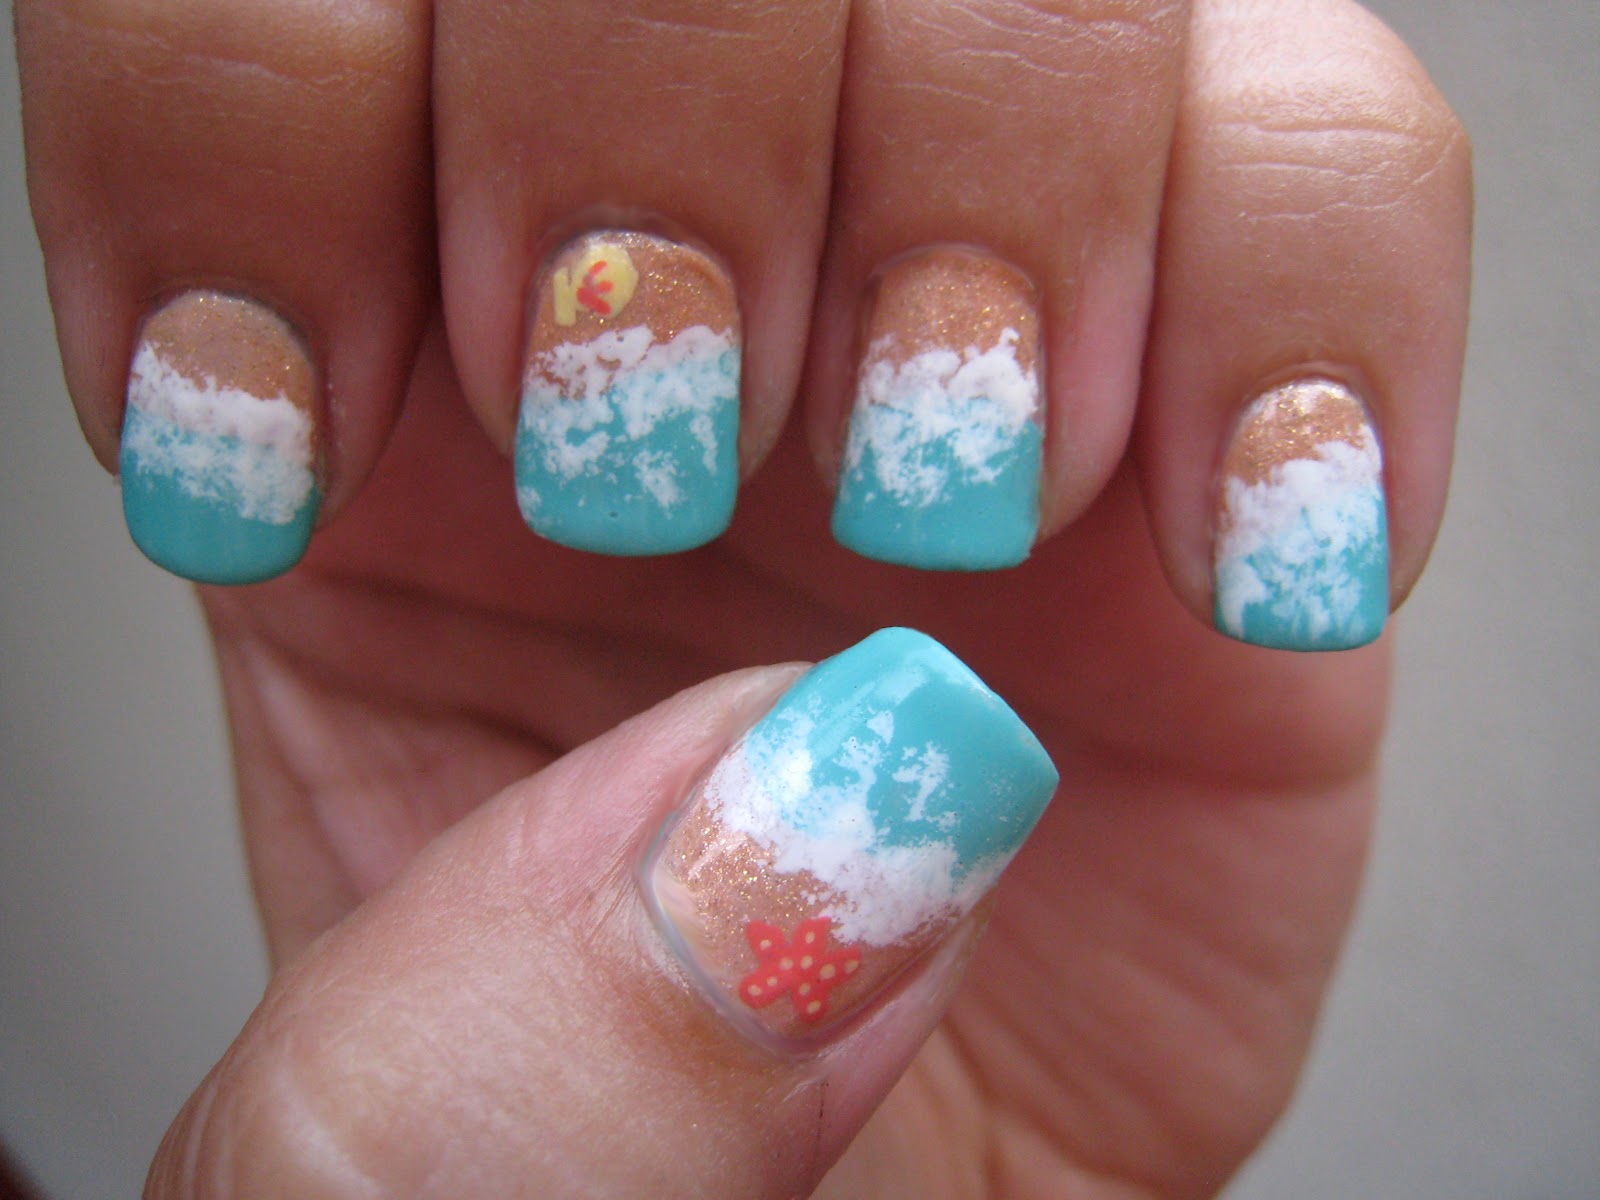
The beach is the perfect place to relax and unwind during the summer months. The warm sun, salty breeze, and crystal-clear water make it the ultimate destination for beach lovers. And what better way to show your love for the beach than by adorning your nails with easy and beautiful beach-inspired designs? Whether you're heading to the beach or just want to bring a piece of it with you, these easy beach nail designs are perfect for any summer day. One simple and classic beach nail design is the sand and sea design. To achieve this look, start by painting your nails a light blue or turquoise color to represent the ocean. Then, using a thin brush or toothpick, create small lines in a darker blue or green shade to represent the waves. Finally, sprinkle some gold glitter or shimmery nail polish on the tips of your nails to represent the sandy beach. This design is quick and easy, yet captures the essence of the beach perfectly.1. Easy Beach Nail Designs for Summer


1. Easy Beach Nail Designs for Summer


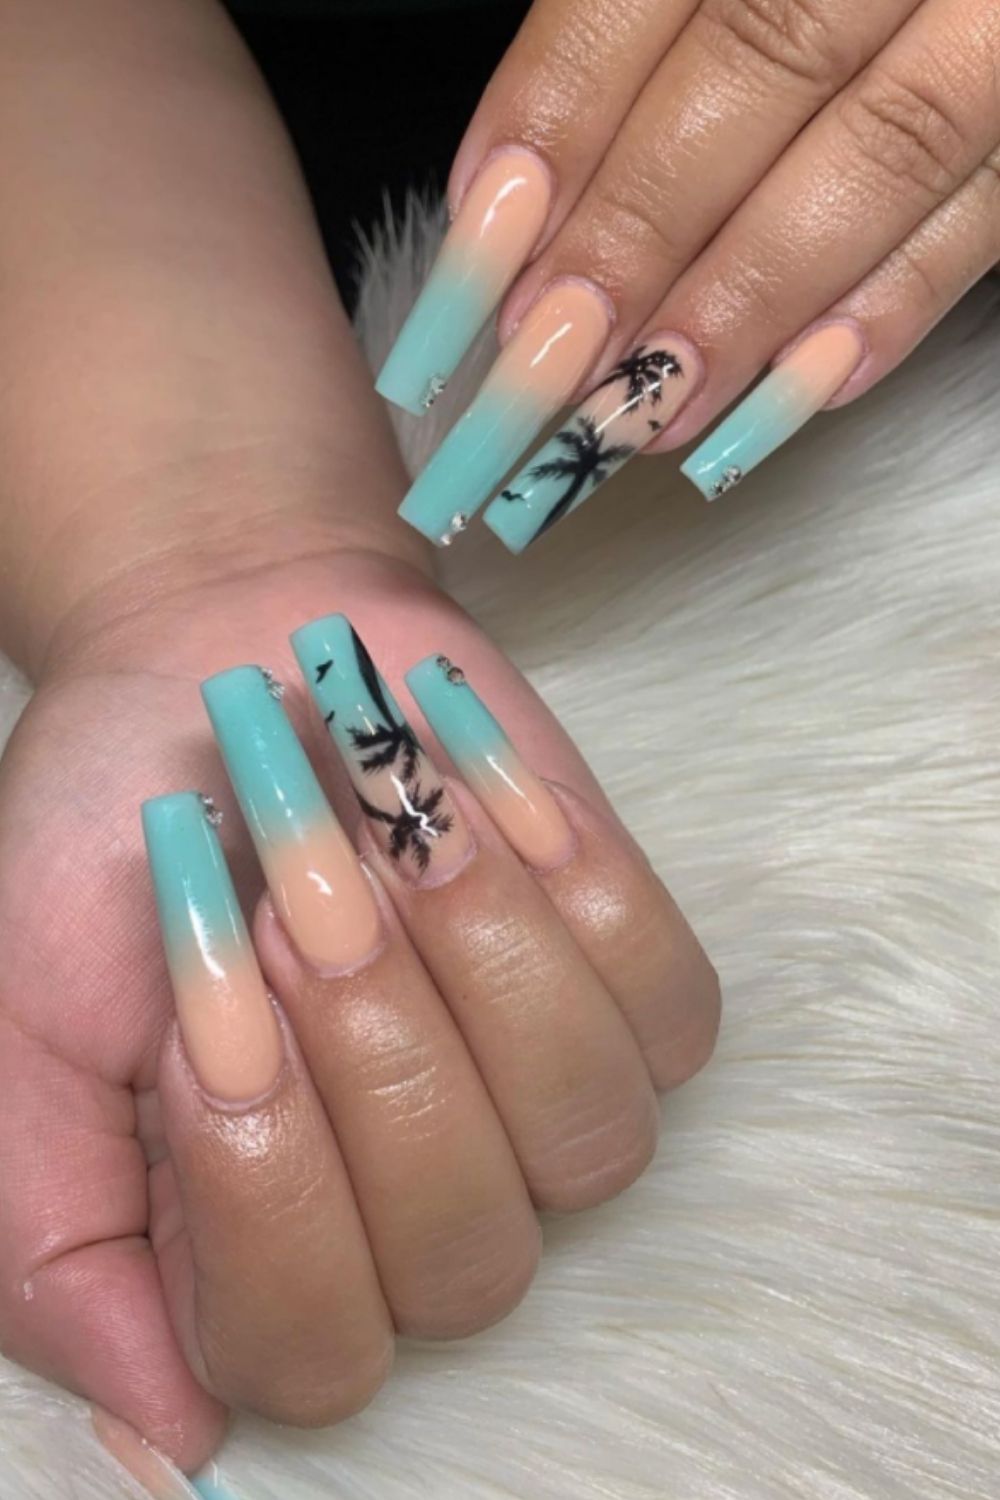
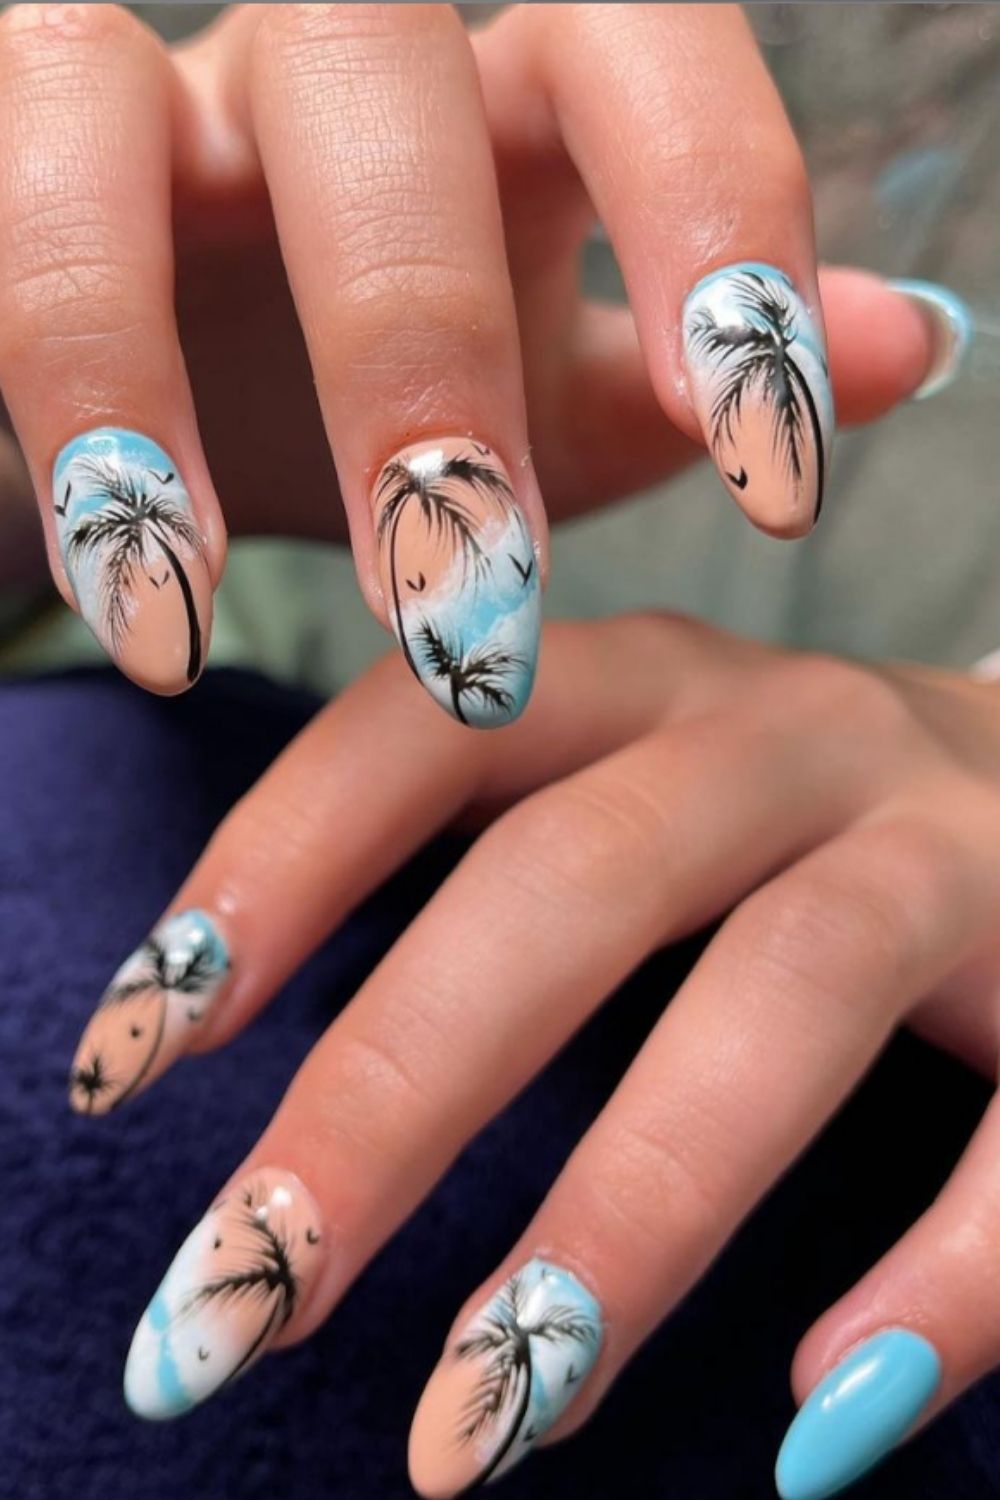
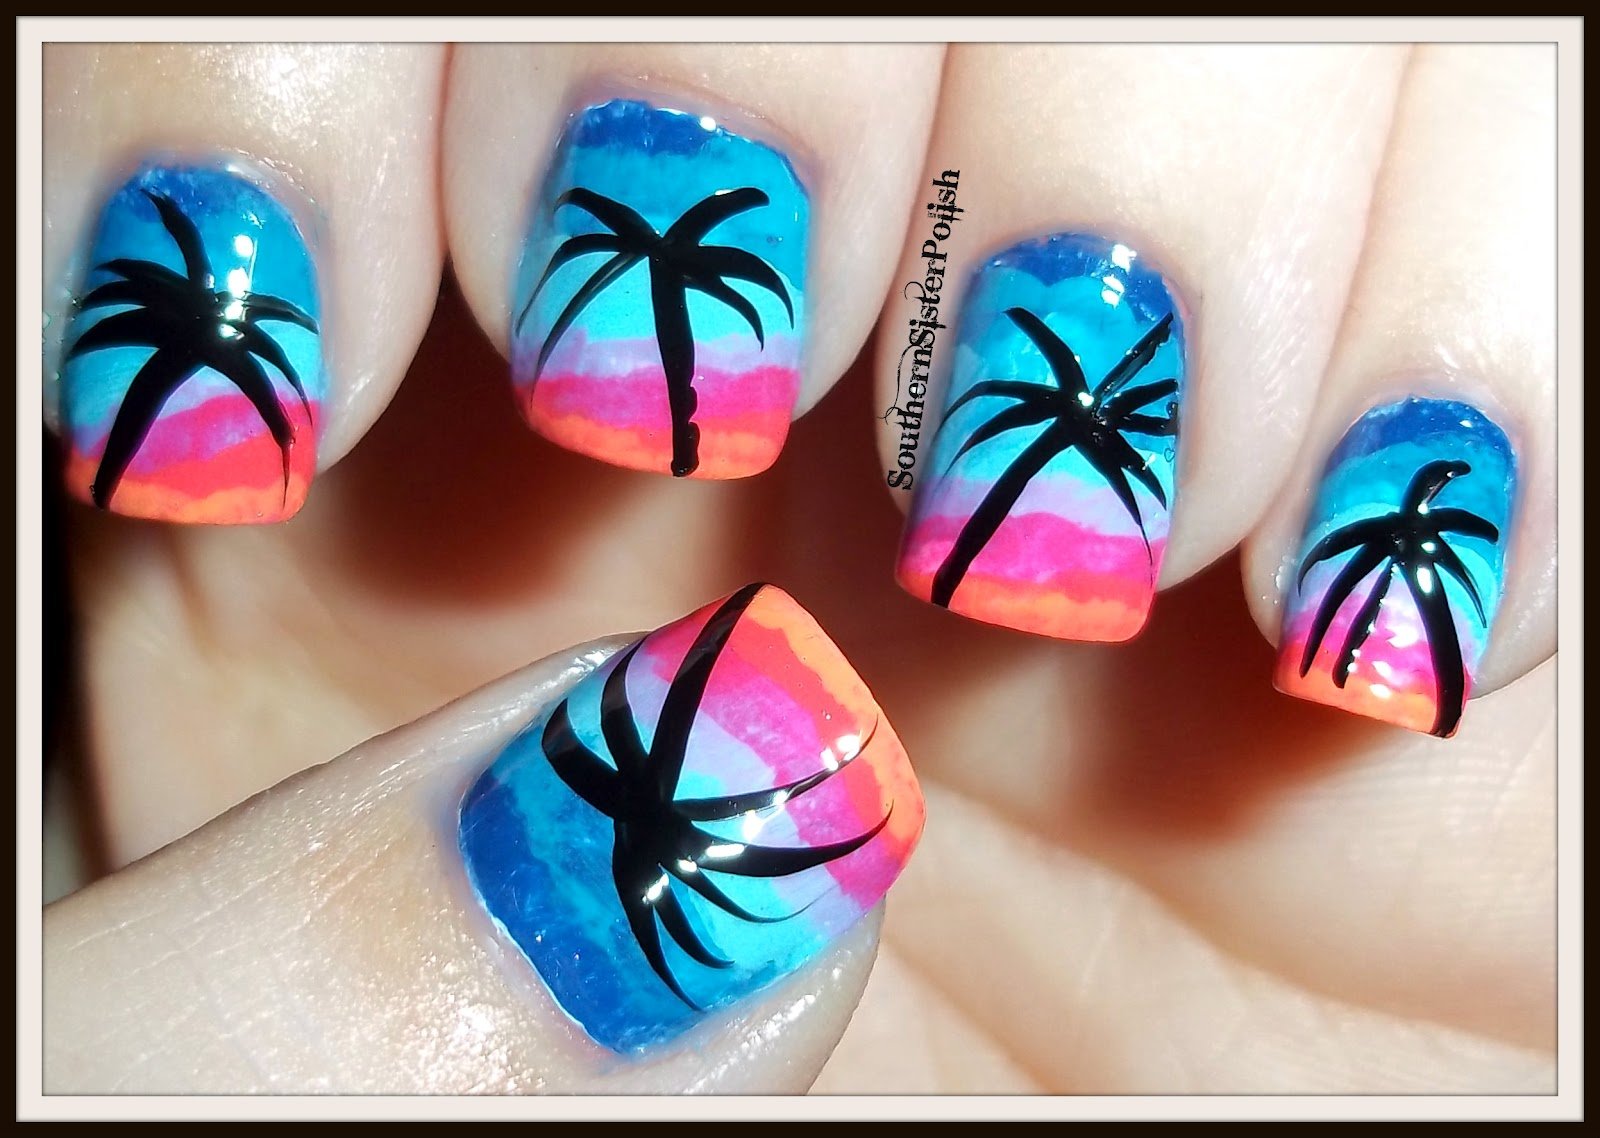
Looking for some beach-inspired nail art ideas that are both simple and stunning? Look no further! One unique design is the seashell nail art. Start by painting your nails a soft pink or nude color. Then, using a small brush or toothpick, draw a seashell shape on each nail using white or light pink nail polish. You can add some glitter or rhinestones to the shells for a touch of sparkle. This design is delicate and feminine, perfect for a day at the beach. Another simple yet eye-catching design is the palm tree nail art. Begin by painting your nails a light green color to represent the palm leaves. Then, using a thin brush or toothpick, create thin lines in a darker green or black shade to represent the palm tree trunk. You can also add some gold glitter or palm tree decals for a more intricate look. This design is perfect for those who want a subtle and elegant beach-inspired look.2. Simple Beach Nail Art Ideas


2. Simple Beach Nail Art Ideas


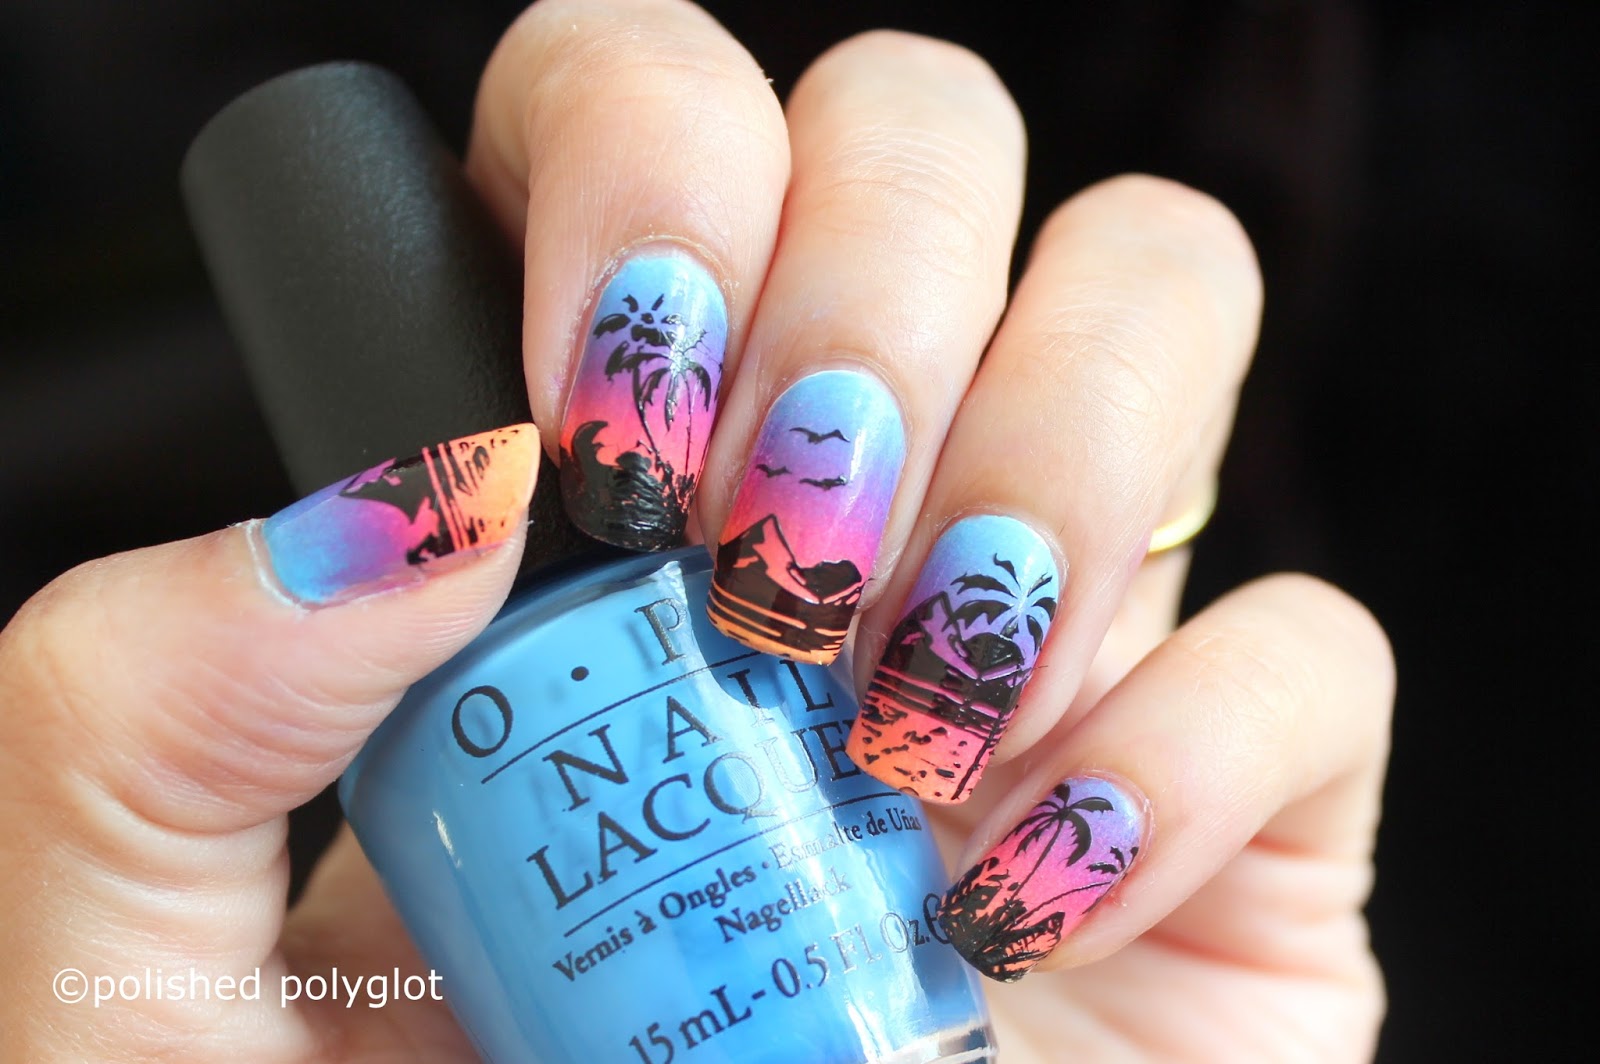
Short on time but still want to rock some beach-inspired nails? These quick and easy designs are perfect for you. One simple design is the sunset ombre nails. Start by painting your nails a light orange or pink color. Then, using a makeup sponge, dab some yellow and red polish onto the tips of your nails to create the ombre effect. This design is perfect for a day at the beach or a summer evening out. If you want something even quicker, try the beach ball nails. Start by painting your nails white and allowing them to dry completely. Then, using a toothpick, create small circles in different colors on each nail to represent beach balls. This design is fun and playful, perfect for a day at the beach with friends.3. Quick and Easy Beach Nail Designs


3. Quick and Easy Beach Nail Designs


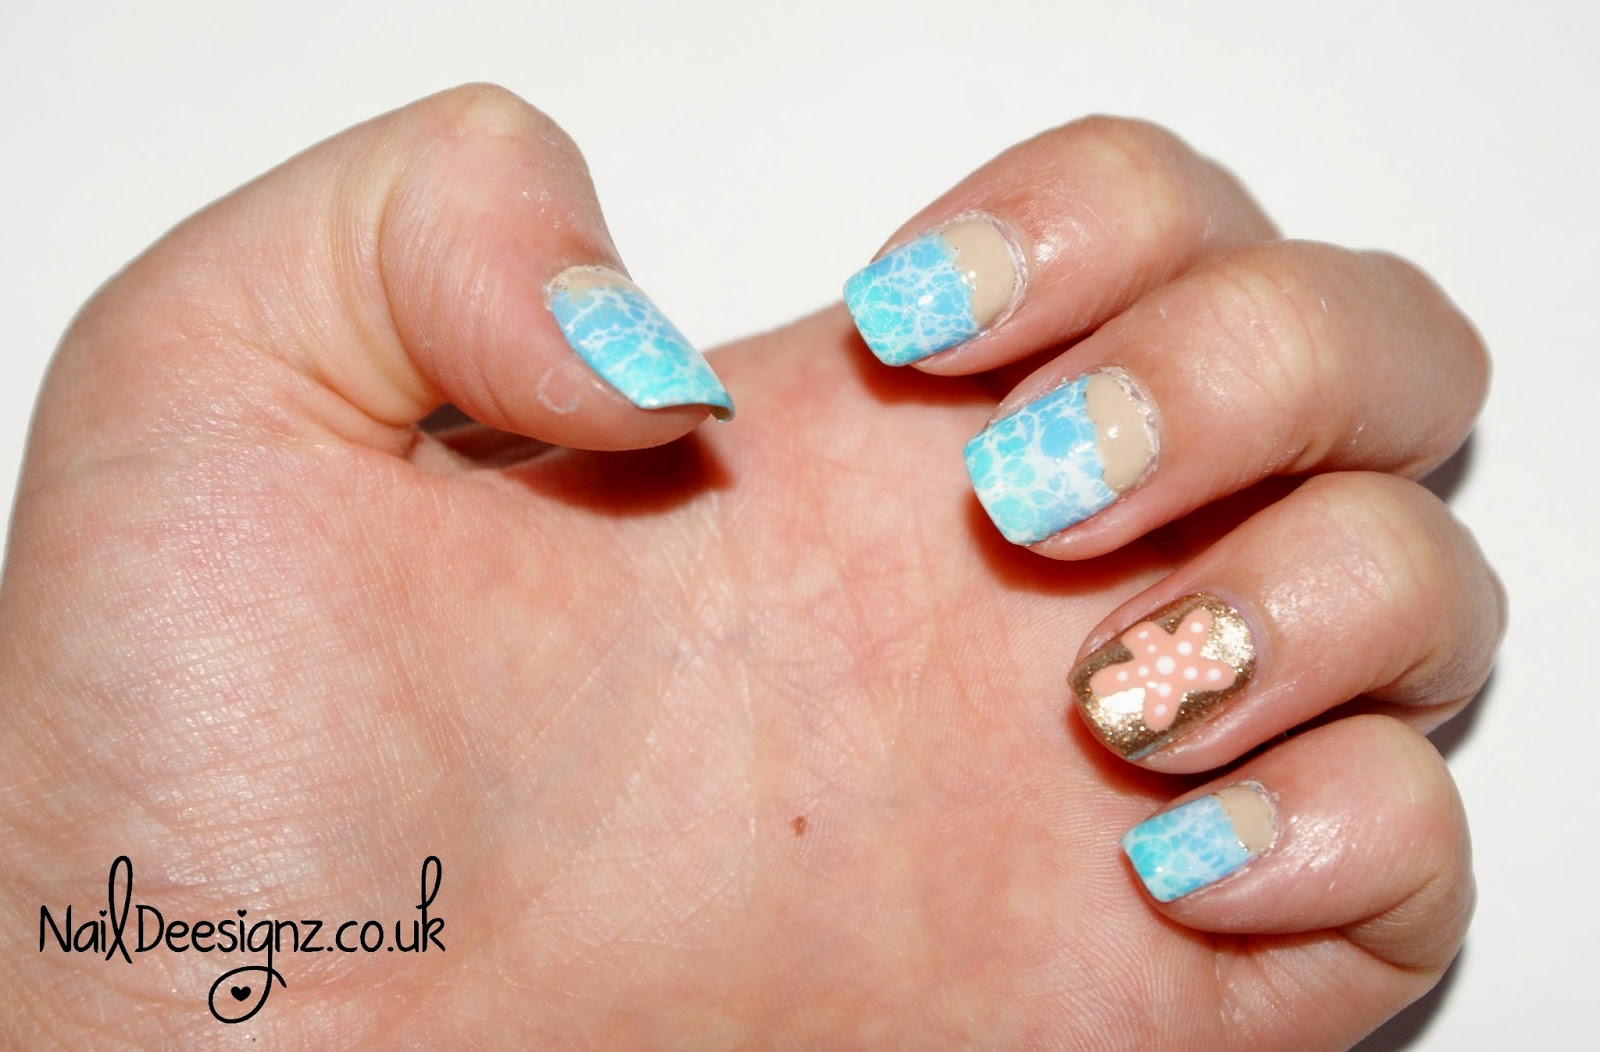
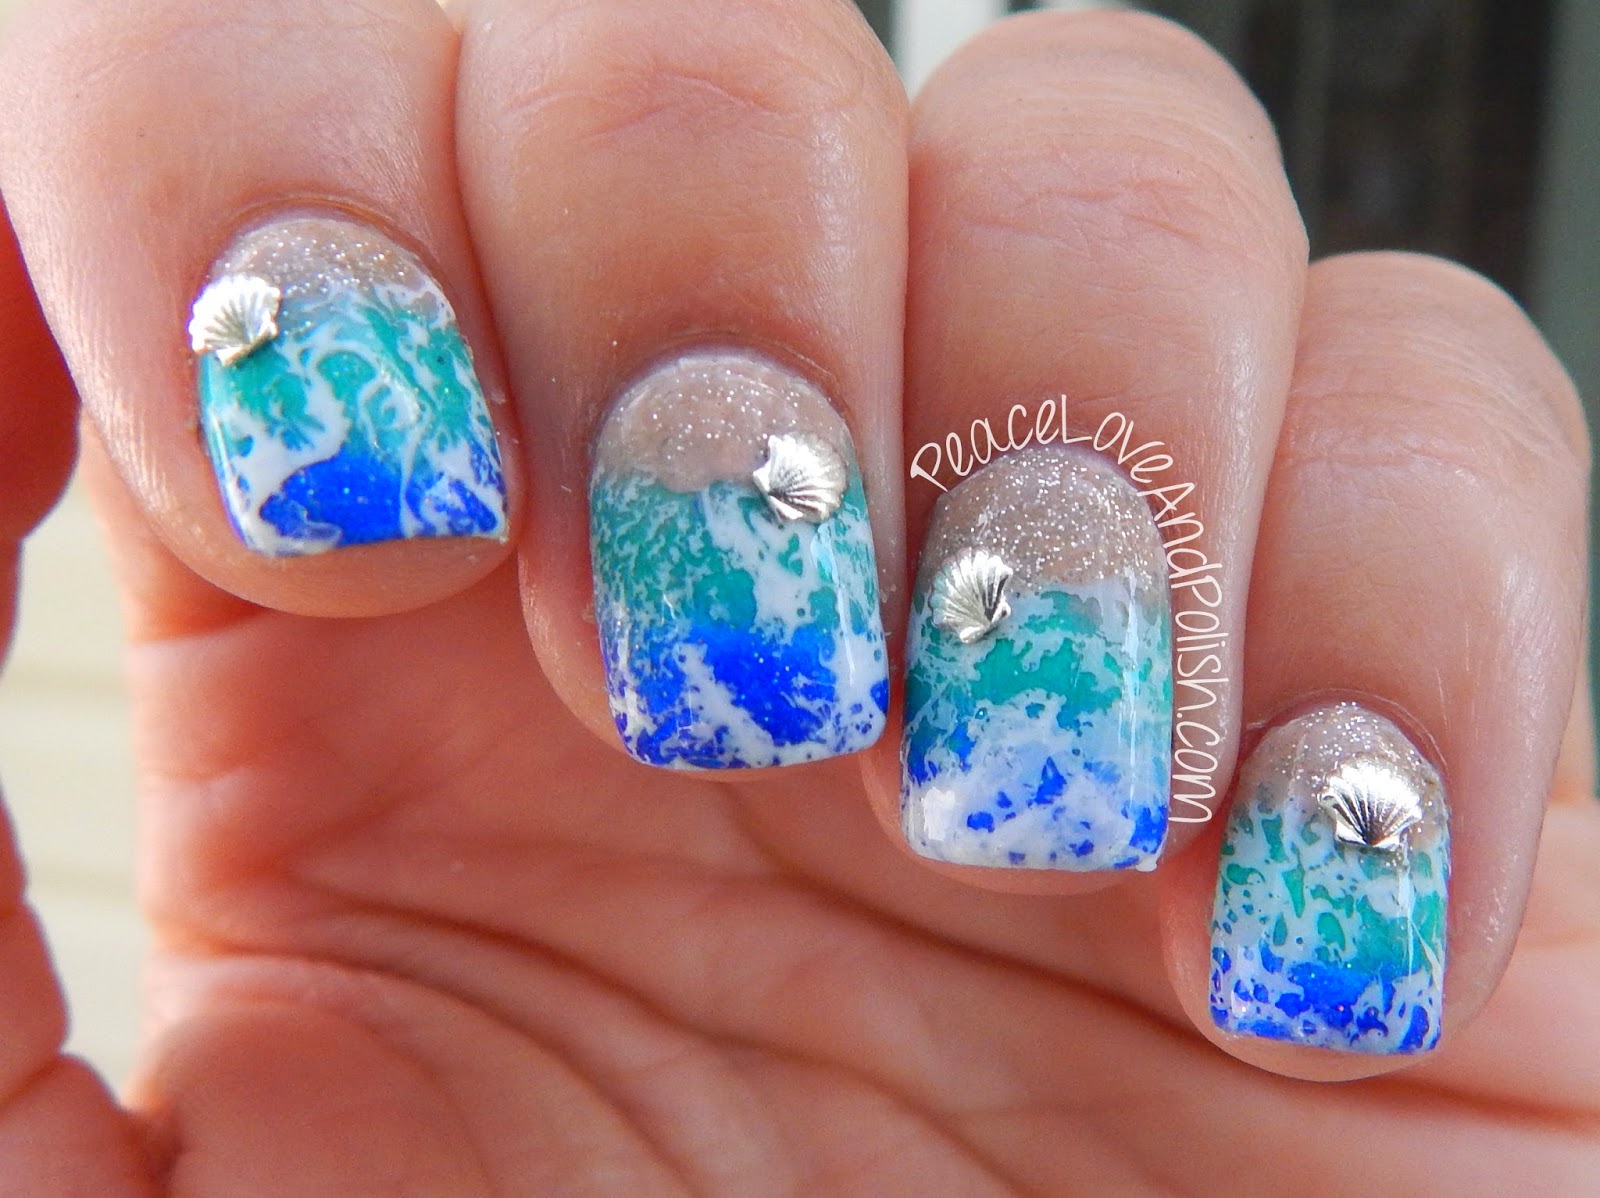
For those who prefer a more minimalist look, there are plenty of simple and elegant beach nail designs to try. One minimalist design is the beach waves nail art. Start by painting your nails a light blue or turquoise color. Then, using a small brush or toothpick, create thin, wavy lines in a darker blue or green shade on each nail. This design is subtle yet captures the beauty of the ocean. Another minimalistic option is the beachy French tip nails. Start by painting your nails a light pink or nude color. Then, using a thin brush, paint a white or light blue line across the tips of your nails to represent the ocean. You can also add a small seashell or starfish decal for a touch of detail. This design is elegant and perfect for any occasion.4. Minimalist Beach Nail Designs

4. Minimalist Beach Nail Designs
If you're looking for a cute and fun beach nail design, there are plenty of options to choose from. One adorable design is the flip flop nails. Start by painting your nails a light blue or turquoise color. Then, using a small brush, create a flip flop shape on each nail using a darker blue or green shade. You can add some glitter or rhinestone embellishments to the flip flops for a touch of sparkle. This design is perfect for a day at the beach or a summer party. For a more playful look, try the beach umbrella nails. Begin by painting your nails a light pink or yellow color. Then, using a thin brush or toothpick, create a small umbrella shape on each nail using a darker color. You can also add some striped details to the umbrellas for a more intricate look. This design is fun and unique, perfect for those who want to stand out.5. Cute and Simple Beach Nail Designs
5. Cute and Simple Beach Nail Designs

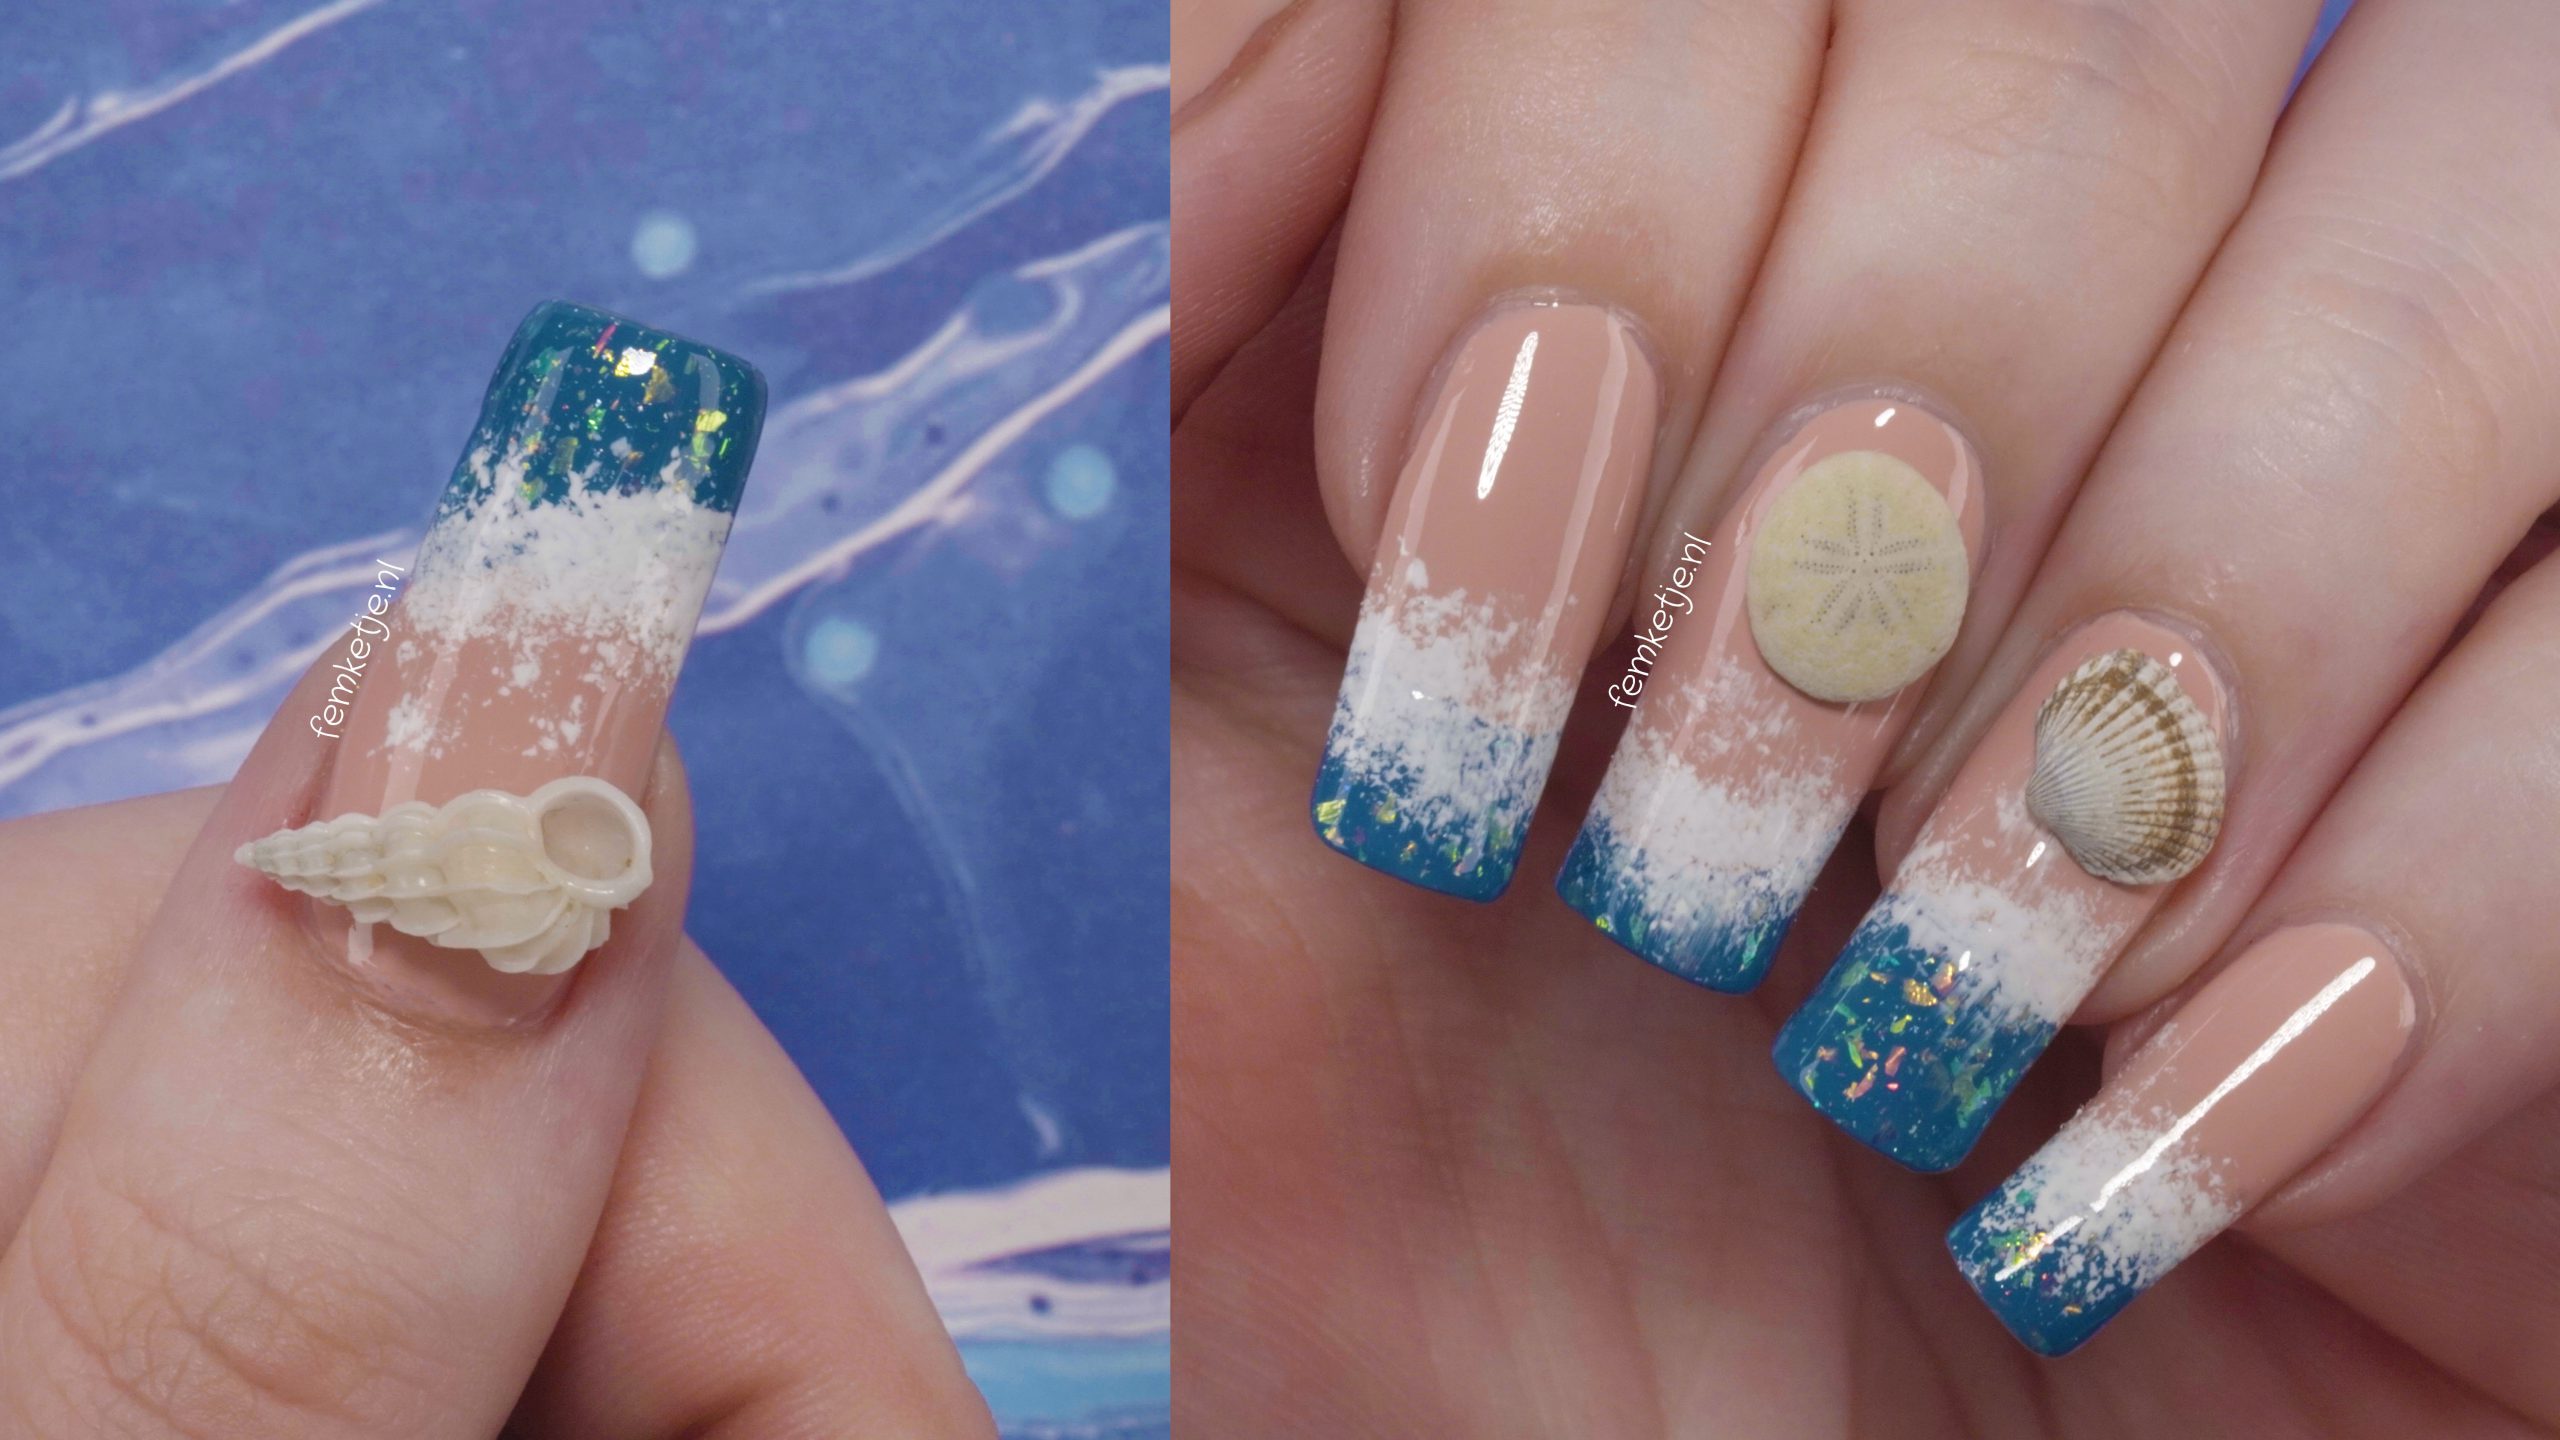
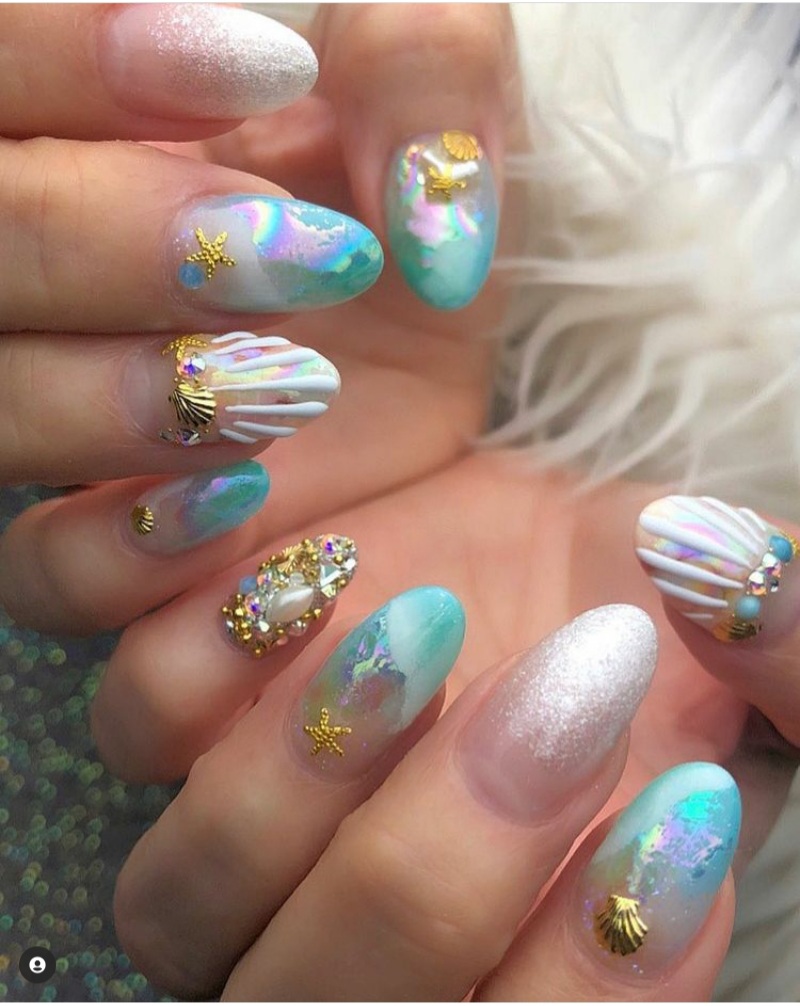
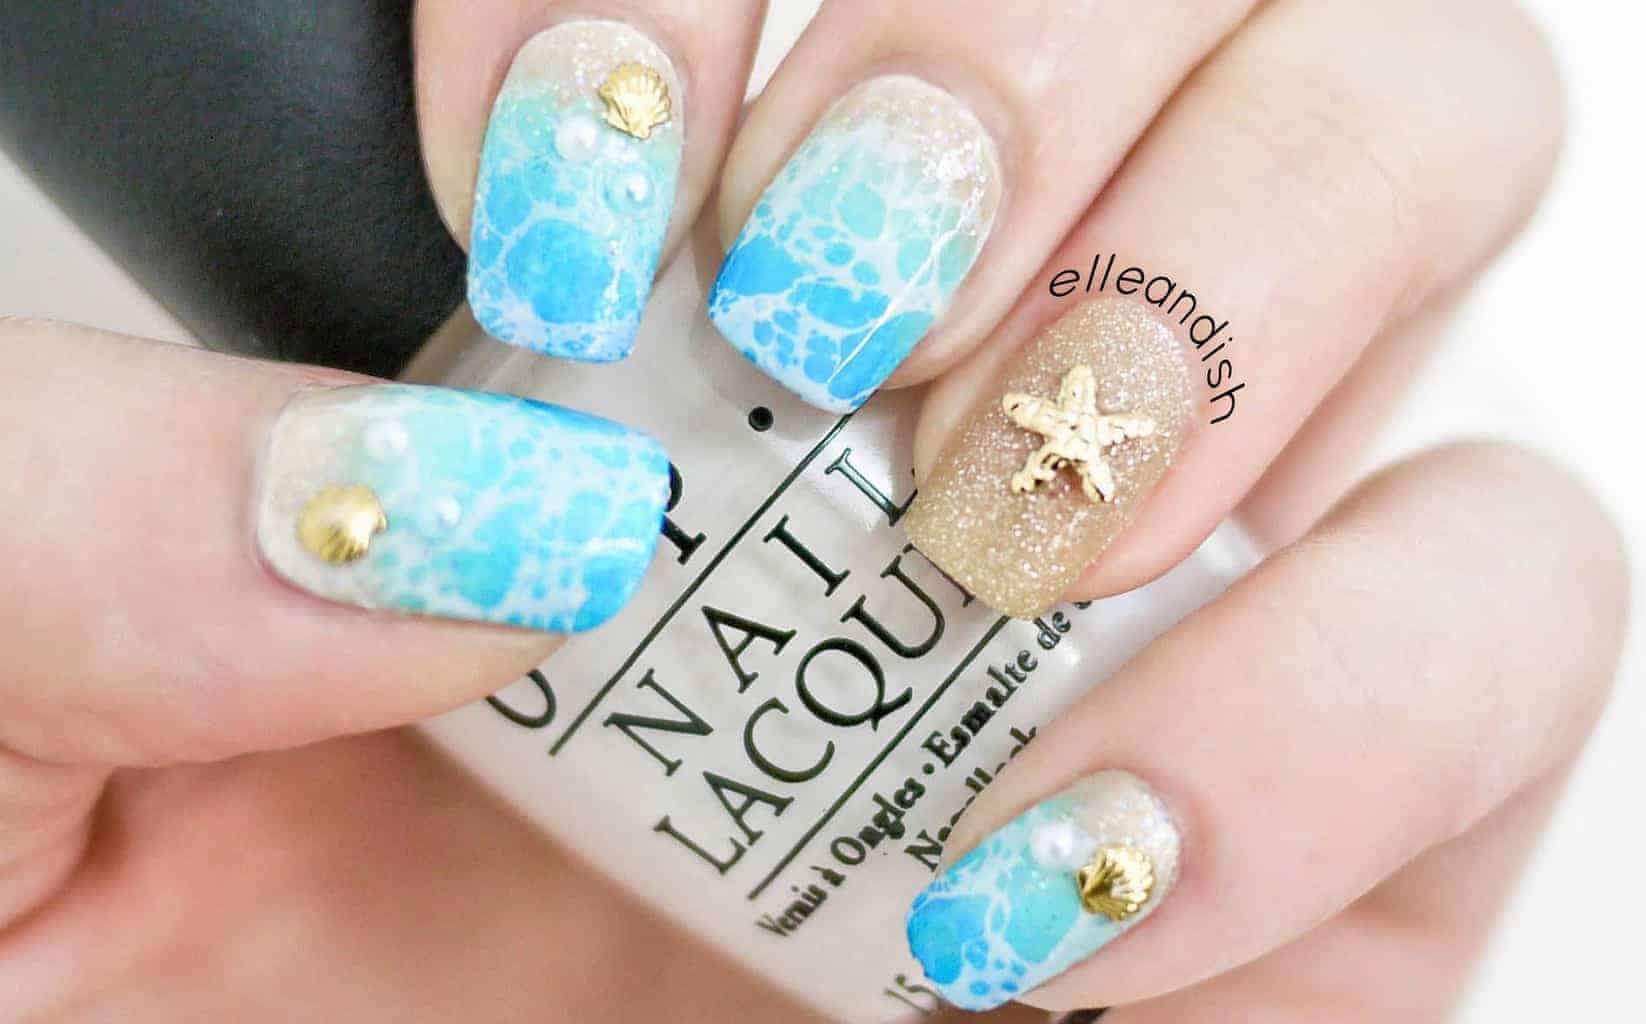
Looking for some do-it-yourself beach nail designs that are easy and budget-friendly? Look no further! One simple design is the sand dollar nails. Begin by painting your nails a light beige or nude color. Then, using a small brush or toothpick, create a sand dollar shape on each nail using white or light pink nail polish. You can also add some glitter or rhinestones to the design for a touch of sparkle. Another DIY option is the mermaid scales nails. Start by painting your nails a light blue or turquoise color. Then, using a makeup sponge, dab on some iridescent nail polish to create a shimmering effect. You can also add some small scales using a small brush or toothpick and a darker shade of blue or green nail polish. This design is perfect for those who want to channel their inner mermaid.6. DIY Beach Nail Designs

6. DIY Beach Nail Designs
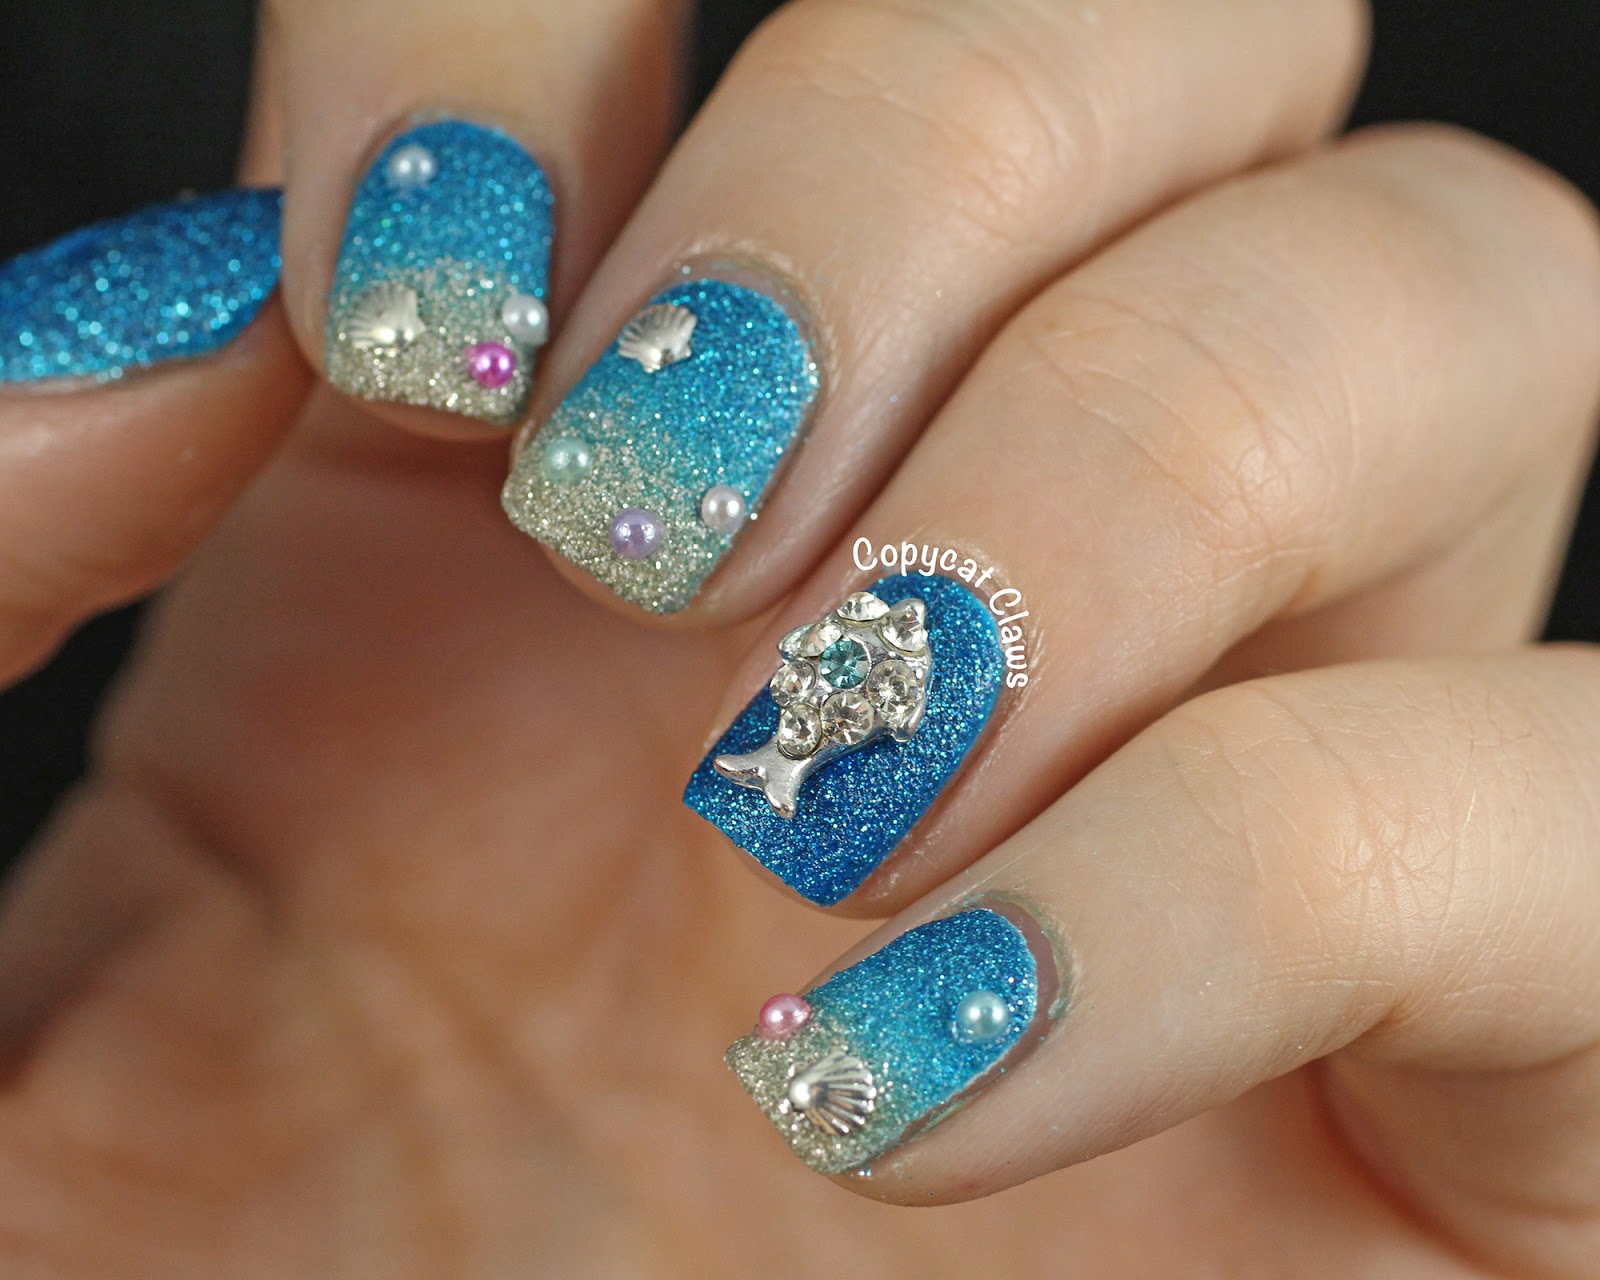
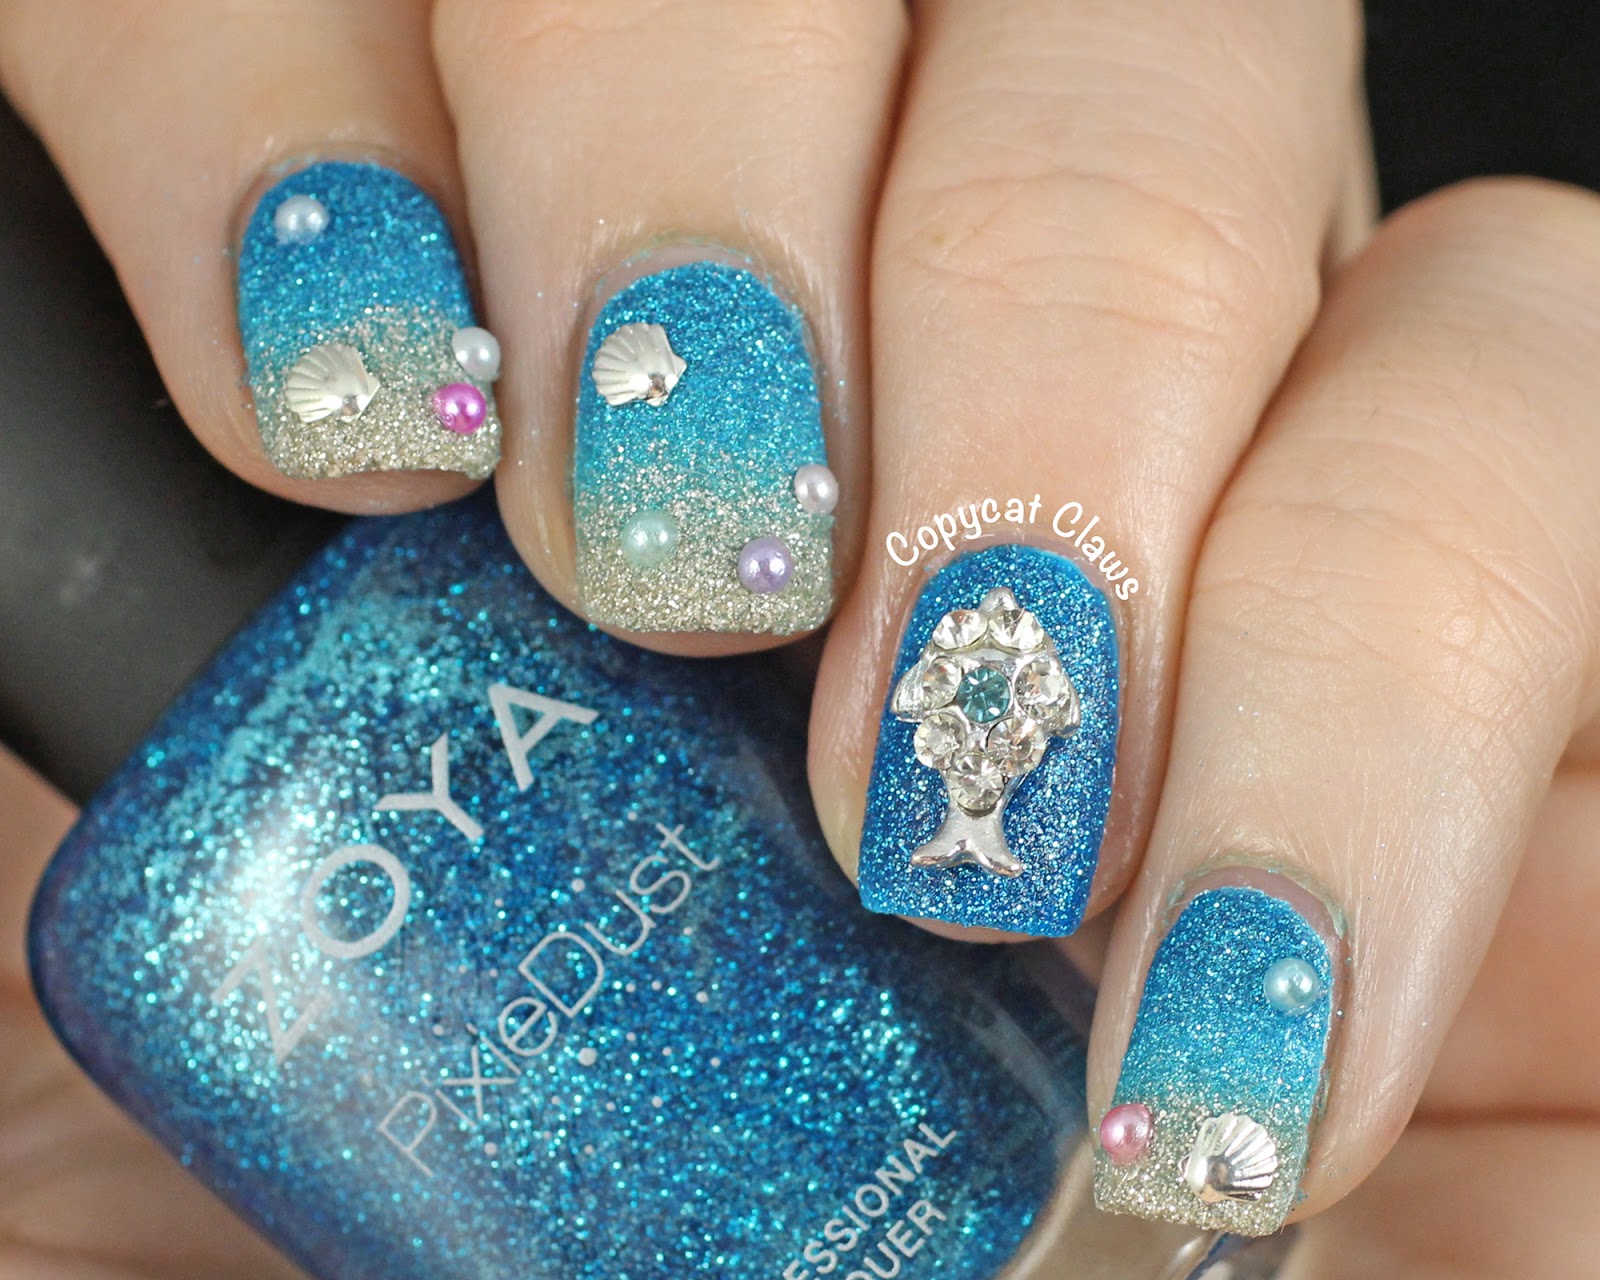
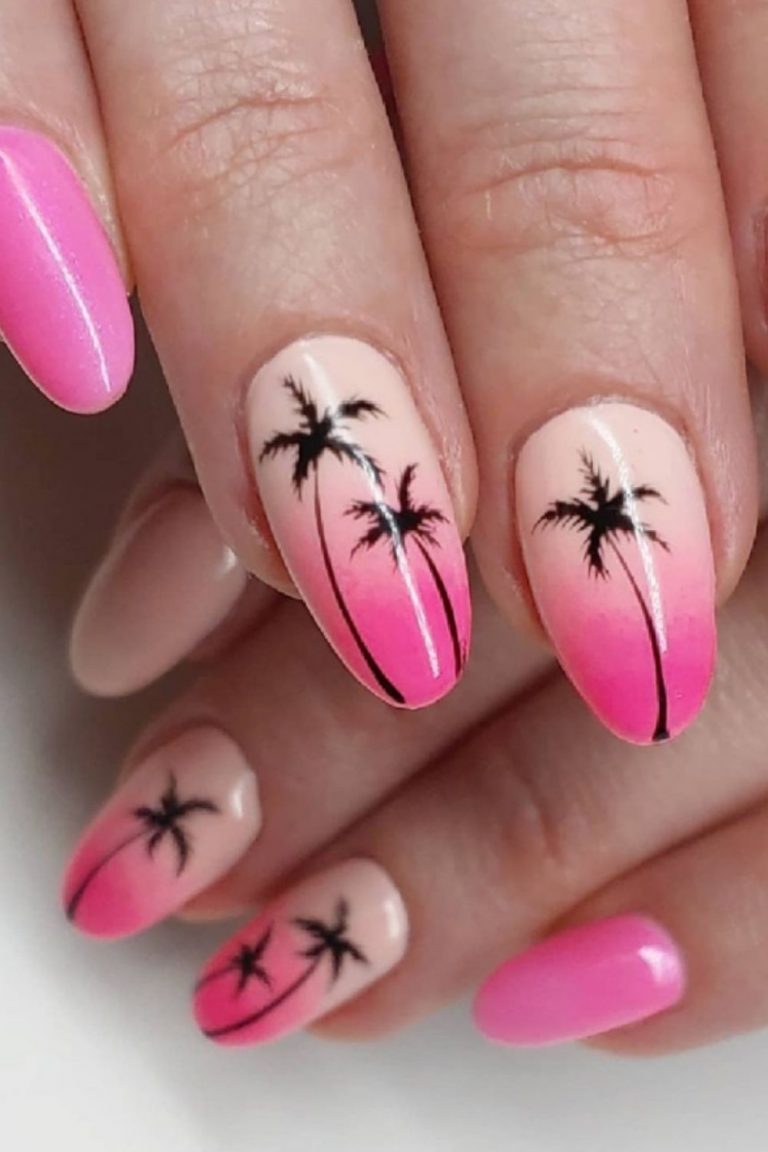
For a more thematic beach nail design, there are plenty of options to choose from. One unique design is the seashell mosaic nails. Start by painting your nails a light blue or turquoise color. Then, using a small brush or toothpick, create small seashell shapes on each nail using white or light pink nail polish. You can also add some pearl embellishments for a touch of elegance. This design is perfect for a beach wedding or special occasion. Another beach-themed design is the tropical sunset nails. Begin by painting your nails a light orange or pink color. Then, using a makeup sponge, dab on some yellow and red polish to create the sunset effect. You can also add some palm tree decals or pineapple designs for a tropical touch. This design is perfect for those who want to bring a piece of the beach with them wherever they go.7. Beach-Themed Nail Designs


7. Beach-Themed Nail Designs


For a more refined and elegant beach nail design, there are plenty of options to choose from. One simple and elegant design is the pearl ombre nails. Start by painting your nails a light pink or nude color. Then, using a makeup sponge, dab on some pearl nail polish to create the ombre effect. You can also add some rhinestones or pearl embellishments for a touch of glamour. This design is perfect for a special occasion or a day at the beach. Another elegant option is the beach wedding nails. Begin by painting your nails a light blue or turquoise color. Then, using a small brush or toothpick, create a small seashell or starfish design on each nail using white or light pink nail polish. You can also add some pearl accents for a touch of elegance. This design is perfect for a beach wedding or any formal event.8. Simple and Elegant Beach Nail Designs

8. Simple and Elegant Beach Nail Designs


For those who love the tropical vibes of the beach, there are plenty of nail designs to choose from. One unique design is the palm tree and flamingo nails. Start by painting your nails a light blue or turquoise color. Then, using a small brush or toothpick, create thin lines in a darker green or black shade to represent palm trees. You can also add a small flamingo decal or hand-painted design for a pop of color. This design is perfect for those who want a playful and tropical look. Another tropical option is the hula girl nails. Begin by painting your nails a light pink or yellow color. Then, using a small brush or toothpick, create a hula girl silhouette on each nail using black nail polish. You can also add some flower accents using a small brush and different colors of nail polish. This design is perfect for those who want to embrace the island spirit.9. Tropical Beach Nail Designs

9. Tropical Beach Nail Designs

For a more whimsical and playful beach nail design, there are plenty of options to choose from. One fun design is the beach ball French tip nails. Start by painting your nails a light blue or turquoise color. Then, using a thin brush, paint a white line across the tips of your nails to represent the ocean. Finally, create small circles in different colors on each nail to represent beach balls. This design is perfect for a day at the beach or a summer party. Another playful option is the beachy doodle nails. Begin by painting your nails a light pink or nude color. Then, using a small brush or toothpick, create small doodles on each nail using different colors of nail polish. You can add anything from palm trees to sunglasses to create a playful and unique design. This design is perfect for those who want to show off their creativity.10. Fun and Playful Beach Nail Designs

10. Fun and Playful Beach Nail Designs
A Fresh Take on Beach Nail Designs: Simple and Stylish
A Nod to the Sea
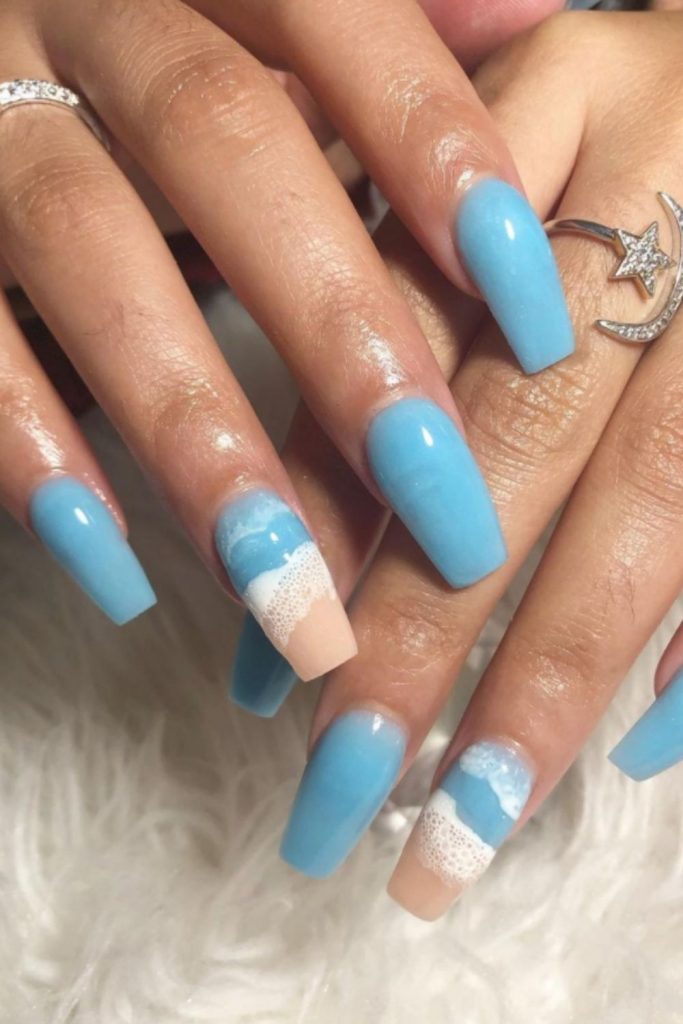
 When it comes to summer nail designs, nothing screams beach vibes more than a simple yet stylish beach nail design. The beauty of this design lies in its versatility – it can be dressed up or down, making it perfect for any occasion. Whether you're lounging by the shore or attending a seaside wedding, this nail design will add a touch of seaside charm to your look.
How to Achieve the Look
 To create this simple beach nail design, you'll need a few essential nail polish colors – a light blue, white, and gold. Begin by painting your nails with the light blue shade as your base. Once dry, use a thin brush to create a white wave design on each nail. Don't worry about making the waves perfect – the beauty of this design is in its imperfections. Next, take the gold polish and add small dots along the edge of the waves to mimic the look of seashells. Finally, seal in your design with a clear topcoat for a glossy finish.
Accessorize for the Beach
 To take your beach nail design to the next level, consider adding some fun and beachy accessories. Attach a tiny seashell or starfish charm to one of your nails for a touch of whimsy. Or, add some small rhinestones to the center of the waves for a bit of sparkle. These small details will elevate your design and make it truly unique.
Why Simple is Best
 With so many nail designs out there, why choose a simple beach design? Well, for starters, it's easy to achieve and doesn't require any special tools or skills. Plus, the simplicity of the design allows for endless variations and personalization. You can switch up the colors, add different accents, or even try different wave patterns. The possibilities are endless, making this design perfect for anyone looking to express their individual style.
In conclusion, a simple beach nail design is the perfect way to add a touch of summer to your look. With its versatility, ease of creation, and endless possibilities, this design is a must-try for anyone looking to elevate their nail game. So grab your polish and get ready to hit the beach with your stylish and beachy nails.
With so many nail designs out there, why choose a simple beach design? Well, for starters, it's easy to achieve and doesn't require any special tools or skills. Plus, the simplicity of the design allows for endless variations and personalization. You can switch up the colors, add different accents, or even try different wave patterns. The possibilities are endless, making this design perfect for anyone looking to express their individual style.
In conclusion, a simple beach nail design is the perfect way to add a touch of summer to your look. With its versatility, ease of creation, and endless possibilities, this design is a must-try for anyone looking to elevate their nail game. So grab your polish and get ready to hit the beach with your stylish and beachy nails.


