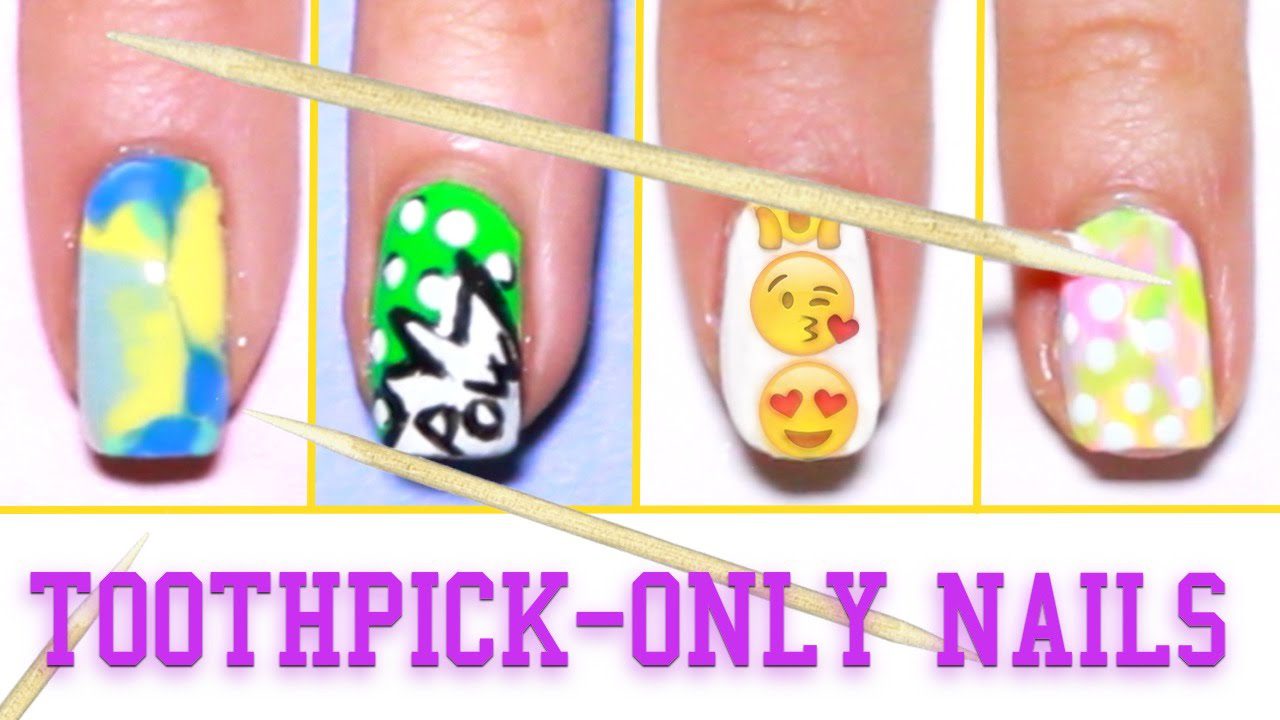
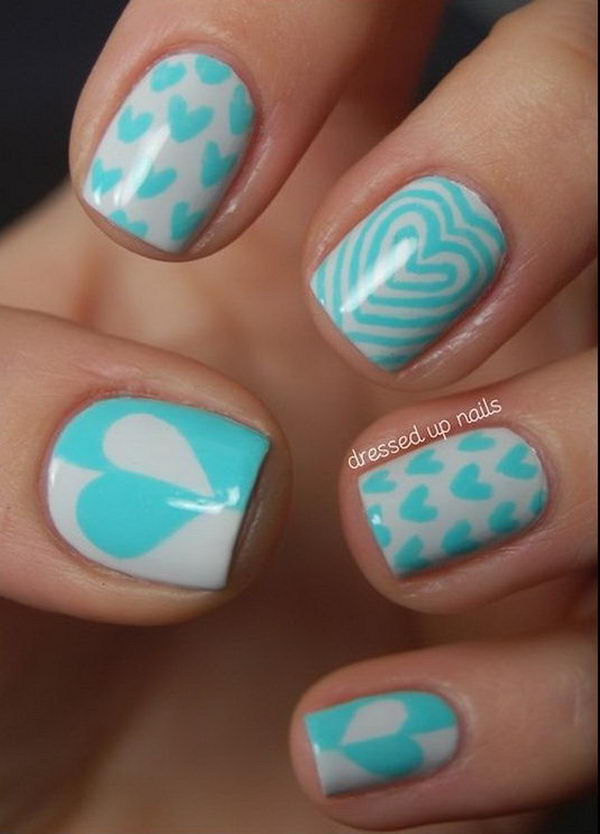
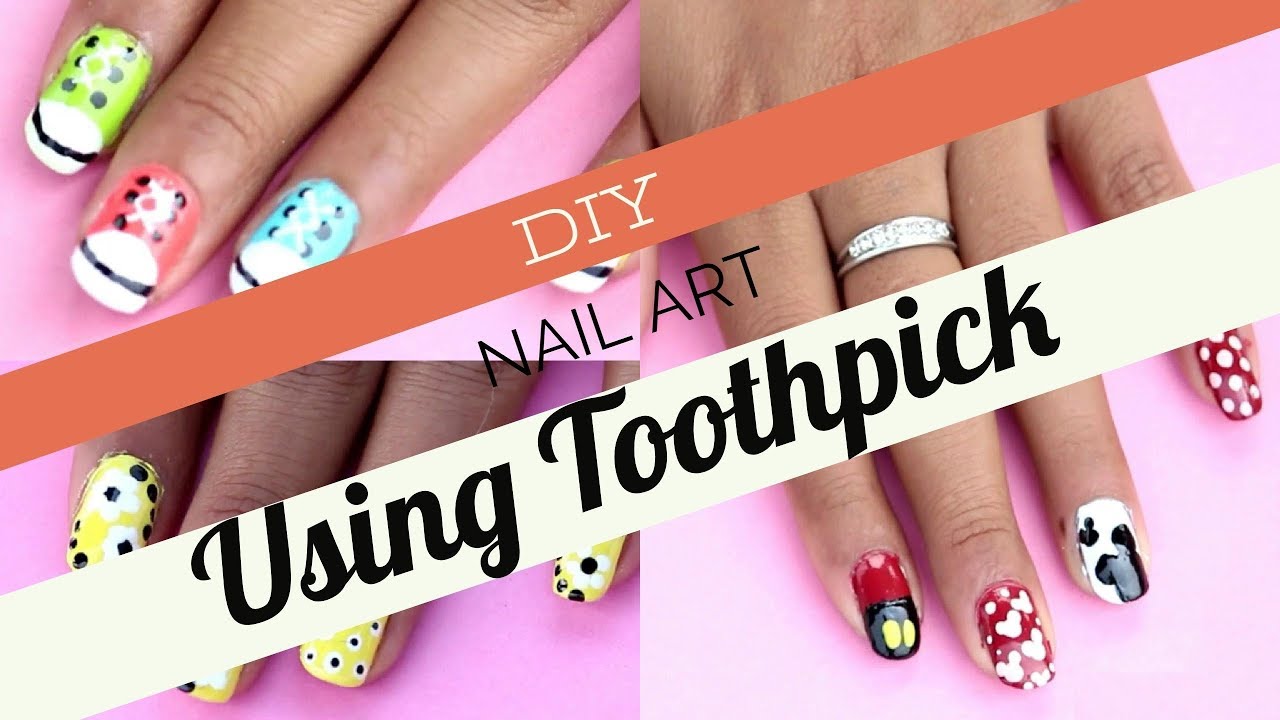
Are you a beginner in the world of nail art and looking for a simple yet stunning design? Look no further, because all you need is a toothpick to create beautiful and easy nail art. You don't need any fancy tools or expensive nail polish, just some creativity and a steady hand. So grab a toothpick and let's get started! To start off, paint your nails with your desired base color. This can be a solid color or a fun pattern, depending on your preference. Once the base color is dry, it's time to get creative with your toothpick. Using the pointed end of the toothpick, you can create small dots on your nails. These dots can be in a pattern, scattered, or even in the shape of a heart or flower. You can also use the flat end of the toothpick to create larger dots or lines on your nails. If you're feeling more adventurous, you can create intricate designs using the toothpick. You can dip the toothpick into different colors of nail polish and create swirls, stripes, or even tiny details like hearts or stars. The possibilities are endless! For a more abstract and modern look, you can try creating a marble effect using a toothpick. Simply drop a few drops of different nail polish colors onto your nail and use the toothpick to swirl them around before they dry. This will create a unique and eye-catching design. With a toothpick, you can also create fun and playful designs like polka dots, animal prints, or even emojis. Just let your imagination run wild and have fun with it. One of the best things about using a toothpick for nail art is that it allows for more precision and control than a regular nail brush. You can easily fix any mistakes or smudges by using the pointed end of the toothpick to clean up the edges. So next time you're in the mood for some DIY nail art, reach for a toothpick and see what kind of design you can come up with. It's a simple and inexpensive way to add some creativity and flair to your nails.1. Easy Nail Art Designs for Beginners Using a Toothpick

1. Easy Nail Art Designs for Beginners Using a Toothpick


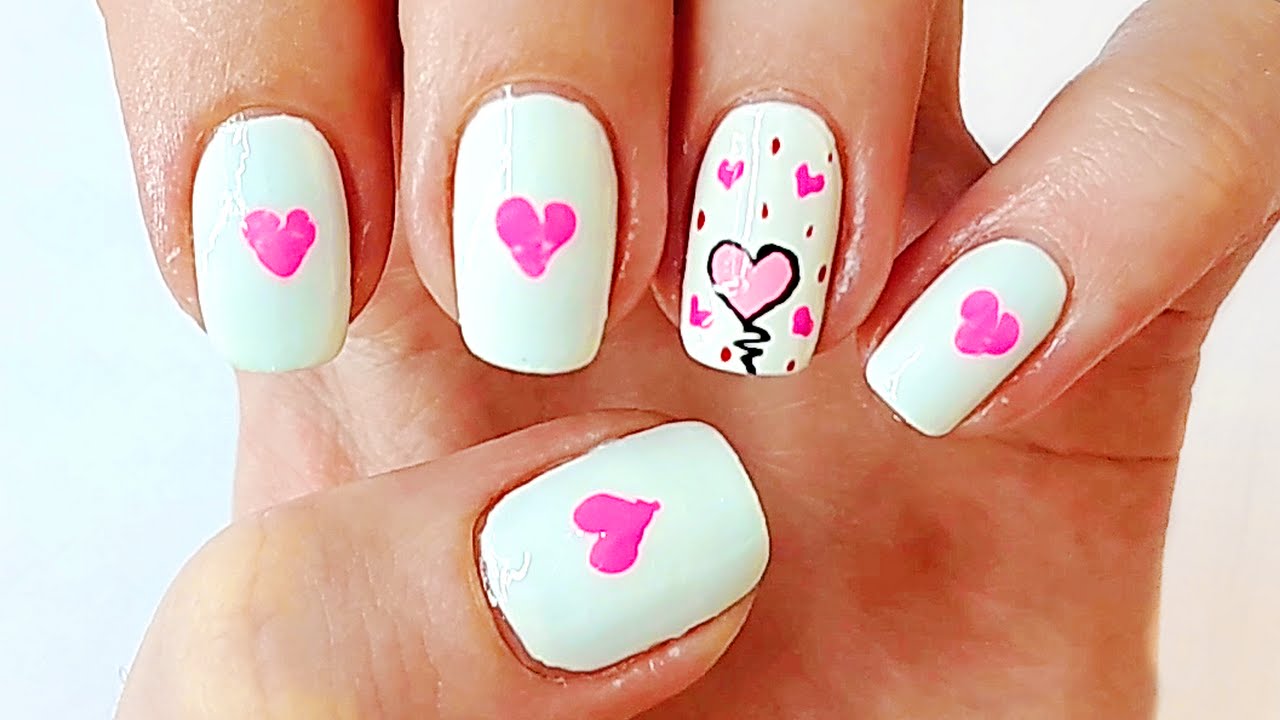

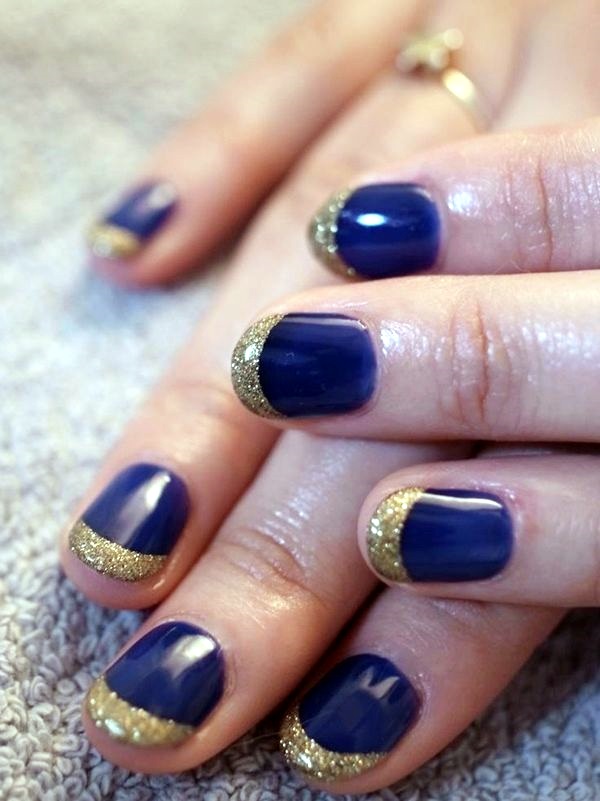
If you're someone who loves simple and minimalist designs, then you'll be pleasantly surprised by the endless possibilities of nail art using a toothpick. With just a few basic techniques, you can create elegant and chic designs that are perfect for any occasion. One of the easiest ways to use a toothpick for nail art is to create a simple and clean line design. Dip the toothpick into your desired nail polish color and carefully drag it across your nail to create a straight line. You can create multiple lines in different colors for a fun and colorful look. Another simple yet stunning design is the half-moon manicure. Paint your nails with a solid base color and let it dry completely. Then, using the pointed end of a toothpick, carefully create a half-moon shape at the base of your nail. You can use a contrasting color or a glitter polish for a more eye-catching look. If you want to add some texture and dimension to your nails, try creating a polka dot design using a toothpick. This design works best with a light-colored base and contrasting dots. Simply dip the end of the toothpick into the nail polish and gently press it onto your nail to create perfect little dots. To create a fun and playful design, you can use the toothpick to create small hearts on your nails. This works best with a light-colored base and a contrasting color for the hearts. Simply use the pointed end of the toothpick to create two dots next to each other, and then drag the toothpick down to connect the two dots and create a heart shape. The best part about using a toothpick for nail art is that you can easily switch up the colors and designs to match your mood or outfit. It's a simple and versatile tool that can create endless possibilities for your nails.2. Simple Nail Art Designs Using a Toothpick


2. Simple Nail Art Designs Using a Toothpick


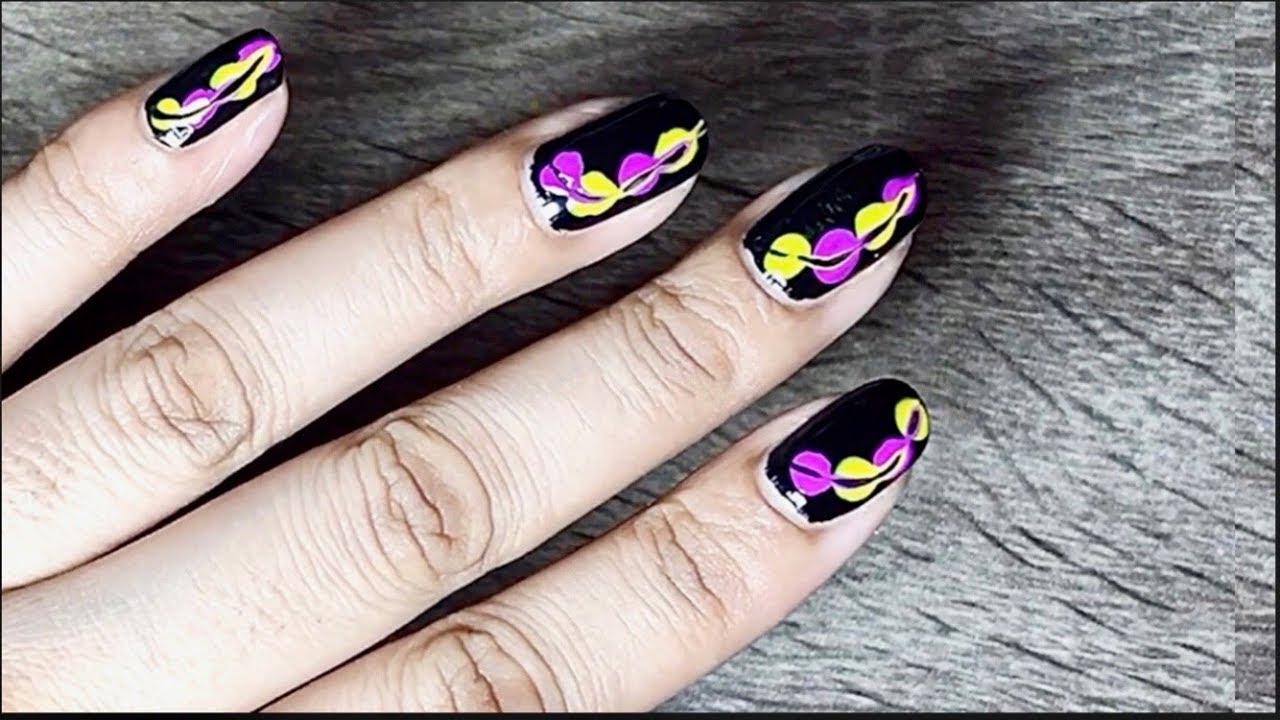
Nail art doesn't always have to be complicated and require expensive tools and products. With a toothpick, you can create beautiful and unique designs right at home. Not only is it budget-friendly, but it also allows for more control and precision in your designs. One of the easiest ways to create DIY nail art with a toothpick is by creating a simple and elegant French tip. Paint your nails with a light base color and let it dry completely. Then, using the pointed end of a toothpick, carefully create a thin white line at the tip of your nail. You can also use different colors for a fun twist on the classic French tip. If you want to add some sparkle to your nails, you can use a toothpick to create a glitter gradient design. Start by painting your nails with a base color and let it dry. Then, dip the flat end of the toothpick into some glitter nail polish and gently dab it onto the top half of your nail, gradually fading it out towards the tip. The toothpick can also be used to create intricate designs like flowers and leaves. Dip the pointed end of the toothpick into different colors of nail polish and carefully create small dots and lines to create a floral design on your nails. It may take some practice, but the end result is worth it. For a more abstract and modern look, you can try creating a geometric design using a toothpick. Simply use the toothpick to create different shapes and lines on your nails, and fill them in with different colors for a fun and unique design. With a toothpick, you can let your creativity run wild and experiment with different designs and techniques. It's a fun and easy way to create your own DIY nail art at home.3. DIY Nail Art with Toothpick


3. DIY Nail Art with Toothpick


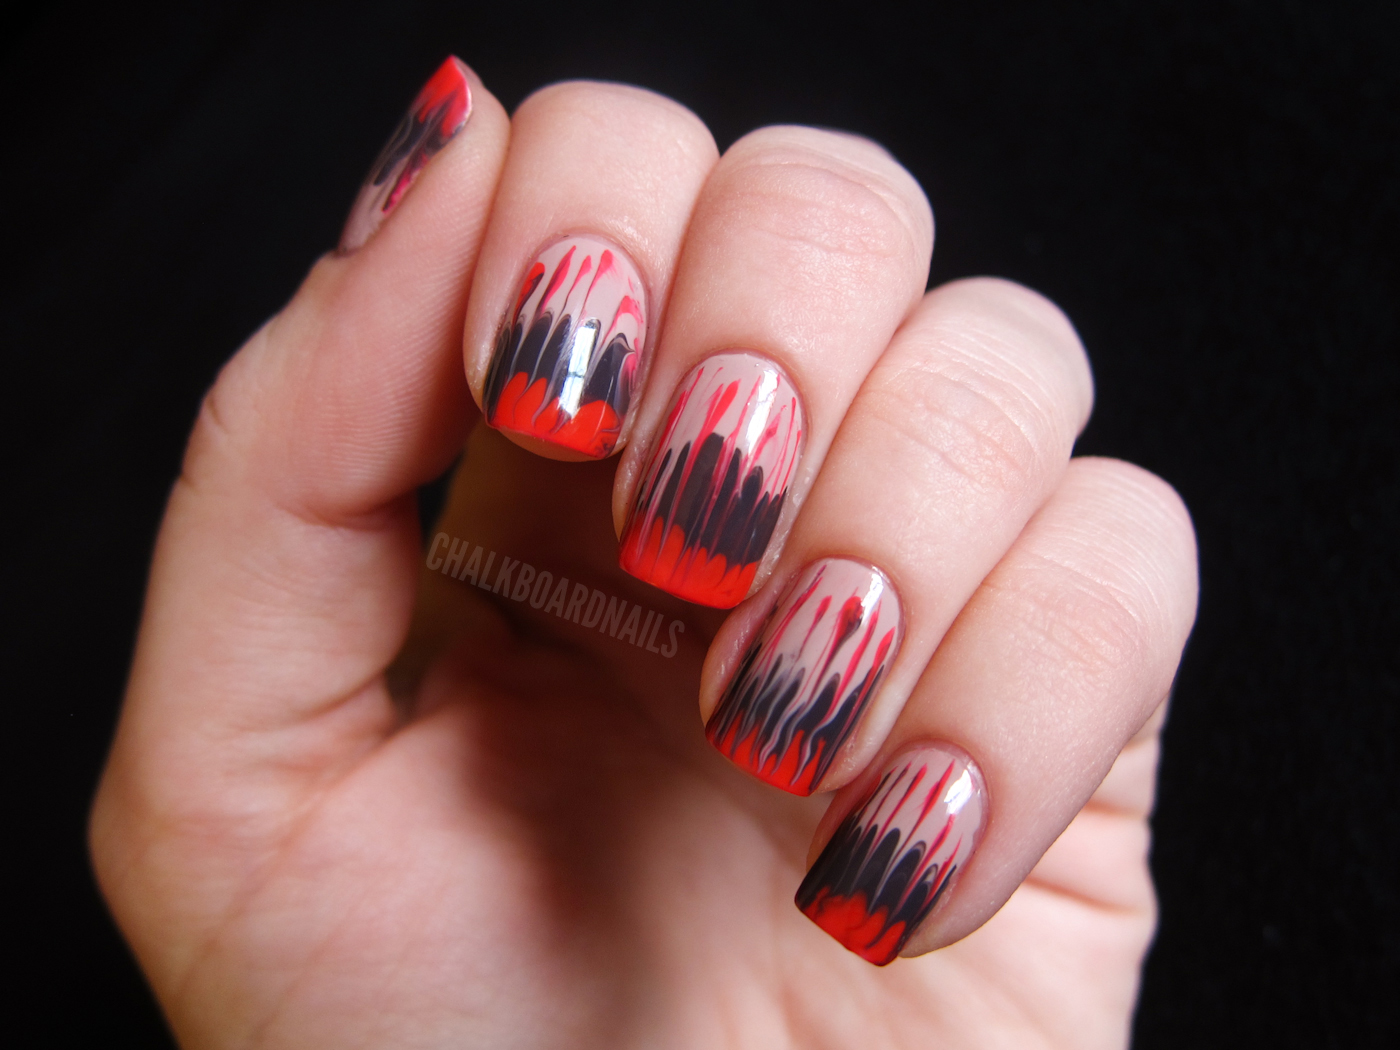
If you're someone who loves to switch up your nail designs frequently, then using a toothpick is the perfect tool for you. It's quick, easy, and allows for more control and precision in your designs. With just a few simple techniques, you can create stunning nail designs in no time. One of the easiest and quickest ways to use a toothpick for nail art is to create a polka dot design. Simply dip the end of the toothpick into your desired nail polish color and gently press it onto your nail to create perfect little dots. You can create a scattered pattern or a more organized pattern, depending on your preference. If you're feeling more adventurous, you can try creating a marble effect using a toothpick. Drop a few drops of different nail polish colors onto your nail and use the toothpick to swirl them around before they dry. This will create a unique and eye-catching design in just a few minutes. For a fun and playful design, you can use a toothpick to create tiny hearts on your nails. This works best with a light-colored base and a contrasting color for the hearts. Simply use the pointed end of the toothpick to create two dots next to each other, and then drag the toothpick down to connect the two dots and create a heart shape. If you want to add some texture to your nails, you can create a raised dot design using a toothpick. Simply dip the pointed end of the toothpick into some nail polish and gently press it onto your nail to create small raised dots. You can create a pattern or randomly place the dots for a unique look. With a toothpick, you can create beautiful and intricate designs in a matter of minutes. It's a quick and easy way to add some creativity and flair to your nails.4. Quick and Easy Nail Designs with Toothpick

4. Quick and Easy Nail Designs with Toothpick


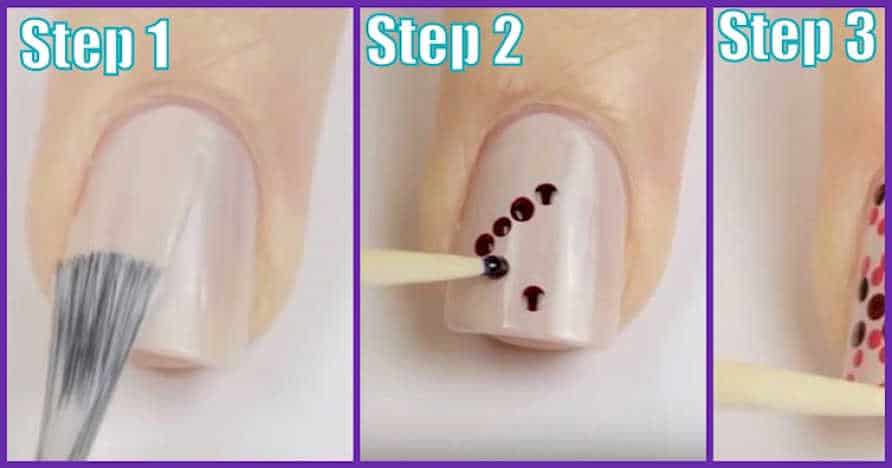
If you're new to the world of nail art, using a toothpick may seem a bit intimidating. But fear not, because with a bit of practice and some guidance, you can create stunning nail designs using just a toothpick. Here's a step-by-step tutorial on how to create a simple yet elegant design using a toothpick. Step 1: Start off by painting your nails with a base color of your choice. This can be a solid color or a fun pattern, depending on your preference. Let it dry completely before moving on to the next step. Step 2: Dip the pointed end of a toothpick into a different color of nail polish. Carefully create small dots on your nail using the toothpick. These dots can be in a pattern, scattered, or even in the shape of a heart or flower. Step 3: To create larger dots or lines, use the flat end of the toothpick instead. You can also use the flat end to create swirls or other intricate designs on your nails. Step 4: For a more abstract and modern look, you can try creating a marble effect using a toothpick. Simply drop a few drops of different nail polish colors onto your nail and use the toothpick to swirl them around before they dry. Step 5: If you make any mistakes or smudges, use the pointed end of the toothpick to clean up the edges and fix them. Step 6: Once your design is complete, let it dry completely before applying a top coat to seal in your design and add some shine. With this tutorial, you can create a simple and beautiful nail art design using just a toothpick. So next time you're in the mood for some DIY nail art, reach for a toothpick and let your creativity shine.5. Toothpick Nail Art Tutorial


5. Toothpick Nail Art Tutorial


Who says nail art has to be complicated and time-consuming? With a toothpick, you can create cute and simple designs that are perfect for any occasion. Whether you're a beginner or a nail art pro, these designs are easy to do and will make your nails stand out. One of the simplest designs you can create with a toothpick is a polka dot design. Simply dip the end of the toothpick into your desired nail polish color and gently press it onto your nail to create perfect little dots. You can create a scattered pattern or a more organized pattern, depending on your preference. If you're feeling more creative, you can use a toothpick to create a fun and playful design like animal prints or emojis. Simply use the pointed end of the toothpick to create small dots and lines to create your desired design. This works best with a light-colored base and a contrasting color for the design. The toothpick can also be used to create a raised dot design, which adds texture and dimension to your nails. Dip the pointed end of the toothpick into nail polish and gently press it onto your nail to create small raised dots. You can create a pattern or randomly place the dots for a unique look. For a more elegant and chic design, you can use a toothpick to create a French tip. Paint your nails with a light base color and let it dry completely. Then, using the pointed end of a toothpick, carefully create a thin white line at the tip of your nail. You can also use different colors for a fun twist on the classic French tip. With a toothpick, you can create cute and simple designs that are perfect for any occasion. So next time you're in the mood for some DIY nail art, grab a toothpick and see what kind of design you can come up with.6. Cute and Simple Nail Designs with Toothpick


6. Cute and Simple Nail Designs with Toothpick


If you're someone who loves a clean and simple look, then minimalist nail art is the perfect choice for you. And what better tool to use than a toothpick? It allows for more control and precision in your designs, making it perfect for creating minimalist nail art. One of the easiest ways to create minimalist nail art using a toothpick is to create a simple line design. Dip the toothpick into your desired nail polish color and carefully drag it across your nail to create a straight line. You can create multiple lines in different colors for a fun and colorful look. If you want to add a pop of color to your nails, you can use a toothpick to create a half-moon manicure. Paint your nails with a solid base color and let it dry completely. Then, using the pointed end of a toothpick, carefully create a half-moon shape at the base of your nail. You can use a contrasting color or a glitter polish for a more eye-catching look. The toothpick can also be used to create a simple but elegant French tip. Paint your nails with a light base color and let it dry completely. Then, using the pointed end of a toothpick, carefully create a thin white line at the tip of your nail. You can also use different colors for a fun twist on the classic French tip. For a subtle and delicate design, you can use a toothpick to create small dots on your nails. This works best with a light-colored base and a contrasting color for the dots. Simply use the pointed end of the toothpick to create perfect little dots on your nails. With a toothpick, you can create minimalist nail art that is simple yet stunning. It's a budget-friendly and easy way to add some creativity and flair to your nails.7. Minimalist Nail Art with Toothpick
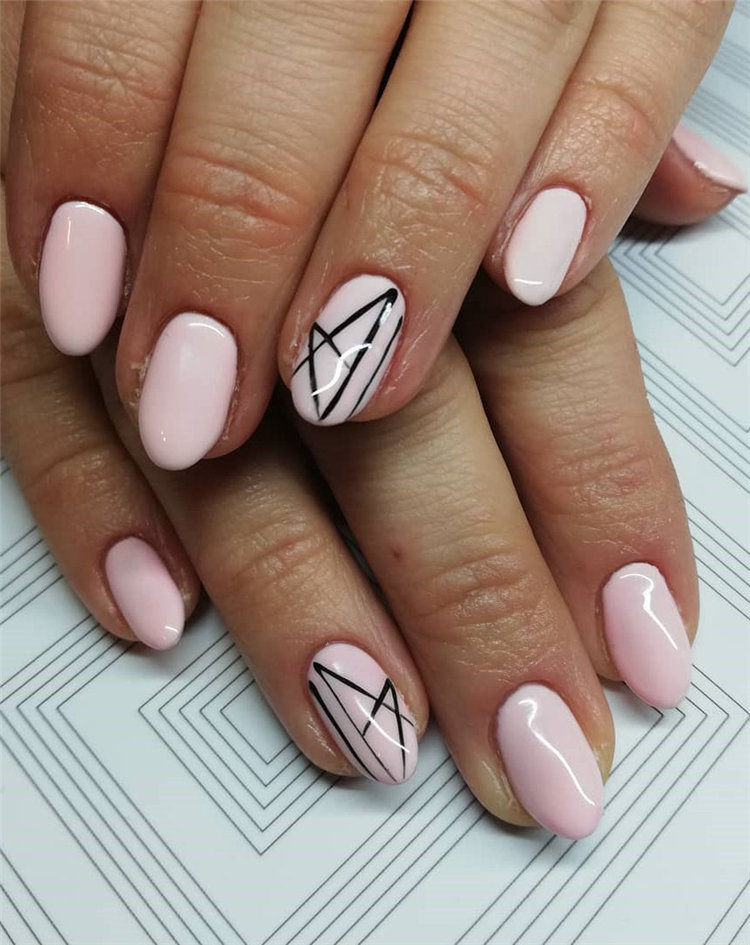

7. Minimalist Nail Art with Toothpick


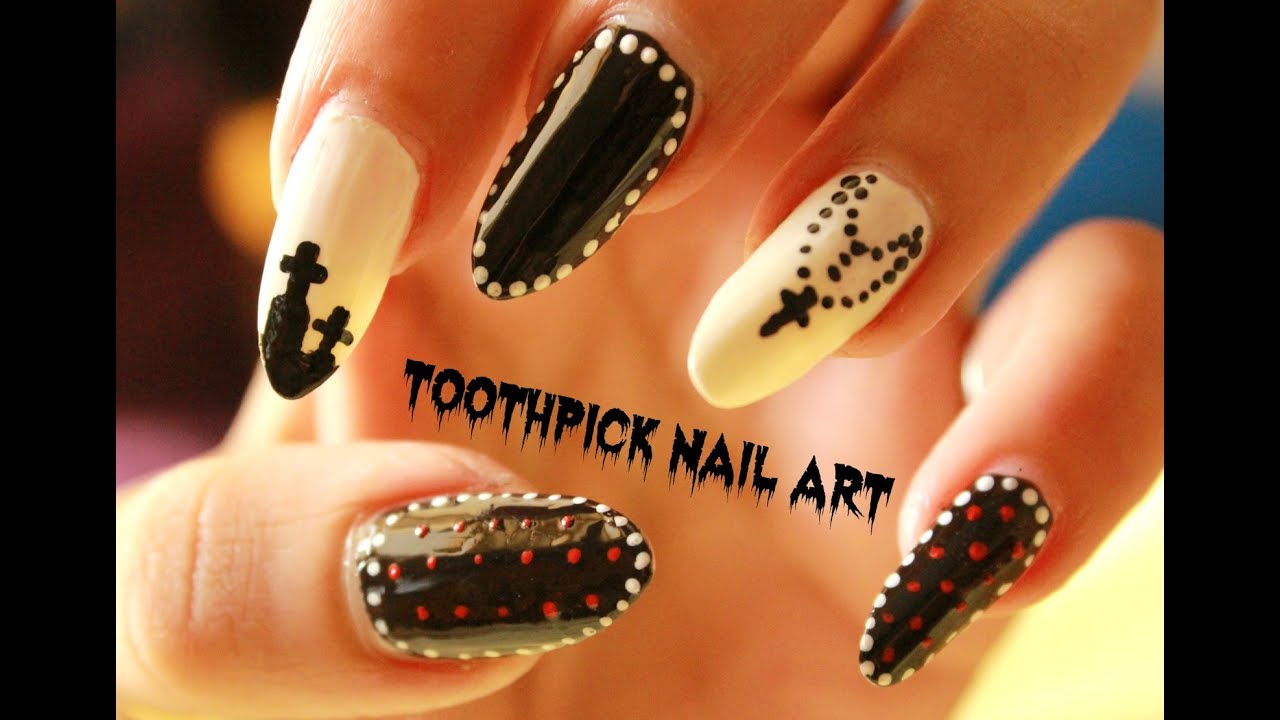
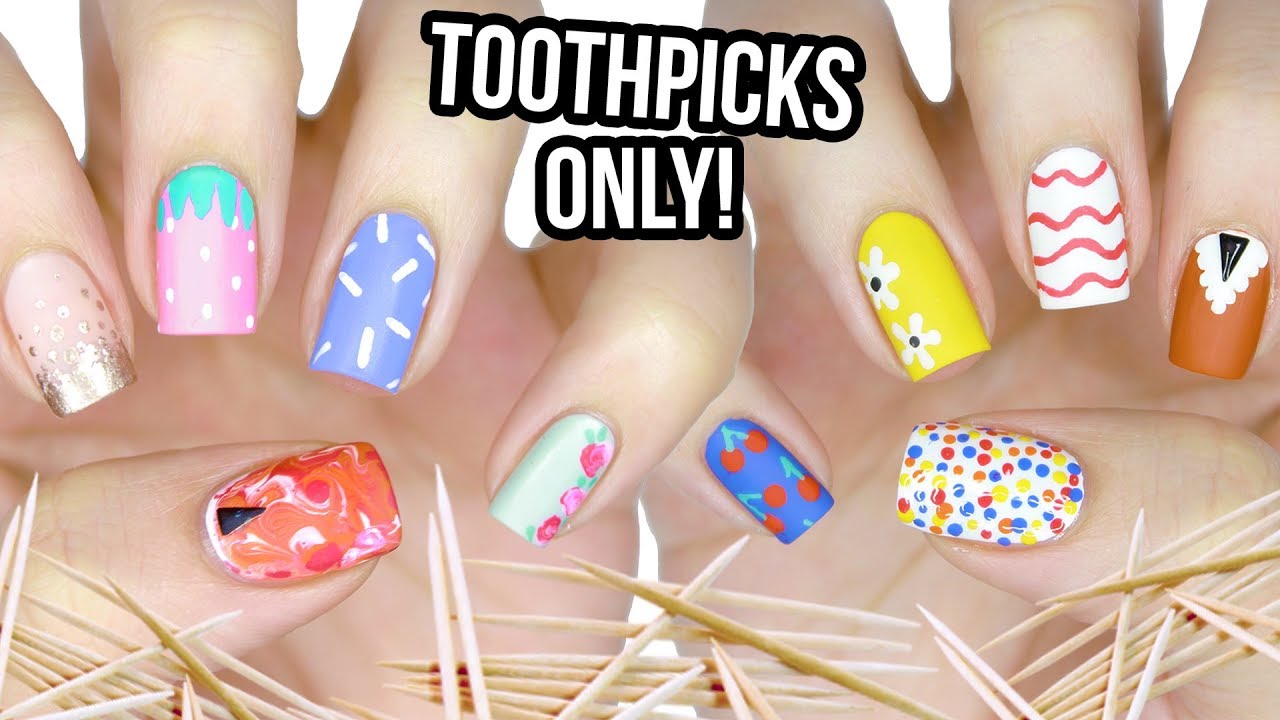
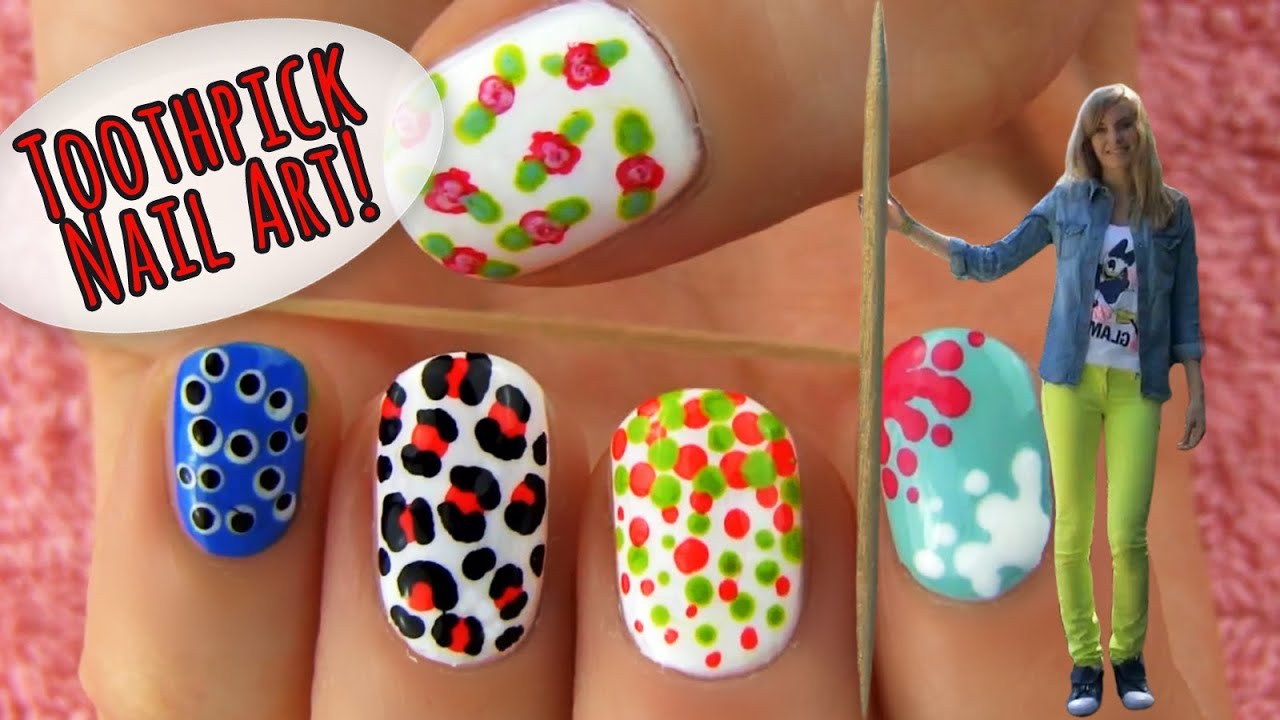
If you're someone who loves to experiment with different nail designs, then using a toothpick is the perfect tool for you. It's versatile, easy to use, and allows for more precision in your designs. Here are some toothpick nail art ideas to inspire your next manicure. 1. Rainbow Dots: Dip the end of a toothpick into different colors of nail polish and create small dots in a rainbow pattern on your nails. 2. Glitter Gradient: Create a glitter gradient on your nails by dipping the flat end of a toothpick into glitter nail polish and gently dabbing it onto your nails. 3. Abstract Lines: Use a toothpick to create abstract lines and shapes on your nails using different colors of nail polish. 4. Floral Design: Create a delicate floral design on your nails by using the toothpick to create small dots and lines in different colors. 5. Polka Dot Tips: Paint your nails with a solid base color and use a toothpick to create polka dots at the tips of your nails. 6. Marble Nails: Create a marble effect on your nails by swirling different colors of nail polish using a toothpick. 7. Heart Tips: Create a fun and playful look by using a toothpick to create tiny hearts at the tips of your nails. 8. Animal Print: Use the pointed end of a toothpick to create animal prints like leopard or zebra on your nails.8. Toothpick Nail Art Ideas


8. Toothpick Nail Art Ideas


The Versatility of Simple Nail Designs Using Toothpicks

Creating Unique and Beautiful Nail Designs
 When it comes to nail designs, there are endless possibilities to choose from. With the use of
toothpicks
, you can create unique and beautiful designs on your nails that are not only easy to do but also budget-friendly. Whether you're a beginner or a pro at nail art, using a toothpick can add a whole new level of creativity to your nail designs.
When it comes to nail designs, there are endless possibilities to choose from. With the use of
toothpicks
, you can create unique and beautiful designs on your nails that are not only easy to do but also budget-friendly. Whether you're a beginner or a pro at nail art, using a toothpick can add a whole new level of creativity to your nail designs.
Why Use Toothpicks?
 Toothpicks are small, thin and pointed objects that are commonly used to remove food particles from teeth. However, they can also be great tools for creating intricate nail designs. The pointed end of a toothpick can act as a fine brush, making it easier to create precise lines and details on your nails. They are also easily accessible and can be found in most households, making them a convenient tool for nail art enthusiasts.
Simple Nail Designs with Toothpicks
 There are various ways to use toothpicks to create simple nail designs. Some ideas include using them to create polka dots, stripes, or even intricate floral designs. You can also use them to create a marble effect by swirling different colored nail polishes together. The possibilities are endless, and with a little bit of practice, you can create stunning designs on your nails.
Step-by-Step Guide to Creating a Simple Nail Design with Toothpicks
 To get you started, here's a step-by-step guide on how to create a simple nail design using toothpicks:
Step 1:
Start by painting your nails with a base color and let it dry completely.
Step 2:
Dip the pointed end of the toothpick into a contrasting nail polish color.
Step 3:
Gently dot the nail polish onto your nails in your desired pattern. You can create polka dots, stripes, or any design that you like.
Step 4:
Use the other end of the toothpick or a clean toothpick to create smaller dots or add details to your design.
Step 5:
Let your design dry completely before adding a top coat to seal and protect your nail art.
To get you started, here's a step-by-step guide on how to create a simple nail design using toothpicks:
Step 1:
Start by painting your nails with a base color and let it dry completely.
Step 2:
Dip the pointed end of the toothpick into a contrasting nail polish color.
Step 3:
Gently dot the nail polish onto your nails in your desired pattern. You can create polka dots, stripes, or any design that you like.
Step 4:
Use the other end of the toothpick or a clean toothpick to create smaller dots or add details to your design.
Step 5:
Let your design dry completely before adding a top coat to seal and protect your nail art.
Final Thoughts
 Using toothpicks for simple nail designs is not only easy but also allows you to let your creativity run wild. With a little bit of practice and patience, you can create unique and beautiful designs on your nails that will surely catch everyone's attention. So, next time you're looking to add some fun and creativity to your nail game, don't forget to reach for your trusty toothpicks.


