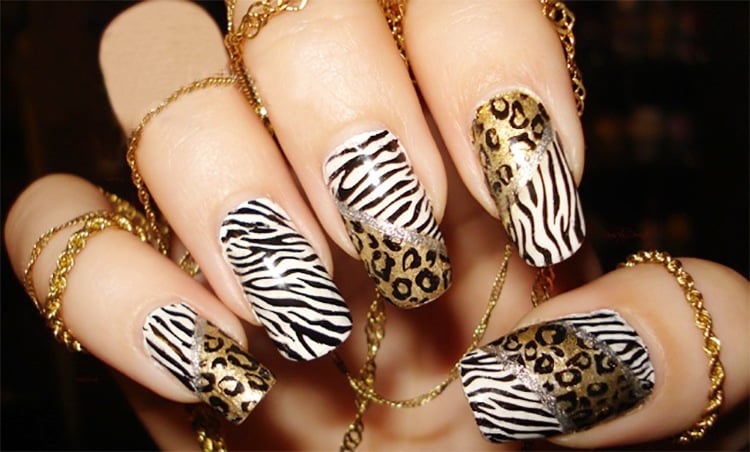
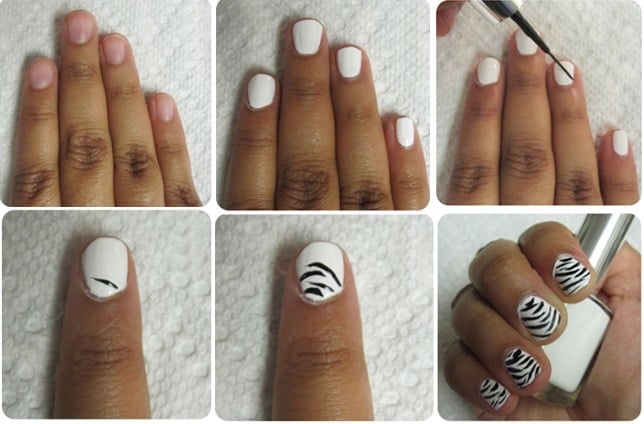
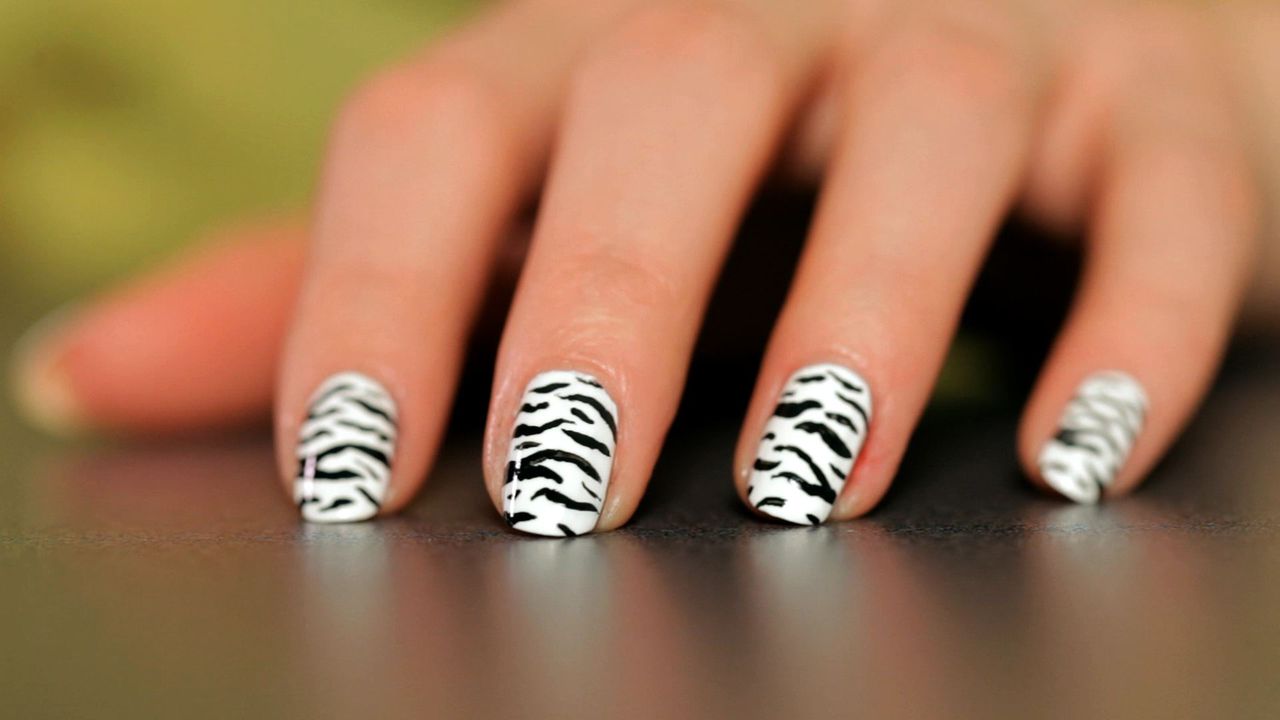
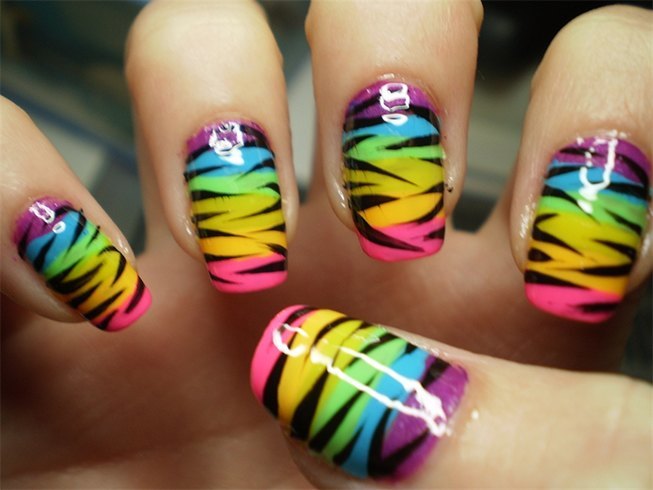
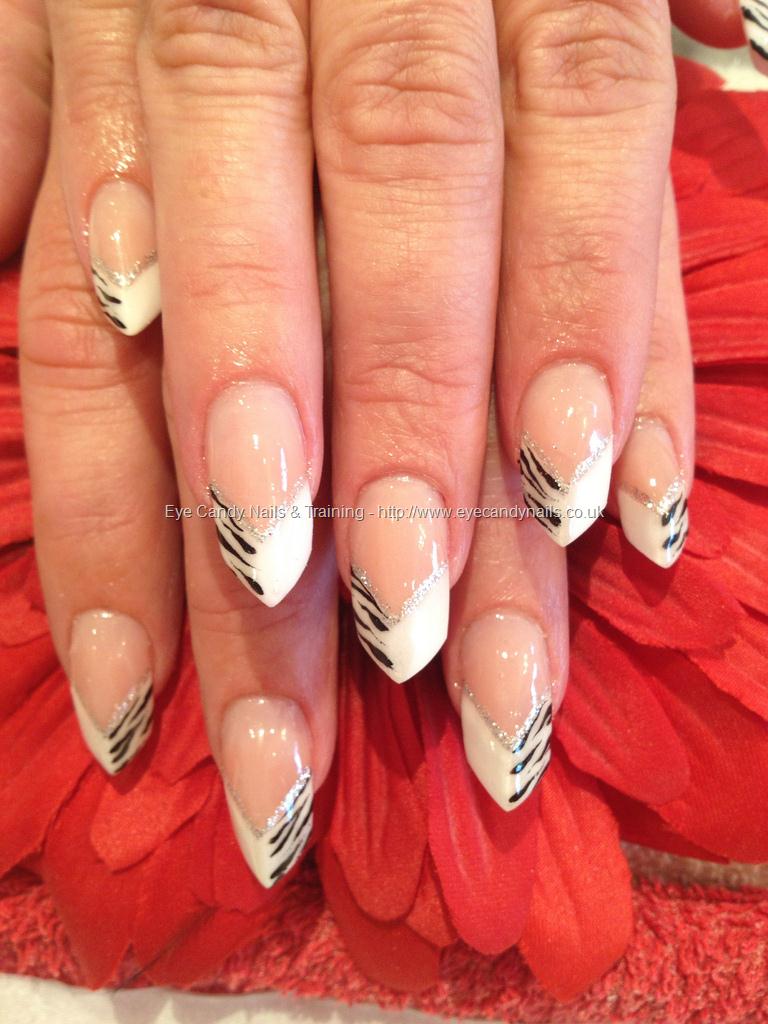
If you're looking for a fun and easy way to spice up your nail game, try out a simple zebra print design! This tutorial will guide you through the steps to achieve a chic and stylish zebra print look on your nails. To start off, you'll need a few essential tools: a base coat, a white nail polish, a black nail polish, and a thin nail art brush. You can also use a dotting tool or toothpick if you don't have a nail art brush. Begin by applying a base coat to your nails to protect them and help the polish last longer. Then, apply two coats of white nail polish as your base color. Let it dry completely before moving on to the next step. Next, using your thin nail art brush, create random, curved stripes on your nails using the black nail polish. Don't worry about the stripes being perfect, as the zebra print is meant to be abstract and natural-looking. Once you've created the black stripes, add a small amount of white polish to the tip of your brush and lightly go over some of the black stripes to create a faded effect. This will give your zebra print design more depth and dimension. Repeat this process on all of your nails, and remember to switch up the direction and thickness of the stripes for a more realistic look. Allow the design to dry completely before moving on to the final step. To finish off your zebra print nails, apply a top coat to seal in your design and add shine. And there you have it - a simple yet eye-catching zebra print nail design!1. Simple Zebra Print Nail Design Tutorial


1. Simple Zebra Print Nail Design Tutorial


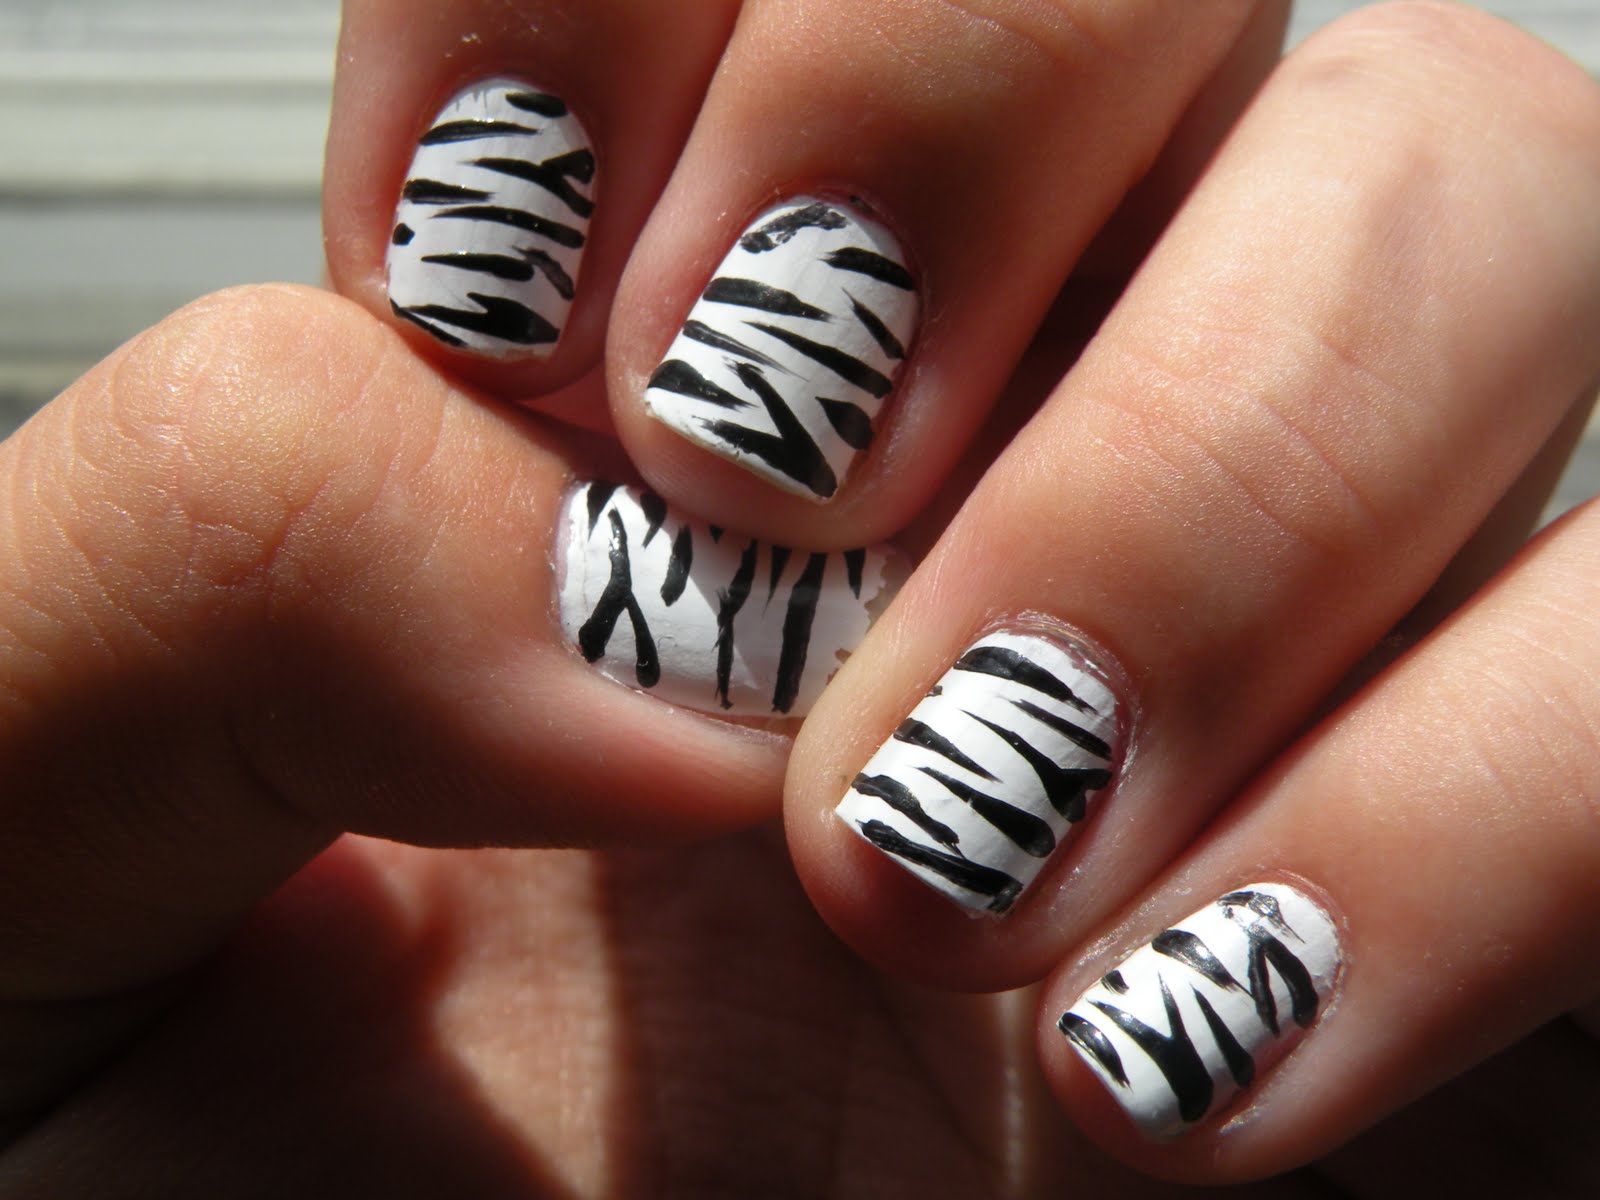
If you're a fan of animal print and looking for a quick and easy way to incorporate it into your nail art, try out this easy zebra print design. All you need is a white nail polish, a black nail polish, and a toothpick or dotting tool. Start off by applying a base coat to your nails, followed by two coats of white nail polish. Make sure to let the polish dry completely before moving on to the next step. Next, using the black nail polish and your toothpick or dotting tool, create random, curved stripes on your nails. Remember to vary the direction and thickness of the stripes for a more natural look. Don't worry about the stripes being perfect, as the imperfections will add to the overall effect of the design. Once you've created the black stripes, use the dotting tool or toothpick to add small dots in between the stripes to create the zebra print pattern. This step is optional but adds an extra touch of detail to the design. Finish off your easy zebra print nails with a top coat to seal in your design and add shine. And voila - a quick and stylish zebra print nail art look!2. Easy Zebra Print Nail Art


2. Easy Zebra Print Nail Art


If you're on a budget or love to create your own nail designs, try out this DIY zebra print nail tutorial. All you need is a white nail polish, a black nail polish, a toothpick or nail art brush, and a plastic bag or cling wrap. Start off by applying a base coat to your nails, followed by two coats of white nail polish. Allow the polish to dry completely before moving on to the next step. Next, add a few drops of black nail polish onto a plastic bag or piece of cling wrap. Then, using a toothpick or nail art brush, create random, curved lines on the plastic bag or cling wrap with the black polish. Once you've created the black lines, press the plastic bag or cling wrap onto your white nails and gently lift it off to reveal the zebra print pattern. Repeat this process on all of your nails, making sure to use a new piece of plastic bag or cling wrap for each nail. Finish off your DIY zebra print nails with a top coat to seal in your design and add shine. This method may take a bit more time and patience, but the end result is worth it!3. DIY Zebra Print Nails


3. DIY Zebra Print Nails


If you're short on time but still want to rock a trendy zebra print look on your nails, this quick and simple zebra print nail design is perfect for you. All you need is a white nail polish, a black nail polish, and a makeup sponge. Start off by applying a base coat to your nails, followed by two coats of white nail polish. Make sure to let the polish dry completely before moving on to the next step. Next, paint a small amount of black nail polish onto a makeup sponge. Then, lightly dab the sponge onto your nails to create the zebra print pattern. You may need to repeat this step a few times to achieve your desired level of coverage. Once you're satisfied with the zebra print, clean up any excess polish around your nails using a cotton swab dipped in nail polish remover. Finish off with a top coat to seal in your design and add shine.4. Quick and Simple Zebra Print Nails


4. Quick and Simple Zebra Print Nails


If you're new to nail art and want to try out a zebra print design, this zebra print nail design for beginners is the perfect place to start. All you need is a white nail polish, a black nail polish, and a toothpick or dotting tool. Start off by applying a base coat to your nails, followed by two coats of white nail polish. Allow the polish to dry completely before moving on to the next step. Next, using the black nail polish and your toothpick or dotting tool, create random, curved lines on your nails. Remember to vary the direction and thickness of the stripes for a more natural look. Don't worry about the lines being perfect, as the imperfections will add to the overall effect of the design. To finish off your zebra print nails, add a top coat to seal in your design and add shine. This simple and beginner-friendly zebra print design is a great way to start experimenting with nail art.5. Zebra Print Nail Design for Beginners


5. Zebra Print Nail Design for Beginners
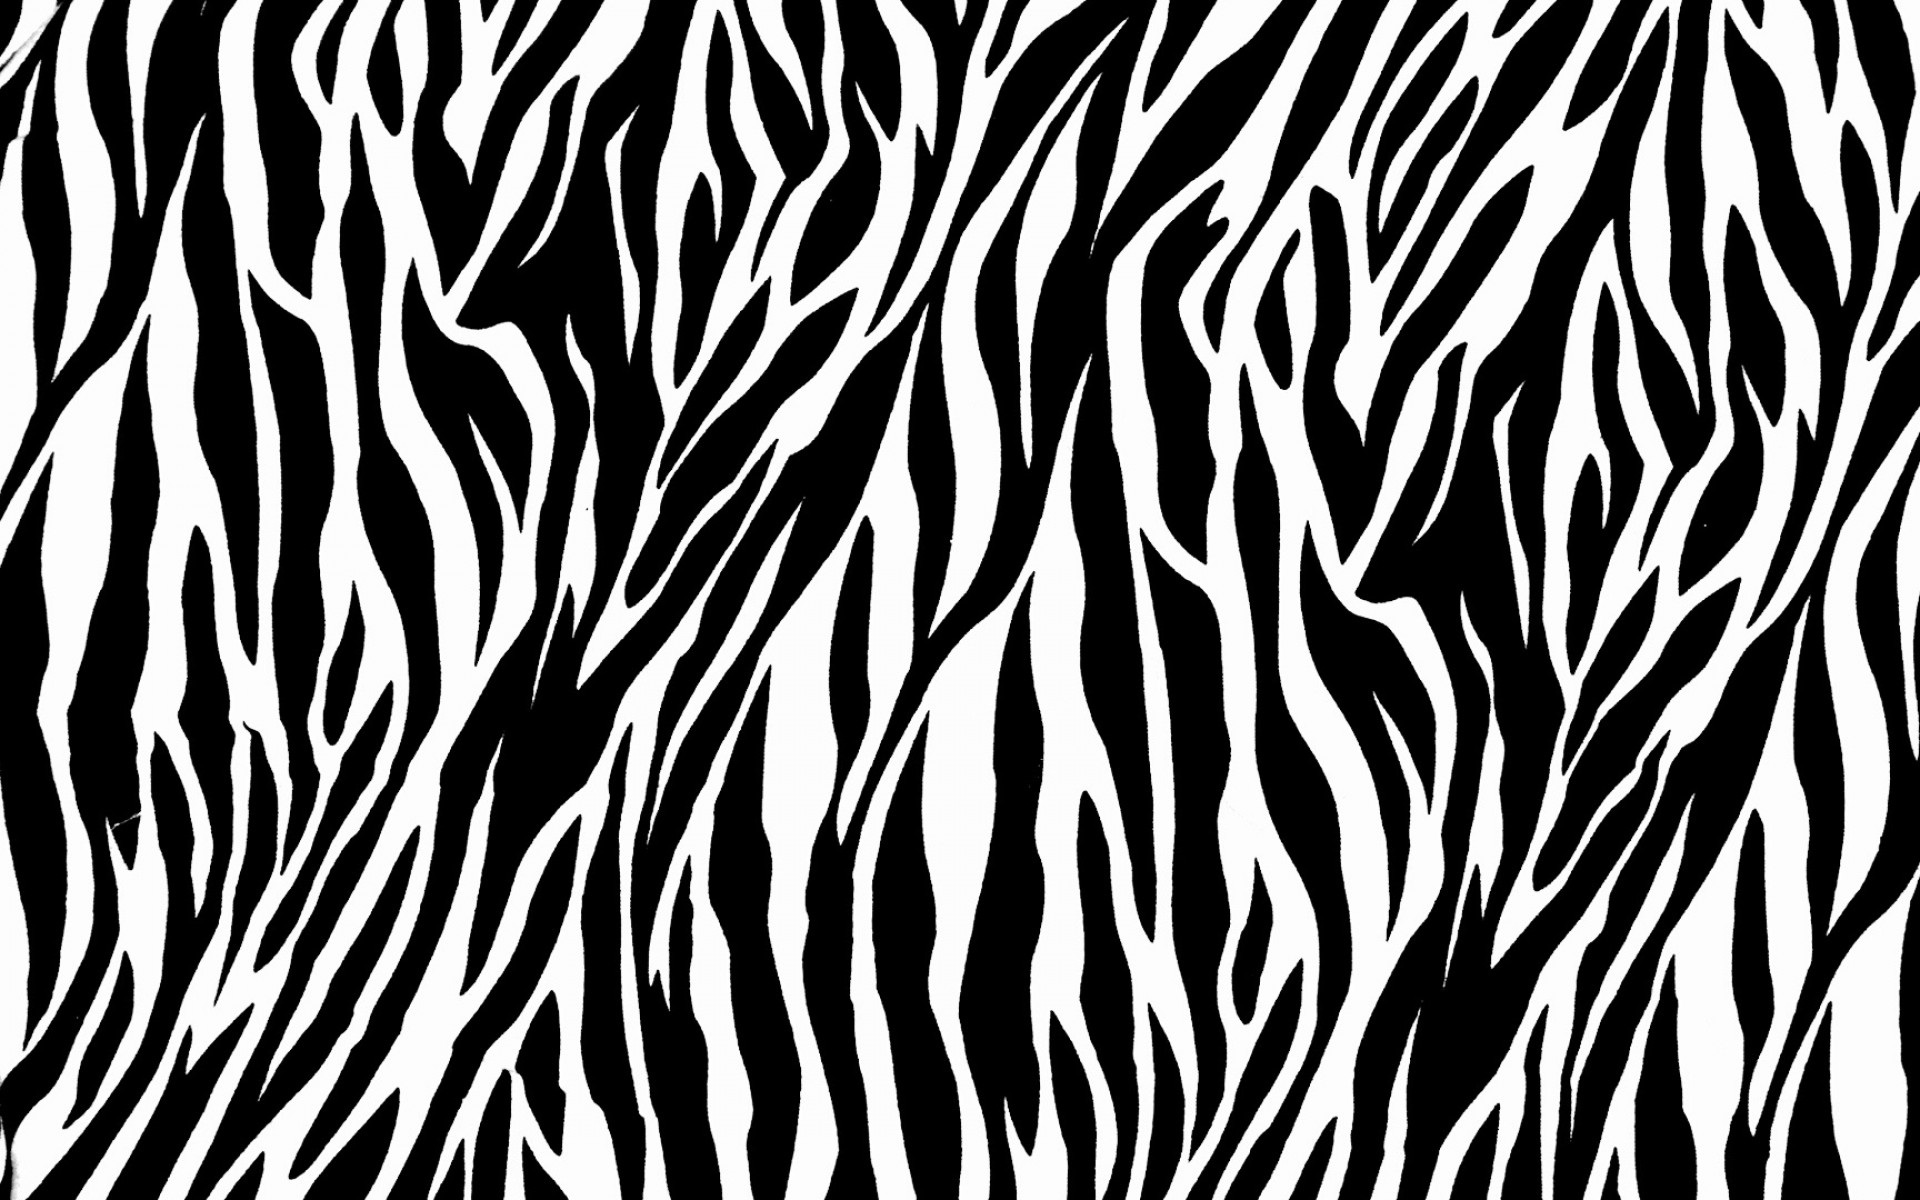
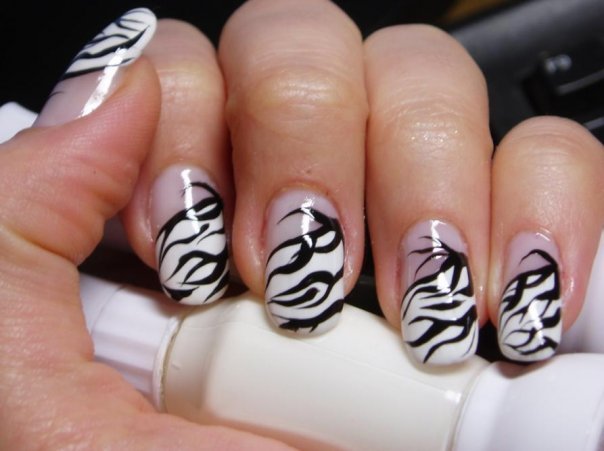
If you prefer a more classic and minimalistic look, try out this black and white zebra print nail design. All you need is a black nail polish, a white nail polish, and a thin nail art brush. Start off by applying a base coat to your nails, followed by two coats of black nail polish. Make sure to let the polish dry completely before moving on to the next step. Next, using your thin nail art brush, create random, curved stripes with white nail polish on your nails. Remember to switch up the direction and thickness of the stripes for a more realistic look. Let the design dry completely before adding a top coat to seal in your design and add shine. This black and white zebra print design is perfect for those who prefer a more subtle and sophisticated nail look.6. Black and White Zebra Print Nails


6. Black and White Zebra Print Nails

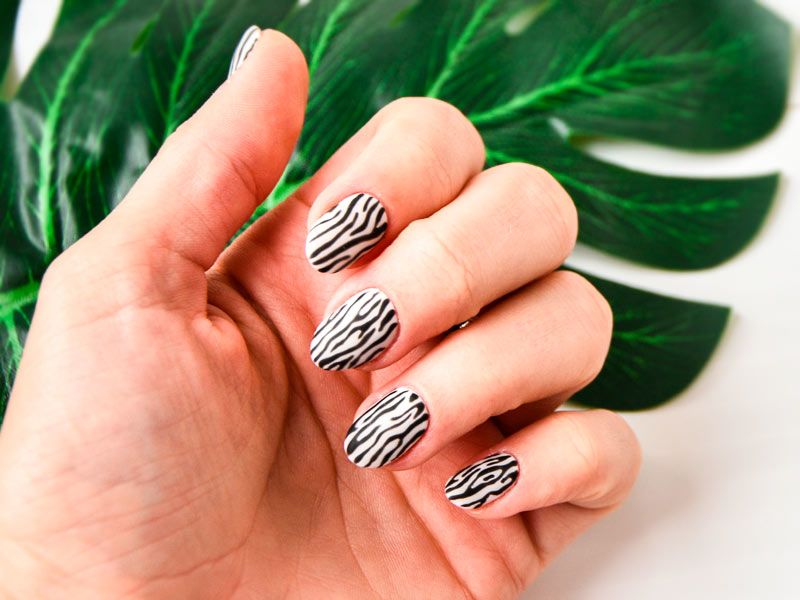
If you love minimalist nail designs, try out this minimalist zebra print nail design. All you need is a white nail polish, a black nail polish, and a thin nail art brush. Start off by applying a base coat to your nails, followed by two coats of white nail polish. Allow the polish to dry completely before moving on to the next step. Next, using your thin nail art brush, create thin and subtle black stripes on your nails. Remember to vary the direction and thickness of the stripes for a more natural look. Finish off with a top coat to seal in your design and add shine. This minimalist zebra print design is perfect for those who want a more subtle and understated look on their nails.7. Minimalist Zebra Print Nail Design


7. Minimalist Zebra Print Nail Design
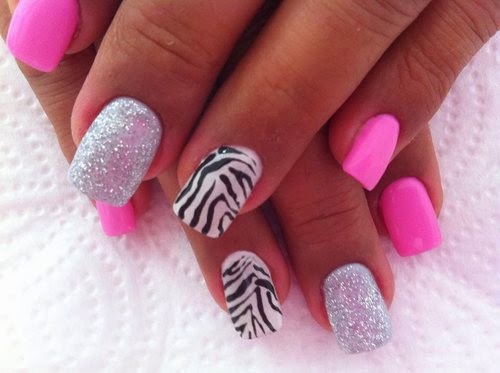
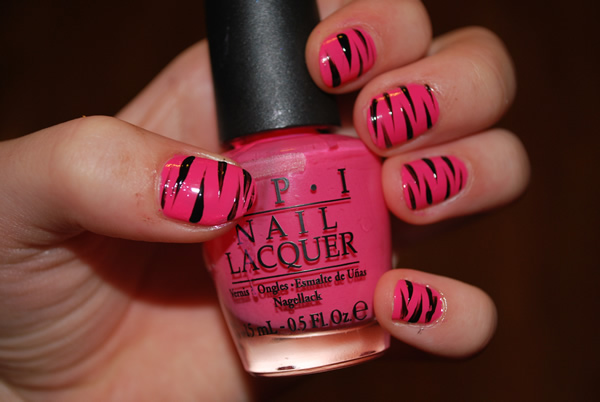
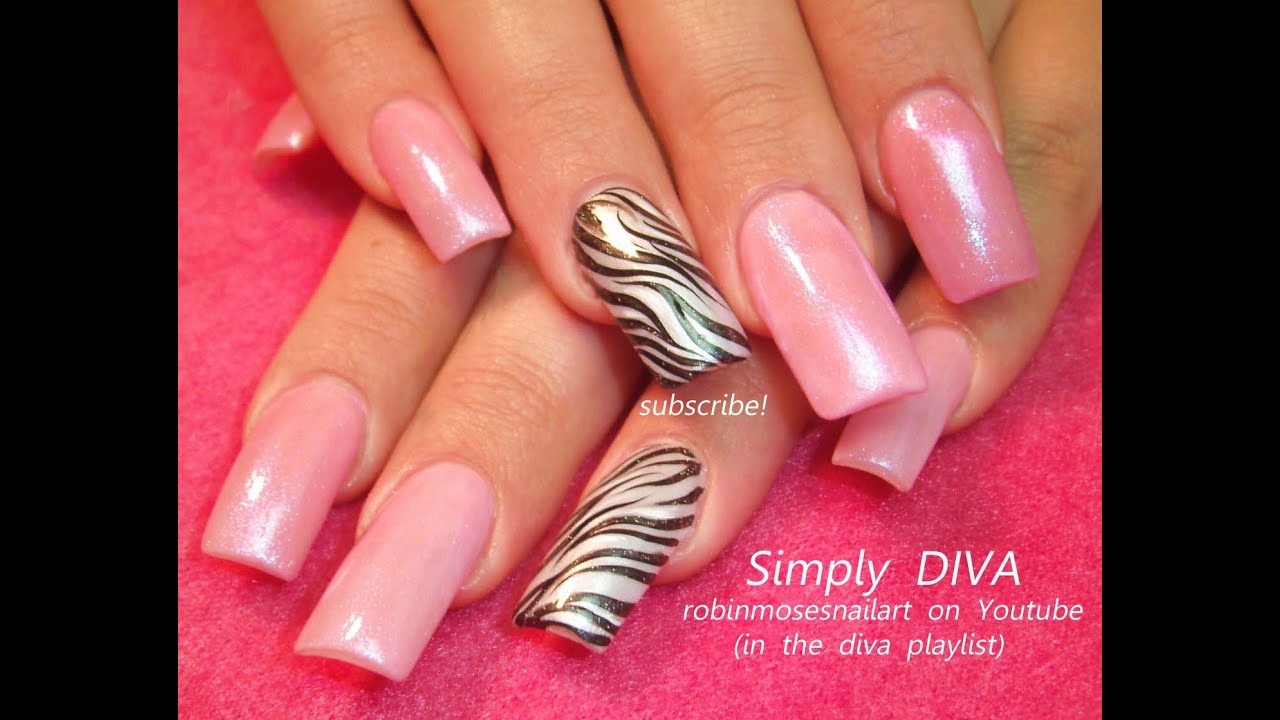
Add a pop of color to your zebra print nails with this zebra print nail design with an accent nail. You'll need a white nail polish, a black nail polish, a thin nail art brush, and a colored nail polish of your choice. Start off by applying a base coat to your nails, followed by two coats of white nail polish. Let the polish dry completely before moving on to the next step. Next, using your thin nail art brush, create random, curved stripes with black nail polish on all of your nails except for your ring finger. For the accent nail, paint it with the colored polish of your choice. Finish off your zebra print nails by adding a top coat to seal in your design and add shine. This design adds a fun twist to the classic zebra print look.8. Zebra Print Nail Design with Accent Nail


8. Zebra Print Nail Design with Accent Nail


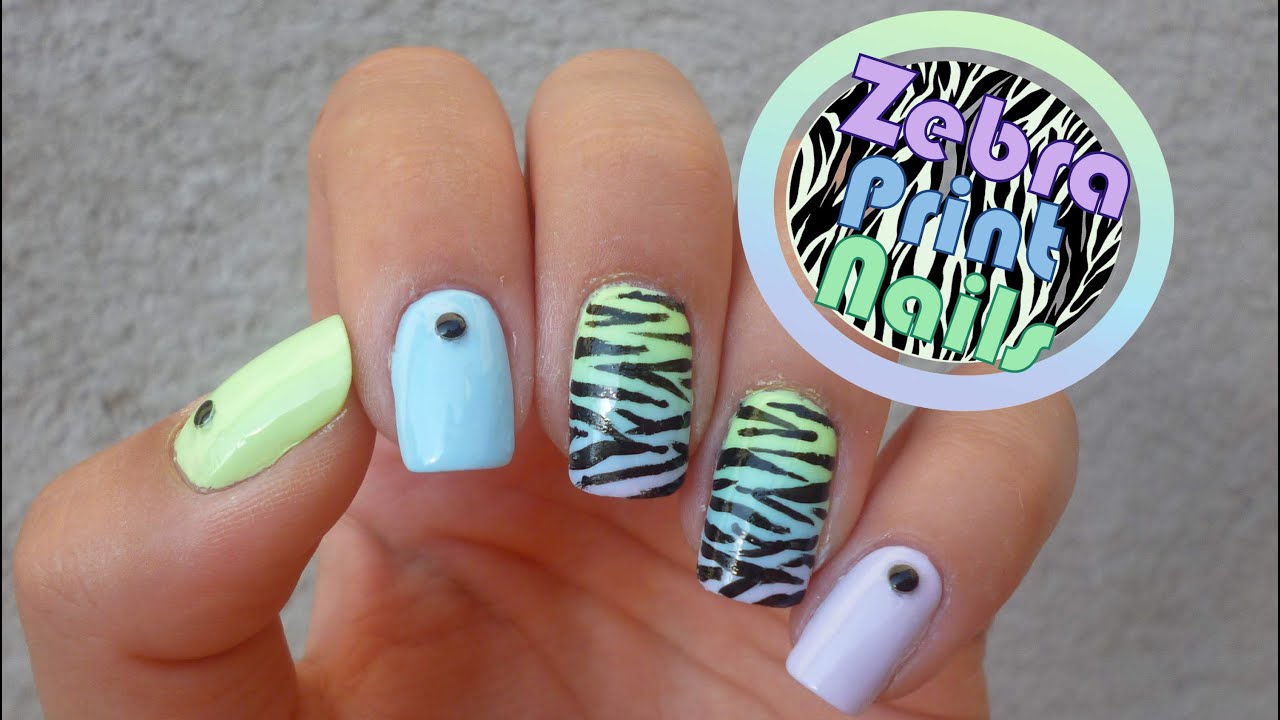
If you love the look of gradient nails, try out this gradient zebra print nail design. You'll need a white nail polish, a black nail polish, a makeup sponge, and a toothpick or dotting tool. Start off by applying a base coat to your nails, followed by two coats of white nail polish. Allow the polish to dry completely before moving on to the next step. Next, paint a small amount of black nail polish onto a makeup sponge and lightly dab it onto your nails in a gradient pattern. You may need to repeat this step a few times to achieve your desired level of coverage. Once the gradient is dry, use a toothpick or dotting tool to create the zebra print pattern on top of the gradient. Finish off with a top coat to seal in your design and add shine.9. Gradient Zebra Print Nails

9. Gradient Zebra Print Nails


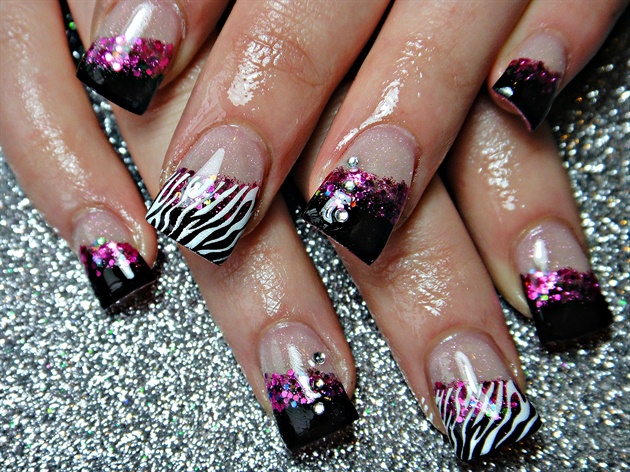
Take your zebra print nails to the next level with this zebra print nail design with rhinestones. You'll need a white nail polish, a black nail polish, a thin nail art brush, and rhinestones of your choice. Start off by applying a base coat to your nails, followed by two coats of white nail polish. Let the polish dry completely before moving on to the next step. Next, using your thin nail art brush, create random, curved stripes with black nail polish on your nails. Remember to vary the direction and thickness of the stripes for a more natural look. Once the stripes are dry, carefully place rhinestones on top of the black stripes for some added bling. Finish off your zebra print nails with a top coat to seal in your design and add shine. This design is perfect for those who want a more glamorous and eye-catching zebra print look.10. Zebra Print Nail Design with Rhinestones

10. Zebra Print Nail Design with Rhinestones
The Versatility of Zebra Print in Nail Designs

Unleashing Your Wild Side
 When it comes to nail designs, there are endless possibilities to express your style and personality. From intricate patterns to bold colors, there is something for everyone. However, if you want to make a statement and stand out from the crowd, why not try a simple zebra print nail design? This classic animal print has been a favorite in the fashion world for decades, and it has now made its way into the world of nail art. Let's explore the versatility of zebra print in nail designs and how you can unleash your wild side with this bold and eye-catching look.
A Timeless Print
 Zebra print has been a staple in the fashion industry for its bold and sophisticated look. It is a timeless print that never goes out of style, making it a perfect choice for your nail design. Whether you prefer a classic black and white or want to add a pop of color, zebra print can be easily incorporated into any nail design. It is also a great option for those who are new to nail art as it is easy to create and looks stunning on any nail length and shape.
Simple Yet Striking
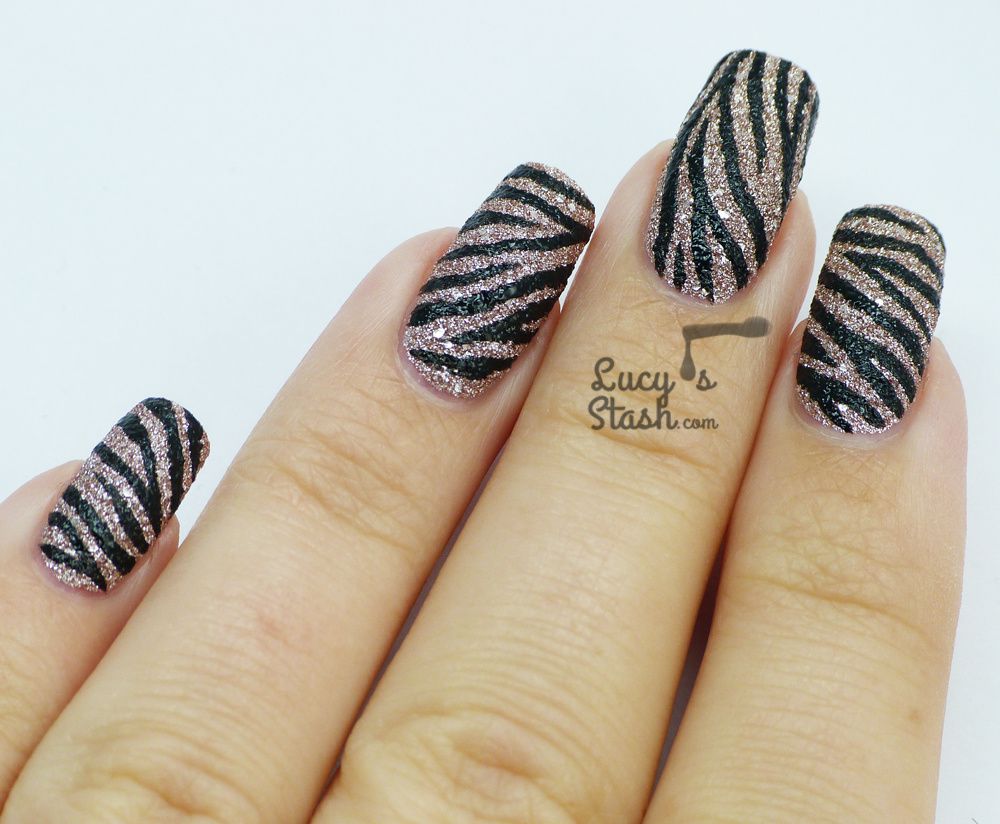
 One of the reasons why zebra print is so popular in nail designs is its simplicity. With just a few strokes of a nail polish brush, you can create a striking zebra print on your nails. You can opt for a full zebra print design on all your nails or use it as an accent on one or two nails. You can also experiment with different color combinations, such as using a black and silver zebra print or adding a touch of gold for a glamorous look. The possibilities are endless, and you can let your creativity run wild.
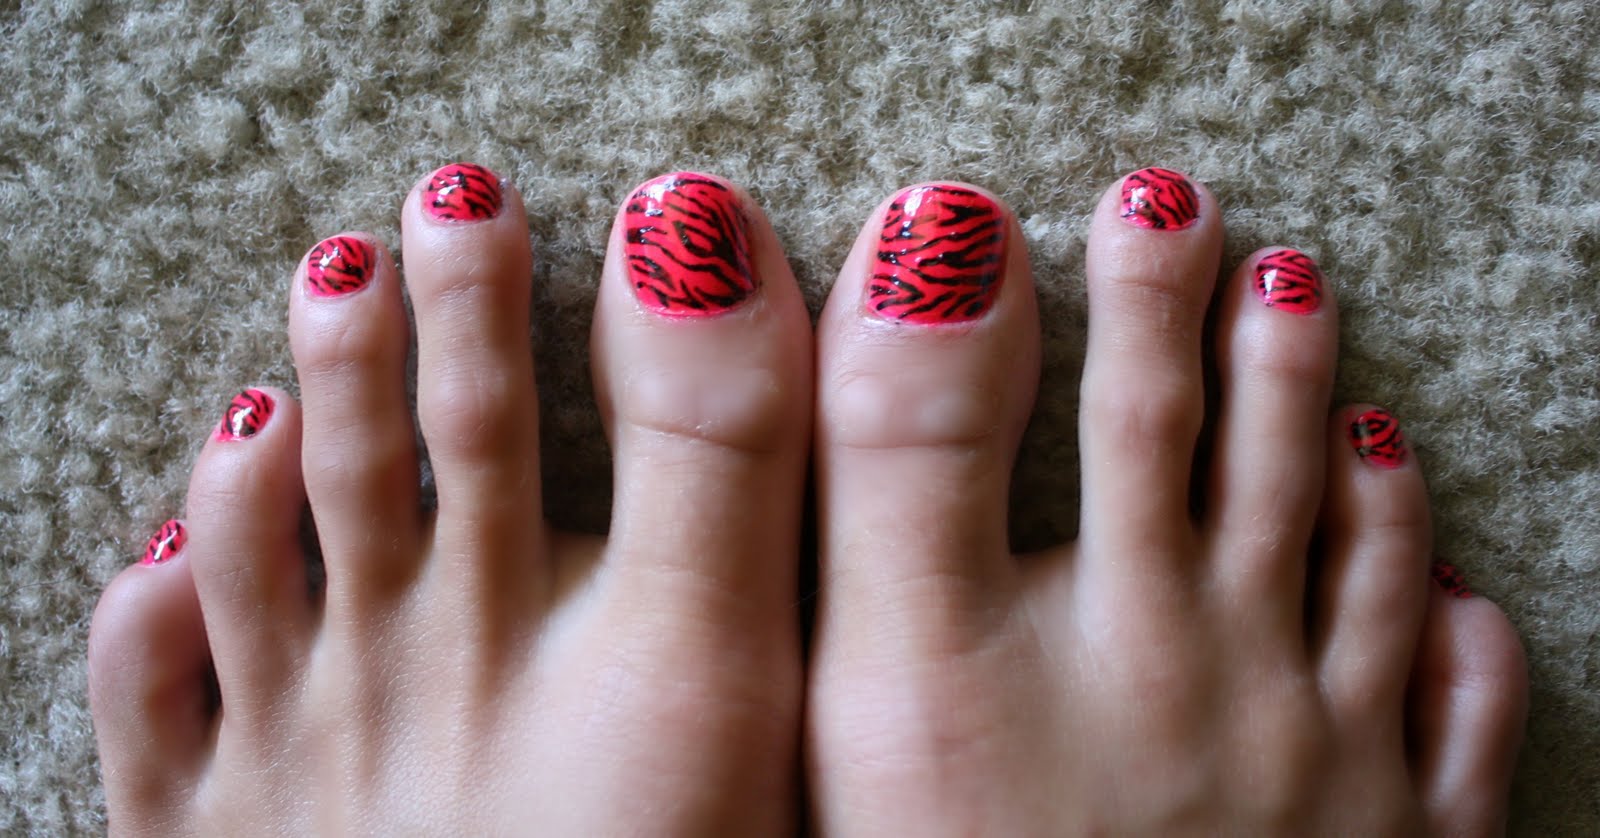
Perfect for Any Occasion
 Zebra print nail designs are not only versatile in terms of style but also perfect for any occasion. Whether you want to add a touch of edge to your everyday look or stand out at a special event, zebra print nails can do the trick. They are also a popular choice for bridal and prom looks as they add a touch of elegance and sophistication. With zebra print, you can achieve a bold and chic look without going over the top.
In conclusion, zebra print is a must-try in the world of nail designs. Its versatility, simplicity, and timeless appeal make it a perfect choice for anyone looking to add a touch of wildness to their nails. So why not unleash your wild side and try a simple zebra print nail design for your next manicure? Trust us; your nails will thank you.
Zebra print nail designs are not only versatile in terms of style but also perfect for any occasion. Whether you want to add a touch of edge to your everyday look or stand out at a special event, zebra print nails can do the trick. They are also a popular choice for bridal and prom looks as they add a touch of elegance and sophistication. With zebra print, you can achieve a bold and chic look without going over the top.
In conclusion, zebra print is a must-try in the world of nail designs. Its versatility, simplicity, and timeless appeal make it a perfect choice for anyone looking to add a touch of wildness to their nails. So why not unleash your wild side and try a simple zebra print nail design for your next manicure? Trust us; your nails will thank you.


