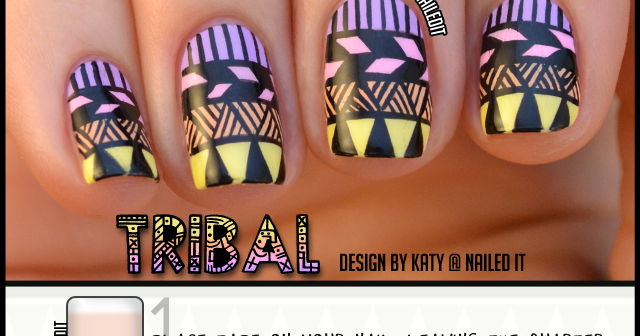
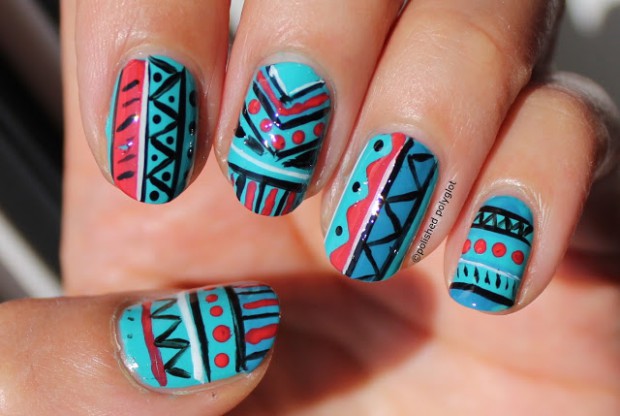
Are you new to the world of nail art and looking for an easy design to try? Look no further than this simple tribal nail art tutorial! With just a few basic tools and some creative touches, you can achieve a stunning tribal-inspired manicure in no time. Start by applying a base coat to your nails to protect them and help your design last longer. Then, using a nail art brush or a thin paintbrush, create a diagonal line across your nail using a bold color of your choice. Next, add a second diagonal line intersecting the first one, creating a V-shape on your nail. Fill in the space between the two lines with a lighter color, leaving a small gap between the two colors to create a tribal pattern. You can also add small dots or lines using a dotting tool to add more detail to your design. Finish off with a top coat to seal in your design and give it a glossy finish. Voila, you now have a beautiful tribal nail design that is perfect for beginners!1. "Easy Tribal Nail Art Tutorial for Beginners"


1. "Easy Tribal Nail Art Tutorial for Beginners"


If you're someone who likes to follow a step-by-step guide for your nail art, then this tutorial is for you. This tribal nail design is a bit more intricate, but the end result is worth the effort. Start by applying a base coat to your nails to protect them. Then, using a white nail polish, create a diagonal line across your nail. This will serve as the base for your tribal design. Next, using a nail art brush or a thin paintbrush, create small triangles or chevron shapes along the white line using different colors of your choice. You can also add small dots or lines using a dotting tool to add more detail to your design. Once you're happy with the placement of your design, seal it in with a top coat. For an extra touch, you can also add some gold or silver flakes on top of your design for a metallic finish. This tribal nail design is perfect for anyone looking to make a statement with their nails!2. "Step-by-Step Tribal Nail Design Tutorial"


2. "Step-by-Step Tribal Nail Design Tutorial"
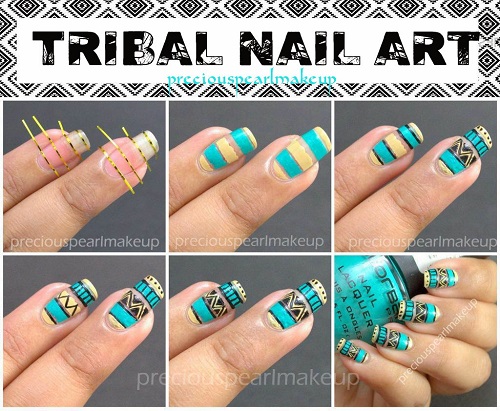
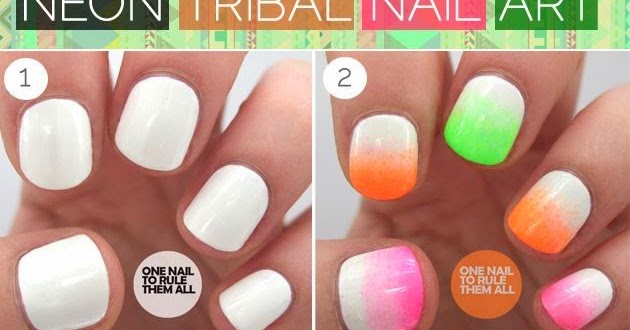
Looking for a way to create a tribal print without having to freehand it? This tutorial using tape is the perfect solution. Start by applying a base coat to your nails to protect them. Next, using nail tape, create a diagonal line across your nail. You can also use regular tape and cut it into thin strips if you don't have nail tape on hand. Make sure to press down firmly on the edges of the tape to prevent any polish from seeping through. Once the tape is in place, use a makeup sponge to create a gradient effect using two different colors. Remove the tape immediately after sponging to reveal a clean line. Using a nail art brush or a thin paintbrush, create small triangles or chevron shapes along the line using a contrasting color. Remove the tape once again and seal in your design with a top coat. This tribal print nail tutorial is perfect for those who want a unique and modern take on the traditional tribal design.3. "Tribal Print Nail Tutorial Using Tape"


3. "Tribal Print Nail Tutorial Using Tape"


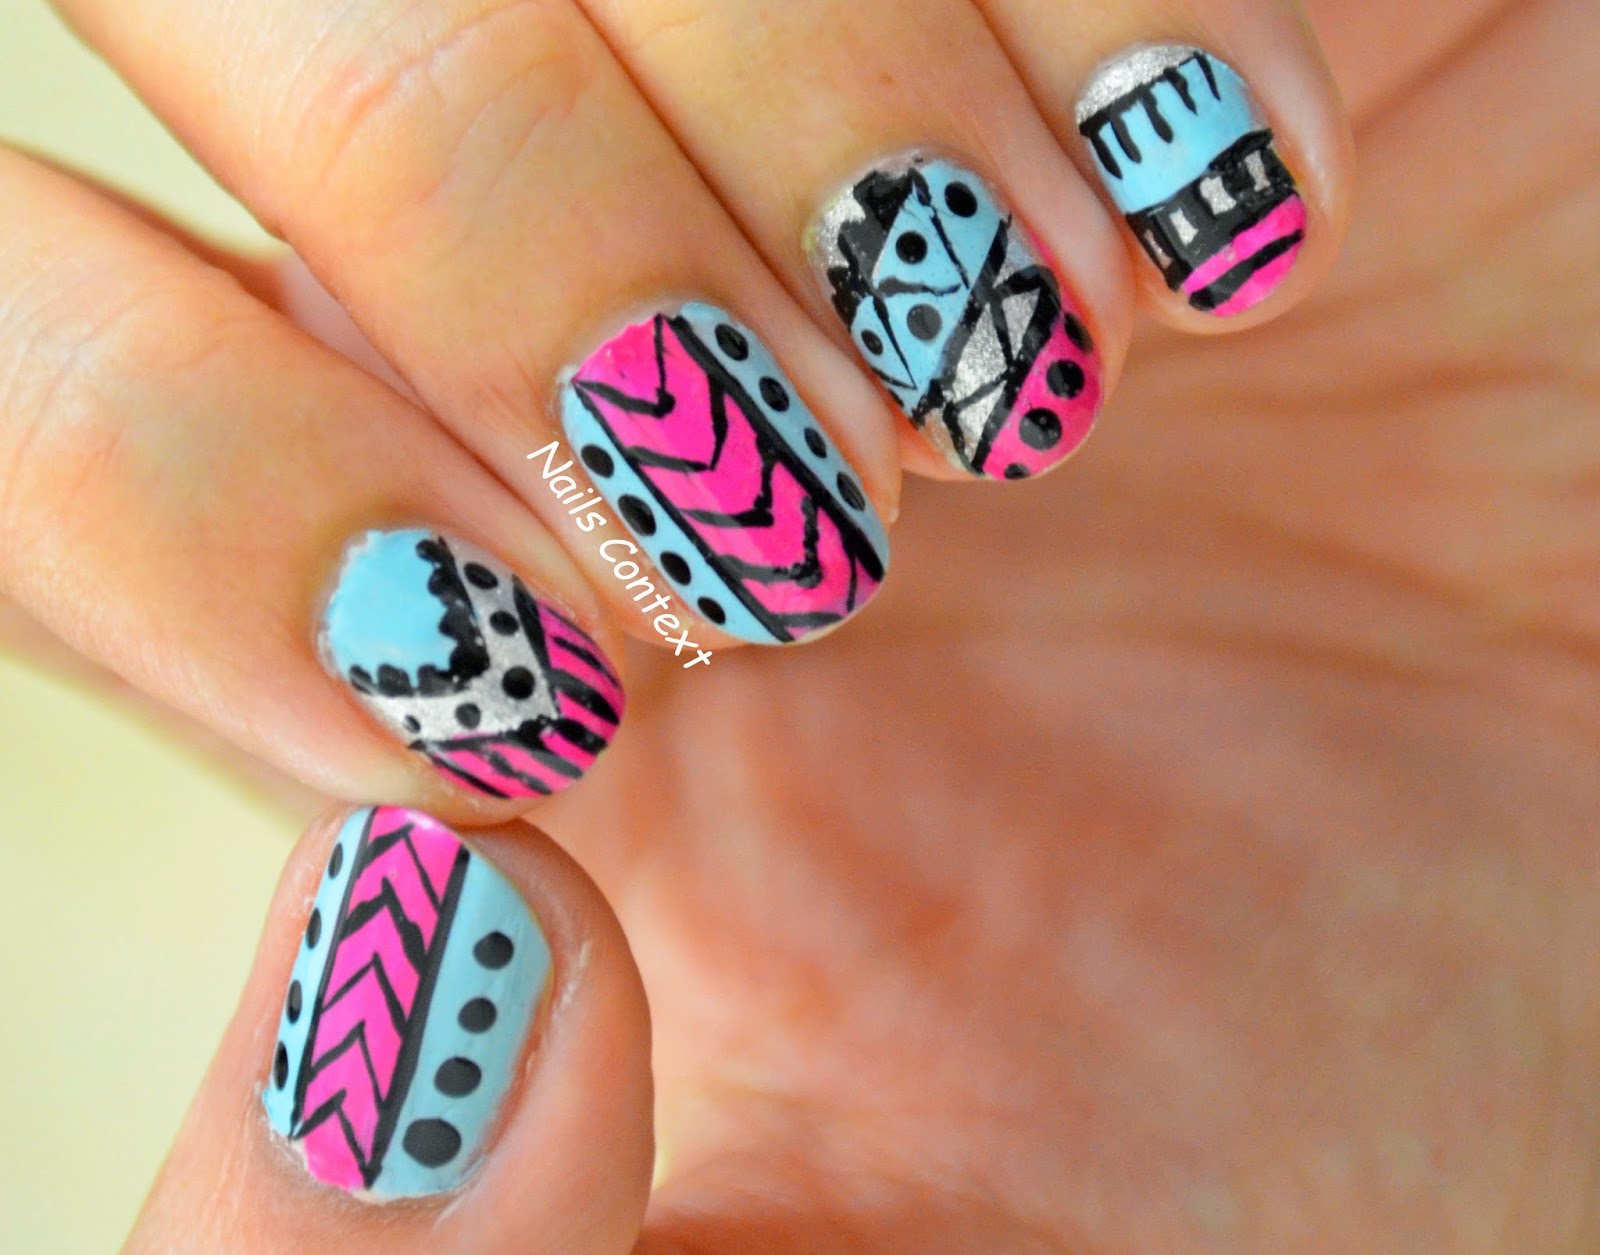
If you love using a dotting tool in your nail art, then this tutorial is for you. Start by applying a base coat to your nails to protect them. Using a white nail polish, create a diagonal line across your nail. Then, using a dotting tool, create small dots along the line using different colors of your choice. Next, create small triangles or chevron shapes around the dots using a nail art brush or a thin paintbrush. You can also add additional dots or lines to add more detail to your design. Finish off with a top coat to seal in your design and give it a glossy finish. This tribal nail art tutorial is perfect for those who prefer a more abstract and playful take on the tribal design.4. "Tribal Nail Art Tutorial with Dotting Tool"


4. "Tribal Nail Art Tutorial with Dotting Tool"


Don't have any fancy nail art tools on hand? No problem! This tribal nail design can be created using a simple toothpick. Start by applying a base coat to your nails to protect them. Using a white nail polish, create a diagonal line across your nail. Then, using the pointed end of a toothpick, create small dots along the line using different colors of your choice. Next, use the flat end of the toothpick to create small triangles or chevron shapes around the dots. You can also use the flat end to create larger dots or lines to add more detail to your design. Seal in your design with a top coat and you're all set with a unique tribal nail design created with just a toothpick!5. "DIY Tribal Nail Design Tutorial with Toothpick"


5. "DIY Tribal Nail Design Tutorial with Toothpick"


Short nails don't have to limit your nail art options. This tribal nail tutorial is perfect for those with shorter nails, as it doesn't require much space. Start by applying a base coat to your nails to protect them. Using a nail art brush or a thin paintbrush, create a diagonal line across your nail using a bold color of your choice. Next, create small triangles or chevron shapes along the line using different colors of your choice. You can also use a dotting tool to add small dots or lines for more detail. Finish off with a top coat to seal in your design and give it a glossy finish. This tribal nail tutorial is perfect for those with shorter nails who still want to rock a bold and colorful design.6. "Tribal Nail Tutorial for Short Nails"


6. "Tribal Nail Tutorial for Short Nails"


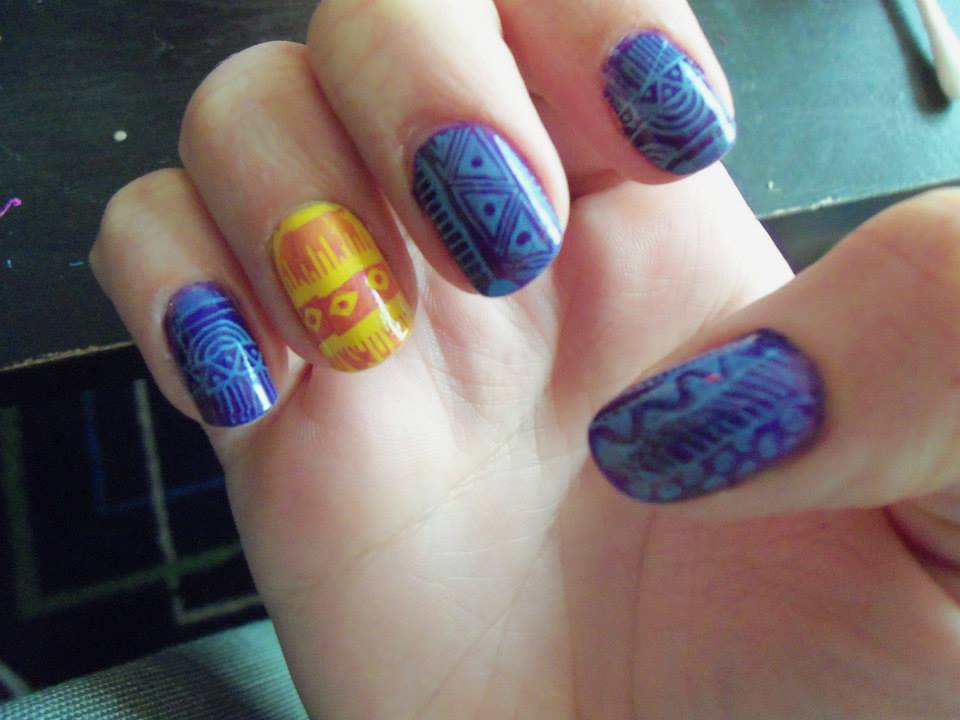
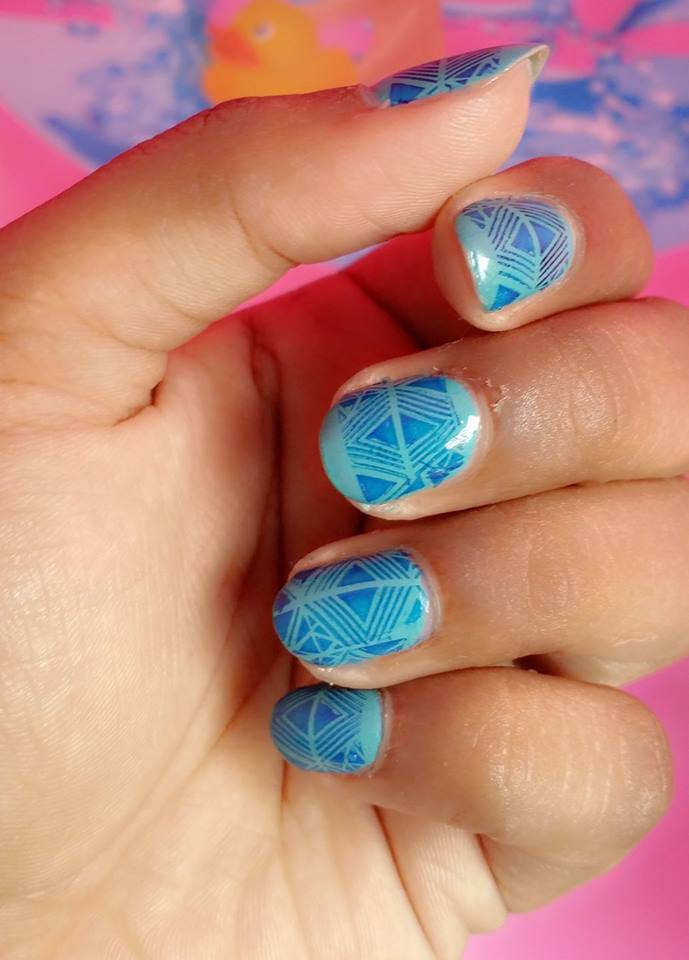
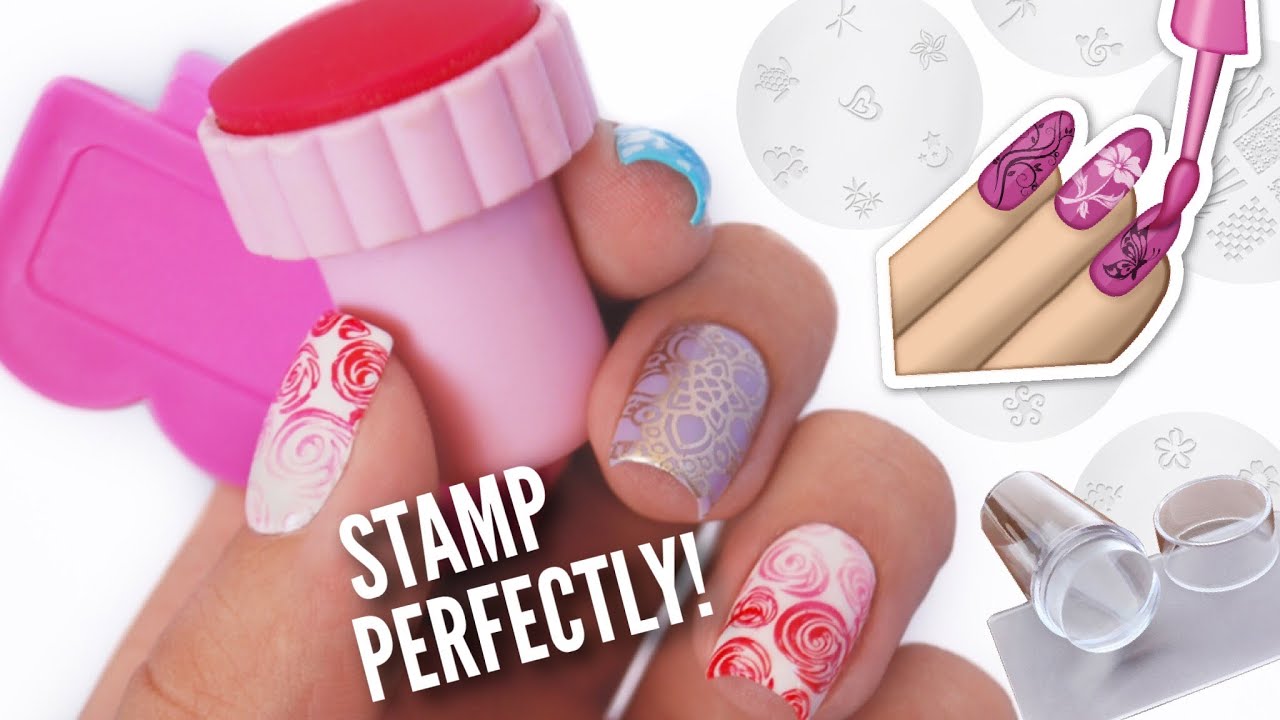
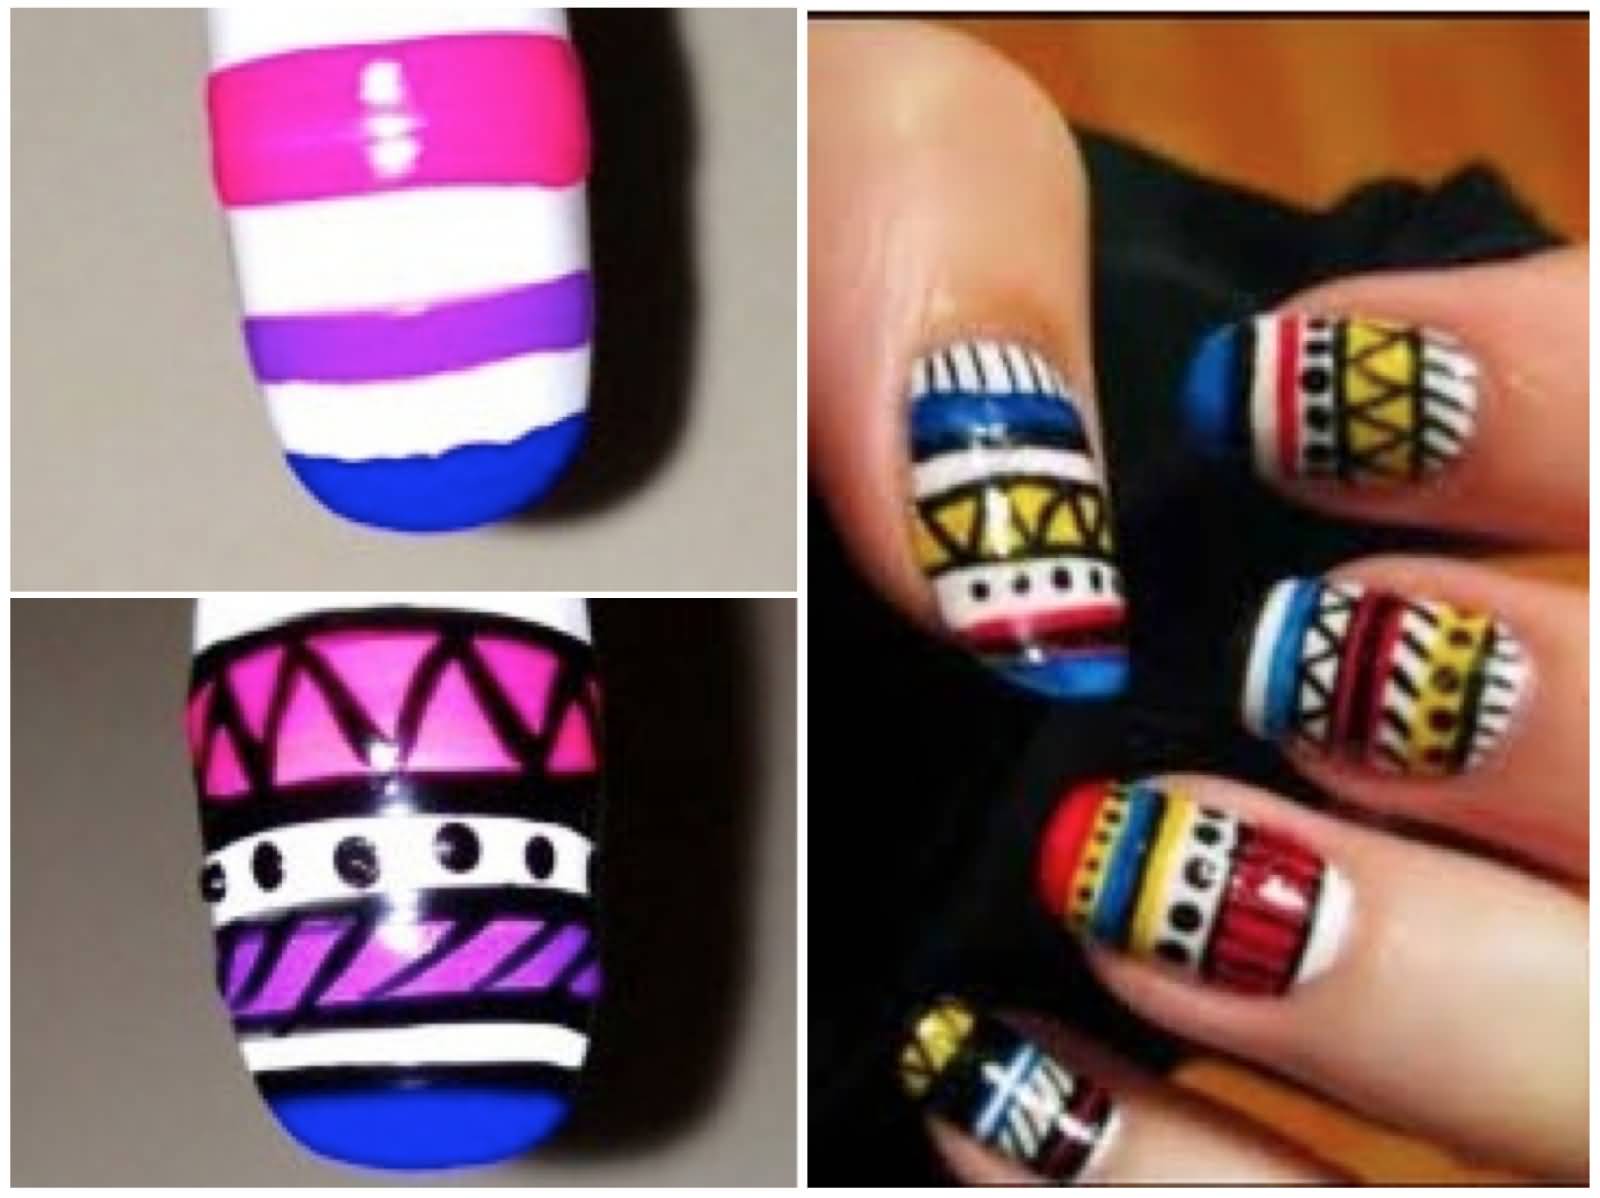
For those who love using stamping plates in their nail art, this tribal nail design tutorial is a must-try. Start by applying a base coat to your nails to protect them. Using a white nail polish, create a diagonal line across your nail. Then, using a stamp and scraper, transfer a tribal design onto your nail using a black or dark-colored polish. Fill in the space between the design and the white line using a contrasting color of your choice. You can also use a nail art brush or a thin paintbrush to add additional details to your design. Seal in your design with a top coat and you'll have a stunning tribal nail design created with the help of a stamping plate.7. "Tribal Nail Design Tutorial with Stamping Plate"


7. "Tribal Nail Design Tutorial with Stamping Plate"

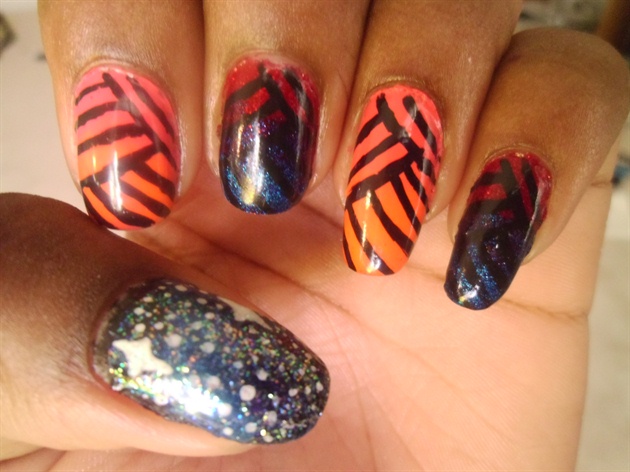
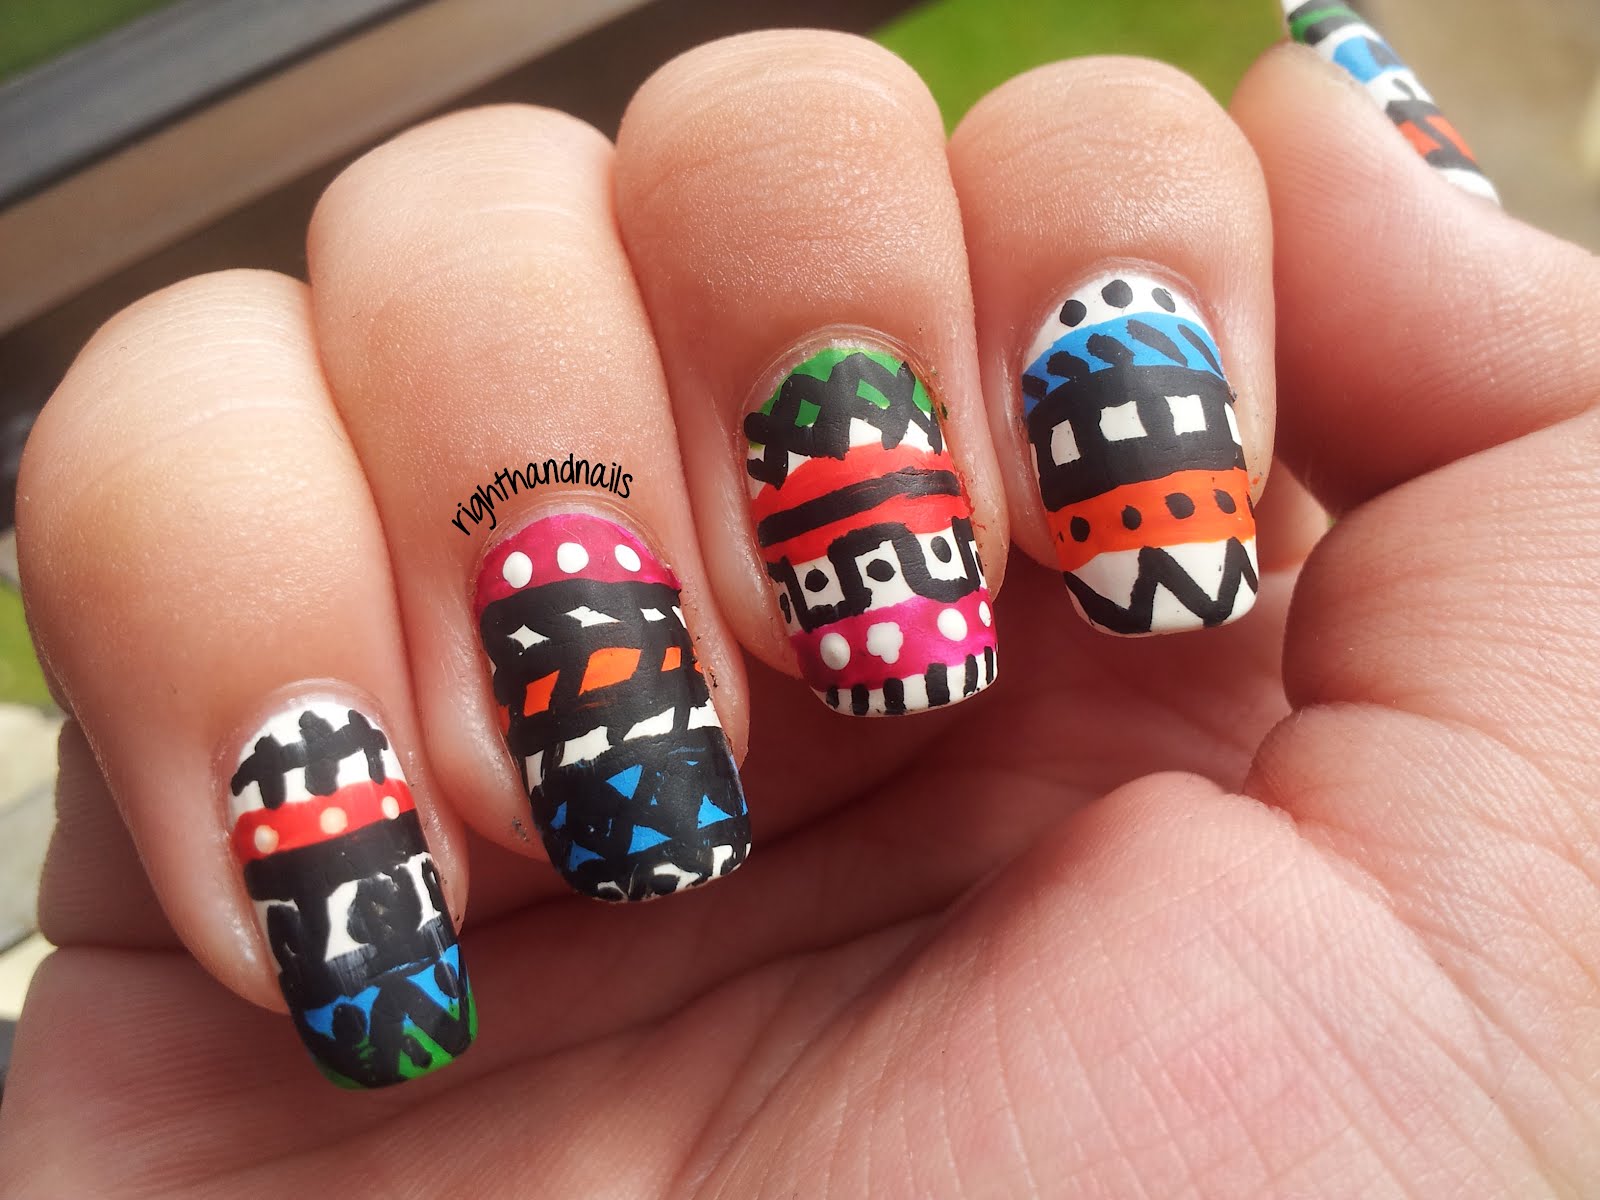
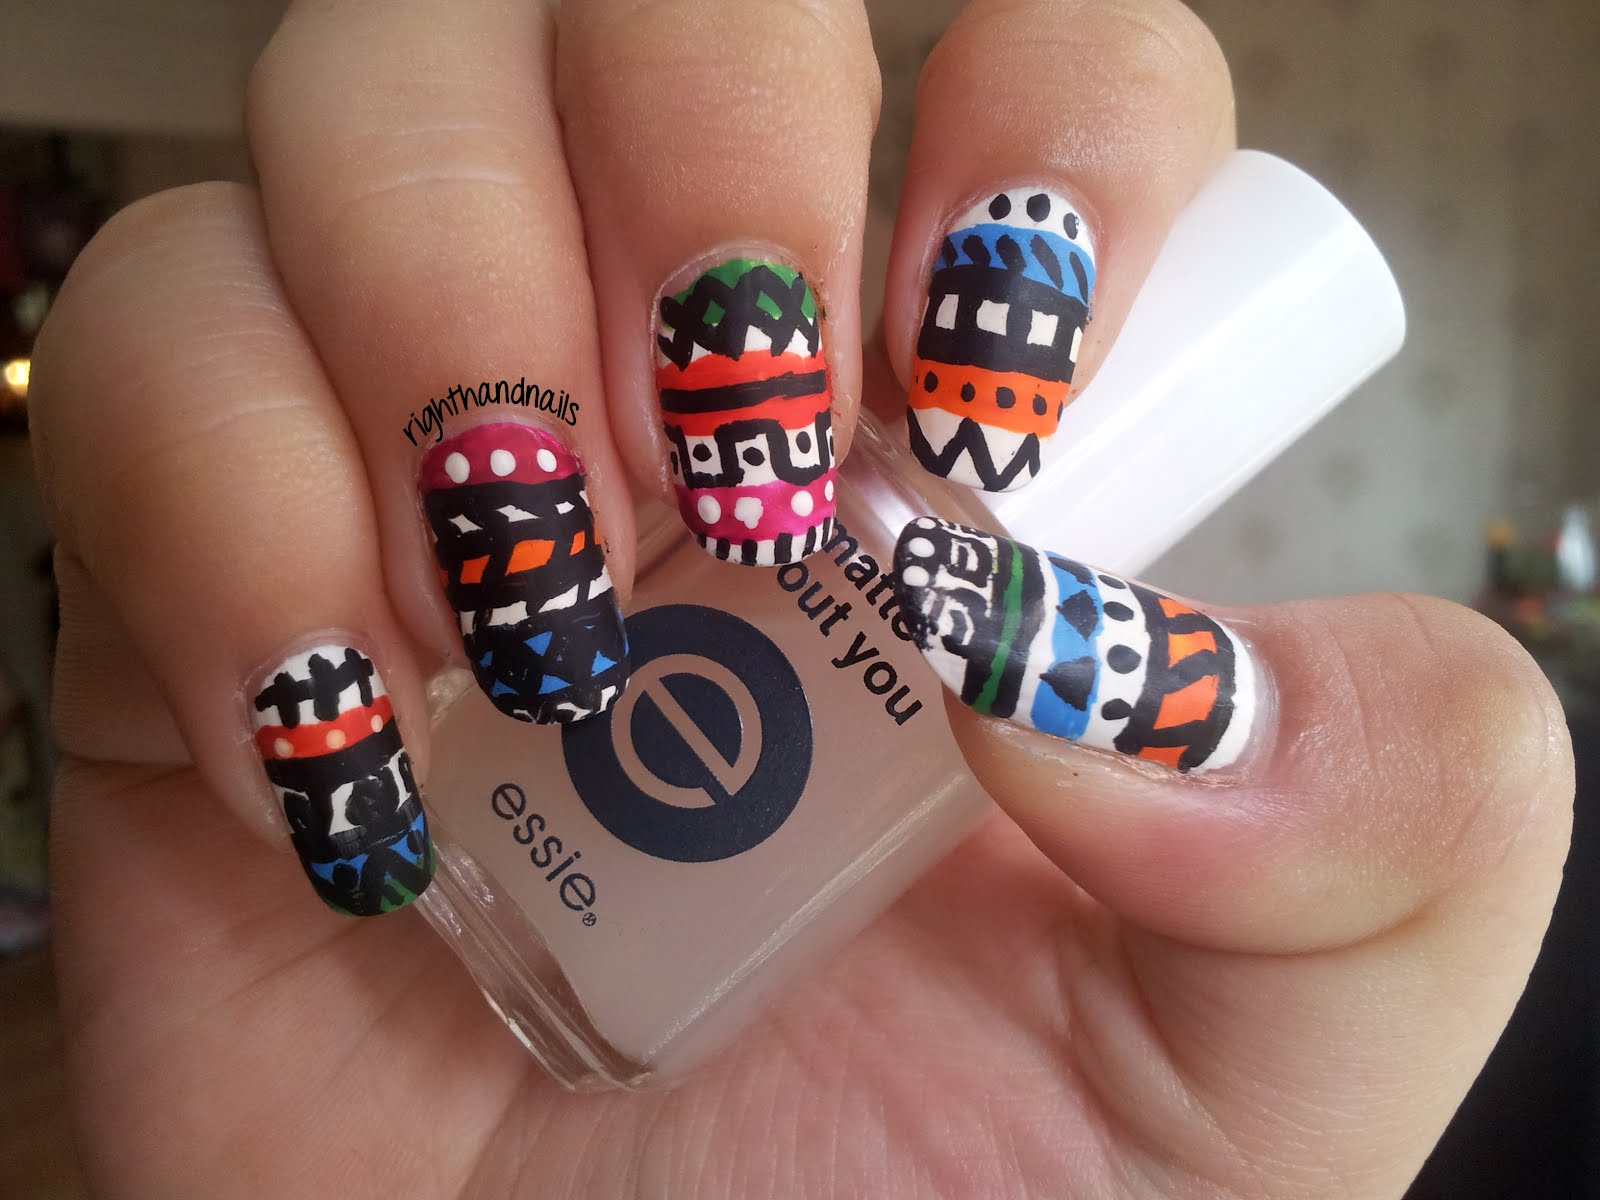
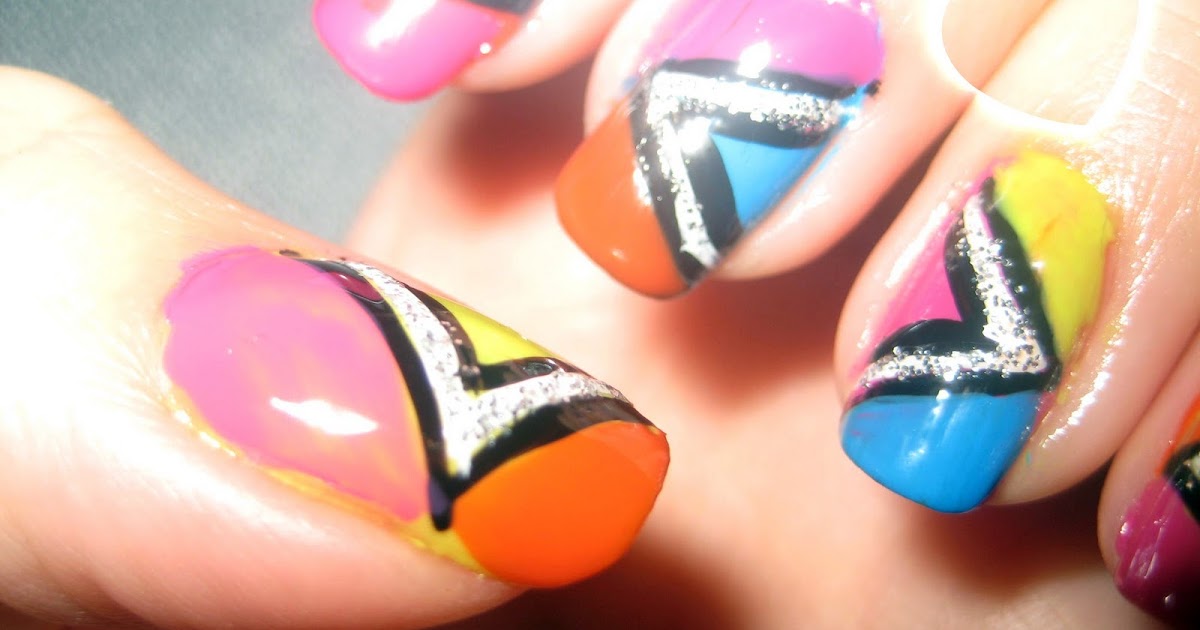
If you love bright and bold colors, then this tribal nail art tutorial is perfect for you. Start by applying a base coat to your nails to protect them. Using a white nail polish, create a diagonal line across your nail. Then, using a dotting tool, create small dots along the line using different bright colors of your choice. Next, create small triangles or chevron shapes around the dots using a nail art brush or a thin paintbrush. You can also add additional dots or lines to add more detail to your design. Finish off with a top coat to seal in your design and give it a glossy finish. This colorful tribal nail art tutorial is perfect for the summer season or anyone who loves to add a pop of color to their look.8. "Colorful Tribal Nail Art Tutorial"


8. "Colorful Tribal Nail Art Tutorial"

Nail vinyls are a great tool to help achieve clean and precise lines in your nail art. For this tribal nail tutorial, start by applying a base coat to your nails to protect them. Next, using a nail vinyl, create a diagonal line across your nail. These vinyls come in a variety of shapes and designs, so you can choose one that speaks to your personal style. Using a makeup sponge, create a gradient effect using two different colors. Remove the vinyl immediately after sponging to reveal a clean line. Using a nail art brush or a thin paintbrush, create small triangles or chevron shapes along the line using a contrasting color. Remove the vinyl once again and seal in your design with a top coat. This tribal nail tutorial is perfect for those who want a clean and polished tribal design.9. "Tribal Nail Tutorial Using Nail Vinyls"


9. "Tribal Nail Tutorial Using Nail Vinyls"


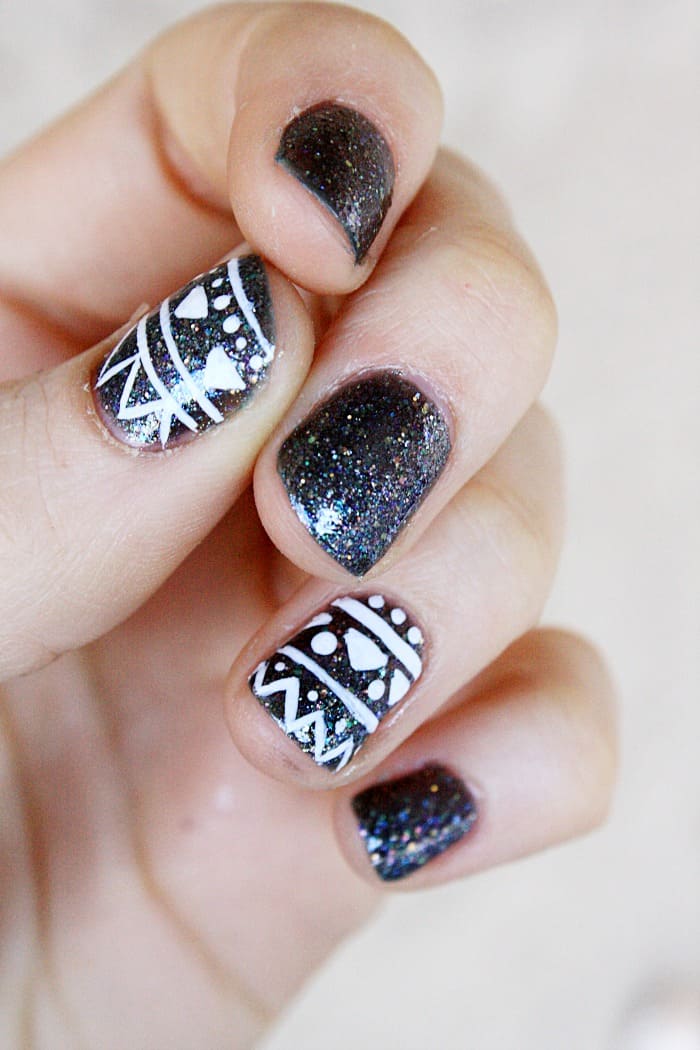
If you prefer a more minimalistic approach to your nail art, then this black and white tribal design is for you. Start by applying a base coat to your nails to protect them. Using a black nail polish, create a diagonal line across your nail. Then, using a nail art brush or a thin paintbrush, create small triangles or chevron shapes along the line. Next, using a white nail polish, create a smaller diagonal line inside the black line. This will create a layered effect in your design. Seal in your design with a top coat and you'll have a chic and modern black and white tribal design that is perfect for any occasion.10. "Black and White Tribal Nail Design Tutorial"

10. "Black and White Tribal Nail Design Tutorial"

Adding a Personal Touch to Your Tribal Nail Design
Customizing Your Design
 If you're looking to add a unique touch to your tribal nail design, consider customizing it to reflect your personal style. You can do this by adding in your favorite colors or incorporating symbols or patterns that hold special meaning to you. This will not only make your design stand out, but it will also make it more meaningful to you.
Experiment with Different Shapes
 One of the great things about tribal nail designs is the freedom to play with different shapes and lines. Instead of sticking to the traditional triangular shapes, try incorporating circles, squares, or even zig-zags into your design. This will give your nails a more dynamic and eye-catching look.
Mix and Match with Other Nail Art Techniques
 Another way to make your tribal nail design truly unique is to mix and match it with other nail art techniques. You can add in some glitter, rhinestones, or even try out a gradient effect to really make your design pop. Don't be afraid to experiment and have fun with different combinations to create a one-of-a-kind look.
From Nails to Outfit Inspiration
 Tribal nail designs can also serve as inspiration for your outfit choices. Take the colors and patterns from your nails and incorporate them into your clothing, accessories, or even makeup. This will create a cohesive and stylish look that is sure to turn heads.
In conclusion, tribal nail designs are not only a fun and creative way to express yourself, but they also offer endless possibilities for customization. With the tips and techniques mentioned above, you can elevate your tribal nail design to the next level and make it truly your own. So go ahead and unleash your inner artist and create a stunning tribal nail design that reflects your unique personality.
Tribal nail designs can also serve as inspiration for your outfit choices. Take the colors and patterns from your nails and incorporate them into your clothing, accessories, or even makeup. This will create a cohesive and stylish look that is sure to turn heads.
In conclusion, tribal nail designs are not only a fun and creative way to express yourself, but they also offer endless possibilities for customization. With the tips and techniques mentioned above, you can elevate your tribal nail design to the next level and make it truly your own. So go ahead and unleash your inner artist and create a stunning tribal nail design that reflects your unique personality.


