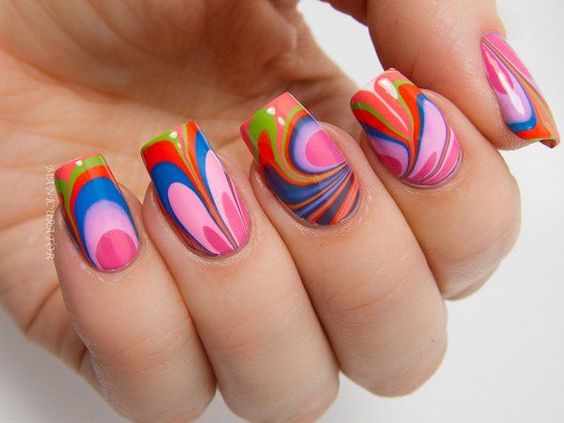
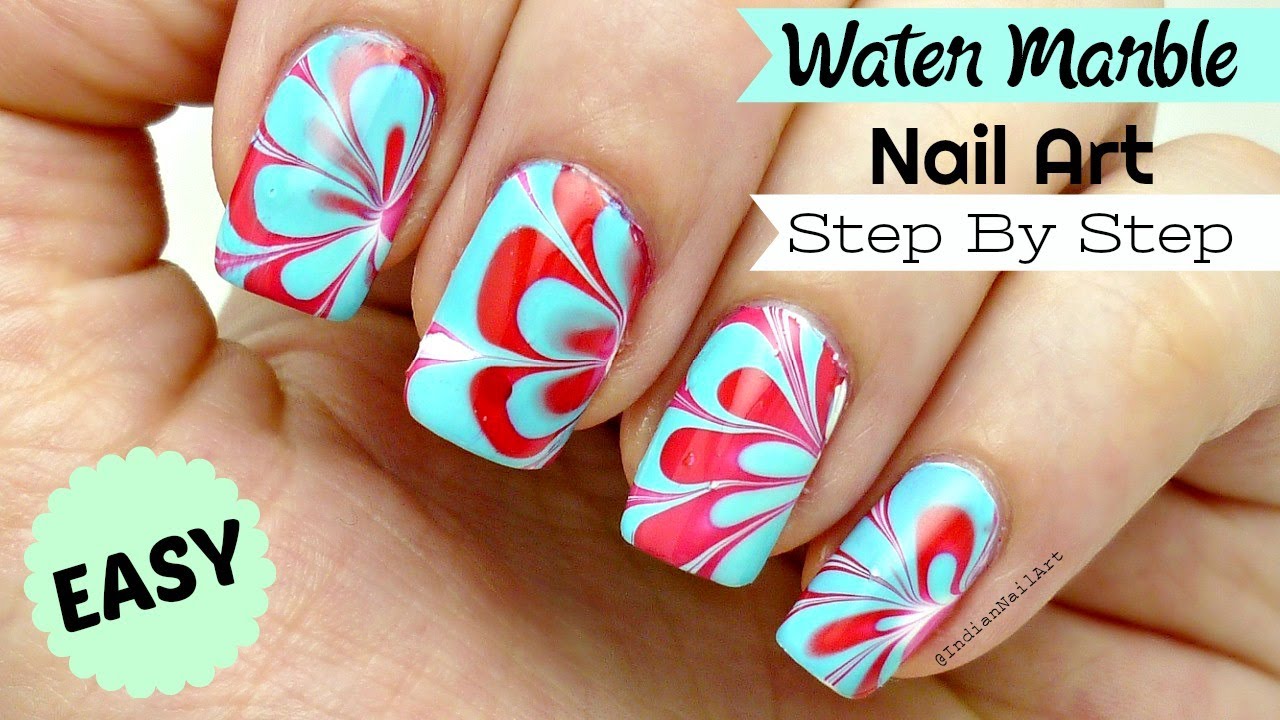
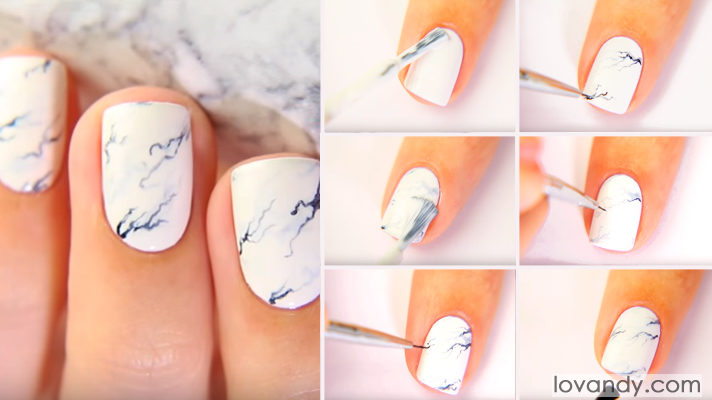
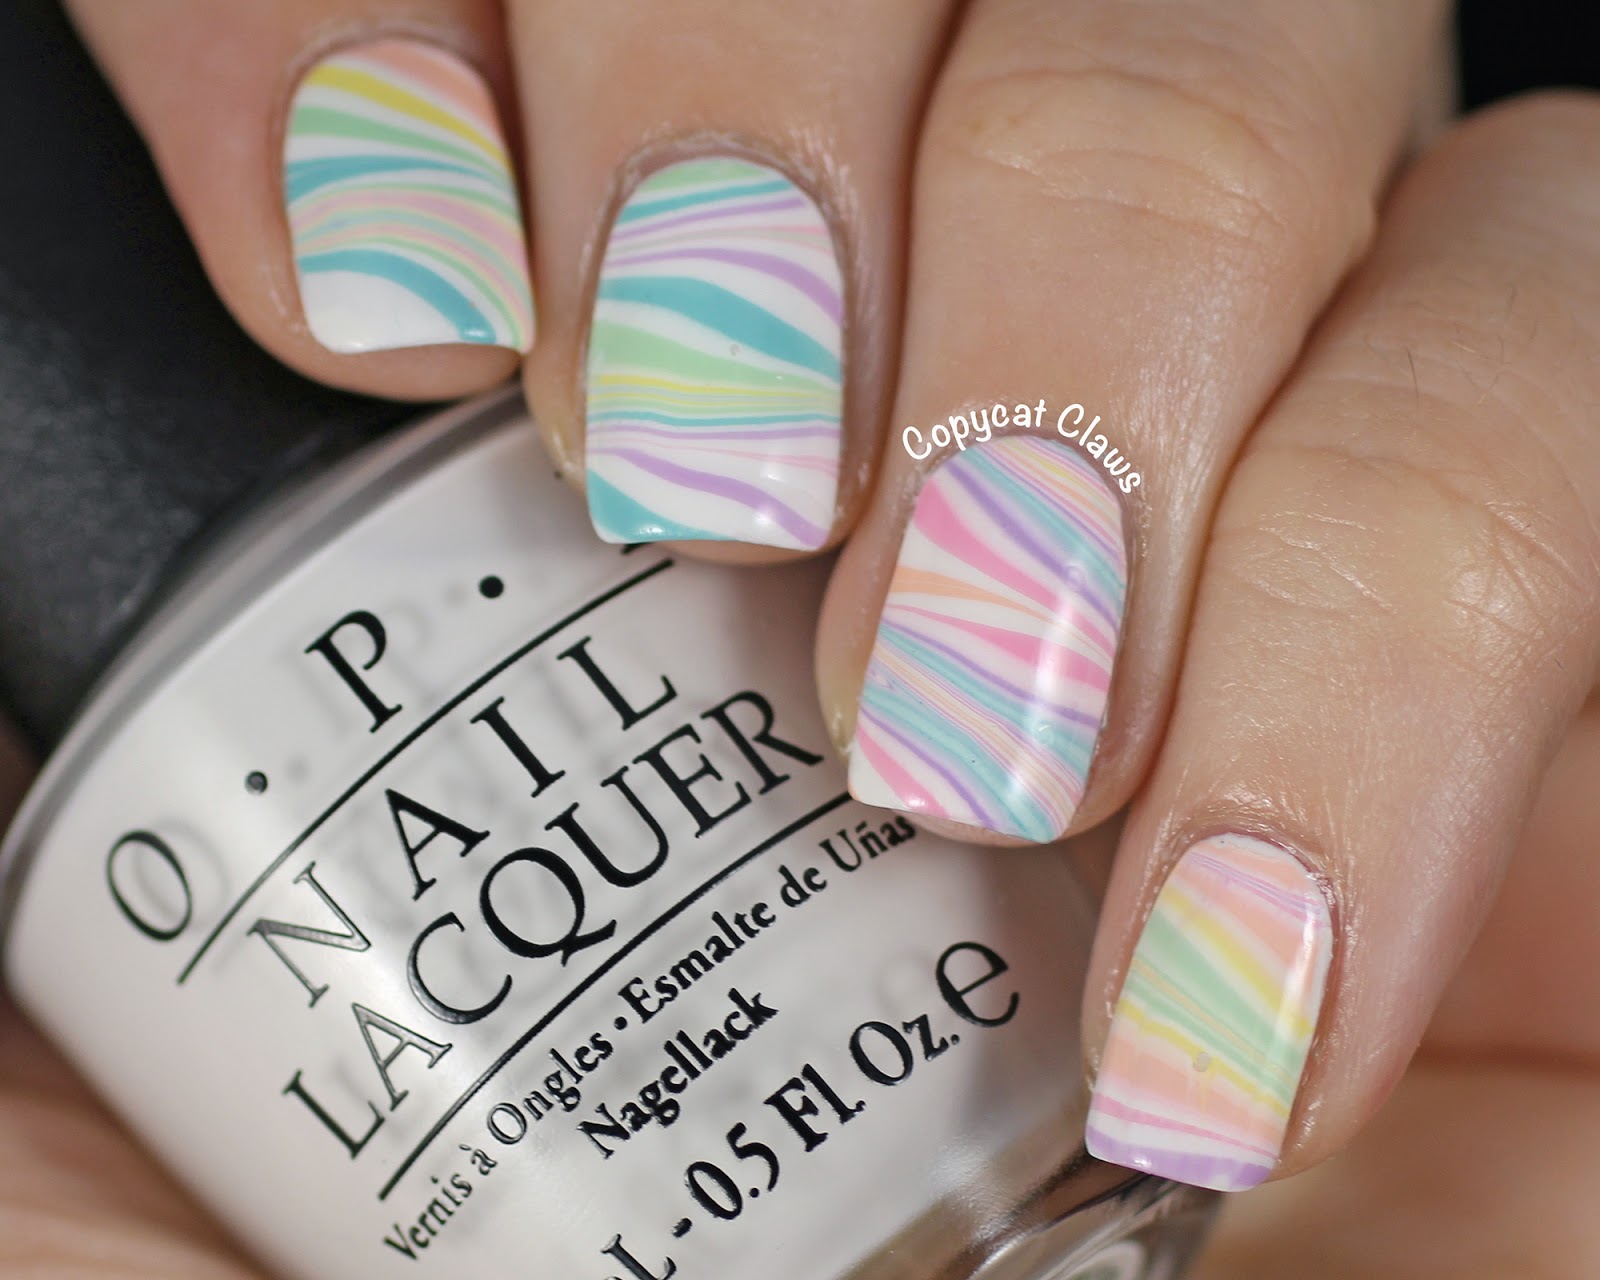
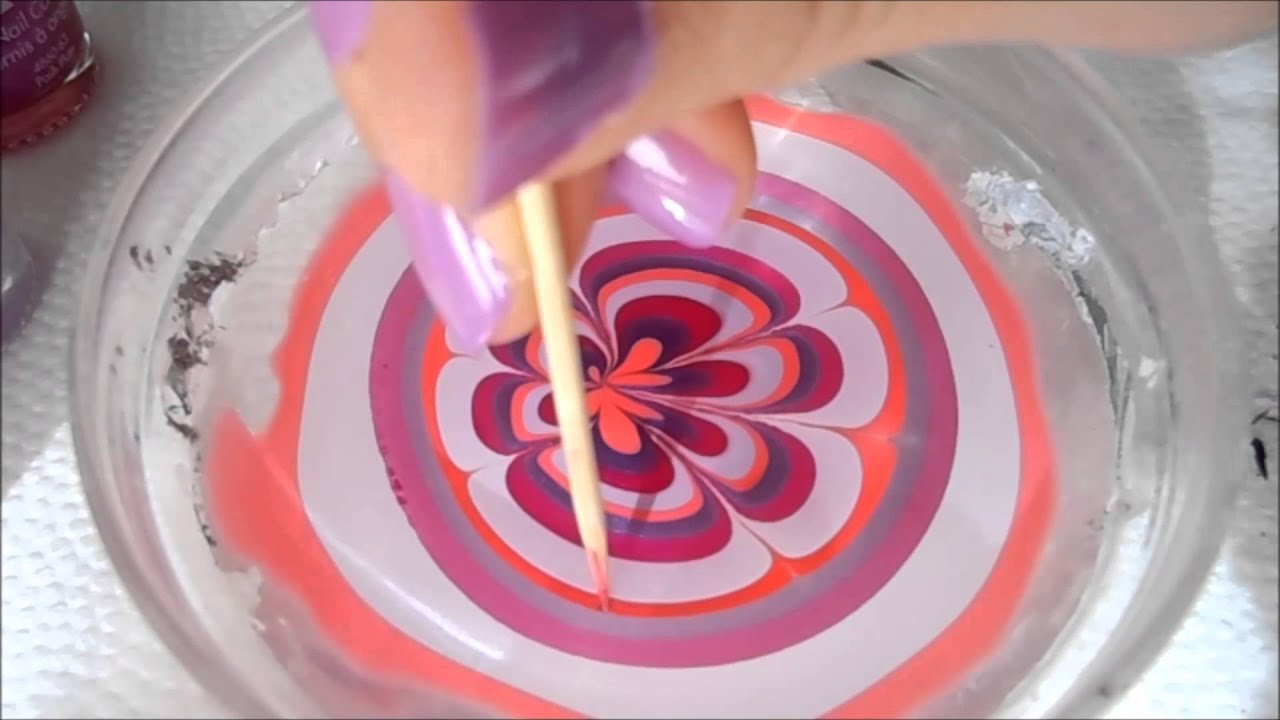
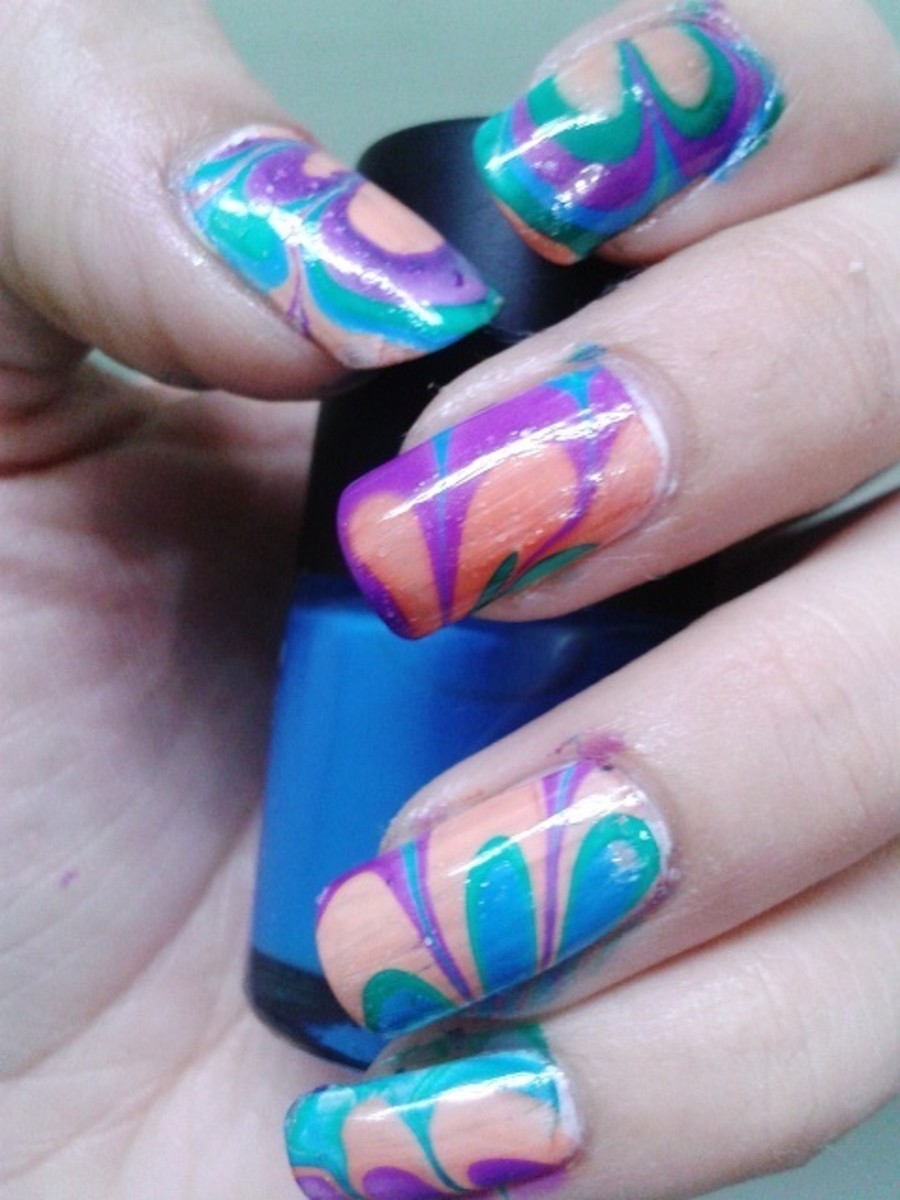
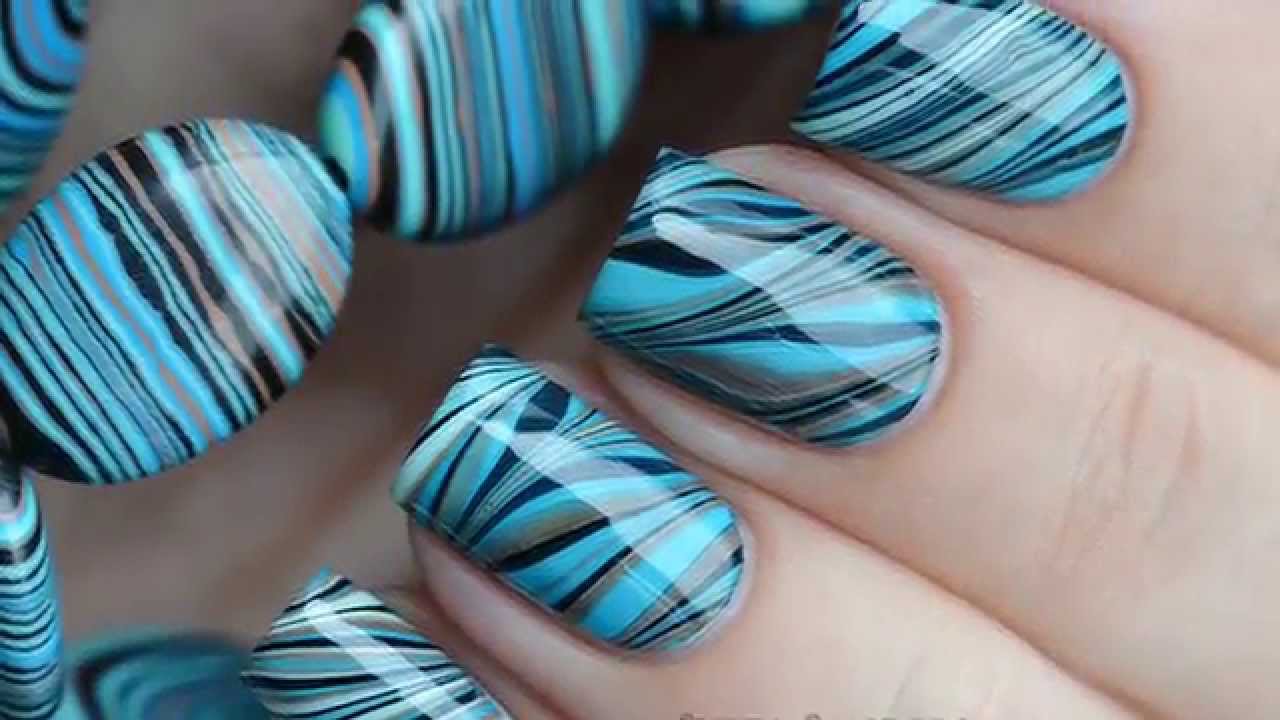
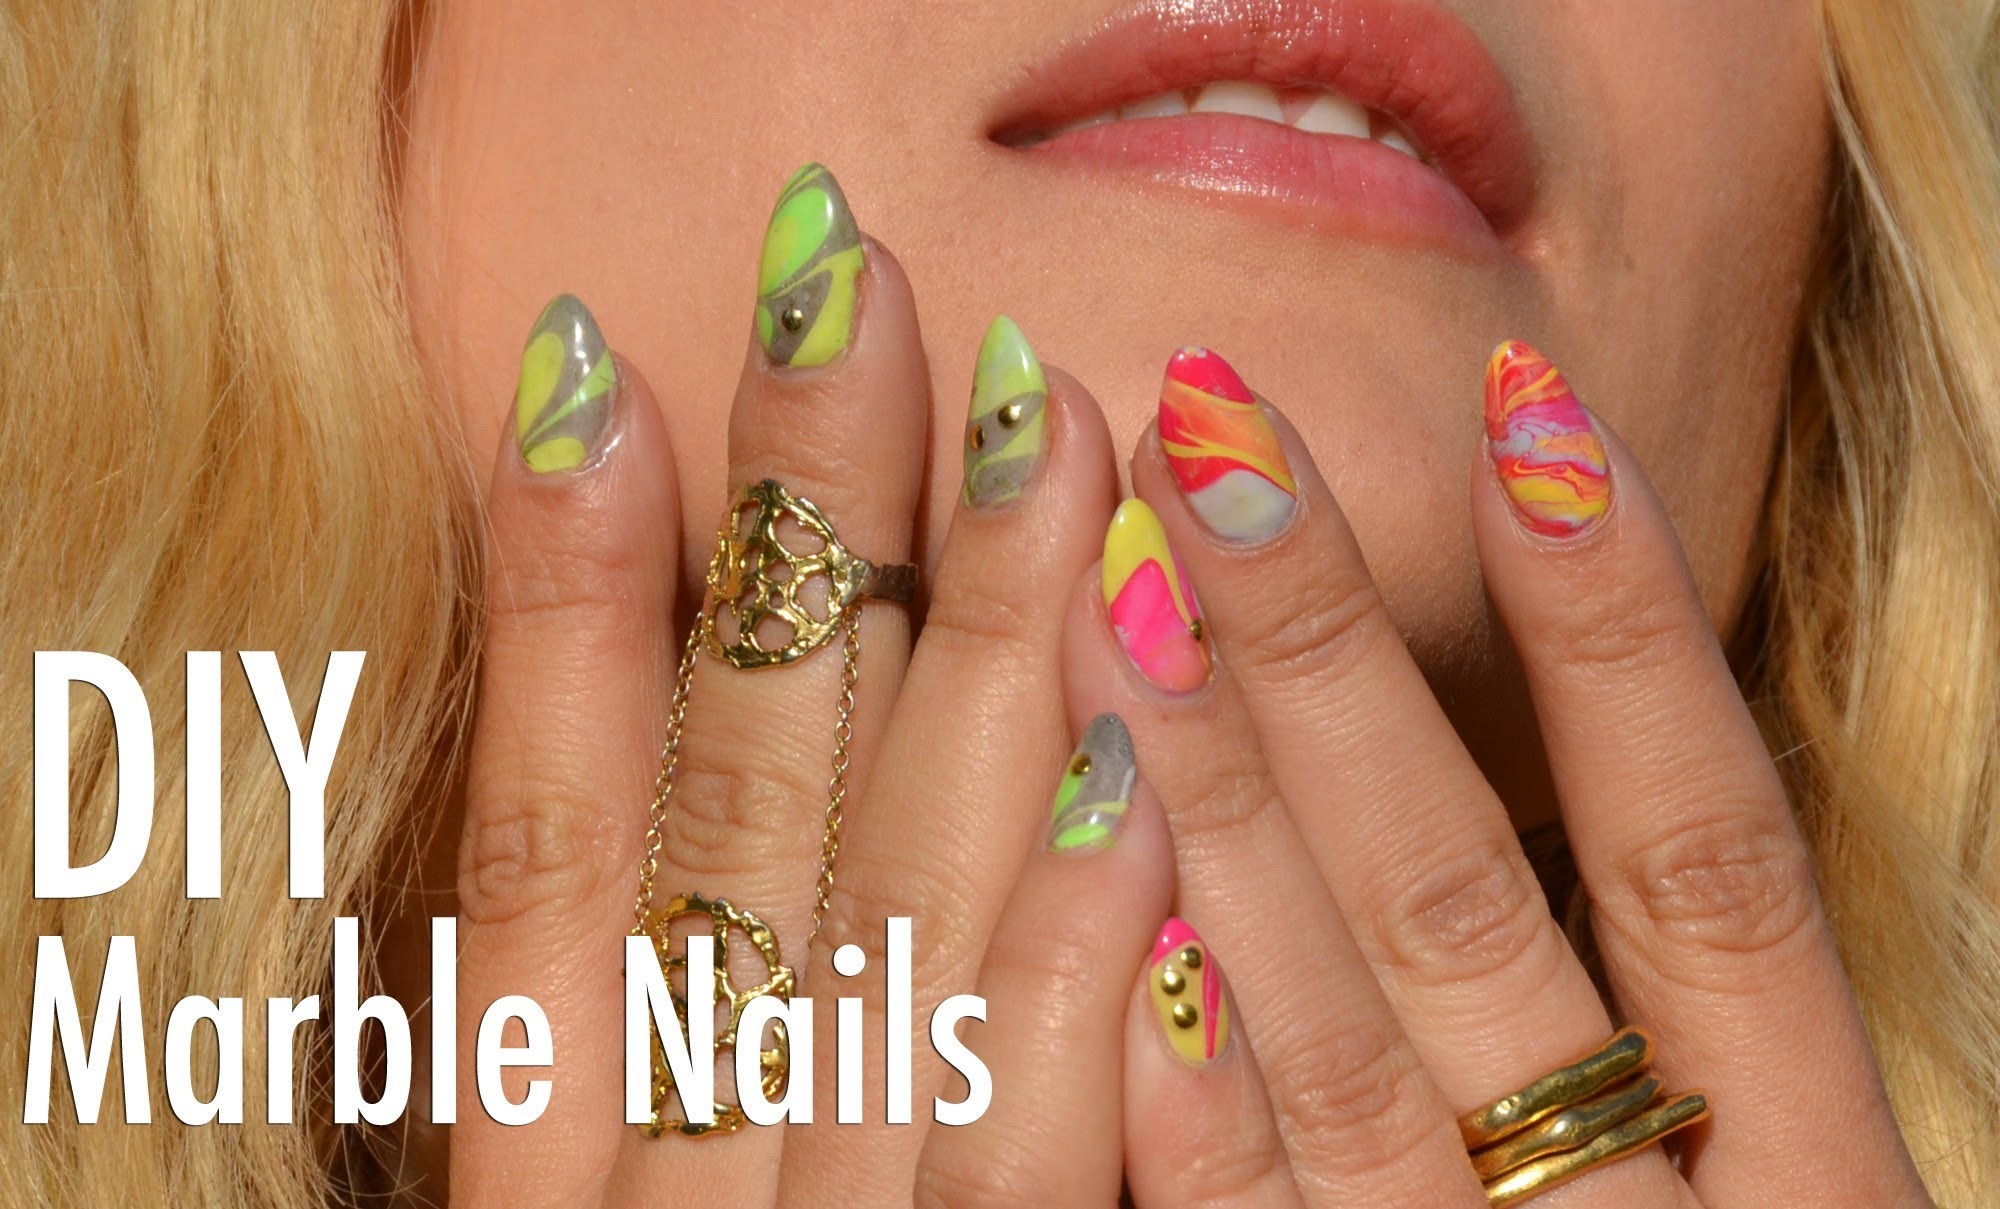
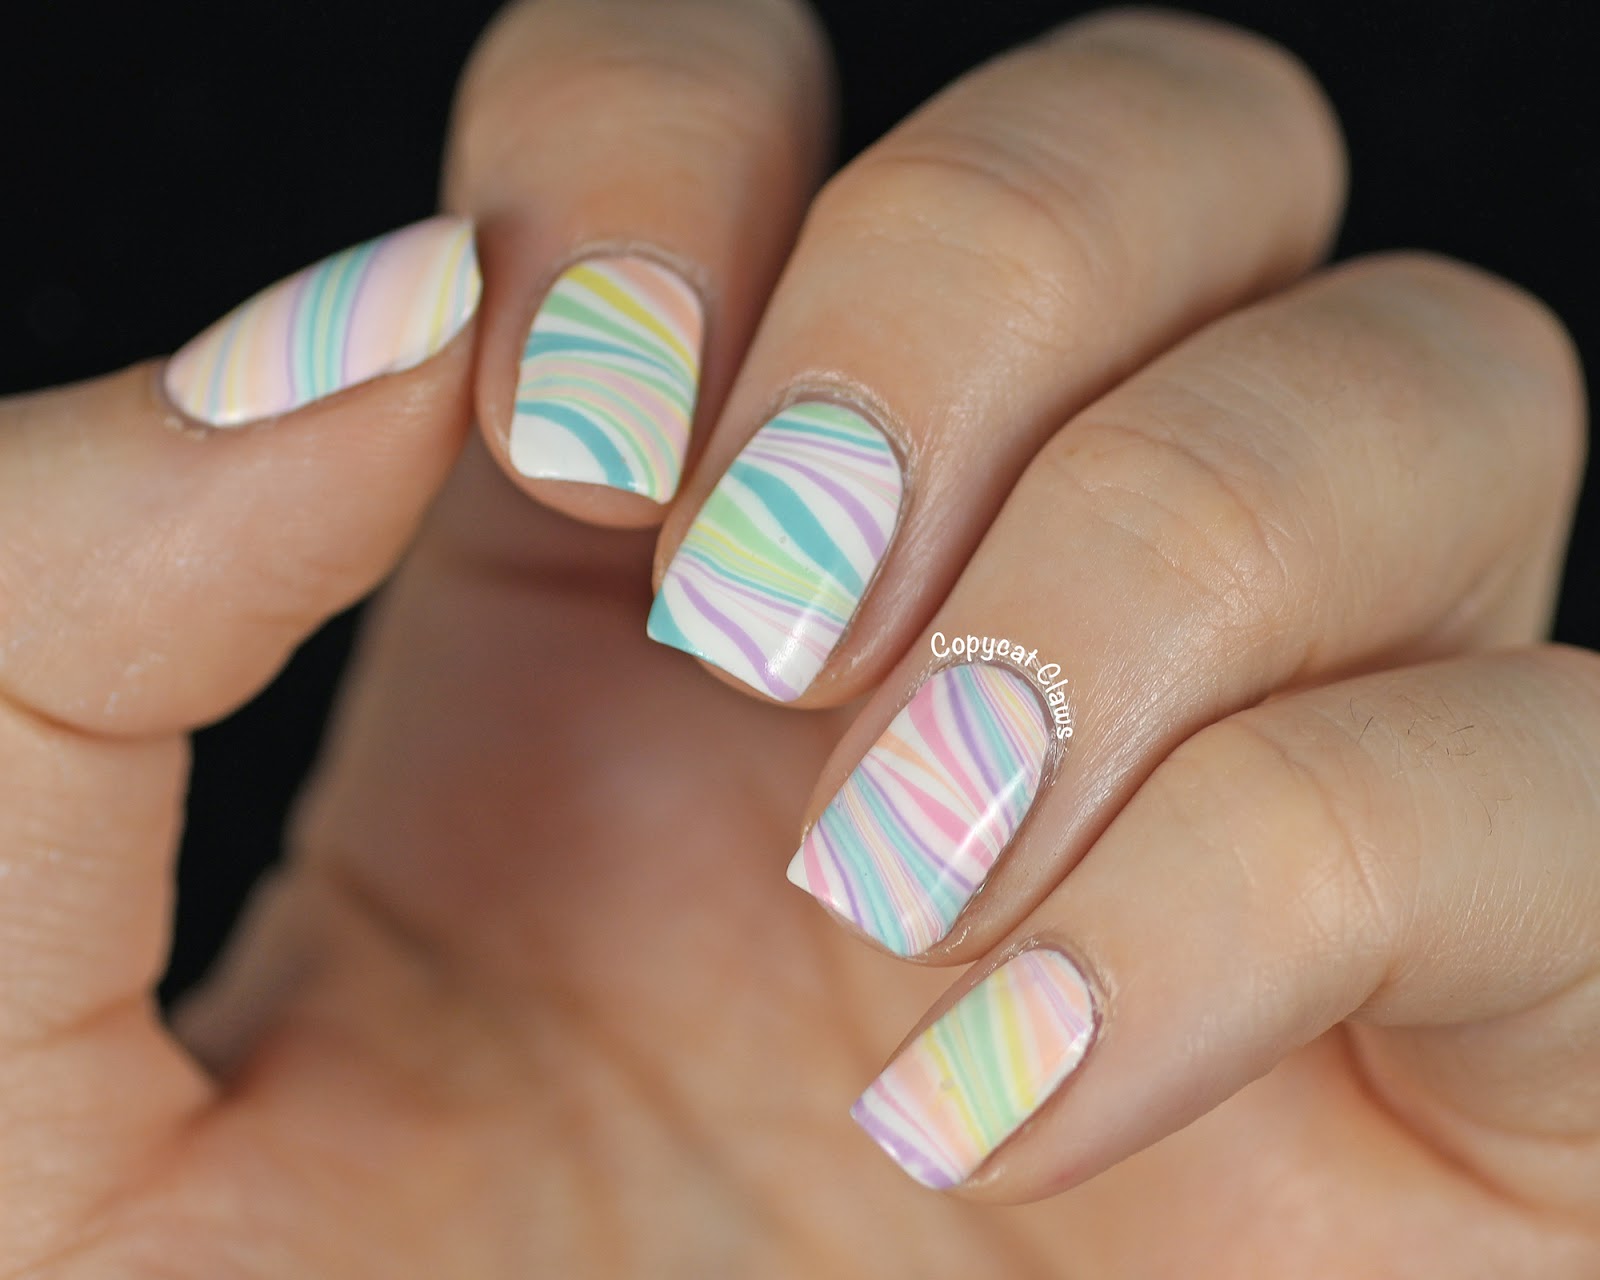
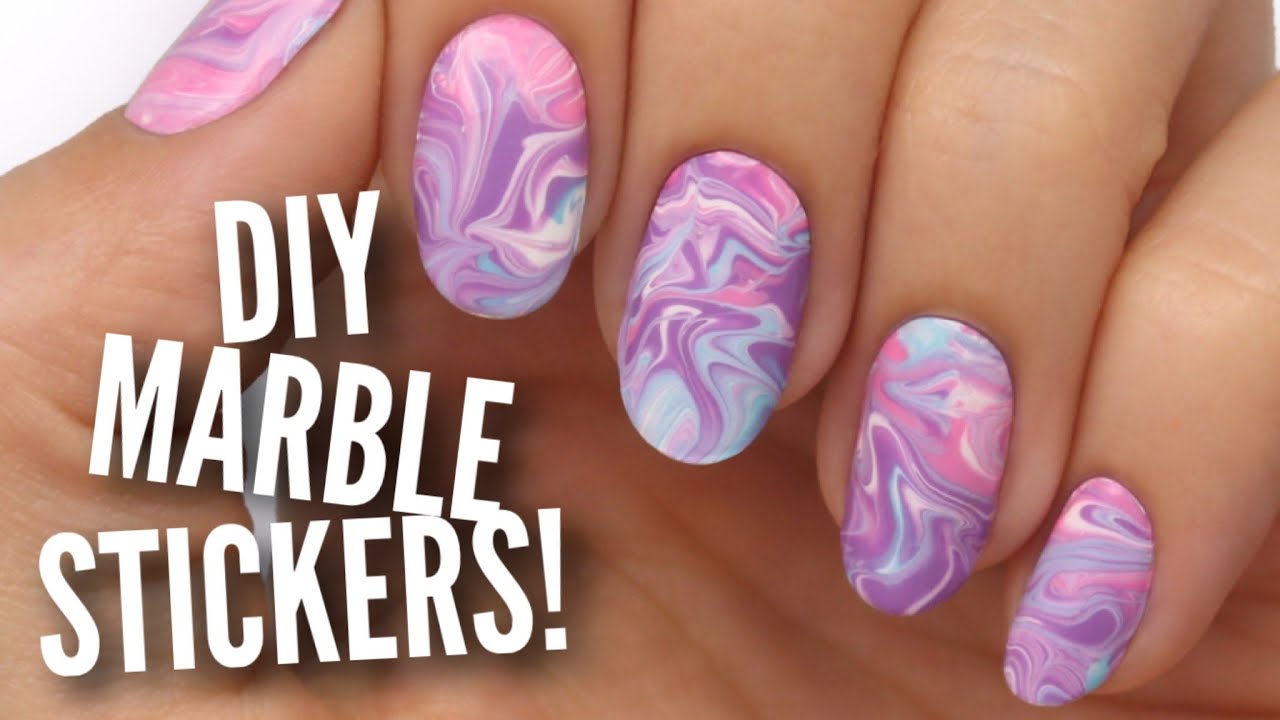
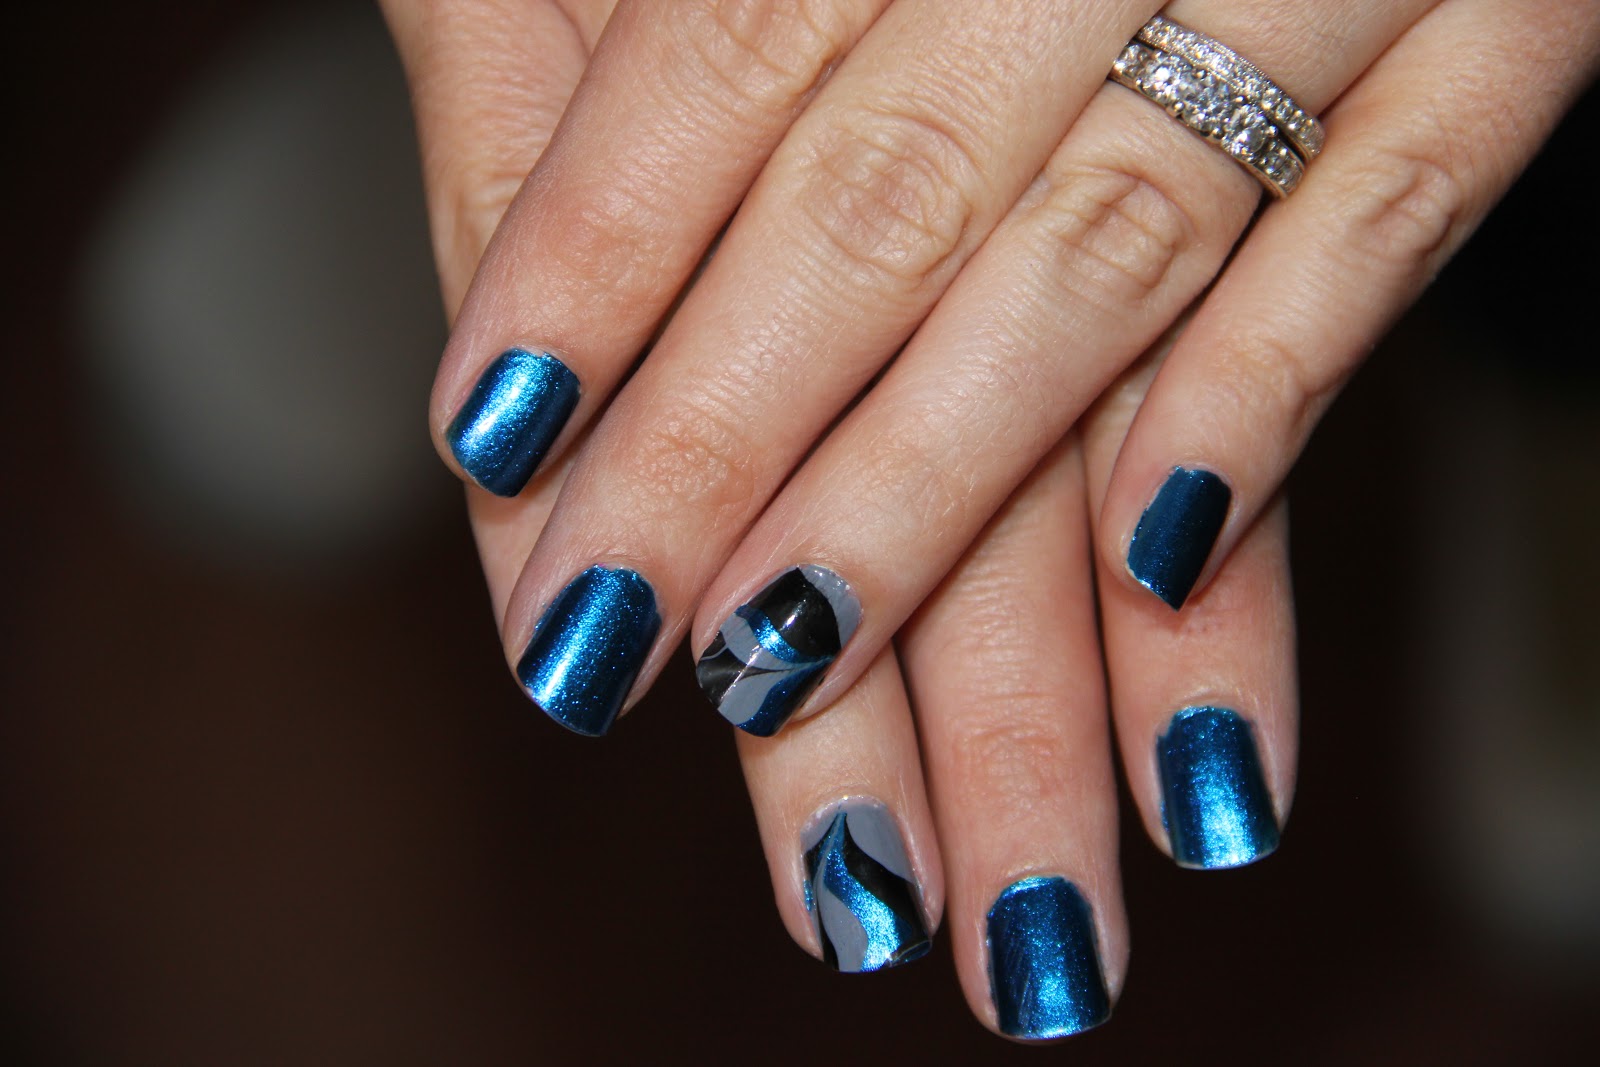
Water marble nail art has become a popular trend in the world of nail design. It involves creating a marbled effect on the nails by swirling different colors of nail polish in a bowl of water. It may seem like a complicated technique, but with the right tools and step by step guide, you can achieve beautiful water marble nails in no time. Featured keywords: water marble nail art, step by step guide, marbled effect, nail polish, complicated technique, beautiful water marble nails First, gather all the necessary materials for this nail art. You will need a bowl of room temperature water, nail polish in your desired colors, nail polish remover, tape, toothpick, and a base and top coat. Next, prep your nails by removing any old nail polish and filing them into your desired shape. Apply a base coat to protect your nails and make the nail polish last longer. Take a piece of tape and place it around your nail, leaving only the tip exposed. This will help with easier clean up later on. You can also apply a thin layer of petroleum jelly around your fingers to prevent the nail polish from sticking to your skin. Now comes the fun part - creating the marbled effect! Start by choosing your first color and dripping a few drops onto the surface of the water. Then, add a few drops of your second color on top of the first one. Continue with the rest of your colors, alternating between them. Using a toothpick, gently swirl the colors together to create a marbled effect. Don't overdo it, as the colors can easily blend and turn into a muddy mess. If this happens, just wipe the surface of the water with a tissue and start over. Once you are happy with the design, slowly dip your nail into the water at a 45-degree angle. This will ensure that the design wraps around your entire nail. Hold your nail in the water for a few seconds and use the toothpick to remove any excess nail polish from the surface of the water. Remove your finger from the water and peel off the tape. Use a cotton swab dipped in nail polish remover to clean up any excess nail polish around your cuticles. Finally, apply a top coat to seal in the design and make it last longer. And voila, you have achieved a beautiful water marble nail art!1. Water Marble Nail Art Tutorial | Step by Step Guide


1. Water Marble Nail Art Tutorial
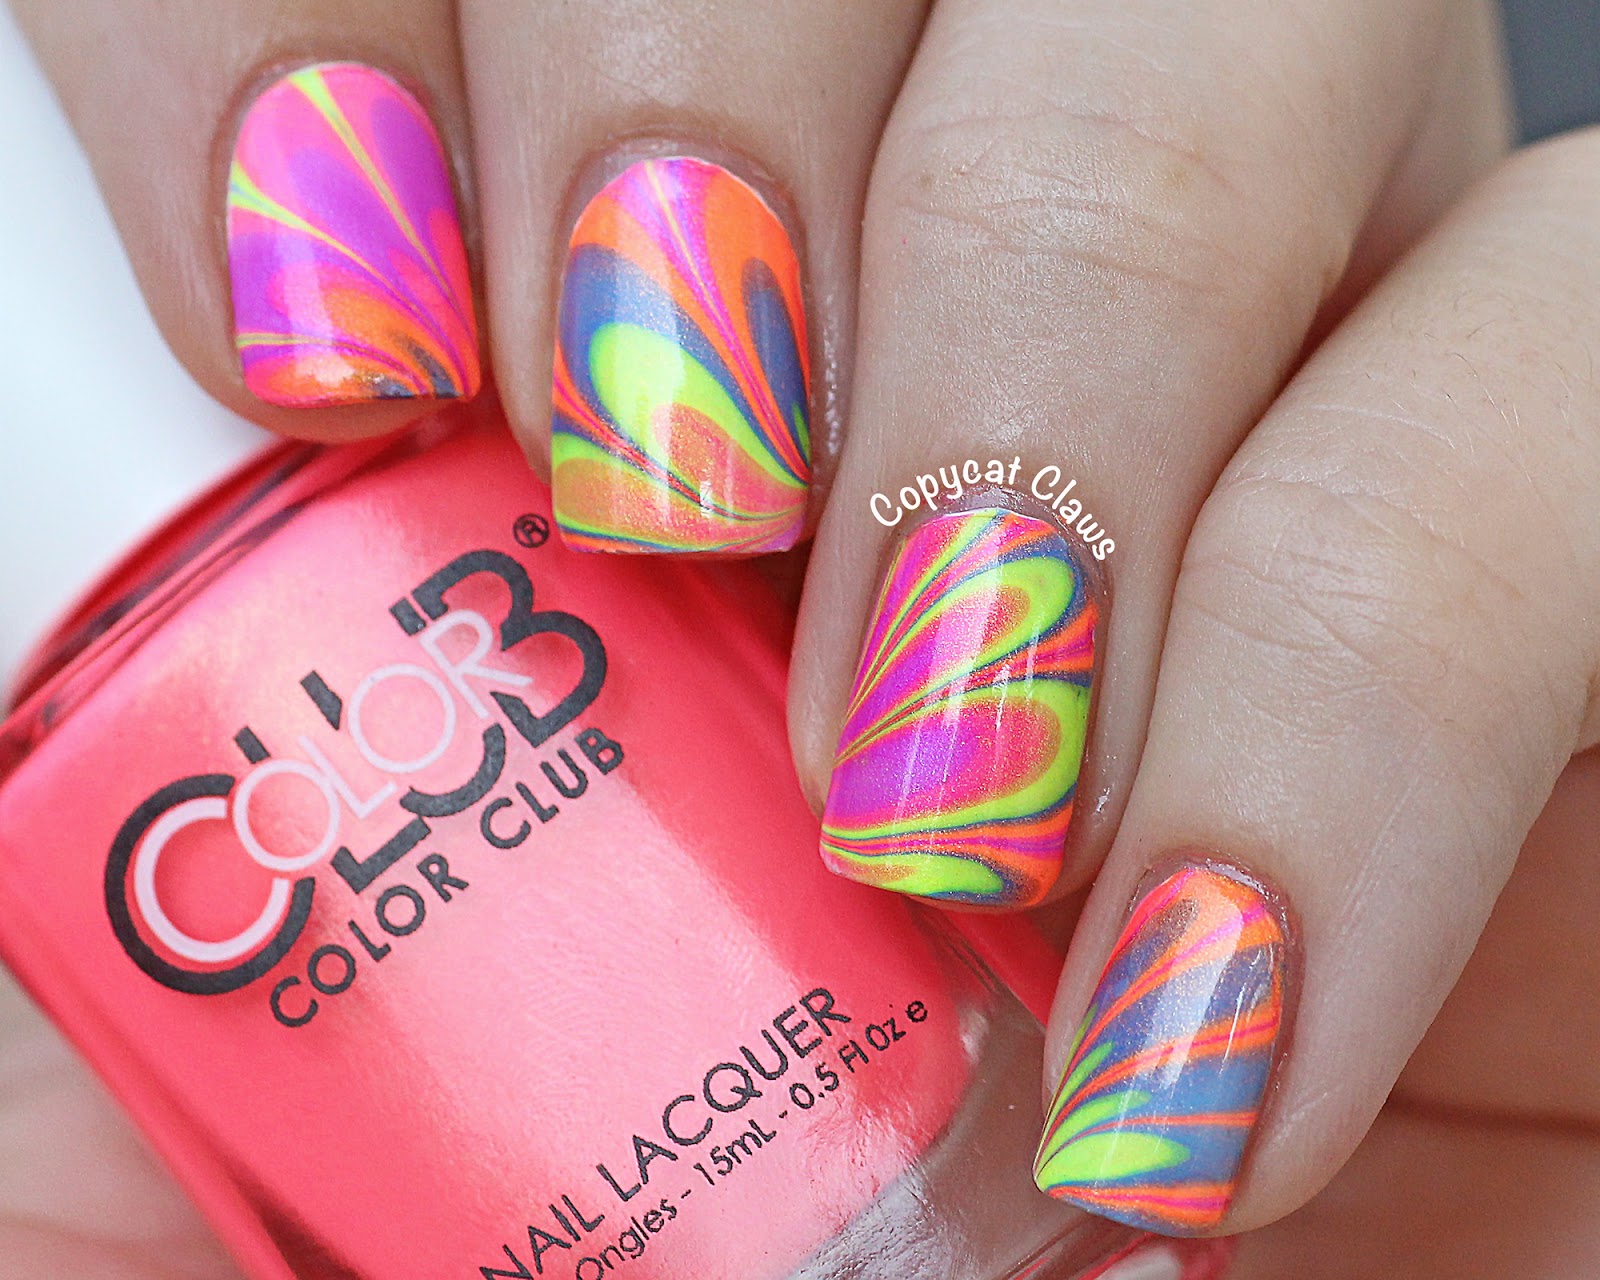

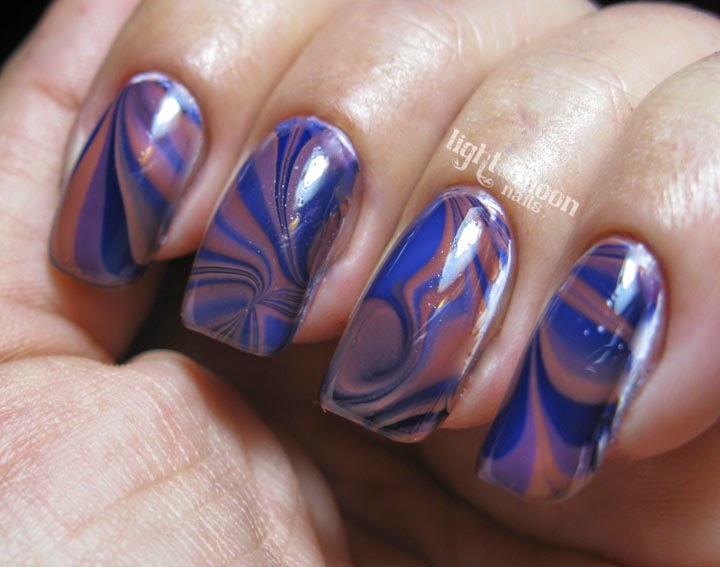


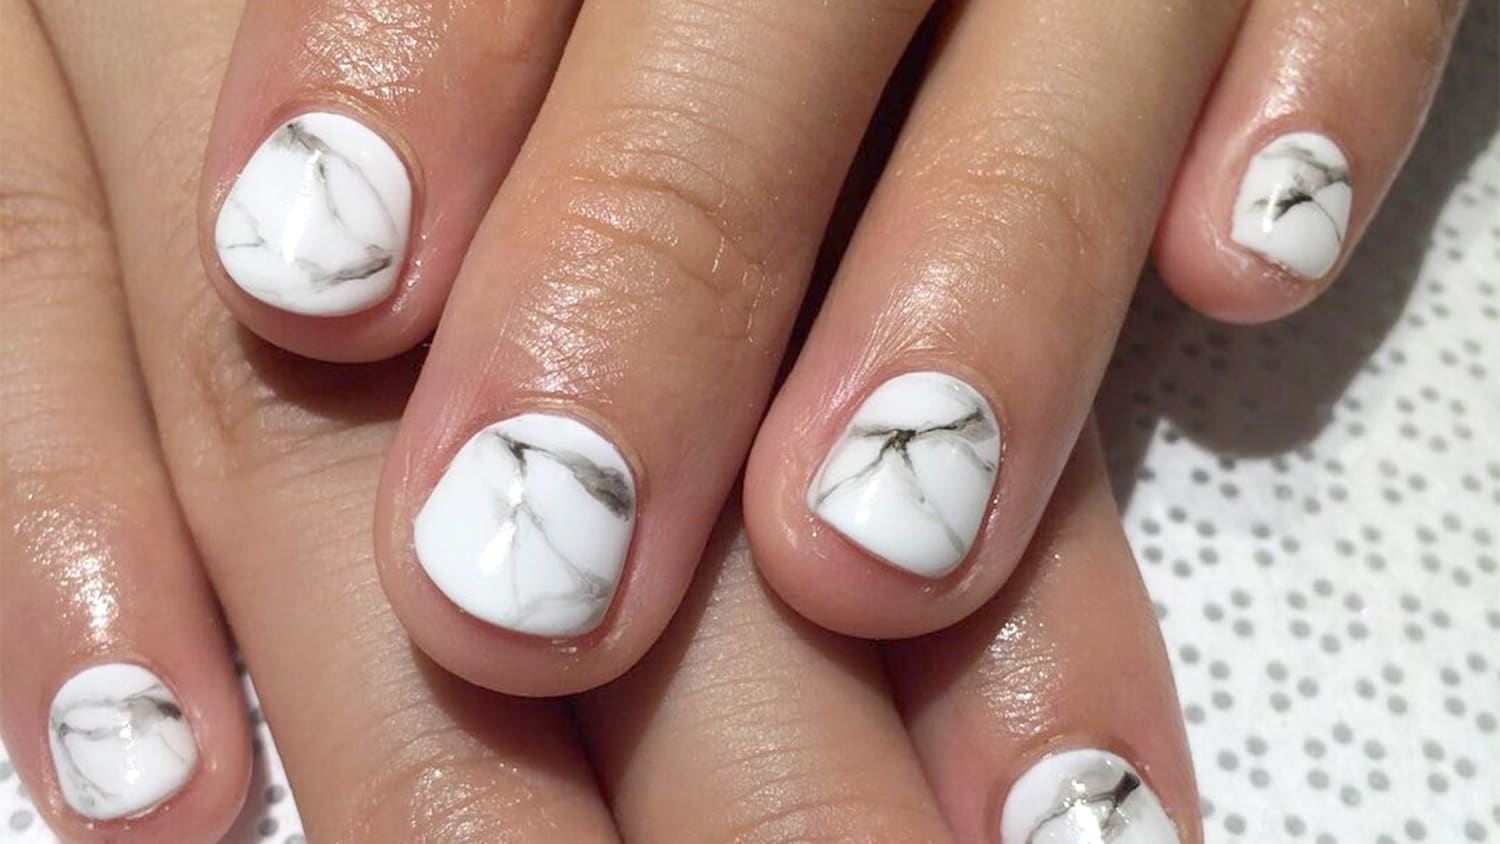
Water marble nails may seem intimidating, but with the right step by step guide, you can master this technique and create stunning marbled designs on your nails. Here's how to do water marble nails in a few easy steps. Featured keywords: water marble nails, step by step guide, intimidating, technique, stunning marbled designs The first step is to gather all the necessary materials. This includes a bowl of room temperature water, nail polish in your desired colors, tape, toothpick, nail polish remover, and a base and top coat. Prep your nails by removing any old nail polish and shaping them to your liking. Apply a base coat to protect your nails and make the nail polish last longer. Next, take a piece of tape and wrap it around your nail, leaving only the tip exposed. This will make clean up easier later on. You can also apply a thin layer of petroleum jelly around your fingers to prevent the nail polish from sticking to your skin. Now, it's time to create the marbled effect. Start by dripping a few drops of your first color onto the surface of the water. Then, add a few drops of your second color on top of the first one. Continue with the rest of your colors, alternating between them. Using a toothpick, gently swirl the colors together to create a marbled effect. Be careful not to overdo it, as the colors can easily blend and turn into a muddy mess. If this happens, just wipe the surface of the water with a tissue and start over. Once you are satisfied with the design, slowly dip your nail into the water at a 45-degree angle. This will ensure that the design wraps around your entire nail. Hold your nail in the water for a few seconds and use the toothpick to remove any excess nail polish from the surface of the water. Remove your finger from the water and peel off the tape. Use a cotton swab dipped in nail polish remover to clean up any excess nail polish around your cuticles. Finally, apply a top coat to seal in the design and make it last longer. And there you have it - perfect water marble nails!2. How to Do Water Marble Nails: Step by Step Guide


Step by Step Guide

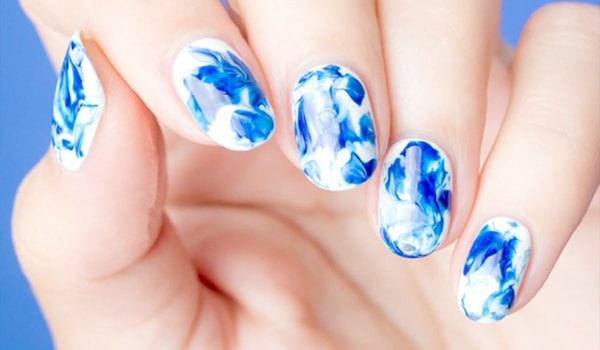
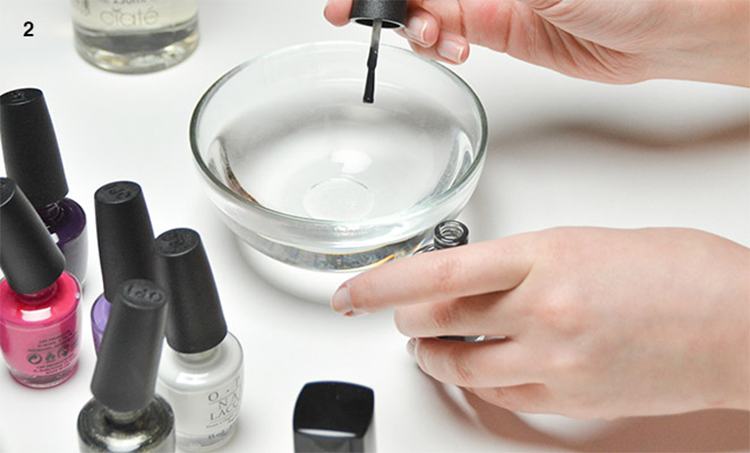


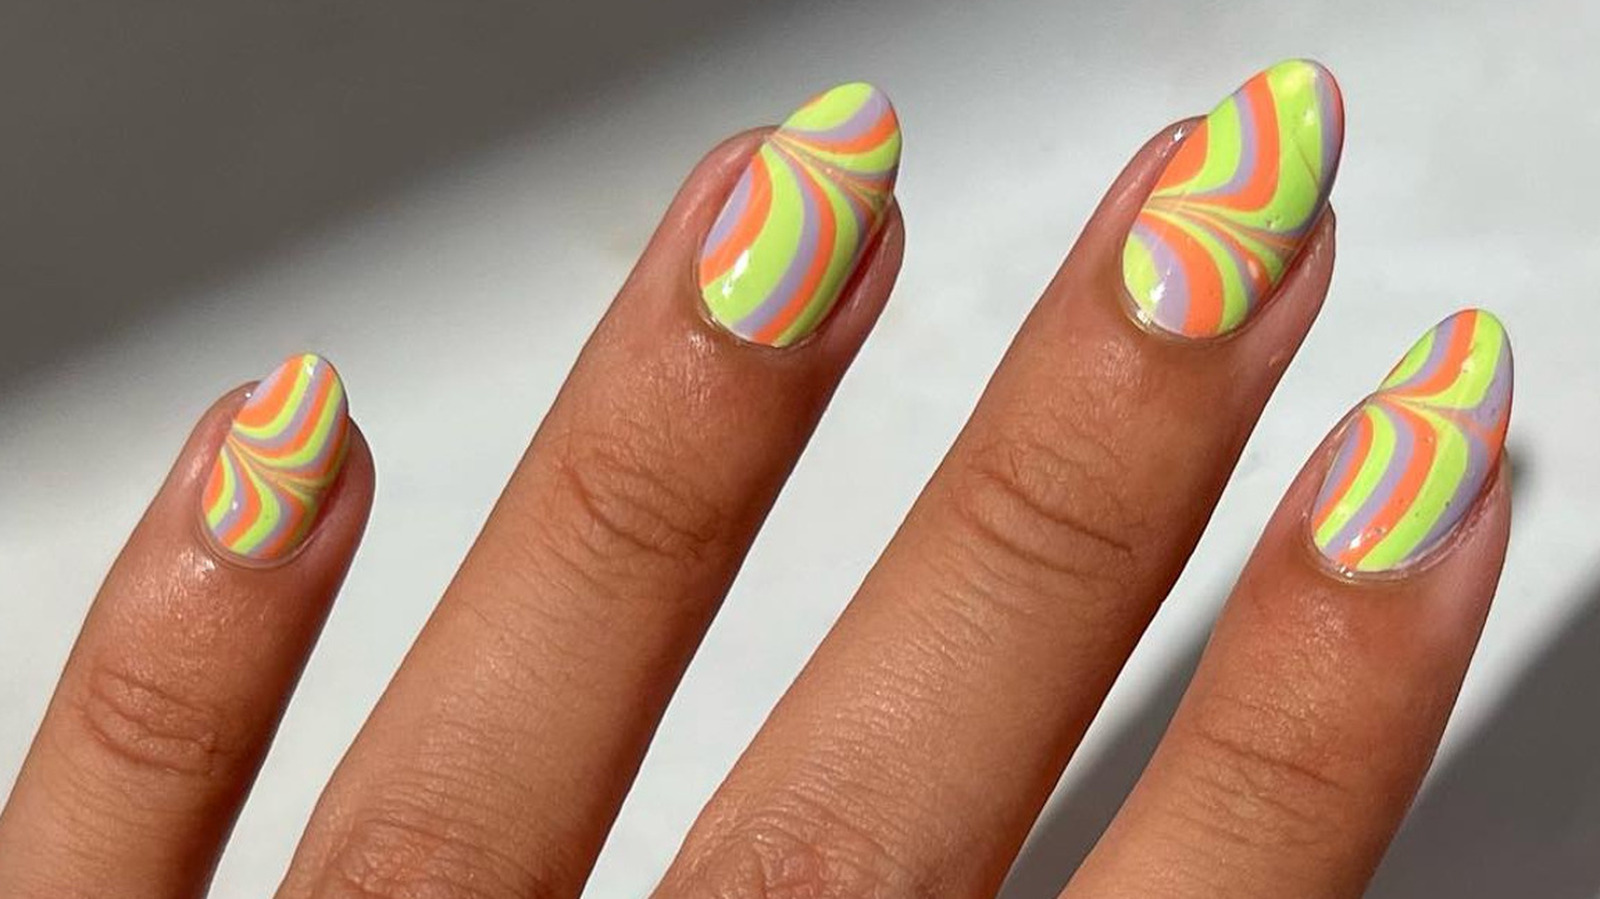
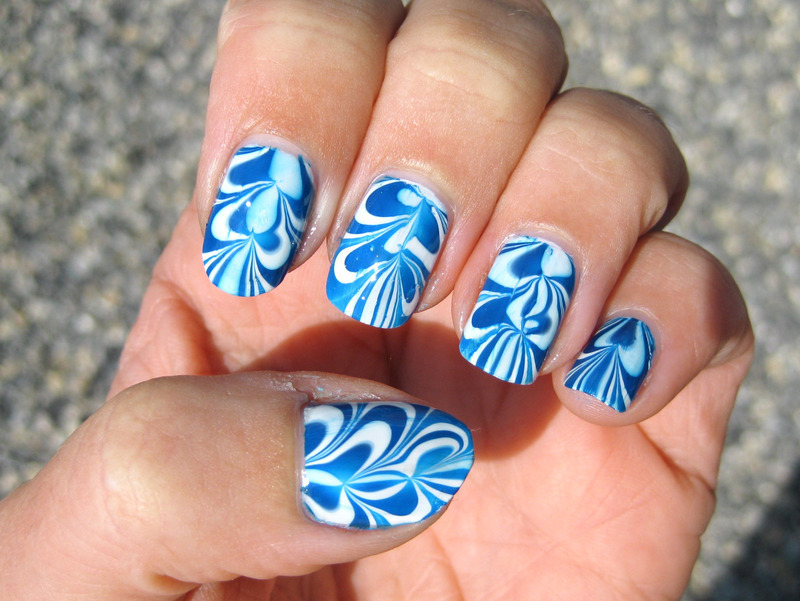
Water marble nail art may seem like a daunting task for beginners, but with a little practice and this easy tutorial, you can create beautiful marbled designs on your nails in no time. Here's a step by step guide for beginners to achieve perfect water marble nails. Featured keywords: water marble nail art, daunting task, beginners, practice, easy tutorial, beautiful marbled designs To start, gather all the necessary materials - a bowl of room temperature water, nail polish in your desired colors, tape, toothpick, nail polish remover, and a base and top coat. Prep your nails by removing any old nail polish and shaping them to your desired shape. Apply a base coat to protect your nails and make the nail polish last longer. Next, take a piece of tape and wrap it around your nail, leaving only the tip exposed. This will make clean up easier later on. You can also apply a thin layer of petroleum jelly around your fingers to prevent the nail polish from sticking to your skin. Now comes the fun part - creating the marbled effect. Start by dripping a few drops of your first color onto the surface of the water. Then, add a few drops of your second color on top of the first one. Continue with the rest of your colors, alternating between them. Using a toothpick, gently swirl the colors together to create a marbled effect. Don't overdo it, as the colors can easily blend and turn into a muddy mess. If this happens, just wipe the surface of the water with a tissue and start over. Once you are happy with the design, slowly dip your nail into the water at a 45-degree angle. This will ensure that the design wraps around your entire nail. Hold your nail in the water for a few seconds and use the toothpick to remove any excess nail polish from the surface of the water. Remove your finger from the water and peel off the tape. Use a cotton swab dipped in nail polish remover to clean up any excess nail polish around your cuticles. Finally, apply a top coat to seal in the design and make it last longer. And there you have it - easy water marble nail art for beginners!3. Easy Water Marble Nail Art Tutorial for Beginners


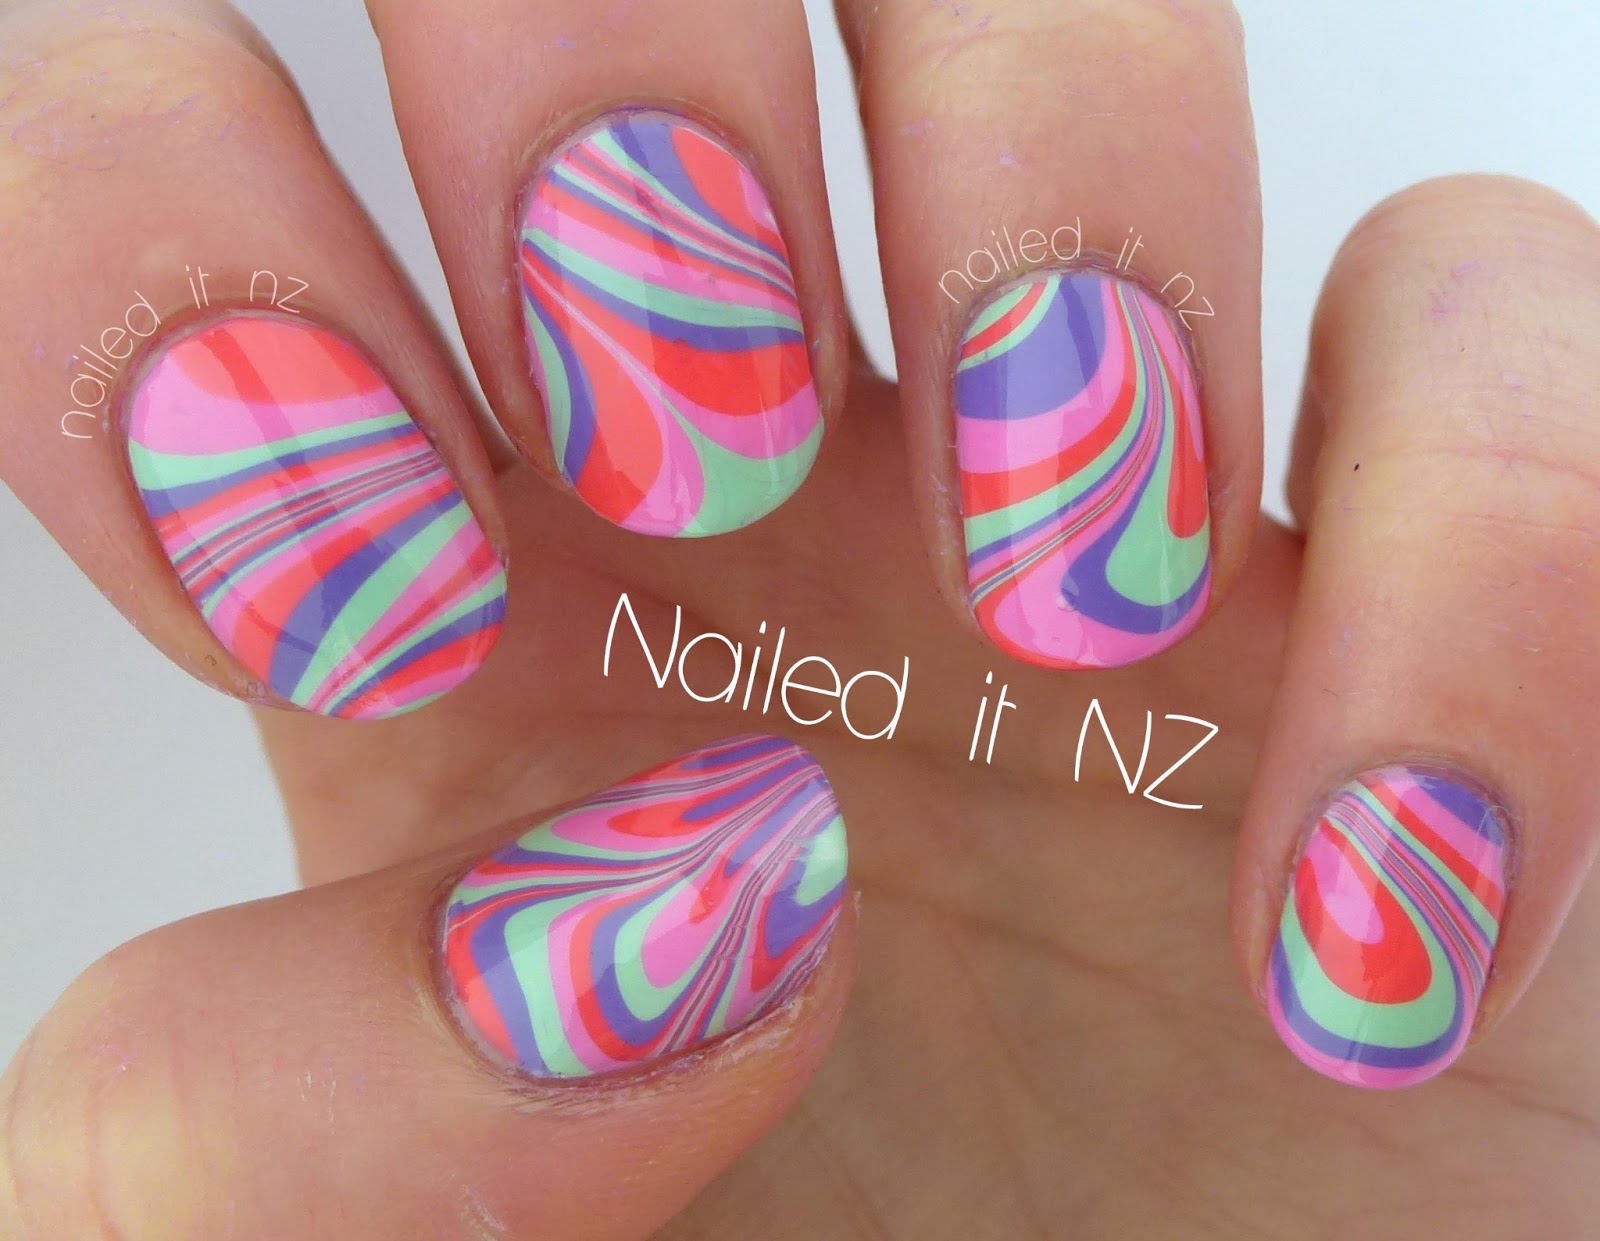
2. How to Do Water Marble Nails: Step by Step Guide


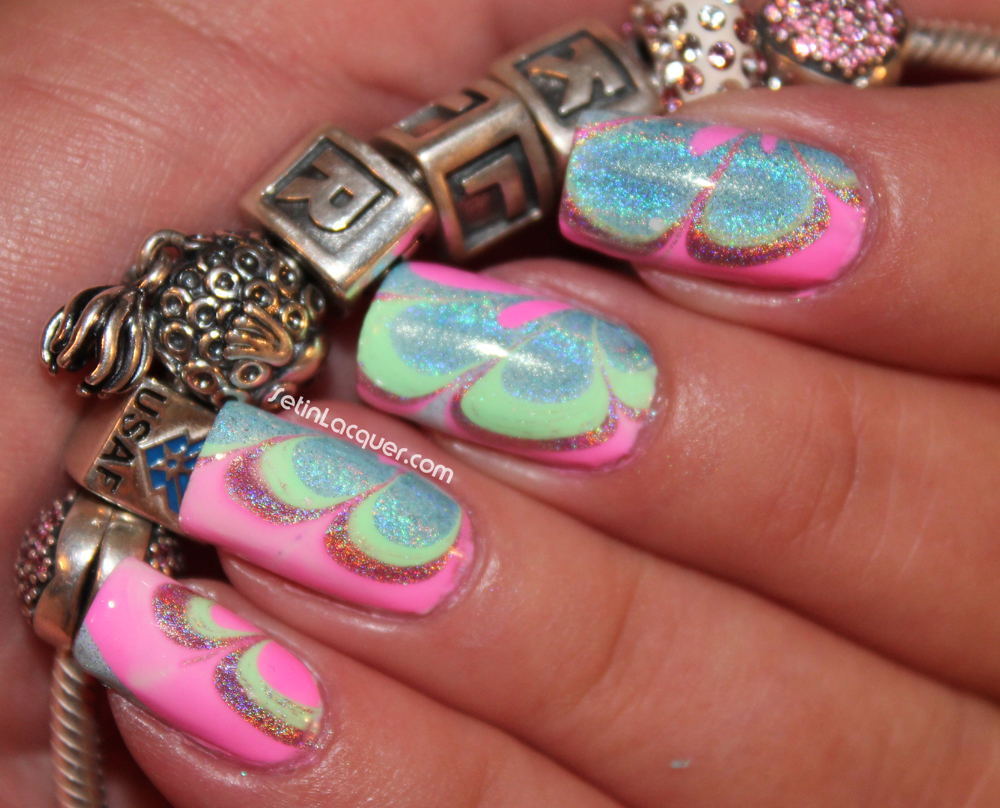
Water marble nails are a unique and eye-catching way to add some personality to your nails. With this step by step water marble nail design tutorial, you can achieve perfect marbled nails in no time. Let's get started! Featured keywords: water marble nails, step by step, unique, eye-catching, personality, marbled nails First, gather all the necessary materials - a bowl of room temperature water, nail polish in your desired colors, tape, toothpick, nail polish remover, and a base and top coat. Prep your nails by removing any old nail polish and shaping them to your desired shape. Apply a base coat to protect your nails and make the nail polish last longer. Next, take a piece of tape and wrap it around your nail, leaving only the tip exposed. This will make clean up easier later on. You can also apply a thin layer of petroleum jelly around your fingers to prevent the nail polish from sticking to your skin. Now, it's time to create the marbled effect. Start by dripping a few drops of your first color onto the surface of the water. Then, add a few drops of your second color on top of the first one. Continue with the rest of your colors, alternating between them. Using a toothpick, gently swirl the colors together to create a marbled effect. Be careful not to overdo it, as the colors can easily blend and turn into a muddy mess. If this happens, just wipe the surface of the water with a tissue and start over. Once you are satisfied with the design, slowly dip your nail into the water at a 45-degree angle. This will ensure that the design wraps around your entire nail. Hold your nail in the water for a few seconds and use the toothpick to remove any excess nail polish from the surface of the water. Remove your finger from the water and peel off the tape. Use a cotton swab dipped in nail polish remover to clean up any excess nail polish around your cuticles. Finally, apply a top coat to seal in the design and make it last longer. Now you have a stunning water marble nail design!4. Step by Step Water Marble Nail Design Tutorial


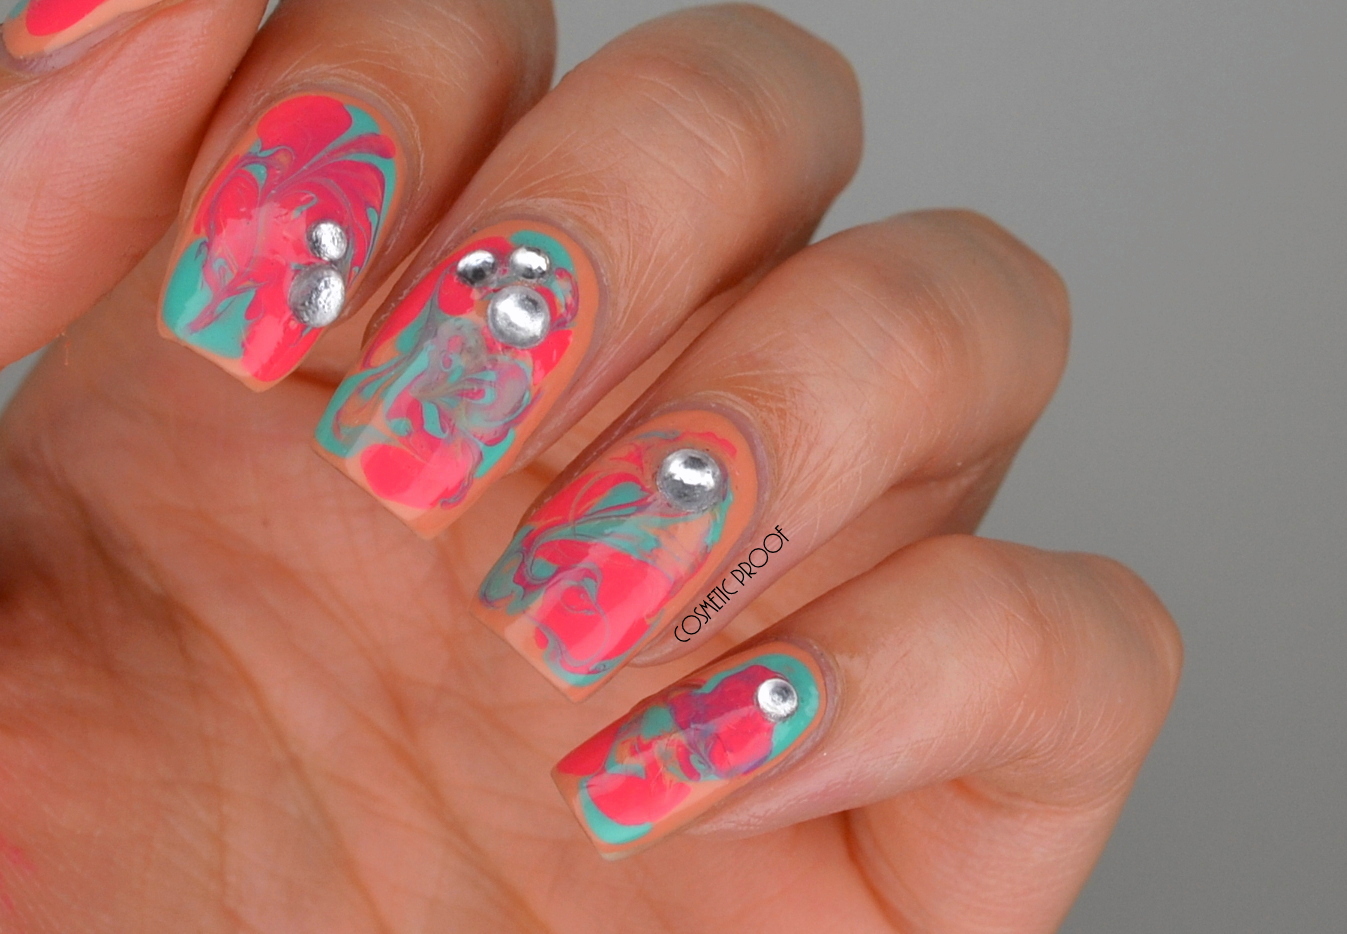
3. Easy Water Marble Nail Art Tutorial for Beginners

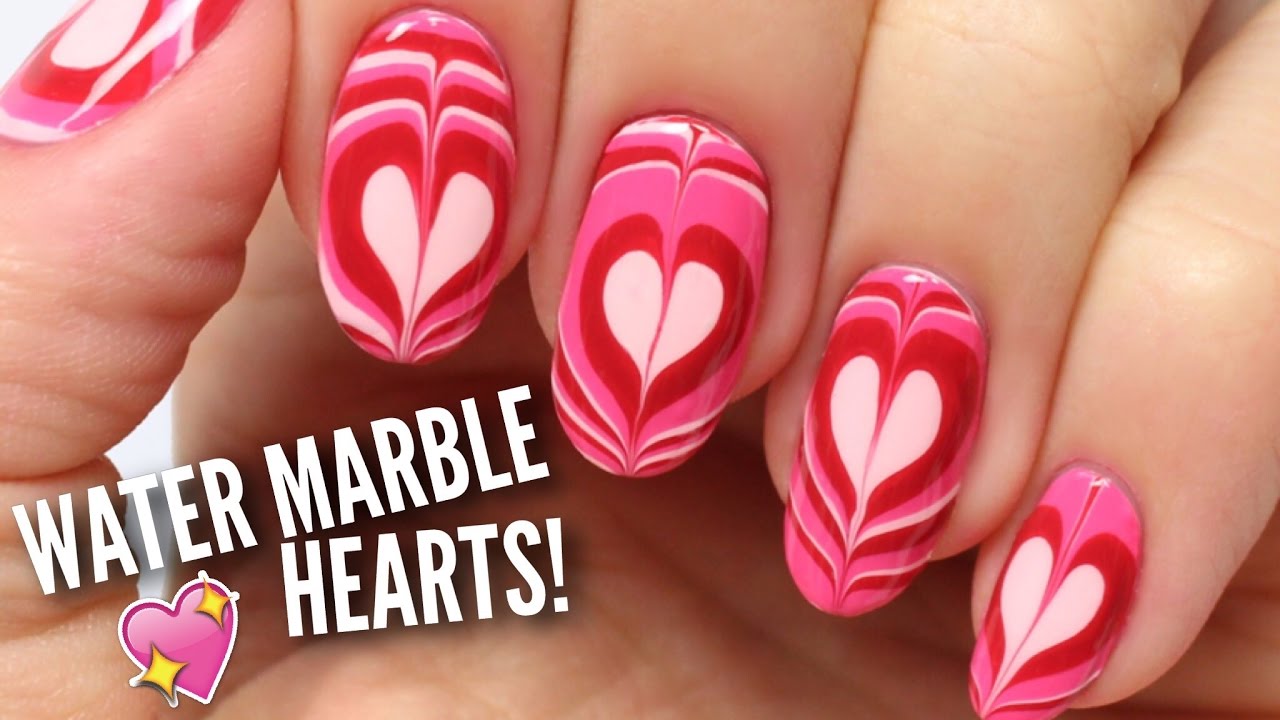
Water marble nail art is a fun and creative way to add some color and design to your nails. With these step by step instructions, you can achieve the perfect marbled effect on your nails. Let's dive in! Featured keywords: water marble nail art, step by step instructions, fun, creative, color, design, perfect marbled effect Begin by gathering all the necessary materials - a bowl of room temperature water, nail polish in your desired colors, tape, toothpick, nail polish remover, and a base and top coat. Prep your nails by removing any old nail polish and shaping them to your desired shape. Apply a base coat to protect your nails and make the nail polish last longer. Next, take a piece of tape and wrap it around your nail, leaving only the tip exposed. This will make clean up easier later on. You can also apply a thin layer of petroleum jelly around your fingers to prevent the nail polish from sticking to your skin. Now, it's time to create the marbled effect. Start by dripping a few drops of your first color onto the surface of the water. Then, add a few drops of your second color on top of the first one. Continue with the rest of your colors, alternating between them. Using a toothpick, gently swirl the colors together to create a marbled effect. Be careful not to overdo it, as the colors can easily blend and turn into a muddy mess. If this happens, just wipe the surface of the water with a tissue and start over. Once you are satisfied with the design, slowly dip your nail into the water at a 45-degree angle. This will ensure that the design wraps around your entire nail. Hold your nail in the water for a few seconds and use the toothpick to remove any excess nail polish from the surface of the water. Remove your finger from the water and peel off the tape. Use a cotton swab dipped in nail polish remover to clean up any excess nail polish around your cuticles. Finally, apply a top coat to seal in the design and make it last longer. And voila, you have successfully created a gorgeous water marble nail art!5. Water Marble Nail Art: Step by Step Instructions

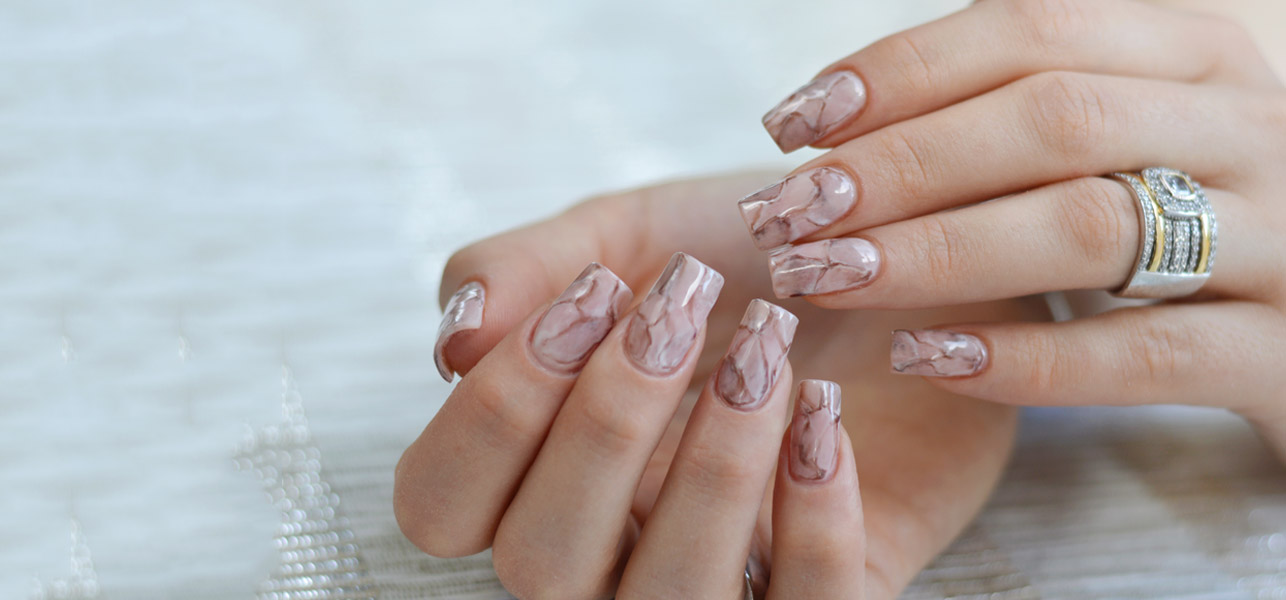
4. Step by Step Water Marble Nail Design Tutorial


Water marble nails are a popular DIY nail art technique that allows you to create unique and intricate designs on your nails. With this step by step tutorial, you can achieve perfect water marble nails at home. Let's get started! Featured keywords: DIY water marble nails, step by step tutorial, popular, unique, intricate designs, perfect water marble nails, at home Start by gathering all the necessary materials - a bowl of room temperature water, nail polish in your desired colors, tape, toothpick, nail polish remover, and a base and top coat. Prep your nails by removing any old nail polish and shaping them to your desired shape. Apply a base coat to protect your nails and make the nail polish last longer. Next, take a piece of tape and wrap it around your nail, leaving only the tip exposed. This will make clean up easier later on. You can also apply a thin layer of petroleum jelly around your fingers to prevent the nail polish from sticking to your skin. Now, it's time to create the marbled effect. Start by dripping a few drops of your first color onto the surface of the water. Then, add a few drops of your second color on top of the first one. Continue with the rest of your colors, alternating between them. Using a toothpick, gently swirl the colors together to create a marbled effect. Be careful not to overdo it, as the colors can easily blend and turn into a muddy mess. If this happens, just wipe the surface of the water with a tissue and start over. Once you are satisfied with the design, slowly dip your nail into the water at a 45-degree angle. This will ensure that the design wraps around your entire nail. Hold your nail in the water for a few seconds and use the toothpick to remove any excess nail polish from the surface of the water. Remove your finger from the water and peel off the tape. Use a cotton swab dipped in nail polish remover to clean up any excess nail polish around your cuticles. Finally, apply a top coat to seal in the design and make it last longer. And there you have it - beautiful DIY water marble nails!6. DIY Water Marble Nails: Step by Step Tutorial

5. Water Marble Nail Art: Step by Step Instructions
Water marble nail design is a fun and creative way to add some color and design to your nails. If you're a beginner, don't worry - with this step by step guide, you can achieve perfect marbled nails in no time. Let's dive in! Featured keywords: water marble nail design, beginners, step by step guide, fun, creative, color, design, perfect marbled nails To start, gather all the necessary materials - a bowl of room temperature water, nail polish in your desired colors, tape, toothpick, nail polish remover, and a base and top coat.7. Water Marble Nail Design for Beginners: Step by Step Guide


6. DIY Water Marble Nails: Step by Step Tutorial
.jpg)
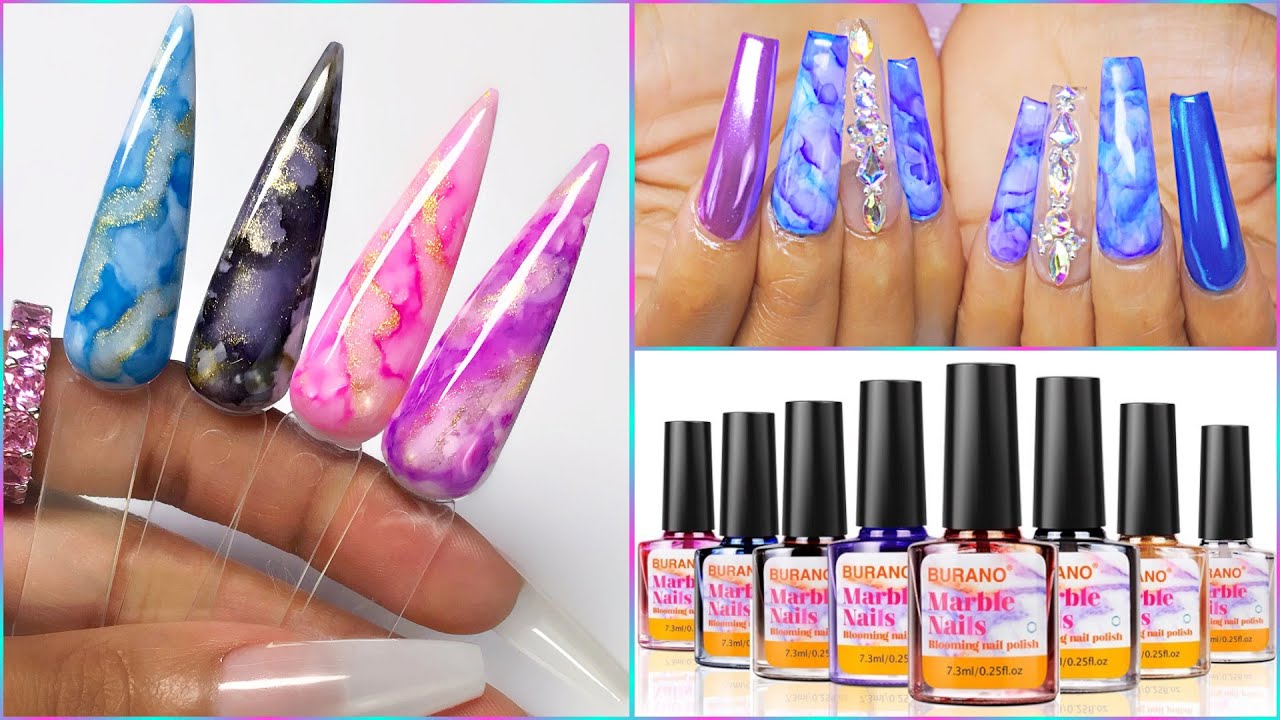
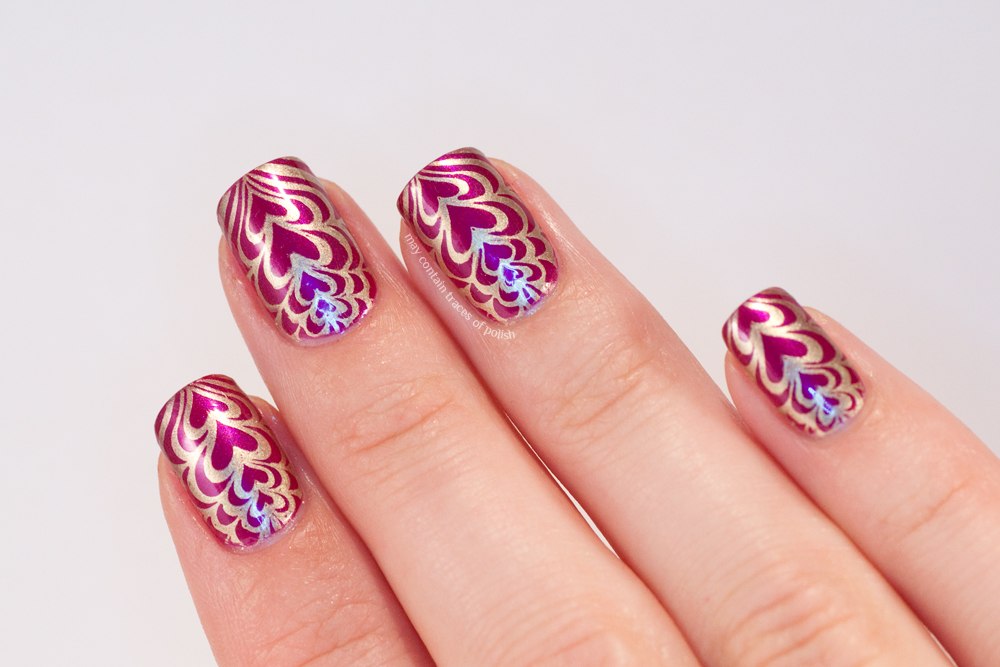
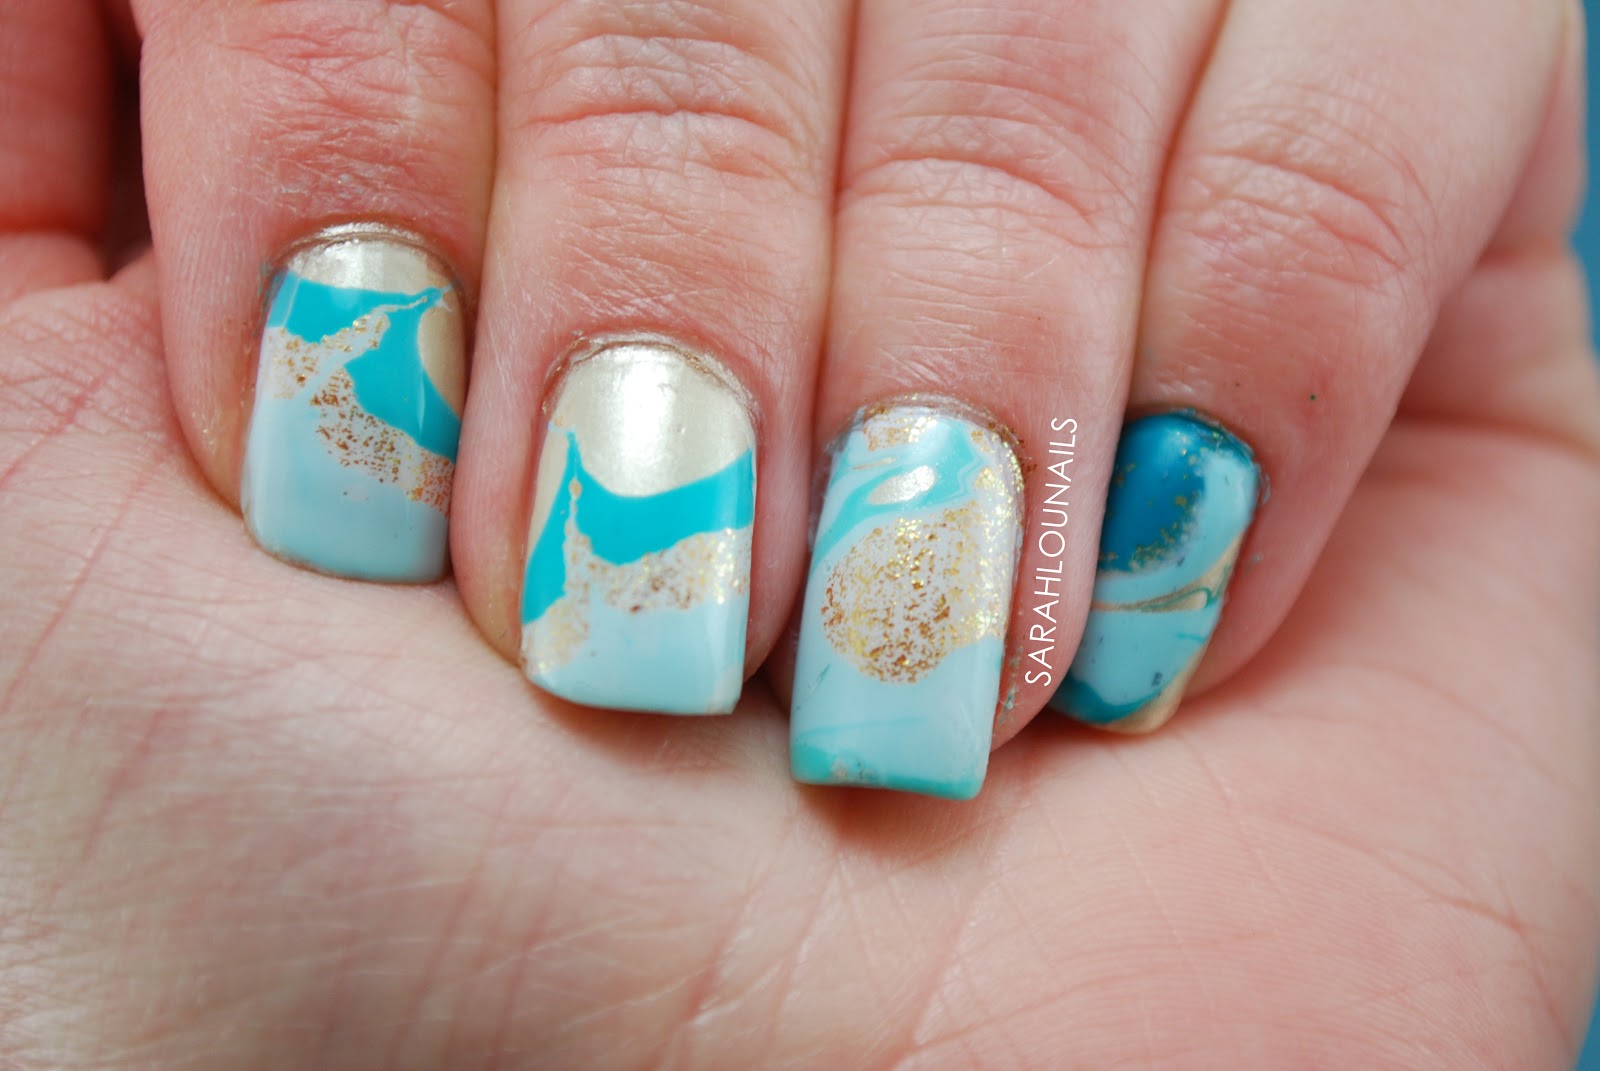
Why Choose Water Marble Nail Designs?

Elevate Your Nail Game

Water marble nail designs have become increasingly popular in recent years, and for good reason. Not only are they visually stunning, but they also offer a unique and eye-catching way to elevate your nail game. Water marble nails are a great way to add a pop of color and personality to your overall look, whether it's for a special occasion or just a fun everyday style.
Endless Design Possibilities

One of the greatest advantages of water marble nail designs is the endless possibilities they offer. With just a few simple steps, you can create intricate and detailed designs that are impossible to achieve with regular nail polish. From abstract patterns to intricate florals, the creative options are limitless.
Easy and Affordable
Contrary to popular belief, creating water marble nail designs is actually quite simple and affordable. With a few basic materials and some practice, you can achieve salon-worthy results at home. Plus, the materials needed for water marble nails are relatively inexpensive and can be found at most drugstores or online.
Long-Lasting and Durable

Another benefit of water marble nail designs is their durability. Unlike traditional nail polish, water marble designs tend to last longer and are less prone to chipping or peeling. This is because the design is created using multiple layers of polish, which makes it more resistant to wear and tear.
Personalized and Unique

With water marble nail designs, the sky's the limit when it comes to creativity. You can mix and match colors and patterns to create a personalized and unique look that reflects your individual style. Plus, each design is truly one-of-a-kind, making your nails stand out from the crowd.
In conclusion, water marble nail designs offer a fun, affordable, and creative way to elevate your nail game. Whether you're a nail art pro or a beginner, anyone can achieve stunning results with a little bit of practice and the right tools. So why settle for boring plain nails when you can make a statement with water marble designs?


