Looking for a quick and easy way to add some patriotic flair to your nails this 4th of July? Look no further! This easy nail art tutorial will have you sporting red, white, and blue nails in no time. Start by painting your nails with a white base coat. This will help the colors stand out and make them pop. Next, take some red and blue nail polish and use a small nail brush to create diagonal stripes on each nail. You can alternate between red and blue or do one color on each nail. For an extra touch, add some silver or gold glitter polish over the stripes for a festive touch. Finish off with a clear top coat to seal in your design and give it some shine.Easy 4th of July Nail Art Tutorial


Easy 4th of July Nail Art Tutorial


If you're new to nail art or just looking for a simple design, this tutorial is perfect for you. With just a few steps, you can achieve a cute and patriotic look for your nails. Start by painting your nails with a blue base coat. Let it dry completely before moving on to the next step. Next, take some red and white nail polish and use a small dotting tool to create polka dots on each nail. You can also use a toothpick or the end of a bobby pin if you don't have a dotting tool. For an extra touch, add a small silver or gold star sticker to one nail on each hand. Finish off with a clear top coat to seal in your design and make it last.4th of July Nail Art Tutorial for Beginners

4th of July Nail Art Tutorial for Beginners

Want to save some money and do your own 4th of July nail art? This tutorial is perfect for a DIY approach, using items you probably already have at home. Start by painting your nails with a red base coat. Let it dry completely before moving on to the next step. Next, take some white and blue nail polish and use a small nail brush or toothpick to create stripes on each nail. You can alternate the colors or do one color on each nail. For an extra touch, use a small paintbrush or Q-tip to create small stars on your blue nails using white nail polish. Finish off with a clear top coat to seal in your design and give it some shine.DIY 4th of July Nail Art Tutorial


DIY 4th of July Nail Art Tutorial


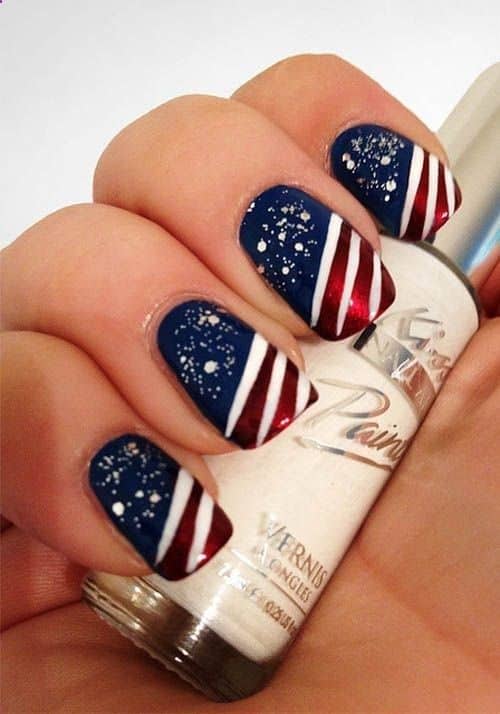
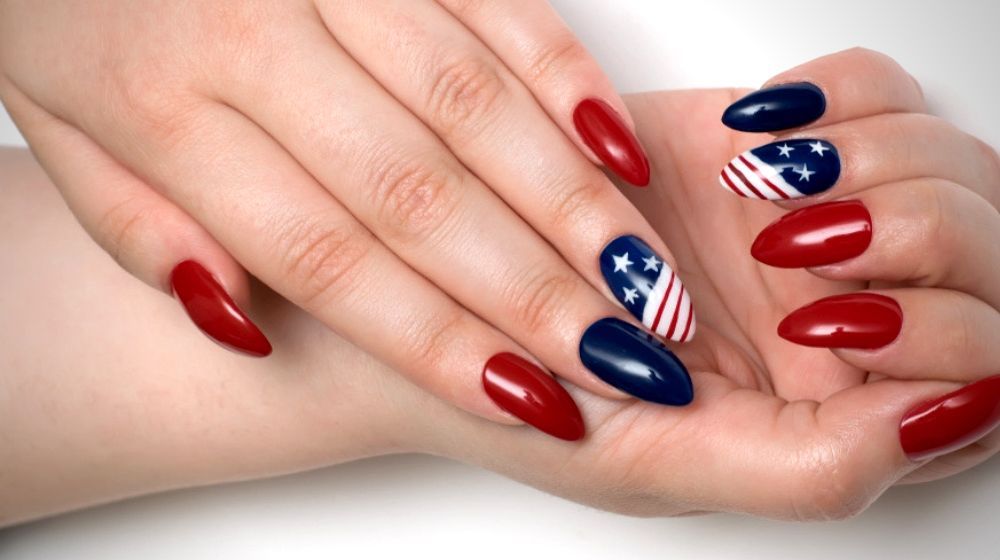
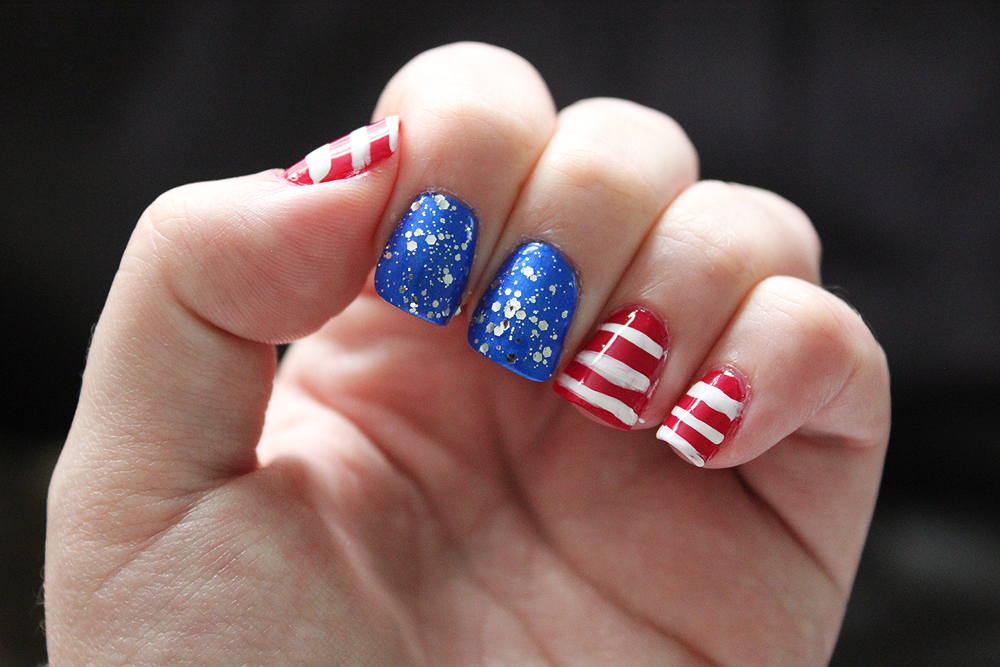
If you want to incorporate all three colors of the American flag into your 4th of July nail art, this tutorial is for you. It may seem more complicated, but with a little patience, you can achieve a stunning look. Start by painting your nails with a white base coat. Let it dry completely before moving on to the next step. Next, take some red and blue nail polish and use a small nail brush or toothpick to create diagonal stripes on each nail. You can alternate between the colors or do one color on each nail. For an extra touch, use a small paintbrush or Q-tip to create small stars on your blue nails using white nail polish. Finish off with a clear top coat to seal in your design and give it some shine.Red, White, and Blue Nail Art Tutorial for 4th of July

Red, White, and Blue Nail Art Tutorial for 4th of July


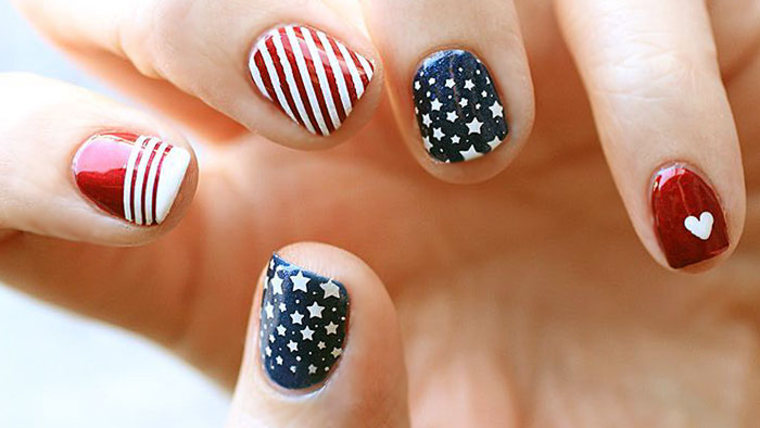
If you're looking for a simple and understated 4th of July nail art, this tutorial is for you. It's perfect for those who want to show their patriotic spirit without going over the top. Start by painting your nails with a white base coat. Let it dry completely before moving on to the next step. Next, take some blue nail polish and use a small nail brush or toothpick to create a diagonal stripe on one side of each nail. You can also use a striping tape to help create a clean line. For an extra touch, add a small red heart sticker to the other side of each nail. Finish off with a clear top coat to seal in your design and make it last.Simple 4th of July Nail Art Tutorial

Simple 4th of July Nail Art Tutorial

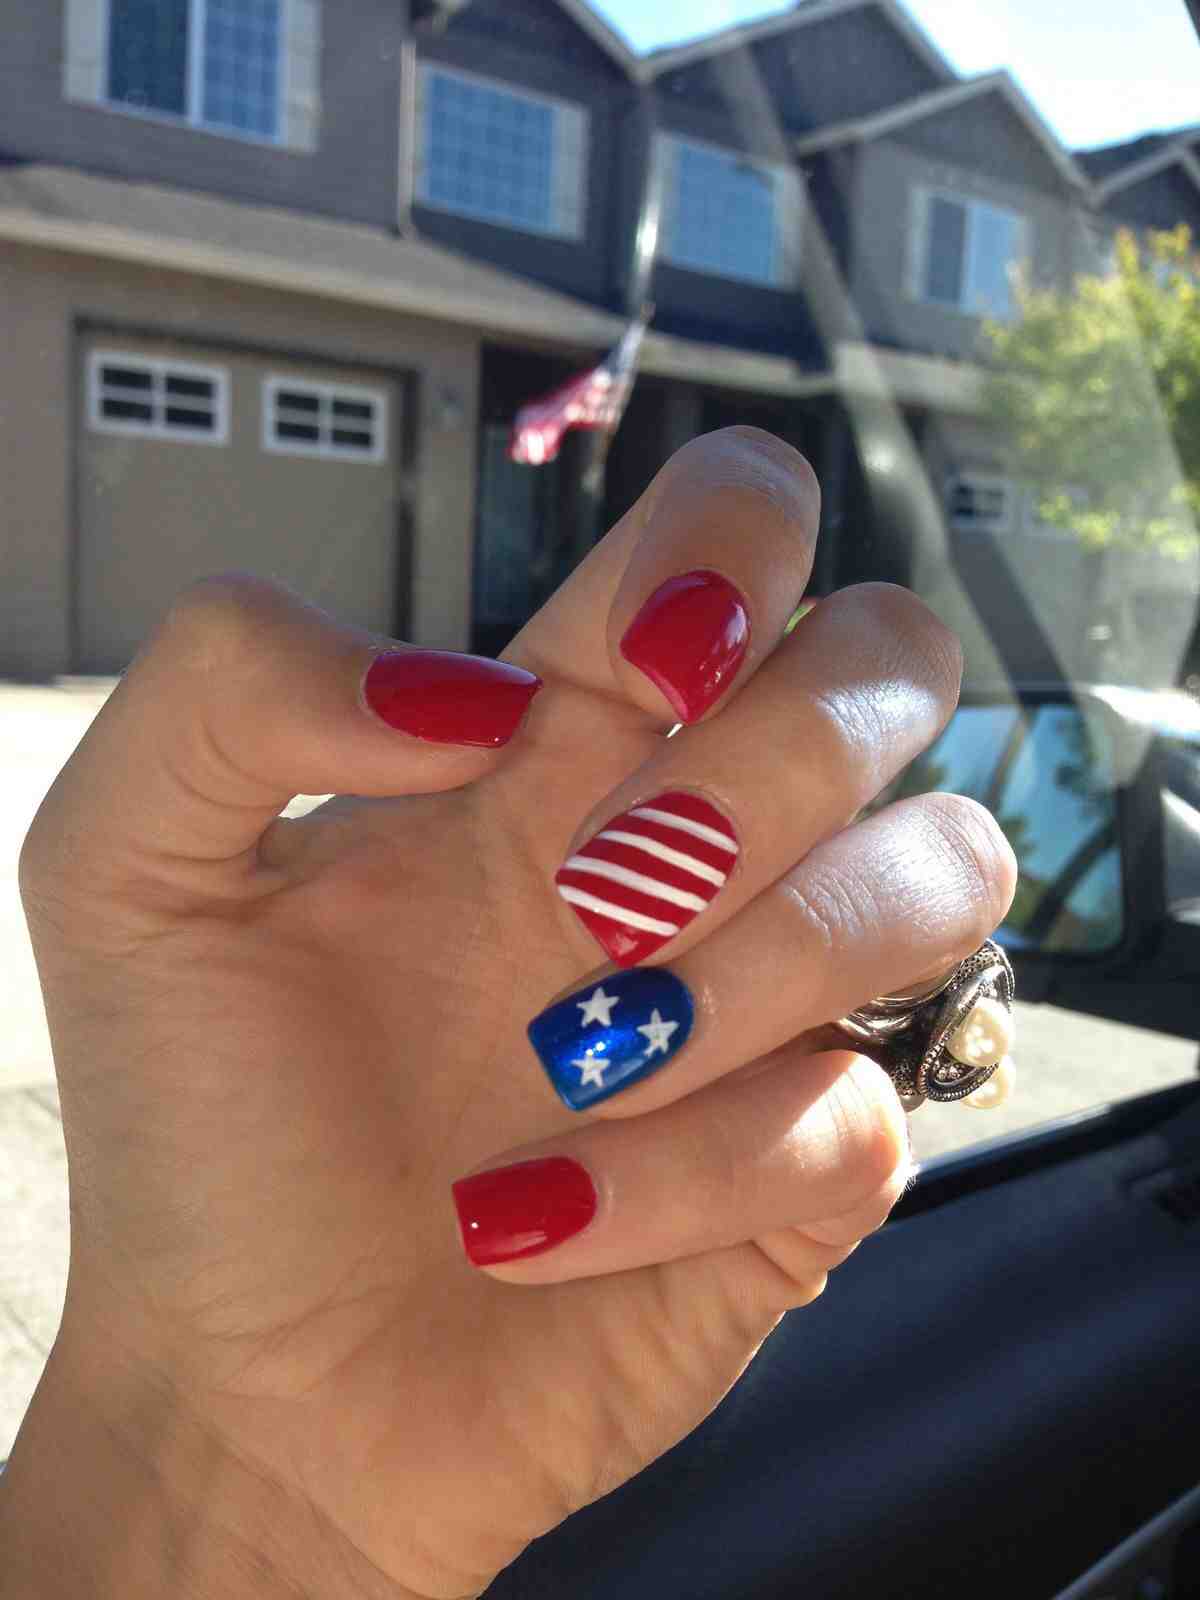
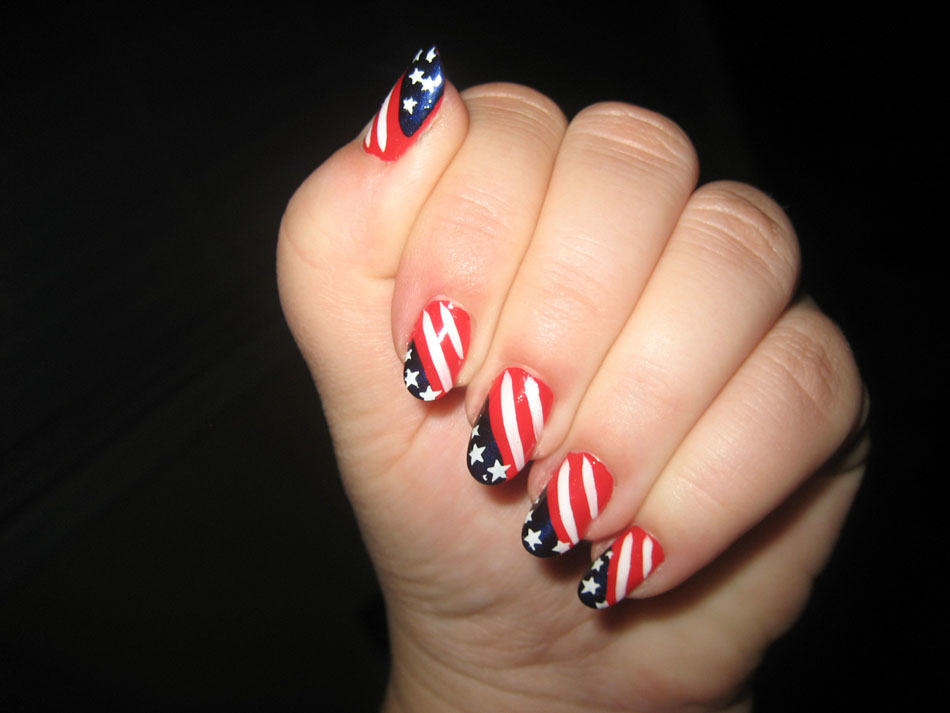
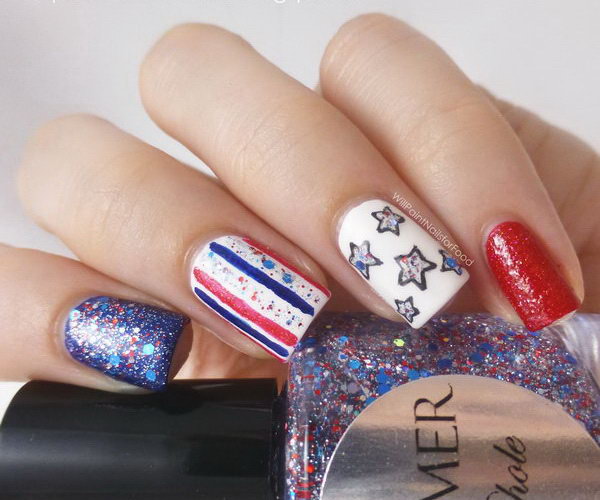
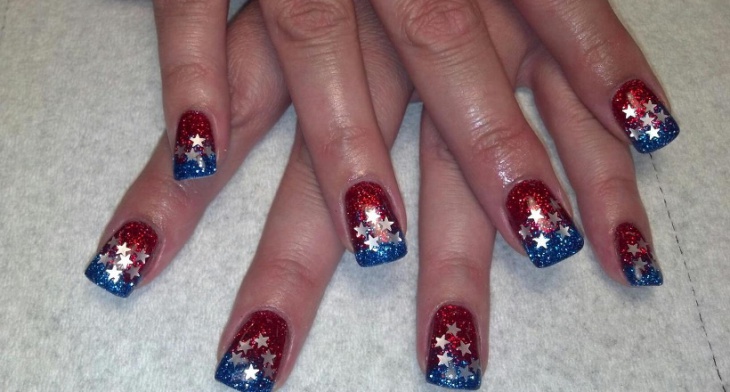
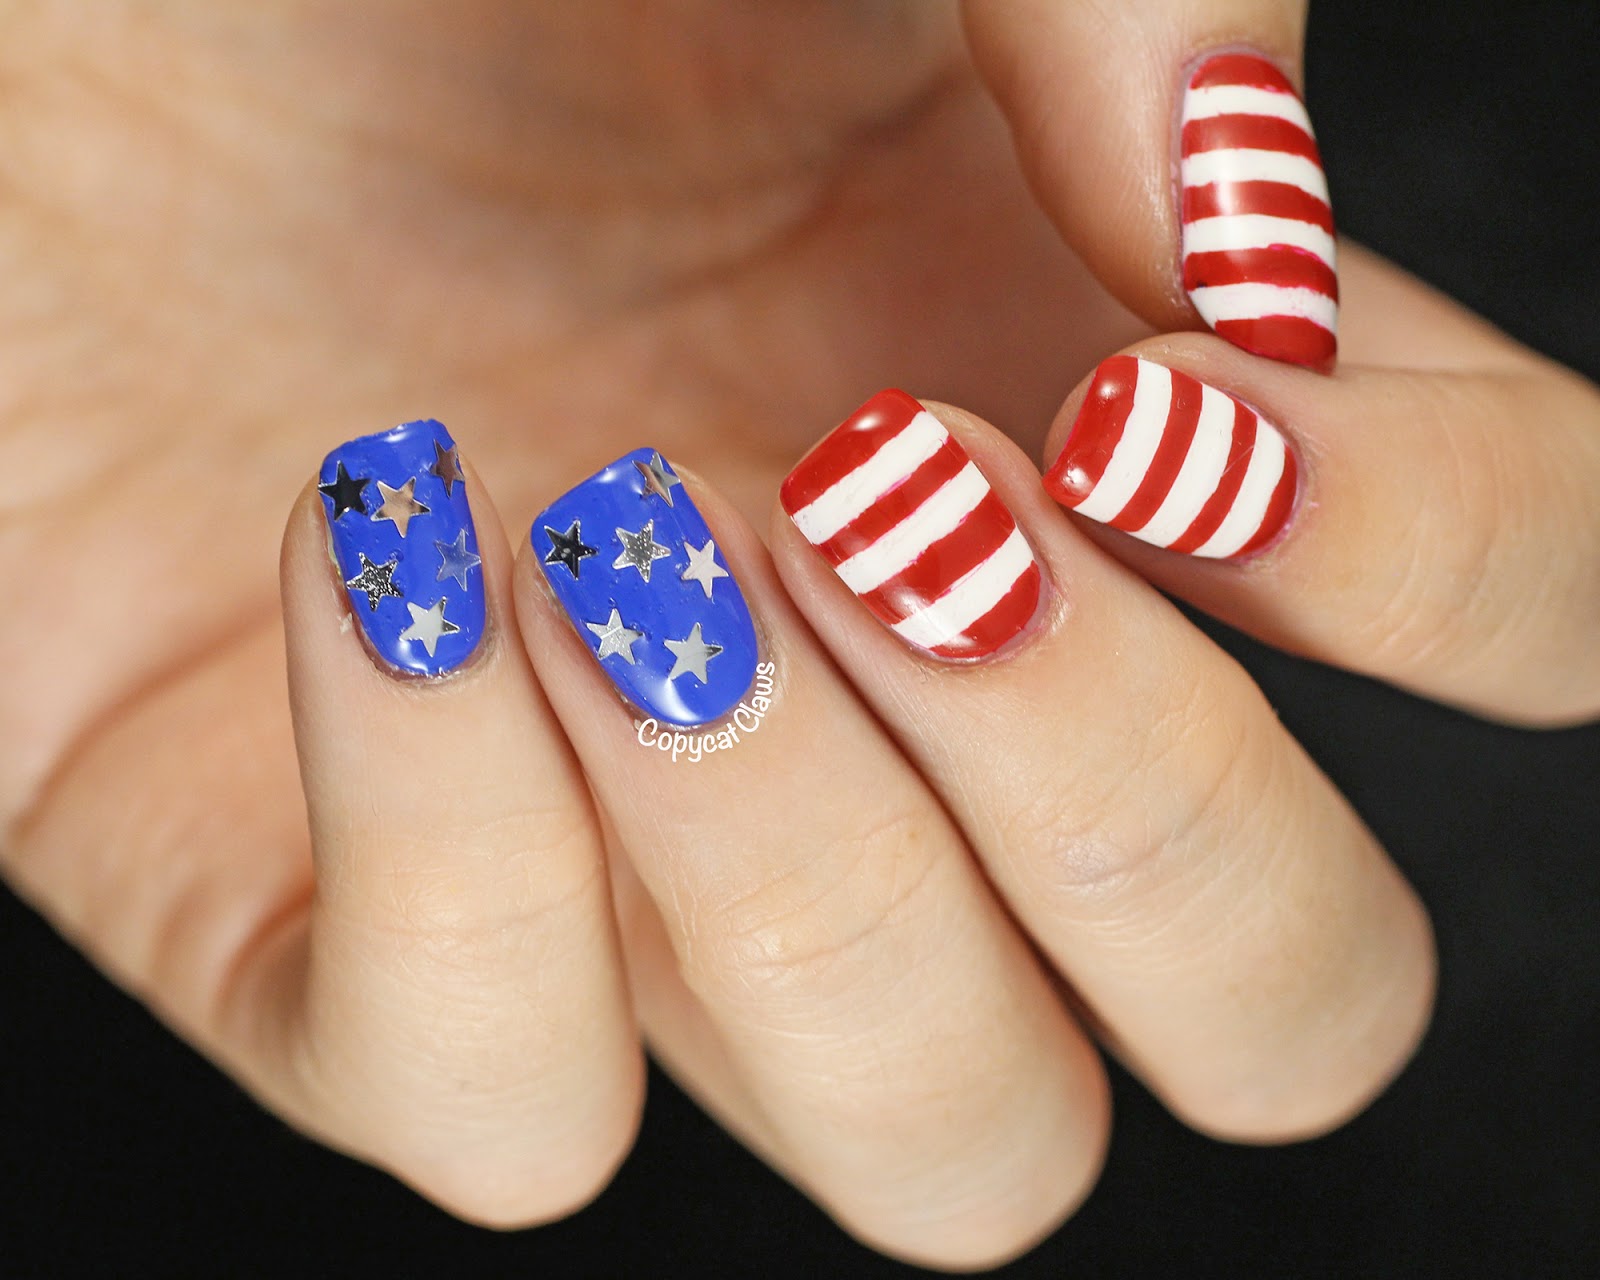
This tutorial combines the classic stars and stripes of the American flag for a festive and patriotic nail art design. Start by painting your nails with a red base coat. Let it dry completely before moving on to the next step. Next, use a small nail brush or toothpick to create white diagonal stripes on each nail. You can also use a striping tape for a cleaner look. For the stars, use a small paintbrush or Q-tip to create blue stars on the red part of your nails. You can also use star-shaped stickers if you have them. Finish off with a clear top coat to seal in your design and give it some shine.4th of July Nail Art Tutorial with Stars and Stripes

4th of July Nail Art Tutorial with Stars and Stripes

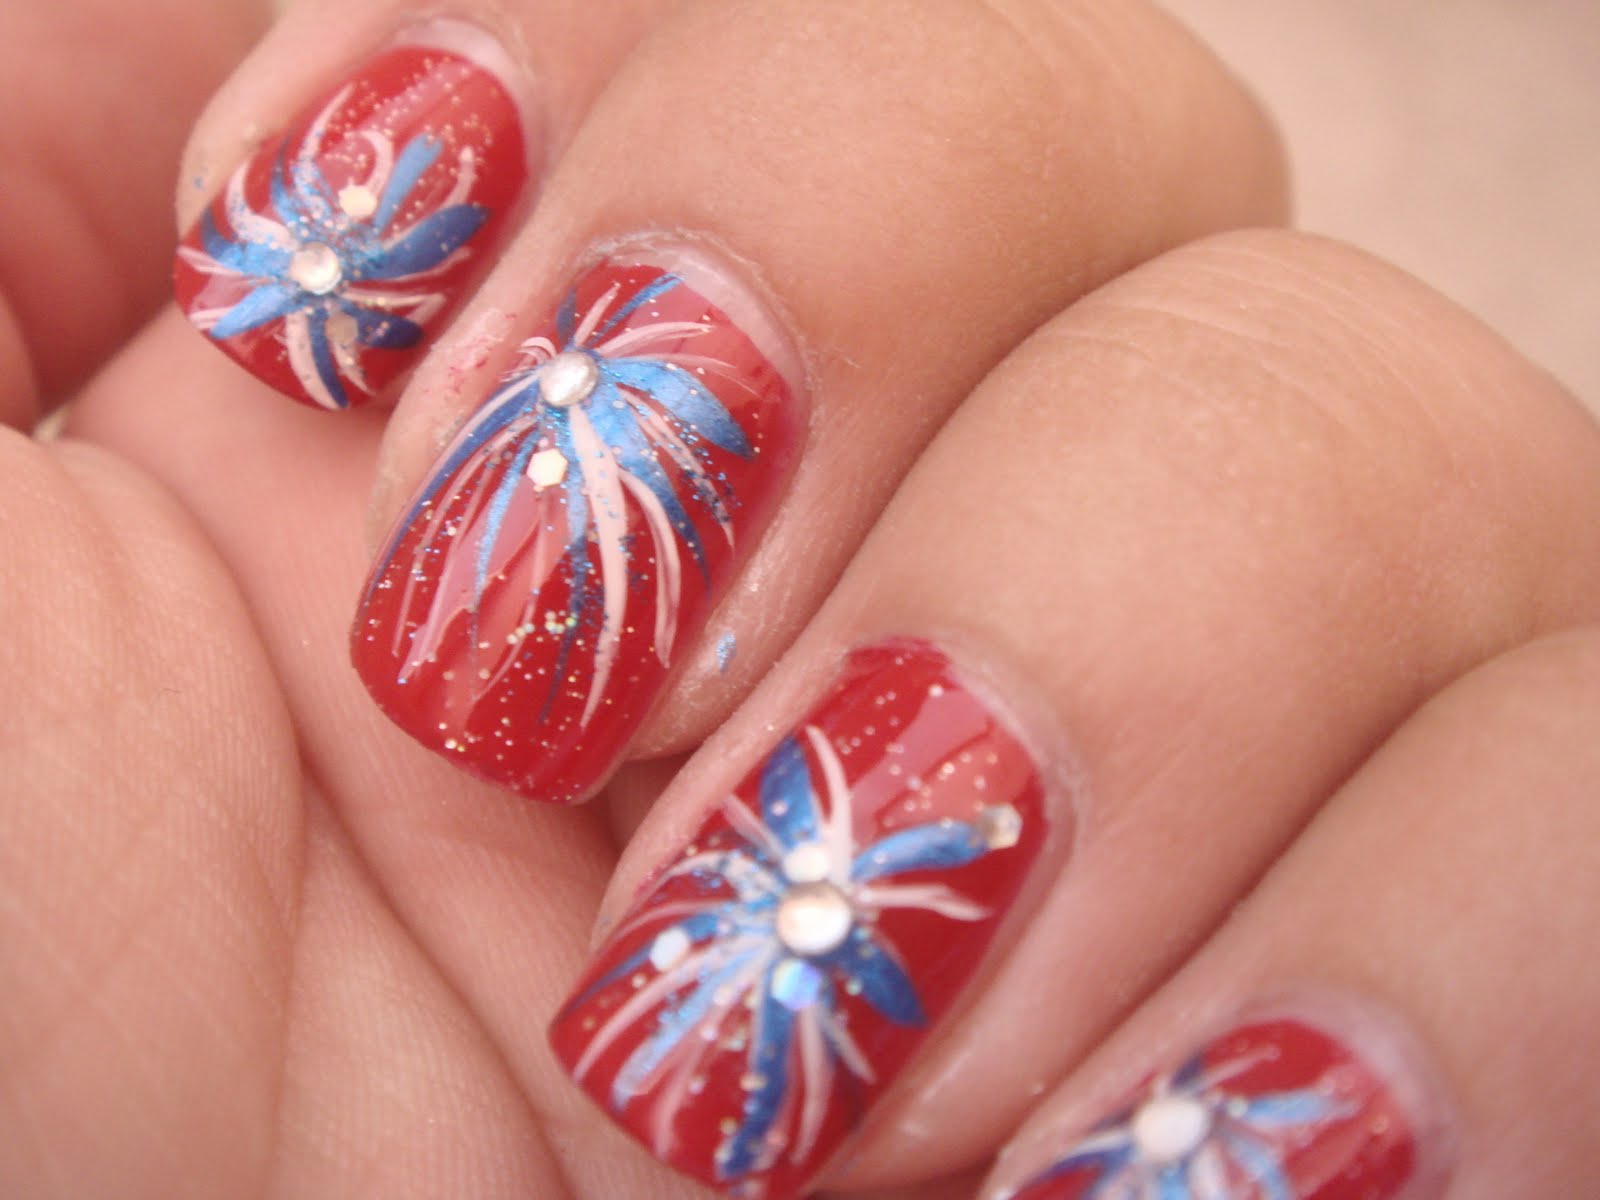
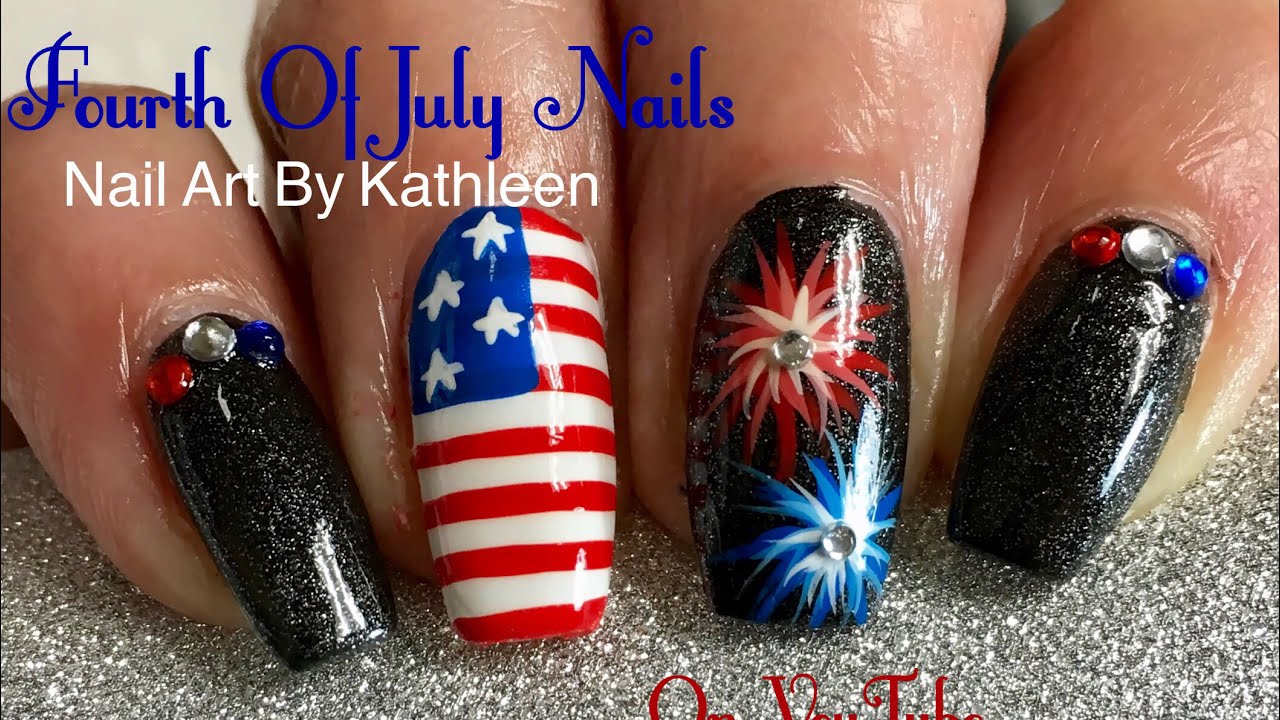
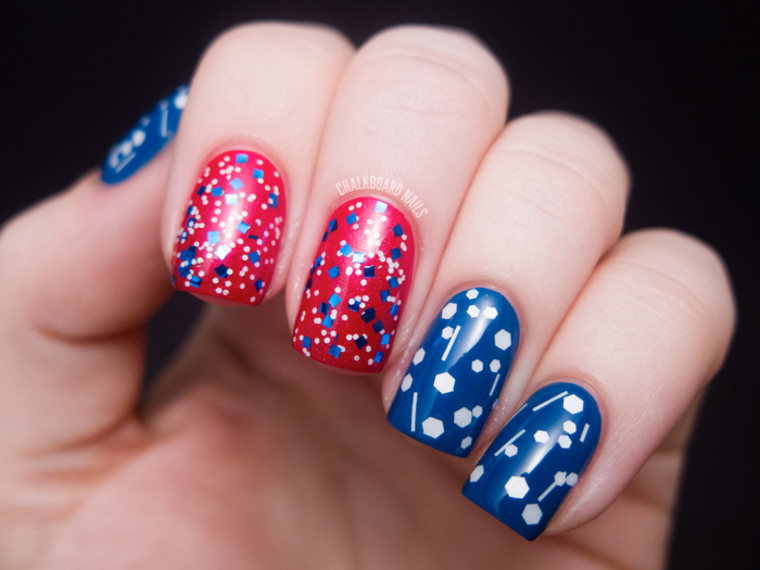
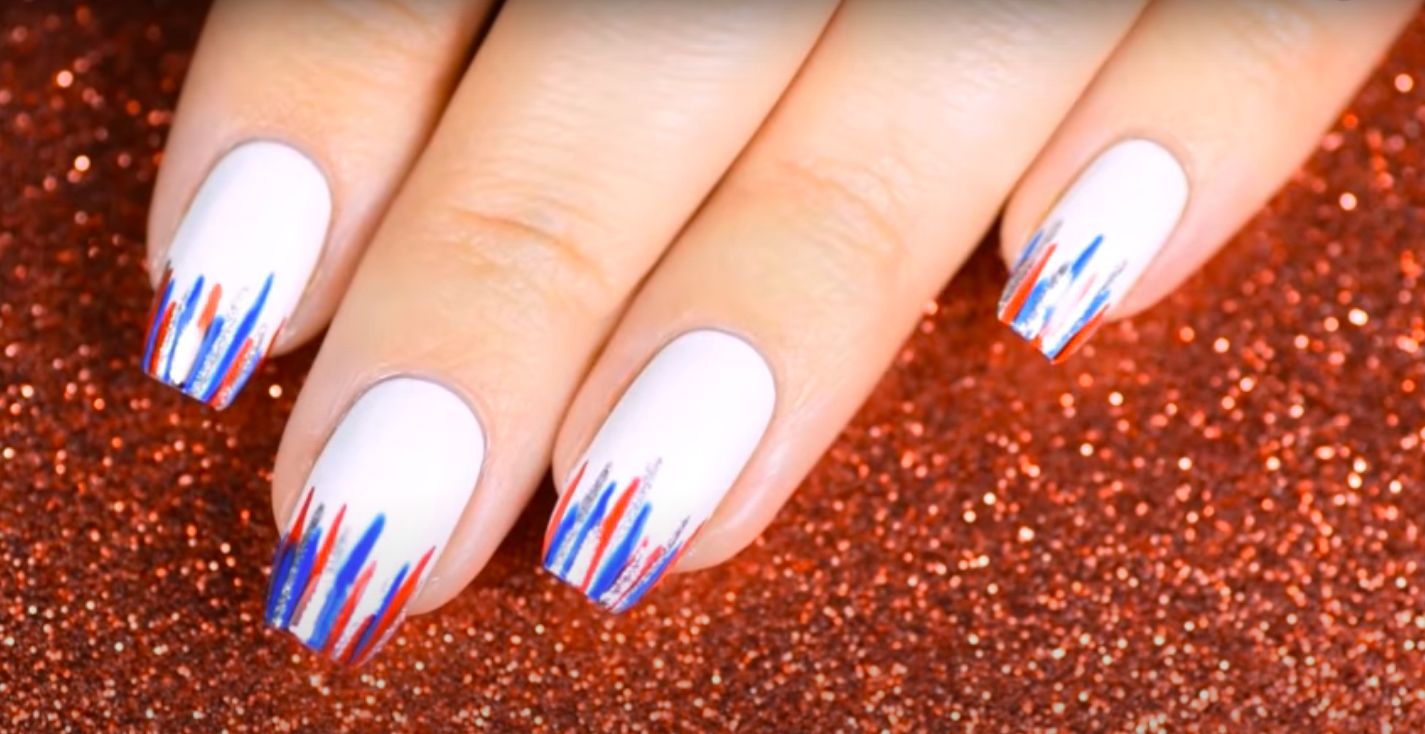
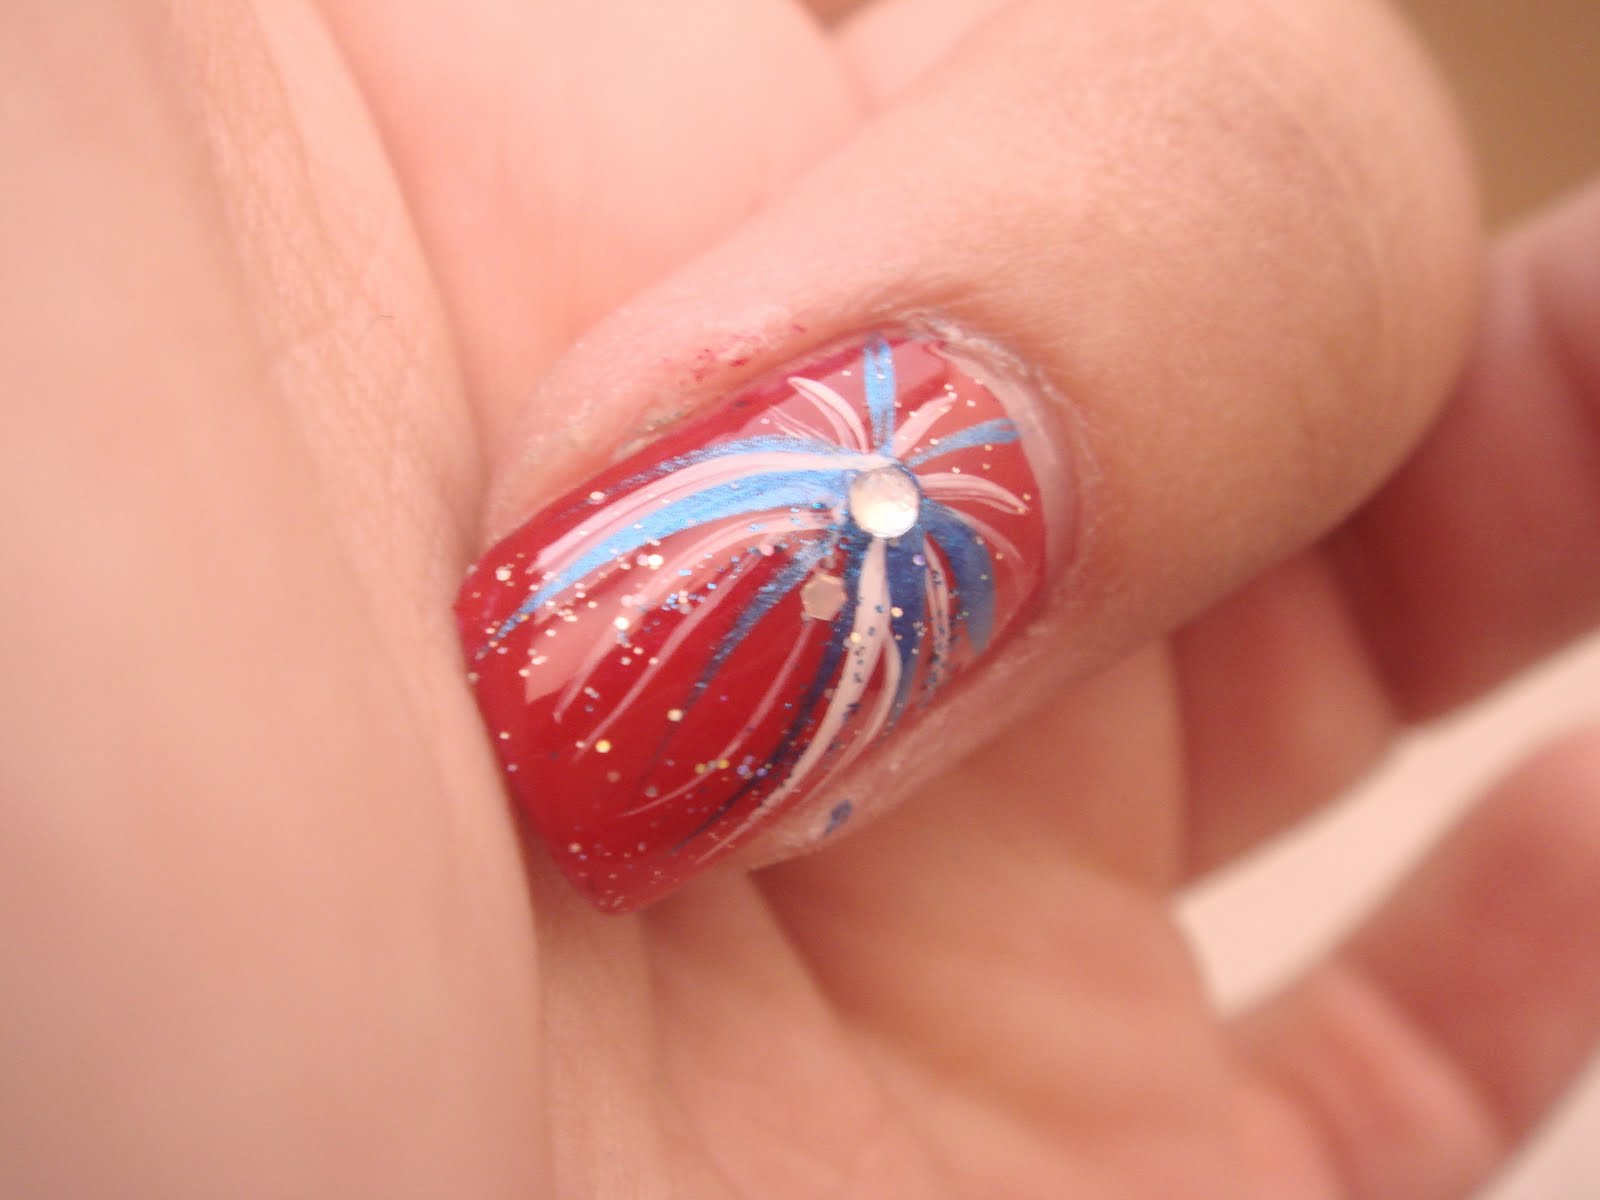
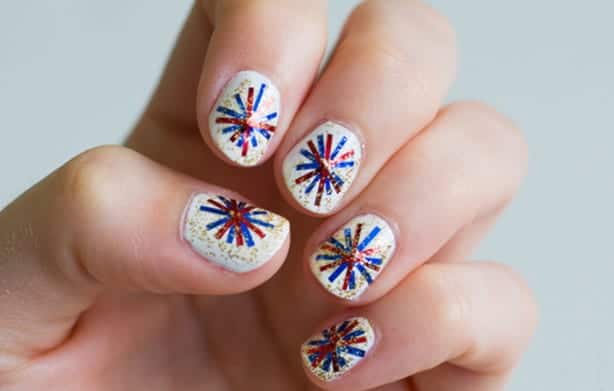
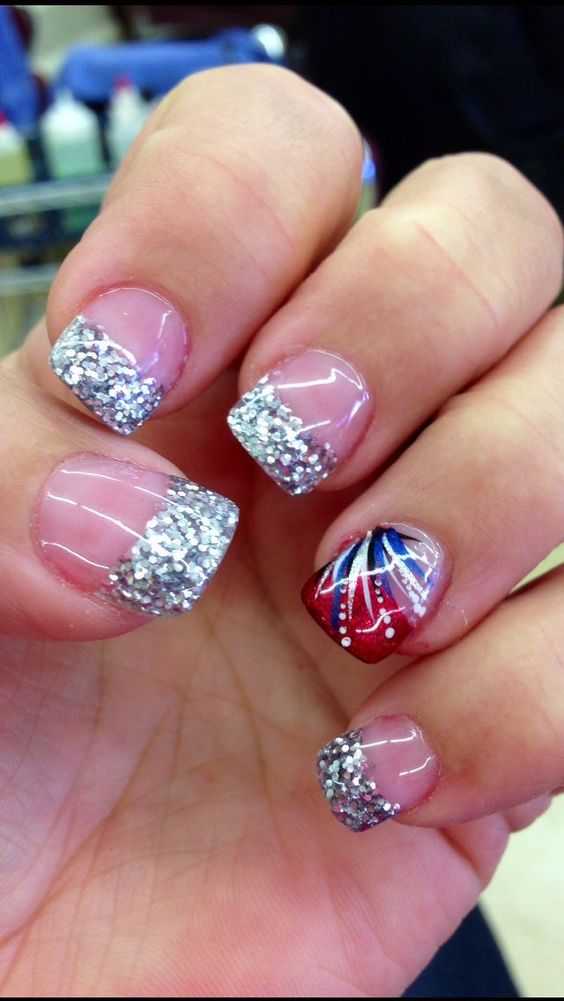
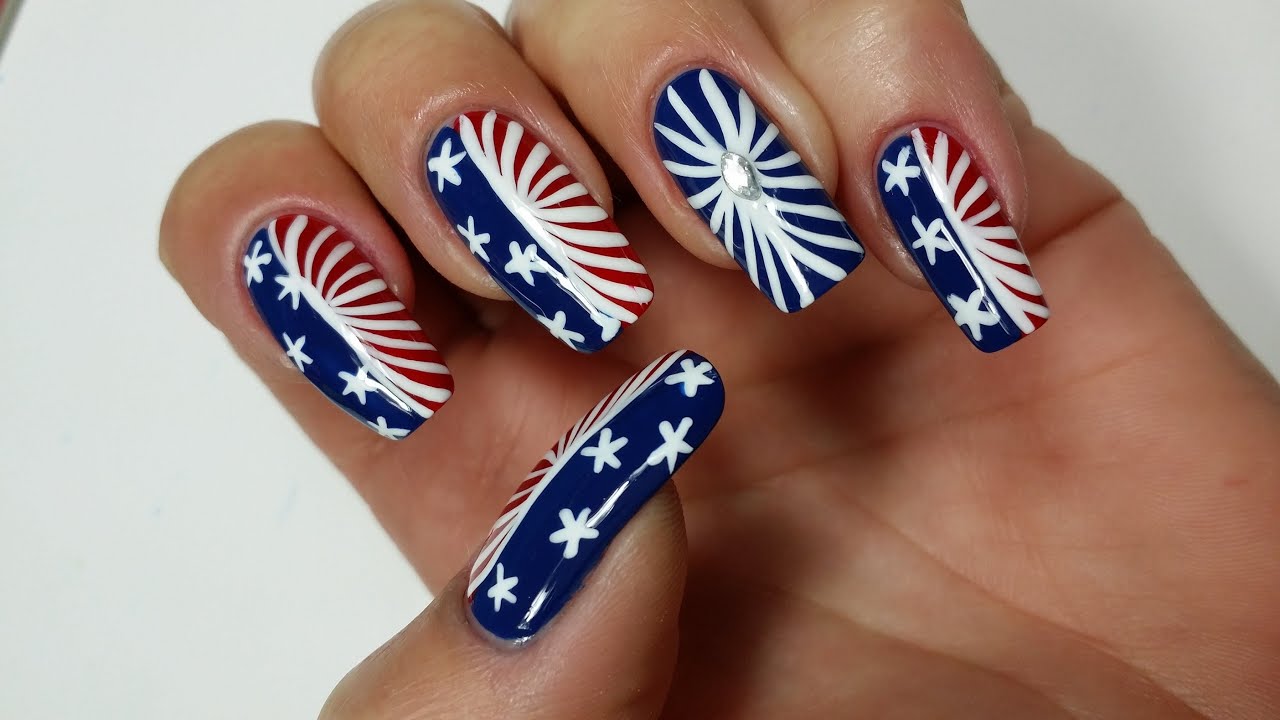
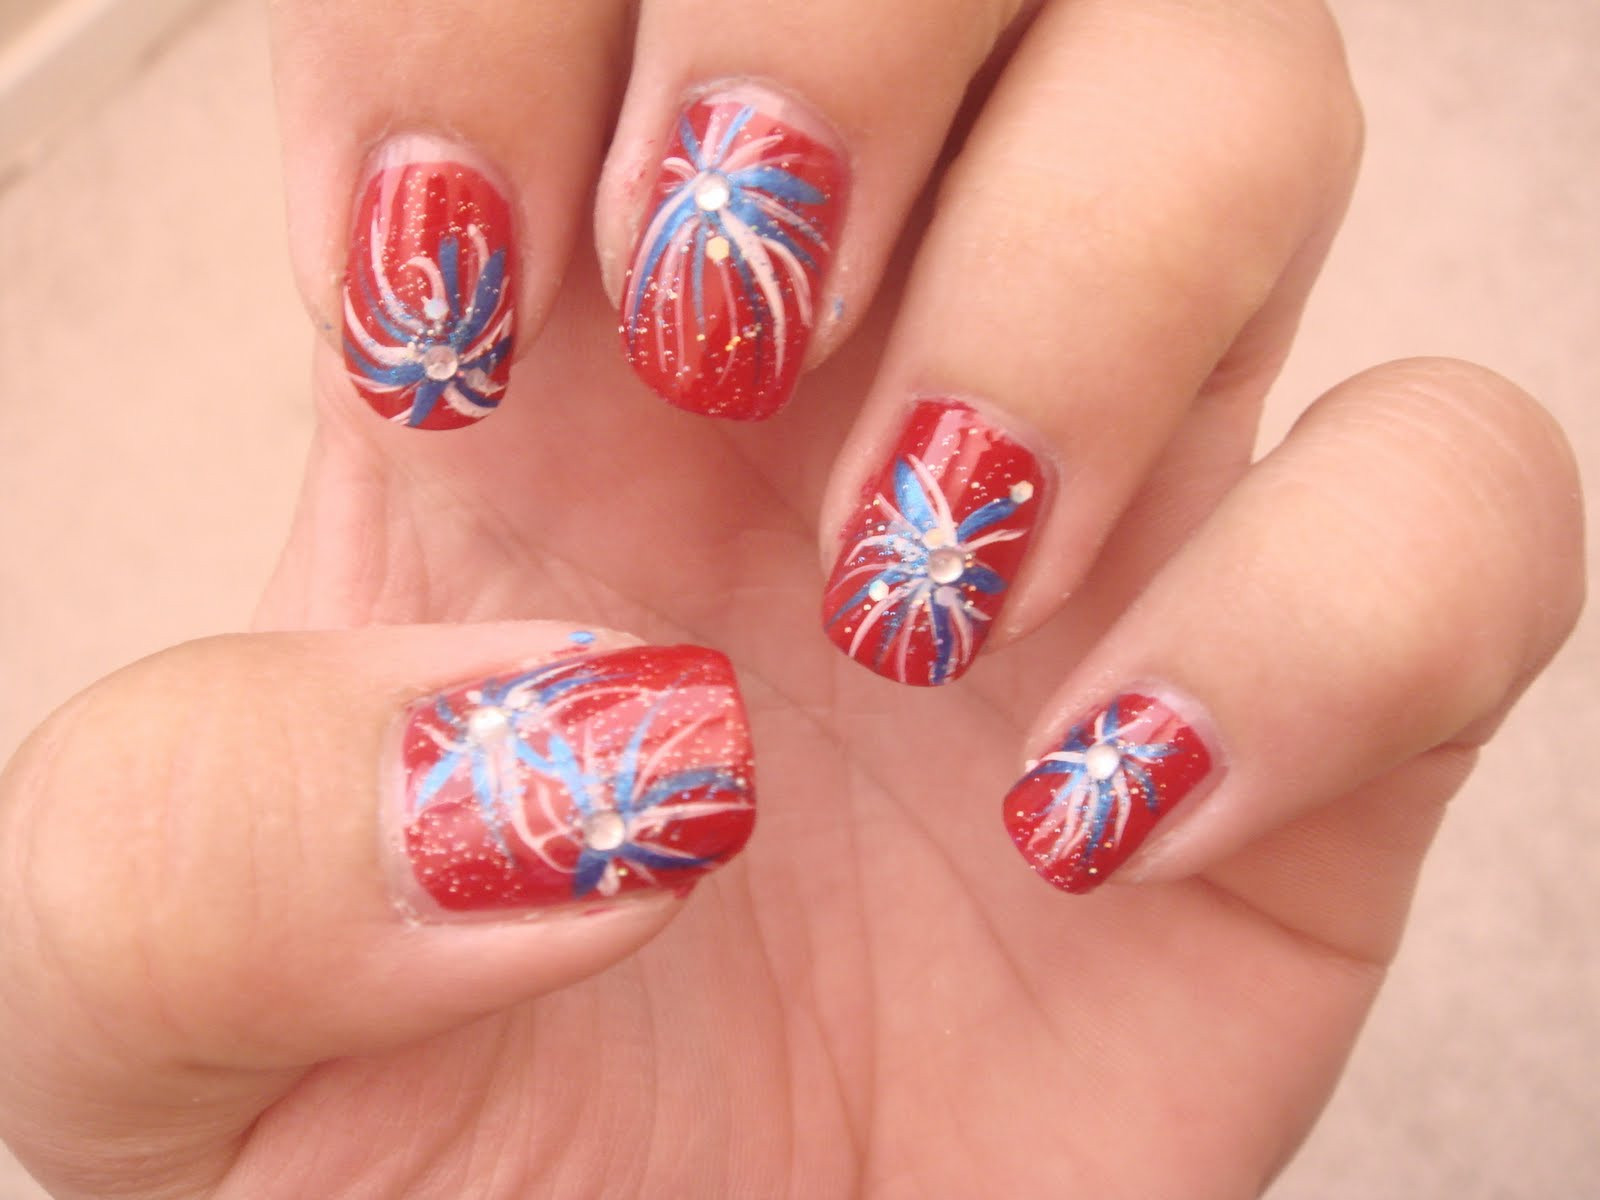
What's more fitting for the 4th of July than a firework nail art design? This tutorial will have your nails looking like a mini fireworks display. Start by painting your nails with a black base coat. Let it dry completely before moving on to the next step. Next, take some red and blue nail polish and use a small nail brush or toothpick to create small dots all over your nails. You can also use a glitter polish for some added sparkle. For the firework effect, use a small paintbrush or Q-tip to create white lines coming out from the dots. Finish off with a clear top coat to seal in your design and give it some shine.Firework Nail Art Tutorial for 4th of July


Firework Nail Art Tutorial for 4th of July


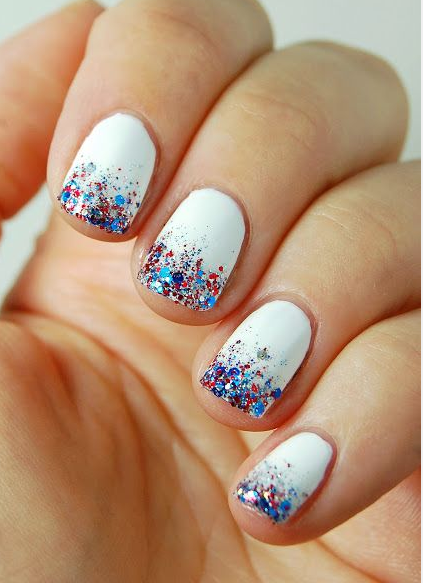
Who doesn't love a bit of glitter? This tutorial will have your nails sparkling and shining, perfect for celebrating the 4th of July. Start by painting your nails with a silver or gold base coat. Let it dry completely before moving on to the next step. Next, use a small nail brush or toothpick to create red and blue diagonal stripes on each nail. You can also use striping tape for a cleaner look. For the glitter, use a small paintbrush or Q-tip to apply silver or gold glitter polish over the diagonal stripes. Finish off with a clear top coat to seal in your design and make it last.Glitter 4th of July Nail Art Tutorial
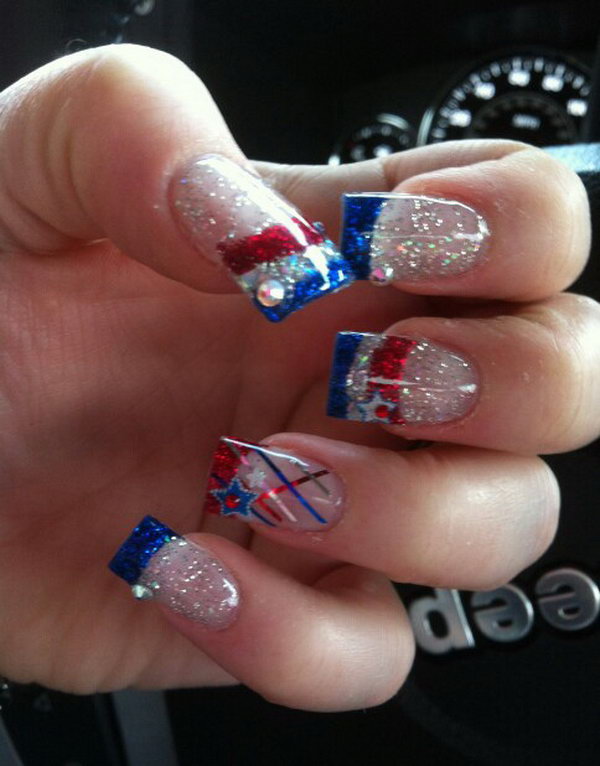

Glitter 4th of July Nail Art Tutorial


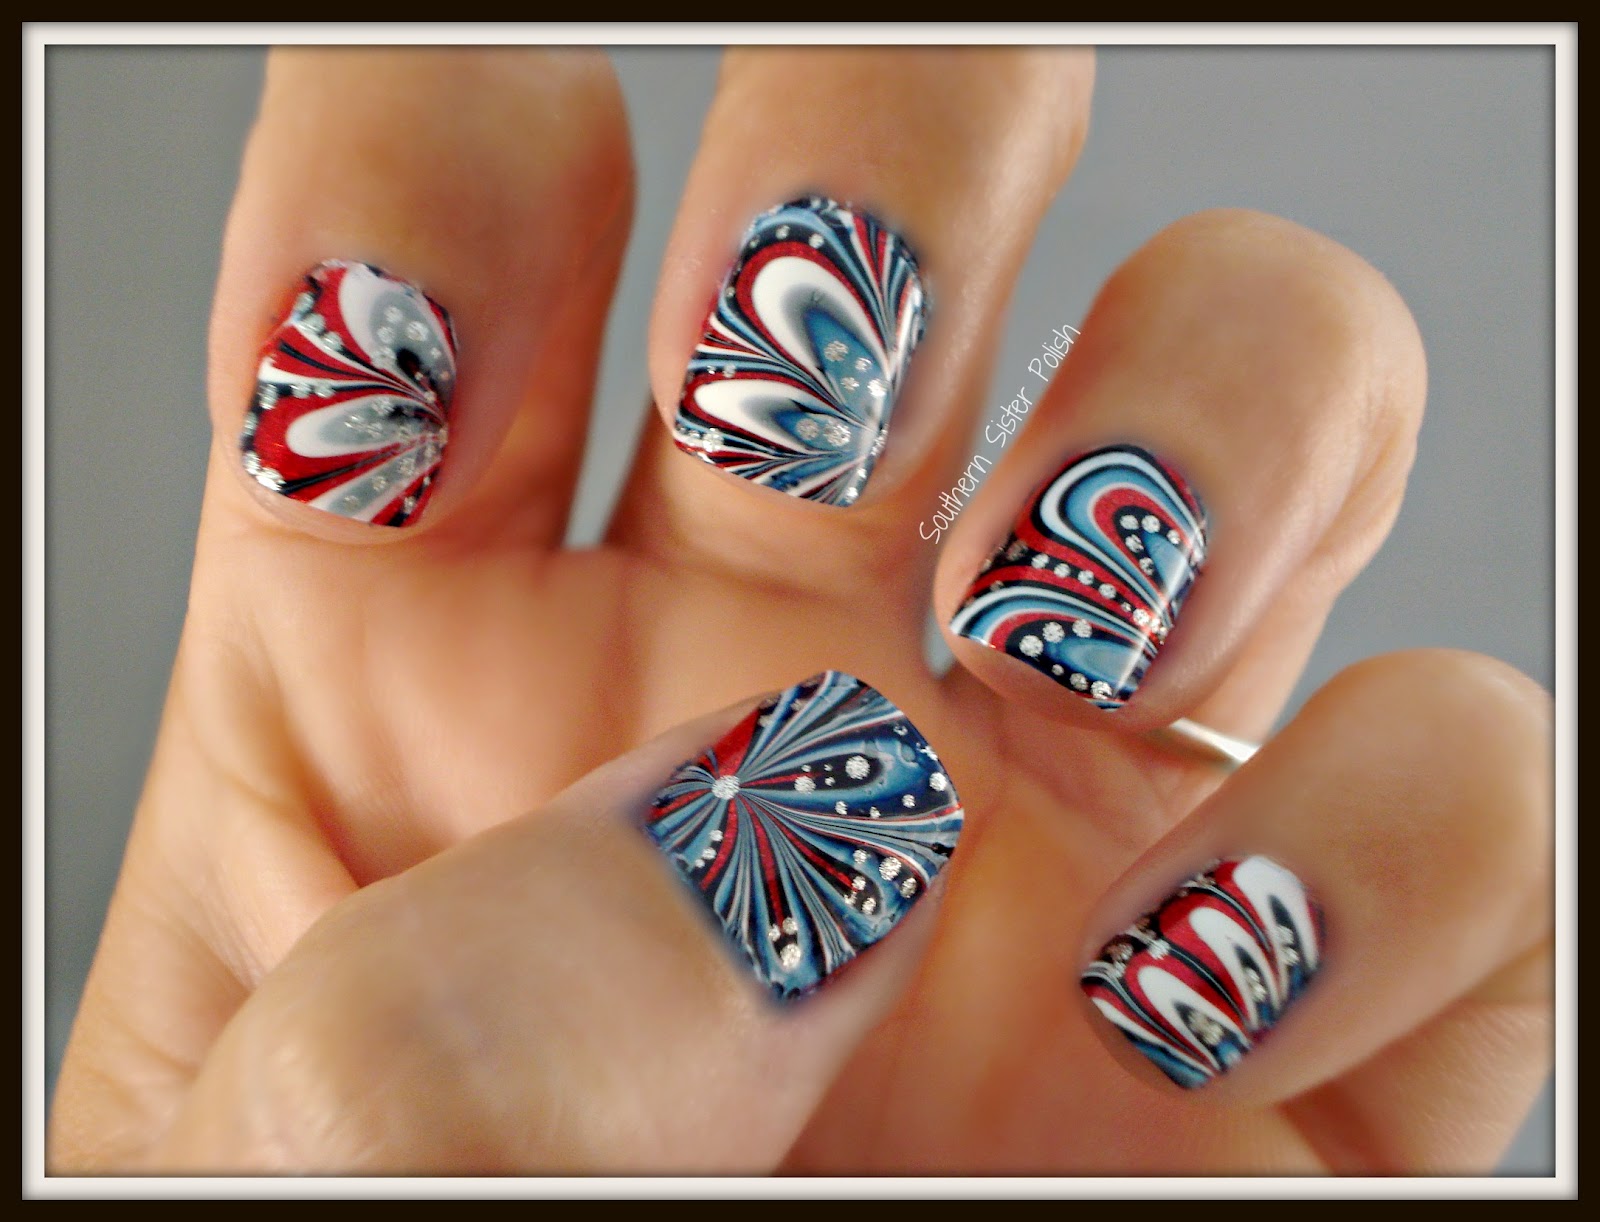
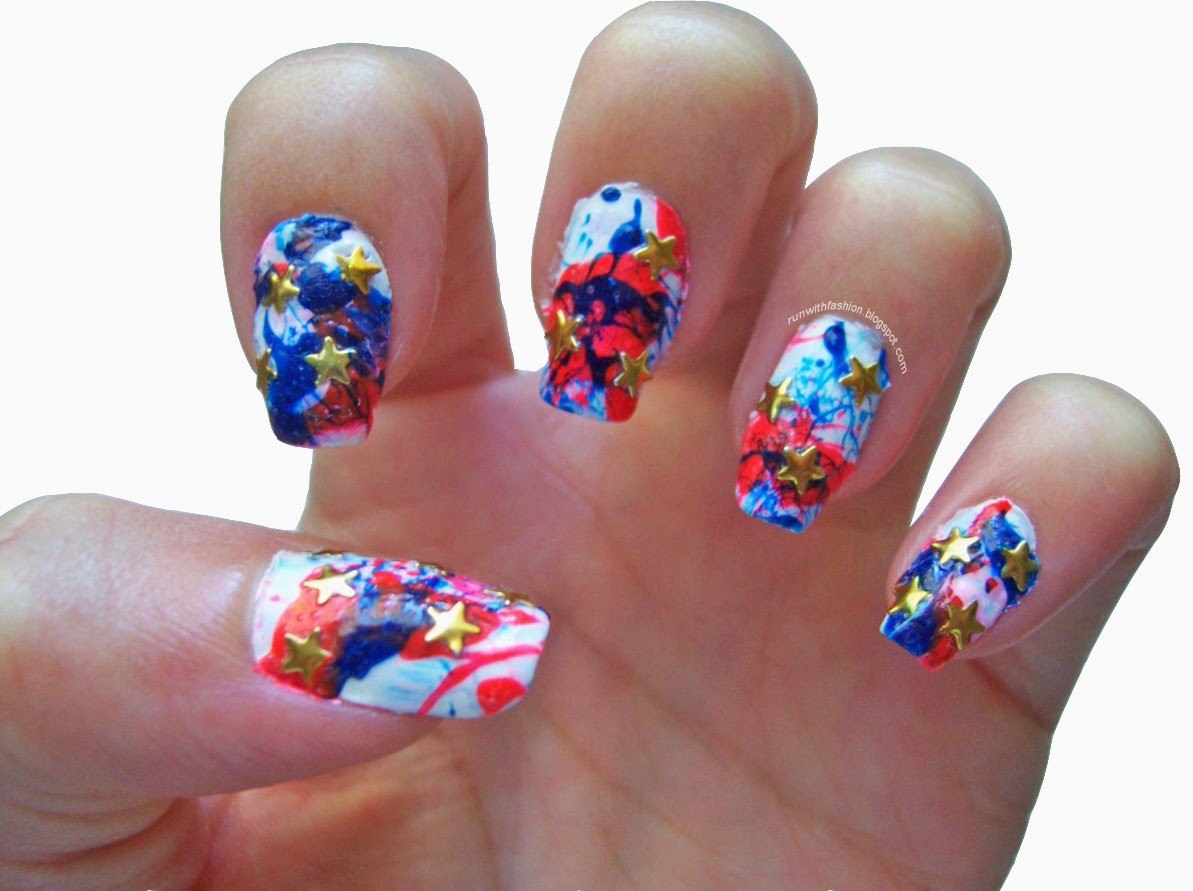
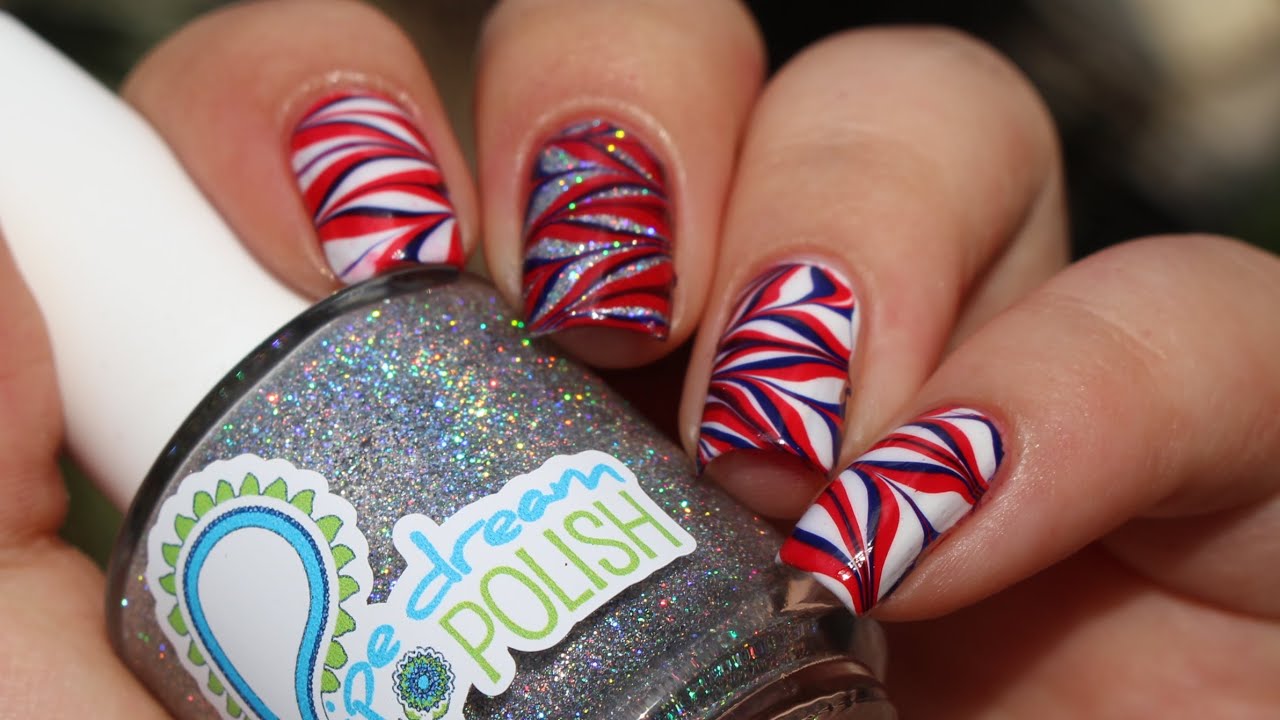
This tutorial may take a bit more time and patience, but the end result is worth it. The water marble technique creates a unique and beautiful design on your nails. Start by painting your nails with a white base coat. Let it dry completely before moving on to the next step. Next, take three colors of nail polish - red, blue, and white - and drop them into a cup of water, creating concentric circles. Use a toothpick to swirl the colors together. Dip your nails one at a time into the water, allowing the nail polish to adhere to your nails. Clean up any excess polish on your skin with a cotton swab dipped in nail polish remover. Finish off with a clear top coat to seal in your design.Water Marble 4th of July Nail Art Tutorial


Water Marble 4th of July Nail Art Tutorial
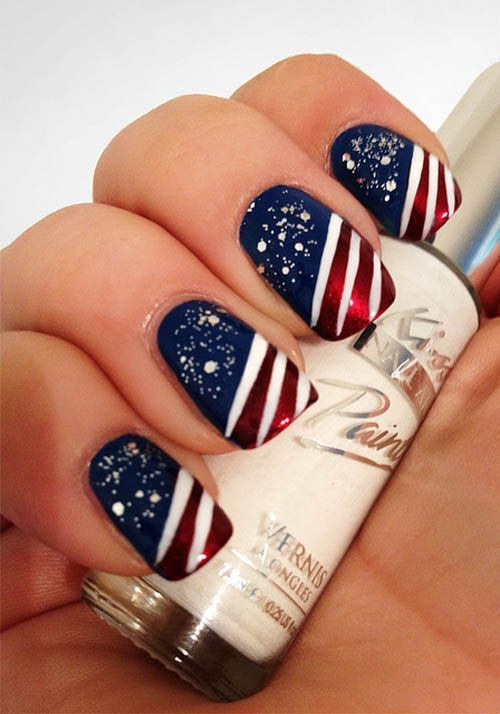
If you love stripes, this tutorial is for you. It's simple and easy to achieve, but still adds a festive touch to your nails for the 4th of July. Start by painting your nails with a white base coat. Let it dry completely before moving on to the next step. Next, use a striping tape or a small nail brush to create red and blue stripes on each nail. You can alternate the colors or do one color on each nail. For an extra touch, add some silver or gold glitter polish over the stripes. Finish off with a clear top coat to seal in your design and give it some shine.Striped 4th of July Nail Art Tutorial

Striped 4th of July Nail Art Tutorial


Celebrate Independence Day with Festive 4th of July Nail Art
Express Your Patriotism on Your Fingertips
 The 4th of July is a day of celebration, marking the birth of the United States of America and all the freedoms it stands for. It's a day filled with barbecues, parades, and of course, fireworks. But why not take your patriotic spirit to the next level and show it off on your nails?
4th of July nail art
has become a popular trend in recent years, with people getting creative and using their nails as a canvas to express their love for their country. In this tutorial, we will guide you through some simple yet stunning designs that will make your nails the talk of the party.
The 4th of July is a day of celebration, marking the birth of the United States of America and all the freedoms it stands for. It's a day filled with barbecues, parades, and of course, fireworks. But why not take your patriotic spirit to the next level and show it off on your nails?
4th of July nail art
has become a popular trend in recent years, with people getting creative and using their nails as a canvas to express their love for their country. In this tutorial, we will guide you through some simple yet stunning designs that will make your nails the talk of the party.
Gather Your Supplies
 Before we dive into the designs, make sure you have all the necessary supplies. You will need a base coat, red, white, and blue nail polish, a small paintbrush or dotting tool, and a topcoat to seal in your design.
Pro tip:
Look for
long-lasting and chip-resistant nail polishes
to ensure your manicure lasts through all the festivities.
Before we dive into the designs, make sure you have all the necessary supplies. You will need a base coat, red, white, and blue nail polish, a small paintbrush or dotting tool, and a topcoat to seal in your design.
Pro tip:
Look for
long-lasting and chip-resistant nail polishes
to ensure your manicure lasts through all the festivities.
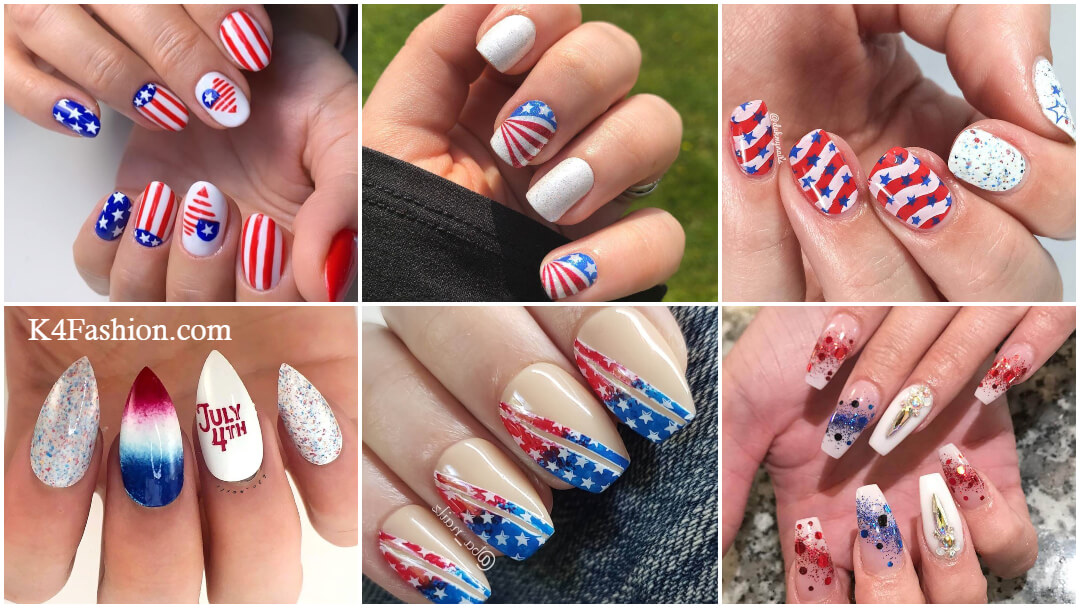
Stars and Stripes
 For a classic 4th of July look, you can't go wrong with stars and stripes. Start by applying a base coat and letting it dry. Then, paint your nails with a
bold red
polish. Once dry, use a small paintbrush or a toothpick to create
thin white stripes
on your nails. Next, take a
dotting tool
and dip it into a
blue polish
to create
small stars
on the white stripes. Finally, seal in your design with a topcoat to make it last all day.
For a classic 4th of July look, you can't go wrong with stars and stripes. Start by applying a base coat and letting it dry. Then, paint your nails with a
bold red
polish. Once dry, use a small paintbrush or a toothpick to create
thin white stripes
on your nails. Next, take a
dotting tool
and dip it into a
blue polish
to create
small stars
on the white stripes. Finally, seal in your design with a topcoat to make it last all day.
Fireworks Explosion
 If you want to add some sparkle to your nails, try this fireworks-inspired design. After applying a base coat, paint your nails with a
shimmery blue
polish. Once dry, use a
silver glitter
polish to create
firework bursts
on your nails. You can also add some
red, white, and blue glitter
for an extra festive touch. Finish off with a topcoat to make your nails shine like the fireworks in the sky.
If you want to add some sparkle to your nails, try this fireworks-inspired design. After applying a base coat, paint your nails with a
shimmery blue
polish. Once dry, use a
silver glitter
polish to create
firework bursts
on your nails. You can also add some
red, white, and blue glitter
for an extra festive touch. Finish off with a topcoat to make your nails shine like the fireworks in the sky.
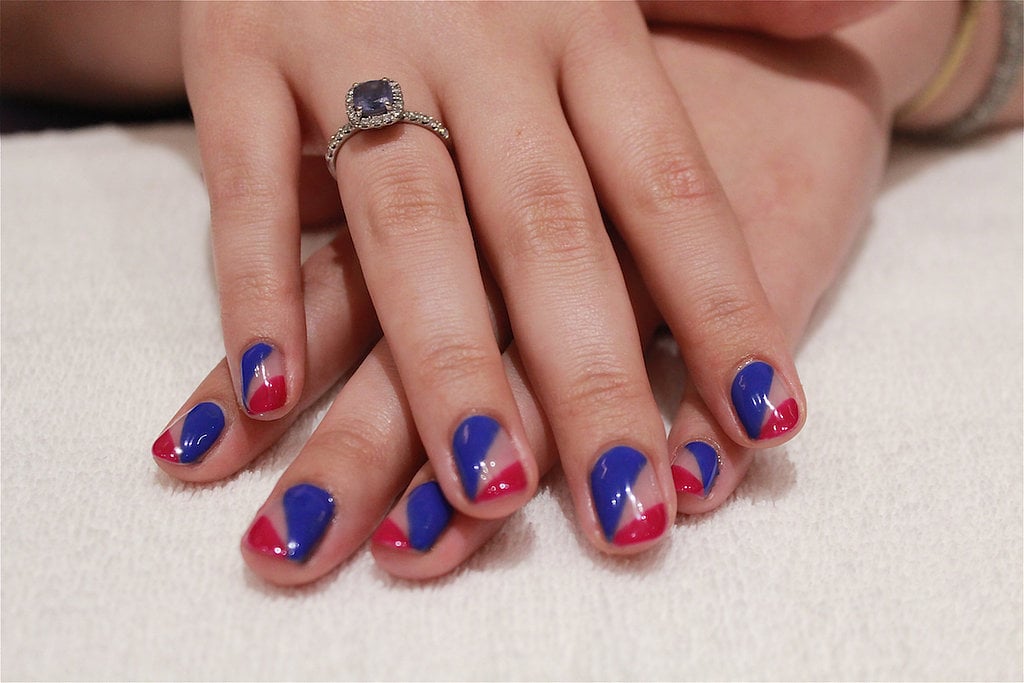
Patriotic Ombré
 Ombré nails are a popular trend, and what better way to incorporate it into your 4th of July nail art? Start by painting your nails with a
white base
and letting it dry. Then, take a makeup sponge and apply
red, white, and blue polish
in horizontal stripes. Dab the sponge on your nails to create a
gradient effect
. You can also use a
dotting tool
to create
stars
on the blue section. Finish off with a topcoat to blend the colors together seamlessly.
Ombré nails are a popular trend, and what better way to incorporate it into your 4th of July nail art? Start by painting your nails with a
white base
and letting it dry. Then, take a makeup sponge and apply
red, white, and blue polish
in horizontal stripes. Dab the sponge on your nails to create a
gradient effect
. You can also use a
dotting tool
to create
stars
on the blue section. Finish off with a topcoat to blend the colors together seamlessly.
Final Thoughts
 With these
4th of July nail art ideas
, you can show off your patriotism in style. Don't be afraid to get creative and add your own personal touch to these designs. Just remember to have fun and celebrate this special day with your loved ones. Happy Independence Day!
With these
4th of July nail art ideas
, you can show off your patriotism in style. Don't be afraid to get creative and add your own personal touch to these designs. Just remember to have fun and celebrate this special day with your loved ones. Happy Independence Day!


