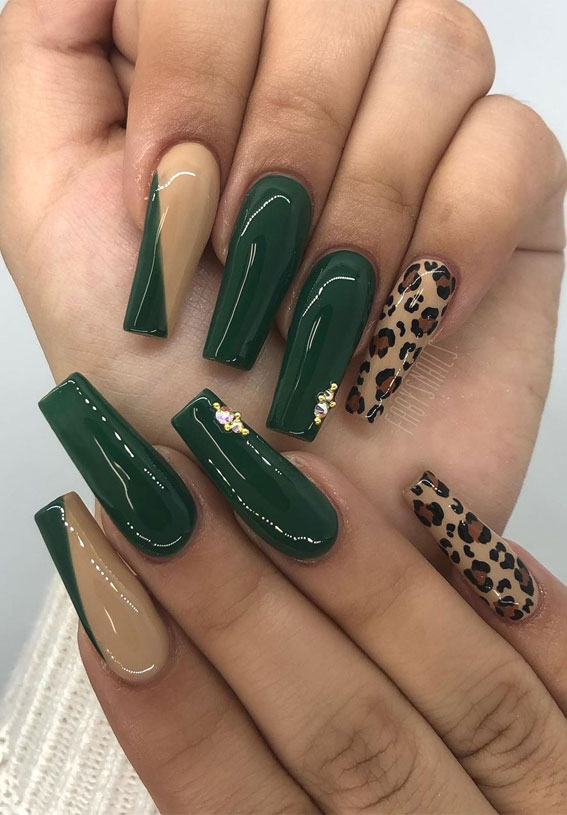
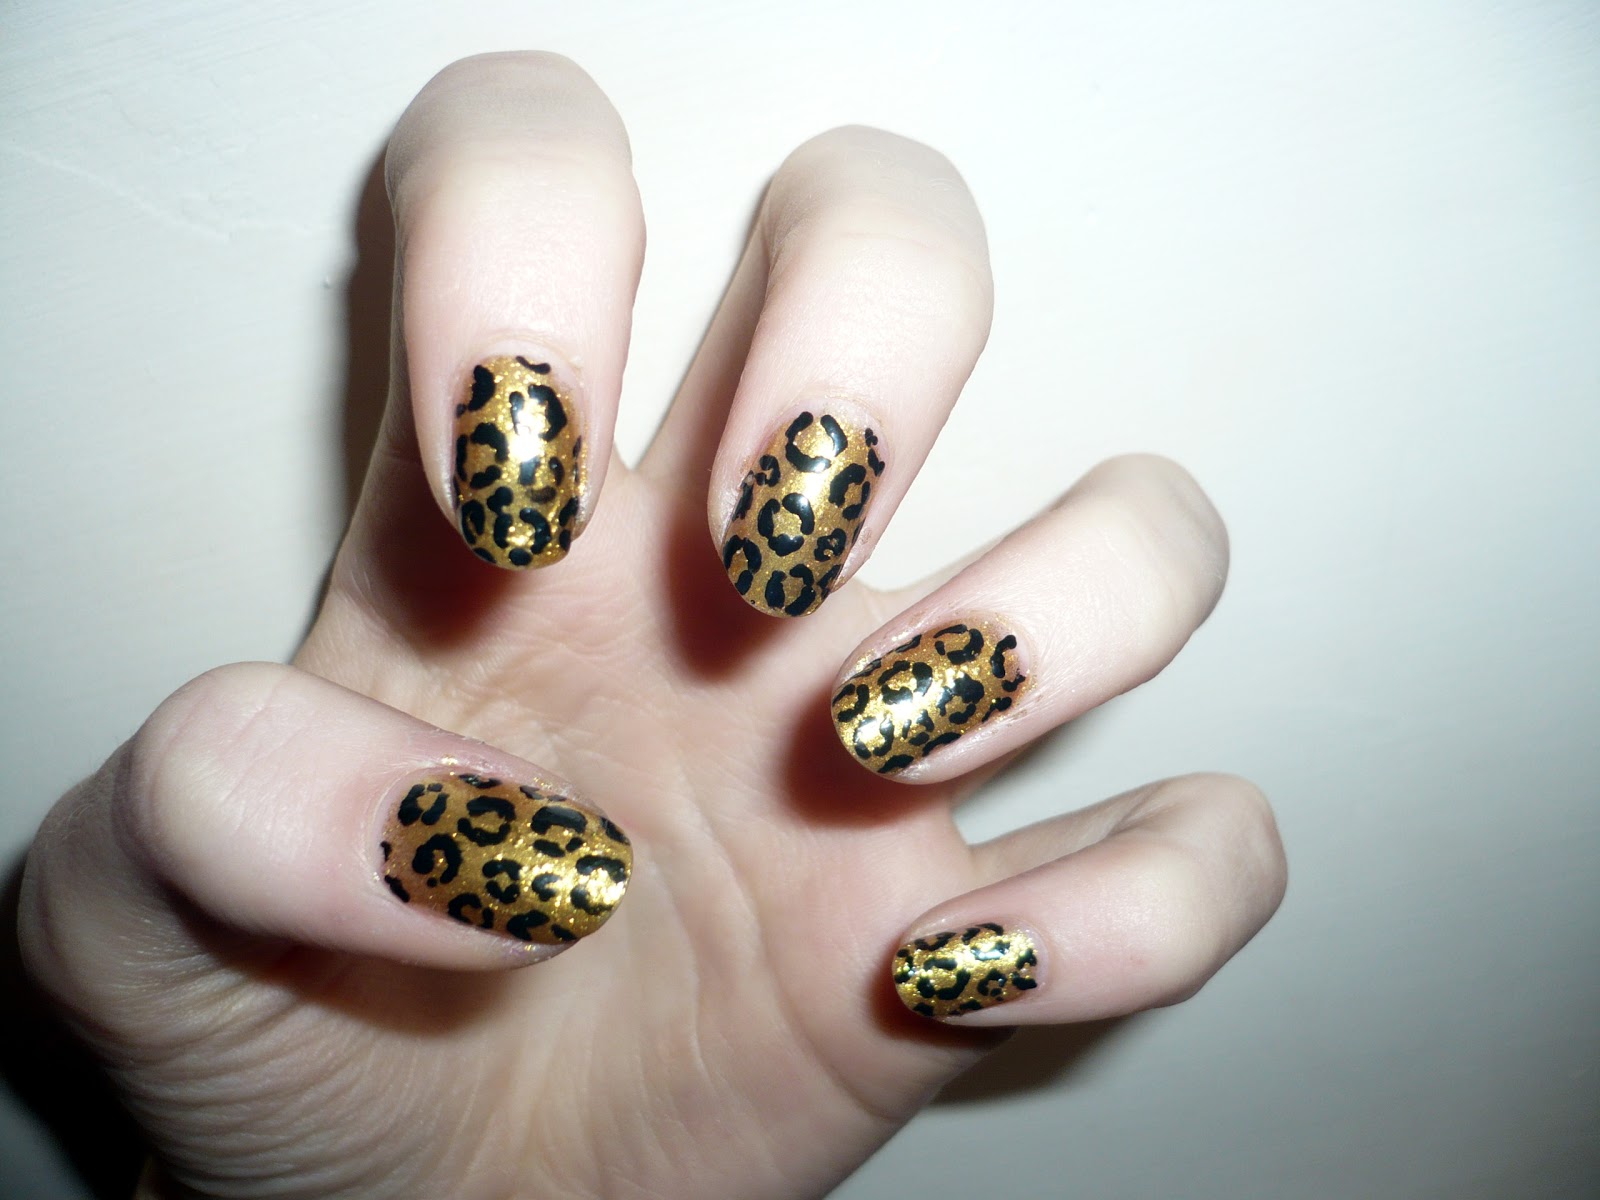
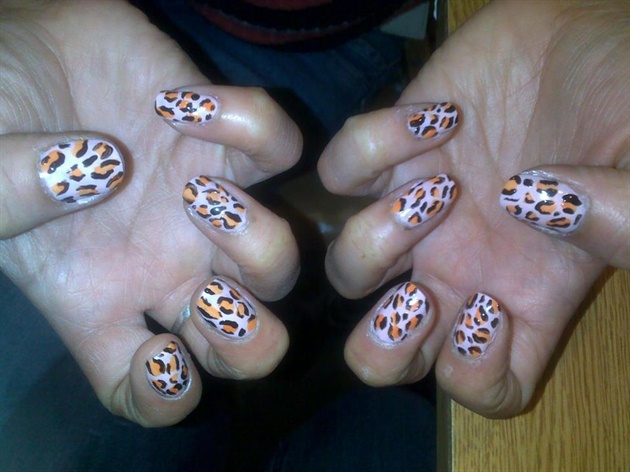
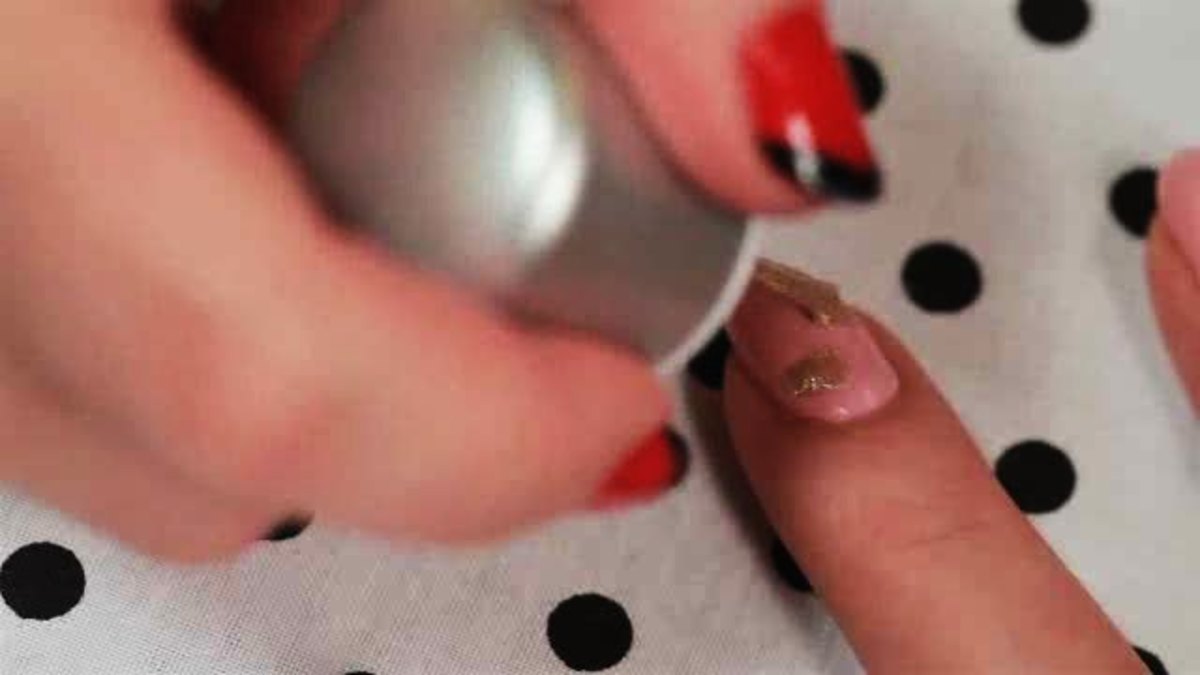
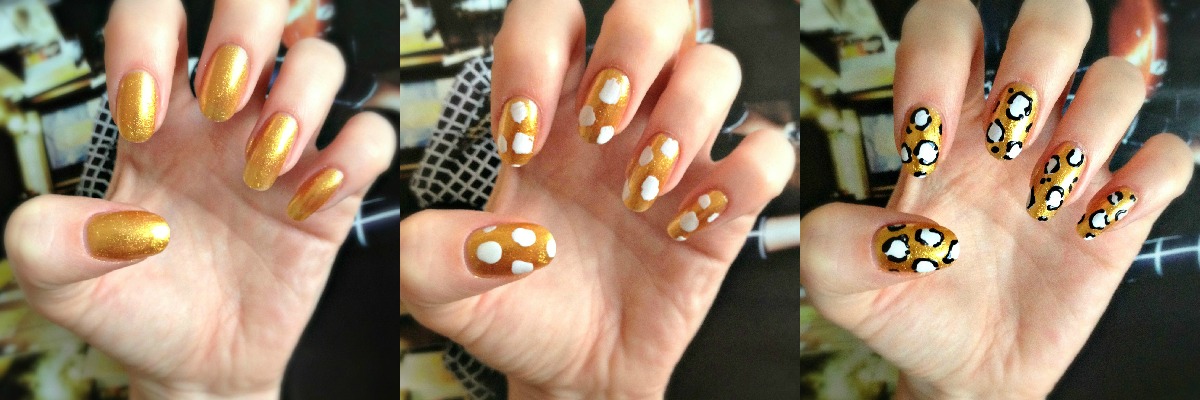
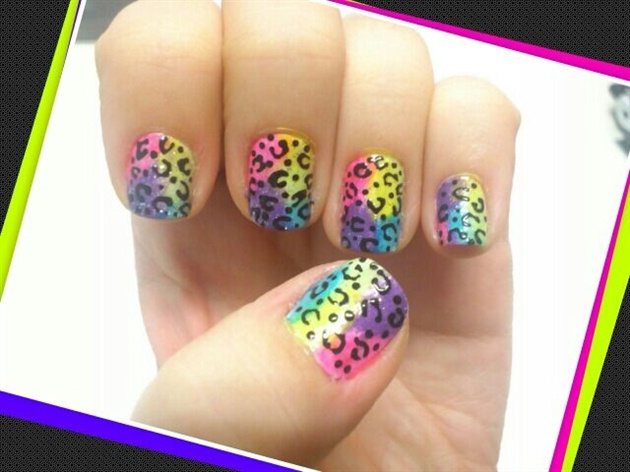
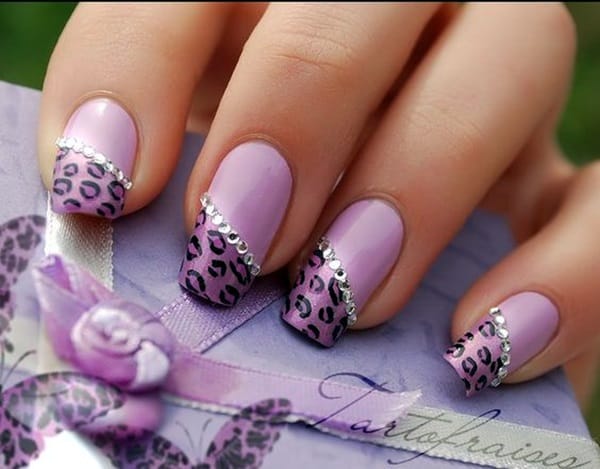
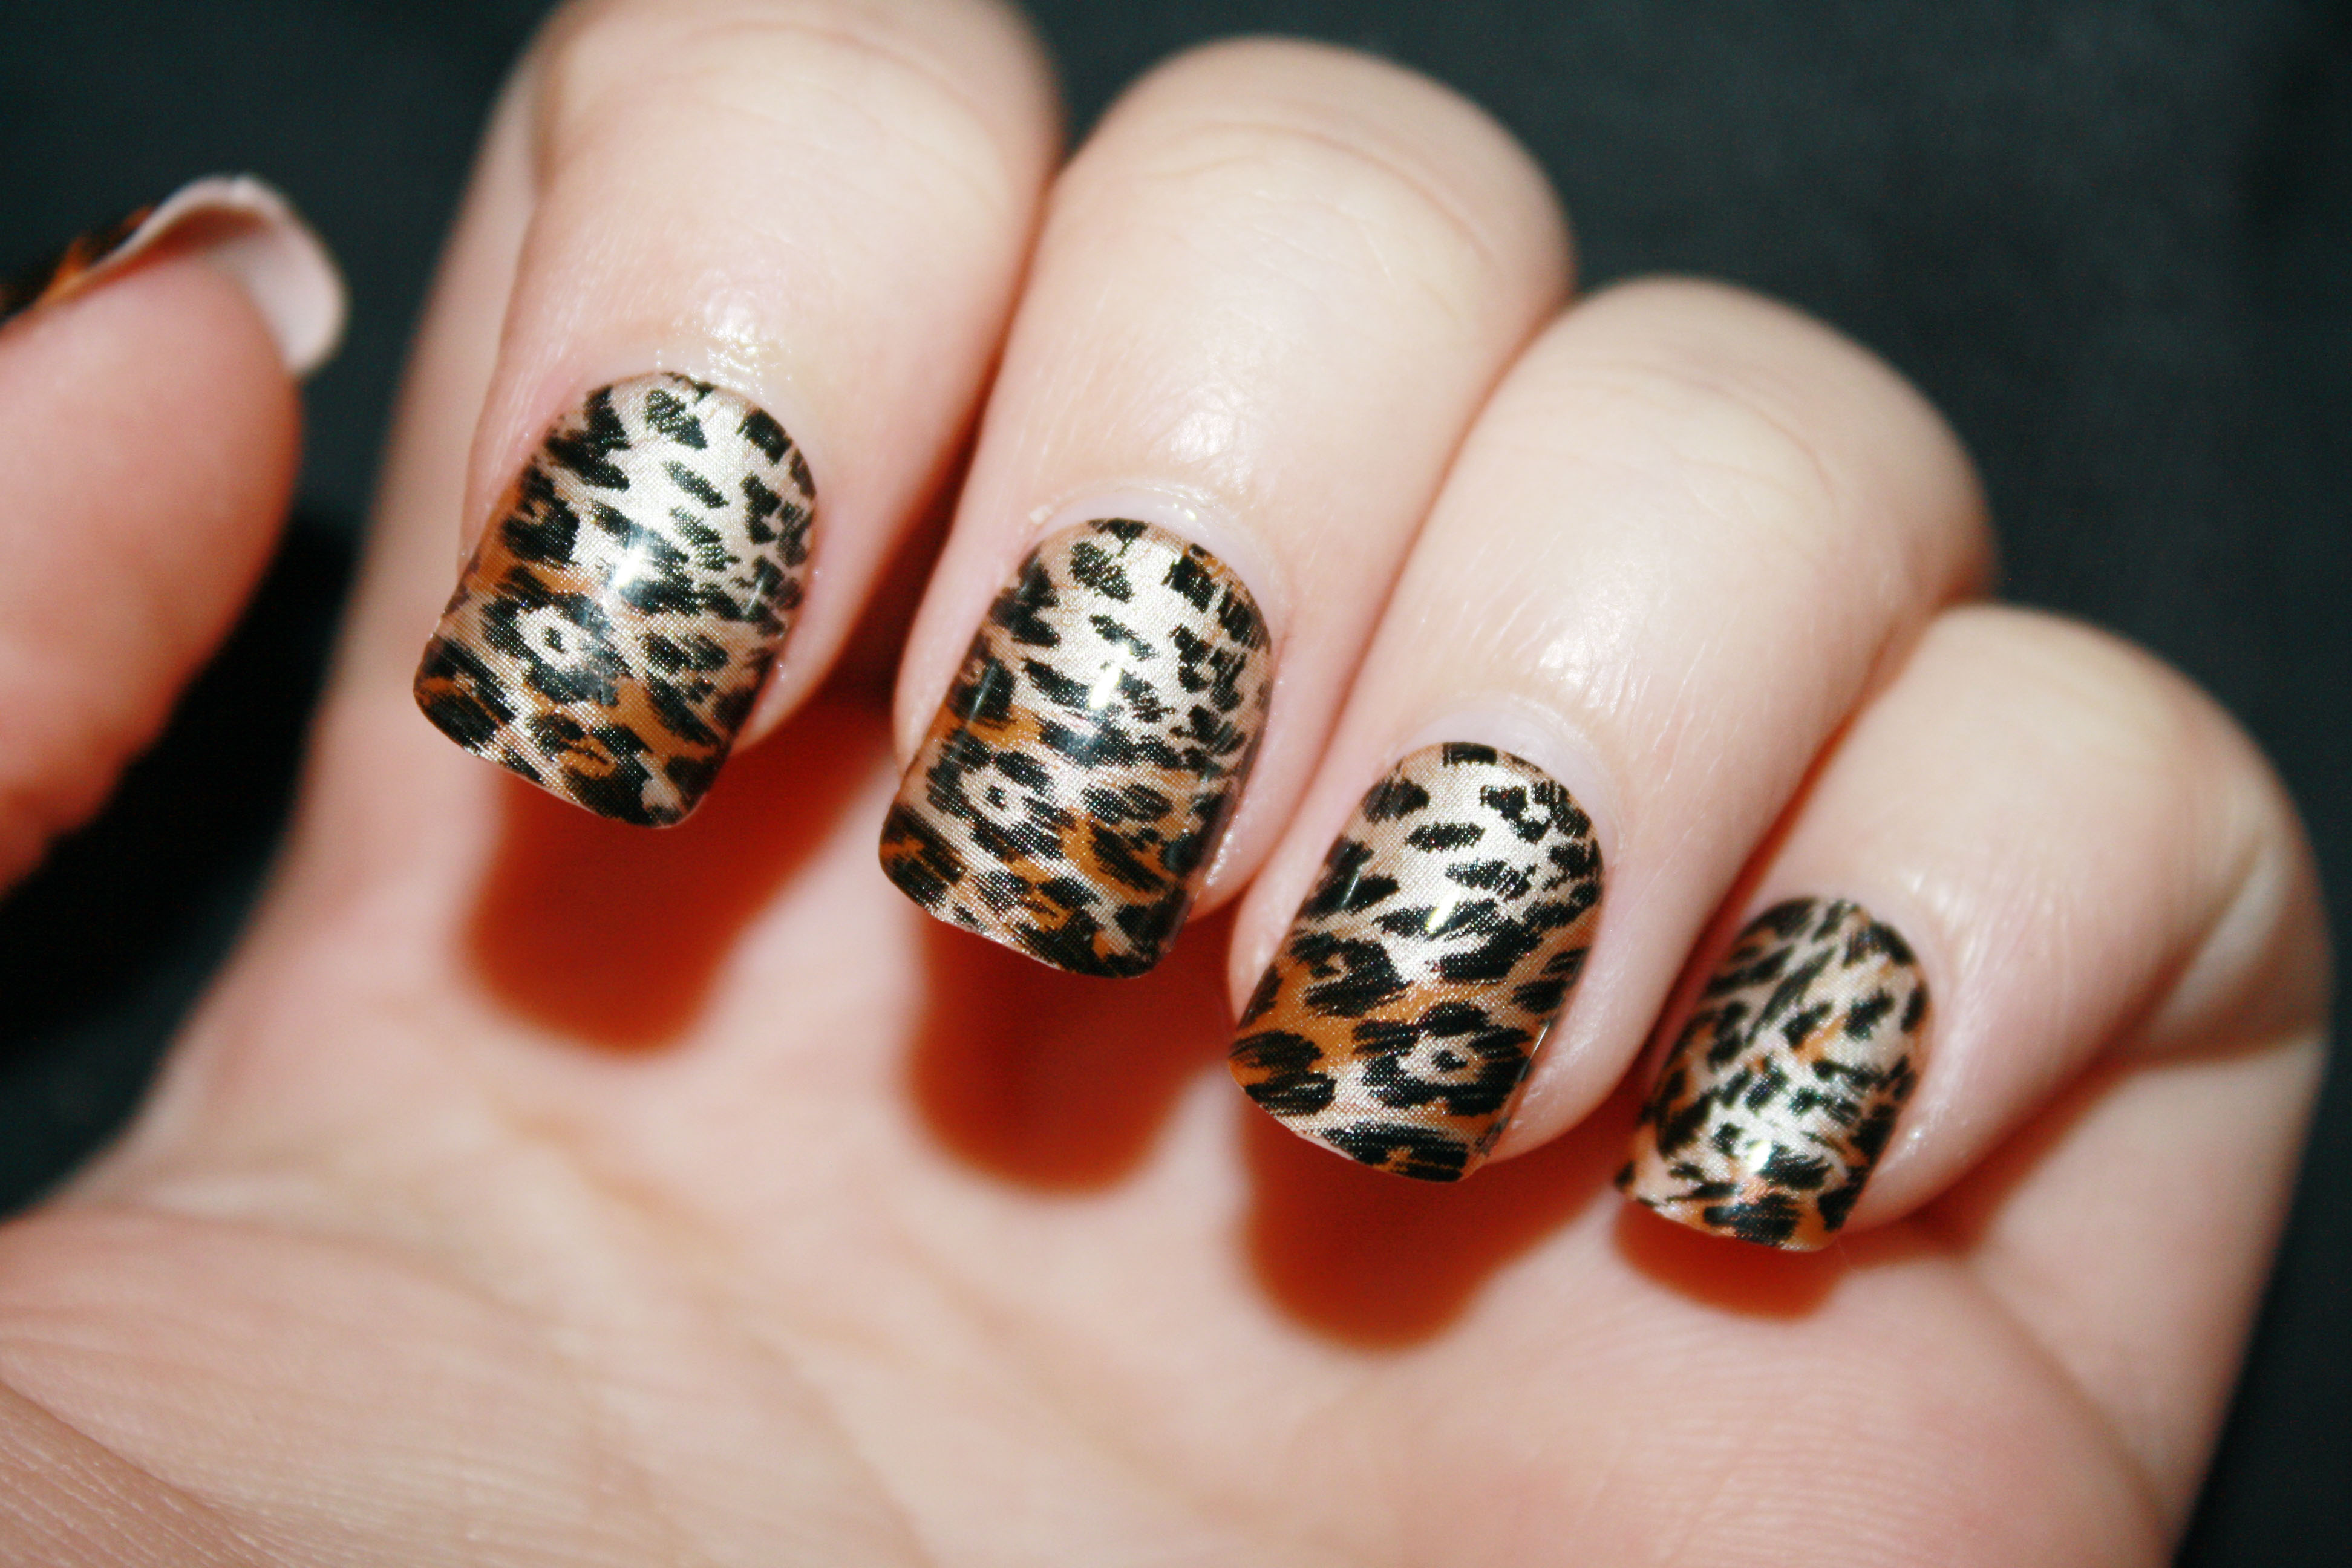
Are you looking for a bold and eye-catching nail art design? Look no further than acid leopard print! This fun and funky look combines the edgy vibes of acid wash with the classic leopard print pattern for a truly unique manicure. And the best part? It's surprisingly easy to recreate at home. To get started, you'll need a few supplies: a base coat, a white or light-colored nail polish, a black nail polish, and a few different colors of acrylic or gel paint. You'll also need a thin brush or dotting tool to create the leopard print pattern. Begin by applying a base coat to your nails to protect them and help the polish adhere better. Then, paint your nails with the white or light-colored polish and let it dry completely. Next, take your black polish and use the thin brush or dotting tool to create random, abstract shapes on your nails. These will be the base for your leopard print. Don't worry about making them perfect – the more imperfect and abstract they are, the better. Once the black polish has dried, it's time to add the leopard print. Dip your brush or dotting tool into one of the colored paints and make small, irregular dots around the black shapes. You can use as many or as few colors as you like, but make sure to leave some blank spaces for a more realistic leopard print effect. Continue adding dots in different colors until you're happy with the overall look. You can also add some smaller dots in black to fill in any gaps or add some extra dimension to the design. Finish off with a layer of top coat to seal in your design and give it a glossy finish. And just like that, you have a gorgeous acid leopard nail art look that's sure to turn heads!1. "Easy Acid Leopard Nail Art Tutorial"


1. "Easy Acid Leopard Nail Art Tutorial"


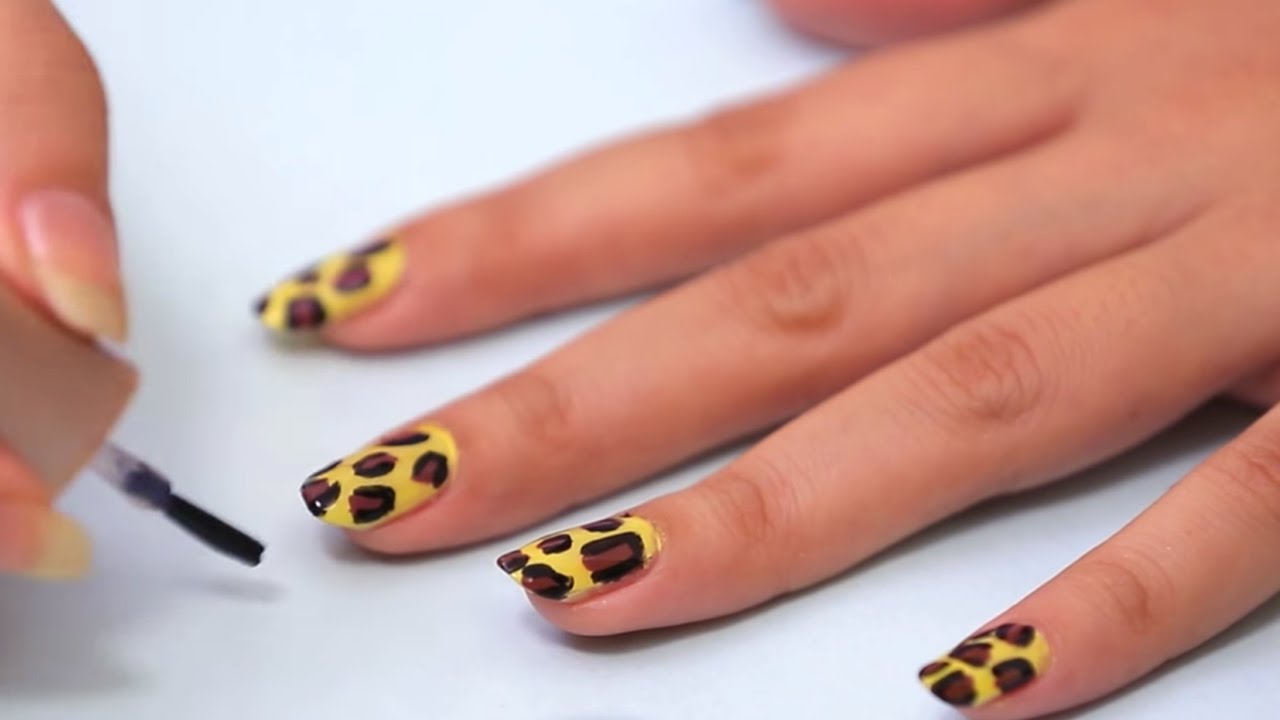

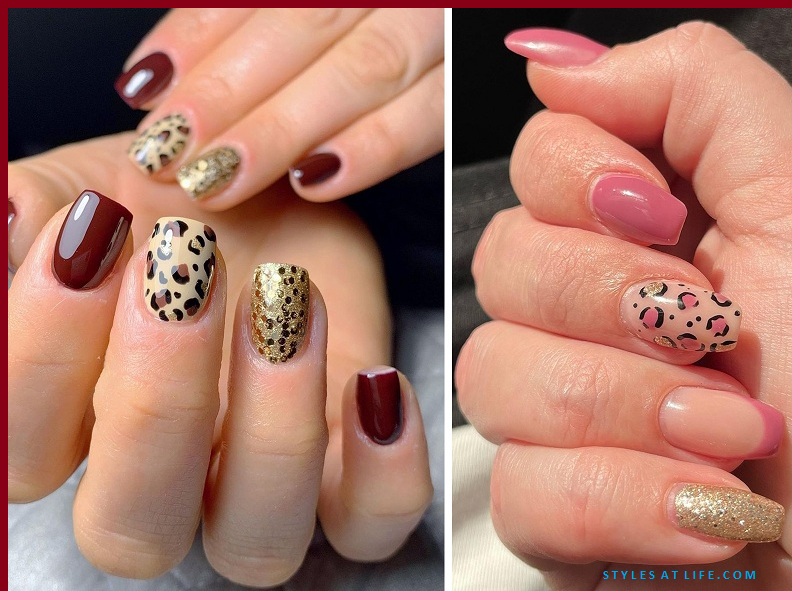


If you're new to nail art, the thought of creating an acid leopard print design might seem intimidating. But fear not – with this easy step-by-step tutorial, you'll be a pro in no time! Start by applying a base coat to your nails to protect them and help the polish adhere better. Then, paint your nails with a white or light-colored polish and let it dry completely. Next, take your black nail polish and use the brush to paint random, abstract shapes on your nails. These will serve as the base for your leopard print. Don't worry about making them perfect – the more imperfect and abstract they are, the better. Once the black polish has dried, it's time to add the leopard print. Take a thin brush or dotting tool and dip it into one of the colored acrylic or gel paints. Make small, irregular dots around the black shapes, leaving some blank spaces for a more realistic leopard print effect. Continue adding dots in different colors until you're happy with the overall look. You can also add some smaller dots in black to fill in any gaps or add some extra dimension to the design. Finish off with a layer of top coat to seal in your design and give it a glossy finish. And just like that, you have a stunning acid leopard nail art look!2. "Step-by-Step Acid Leopard Nail Art Tutorial"

2. "Step-by-Step Acid Leopard Nail Art Tutorial"


If you're new to the world of nail art, trying out a complex design like acid leopard print might seem daunting. But fear not – this tutorial is perfect for beginners who want to dip their toes into the world of nail art. Start by applying a base coat to your nails to protect them and help the polish adhere better. Then, paint your nails with a white or light-colored polish and let it dry completely. Next, take your black nail polish and use the brush to paint random, abstract shapes on your nails. These will serve as the base for your leopard print. Don't worry about making them perfect – the more imperfect and abstract they are, the better. Once the black polish has dried, it's time to add the leopard print. Take a thin brush or dotting tool and dip it into one of the colored acrylic or gel paints. Make small, irregular dots around the black shapes, leaving some blank spaces for a more realistic leopard print effect. Continue adding dots in different colors until you're happy with the overall look. You can also add some smaller dots in black to fill in any gaps or add some extra dimension to the design. Finish off with a layer of top coat to seal in your design and give it a glossy finish. And just like that, you have a beautiful and easy acid leopard nail art look!3. "Acid Leopard Nail Art Tutorial for Beginners"


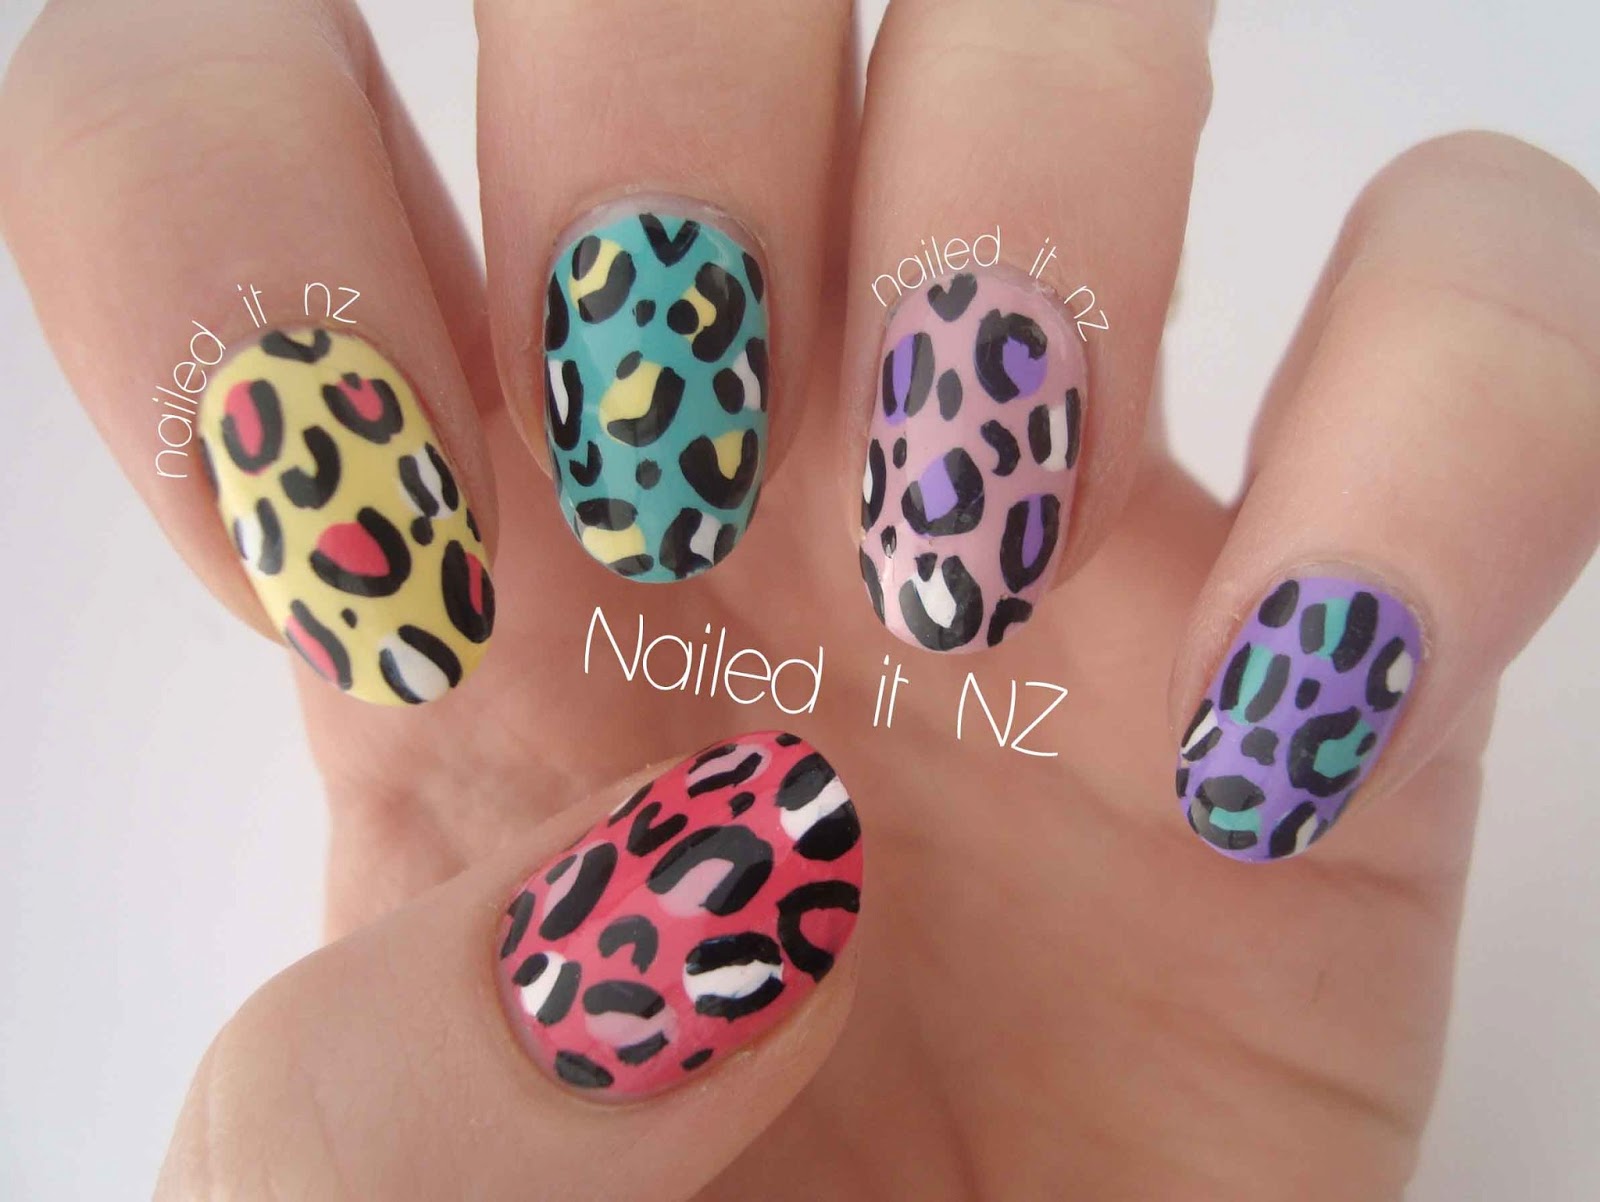
3. "Acid Leopard Nail Art Tutorial for Beginners"


If you love leopard print but want to give it a unique and edgy twist, why not try an acid leopard print nail art design? This bold and eye-catching look is perfect for those who want to stand out from the crowd. To get started, you'll need a few supplies: a base coat, a white or light-colored nail polish, a black nail polish, and a few different colors of acrylic or gel paint. You'll also need a thin brush or dotting tool to create the leopard print pattern. Start by applying a base coat to your nails to protect them and help the polish adhere better. Then, paint your nails with the white or light-colored polish and let it dry completely. Next, take your black polish and use the thin brush or dotting tool to create random, abstract shapes on your nails. These will be the base for your leopard print. Don't worry about making them perfect – the more imperfect and abstract they are, the better. Once the black polish has dried, it's time to add the leopard print. Dip your brush or dotting tool into one of the colored paints and make small, irregular dots around the black shapes. You can use as many or as few colors as you like, but make sure to leave some blank spaces for a more realistic leopard print effect. Continue adding dots in different colors until you're happy with the overall look. You can also add some smaller dots in black to fill in any gaps or add some extra dimension to the design. Finish off with a layer of top coat to seal in your design and give it a glossy finish. And just like that, you have a stunning acid leopard print nail art look!4. "Acid Leopard Print Nail Art Tutorial"


4. "Acid Leopard Print Nail Art Tutorial"


Love trying out new nail art designs but don't want to break the bank at the salon? This DIY acid leopard nail art tutorial is perfect for you! With just a few supplies and some creativity, you can create your very own professional-looking nail art at home. You'll need a base coat, a white or light-colored nail polish, a black nail polish, and a few different colors of acrylic or gel paint. You'll also need a thin brush or dotting tool to create the leopard print pattern. Start by applying a base coat to your nails to protect them and help the polish adhere better. Then, paint your nails with the white or light-colored polish and let it dry completely. Next, take your black polish and use the thin brush or dotting tool to create random, abstract shapes on your nails. These will be the base for your leopard print. Don't worry about making them perfect – the more imperfect and abstract they are, the better. Once the black polish has dried, it's time to add the leopard print. Dip your brush or dotting tool into one of the colored paints and make small, irregular dots around the black shapes. You can use as many or as few colors as you like, but make sure to leave some blank spaces for a more realistic leopard print effect. Continue adding dots in different colors until you're happy with the overall look. You can also add some smaller dots in black to fill in any gaps or add some extra dimension to the design. Finish off with a layer of top coat to seal in your design and give it a glossy finish. And just like that, you have a stunning DIY acid leopard nail art look!5. "DIY Acid Leopard Nail Art Tutorial"
5. "DIY Acid Leopard Nail Art Tutorial"
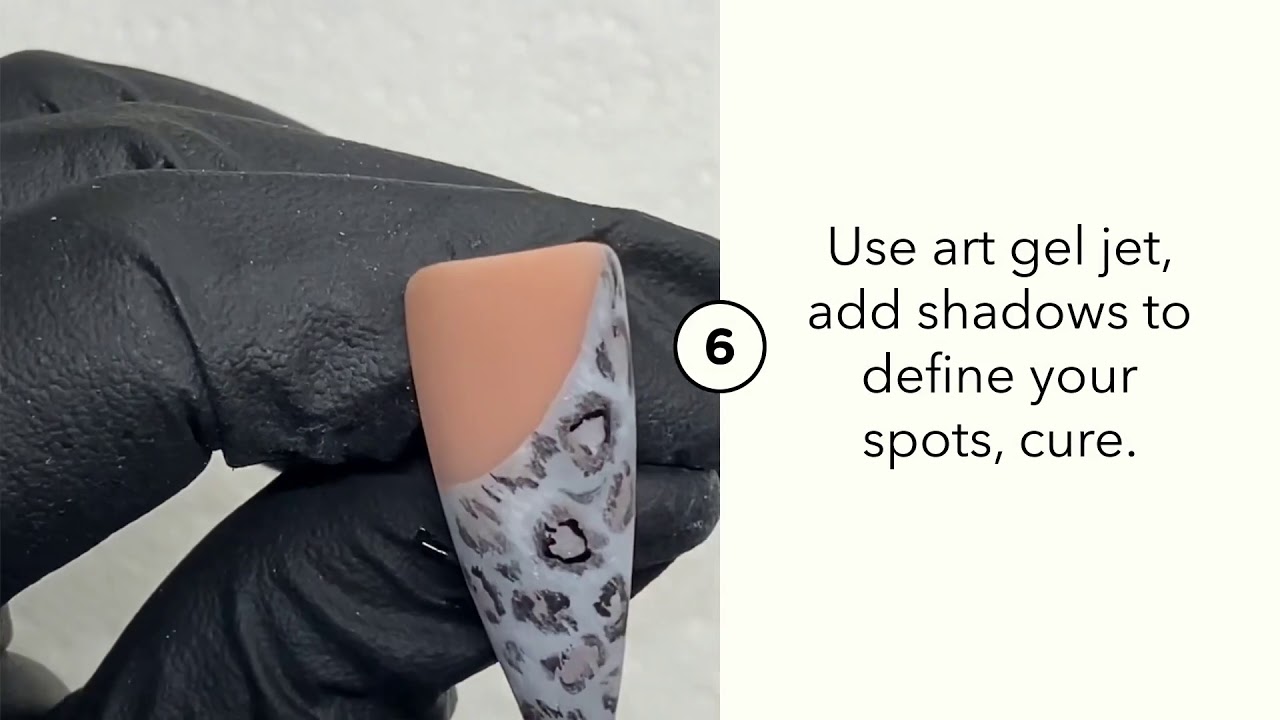
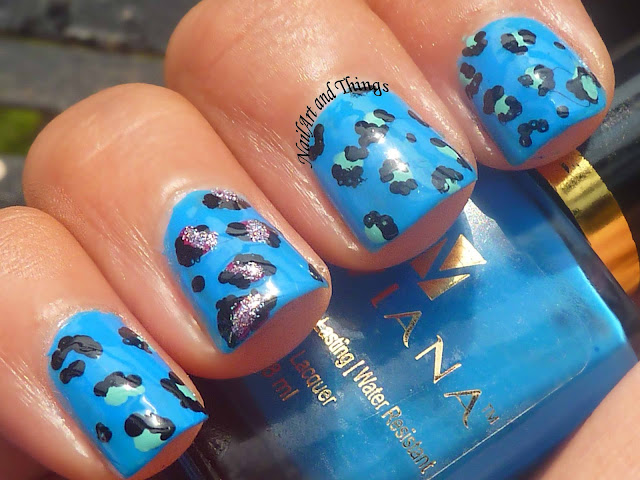
If you're a fan of gel polish and want to try out a fun and funky design, this acid leopard nail art tutorial is perfect for you! The long-lasting and shiny finish of gel polish is perfect for showing off this bold and edgy look. To get started, you'll need a few supplies: a base coat, a white or light-colored gel polish, a black gel polish, and a few different colors of acrylic or gel paint. You'll also need a thin brush or dotting tool to create the leopard print pattern. Begin by applying a thin layer of base coat to your nails and cure it under a UV or LED lamp, following the instructions for your specific brand of gel polish. Then, apply a layer of white or light-colored gel polish and cure it under the lamp. Next, take your black gel polish and use the thin brush or dotting tool to create random, abstract shapes on your nails. These will be the base for your leopard print. Don't worry about making them perfect – the more imperfect and abstract they are, the better. Once the black gel polish has cured, it's time to add the leopard print. Dip your brush or dotting tool into one of the colored paints and make small, irregular dots around the black shapes. You can use as many or as few colors as you like, but make sure to leave some blank spaces for a more realistic leopard print effect. Continue adding dots in different colors until you're happy with the overall look. You can also add some smaller dots in black to fill in any gaps or add some extra dimension to the design. Finish off with a layer of top coat and cure it under the lamp to seal in your design and give it a glossy finish. And just like that, you have a stunning acid leopard nail art look with gel polish!6. "Acid Leopard Nail Art Tutorial with Gel Polish"

6. "Acid Leopard Nail Art Tutorial with Gel Polish"

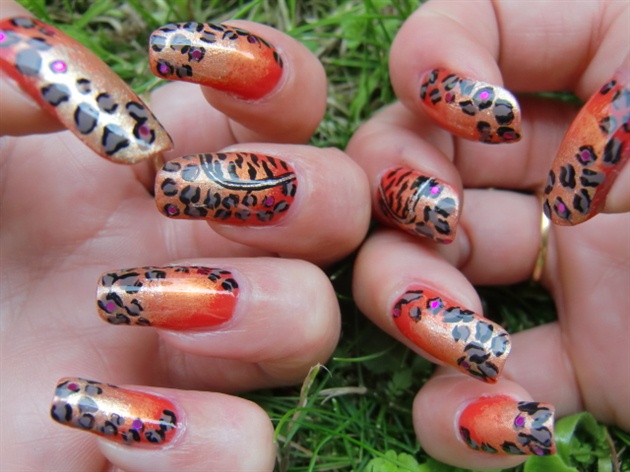
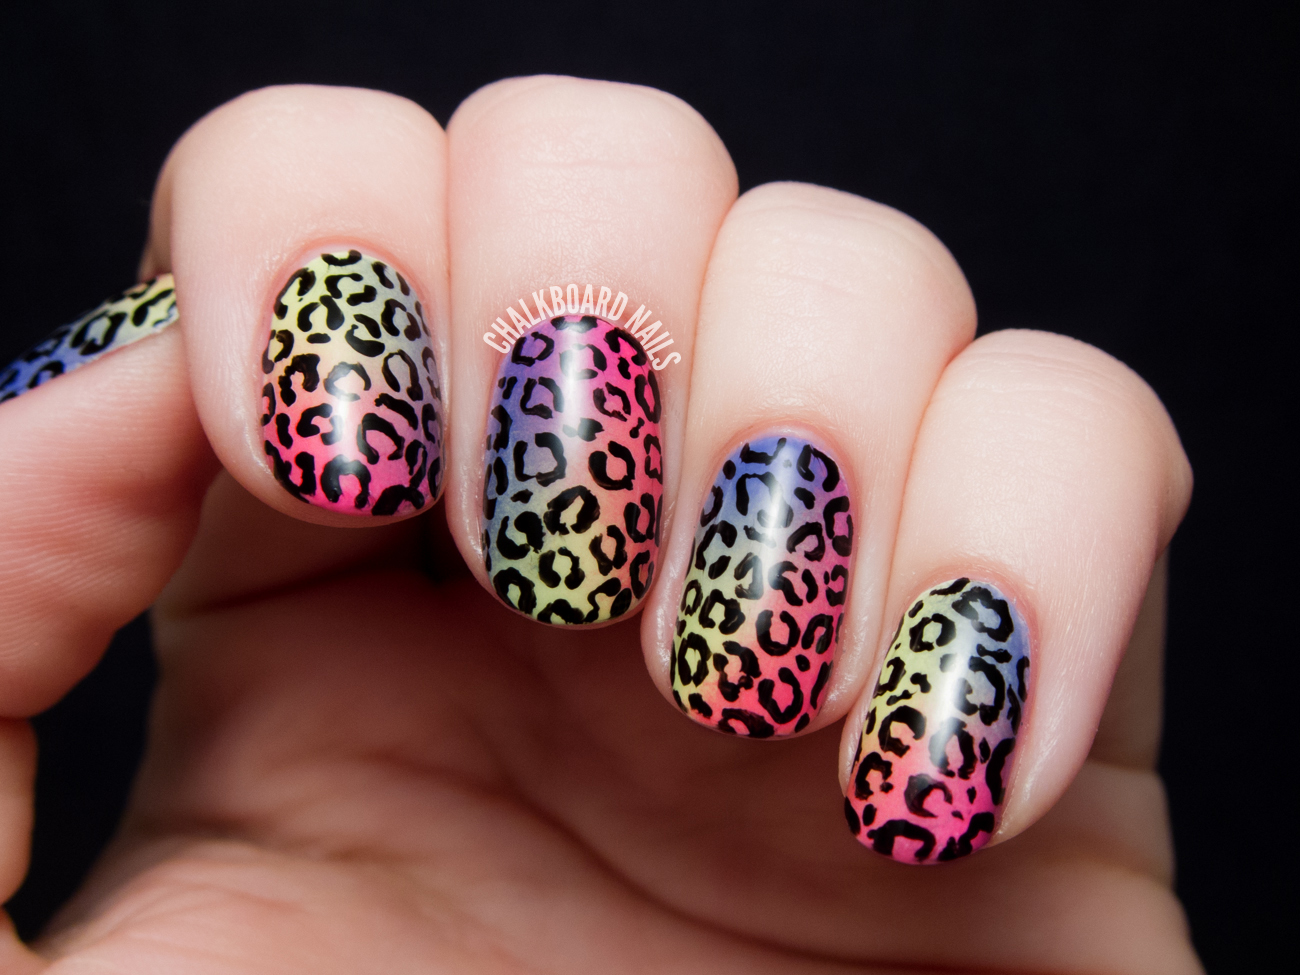
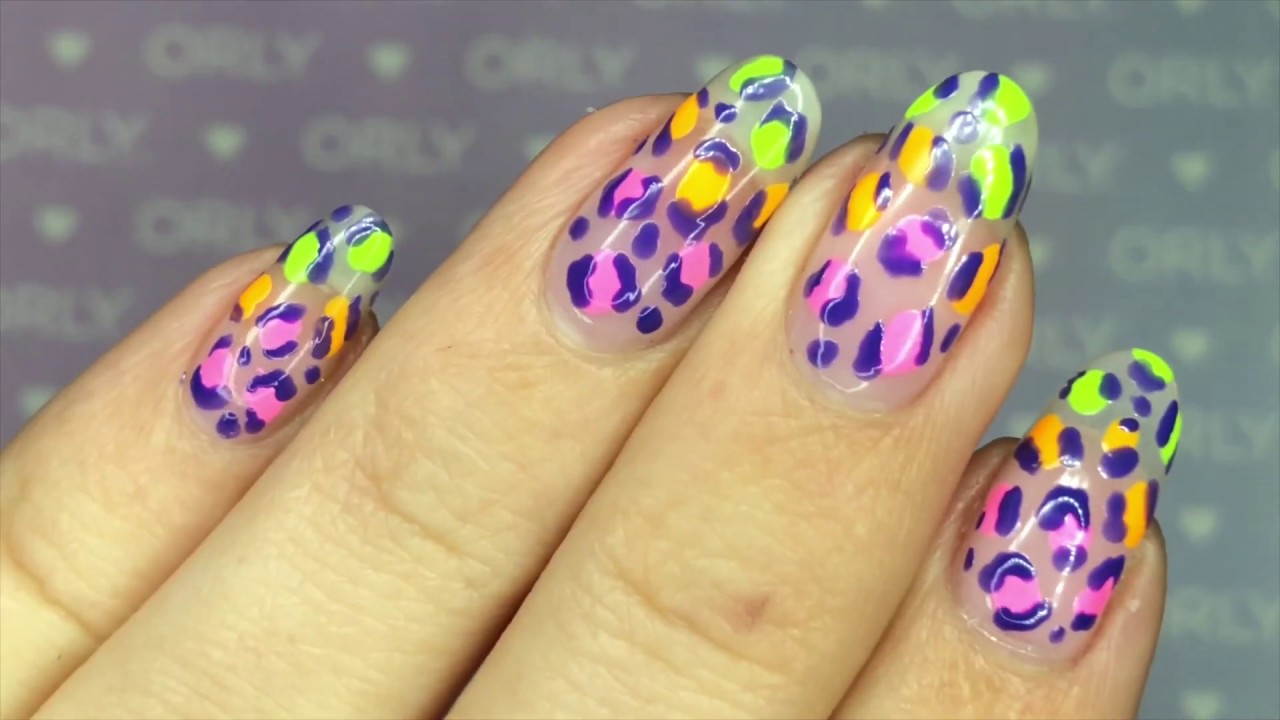
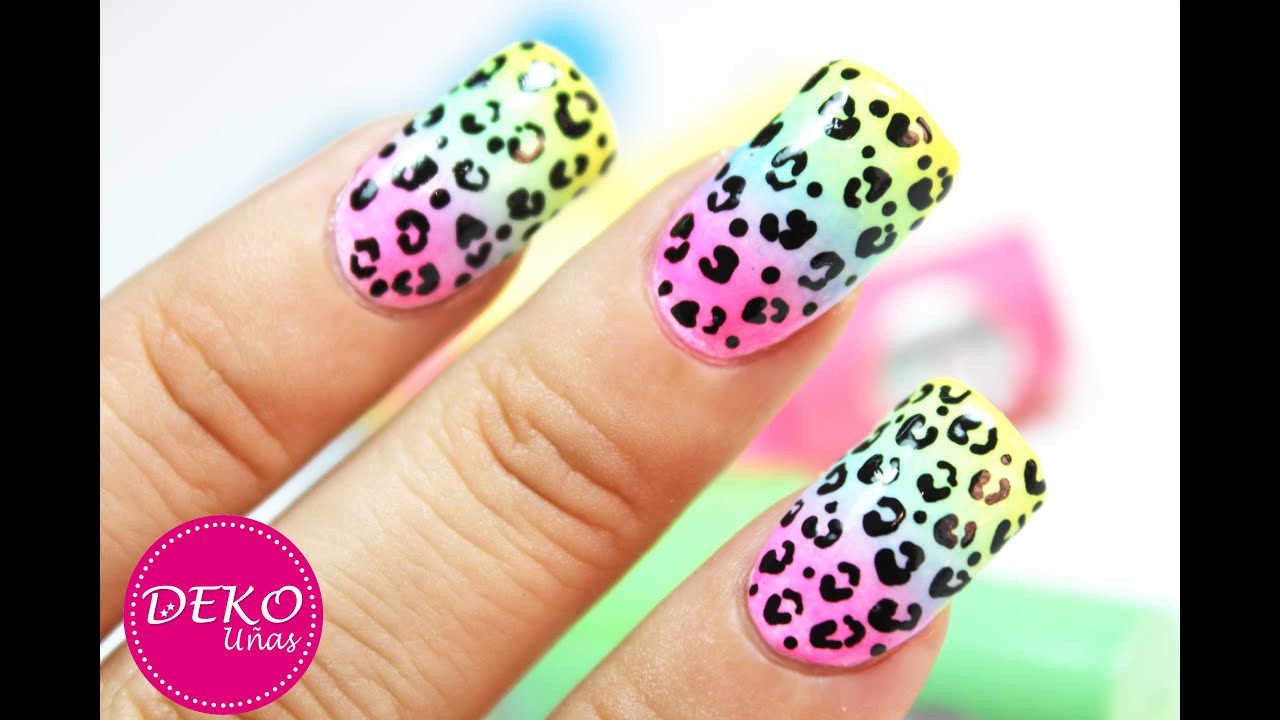
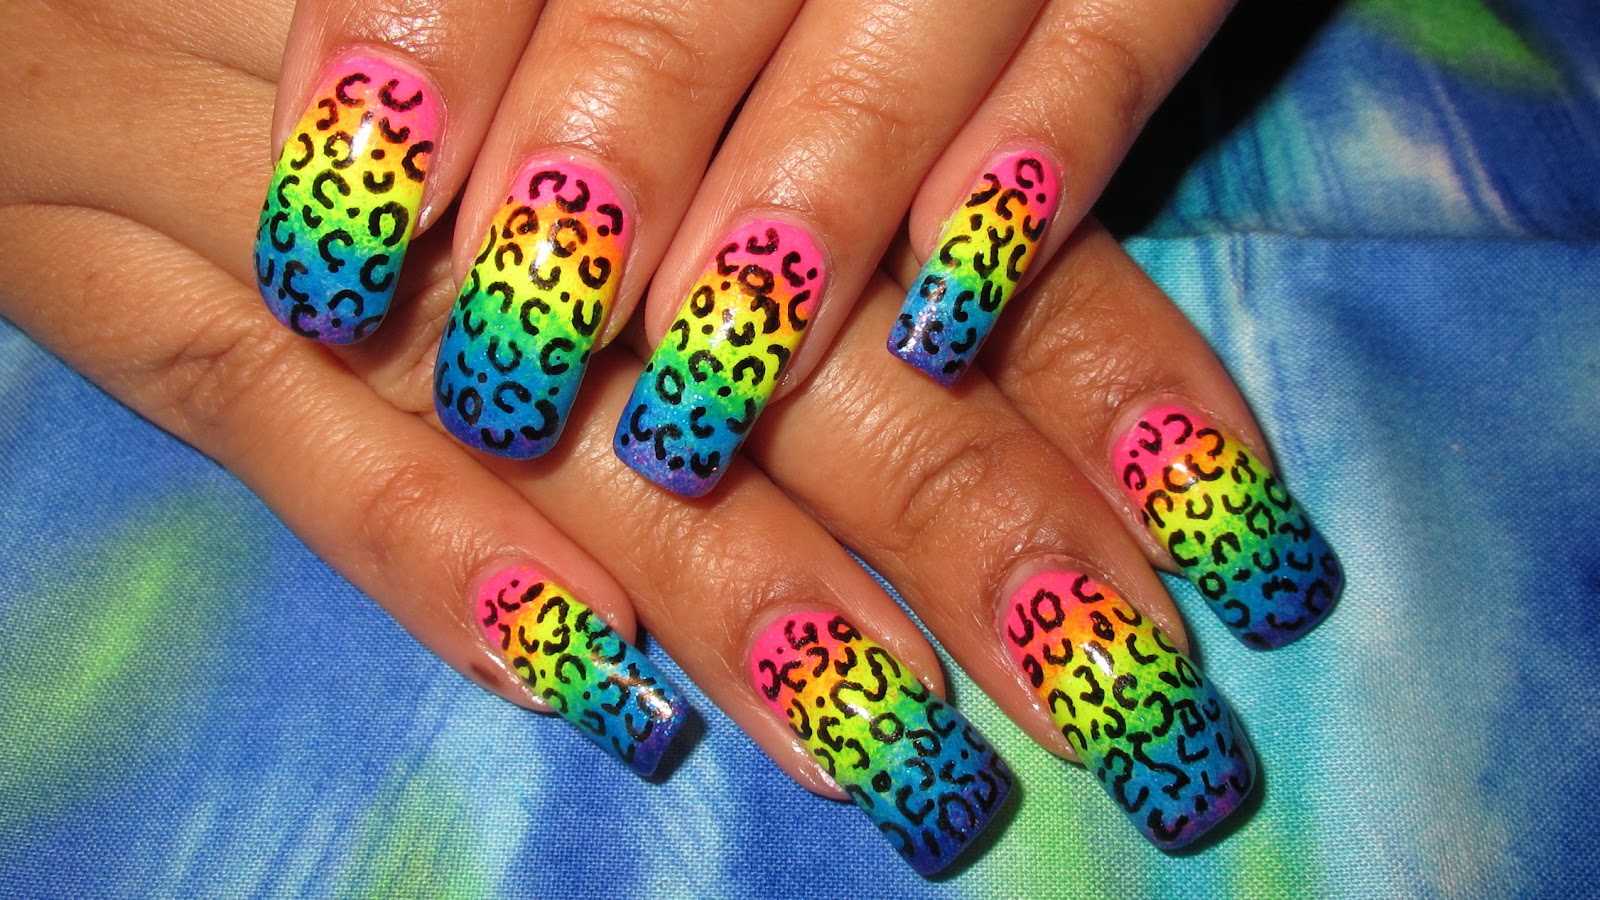
Why settle for one color when you can have a whole rainbow on your nails? This rainbow acid leopard nail art tutorial takes the classic leopard print design and gives it a fun and colorful twist. You'll need a base coat, a white or light-colored nail polish, a black nail polish, and a few different colors of acrylic or gel paint. You'll also need a thin brush or dotting tool to create the leopard print pattern. Start by applying a base coat to your nails to protect them and help the polish adhere better. Then, paint your nails with the white or light-colored polish and let it dry completely. Next, take your black polish and use the thin brush or dotting tool to create random, abstract shapes on your nails. These will be the base for your leopard print. Don't worry about making them perfect – the more imperfect and abstract they are, the better. Once the black polish has dried, it's time to add the leopard print. Dip your brush or dotting tool into one of the colored paints and make small, irregular dots around the black shapes. You can use as many or as few colors as you like, but make sure to leave some blank spaces for a more realistic leopard print effect. Continue adding dots in different colors until you're happy with the overall look. You can also add some smaller dots in black to fill in any gaps or add some extra dimension to the design. Finish off with a layer of top coat to seal in your design and give it a glossy finish. And just like that, you have a vibrant and playful rainbow acid leopard nail art look!7. "Rainbow Acid Leopard Nail Art Tutorial"


7. "Rainbow Acid Leopard Nail Art Tutorial"
If freehand nail art isn't your forte, don't worry – you can still achieve an amazing acid leopard print design with stamping! This technique uses a special stamping plate and stamping polish to transfer intricate designs onto your nails. To get started, you'll need a base coat, a white or light-colored nail polish, a black nail polish, a stamping plate with a leopard print design, and a stamping tool. You'll also need a few different colors of acrylic or gel paint to fill in the leopard print. Begin by applying a base coat to your nails to protect them and help the polish adhere better. Then, paint your nails with the white or light-colored polish and let it dry completely. Next, take your black polish and use the stamping plate and tool to transfer the leopard print design onto your nails. You may need to practice a few times to get the technique right, but once you do, it's a quick and easy process. Once the design has transferred onto your nails, use a thin brush or dotting tool to fill in the print with different colors of paint. You can also add some smaller black dots to add dimension to the design. Finish off with a layer of top coat to seal in your design and give it a glossy finish. And just like that, you have a stunning acid leopard nail art look with stamping!8. "Acid Leopard Nail Art Tutorial with Stamping"

8. "Acid Leopard Nail Art Tutorial with Stamping"
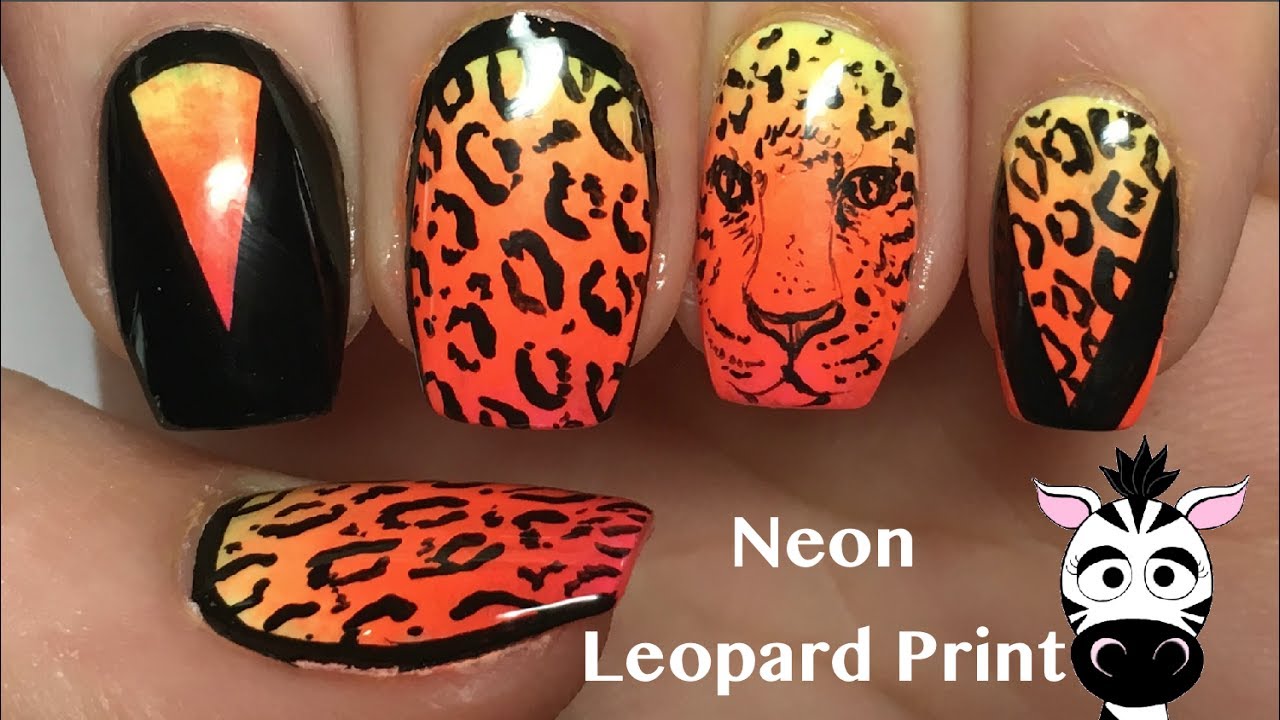
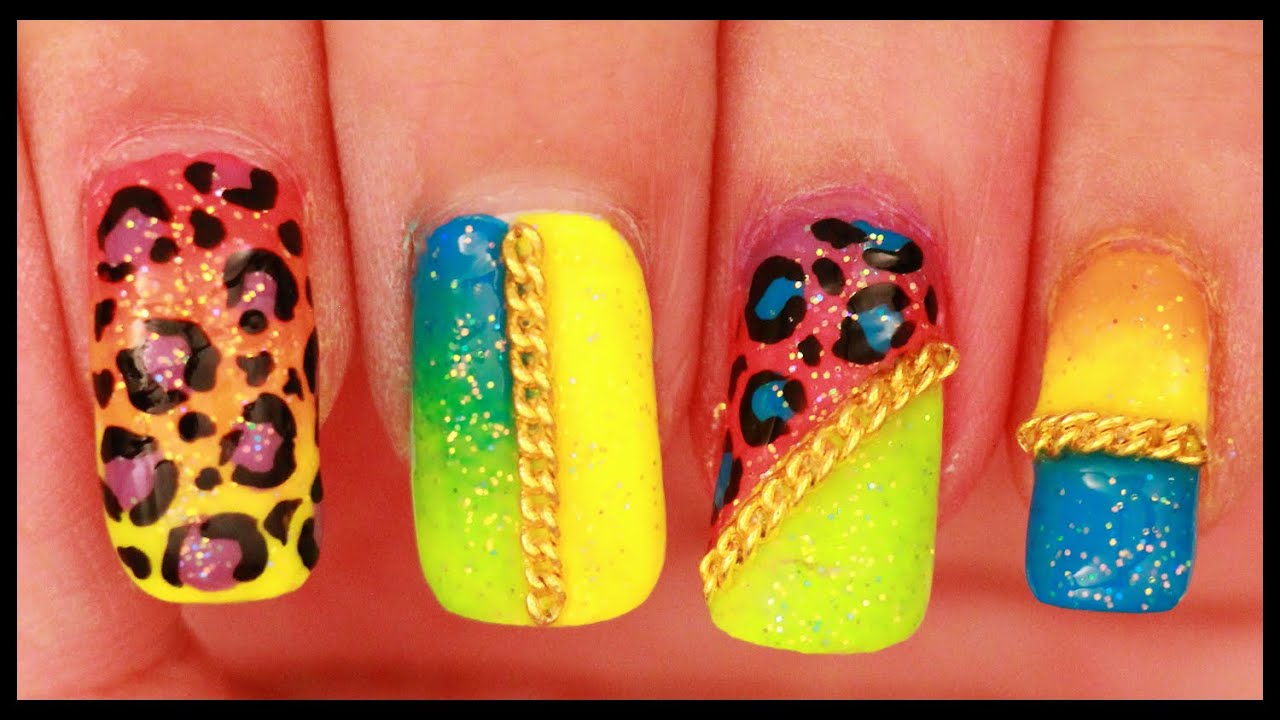
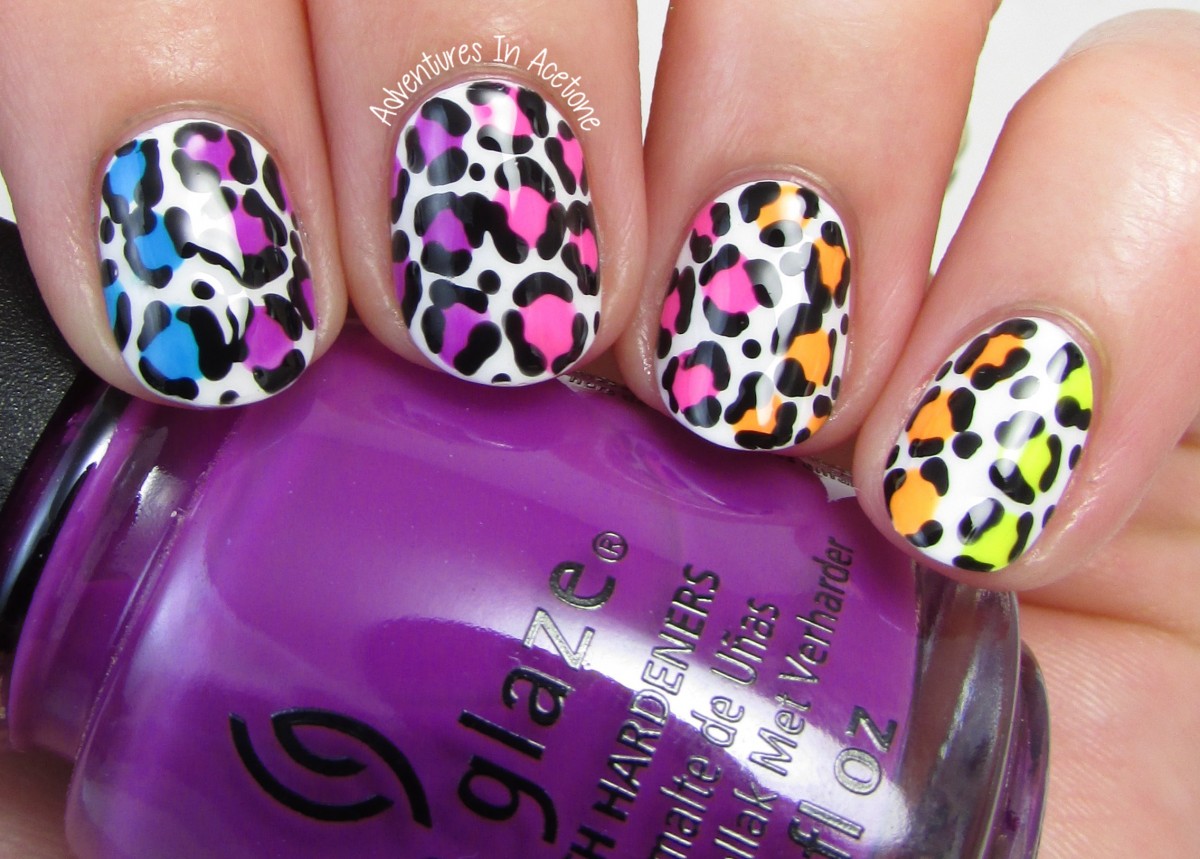
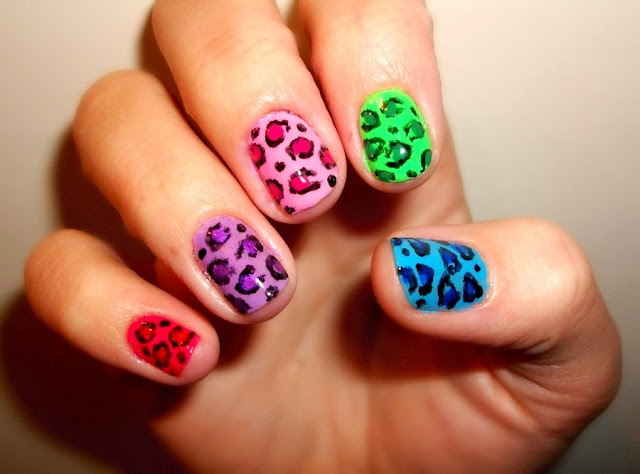
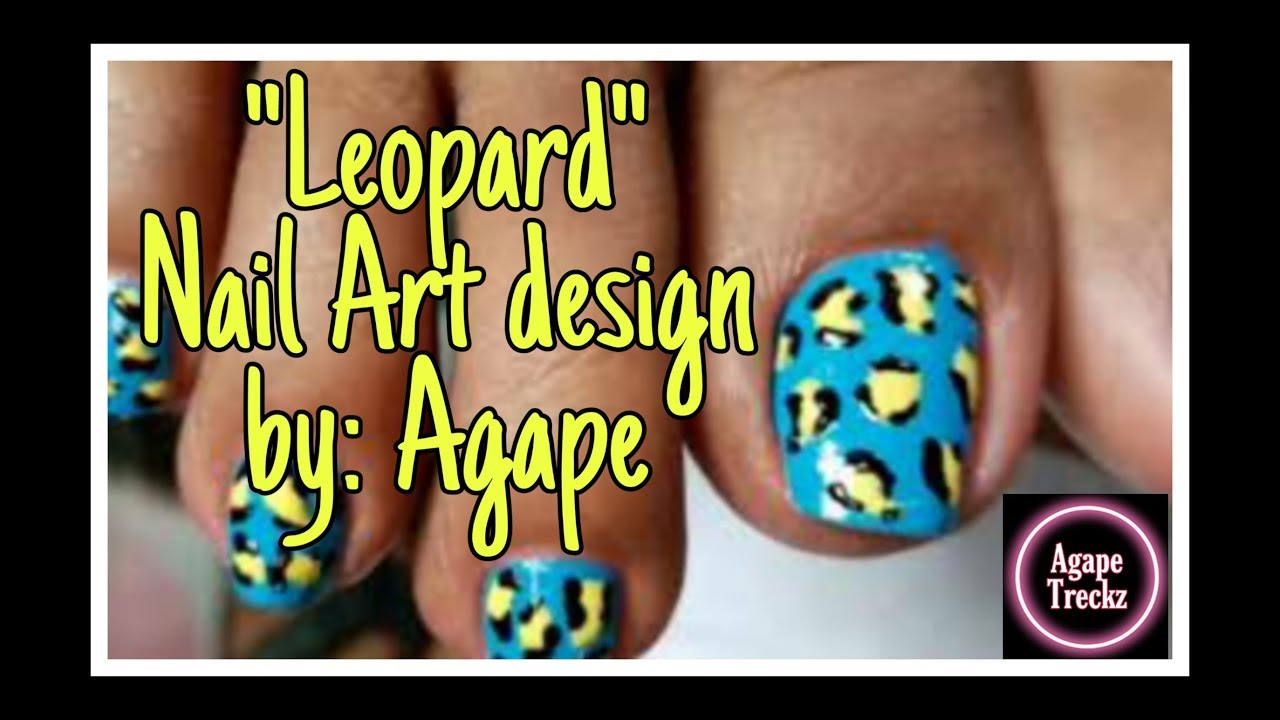
For those who love bright and bold colors, this neon acid leopard nail art tutorial is a must-try! The combination of acid wash and neon colors creates a fun and playful look that's perfect for parties and festivals. You'll need a base coat, a white or light-colored nail polish, a black nail polish, and a few different neon colors of acrylic or gel paint. You'll also need a thin brush or dotting tool to create the leopard print pattern. Start by applying a base coat to your nails to protect them and help the polish adhere better. Then, paint your nails with the white or light-colored polish and let it dry completely. Next, take your black polish and use the thin brush or dotting tool to create random, abstract shapes on your nails. These will be the base for your leopard print. Don't worry about making them perfect – the more imperfect and abstract they are, the better. Once the black polish has dried, it's time to add the leopard print. Dip your brush or dotting tool into one of the neon paints and make small, irregular dots around the black shapes. You can use as many or as few colors as you like, but make sure to leave some blank spaces for a more realistic leopard print effect.9. "Neon Acid Leopard Nail Art Tutorial"

9. "Neon Acid Leopard Nail Art Tutorial"

Add Some Acid Leopard Flair to Your Nails with This Easy Tutorial
Get the Bold and Edgy Look You've Been Craving
 Are you tired of the same old boring nail designs? Want to add some fierce and funky vibes to your nails? Look no further than this acid leopard nail art tutorial. This trend has been taking the beauty world by storm and it's easy to see why. With its bold colors and playful patterns, acid leopard nails are the perfect way to make a statement and show off your unique style.
To achieve this look, you'll need a few key supplies: a base coat, your choice of
acid-colored
nail polishes (think neon pinks, greens, and yellows), a
black
nail polish, a small brush or dotting tool, and a top coat. Once you have everything ready, it's time to get started.
Are you tired of the same old boring nail designs? Want to add some fierce and funky vibes to your nails? Look no further than this acid leopard nail art tutorial. This trend has been taking the beauty world by storm and it's easy to see why. With its bold colors and playful patterns, acid leopard nails are the perfect way to make a statement and show off your unique style.
To achieve this look, you'll need a few key supplies: a base coat, your choice of
acid-colored
nail polishes (think neon pinks, greens, and yellows), a
black
nail polish, a small brush or dotting tool, and a top coat. Once you have everything ready, it's time to get started.
Step 1: Prep Your Nails
 As with any nail design, it's important to start with a clean and well-prepped nail. Begin by
trimming and shaping
your nails to your desired length and shape. Then, apply a base coat to protect your nails from the colorful polishes and to help your manicure last longer.
As with any nail design, it's important to start with a clean and well-prepped nail. Begin by
trimming and shaping
your nails to your desired length and shape. Then, apply a base coat to protect your nails from the colorful polishes and to help your manicure last longer.
Step 2: Add the Base Colors
 Start by painting each nail with your base color of choice. This can be a
bold pink
,
lime green
, or any other bright and vibrant color you love. Let the polish dry completely before moving on to the next step.
Start by painting each nail with your base color of choice. This can be a
bold pink
,
lime green
, or any other bright and vibrant color you love. Let the polish dry completely before moving on to the next step.
Step 3: Create the Leopard Spots
 Now it's time to add the fun leopard print pattern. Using your small brush or dotting tool, create
random and abstract
black spots on each nail. Don't worry about making them perfect, as leopard spots are supposed to be unique and imperfect. You can also vary the size of the spots to add more dimension to the design.
Now it's time to add the fun leopard print pattern. Using your small brush or dotting tool, create
random and abstract
black spots on each nail. Don't worry about making them perfect, as leopard spots are supposed to be unique and imperfect. You can also vary the size of the spots to add more dimension to the design.
Step 4: Add Some Neon Accents
 To make your nails truly pop, add some
neon accents
to the leopard spots. Use your dotting tool to add small dots of
neon pink
,
green
, or any other bright color to the center of some of the black spots. This will add a fun and playful element to your design.
To make your nails truly pop, add some
neon accents
to the leopard spots. Use your dotting tool to add small dots of
neon pink
,
green
, or any other bright color to the center of some of the black spots. This will add a fun and playful element to your design.
Step 5: Seal the Look with a Top Coat
 Once your design is complete and has dried completely, seal it with a top coat. This will not only give your nails a glossy finish, but it will also help protect the design and make it last longer.
And there you have it, your very own acid leopard nail art! This fun and easy tutorial is perfect for anyone looking to add a
bold and edgy
touch to their nails. So go ahead and give it a try, and get ready to turn heads with your fierce and fashionable manicure.
HTML Code:
Once your design is complete and has dried completely, seal it with a top coat. This will not only give your nails a glossy finish, but it will also help protect the design and make it last longer.
And there you have it, your very own acid leopard nail art! This fun and easy tutorial is perfect for anyone looking to add a
bold and edgy
touch to their nails. So go ahead and give it a try, and get ready to turn heads with your fierce and fashionable manicure.
HTML Code:
Add Some Acid Leopard Flair to Your Nails with This Easy Tutorial

Get the Bold and Edgy Look You've Been Craving
Are you tired of the same old boring nail designs? Want to add some fierce and funky vibes to your nails? Look no further than this acid leopard nail art tutorial. This trend has been taking the beauty world by storm and it's easy to see why. With its bold colors and playful patterns, acid leopard nails are the perfect way to make a statement and show off your unique style.
To achieve this look, you'll need a few key supplies: a base coat, your choice of acid-colored nail polishes (think neon pinks, greens, and yellows), a black nail polish, a small brush or dotting tool, and a top coat. Once you have everything ready, it's time to get started.
Step 1: Prep Your Nails
As with any nail design, it's important to start with a clean and well-prepped nail. Begin by trimming and shaping your nails to your desired length and shape. Then, apply a base coat to protect your nails from the colorful polishes and to help your manicure last longer.
Step 2: Add the Base Colors
Start by painting each nail with your base color of choice. This can be a bold pink , lime


