Baroque nail art is all the rage these days, with its intricate and elegant designs. If you're new to the world of nail art, it can seem intimidating to try and recreate these stunning looks. But fear not, because we have an easy baroque nail art tutorial just for beginners! All you need for this tutorial is a few basic nail art tools and your favorite baroque-inspired nail polish. Follow these simple steps and you'll have gorgeous baroque nails in no time!1. "Easy Baroque Nail Art Tutorial for Beginners"


1. "Easy Baroque Nail Art Tutorial for Beginners"


If you're looking for a more detailed tutorial, we've got you covered. This step-by-step baroque nail art tutorial will guide you through every stage of creating a stunning baroque design on your nails. Step 1: Start by preparing your nails - remove any old nail polish, trim and shape your nails, and apply a base coat to protect them. Step 2: Apply a deep red or royal blue nail polish as the base color for your baroque design. Let it dry completely before moving on to the next step. Step 3: Using a thin nail art brush, create intricate swirls and flourishes with gold or silver nail polish on your nails. Don't worry about making them perfect, as the imperfections add to the baroque charm. Step 4: You can also add some pearl or gemstone accents to your baroque design for some extra glamour. Step 5: Once your design is complete, let it dry completely before sealing it with a top coat.2. "Step-by-Step Baroque Nail Art Tutorial"


2. "Step-by-Step Baroque Nail Art Tutorial"


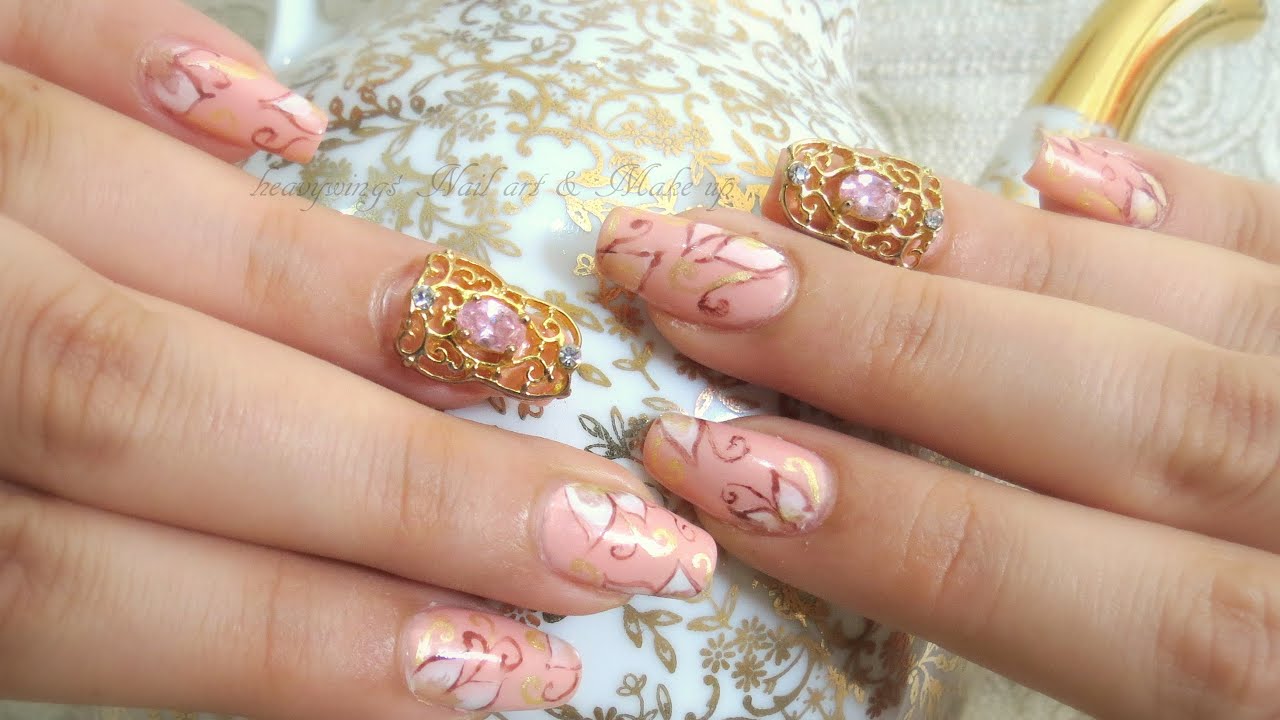
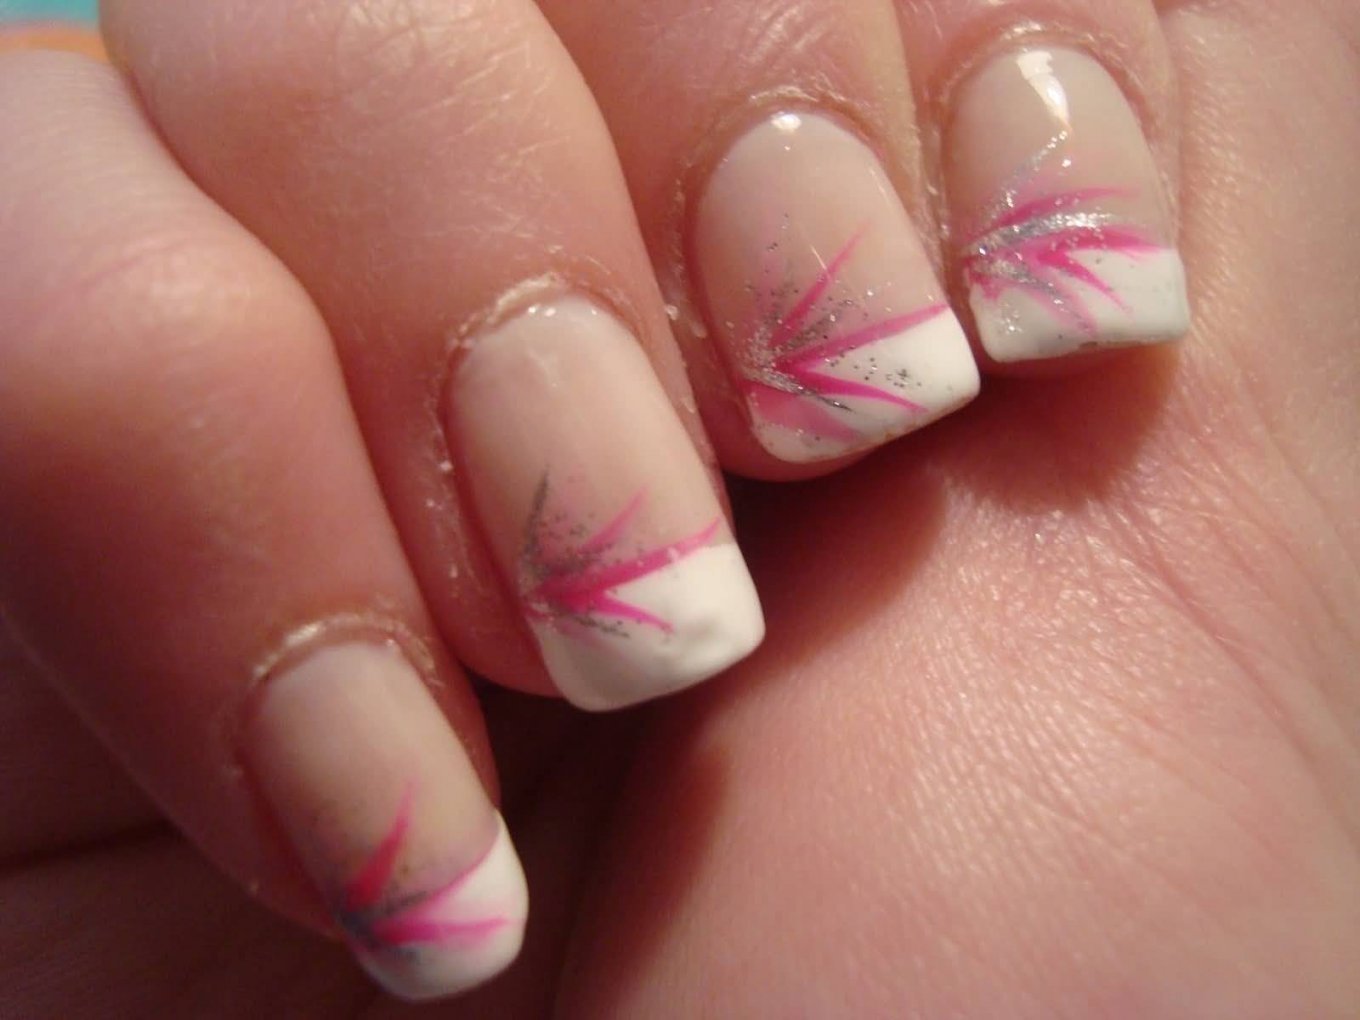
If you're feeling creative and want to put your own spin on baroque nail art, this tutorial is for you. We'll show you how to create a baroque-inspired design using different colors and techniques. Step 1: Start by painting your nails with a pastel pink or mint green nail polish as the base color. Step 2: Using a white or light pink nail polish, create small dots all over your nails. These will serve as the base for your baroque design. Step 3: Using a thin nail art brush, create gold or silver swirls and flourishes on top of the dots. You can also add some pearl or gemstone accents for a more opulent look. Step 4: Once your design is complete, let it dry completely before sealing it with a top coat.3. "Baroque Inspired Nail Art Tutorial"


3. "Baroque Inspired Nail Art Tutorial"

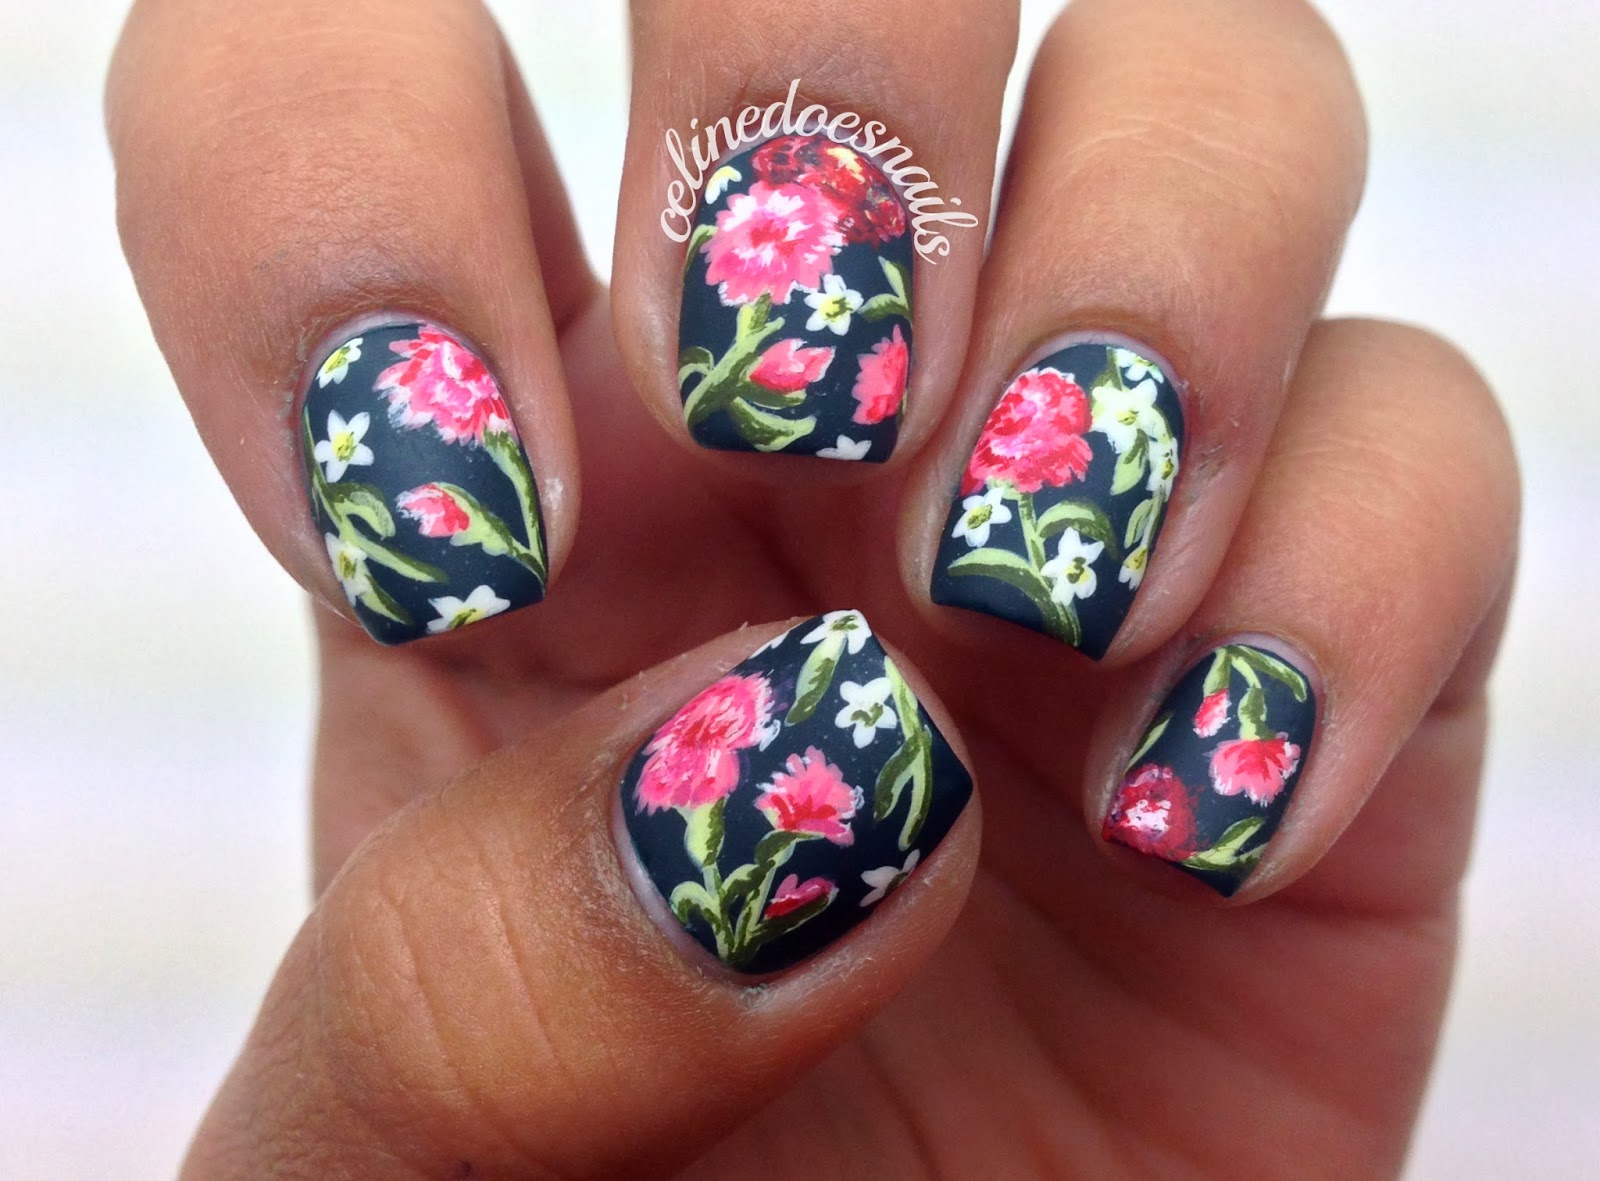
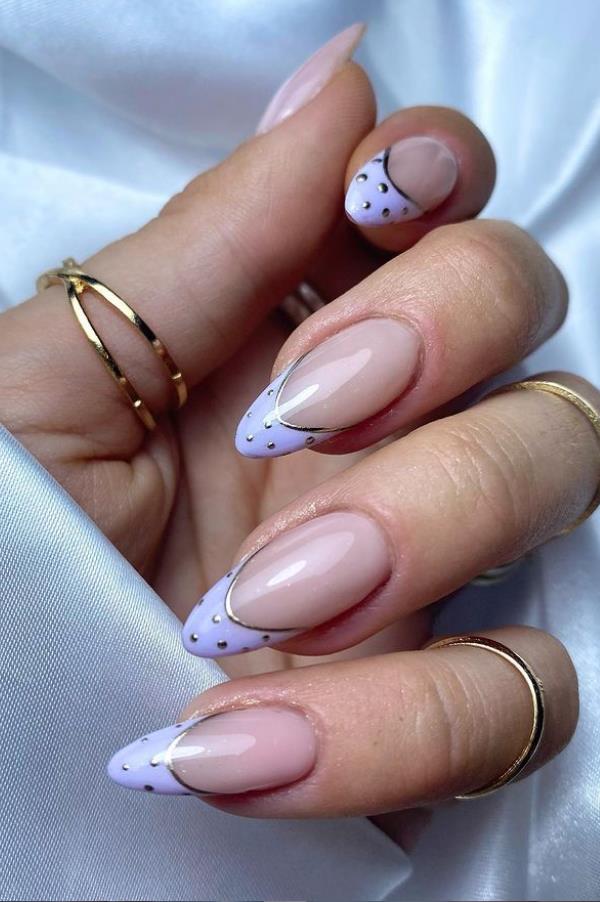
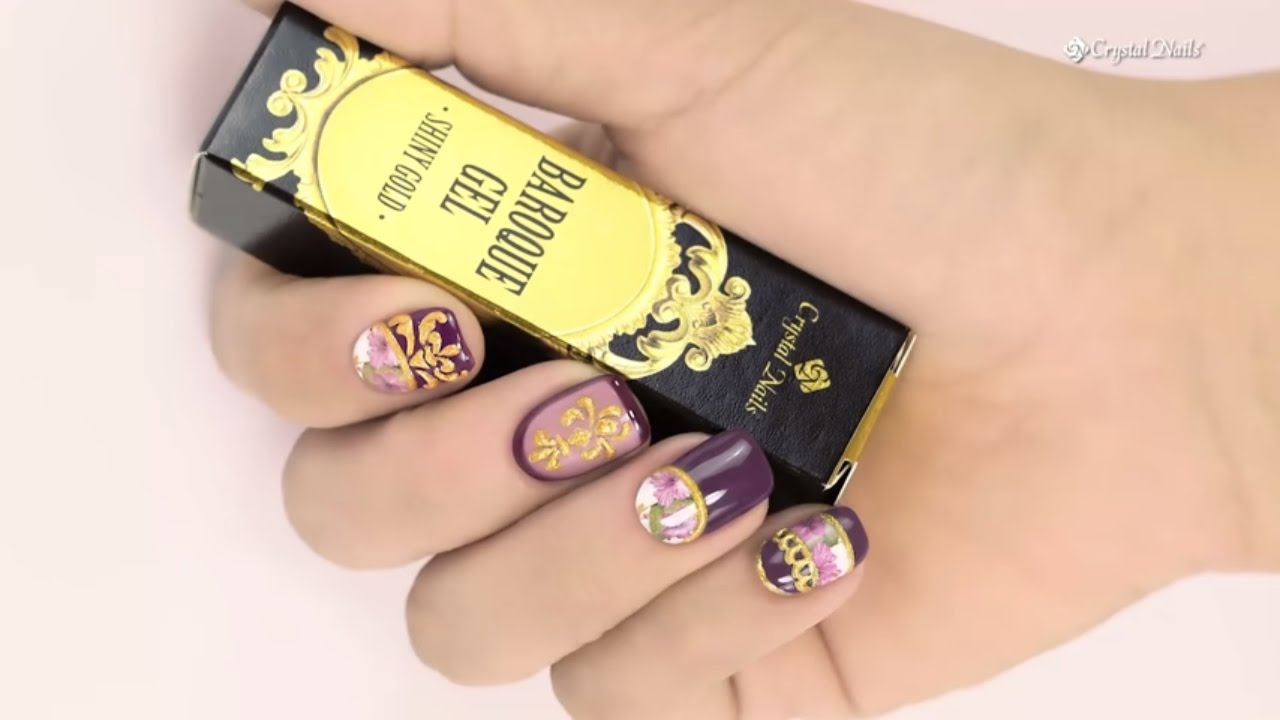
Floral designs are a popular addition to baroque nail art. This tutorial will show you how to combine the two for a gorgeous and delicate look. Step 1: Start by painting your nails with a light pink or lavender nail polish as the base color. Step 2: Using a thin nail art brush, create gold or silver swirls and flourishes on your nails. Step 3: Using a green or dark pink nail polish, create small flowers on top of the swirls. You can also add some pearl or gemstone accents to the center of the flowers. Step 4: Once your design is complete, let it dry completely before sealing it with a top coat.4. "Baroque Floral Nail Art Tutorial"


4. "Baroque Floral Nail Art Tutorial"


Gold is a staple in baroque designs, and this tutorial will show you how to create a stunning gold baroque nail art look. Step 1: Start by painting your nails with a black or dark blue nail polish as the base color. Step 2: Using a thin nail art brush, create intricate swirls and flourishes with gold nail polish on your nails. Step 3: You can also add some pearl or gemstone accents to your design for some extra glam. Step 4: Once your design is complete, let it dry completely before sealing it with a top coat.5. "Gold Baroque Nail Art Tutorial"


5. "Gold Baroque Nail Art Tutorial"
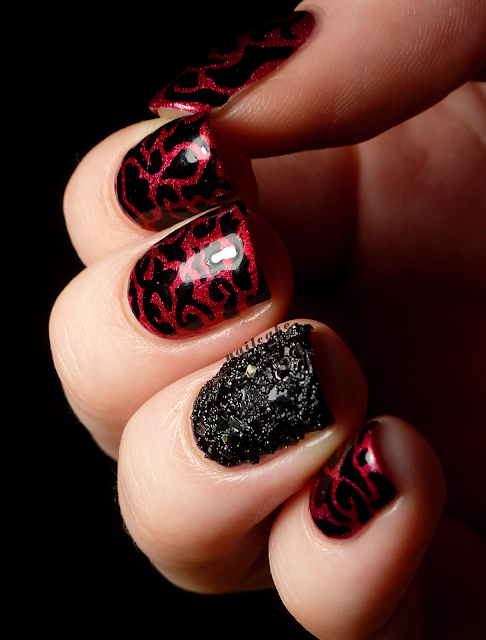
For a more dramatic and edgy take on baroque nail art, try this black and gold tutorial. Step 1: Start by painting your nails with a black nail polish as the base color. Step 2: Using a thin nail art brush, create intricate swirls and flourishes with gold nail polish on your nails. Step 3: You can also add some pearl or gemstone accents to your design for some extra glam. Step 4: Once your design is complete, let it dry completely before sealing it with a top coat.6. "Black and Gold Baroque Nail Art Tutorial"


6. "Black and Gold Baroque Nail Art Tutorial"

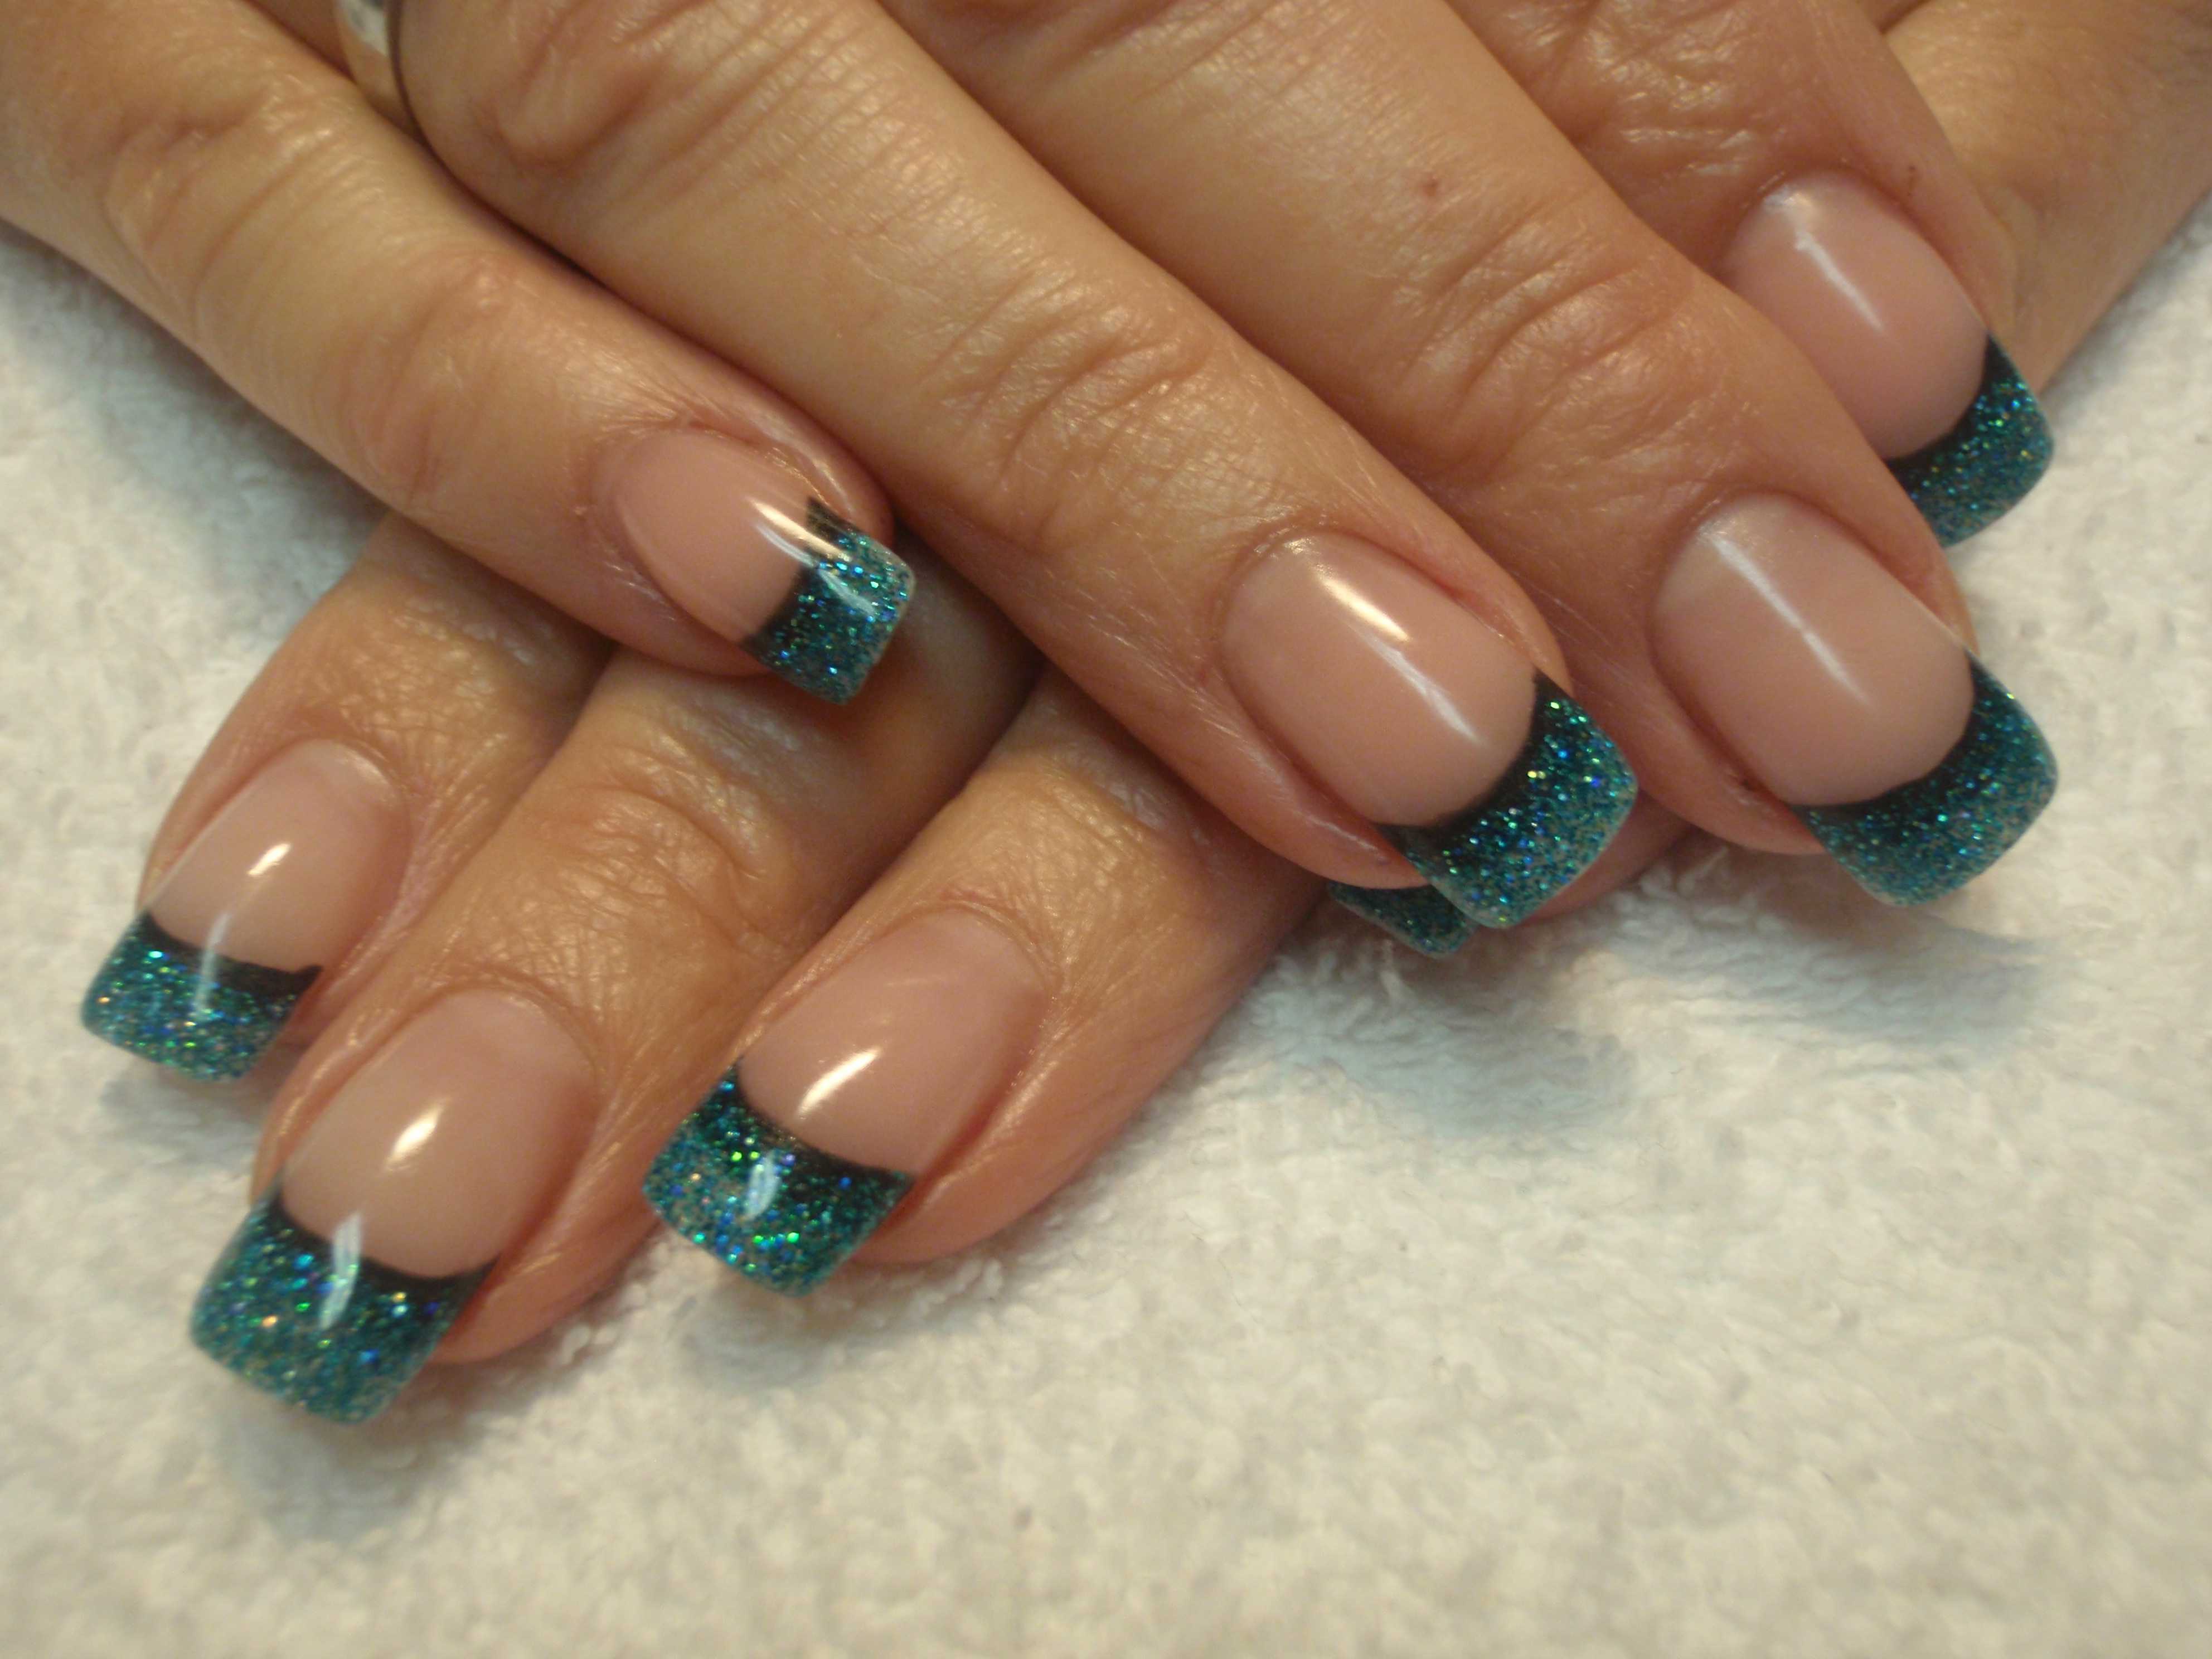
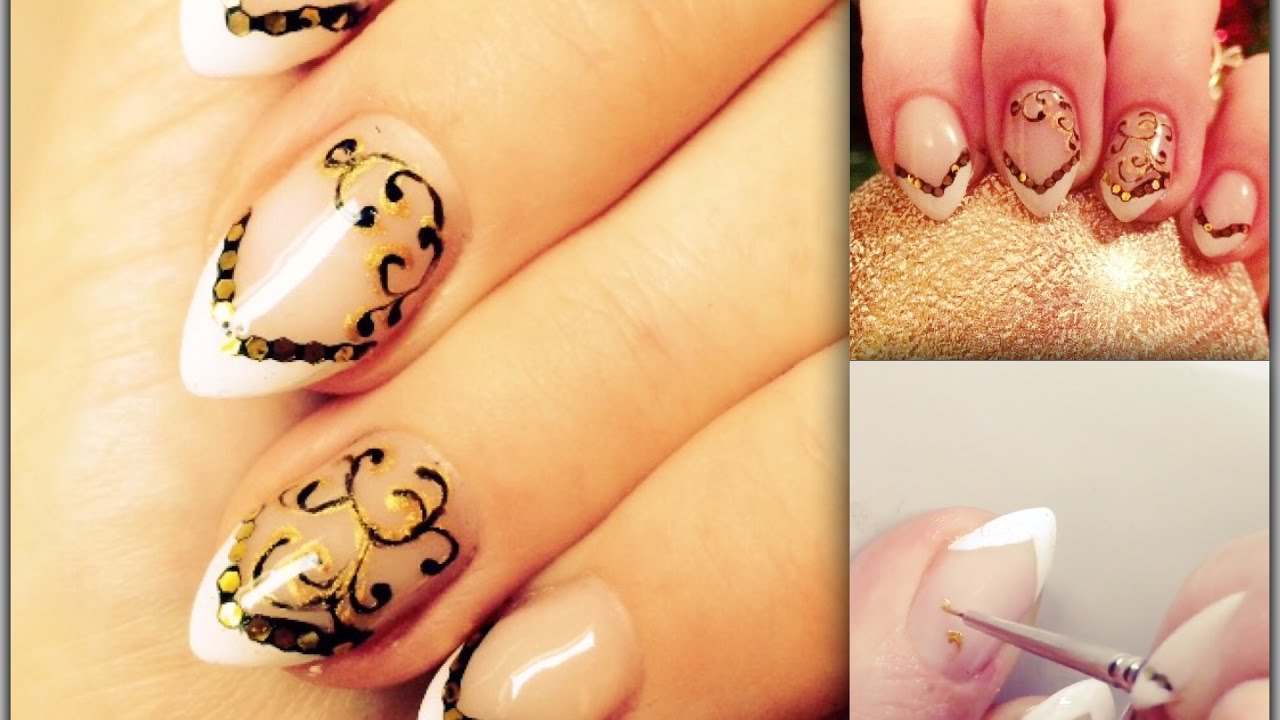
This tutorial puts a baroque twist on the classic French tip design. Step 1: Start by painting your nails with a nude or light pink nail polish as the base color. Step 2: Using a thin nail art brush, create intricate swirls and flourishes with gold or silver nail polish on the tips of your nails. Step 3: You can also add some pearl or gemstone accents to your design for some extra glam. Step 4: Once your design is complete, let it dry completely before sealing it with a top coat.7. "Baroque French Tip Nail Art Tutorial"
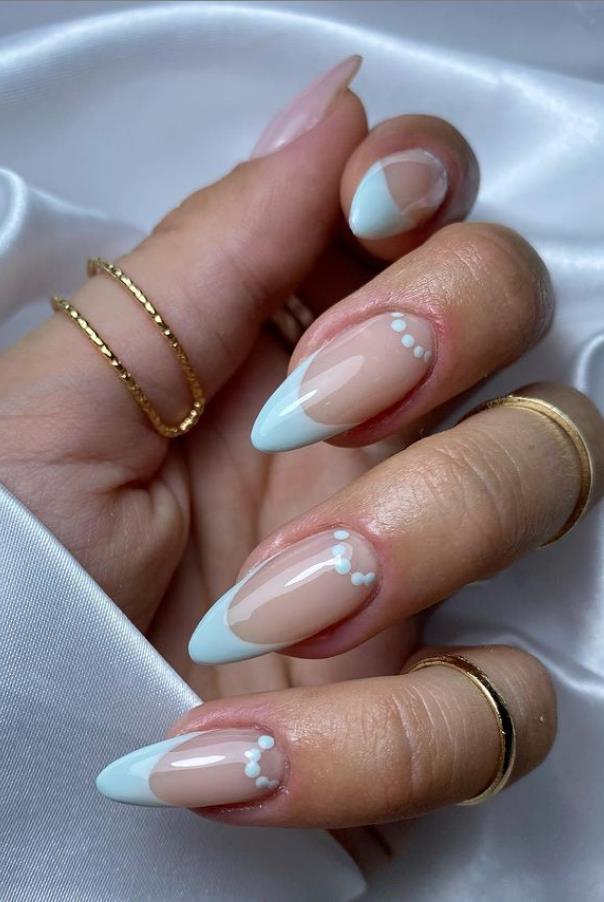

7. "Baroque French Tip Nail Art Tutorial"
If you're new to nail art, stamping can be an easy and fun way to create intricate designs. This tutorial will show you how to use a stamping tool to create a beautiful baroque design on your nails. Step 1: Start by painting your nails with a light pink or mint green nail polish as the base color. Step 2: Using a stamping tool, transfer a baroque design onto your nails using gold or silver nail polish. Step 3: You can also add some pearl or gemstone accents to your design for some extra glam. Step 4: Once your design is complete, let it dry completely before sealing it with a top coat.8. "Baroque Stamping Nail Art Tutorial"


8. "Baroque Stamping Nail Art Tutorial"

Marble designs are another popular trend in nail art, and this tutorial will show you how to incorporate it into a baroque design. Step 1: Start by painting your nails with a white or light pink nail polish as the base color. Step 2: Using a black or dark blue nail polish, create a marble effect on your nails by swirling the colors together with a toothpick. Step 3: Using a thin nail art brush, create intricate gold or silver swirls and flourishes on your nails. Step 4: Once your design is complete, let it dry completely before sealing it with a top coat.9. "Baroque Marble Nail Art Tutorial"


9. "Baroque Marble Nail Art Tutorial"


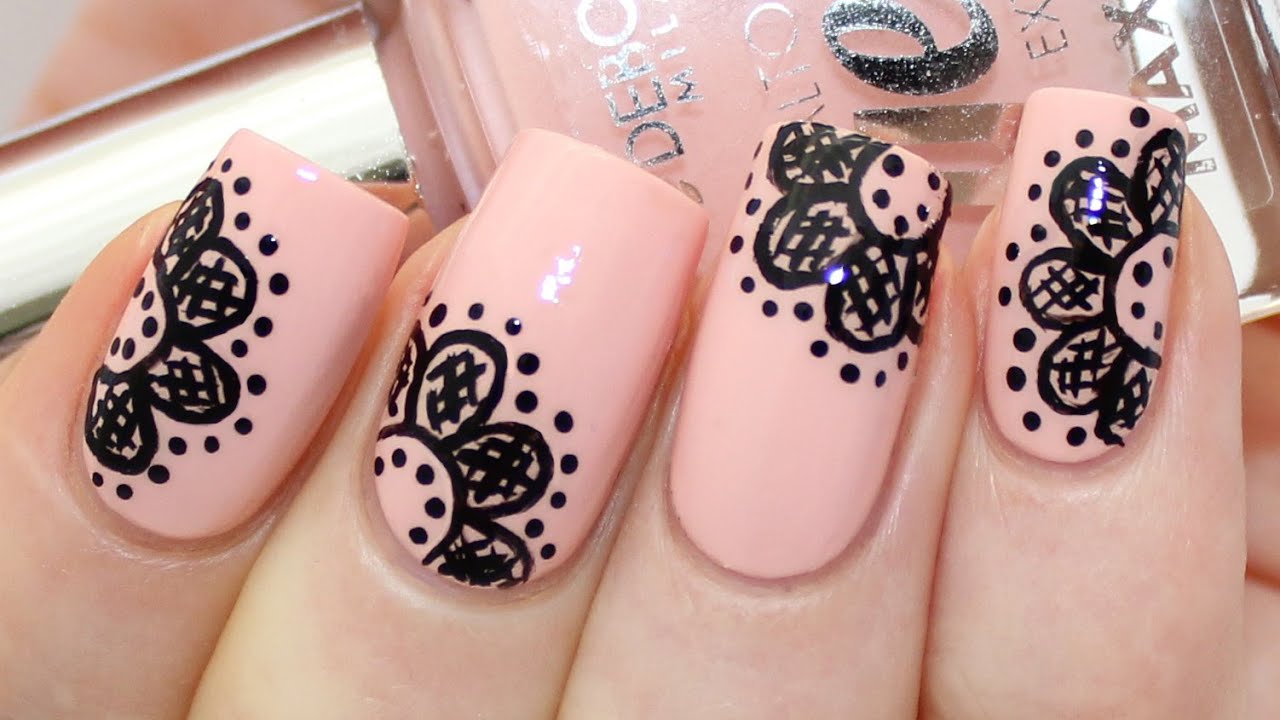
Lace designs are delicate and elegant, making them a perfect addition to baroque nail art. This tutorial will show you how to create a stunning baroque lace design on your nails. Step 1: Start by painting your nails with a nude or light pink nail polish as the base color. Step 2: Using a thin nail art brush, create intricate gold or silver lace patterns on your nails. Step 3: You can also add some pearl or gemstone accents to your design for some extra glam. Step 4: Once your design is complete, let it dry completely before sealing it with a top coat. With these 10 baroque nail art tutorials, you'll be able to create stunning designs that are sure to turn heads. So grab your nail polish and let your creativity run wild! Remember to have fun and experiment with different colors and techniques to make the designs your own. Happy nail art-ing!10. "Baroque Lace Nail Art Tutorial"


10. "Baroque Lace Nail Art Tutorial"


Introducing Baroque Nail Art: A Stunning Addition to Your Nail Design Collection

What is Baroque Nail Art?
 Baroque nail art is a style that originated in the Baroque period of the 17th and 18th centuries. It is characterized by intricate and ornate designs, often incorporating elements such as pearls, lace, and gold accents. This style has recently made a comeback in the world of nail art, with modern twists and techniques added to create stunning and elegant designs.
How to Achieve Baroque Nail Art
 To achieve baroque nail art, you will need a few essential tools and materials. First, you will need a base coat and a top coat to protect your nails and give your design a long-lasting finish. Next, you will need a selection of nail polish colors, including bold and metallic shades. Finally, you will need some tools such as a dotting tool, a fine brush, and tweezers to help create intricate designs.
Step-by-Step Tutorial
 Here is a simple step-by-step tutorial to create your own baroque nail art:
Step 1:
Start by applying a base coat to protect your nails and allow it to dry completely.
Step 2:
Choose a base color for your nails. Black or dark shades work best for a dramatic baroque look.
Step 3:
Using a dotting tool, create small dots on your nails with a metallic or gold nail polish. These dots will serve as the base for your intricate design.
Step 4:
Using a fine brush, create swirls and curved lines around the dots to form a baroque pattern. You can also add small dots or pearls for added detail.
Step 5:
Once you have created your desired design, let it dry for a few minutes before applying a top coat to seal and protect your nails.
Here is a simple step-by-step tutorial to create your own baroque nail art:
Step 1:
Start by applying a base coat to protect your nails and allow it to dry completely.
Step 2:
Choose a base color for your nails. Black or dark shades work best for a dramatic baroque look.
Step 3:
Using a dotting tool, create small dots on your nails with a metallic or gold nail polish. These dots will serve as the base for your intricate design.
Step 4:
Using a fine brush, create swirls and curved lines around the dots to form a baroque pattern. You can also add small dots or pearls for added detail.
Step 5:
Once you have created your desired design, let it dry for a few minutes before applying a top coat to seal and protect your nails.
Additional Tips
 - Experiment with different color combinations to create a unique baroque design.
- Add rhinestones or gems for added glam and sparkle.
- Practice on a nail wheel or a piece of paper before attempting the design on your nails.
- Have fun and let your creativity flow!
In Conclusion
 Baroque nail art is a stunning and intricate addition to any nail design collection. With a few tools and some practice, you can achieve beautiful and elegant baroque designs on your own nails. So why not give it a try and add a touch of classic beauty to your next manicure?


