If you're a fan of candy corn, then why not show your love for this sweet treat on your nails? This candy corn nail art tutorial will guide you through the steps to create a fun and festive look for Halloween or any time of the year. To start, you'll need a few basic nail polish colors: yellow, orange, and white. You can also add some glitter polish for a sparkly touch. Begin by painting your nails with a base coat and let it dry completely. Next, take your yellow polish and paint the top third of your nail, making sure to leave a small gap between the yellow and your cuticles. Then, using your orange polish, paint the middle section of your nail, leaving a small gap between the orange and yellow. Finally, use your white polish to paint the bottom section of your nail, leaving a small gap between the white and orange. Once the polish is dry, you can add a layer of glitter polish to give your nails some extra sparkle. This step is completely optional, but it can add a fun touch to your candy corn nails. After the glitter polish is dry, finish off with a top coat to seal in your design and give it a glossy finish.1. "Candy Corn Nail Art Tutorial"


1. "Candy Corn Nail Art Tutorial"

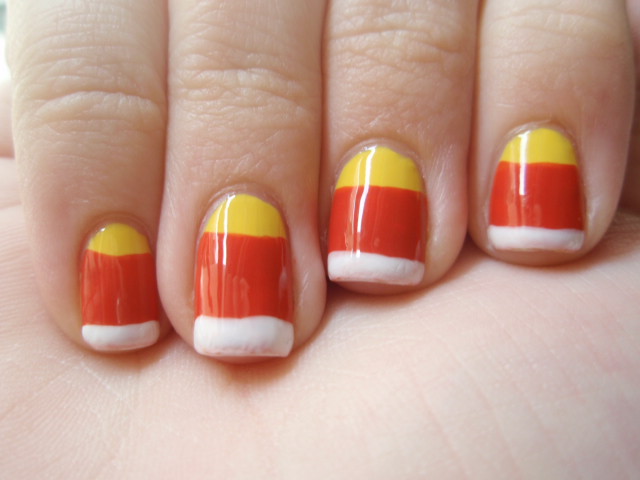

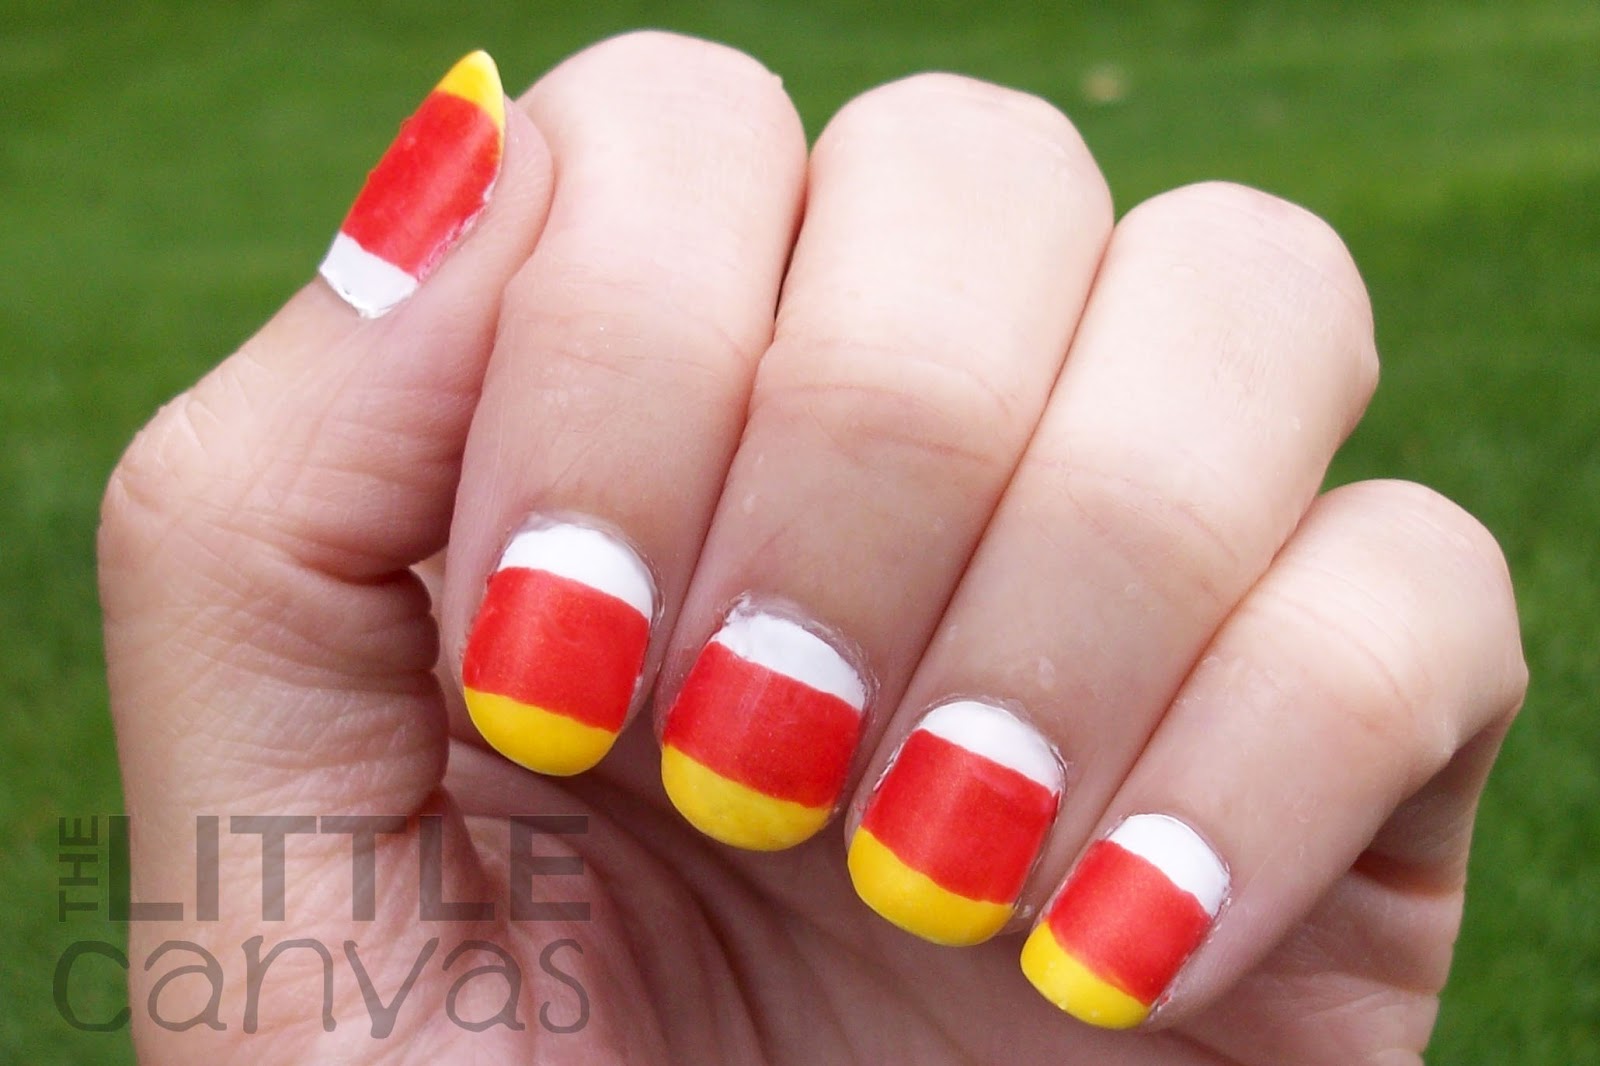
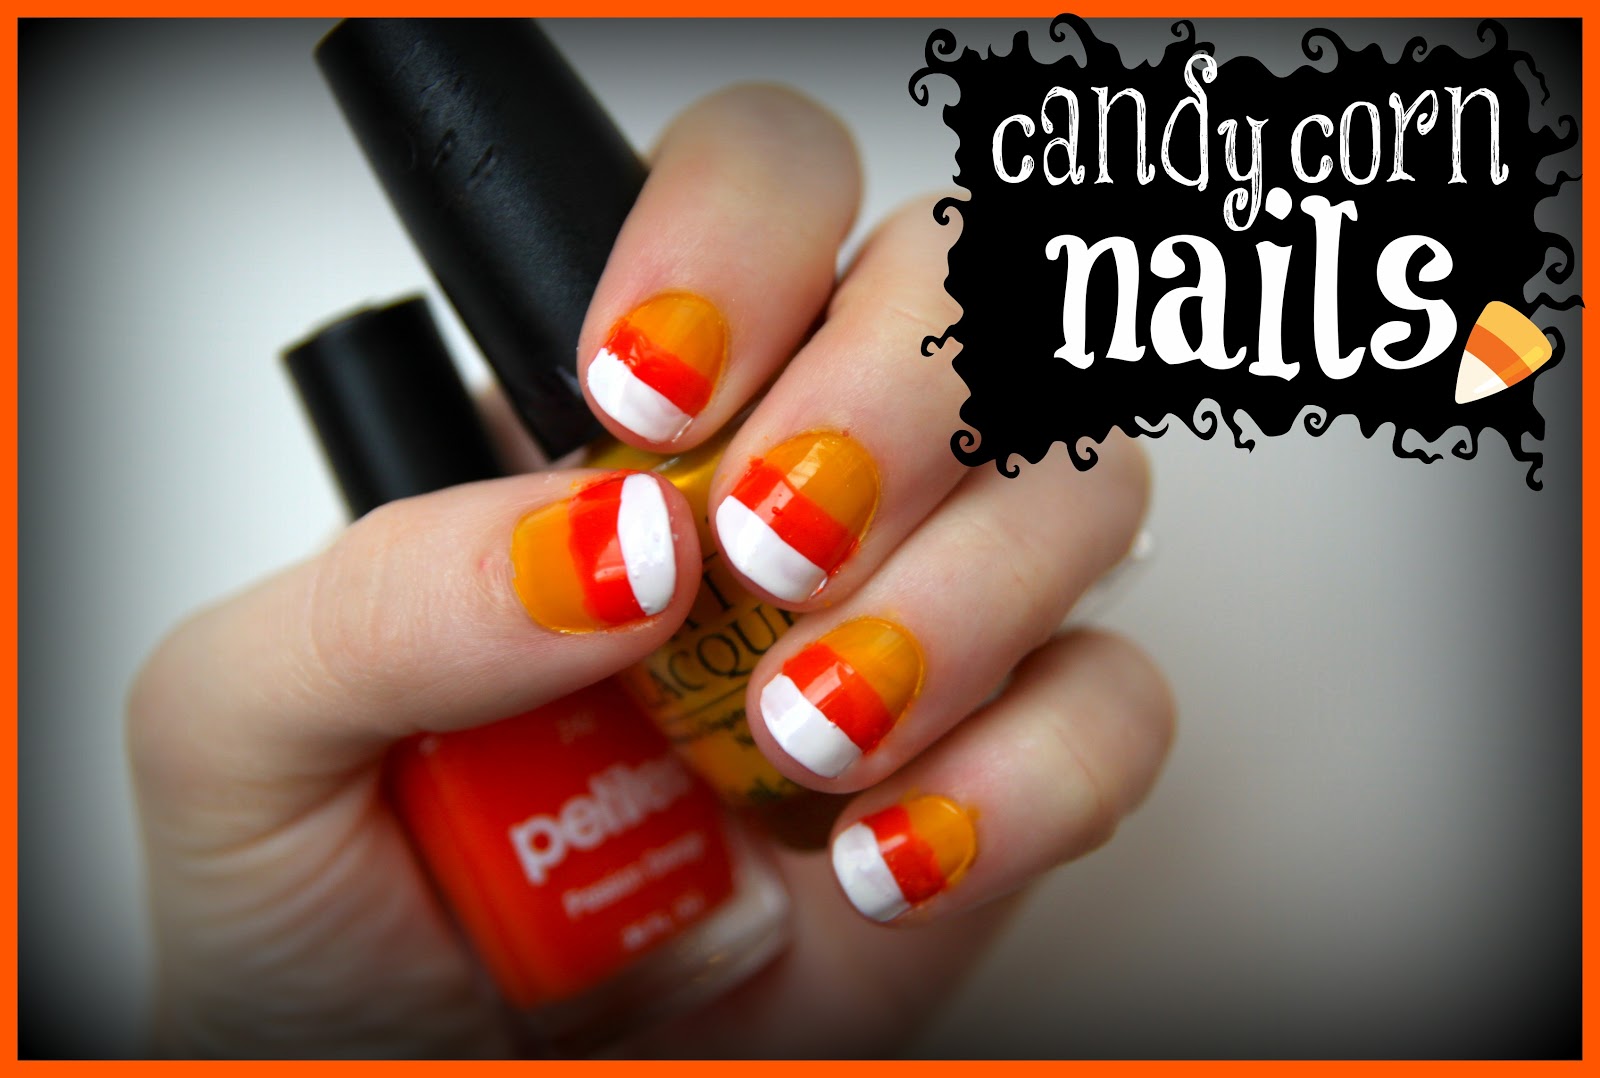
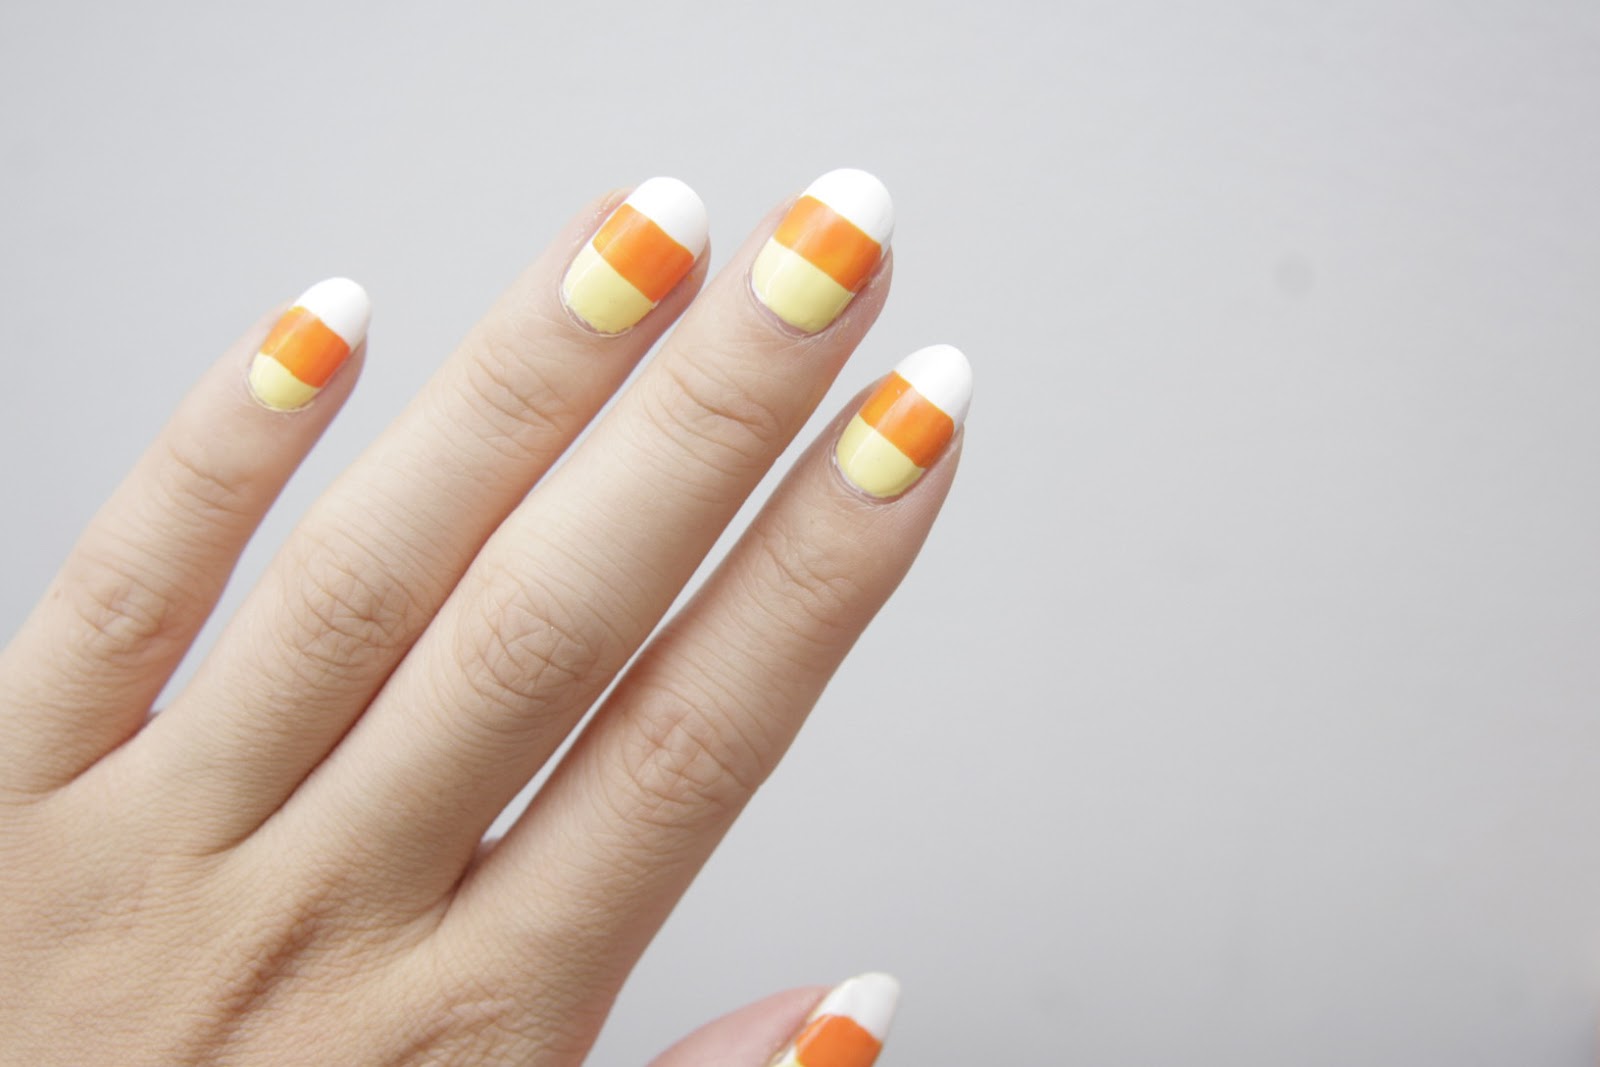
If you're looking for a quick and easy way to create candy corn nail art, then this tutorial is for you. All you need is a white nail polish, an orange nail polish, and a yellow nail polish. Start by painting your nails with a base coat and let it dry completely. Then, take your white polish and paint the entire nail. Once that layer is dry, use your yellow polish to paint the bottom half of your nail, leaving a small gap between the white and yellow. Finally, use your orange polish to paint the tip of your nail, creating the classic candy corn shape. You can also use a toothpick or a nail art brush to create a more defined and precise design. Once the polish is dry, finish off with a top coat to seal in your design and give it a glossy finish.2. "Easy Candy Corn Nail Art"


2. "Easy Candy Corn Nail Art"


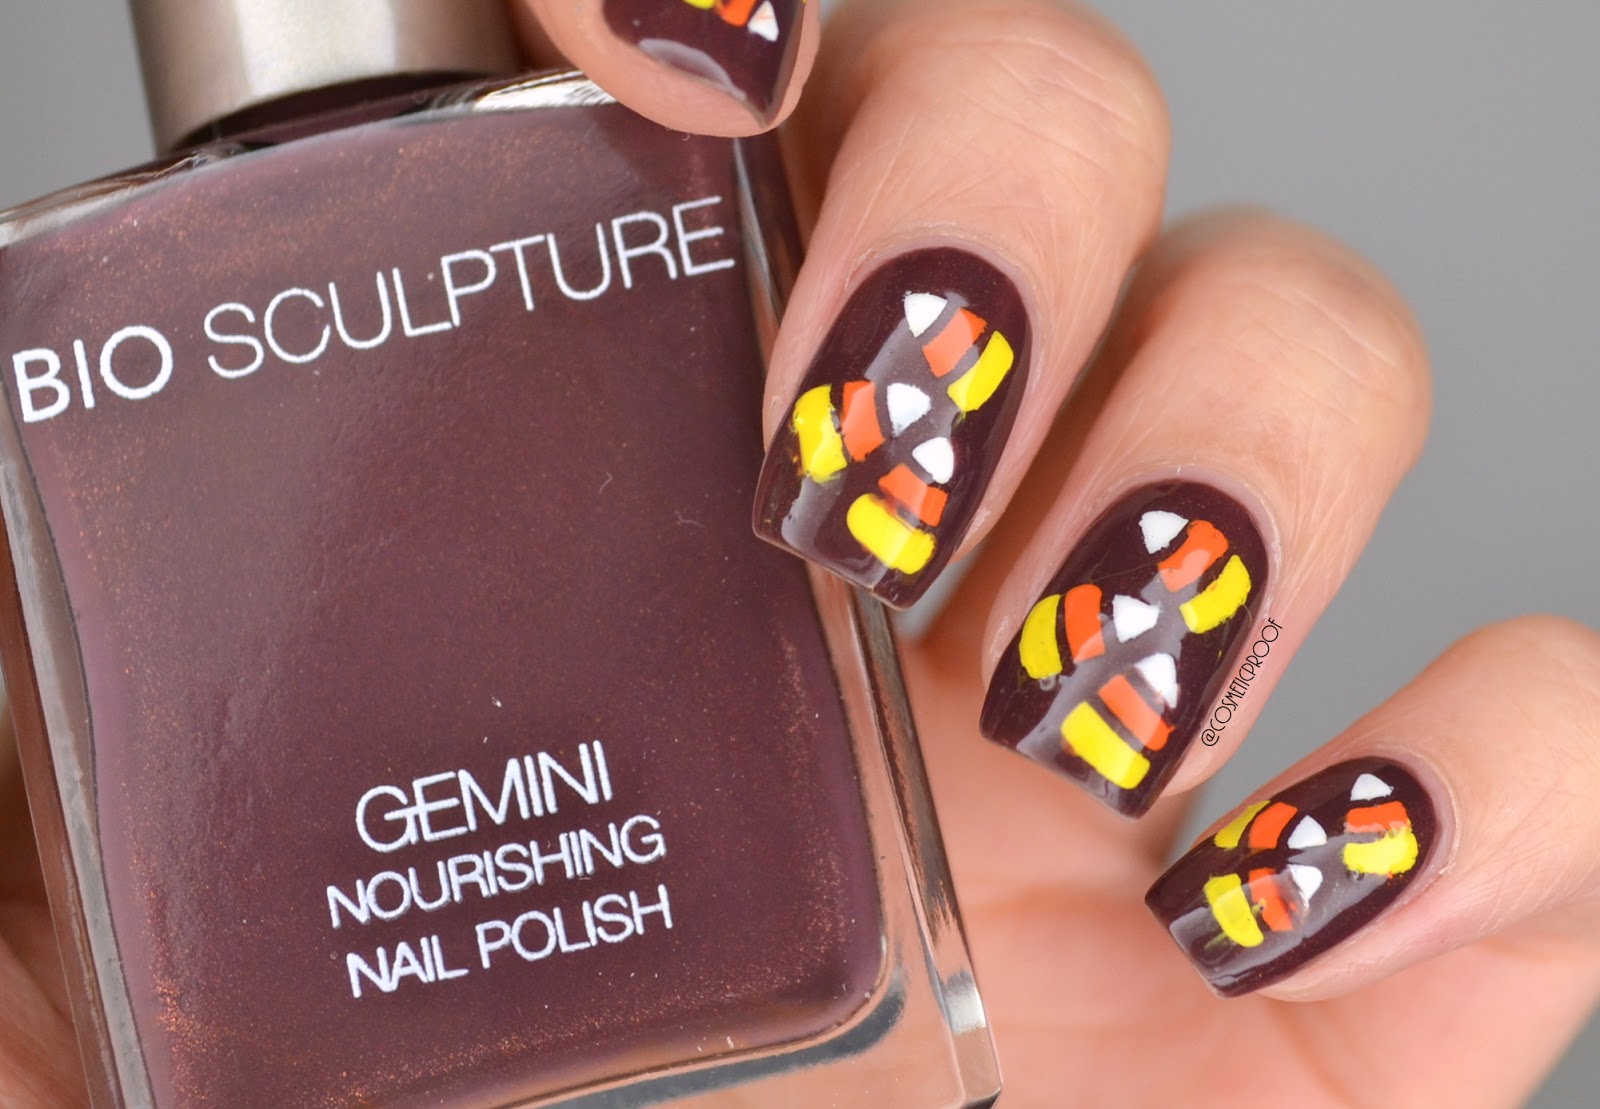
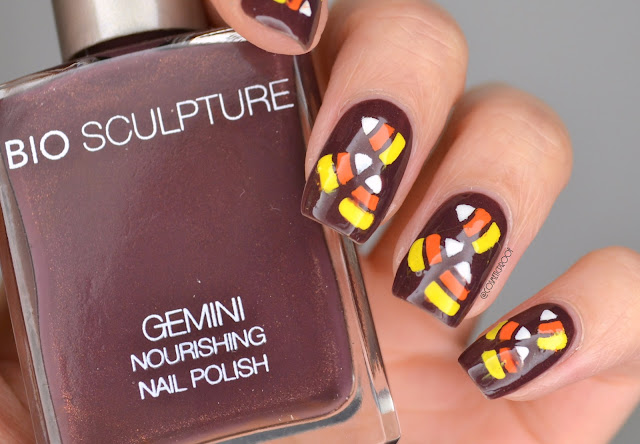
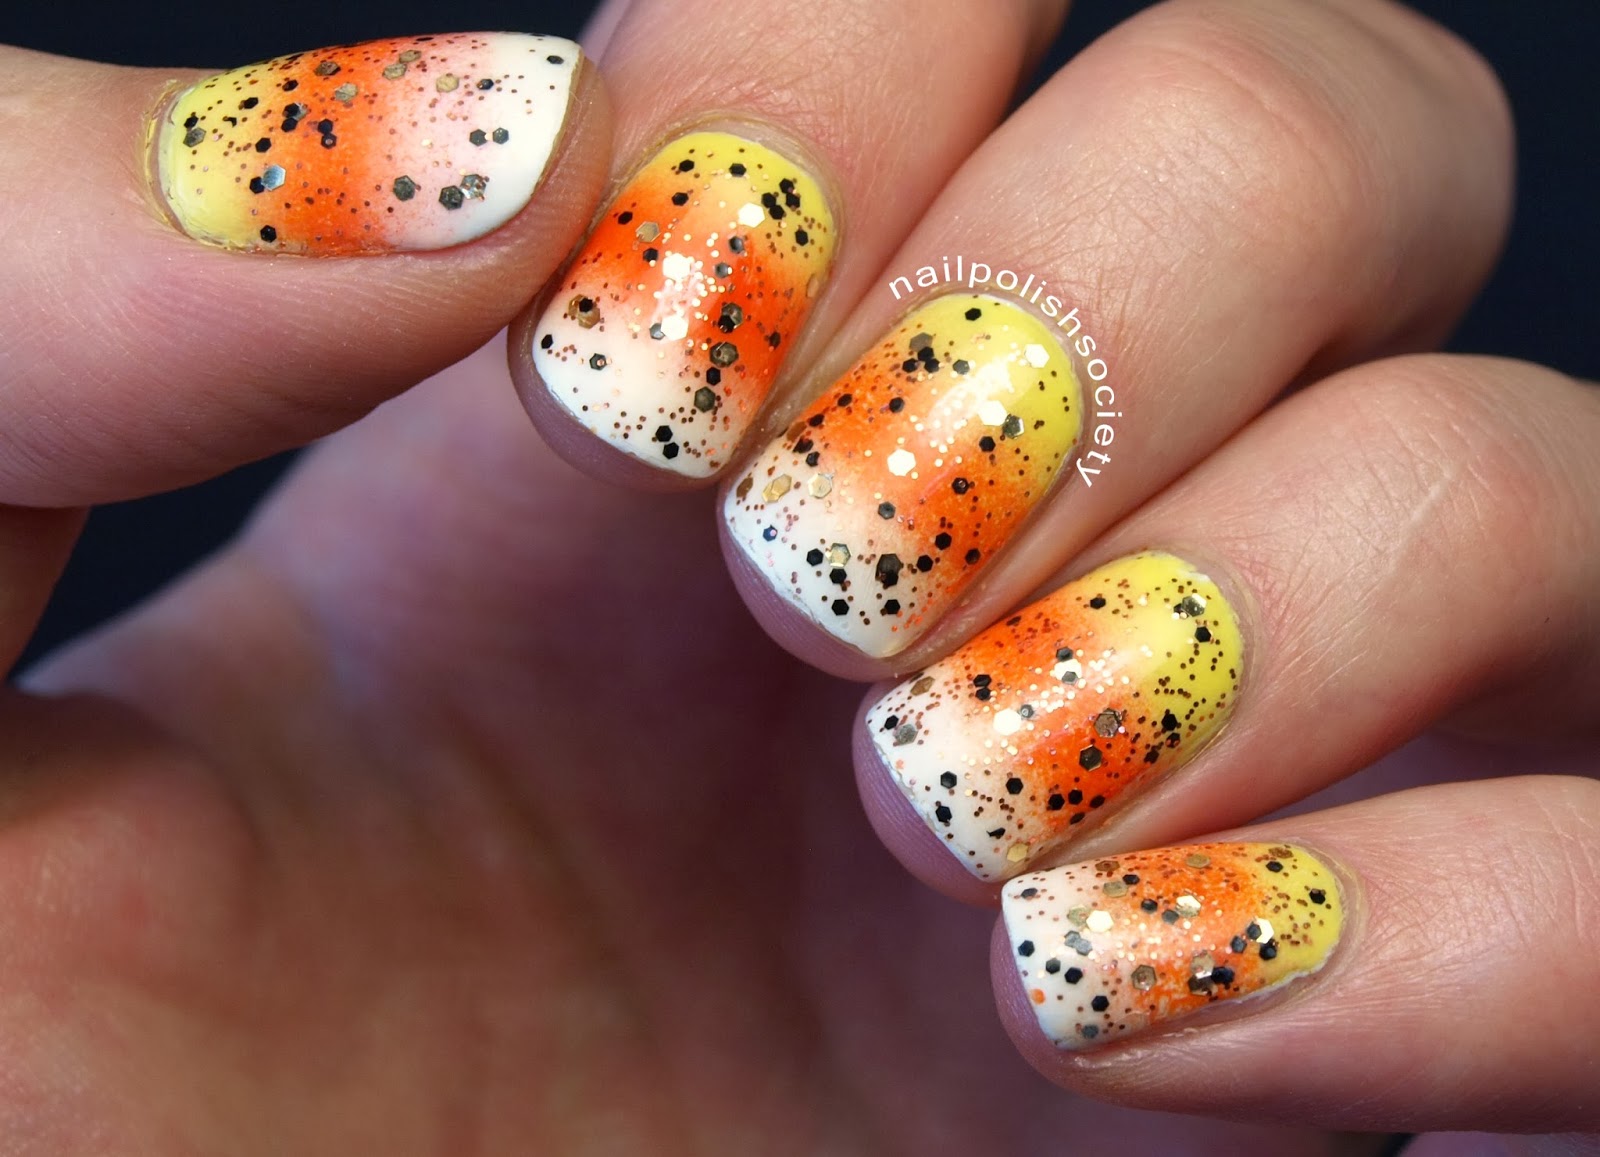
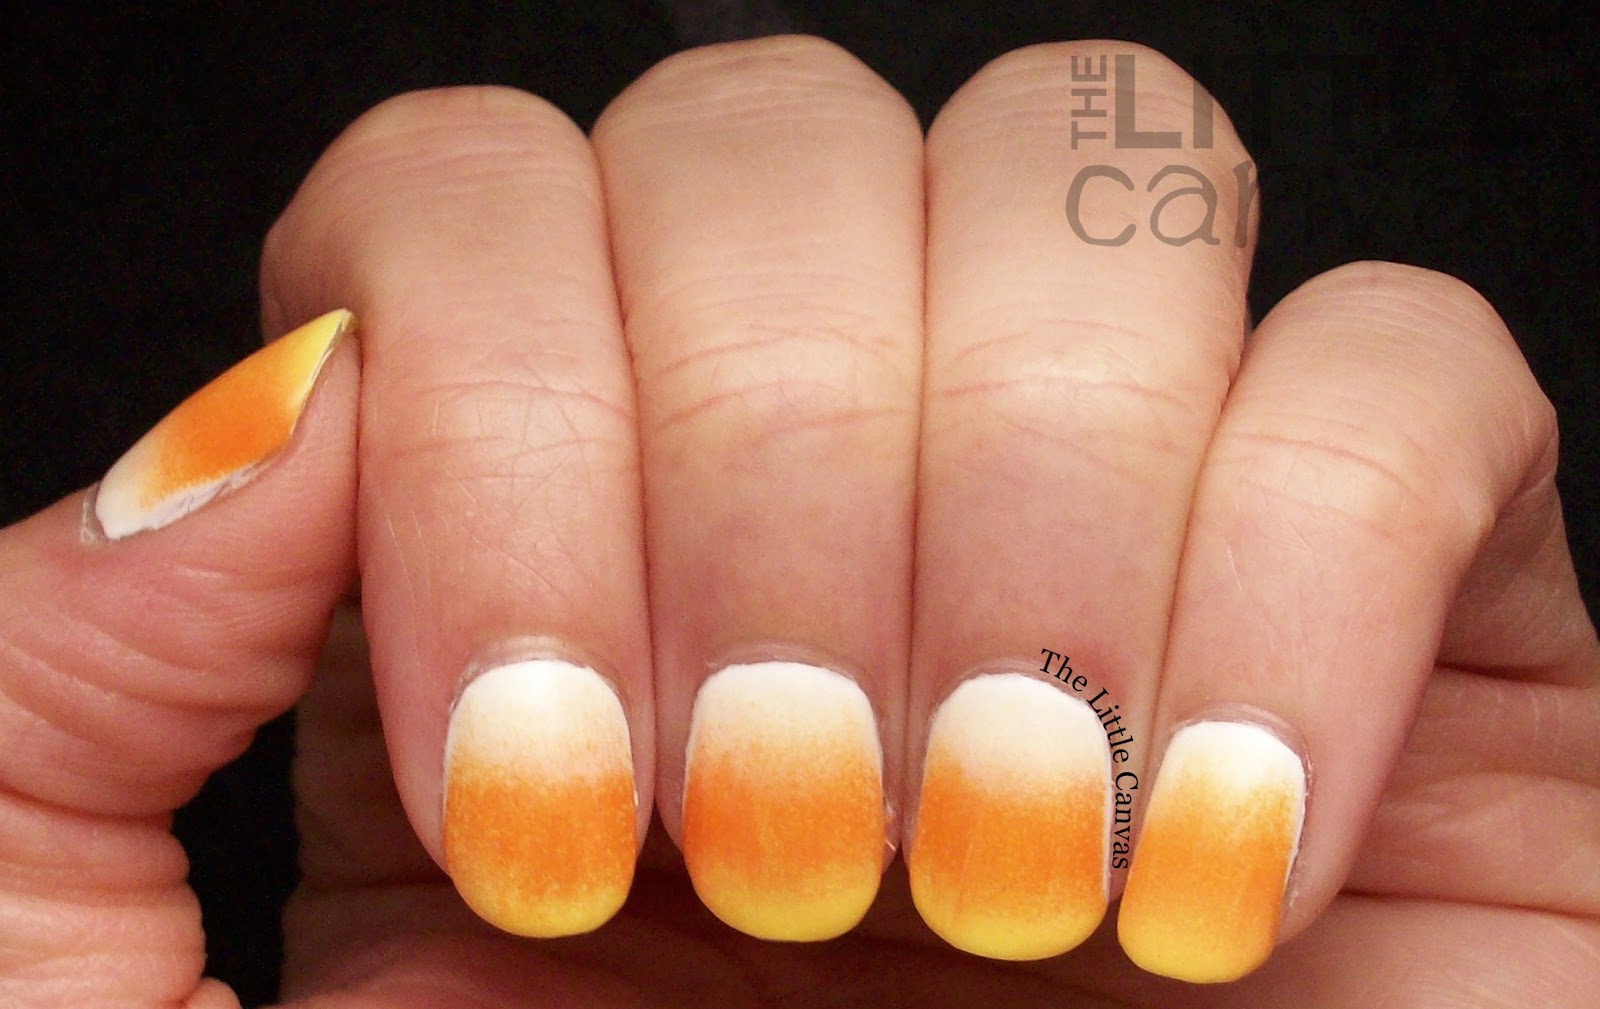
Candy corn nail designs can range from simple and easy to more intricate and detailed. Here are a few ideas to inspire your next candy corn nail art creation: - Create a gradient effect by painting your nails with a base coat and then using a makeup sponge to apply the yellow, orange, and white polish in a downward motion. - Use a black polish to create a candy corn accent nail, either by painting the candy corn shape or using a nail stamping tool. - Add some Halloween-themed nail stickers, such as pumpkins or ghosts, to your candy corn nails for a festive touch. - Instead of the traditional yellow, orange, and white, try using different shades like pastel pink, purple, and blue for a unique twist on the candy corn look. Remember, the possibilities are endless when it comes to nail art. Be creative and have fun with it!3. "Candy Corn Nail Designs"

3. "Candy Corn Nail Designs"


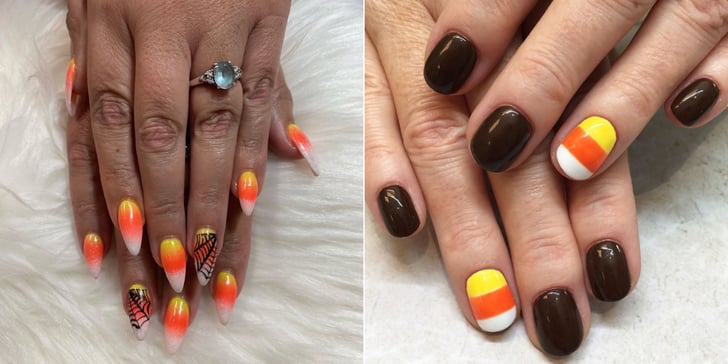
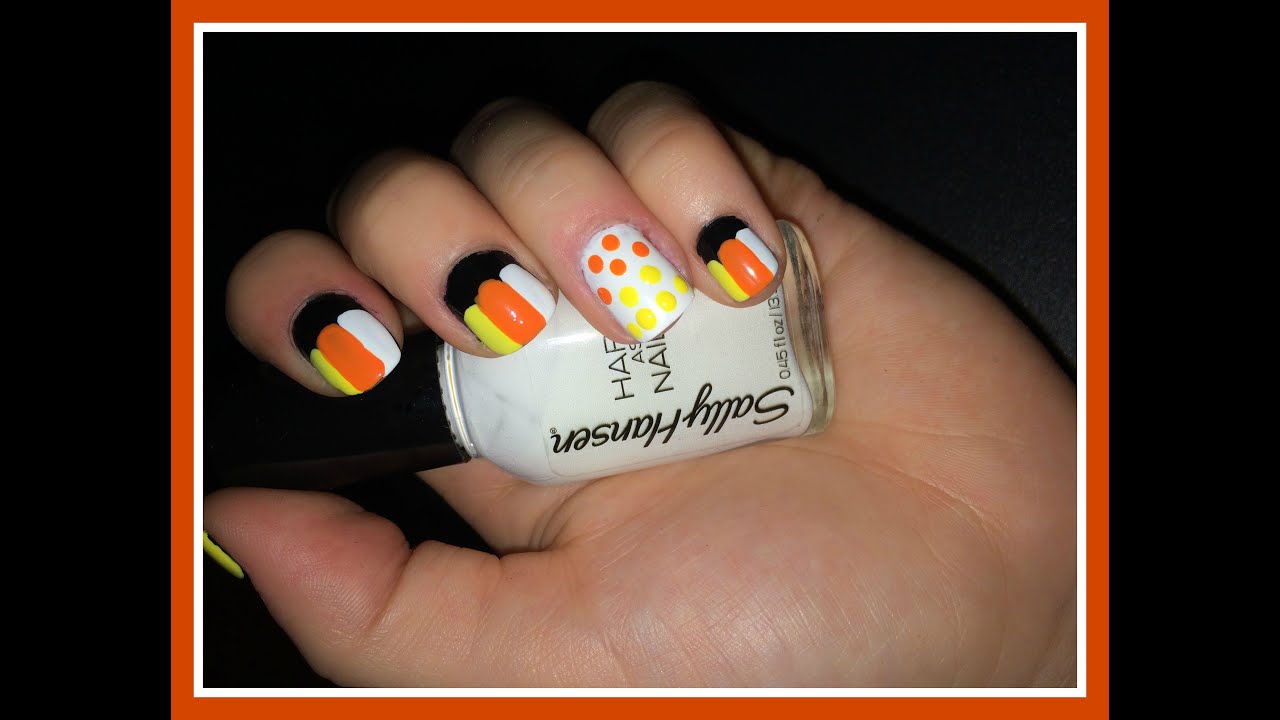
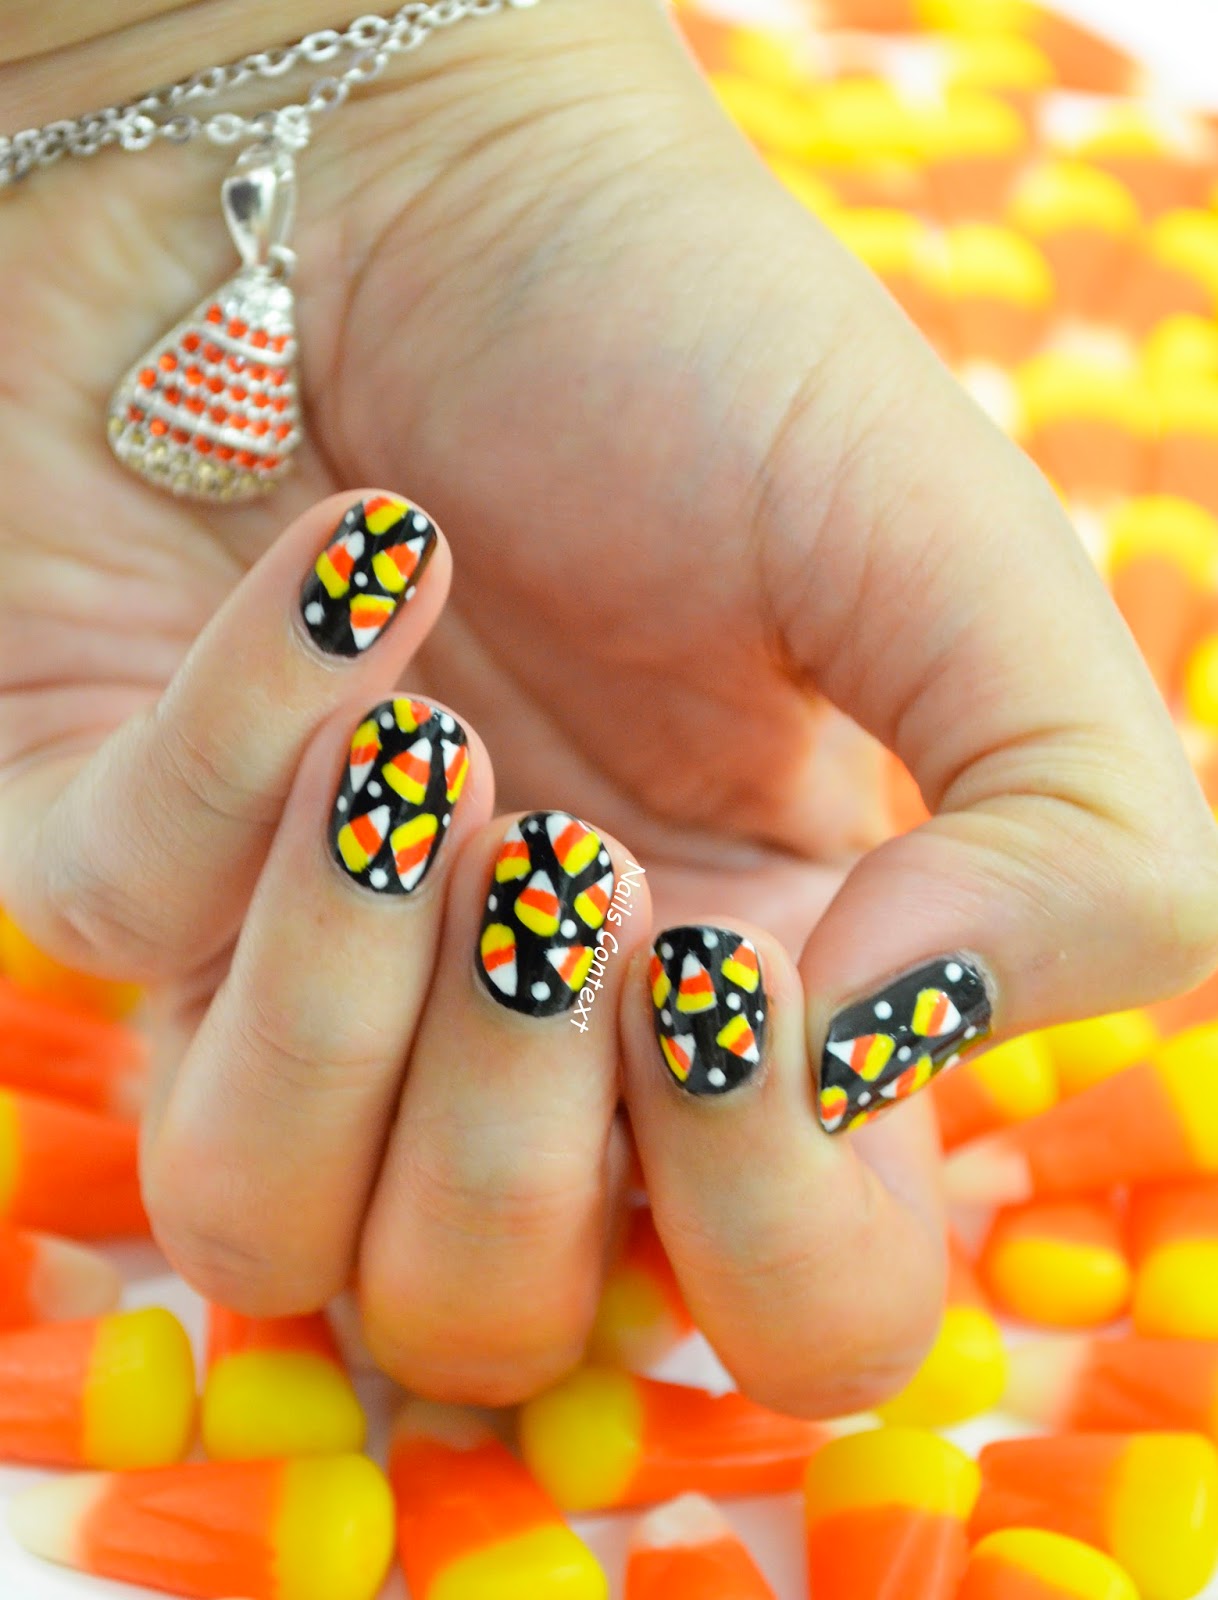
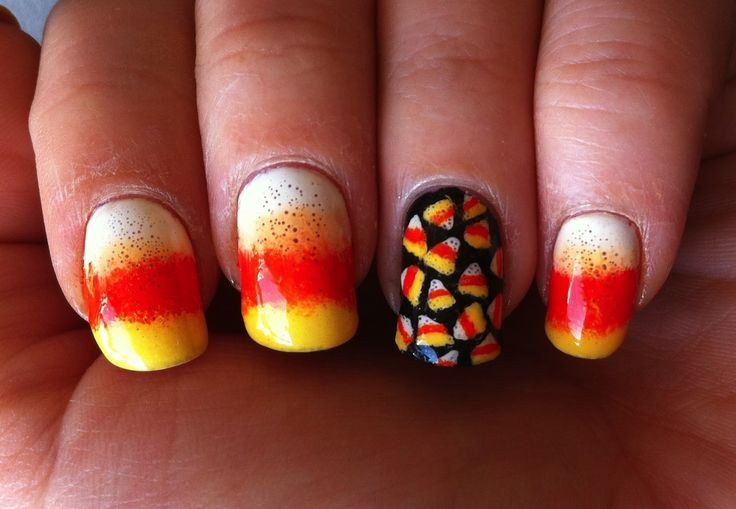
What better time to rock candy corn nails than on Halloween? This spooky holiday is the perfect opportunity to show off your love for this classic candy. In addition to the traditional candy corn design, you can also incorporate other Halloween elements into your nail art. For example, you could paint a spider web design over your candy corn nails or add some bats or ghosts to the mix. If you're feeling extra creative, you can even turn your nails into mini candy corn characters by adding eyes and a mouth with a black nail polish. This is a fun and unique way to celebrate Halloween with your nail art.4. "Halloween Candy Corn Nails"

4. "Halloween Candy Corn Nails"


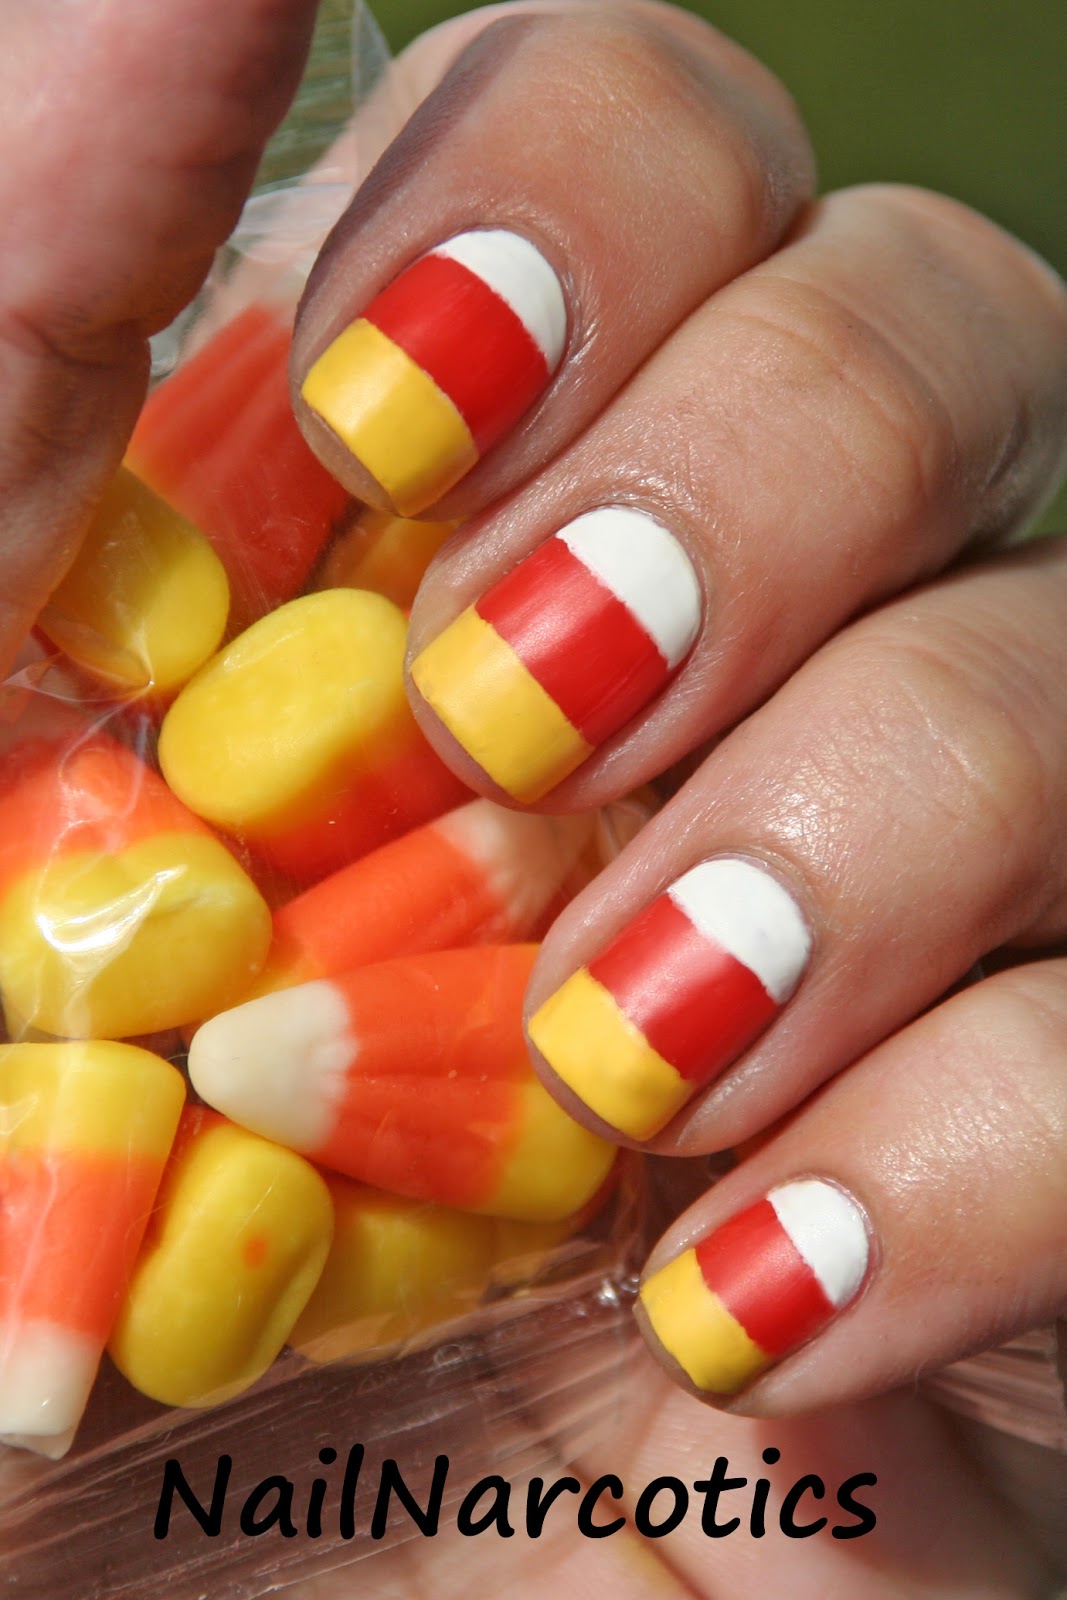
If you're new to nail art or just want a simple and easy candy corn design, then this tutorial is perfect for you. All you need is a white nail polish, an orange nail polish, and a yellow nail polish. Start by painting your nails with a base coat and let it dry completely. Then, take your white polish and paint the entire nail. Once that layer is dry, use your yellow polish to paint the bottom half of your nail, leaving a small gap between the white and yellow. Finally, use your orange polish to paint the tip of your nail, creating the classic candy corn shape. For an extra touch, you can use a toothpick or a nail art brush to add some black lines to mimic the ridges on a piece of candy corn. Finish off with a top coat to seal in your design and give it a glossy finish.5. "Candy Corn Nail Art for Beginners"
5. "Candy Corn Nail Art for Beginners"


Creating candy corn nail art may seem intimidating, but it's actually quite simple when broken down into steps. - Step 1: Prep your nails by filing and shaping them to your desired length and shape. Then, apply a base coat to protect your nails. - Step 2: Paint your nails with a white polish and let it dry completely. - Step 3: Using a yellow polish, paint the bottom third of your nail, leaving a small gap between the white and yellow. Let it dry. - Step 4: With an orange polish, paint the middle section of your nail, leaving a small gap between the yellow and orange. Let it dry. - Step 5: Use a toothpick or a nail art brush to add black lines to mimic the ridges on a piece of candy corn. - Step 6: Finish off with a top coat to seal in your design and give it a glossy finish.6. "Candy Corn Nail Art Step by Step"


6. "Candy Corn Nail Art Step by Step"
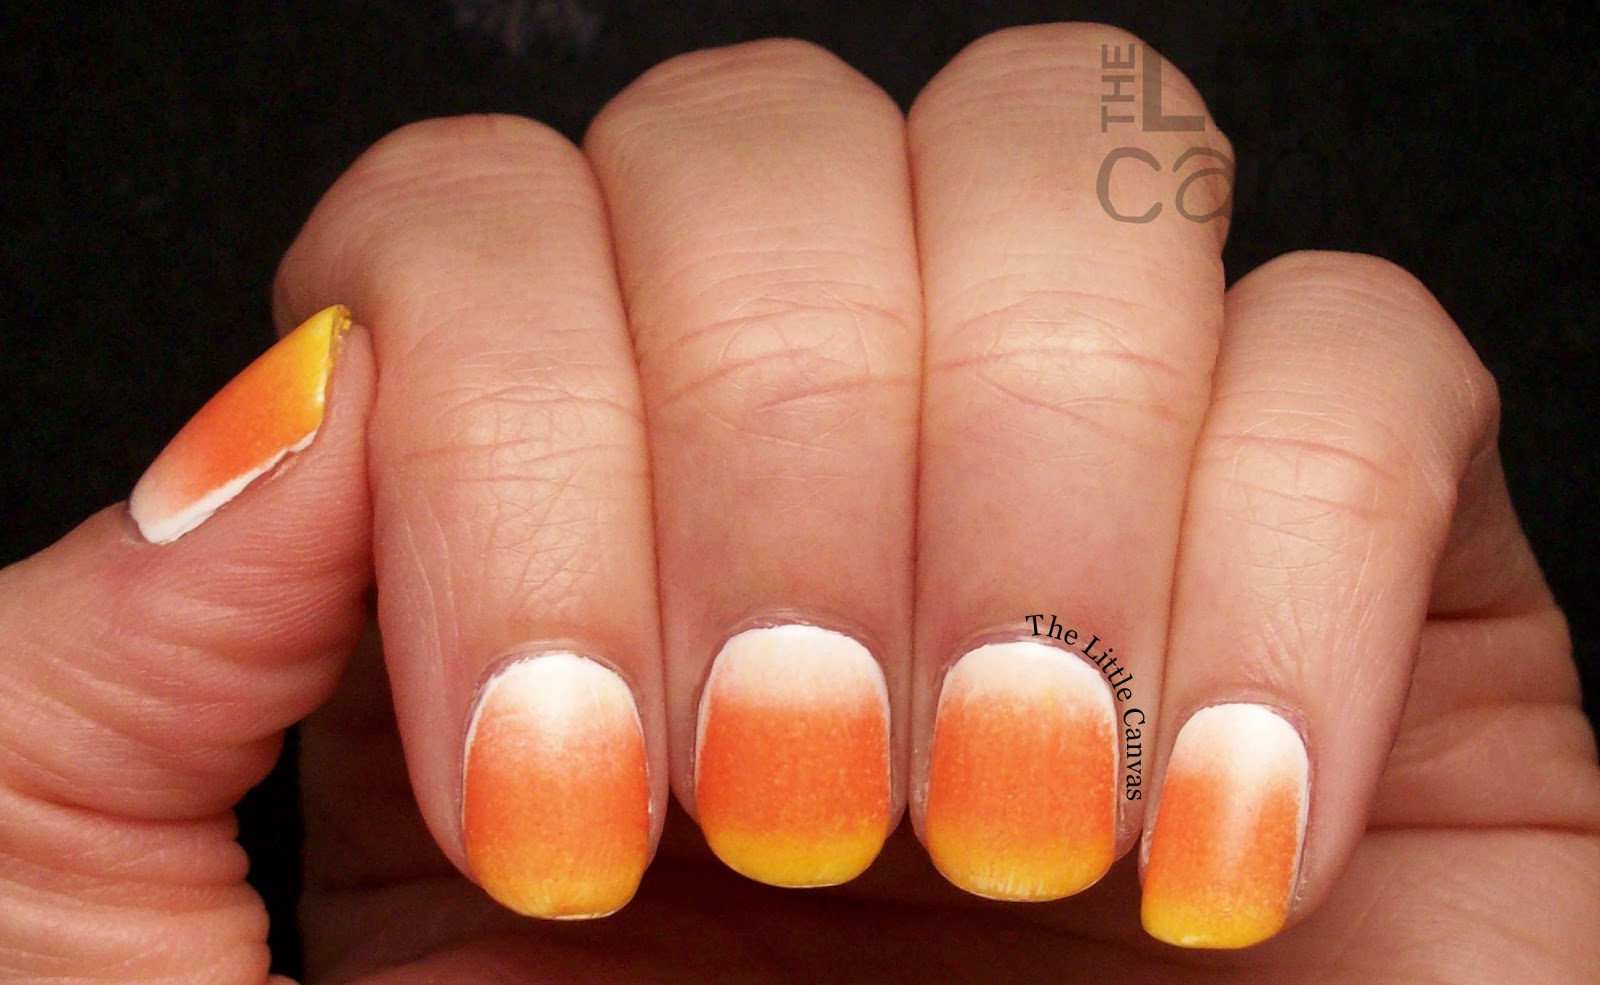
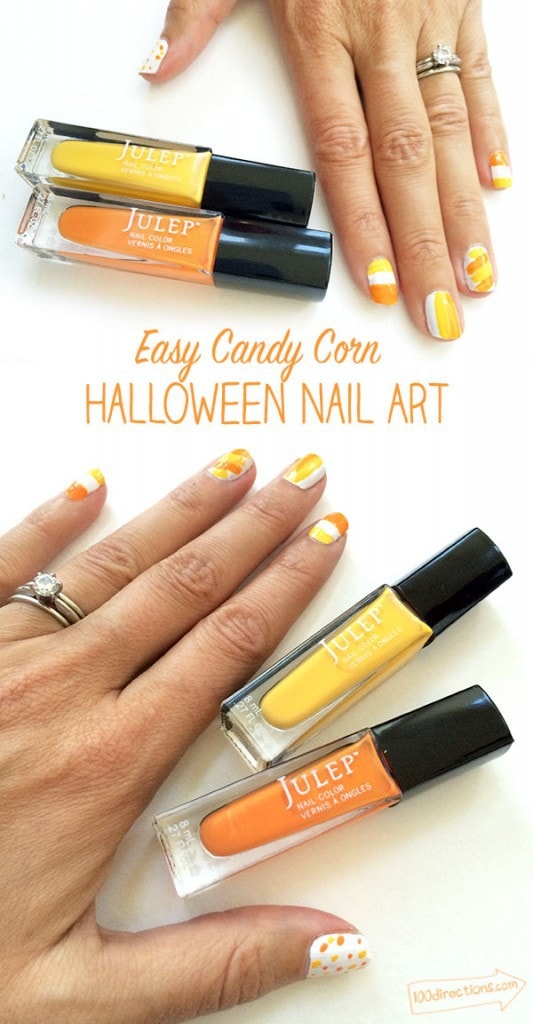
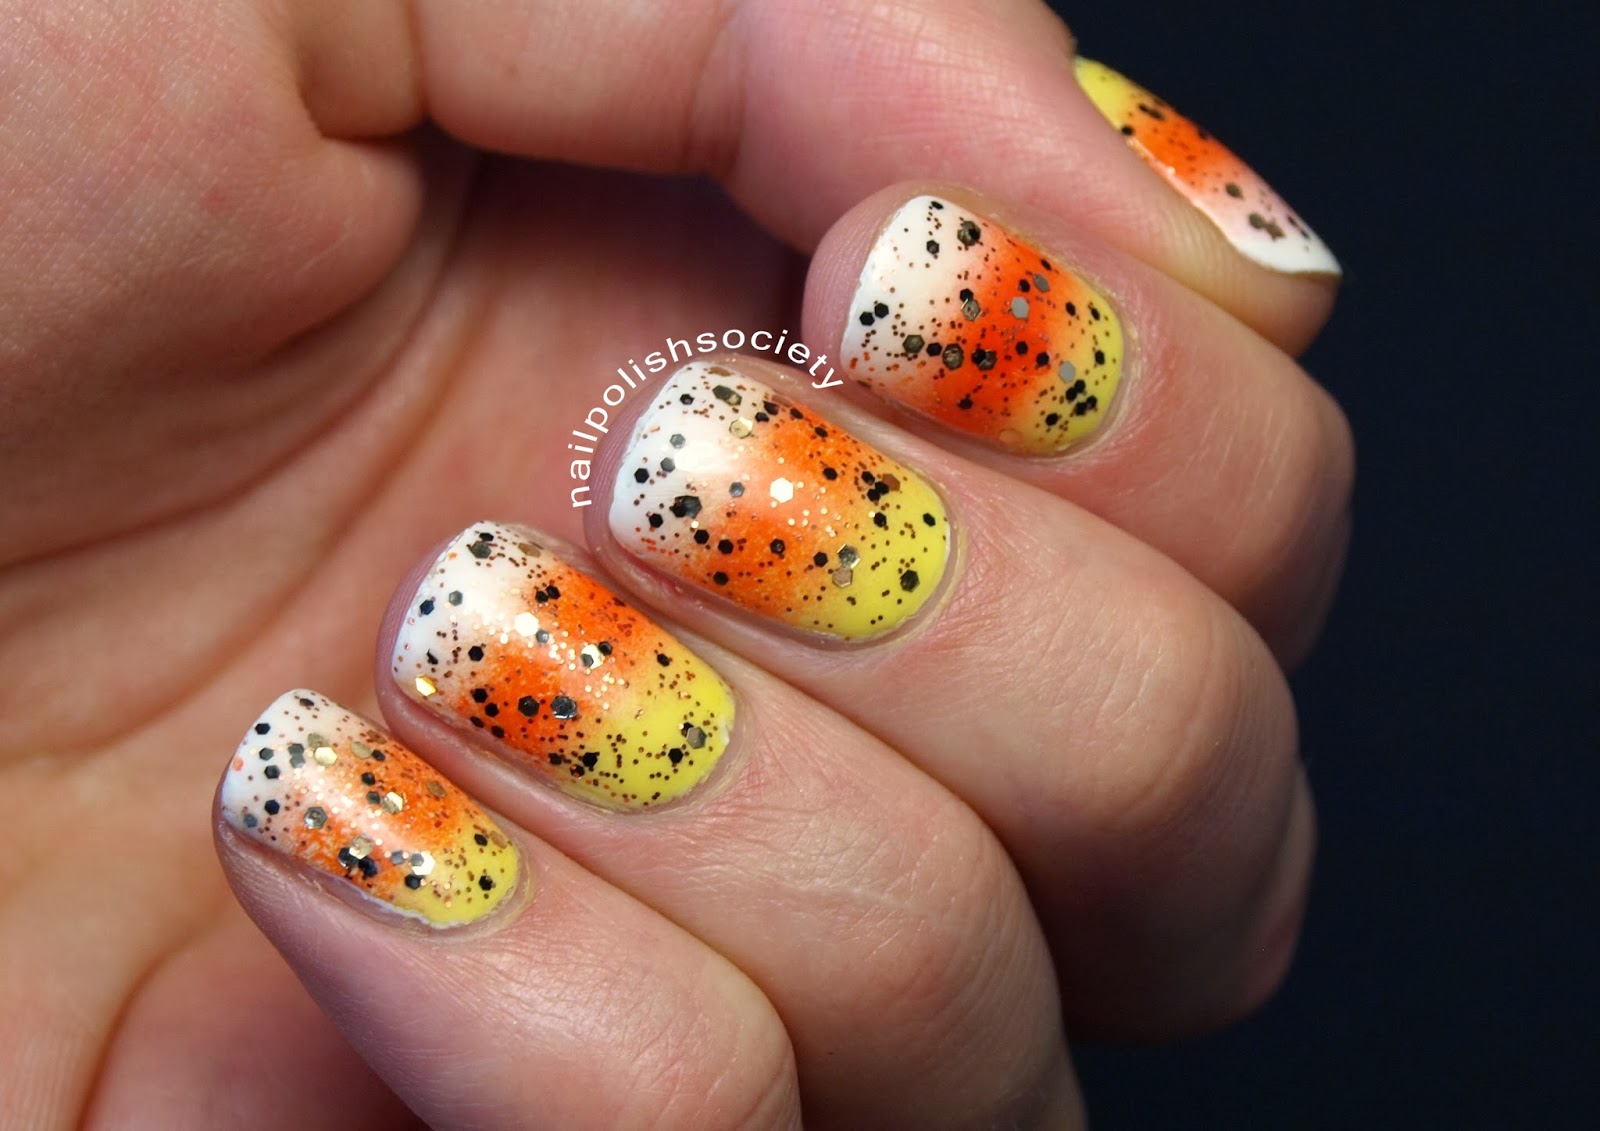
The classic candy corn design is just one way to incorporate this beloved treat into your nail art. Here are a few more ideas to inspire you: - Use different shades of yellow, orange, and white to create an ombre effect on your nails. - Instead of painting the candy corn design on your nails, try using nail polish strips or stickers for a quick and easy alternative. - Add some sparkle by using a glitter polish for the white section of the candy corn. - Create a 3D effect by using a small amount of white nail polish to add texture and dimension to your candy corn nails.7. "Candy Corn Nail Art Ideas"

7. "Candy Corn Nail Art Ideas"


If you're looking for a precise and clean design, using tape can help achieve that. Here's how: - Step 1: Paint your nails with a base coat and let it dry completely. - Step 2: Cut small strips of tape and place them on your nails in the shape of a candy corn, leaving small gaps between each color. - Step 3: Use a yellow polish to paint the bottom section of your nail, making sure to cover the exposed area of the nail. Let it dry. - Step 4: With an orange polish, paint the middle section of your nail, again making sure to cover the exposed area. Let it dry. - Step 5: Carefully remove the tape to reveal clean and precise lines. If needed, use a toothpick or a nail art brush to touch up any areas. - Step 6: Finish off with a top coat to seal in your design and give it a glossy finish.8. "Candy Corn Nail Art with Tape"


8. "Candy Corn Nail Art with Tape"
If you prefer acrylic nails over natural nails, you can still rock candy corn nail art. Here's how: - Step 1: Prep your nails by applying a base coat to protect them. - Step 2: Using an acrylic brush, create a white base on your nails. Let it dry. - Step 3: With a smaller brush, create a yellow section at the bottom of your nail and an orange section in the middle, leaving small gaps between each color. Let it dry. - Step 4: Use a toothpick or a nail art brush to add black lines to mimic the ridges on a piece of candy corn. - Step 5: Finish off with a top coat to seal in your design and give it a glossy finish.9. "Candy Corn Acrylic Nails"
9. "Candy Corn Acrylic Nails"


If you're short on time or don't have the skills to create your own candy corn nail art, you can still achieve the look by using nail art stickers. - Step 1: Prep your nails by applying a base coat. - Step 2: Paint your nails with a white polish and let it dry completely. - Step 3: Apply the candy corn nail stickers on top of the white polish, following the shape of your nails. - Step 4: Use a toothpick or a nail art brush to add black lines to mimic the ridges on a piece of candy corn. - Step 5: Finish off with a top coat to seal in your design and give it a glossy finish. With these 10 candy corn nail art ideas, you'll be ready to show off your love for this iconic Halloween candy on your nails. Whether you're a beginner or a nail art pro, there's a design for everyone to enjoy. Have fun and get creative with your candy corn nail art! 10. "Candy Corn Nail Art Stickers"
10. "Candy Corn Nail Art Stickers"

Transform Your Nails with Candy Corn Nail Art

Unleash Your Creative Side
 If you're looking for a fun and festive way to spruce up your nails for Halloween, candy corn nail art is the perfect solution. This playful design is sure to grab attention and add a touch of whimsy to your overall look. With just a few simple steps, you can transform your nails into a colorful and eye-catching treat.
Gather Your Supplies
 Before getting started, make sure you have all the necessary supplies. You will need a base coat, top coat, white, yellow, and orange nail polish, a thin brush or toothpick, and a small piece of makeup sponge. You can also add some glitter or rhinestones for an extra touch of sparkle and glam.
Step-by-Step Guide
 1. Start by applying a base coat to your nails to protect them and help the polish adhere better.
2. Once the base coat is dry, paint your nails with two coats of white nail polish. This will serve as the base for the candy corn design.
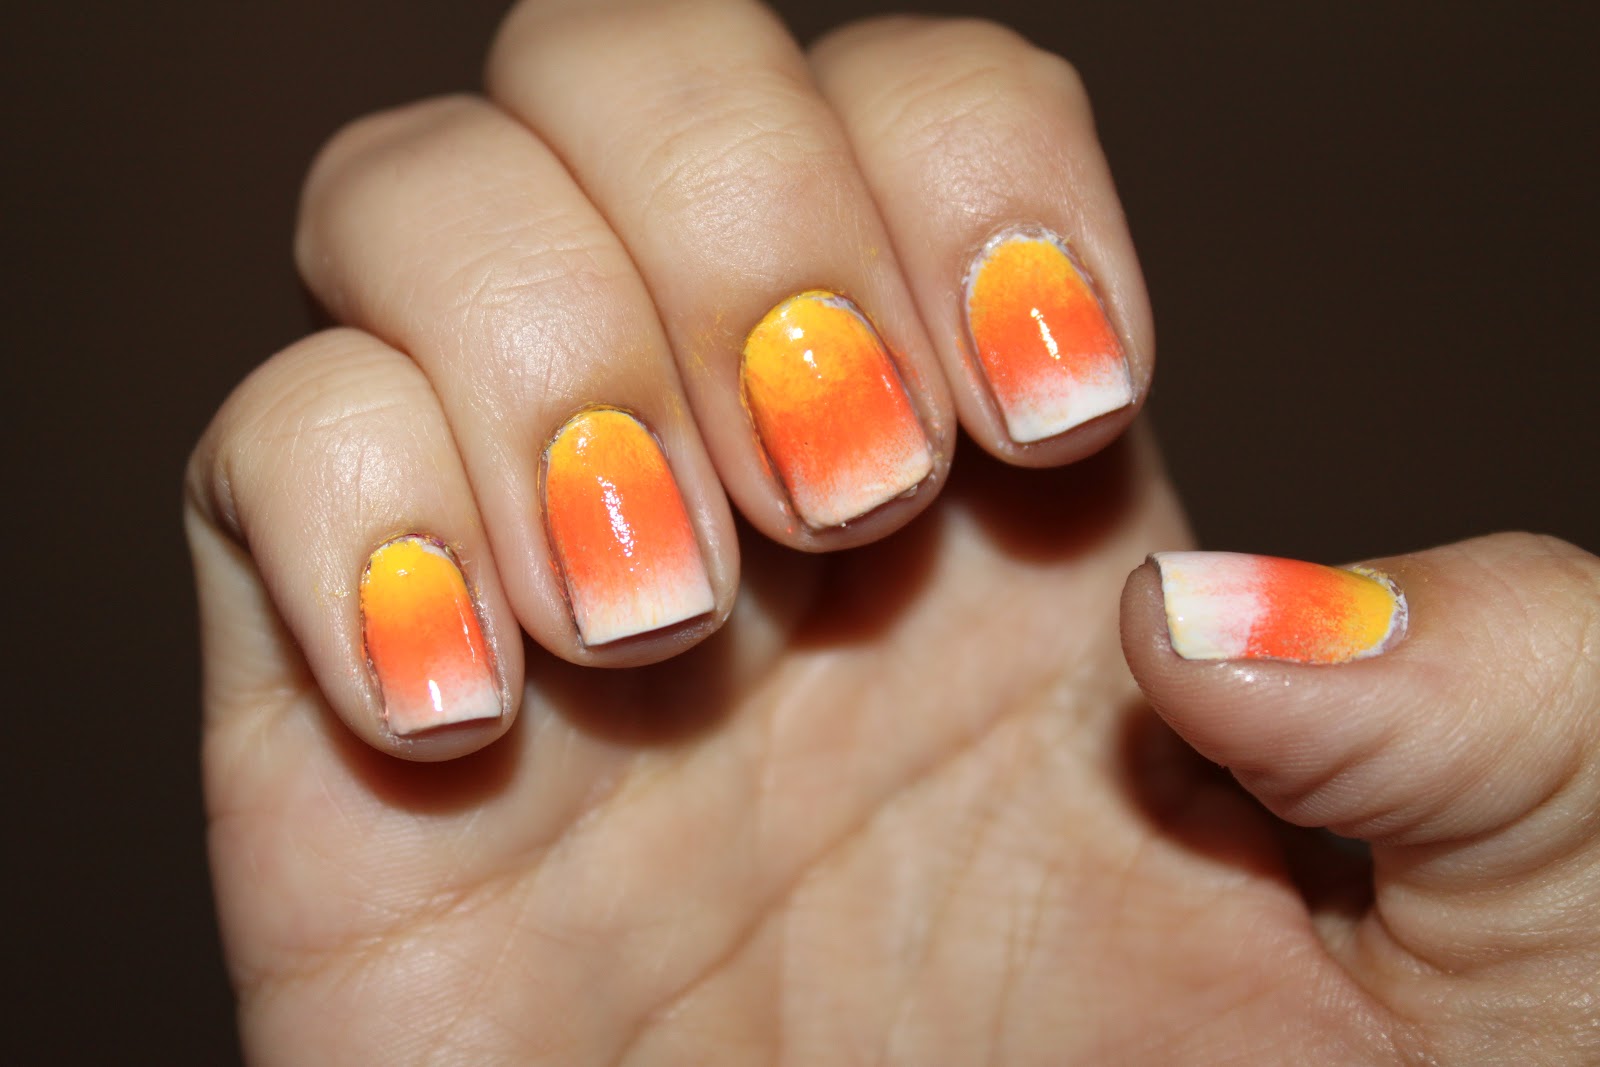
3. Take the small piece of makeup sponge and paint one-third of it with yellow nail polish and another third with orange nail polish. Leave the middle section unpainted.
4. Gently dab the sponge onto your nails, starting at the tips and working your way towards the base. This will create the gradient effect of a candy corn.
5. Use the thin brush or toothpick to paint a white stripe along the edge of the yellow section and another one along the edge of the orange section.
6. Let the polish dry completely before applying a top coat to seal and protect your design.
1. Start by applying a base coat to your nails to protect them and help the polish adhere better.
2. Once the base coat is dry, paint your nails with two coats of white nail polish. This will serve as the base for the candy corn design.
3. Take the small piece of makeup sponge and paint one-third of it with yellow nail polish and another third with orange nail polish. Leave the middle section unpainted.
4. Gently dab the sponge onto your nails, starting at the tips and working your way towards the base. This will create the gradient effect of a candy corn.
5. Use the thin brush or toothpick to paint a white stripe along the edge of the yellow section and another one along the edge of the orange section.
6. Let the polish dry completely before applying a top coat to seal and protect your design.
Get Creative
 While the classic candy corn design is always a hit, don't be afraid to get creative and add your own personal touch. You can experiment with different color combinations, add stripes or polka dots, or even create a spooky jack-o'-lantern face using black nail polish. The possibilities are endless, so let your imagination run wild.
Final Thoughts
 Candy corn nail art is a fun and easy way to add a festive touch to your Halloween look. With the right tools and a little bit of creativity, you can create a unique and eye-catching design that will make your nails stand out. So go ahead and indulge in some sweet and colorful nail art this Halloween.


