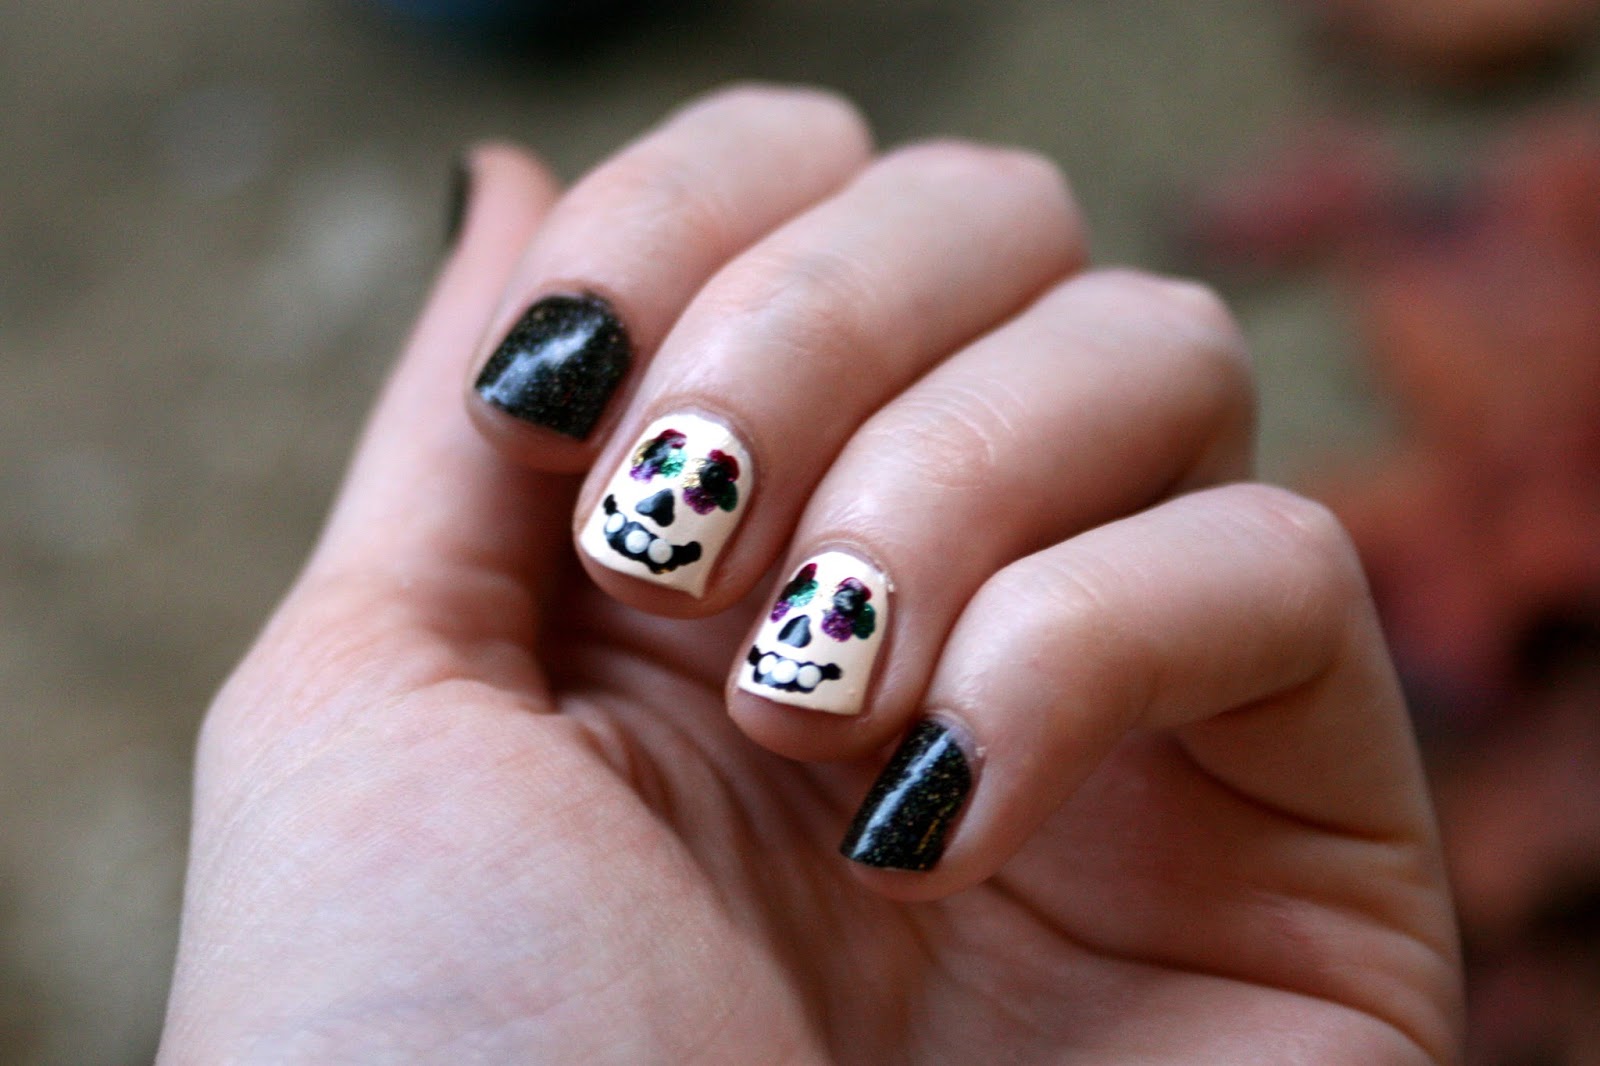
Want to rock some spooky yet sweet nail art? Look no further than our candy skull nail art tutorial! Follow these easy steps to create a fun and colorful look that's perfect for Halloween or any day of the year. Start by painting your nails with a base color of your choice. We recommend using a light shade to make the candy skull design pop. Next, use a small brush or toothpick to draw a circle near the base of your nail. This will be the skull's head. Using black nail polish, outline the circle and fill it in. Then, use the same nail polish to create two small triangles for the eyes and a larger triangle for the nose. Don't worry about making them perfect, as the imperfections will add to the charm of the design. Now, take a bright nail polish color and create a vertical line down the center of the skull's head for the mouth. Add a smaller horizontal line across the top of the mouth for the teeth. Using a toothpick or small brush, add some colorful dots or stripes to the skull's face for a fun and festive touch. You can also add small flowers or other designs to the sides of the skull. Finally, seal in your design with a clear top coat and voila! You now have a cute and spooky candy skull nail art design.1. "Candy Skull Nail Art Tutorial"


1. "Candy Skull Nail Art Tutorial"


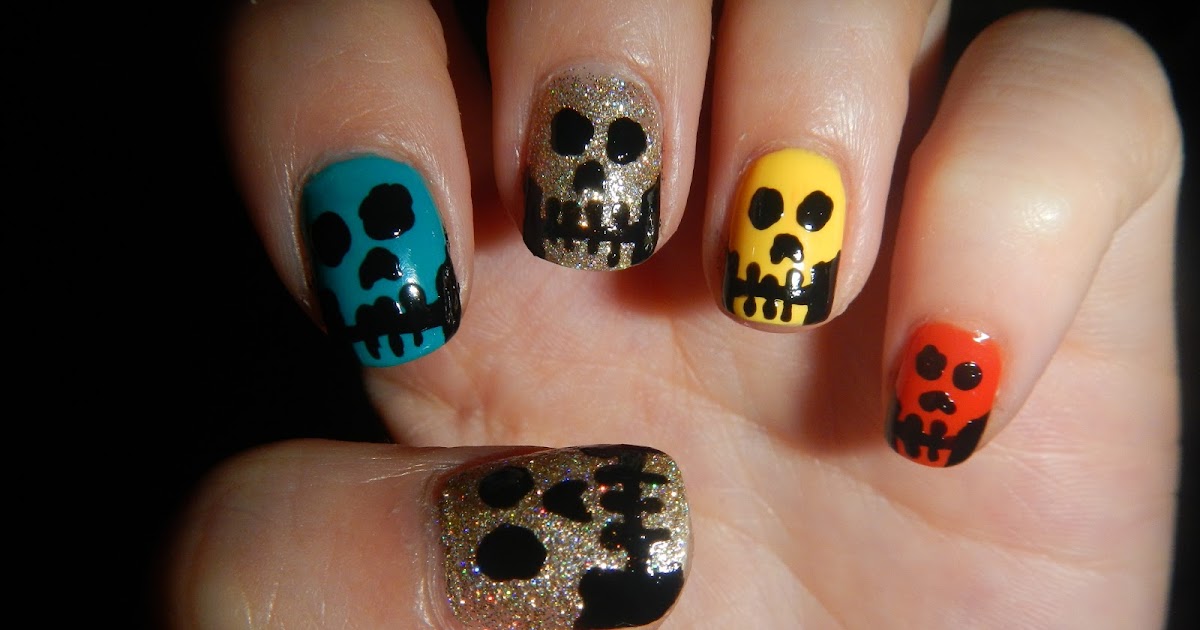
Looking for some inspiration for your candy skull nail art? Here are a few design ideas to get you started: - Create a gradient effect by using different shades of the same color for the skull's head and mouth. - Use metallic or glitter nail polish for a more eye-catching and glamorous look. - Add small details like hearts or stars to the skull's face for a unique twist on the traditional design. - Create a full set of candy skull nails by painting each nail with a different color and skull design. - Use nail art stickers or decals for an easier way to achieve a detailed and intricate candy skull design. Remember, there are no rules when it comes to creating your own candy skull nail art design. Let your creativity run wild and have fun with it!2. "Candy Skull Nail Art Designs"


2. "Candy Skull Nail Art Designs"


Don't have a lot of time to spend on your nails? No problem! Here's an easy candy skull nail art design that you can do in just a few minutes: - Paint your nails with a base color of your choice. - Using a toothpick or small brush, create a candy skull design on one or two accent nails. You can use a simple black and white design or add some colorful accents for a more playful look. - On the remaining nails, add small dots or stripes using nail polish in coordinating colors. - Seal in your design with a clear top coat and you're done! This quick and easy candy skull nail art is perfect for those who are short on time but still want to rock a fun and festive look.3. "Easy Candy Skull Nail Art"

3. "Easy Candy Skull Nail Art"


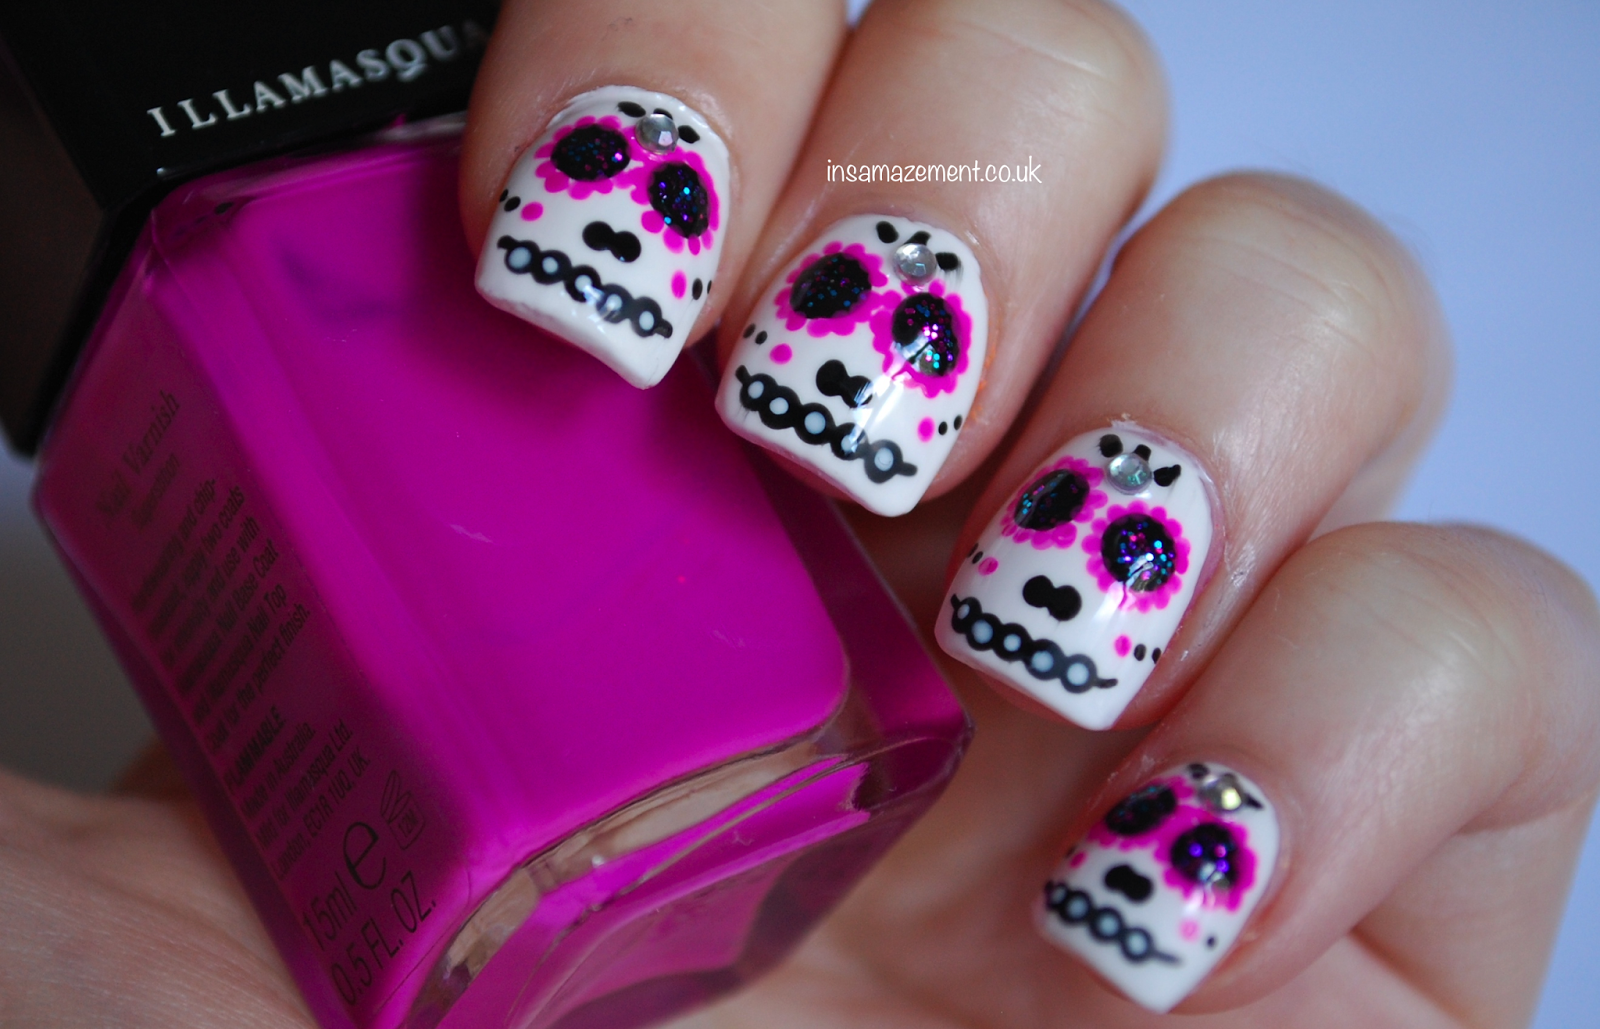
For those who struggle with creating intricate nail art designs, nail art stickers are a game changer. You can find a variety of candy skull nail art stickers online or at your local beauty supply store. Simply paint your nails with a base color, let them dry completely, and then apply the nail art stickers on top. Finish with a clear top coat to seal in the design and you're all set! Not only are nail art stickers a great time saver, but they also give you the opportunity to achieve a more detailed and professional-looking design without the stress and frustration of doing it by hand.4. "Candy Skull Nail Art Stickers"


4. "Candy Skull Nail Art Stickers"


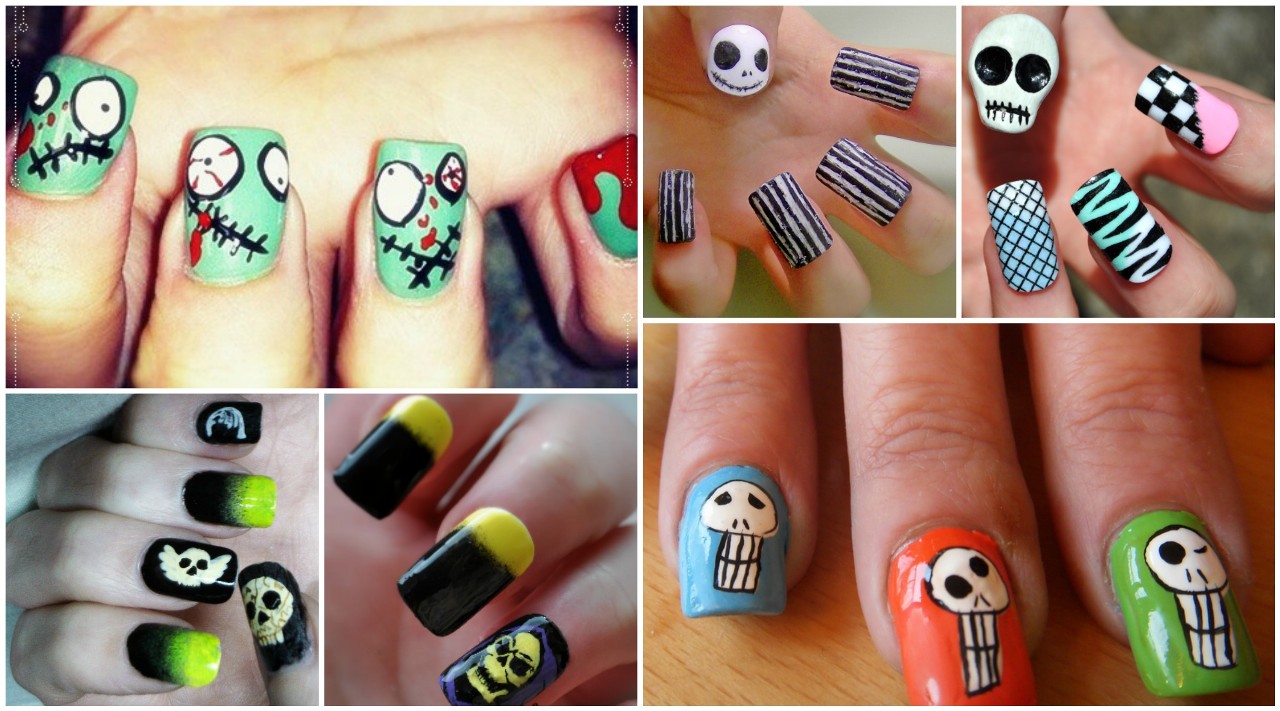
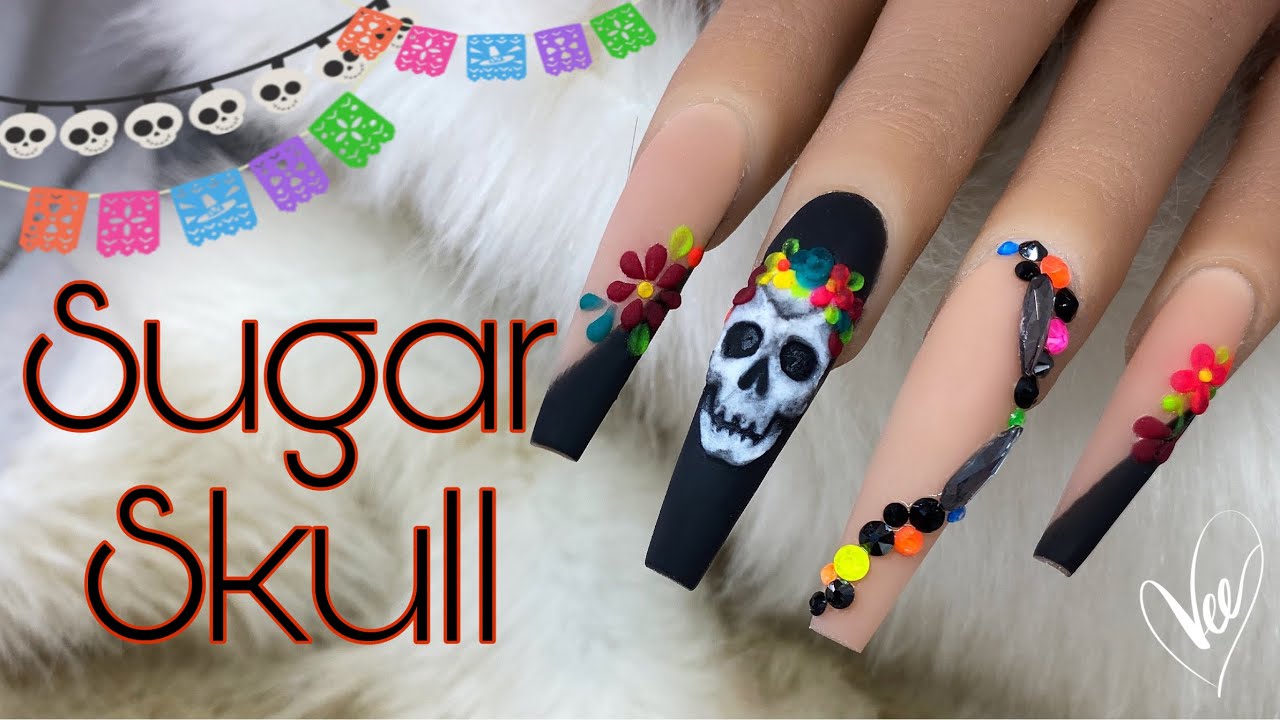
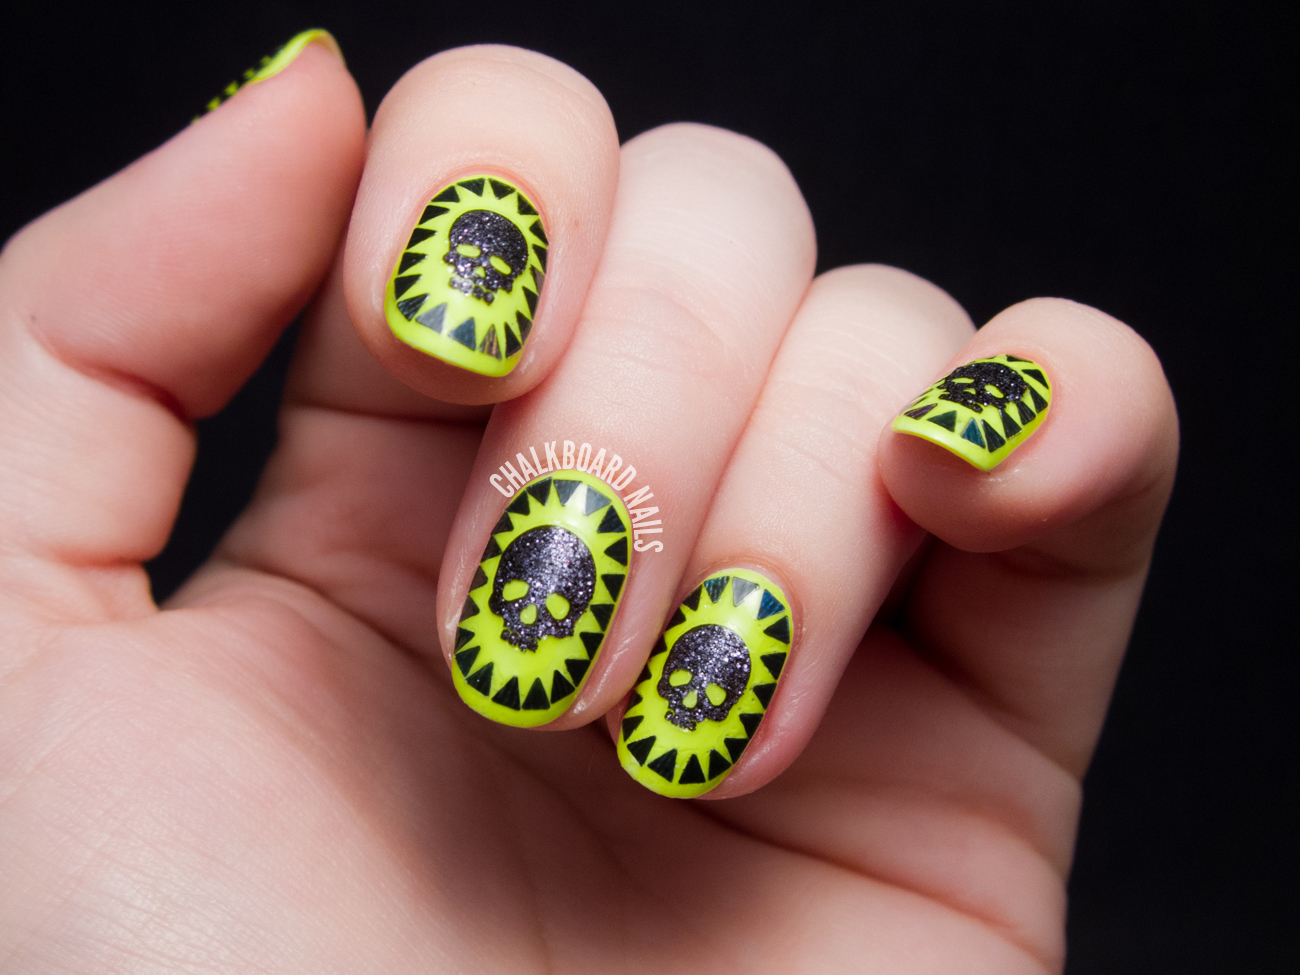
If you're looking for some creative and unique ways to incorporate candy skull nail art into your style, here are a few ideas: - Create a nail art design that combines candy skulls with other Halloween elements, such as spiders, bats, or pumpkins. - Use glow-in-the-dark nail polish for a spooky and fun twist on the traditional candy skull design. - Create a negative space candy skull design by leaving parts of your nails unpainted and using nail art tools to create the skull's features. - Add some glitter or rhinestones to your candy skull design for some extra sparkle and glam. The possibilities are endless when it comes to incorporating candy skulls into your nail art. Don't be afraid to try out new ideas and make the design your own!5. "Candy Skull Nail Art Ideas"


5. "Candy Skull Nail Art Ideas"

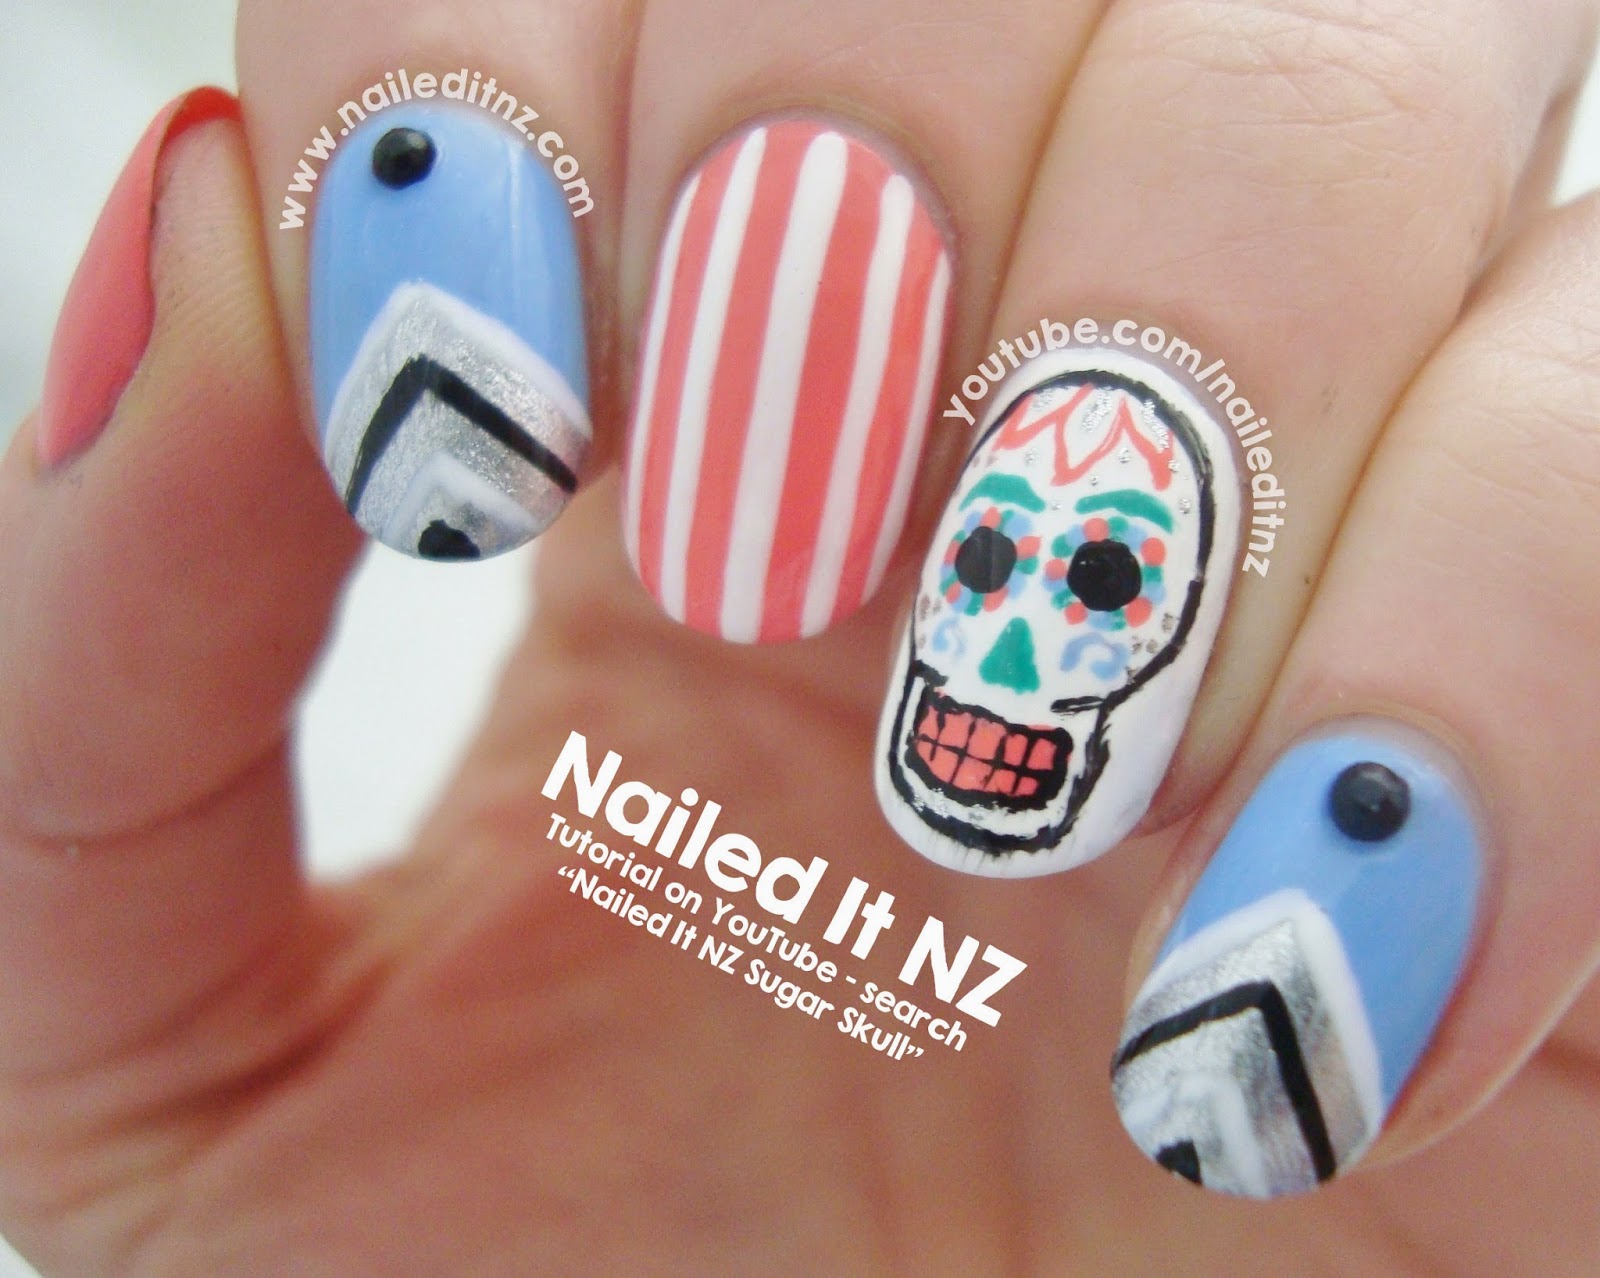
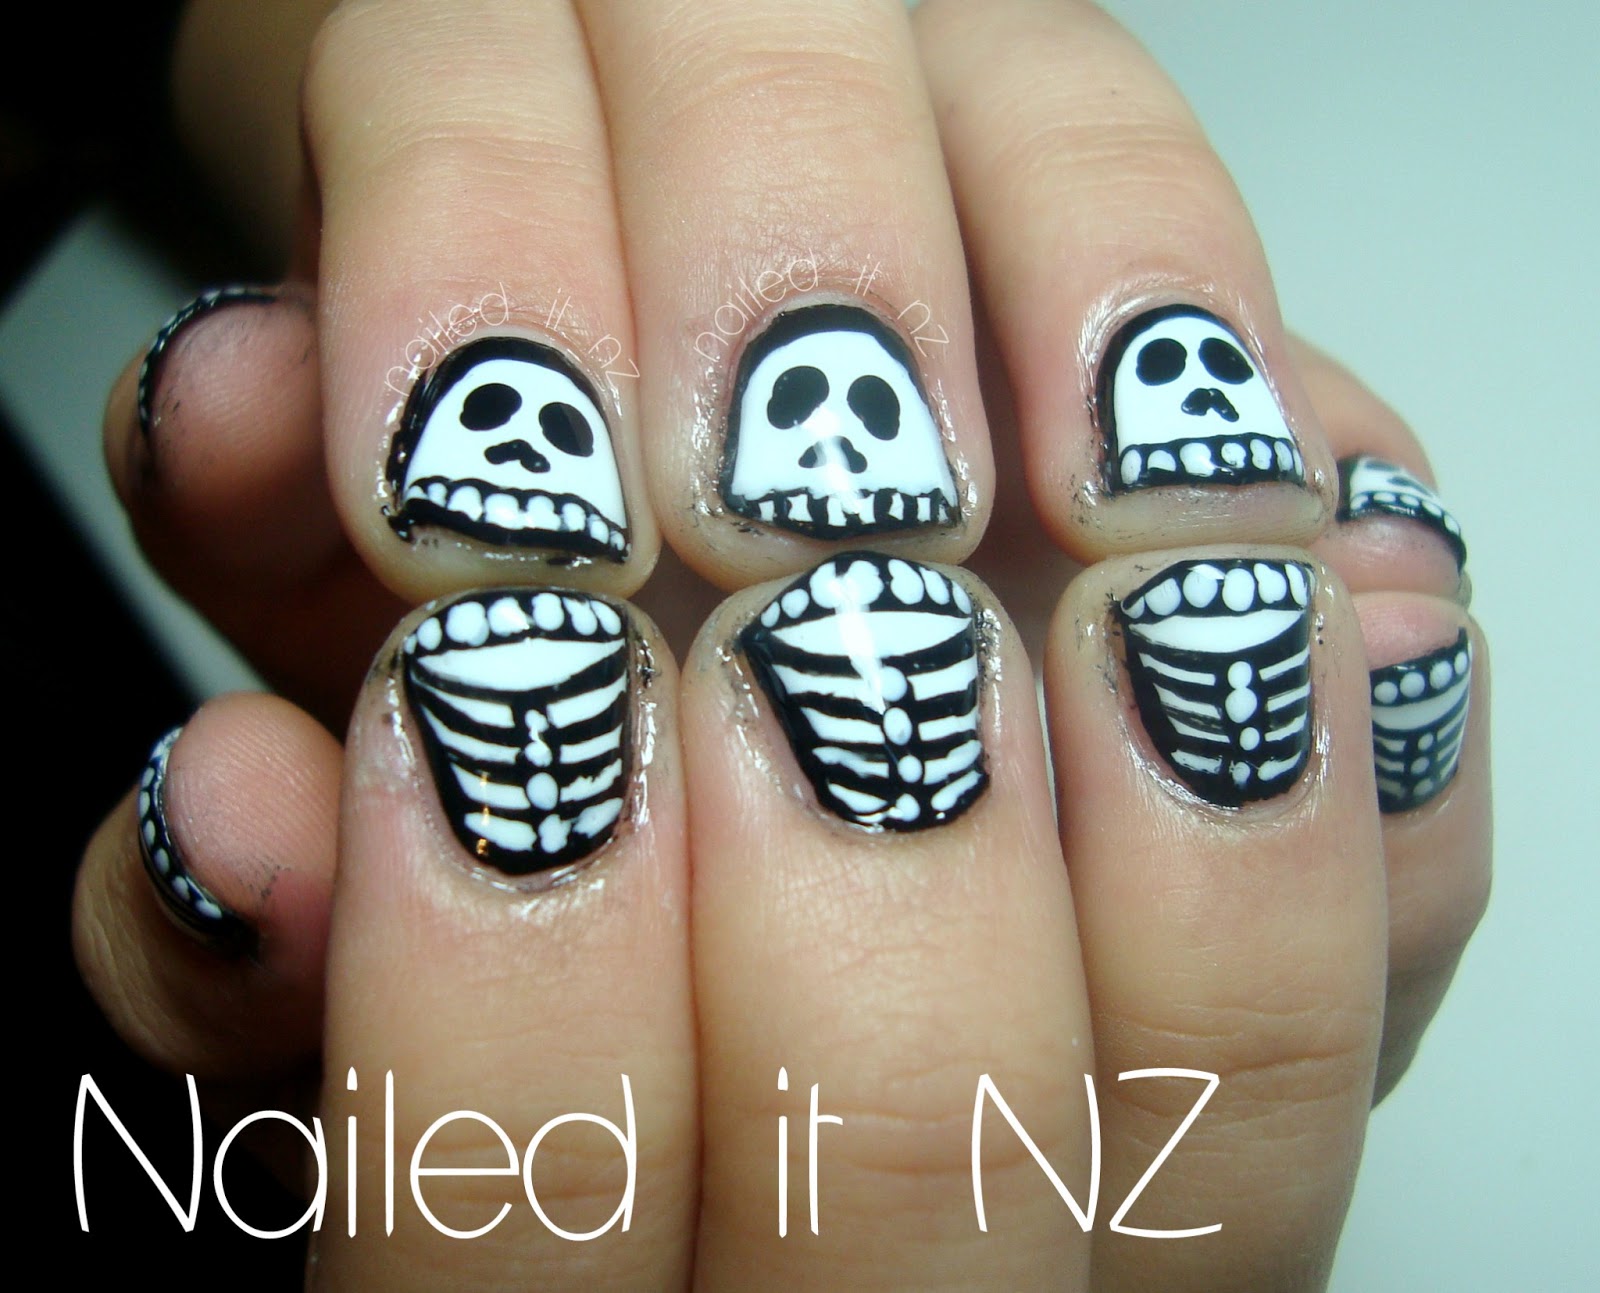
If you're new to nail art or just need a refresher, here's a step-by-step guide to creating your own candy skull nail art: 1. Start by painting your nails with a base color of your choice and letting them dry completely. 2. Using a small brush or toothpick, create a circle near the base of your nail for the skull's head. 3. Outline the circle and fill it in with black nail polish. 4. Use the black nail polish to create two small triangles for the eyes and a larger triangle for the nose. 5. Create a vertical line down the center of the skull's head for the mouth and a smaller horizontal line across the top for the teeth. 6. Use a toothpick or small brush to add colorful dots or stripes to the skull's face. 7. Seal in your design with a clear top coat and enjoy your new candy skull nail art! Remember to have fun and don't worry about making the design perfect. Imperfections add to the charm of the candy skull look.6. "Candy Skull Nail Art Step by Step"


6. "Candy Skull Nail Art Step by Step"

If you're new to nail art or don't have a lot of experience with painting your nails, the candy skull design is a great place to start. Here are a few tips for beginners: - Use nail art stickers or decals to achieve a detailed and intricate design without the stress of doing it by hand. - Start with a simple black and white candy skull design before adding in more colors and details. - Take your time and don't worry about making the design perfect. With practice, you'll improve and be able to create more complex designs. - Have fun and experiment with different colors and techniques to find what works best for you. Don't be afraid to try out new things and make the design your own. The beauty of nail art is that there are no rules!7. "Candy Skull Nail Art for Beginners"


7. "Candy Skull Nail Art for Beginners"
Ready to get started on your candy skull nail art? Here are a few supplies you'll need to achieve the perfect look: - Base coat and top coat - Nail polish in various colors, including black and white - Small brushes or toothpicks for creating the design - Nail art stickers or decals (optional) - Glitter, rhinestones, or other embellishments (optional) - Nail polish remover and cotton pads for cleaning up mistakes With these supplies, you'll be ready to create an amazing candy skull nail art design!8. "Candy Skull Nail Art Supplies"
8. "Candy Skull Nail Art Supplies"


If you're in need of some inspiration for your candy skull nail art, look no further than social media and beauty blogs. You can find countless photos and tutorials for different candy skull designs that will spark your creativity. You can also look to other nail art enthusiasts for inspiration. Join online communities or attend local nail art events to connect with others who share your passion for all things nails. Remember, inspiration can come from anywhere, so keep an open mind and let your imagination run wild.9. "Candy Skull Nail Art Inspiration"


9. "Candy Skull Nail Art Inspiration"

Still not sure which candy skull design to try? Check out our gallery for some ideas and inspiration: - Simple black and white candy skull design - Rainbow candy skulls with colorful accents - Negative space candy skull design - Glow-in-the-dark candy skull nails - Candy skulls with Halloween-inspired details - Candy skulls with added bling, such as glitter or rhinestones No matter which design you choose, have fun and make it your own. With these tips and ideas, you'll be rocking some killer candy skull nail art in no time!10. "Candy Skull Nail Art Gallery"
10. "Candy Skull Nail Art Gallery"
The Rise of Candy Skull Nail Art in House Design

Adding a Sweet and Spooky Touch to Your Nails
 When we think of house design, our minds often go to the interior and exterior of our homes. However, a growing trend in the world of design has been incorporating
candy skull nail art
into the overall aesthetic of a house. Originating from Mexico's Day of the Dead celebrations,
candy skull
or "sugar skull" nail art features intricate and colorful designs that are both sweet and spooky. This unique and bold style has gained popularity in recent years, making its way into home decor and design.
When we think of house design, our minds often go to the interior and exterior of our homes. However, a growing trend in the world of design has been incorporating
candy skull nail art
into the overall aesthetic of a house. Originating from Mexico's Day of the Dead celebrations,
candy skull
or "sugar skull" nail art features intricate and colorful designs that are both sweet and spooky. This unique and bold style has gained popularity in recent years, making its way into home decor and design.
A Unique Twist on Traditional Nail Art
 Nail art has been around for centuries, with different cultures and countries having their own unique styles and techniques. However,
candy skull nail art
has taken a modern twist on traditional nail art, incorporating vibrant colors, intricate details, and a touch of macabre. This style allows homeowners to express their creativity and add a personal touch to their homes in a unique and unexpected way.
Nail art has been around for centuries, with different cultures and countries having their own unique styles and techniques. However,
candy skull nail art
has taken a modern twist on traditional nail art, incorporating vibrant colors, intricate details, and a touch of macabre. This style allows homeowners to express their creativity and add a personal touch to their homes in a unique and unexpected way.
Incorporating Candy Skull Nails into Home Decor
 One of the reasons
candy skull nail art
has become popular in house design is its versatility. The bold and eye-catching designs can be incorporated into various aspects of home decor, such as wallpapers, paintings, or even furniture pieces. This allows homeowners to add a pop of color and personality to their homes without committing to a complete renovation.
One of the reasons
candy skull nail art
has become popular in house design is its versatility. The bold and eye-catching designs can be incorporated into various aspects of home decor, such as wallpapers, paintings, or even furniture pieces. This allows homeowners to add a pop of color and personality to their homes without committing to a complete renovation.
A Sweet and Spooky Statement
 The incorporation of
candy skull nail art
into house design goes beyond just aesthetics. For many, it is a way to pay homage to the Mexican tradition and celebrate the cycle of life and death. It also serves as a reminder to appreciate the beauty in both the sweet and spooky aspects of life. By adding this unique touch to their homes, homeowners are making a bold statement and showcasing their appreciation for culture and individuality.
The incorporation of
candy skull nail art
into house design goes beyond just aesthetics. For many, it is a way to pay homage to the Mexican tradition and celebrate the cycle of life and death. It also serves as a reminder to appreciate the beauty in both the sweet and spooky aspects of life. By adding this unique touch to their homes, homeowners are making a bold statement and showcasing their appreciation for culture and individuality.
In Conclusion
 Candy skull nail art is not just a trend in the world of fashion and beauty; it has also made its way into the world of house design. This unique and eye-catching style allows homeowners to express their creativity and add a touch of personality to their homes. So why not incorporate a little bit of sweetness and spookiness into your house design with some
candy skull nail art
?
Candy skull nail art is not just a trend in the world of fashion and beauty; it has also made its way into the world of house design. This unique and eye-catching style allows homeowners to express their creativity and add a touch of personality to their homes. So why not incorporate a little bit of sweetness and spookiness into your house design with some
candy skull nail art
?


