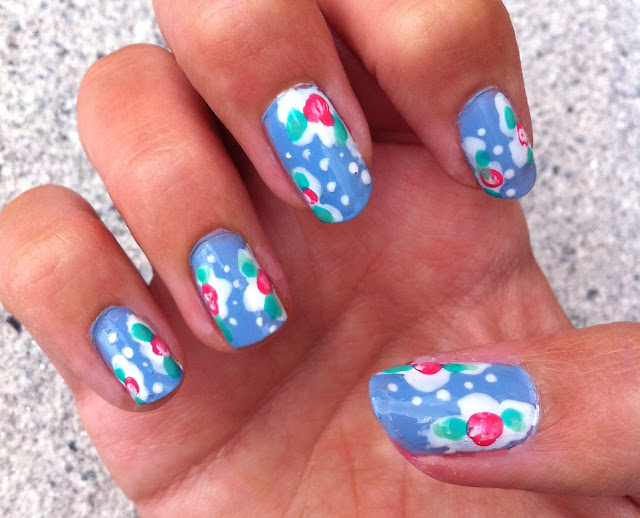
If you're a fan of the charming and whimsical designs of Cath Kidston, why not incorporate them into your nail art? With this easy-to-follow tutorial, you'll be able to recreate the iconic prints onto your nails in no time. To begin, you'll need a base color that will serve as the background for the design. Opt for a light pastel shade like baby pink or mint green to mimic the signature colors of Cath Kidston's designs. Next, using a small dotting tool or toothpick, create small polka dots all over your nails. These dots will serve as the base for the floral designs in the next step. Now, using a thin brush, draw dainty flowers on top of the polka dots. You can use different colors for the flowers to add more dimension and variety to the design. Once you're satisfied with the flower placement, use a small brush or toothpick to add leaves and stems to the flowers. This will give the design a more realistic and intricate look. Finally, seal everything with a glossy top coat to make the design last longer and give it a more professional finish. And there you have it, your very own Cath Kidston inspired nail art!1. "Cath Kidston Inspired Nail Art Tutorial"


1. "Cath Kidston Inspired Nail Art Tutorial"


If you're new to nail art or just want a quick and easy design, this tutorial is perfect for you. With just a few simple steps, you can achieve a beautiful and effortless Cath Kidston inspired nail art. Start by painting your nails with a light base color such as white or light blue. This will make the floral designs stand out more. Next, using a small dotting tool, create clusters of small dots on your nails. These dots will act as the base for the flowers. Now, using a thin brush or toothpick, draw small roses on top of the dots. These roses don't have to be perfect, as the imperfect look adds to the charm of the design. To add some variety, you can also draw daisies or peonies on a few nails. Experiment with different flower shapes and sizes to create a unique design. Seal everything with a top coat and you're done! This easy Cath Kidston nail art is perfect for any occasion and will surely receive compliments.2. "Easy Cath Kidston Nail Art Tutorial"


2. "Easy Cath Kidston Nail Art Tutorial"
.png)


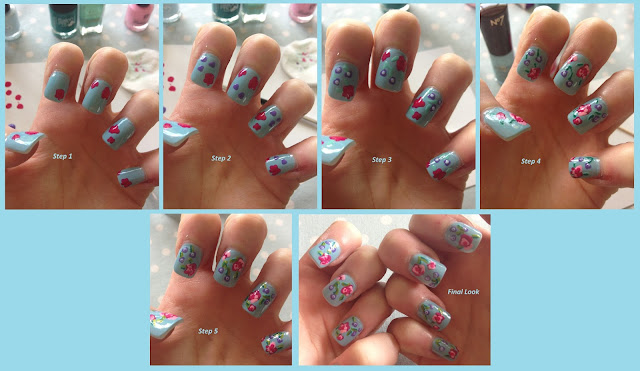
If you're a visual learner and need a more detailed tutorial, this step-by-step guide will walk you through the process of creating a gorgeous Cath Kidston inspired nail art. Step 1: Start by painting your nails with a light base color such as pale pink or mint green. This will serve as the background for the design. Step 2: Using a small dotting tool or toothpick, create small polka dots all over your nails. Step 3: Now, using a thin brush, draw different flowers on top of the polka dots. You can use a mix of colors to make the design more vibrant. Step 4: Once you're happy with the flower placement, use a small brush or toothpick to add leaves and stems to the flowers. Step 5: To add more detail and dimension, you can also add small dots in between the flowers or draw tiny leaves on the stems. Step 6: Seal everything with a glossy top coat to protect the design and give it a shiny finish. Step 7: Admire your beautiful Cath Kidston nail art and show it off to everyone!3. "Step-by-Step Cath Kidston Nail Art Tutorial"


3. "Step-by-Step Cath Kidston Nail Art Tutorial"


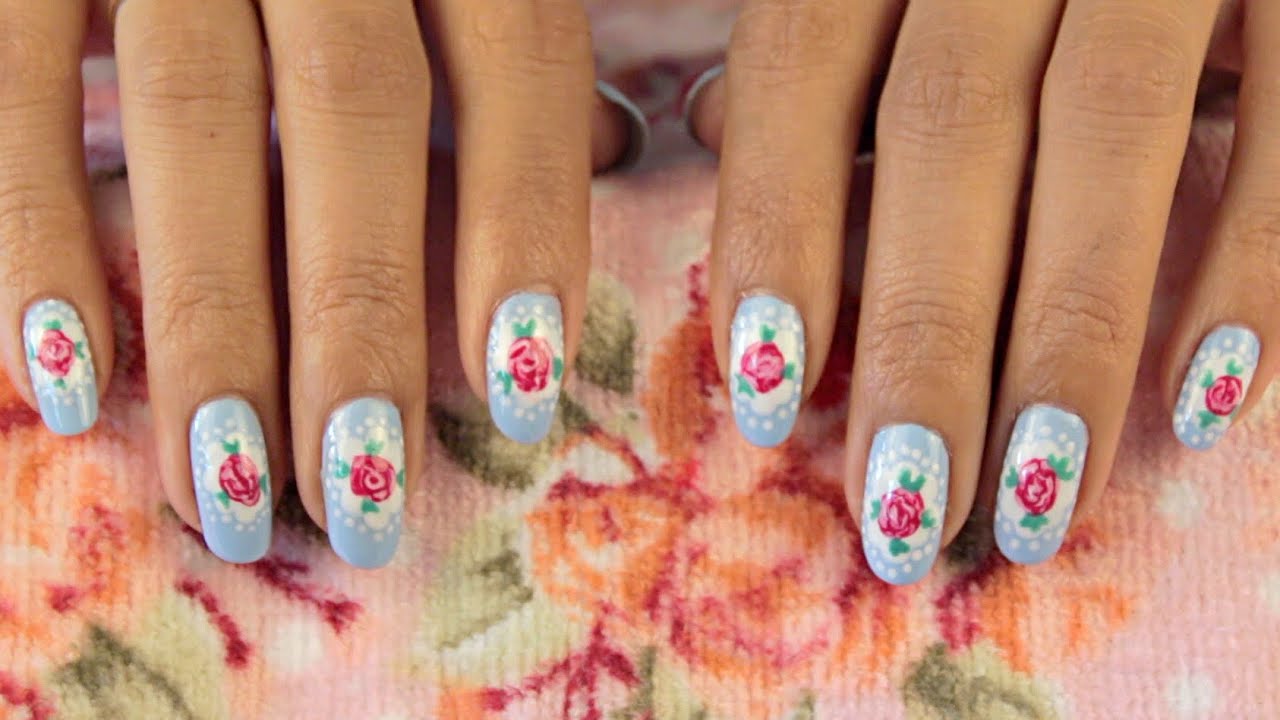
Floral designs are a staple in Cath Kidston's prints, and this tutorial will show you how to recreate them onto your nails. Start by painting your nails with a light base color, such as baby pink or light blue. This will make the floral designs stand out more. Next, using a thin brush, draw small flowers on your nails. You can use different colors for the flowers to add more dimension and variety to the design. Then, using a smaller brush, add leaves and stems to the flowers. This will give the design a more realistic and intricate look. To add a touch of elegance, you can also add tiny pearls or dots in the center of the flowers. Finally, seal everything with a glossy top coat to make the design last longer and give it a more professional finish. This floral Cath Kidston nail art is perfect for any special occasion.4. "Cath Kidston Floral Nail Art Tutorial"


4. "Cath Kidston Floral Nail Art Tutorial"


If you love the vintage and romantic feel of Cath Kidston's designs, this tutorial will show you how to incorporate them into your nail art. Start by painting your nails with a light pastel color, such as baby blue or mint green. This will serve as the base for the design. Next, using a thin brush, draw small roses on your nails. These roses don't have to be perfect, as the imperfect look adds to the vintage feel of the design. Then, using a smaller brush, add leaves and stems to the roses. You can also add small dots or tiny leaves in between the roses for added detail. To complete the vintage look, you can also add small bows or pearls on a few nails. Seal everything with a glossy top coat and you'll have a beautiful and romantic Cath Kidston vintage nail art.5. "Vintage Cath Kidston Nail Art Tutorial"


5. "Vintage Cath Kidston Nail Art Tutorial"

If you're feeling creative and want to put your own spin on the classic Cath Kidston designs, this tutorial is for you. Start by painting your nails with a light pastel color, such as baby pink or light blue. This will serve as the base for the design. Next, using a thin brush or toothpick, draw different shapes and patterns on your nails. You can mix and match different designs to create a unique and personalized look. Then, using a smaller brush, add leaves and stems to the designs. This will give the design a more cohesive and polished look. Finally, seal everything with a glossy top coat to protect the design and give it a shiny finish. This Cath Kidston inspired nail design is perfect for those who want to add their own touch to the classic prints.6. "Cath Kidston Inspired Nail Design Tutorial"


6. "Cath Kidston Inspired Nail Design Tutorial"
If you're on a budget or prefer to do things yourself, this tutorial will show you how to create your own Cath Kidston inspired nail art using household items. Start by painting your nails with a light base color, such as white or light pink. This will make the design stand out more. Next, using a small piece of sponge, dab on different colors onto your nails. This will create a gradient effect and serve as the base for the design. Then, using a thin brush or toothpick, draw small flowers on top of the gradient. You can use a mix of colors for the flowers to make the design more vibrant. To add more detail, you can also add leaves and stems to the flowers using a smaller brush. Seal everything with a top coat and you'll have a beautiful DIY Cath Kidston nail art that didn't break the bank.7. "DIY Cath Kidston Nail Art Tutorial"


7. "DIY Cath Kidston Nail Art Tutorial"
Roses are a staple in Cath Kidston's prints, and this tutorial will show you how to create a gorgeous rose nail art using just a few simple steps. Start by painting your nails with a light base color, such as pale pink or mint green. This will make the roses stand out more. Next, using a thin brush, draw small roses on your nails. You can use different colors for the roses to add more dimension and variety to the design. Then, using a smaller brush, add leaves and stems to the roses. This will give the design a more realistic and intricate look. To add a touch of elegance, you can also add tiny pearls or dots in the center of the roses. Seal everything with a glossy top coat and you'll have a beautiful rose nail art inspired by Cath Kidston's designs.8. "Cath Kidston Rose Nail Art Tutorial"


8. "Cath Kidston Rose Nail Art Tutorial"
If you're a fan of Cath Kidston's designs and want to incorporate multiple elements into your nail art, this tutorial will show you how to do just that. Start by painting your nails with a light base color, such as baby blue or light pink. This will serve as the background for the design. Next, using a small dotting tool or toothpick, create clusters of small dots on your nails. These dots will act as the base for the designs. Then, using a thin brush or toothpick, draw different flowers on top of the dots. You can use a mix of colors to make the design more vibrant. To add more variety, you can also draw daisies or peonies on a few nails. Experiment with different flower shapes and sizes to create a unique design. Seal everything with a glossy top coat and you'll have a beautiful and intricate Cath Kidston inspired nail art design.9. "Cath Kidston Inspired Nail Art Design Tutorial"


9. "Cath Kidston Inspired Nail Art Design Tutorial"
If you're new to nail art or just want a simple and easy design, this tutorial is perfect for you. With just a few steps, you can achieve a beautiful Cath Kidston inspired nail art. Start by painting your nails with a light base color, such as baby pink or mint green. This will make the design stand out more. Next, using a small dotting tool or toothpick, create clusters of small dots on your nails. These dots will act as the base for the flowers. Then, using a thin brush or toothpick, draw daisies on top of the dots. You can use different colors for the daisies to add more dimension to the design. Finally, seal everything with a glossy top coat to protect the design and give it a shiny finish. This Cath Kidston nail art is perfect for beginners and can be done in just a few simple steps.10. "Cath Kidston Nail Art Tutorial for Beginners"

10. "Cath Kidston Nail Art Tutorial for Beginners"
Nail Art Designs Inspired by Cath Kidston

Transforming Your Nails into a Floral Wonderland
 If you're a fan of the charming and vintage-inspired designs of Cath Kidston, then you'll love incorporating them into your nail art! With their signature floral patterns and pastel colors, Cath Kidston designs are the perfect inspiration for creating beautiful and feminine nail looks. In this tutorial, we'll show you how to recreate some of Cath Kidston's most iconic designs on your nails, giving you the perfect way to add a touch of whimsy to your everyday look.
Gather Your Materials
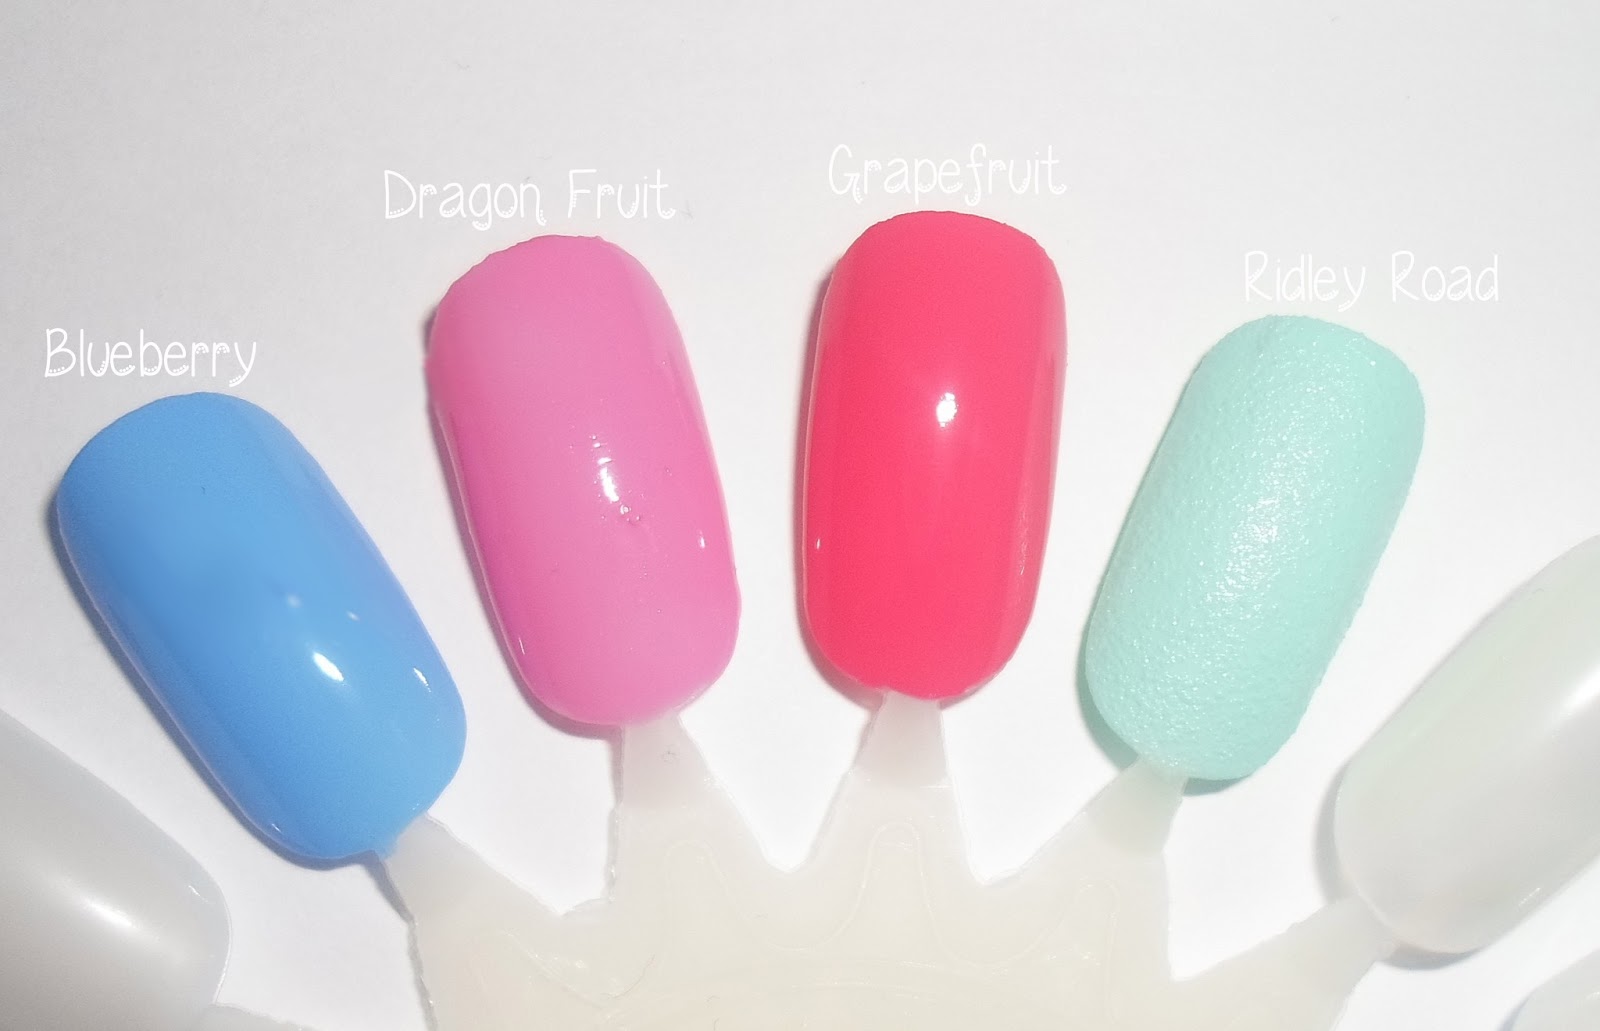
 Before we dive into the tutorial, make sure you have all the necessary materials ready. You'll need a base coat, top coat, white nail polish, and a selection of pastel nail polishes in shades like pink, blue, and green. You'll also need a fine-tipped brush or a toothpick for creating intricate designs, and some nail art gems or pearls for added embellishment. Once you have everything you need, it's time to get started on your Cath Kidston nail art!
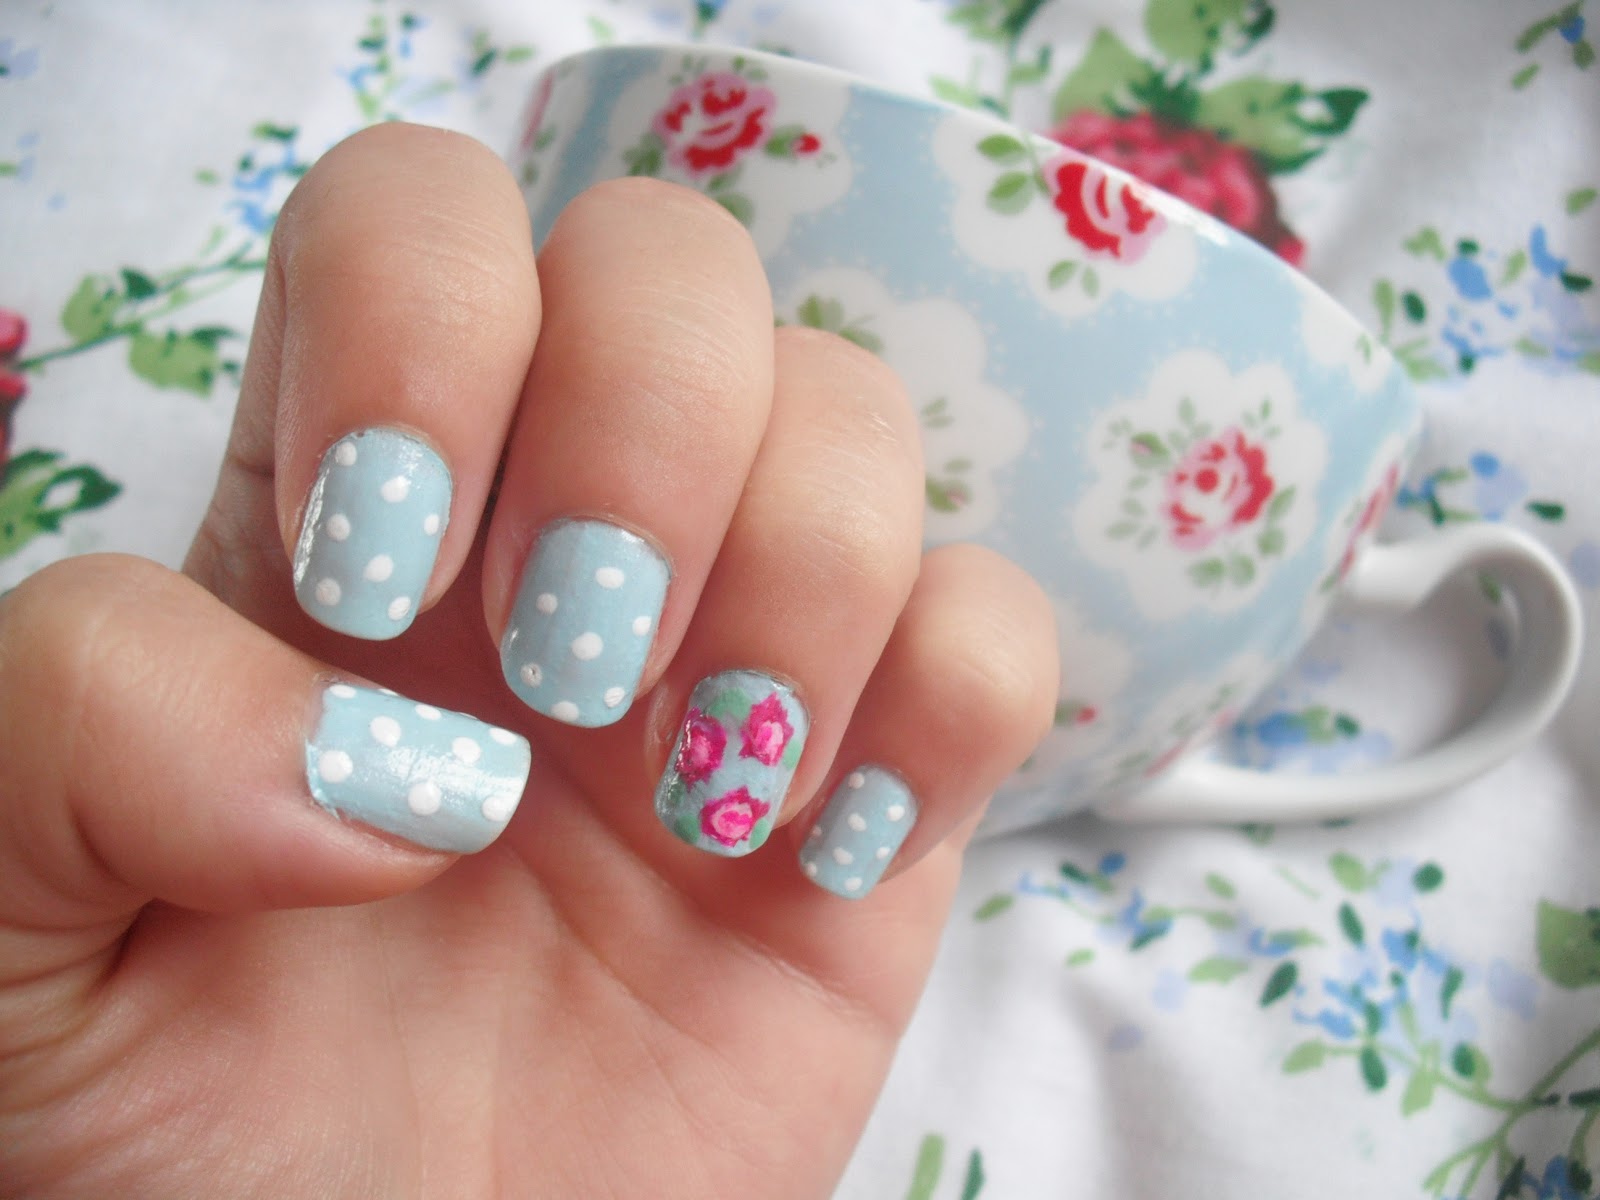
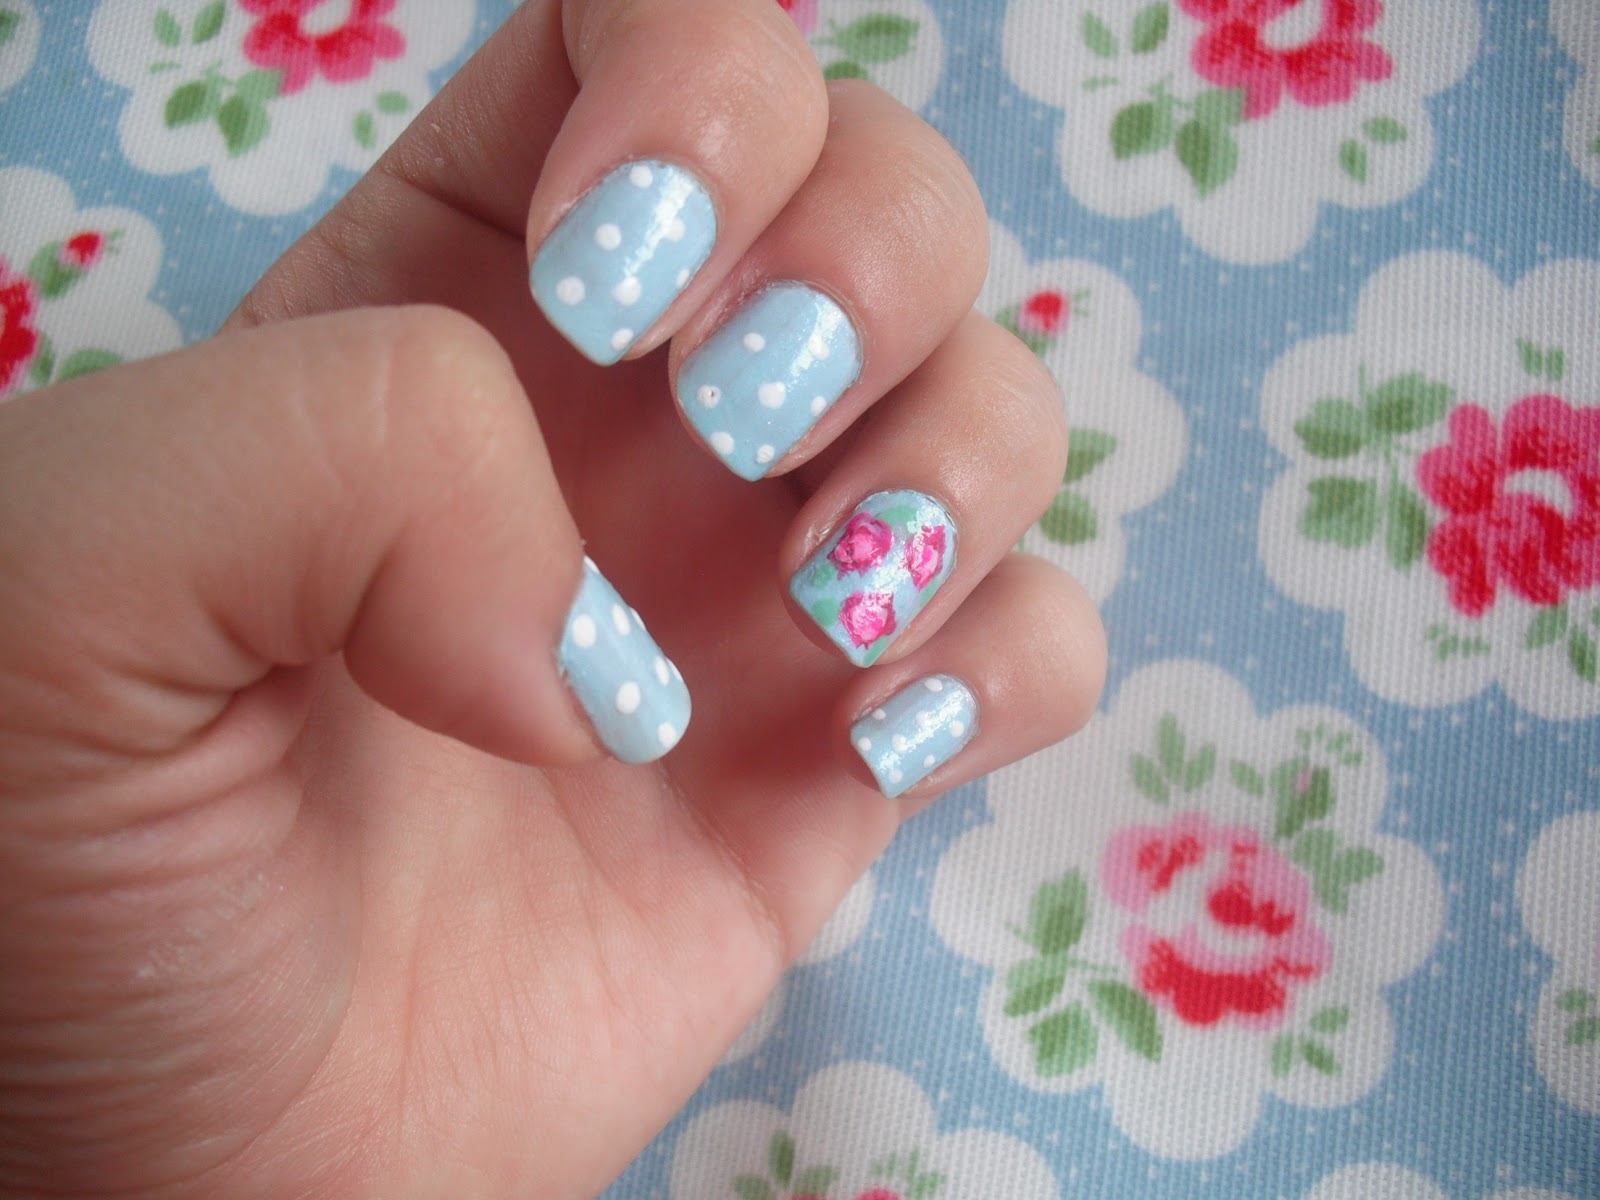
Cath Kidston-Inspired Floral Nails
 To create a floral design inspired by Cath Kidston, start by applying a base coat to protect your nails and help the polish last longer. Next, paint your nails with a white base coat and let it dry completely. Then, using your fine-tipped brush or toothpick, create small flowers on your nails using the pastel colors of your choice. You can also add some leaves and other details to make the design more intricate. Once you're happy with the design, seal it with a top coat and let it dry. For an extra touch of elegance, you can add some nail art gems or pearls to the center of the flowers.
Pastel Polka Dot Nails
 Another iconic Cath Kidston design is their pastel polka dots. To recreate this look on your nails, start by painting your nails with a pastel color of your choice. Once it's dry, use a toothpick or dotting tool to create small dots all over your nails in a contrasting pastel color. You can also add some larger dots in white for a more whimsical touch. Seal the design with a top coat and let it dry.
Final Thoughts
 With these simple and beautiful nail art designs inspired by Cath Kidston, you can add a touch of vintage charm to your everyday look. Play around with different colors and patterns to create your own unique designs and have fun with it! Don't forget to tag us in your creations on social media using
#CathKidstonNails
. Happy painting!
With these simple and beautiful nail art designs inspired by Cath Kidston, you can add a touch of vintage charm to your everyday look. Play around with different colors and patterns to create your own unique designs and have fun with it! Don't forget to tag us in your creations on social media using
#CathKidstonNails
. Happy painting!


