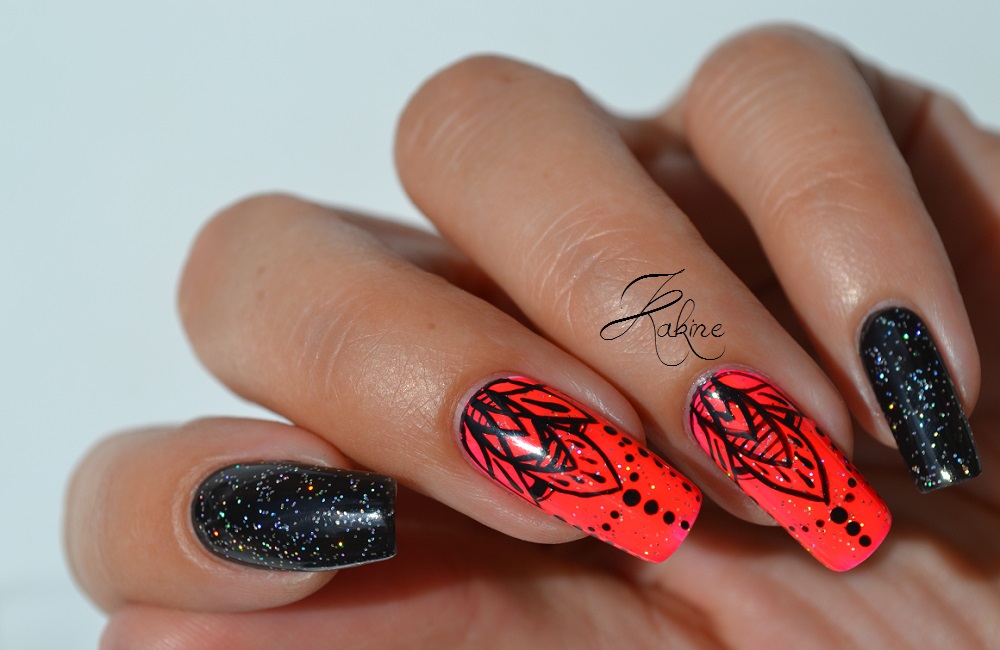
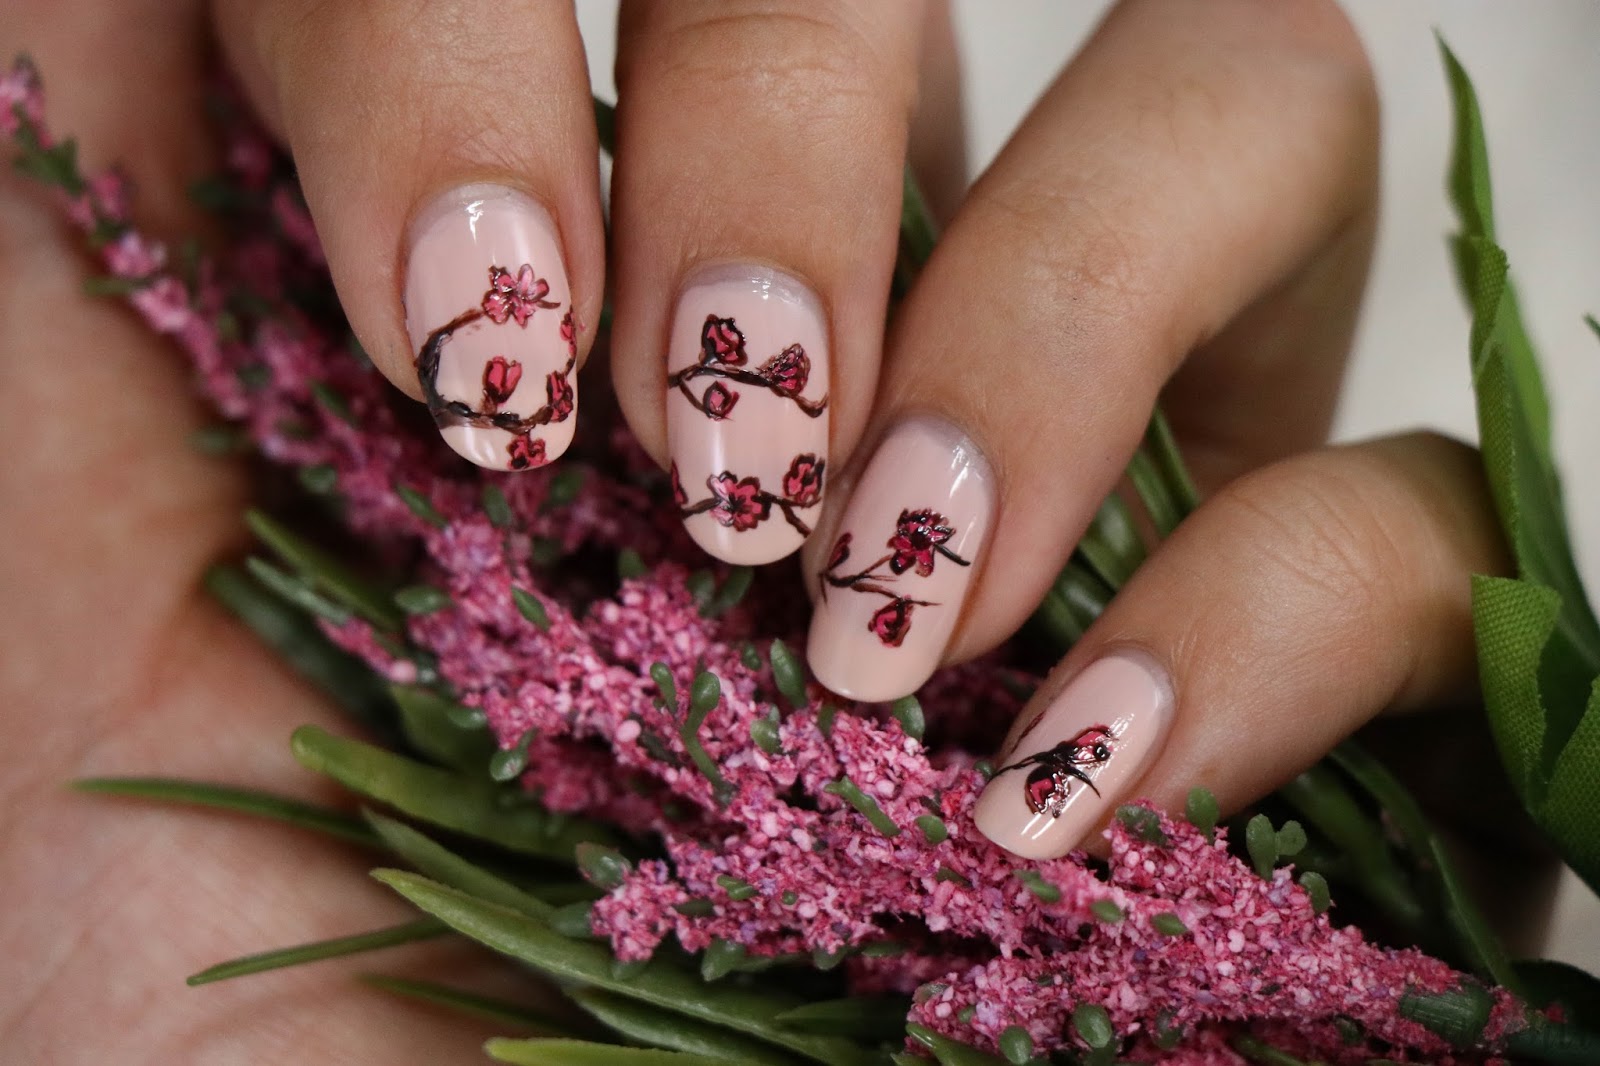
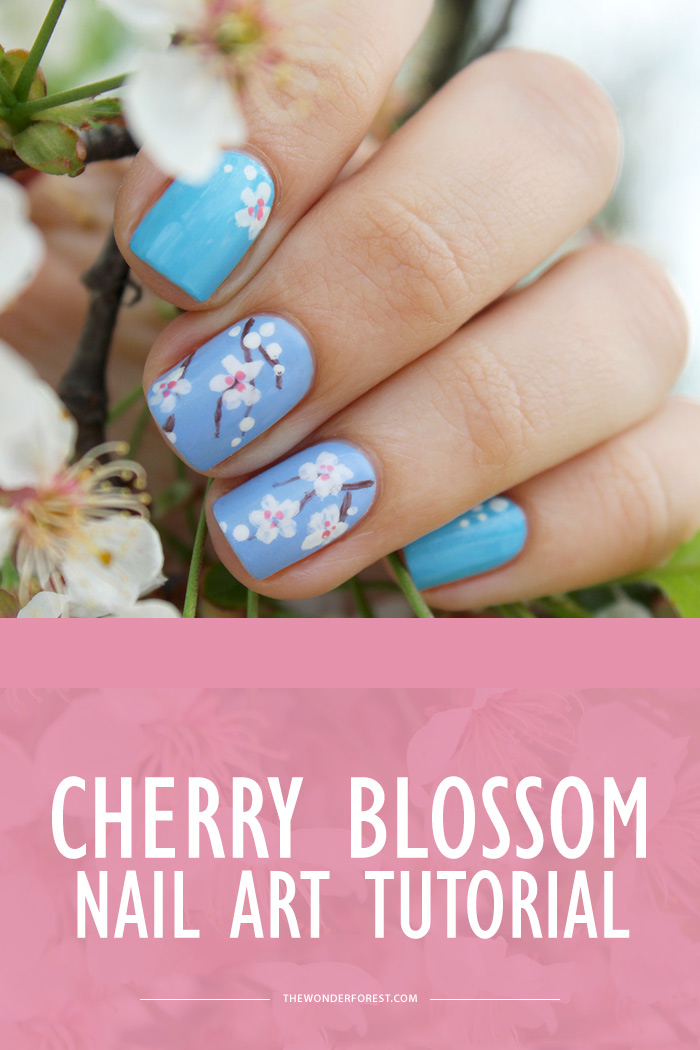
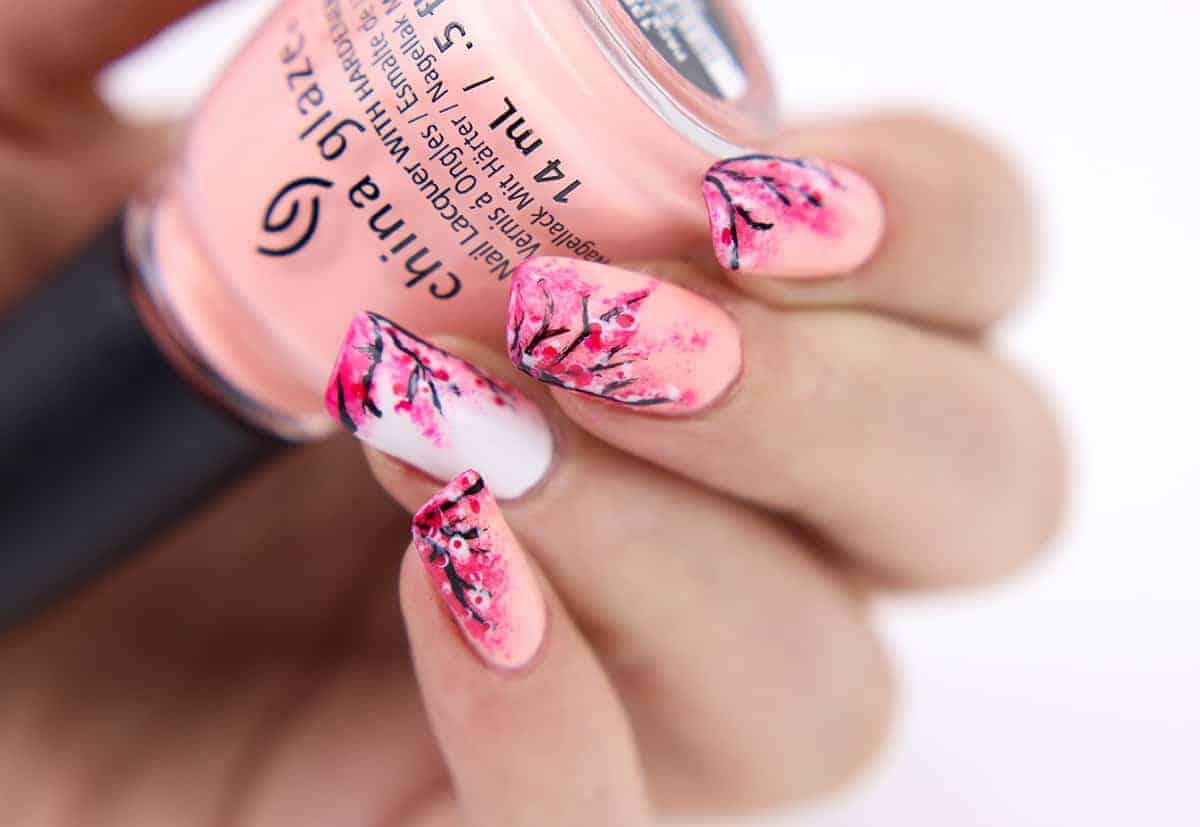
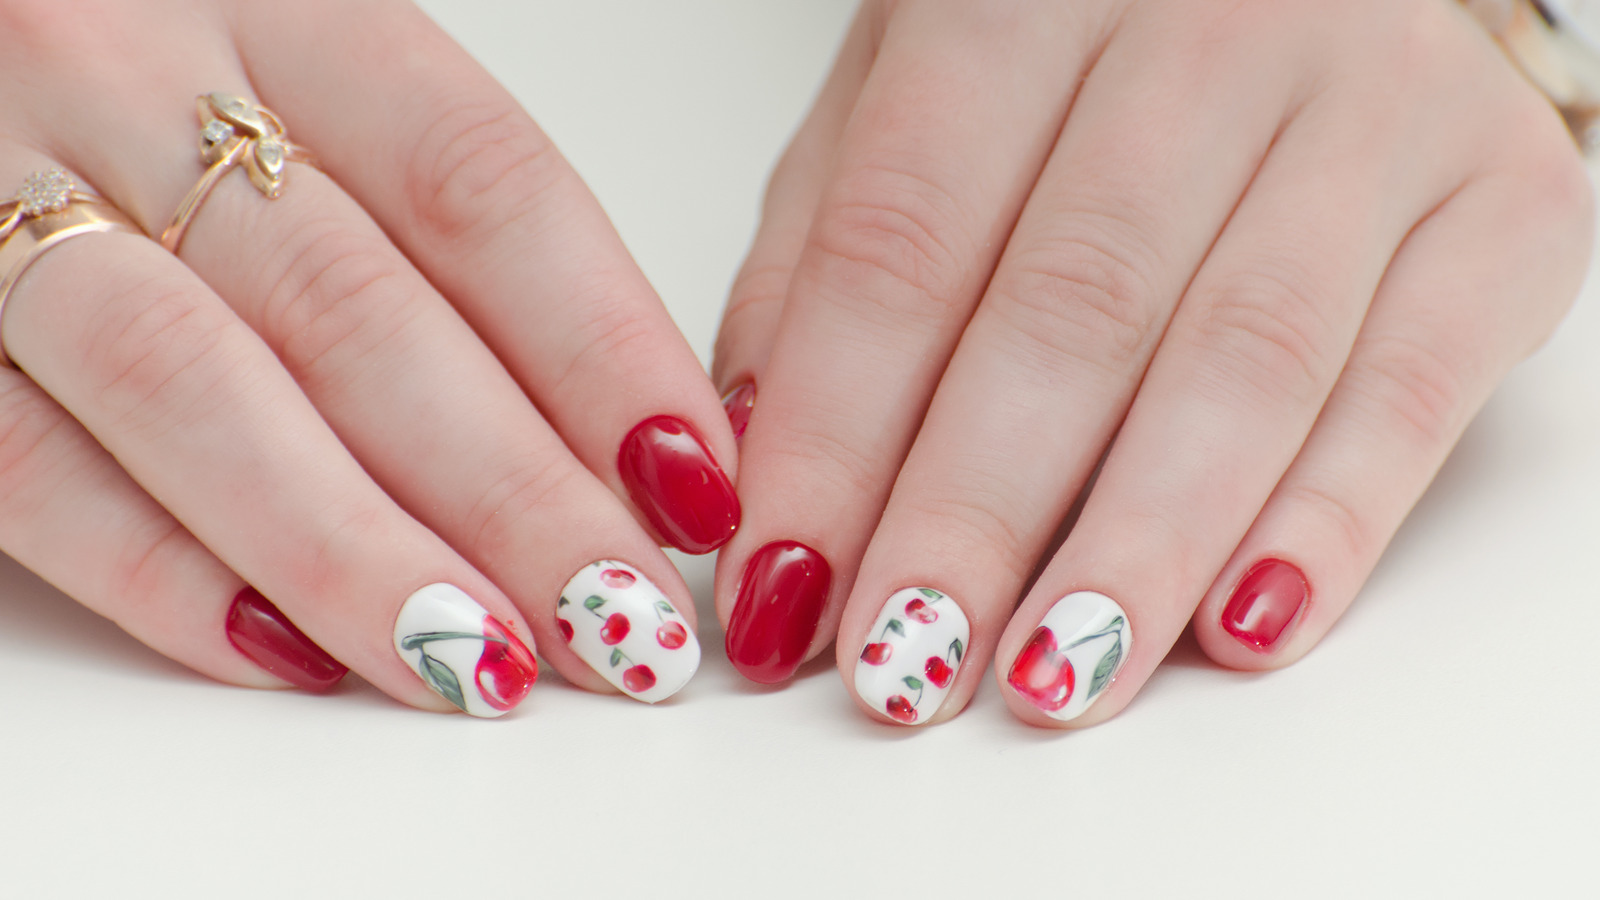
Create a stunning cherry blossom mandala nail art design with this step-by-step tutorial. With just a few simple tools and some patience, you can achieve a beautiful and intricate look that is perfect for any occasion. To begin, you will need a base coat, a white nail polish, a light pink nail polish, a dark pink or red nail polish, a black nail polish, a dotting tool, and a thin nail art brush. Start by applying a base coat to protect your nails and help your nail polish last longer. Then, paint all of your nails with the white nail polish. Let it dry completely before moving on to the next step. Next, take your light pink nail polish and create a small circle in the center of your nail. This will be the center of your cherry blossom mandala. Using your dotting tool, dip it into the dark pink or red nail polish and create five dots around the center circle. These dots will represent the petals of the cherry blossom. With your thin nail art brush, carefully connect the dots to create a flower shape. Don't worry if it's not perfect, as the imperfect lines will add to the overall look of the design. Repeat this process on each nail, creating a different sized cherry blossom mandala on each one. You can also alternate between using dark pink and red nail polish to add variety to your design. Once all of your flowers are complete, take your black nail polish and create small dots in the center of each flower. This will add depth and detail to your design. Finally, seal your design with a top coat to protect it and give it a glossy finish. And just like that, you have a beautiful cherry blossom mandala nail art design. With practice, you can create more intricate designs and experiment with different colors to make your cherry blossom mandalas truly unique.Cherry Blossom Mandala Nail Art Tutorial


Cherry Blossom Mandala Nail Art Tutorial
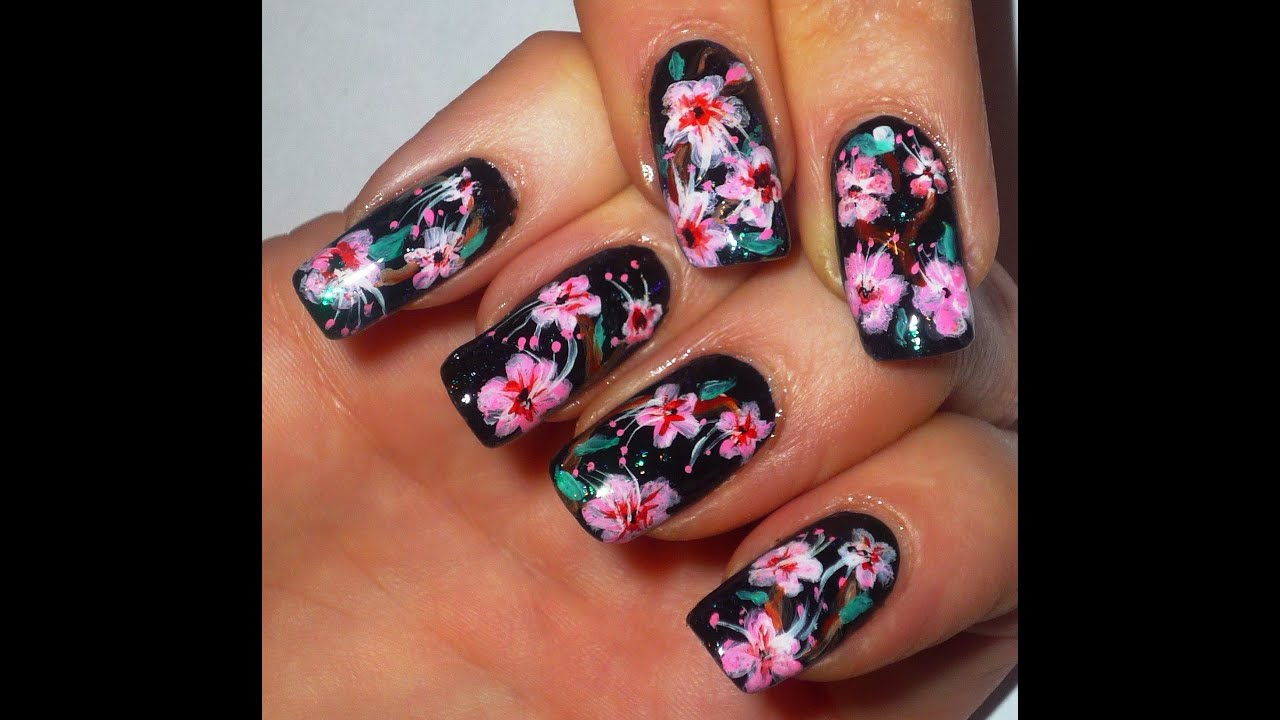


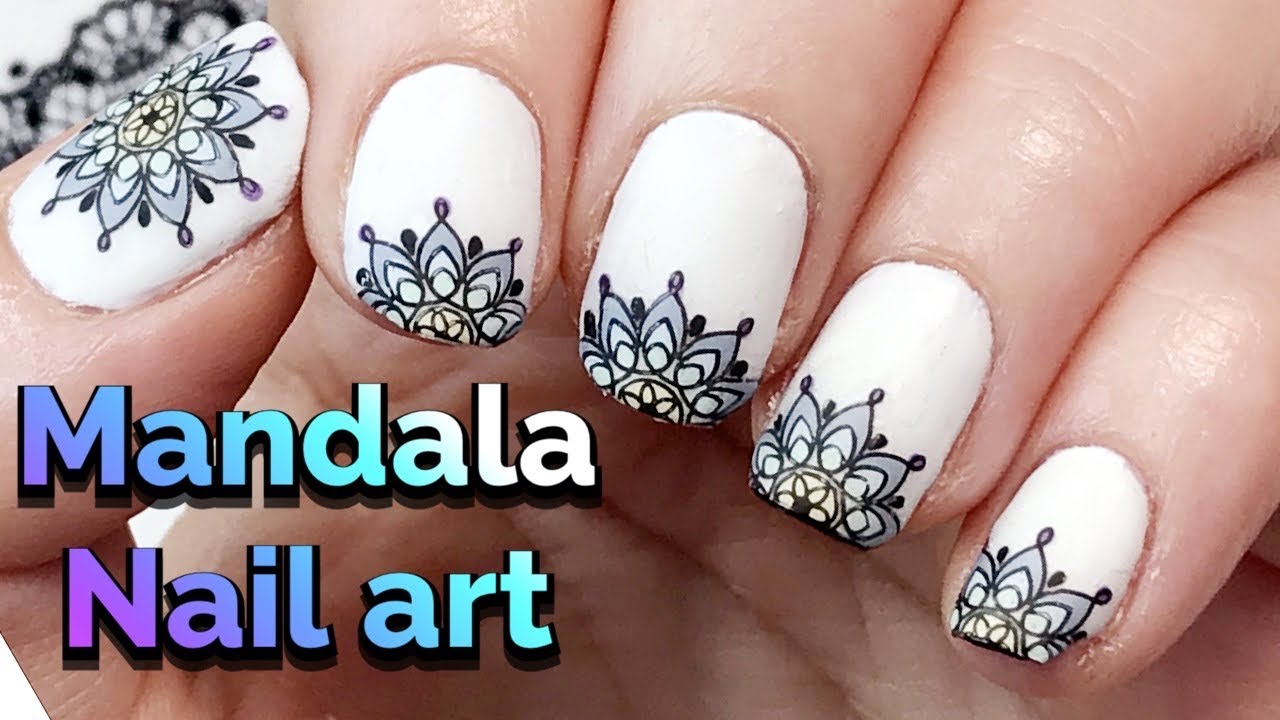
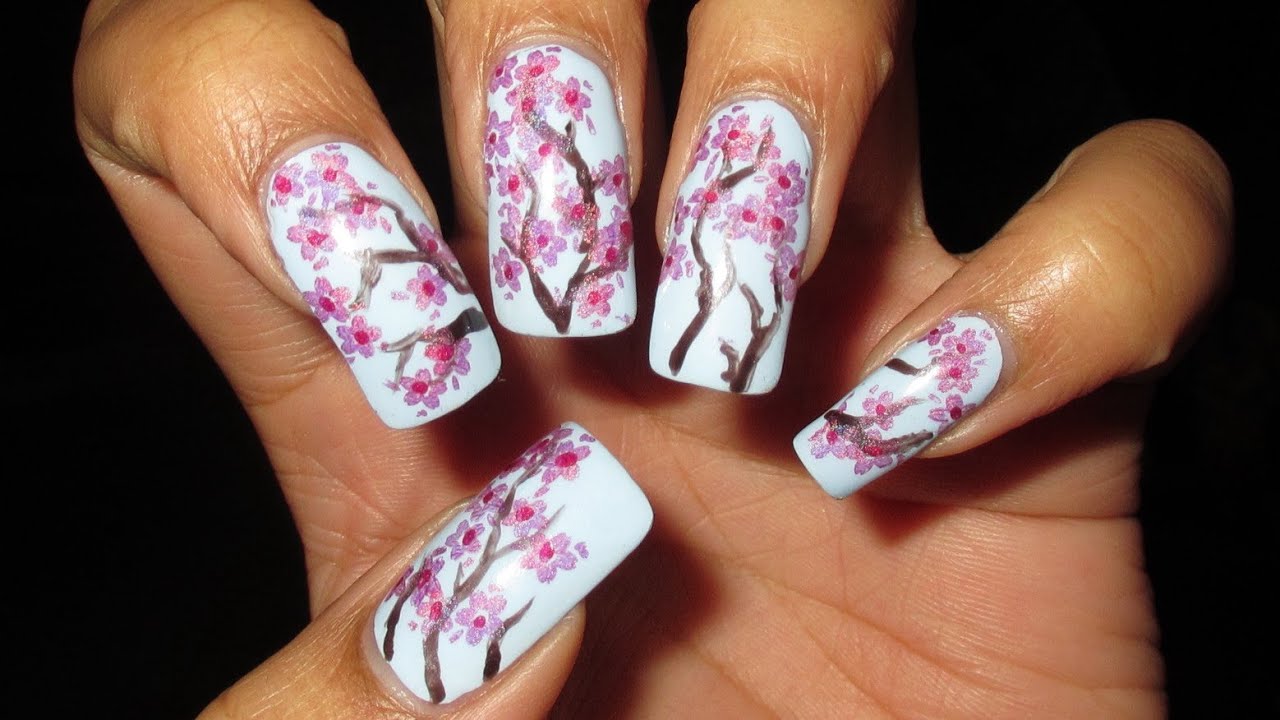
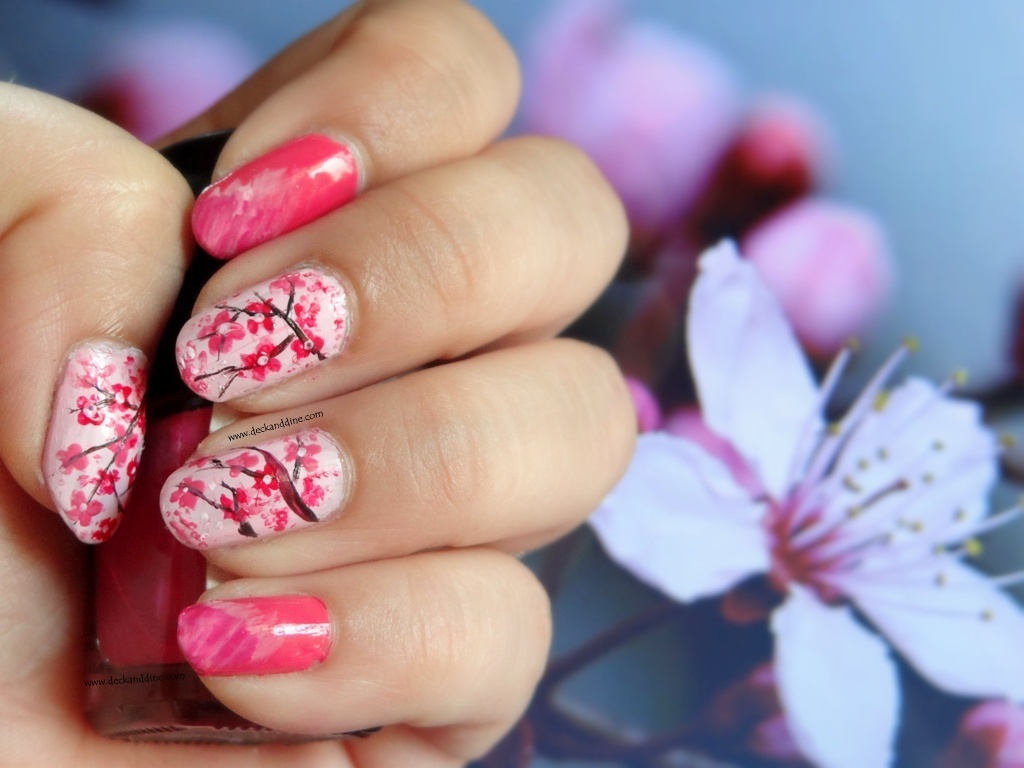
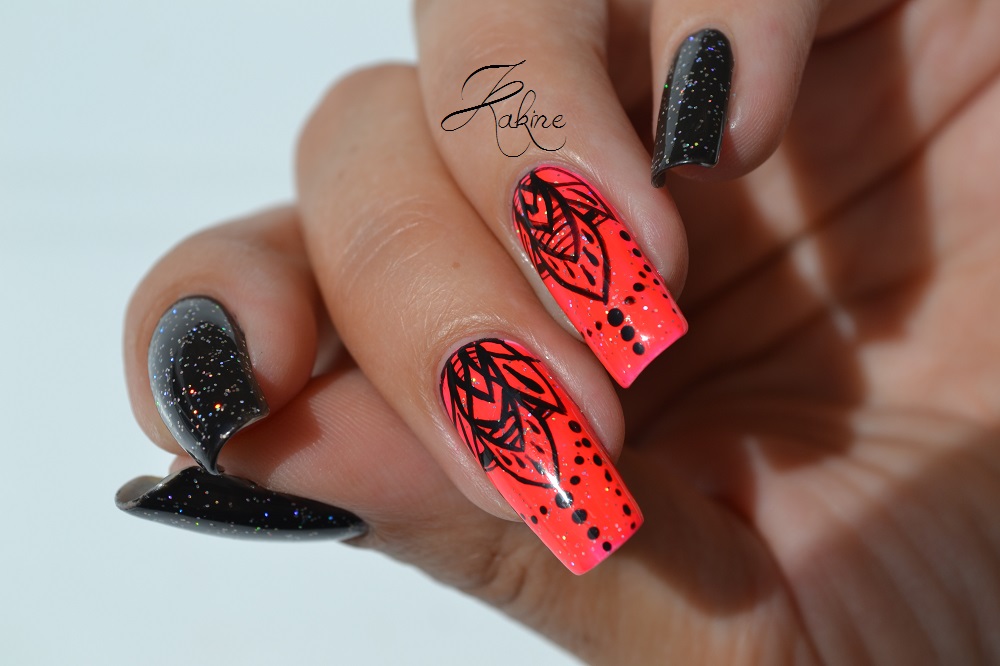
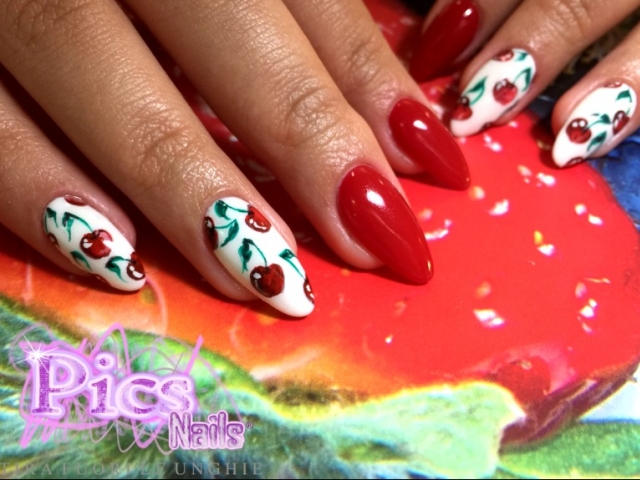
If you're looking for a delicate and feminine nail art design, then a cherry blossom mandala is the perfect choice. The combination of the soft pink flowers and the intricate mandala pattern creates a stunning look that will surely catch everyone's attention. To create this design, you will need a base coat, a light pink nail polish, a dark pink or red nail polish, a white nail polish, a black nail polish, a dotting tool, and a thin nail art brush. Start by applying a base coat to your nails to protect them and help your nail polish last longer. Then, paint all of your nails with the light pink nail polish. You can also use a light purple or peach shade for a twist on the traditional cherry blossom colors. Next, take your dotting tool and create five dots in a circle on each nail. These dots will represent the petals of the cherry blossom. Using your thin nail art brush, carefully connect the dots to create a flower shape. You can also add extra petals to make the flowers look fuller and more realistic. Once all of your flowers are complete, take your black nail polish and create small dots in the center of each one. This will add depth and detail to your design. Now it's time to add the mandala pattern. Using your thin nail art brush, create a large circle around each flower, leaving some space between the circle and the edge of your nail. Then, create smaller circles and lines within the larger circle to create the intricate mandala design. Repeat this process on each nail, creating a unique mandala pattern on each one. You can also alternate between using black and white nail polish to add contrast to your design. Finish off with a top coat to seal your design and give it a glossy finish. Your cherry blossom mandala nail art is now complete and ready to show off.Cherry Blossom Mandala Nail Art Design


Cherry Blossom Mandala Nail Art Design


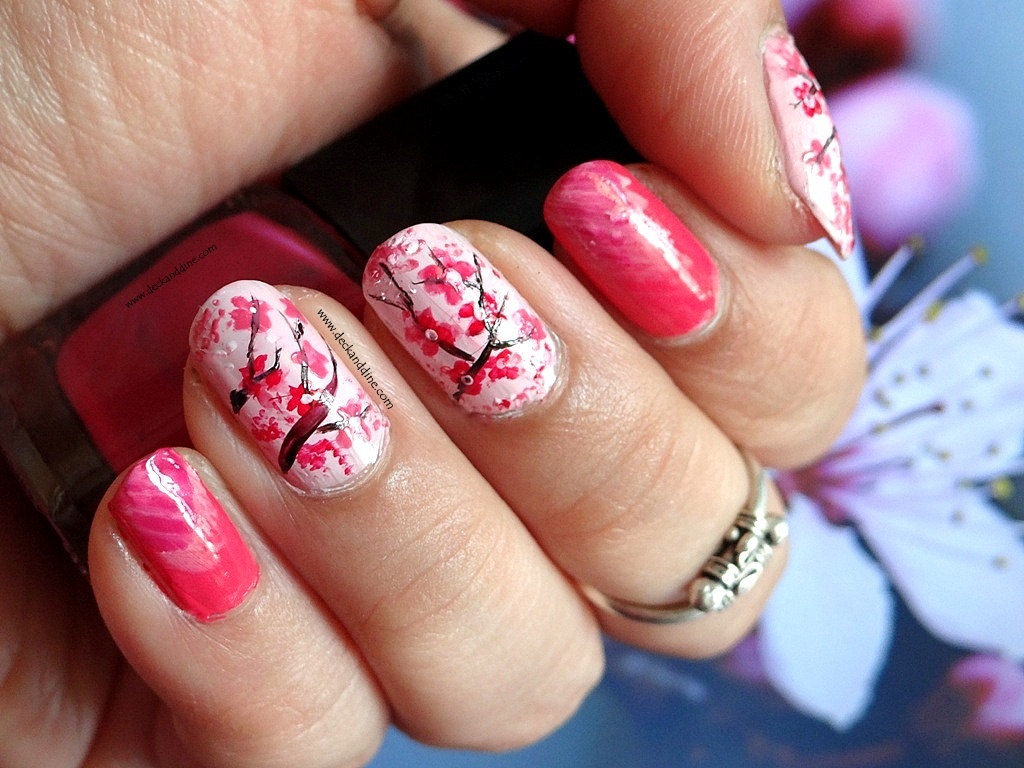
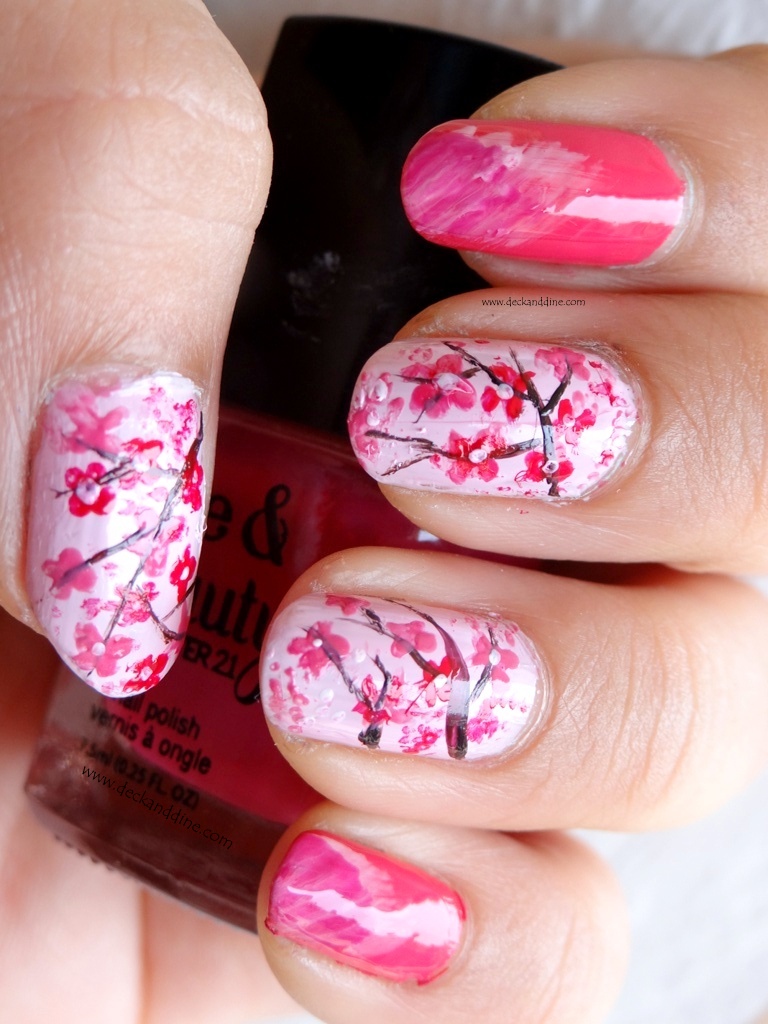
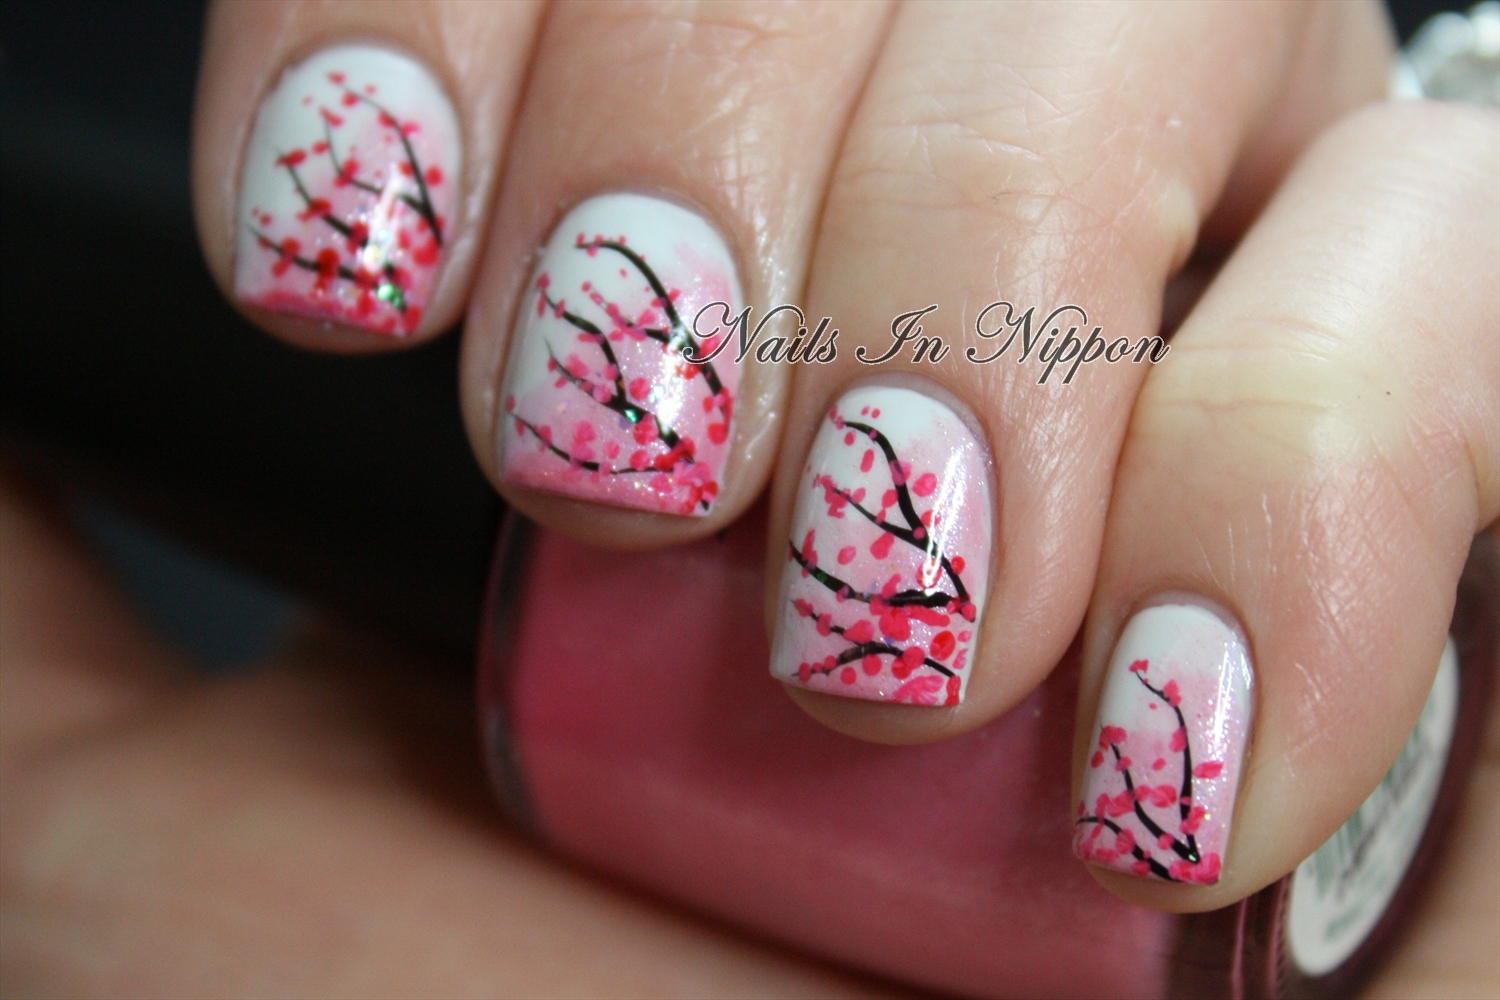
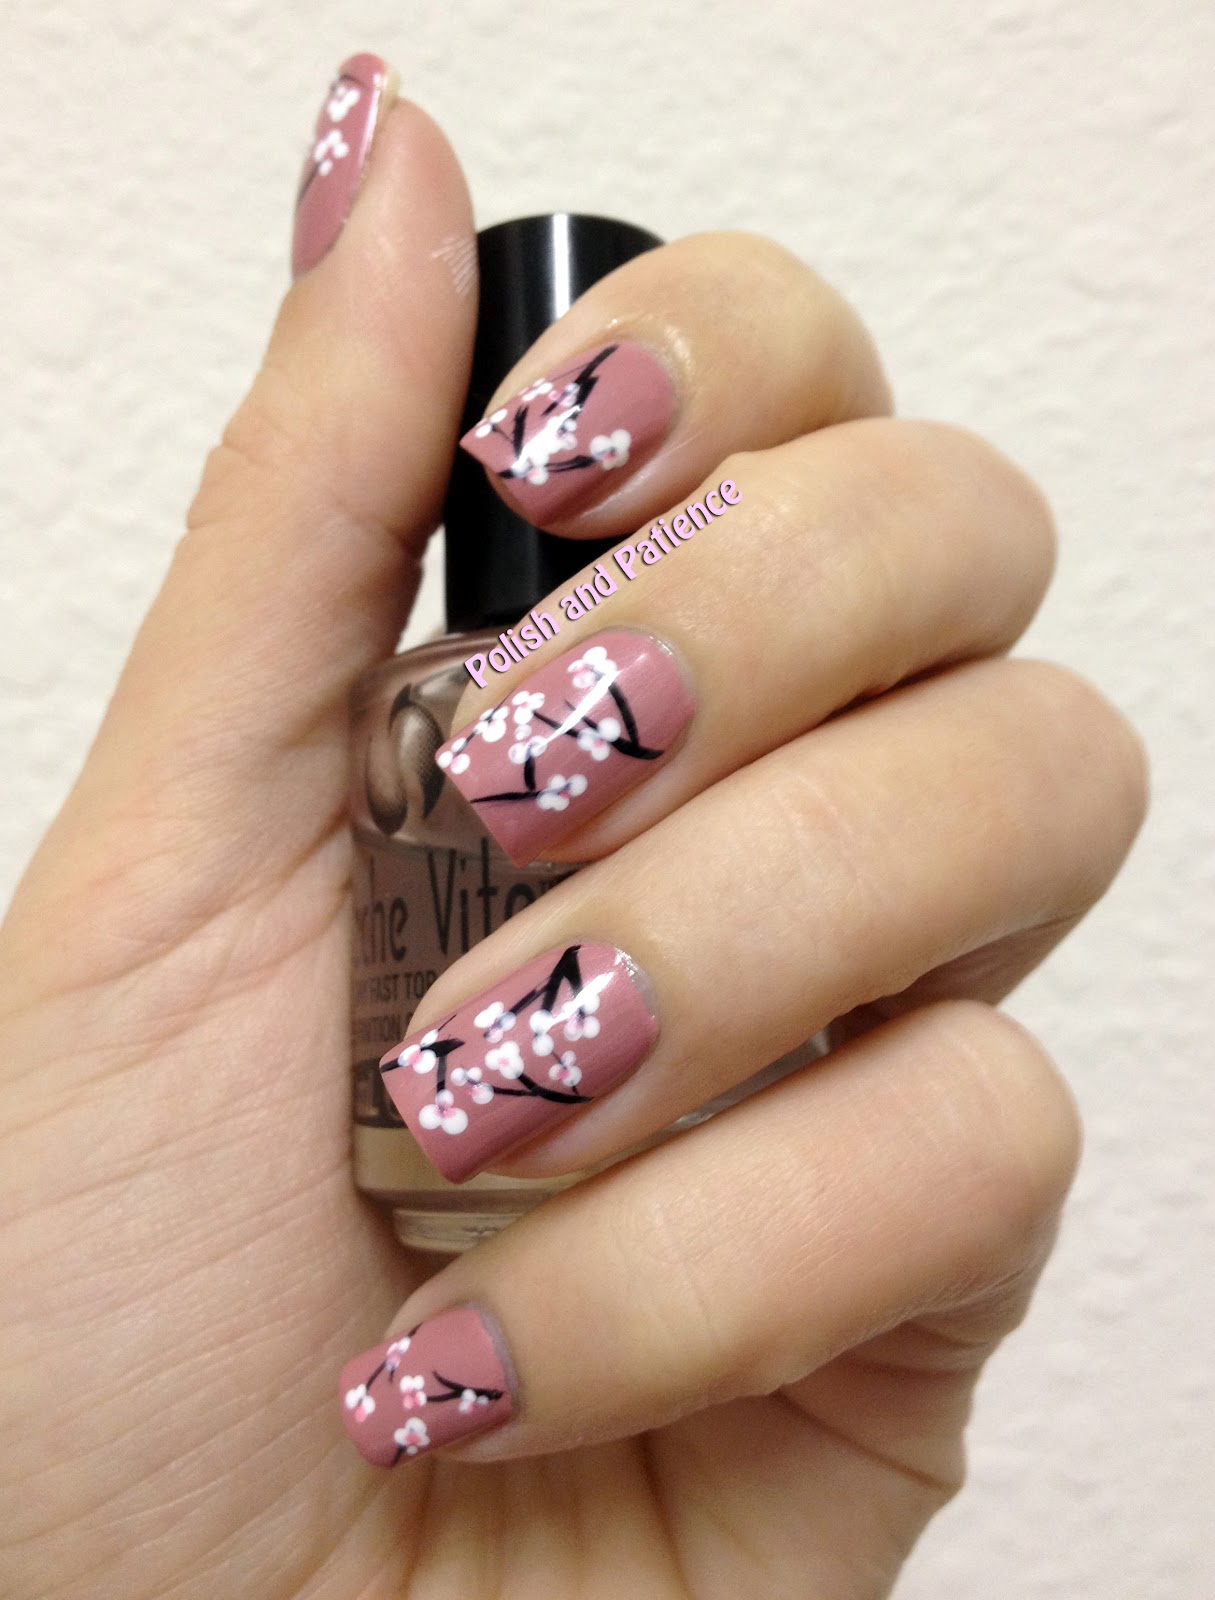
Creating a cherry blossom mandala nail art design may seem intimidating, but with these step-by-step instructions, you'll be able to achieve a beautiful and intricate look in no time. For this design, you will need a base coat, a light pink nail polish, a dark pink or red nail polish, a white nail polish, a black nail polish, a dotting tool, and a thin nail art brush. Start by applying a base coat to your nails to protect them and help your nail polish last longer. Then, paint all of your nails with the white nail polish. Using your dotting tool, create a small circle in the center of each nail. This will be the center of your cherry blossom mandala. Next, take your dark pink or red nail polish and create five dots around the center circle. These dots will represent the petals of the cherry blossom. Using your thin nail art brush, carefully connect the dots to create a flower shape. Don't worry if it's not perfect, as the imperfect lines will add to the overall look of the design. Repeat this process on each nail, creating a different sized cherry blossom mandala on each one. You can also alternate between using dark pink and red nail polish to add variety to your design. Once all of your flowers are complete, take your black nail polish and create small dots in the center of each flower. This will add depth and detail to your design. Finally, use your thin nail art brush to create a large circle around each flower, leaving some space between the circle and the edge of your nail. Then, create smaller circles and lines within the larger circle to create the intricate mandala pattern. Seal your design with a top coat to protect it and give it a glossy finish. Your cherry blossom mandala nail art is now complete.Cherry Blossom Mandala Nail Art Step by Step
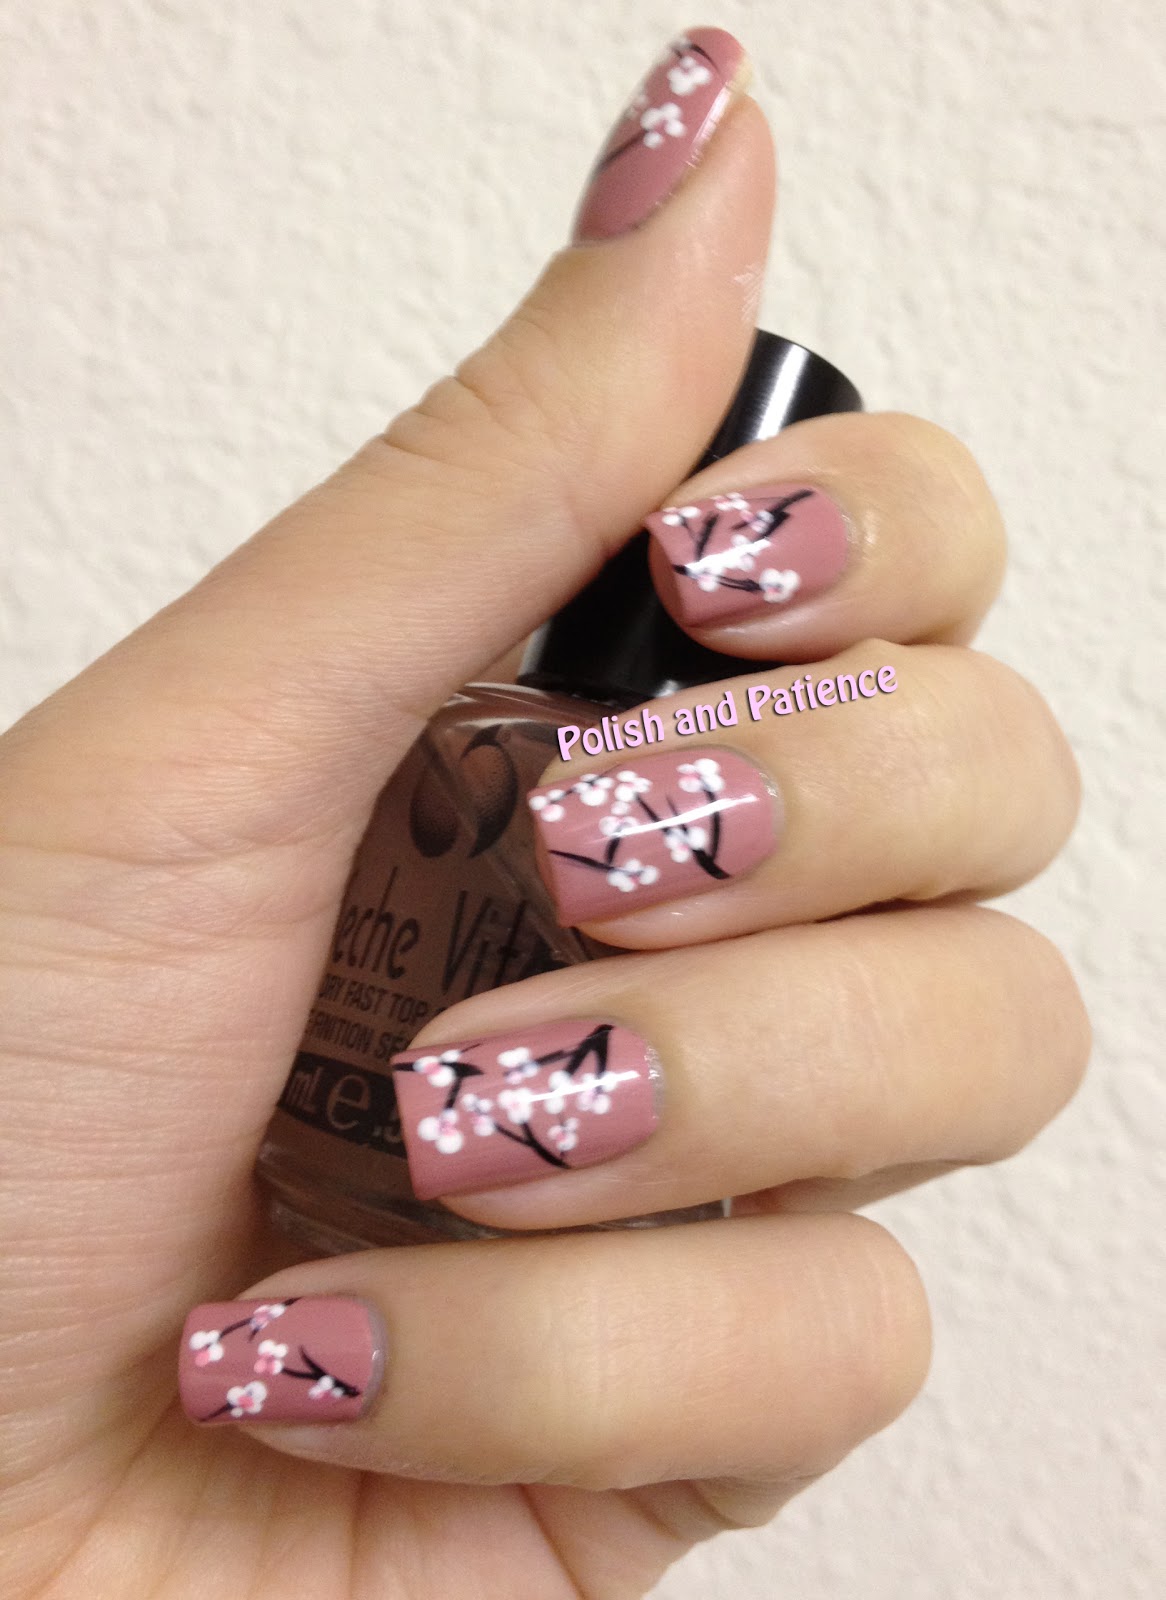

Cherry Blossom Mandala Nail Art Step by Step
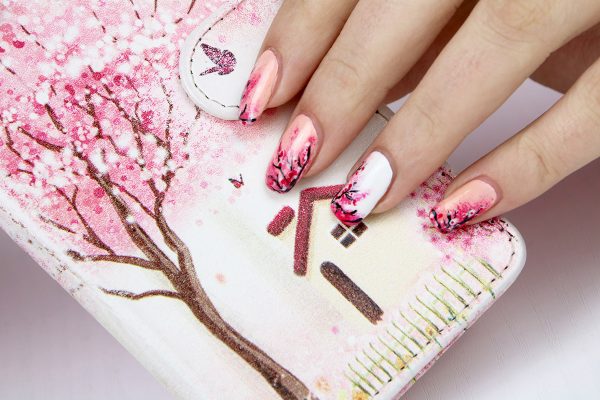
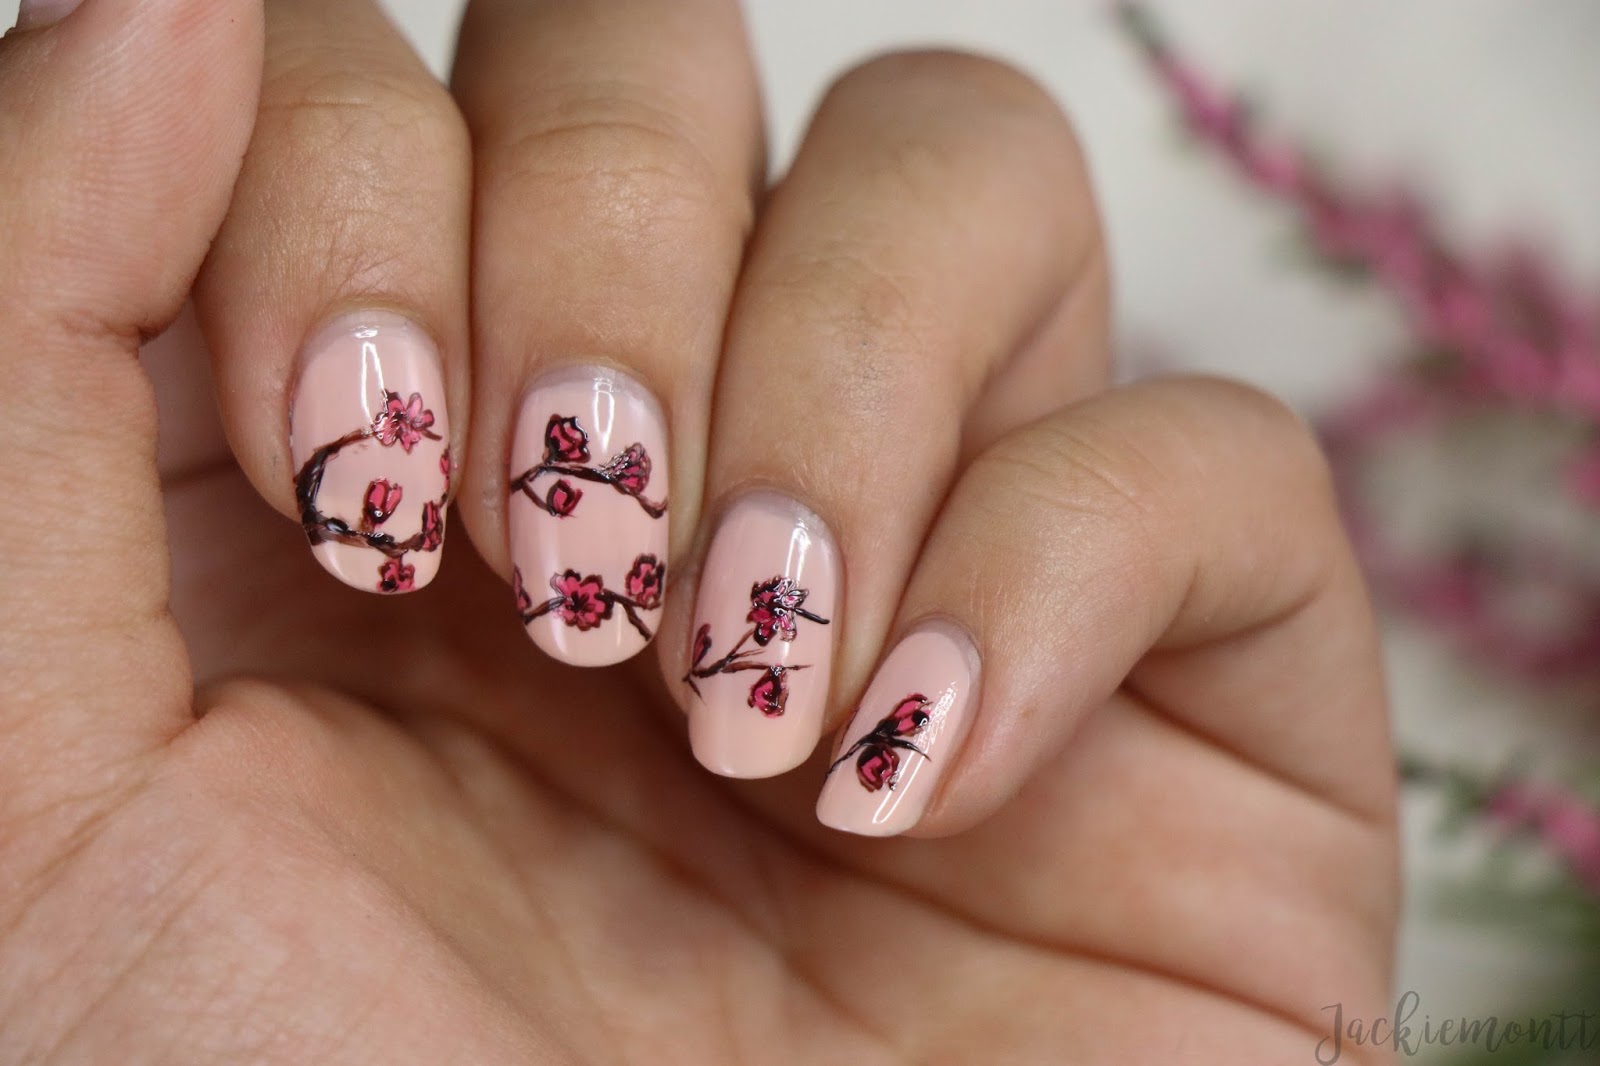

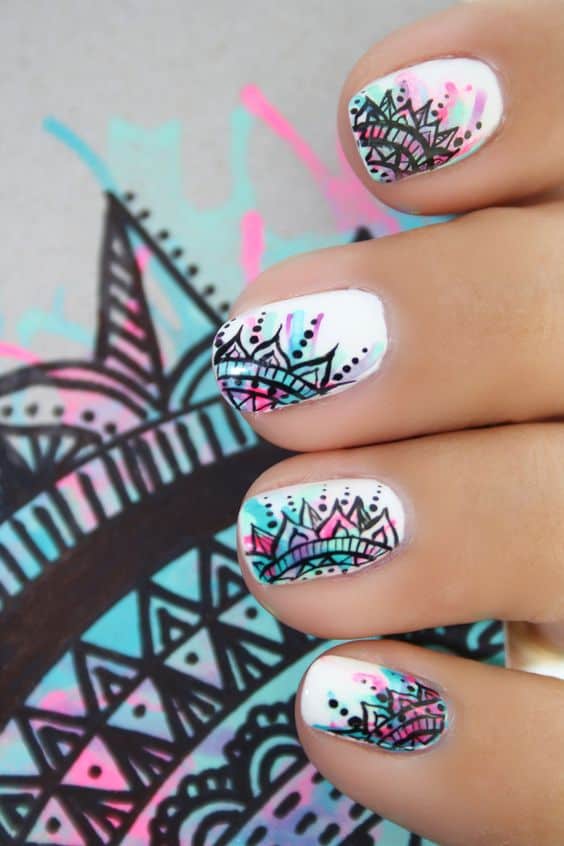
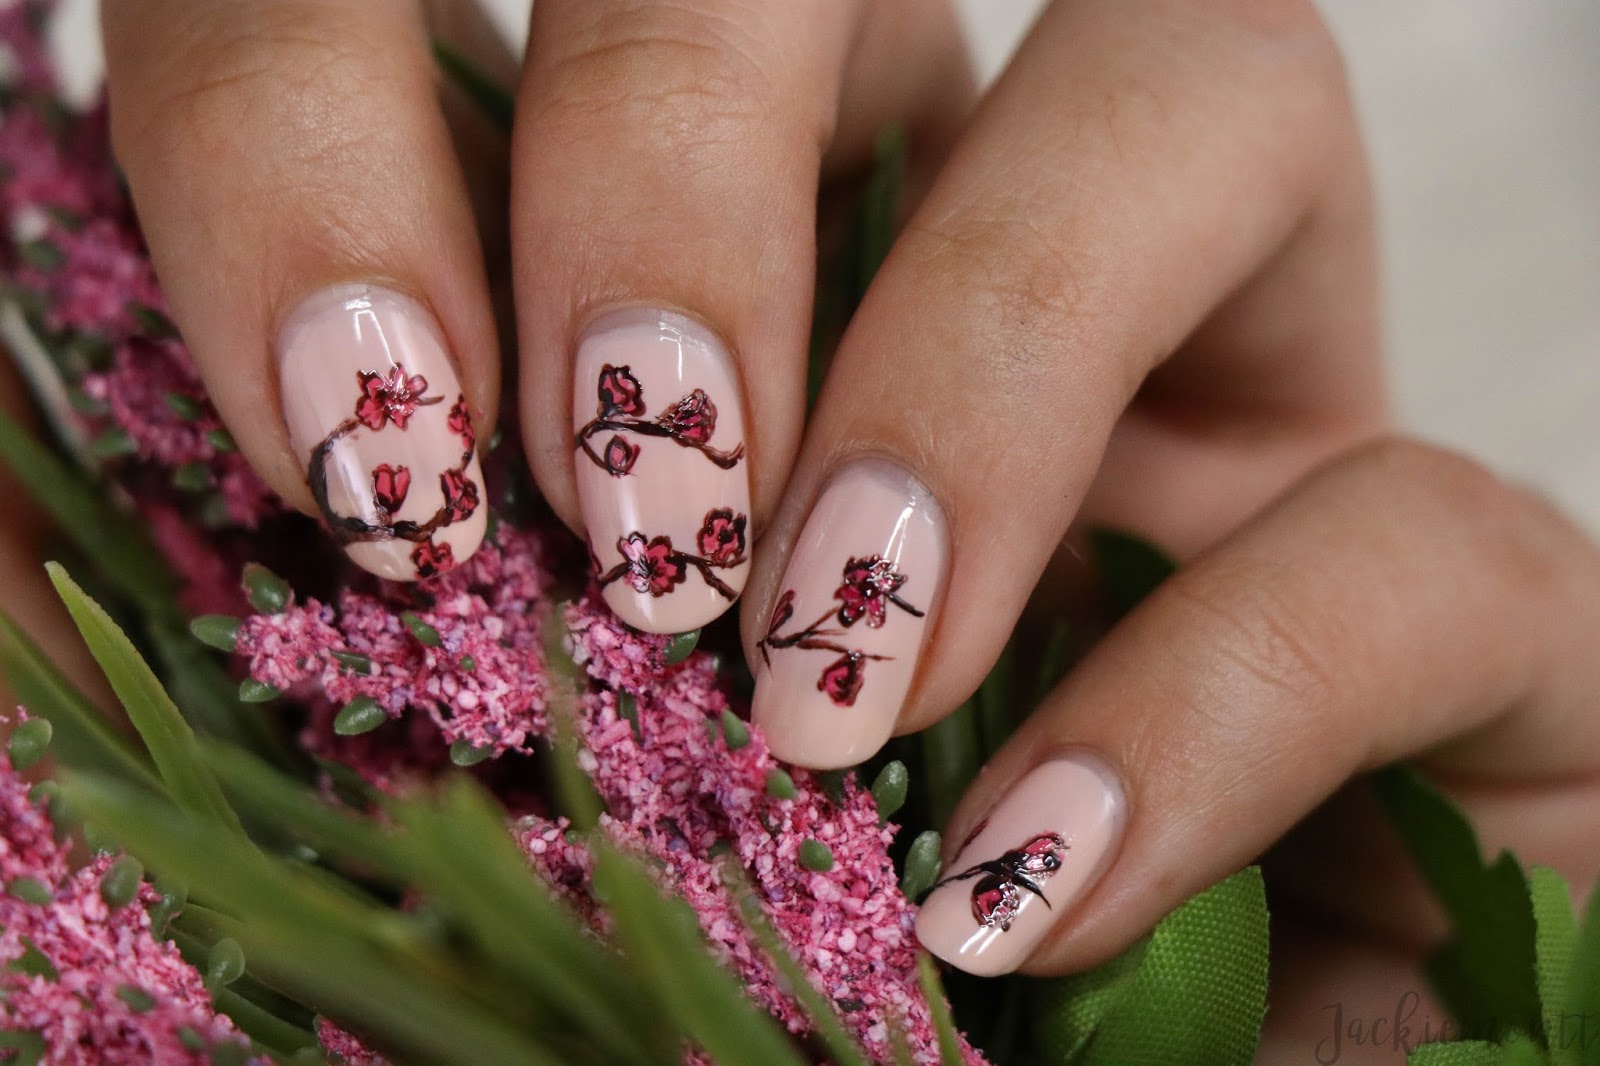
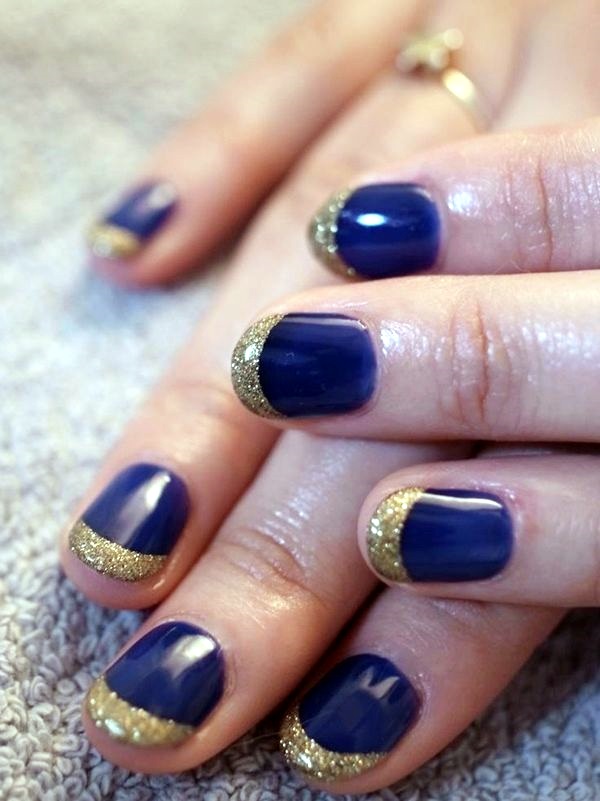
Looking for some inspiration for your cherry blossom mandala nail art? Here are a few ideas to get you started: - Create a gradient effect by using different shades of pink for your flowers. - Add some sparkle to your design by using rhinestones or glitter on some of the flowers. - Experiment with different base colors, such as light purple, peach, or even black. - Use a metallic nail polish for the mandala pattern for a bold and eye-catching look. - Add some leaves or branches to your design to make it look like a cherry blossom tree. - Create a negative space look by leaving some of your nails unpainted and creating the design on the bare nail. These are just a few ideas to help you get creative and make your cherry blossom mandala nail art truly unique.Cherry Blossom Mandala Nail Art Ideas
Cherry Blossom Mandala Nail Art Ideas

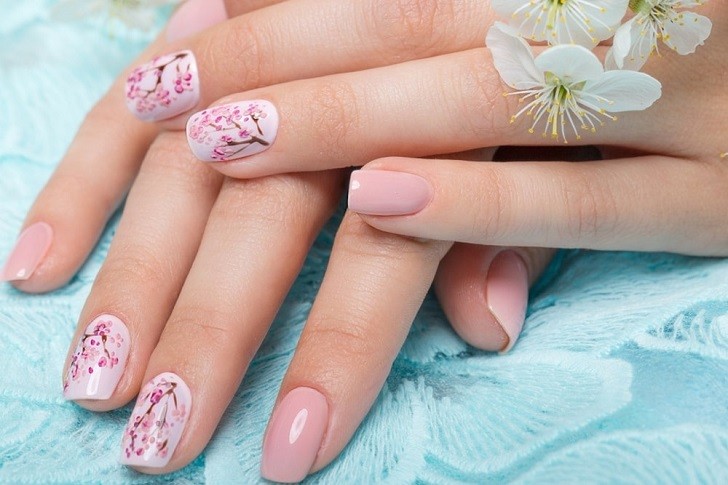
If you're new to nail art, don't worry! This cherry blossom mandala design is perfect for beginners. With just a few simple tools and some patience, you can achieve a beautiful and intricate look. Start by gathering your tools, including a base coat, a light pink nail polish, a dark pink or red nail polish, a white nail polish, a black nail polish, a dotting tool, and a thin nail art brush. Begin by applying a base coat to your nails to protect them and help your nail polish last longer. Then, paint all of your nails with the white nail polish. Next, use your dotting tool to create a small circle in the center of each nail. Then, create five dots around the circle with your dark pink or red nail polish. Using your thin nail art brush, carefully connect the dots to create a flower shape. It's okay if the lines aren't perfect, as the imperfect look adds to the overall design. Repeat this process on each nail, creating different sized flowers on each one. Then, add small black dots in the center of each flower for added detail. Finally, use your thin nail art brush to create a large circle around each flower. Then, create smaller circles and lines within the larger circle to create the intricate mandala pattern. Seal your design with a top coat, and your cherry blossom mandala nail art is complete. With practice, you can achieve more detailed and intricate designs.Cherry Blossom Mandala Nail Art for Beginners

Cherry Blossom Mandala Nail Art for Beginners
If you're short on time or don't have the patience for intricate nail art, you can still achieve a beautiful cherry blossom mandala look with the help of nail art stickers. These stickers come in a variety of designs and can easily be applied to your nails for a quick and easy manicure. To use nail art stickers, start by applying a base coat to your nails. Then, paint your nails with a light pink nail polish and let them dry completely. Next, choose your desired cherry blossom mandala sticker and carefully apply it to your nail. You may need to use a pair of tweezers to help position the sticker correctly. Once the sticker is in place, use a top coat to seal it and protect your design. And just like that, you have a beautiful cherry blossom mandala nail art design without all the fuss.Cherry Blossom Mandala Nail Art Stickers

Cherry Blossom Mandala Nail Art Stickers

To create a cherry blossom mandala nail art design, you will need a few basic supplies: - Base coat - Light pink nail polish - Dark pink or red nail polish - White nail polish - Black nail polish - Dotting tool - Thin nail art brush - Top coat These supplies can easily be found at your local drugstore or beauty supply store. You can also find a variety of nail art tools and supplies online for more options and variety.Cherry Blossom Mandala Nail Art Supplies

Cherry Blossom Mandala Nail Art Supplies

If you have shorter nails, you may think that intricate nail art designs are out of your reach. However, with a few adjustments, you can still achieve a beautiful cherry blossom mandala design on your shorter nails. Start by following the same steps as you would for longer nails, including applying a base coat and painting your nails with a light pink polish. Then, use your dotting tool and thin nail art brush to create smaller flowers and a smaller mandala pattern on your nails. You can also use nail art stickers specifically designed for shorter nails to achieve the same look with less effort. Don't let shorter nails stop you from experimenting with fun and intricate nail art designs.Cherry Blossom Mandala Nail Art Designs for Short Nails

Cherry Blossom Mandala Nail Art Designs for Short Nails
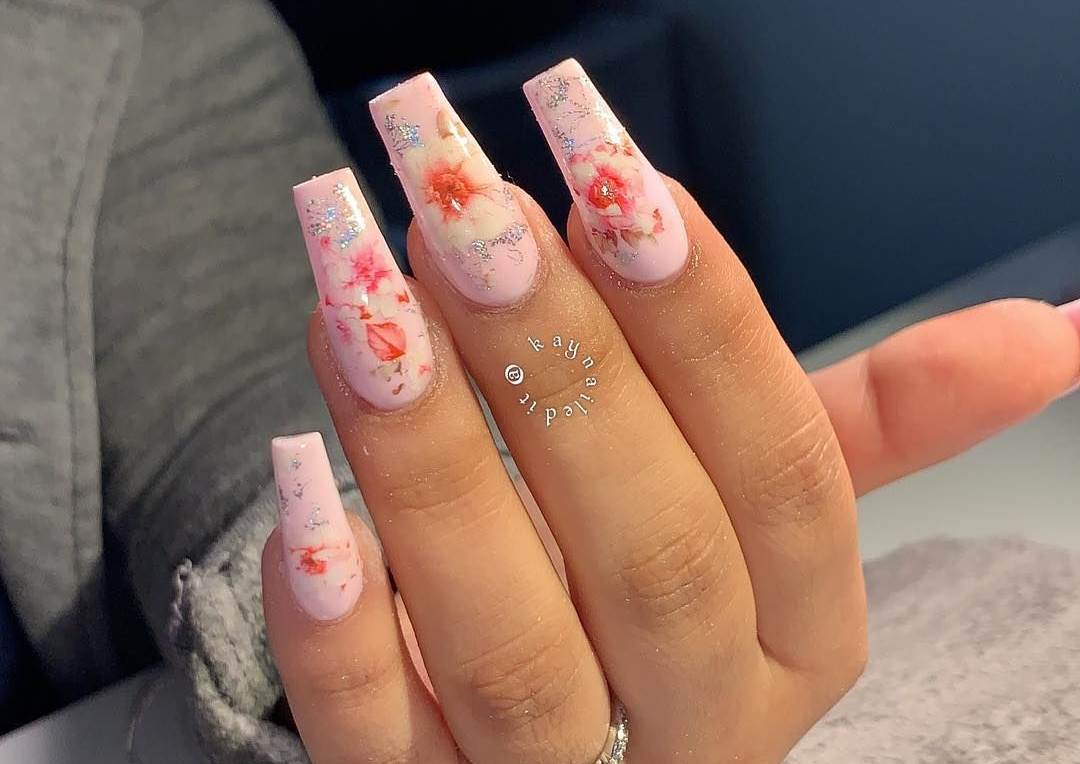


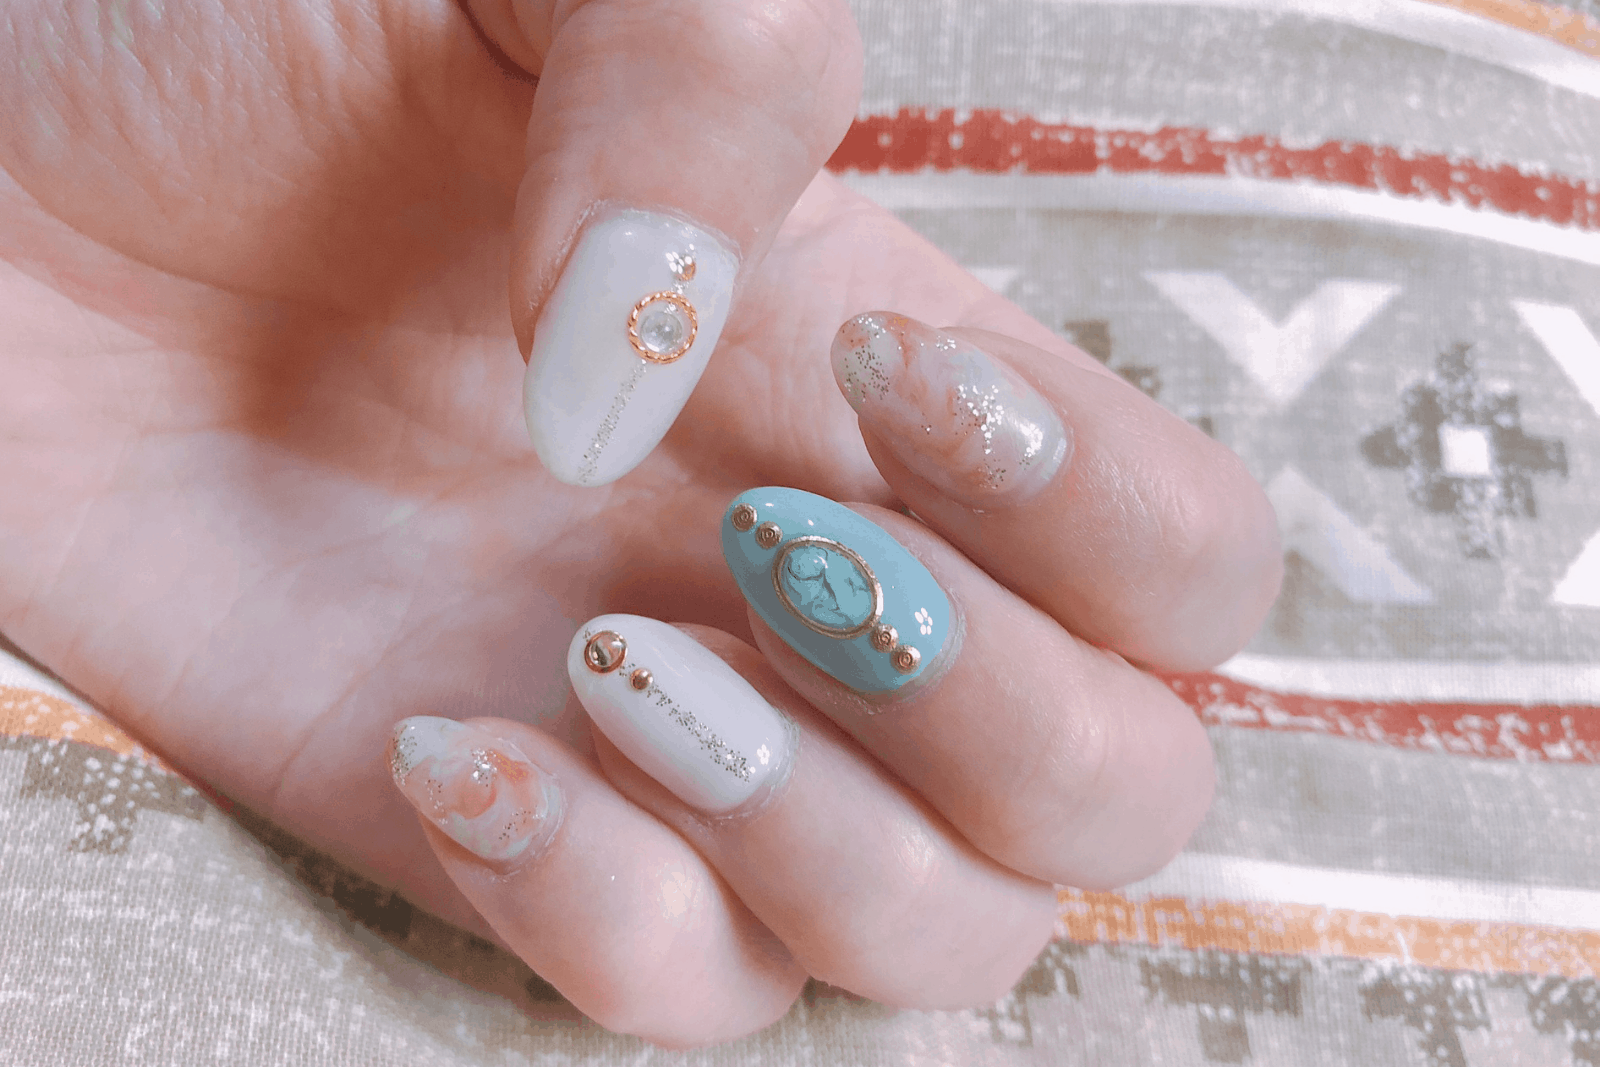
Add some sparkle and glamour to your cherry blossom mandala nail art by incorporating rhinestones into your design. This is a great way to add some extra dimension and detail to your manicure. After following the steps for creating your cherry blossom mandala design, use a small amount of clear nail polish to adhere the rhinestones onto your nails. You can also use a dotting tool or tweezers to help with placement. For a more subtle look, you can use a few rhinestones in the center of each flower. Or, for a bolder look, you can cover your entire nail with rhinestones or create a line of rhinestones along the edge of your nail. Have fun with it and get creative with your rhinestone placement to make your cherry blossom mandala nail art truly unique.Cherry Blossom Mandala Nail Art with Rhinestones


Cherry Blossom Mandala Nail Art with Rhinestones

If you're looking for a longer-lasting manicure, you can achieve a beautiful cherry blossom mandala nail art design using gel polish. Gel polish is known for its durability and can last up to two weeks without chipping. To create this design, you will need a base coat, a light pink gel polish, a dark pink or red gel polish, a white gel polish, a black gel polish, a dotting tool, and a thin nail art brush. Start by applying a base coat to your nails and curing it under a UV or LED lamp. Then, apply a coat of white gel polish and cure it under the lamp. Repeat this step until you achieve full coverage. Next, use your dotting tool and dark pink or red gel polish to create five dots in a circle on each nail. Then, use your thin nail art brush to connect the dots and create a flower shape. Once all of your flowers are complete, use your black gel polish to create small dots in the center of each one. Then, use your thin nail art brush to create the mandala pattern around the flowers. Cure your design under the lamp, and finish off with a top coat to seal your design and give it a glossy finish. Your cherry blossom mandala nail art will now last for weeks without chipping or fading.Cherry Blossom Mandala Nail Art with Gel Polish
Cherry Blossom Mandala Nail Art with Gel Polish
The Art of Cherry Nail Art Mandalas: A Beautiful Addition to Your House Design

Why Choose Cherry Nail Art Mandalas?
 If you're looking to add a touch of elegance and beauty to your home, look no further than cherry nail art mandalas. This unique and intricate design incorporates the delicate beauty of cherry blossoms with the ancient art of mandalas, creating a stunning and eye-catching addition to any house design.
Cherry nail art mandalas are more than just a decorative element. They hold deep symbolism and meaning, making them not just visually appealing but also spiritually significant. The circular shape of the mandala represents the universe, while the cherry blossoms symbolize new beginnings and the fleeting nature of life.
If you're looking to add a touch of elegance and beauty to your home, look no further than cherry nail art mandalas. This unique and intricate design incorporates the delicate beauty of cherry blossoms with the ancient art of mandalas, creating a stunning and eye-catching addition to any house design.
Cherry nail art mandalas are more than just a decorative element. They hold deep symbolism and meaning, making them not just visually appealing but also spiritually significant. The circular shape of the mandala represents the universe, while the cherry blossoms symbolize new beginnings and the fleeting nature of life.
The Process of Creating Cherry Nail Art Mandalas
 Creating a cherry nail art mandala is a meticulous process that requires skill and precision. The design is created by hand using tiny brushes and specialized tools, making each piece a unique work of art. The artist carefully chooses the placement of each cherry blossom and adds intricate details to create a sense of depth and movement within the design.
The combination of soft pink and vibrant green in the cherry blossoms and leaves creates a harmonious and soothing color palette, making cherry nail art mandalas a perfect addition to any house design.
Creating a cherry nail art mandala is a meticulous process that requires skill and precision. The design is created by hand using tiny brushes and specialized tools, making each piece a unique work of art. The artist carefully chooses the placement of each cherry blossom and adds intricate details to create a sense of depth and movement within the design.
The combination of soft pink and vibrant green in the cherry blossoms and leaves creates a harmonious and soothing color palette, making cherry nail art mandalas a perfect addition to any house design.
Where to Incorporate Cherry Nail Art Mandalas in Your Home
 Cherry nail art mandalas can be incorporated in various ways to elevate your house design. They can be featured as a statement piece in the living room or bedroom, adding a touch of elegance and sophistication. They can also be used as a focal point in the entryway, welcoming guests with their beauty and symbolism.
For those who want a more subtle incorporation, cherry nail art mandalas can be used as accents in the bathroom or kitchen, adding a pop of color and a sense of tranquility to these spaces.
Cherry nail art mandalas can be incorporated in various ways to elevate your house design. They can be featured as a statement piece in the living room or bedroom, adding a touch of elegance and sophistication. They can also be used as a focal point in the entryway, welcoming guests with their beauty and symbolism.
For those who want a more subtle incorporation, cherry nail art mandalas can be used as accents in the bathroom or kitchen, adding a pop of color and a sense of tranquility to these spaces.
Final Thoughts
 Cherry nail art mandalas are more than just a trend in house design, they are a timeless and meaningful addition to any home. The combination of delicate cherry blossoms and intricate mandalas creates a sense of balance and harmony, making them the perfect symbol of beauty and new beginnings in your house design. So why not add a touch of elegance and meaning to your home with cherry nail art mandalas?


