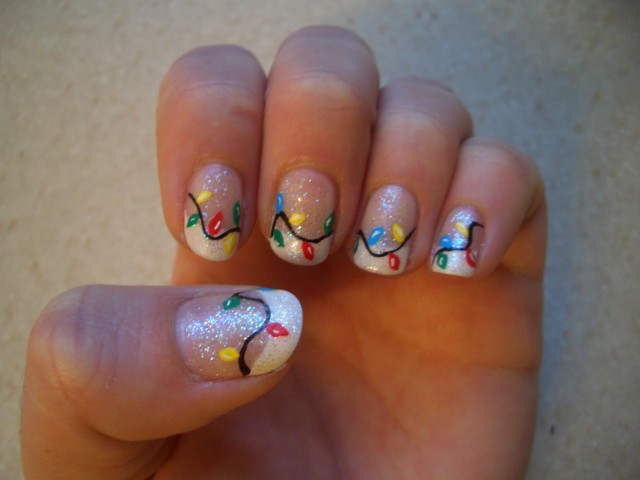
The holiday season is the perfect time to get creative with your nails and what better way to show off your festive spirit than with Christmas lights nail art? This fun and unique design will have your nails shining bright like a Christmas tree. Here is a step-by-step tutorial on how to achieve this festive look.Christmas Lights Nail Art Tutorial


Christmas Lights Nail Art Tutorial


If you're new to nail art, don't worry! This tutorial is perfect for beginners. All you need is a steady hand and some basic nail art tools. Trust us, you'll be amazed at how easy it is to create this festive look.Christmas Lights Nail Art Tutorial for Beginners

Christmas Lights Nail Art Tutorial for Beginners

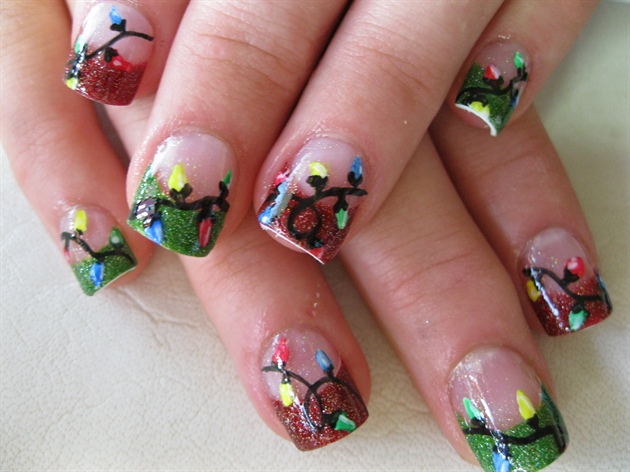
With the holiday rush and all the preparations, you may not have a lot of time to spend on your nails. But don't let that stop you from getting into the holiday spirit. This easy Christmas lights nail art tutorial can be done in just a few simple steps, making it perfect for those who are short on time.Easy Christmas Lights Nail Art Tutorial


Easy Christmas Lights Nail Art Tutorial


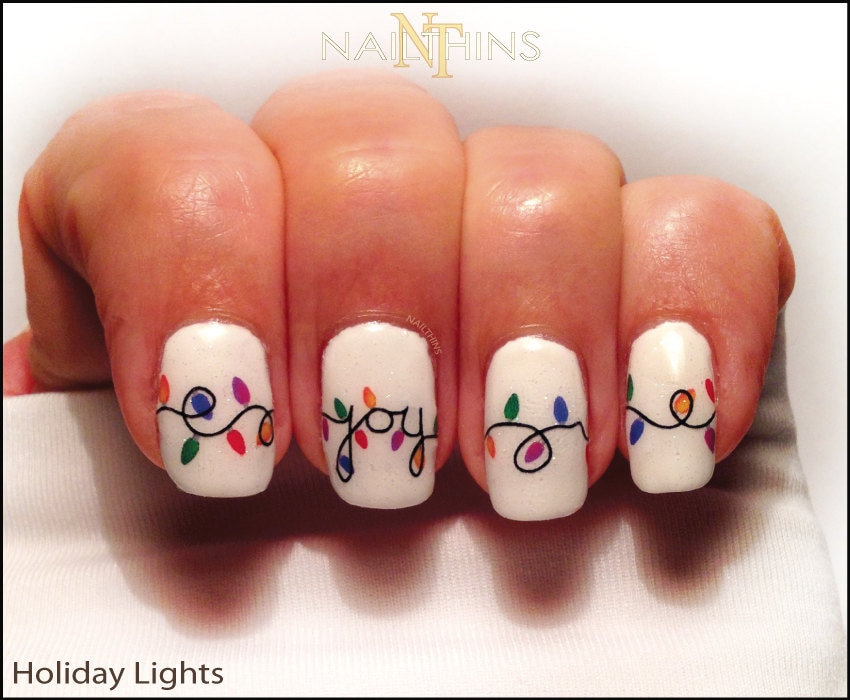
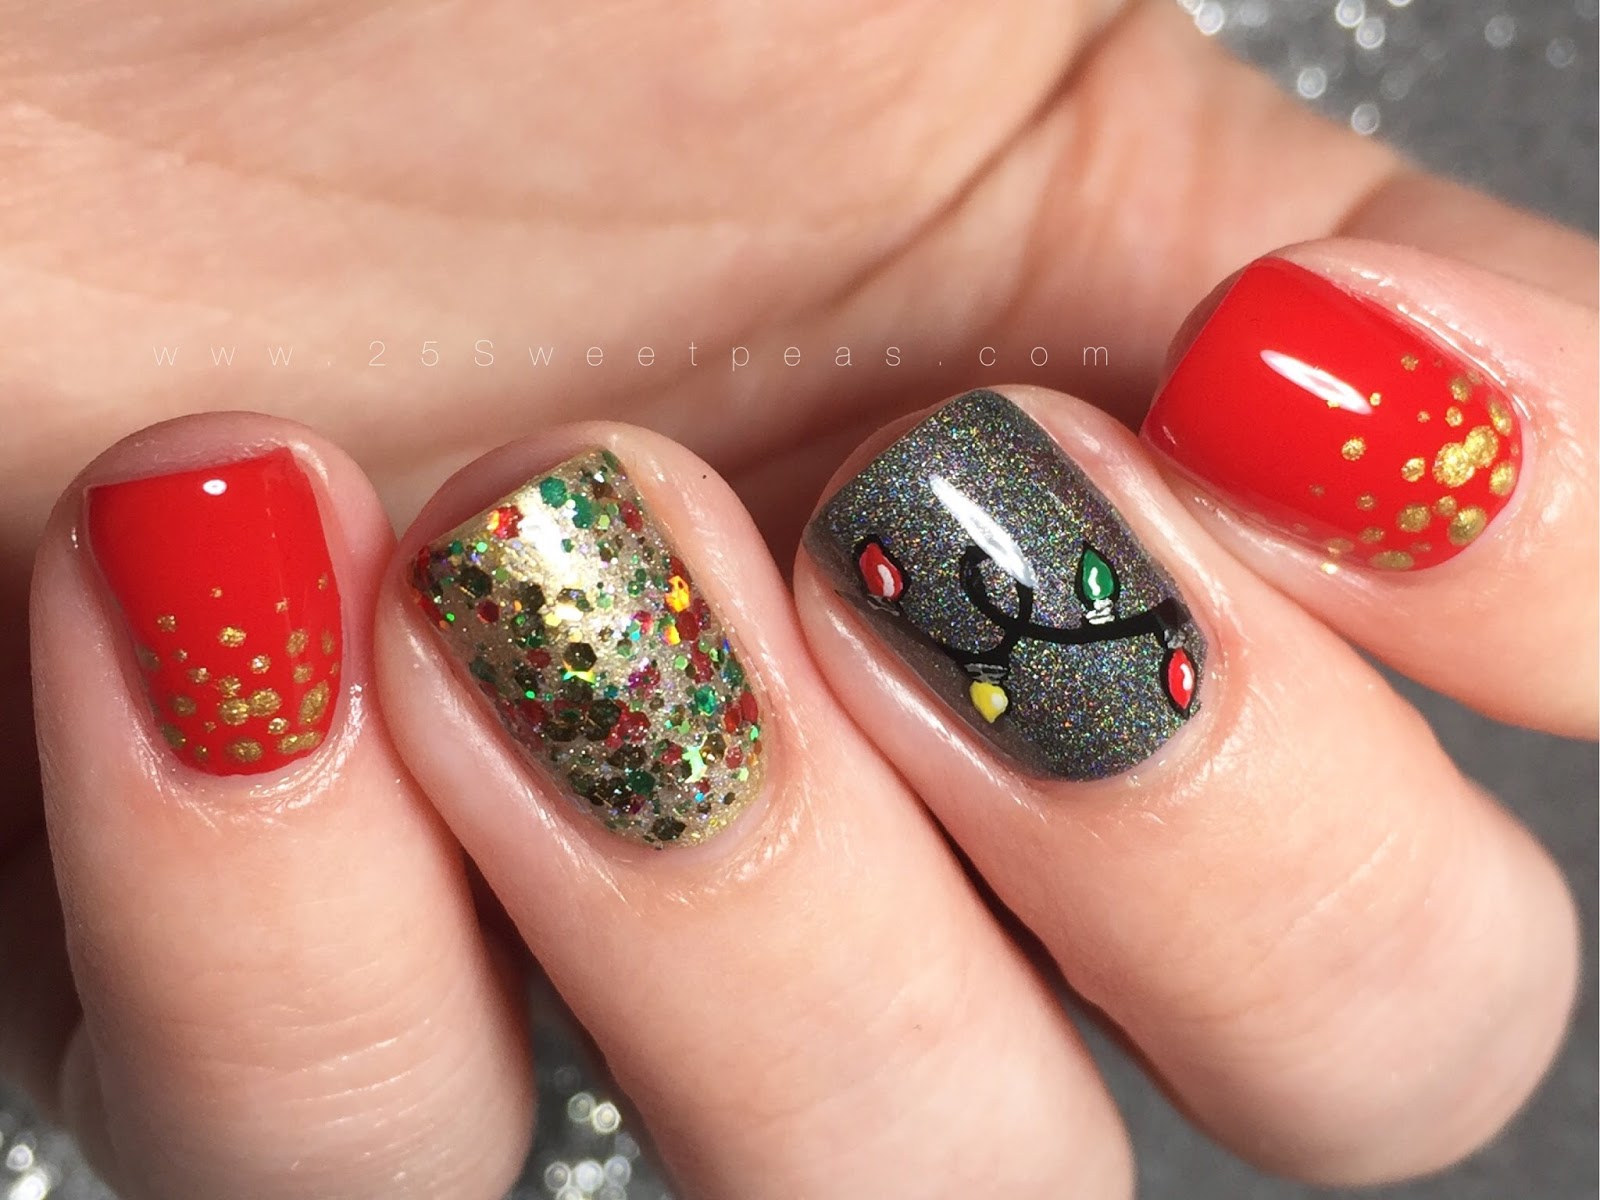
Why spend money at the nail salon when you can create this festive look at home? This DIY tutorial will save you time and money, and you'll have the satisfaction of creating your own holiday nail art. So gather your supplies and get ready to unleash your creativity.DIY Christmas Lights Nail Art Tutorial


DIY Christmas Lights Nail Art Tutorial
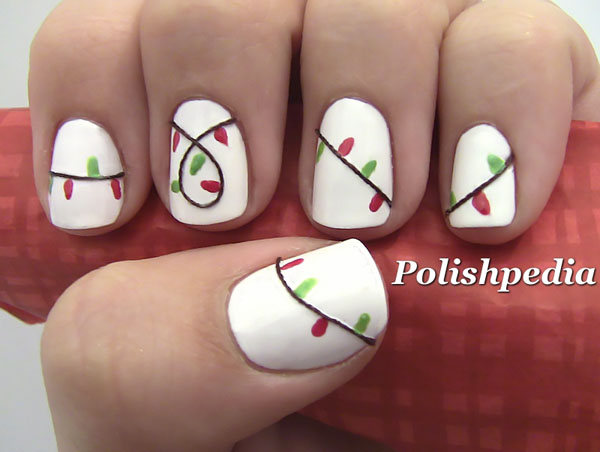
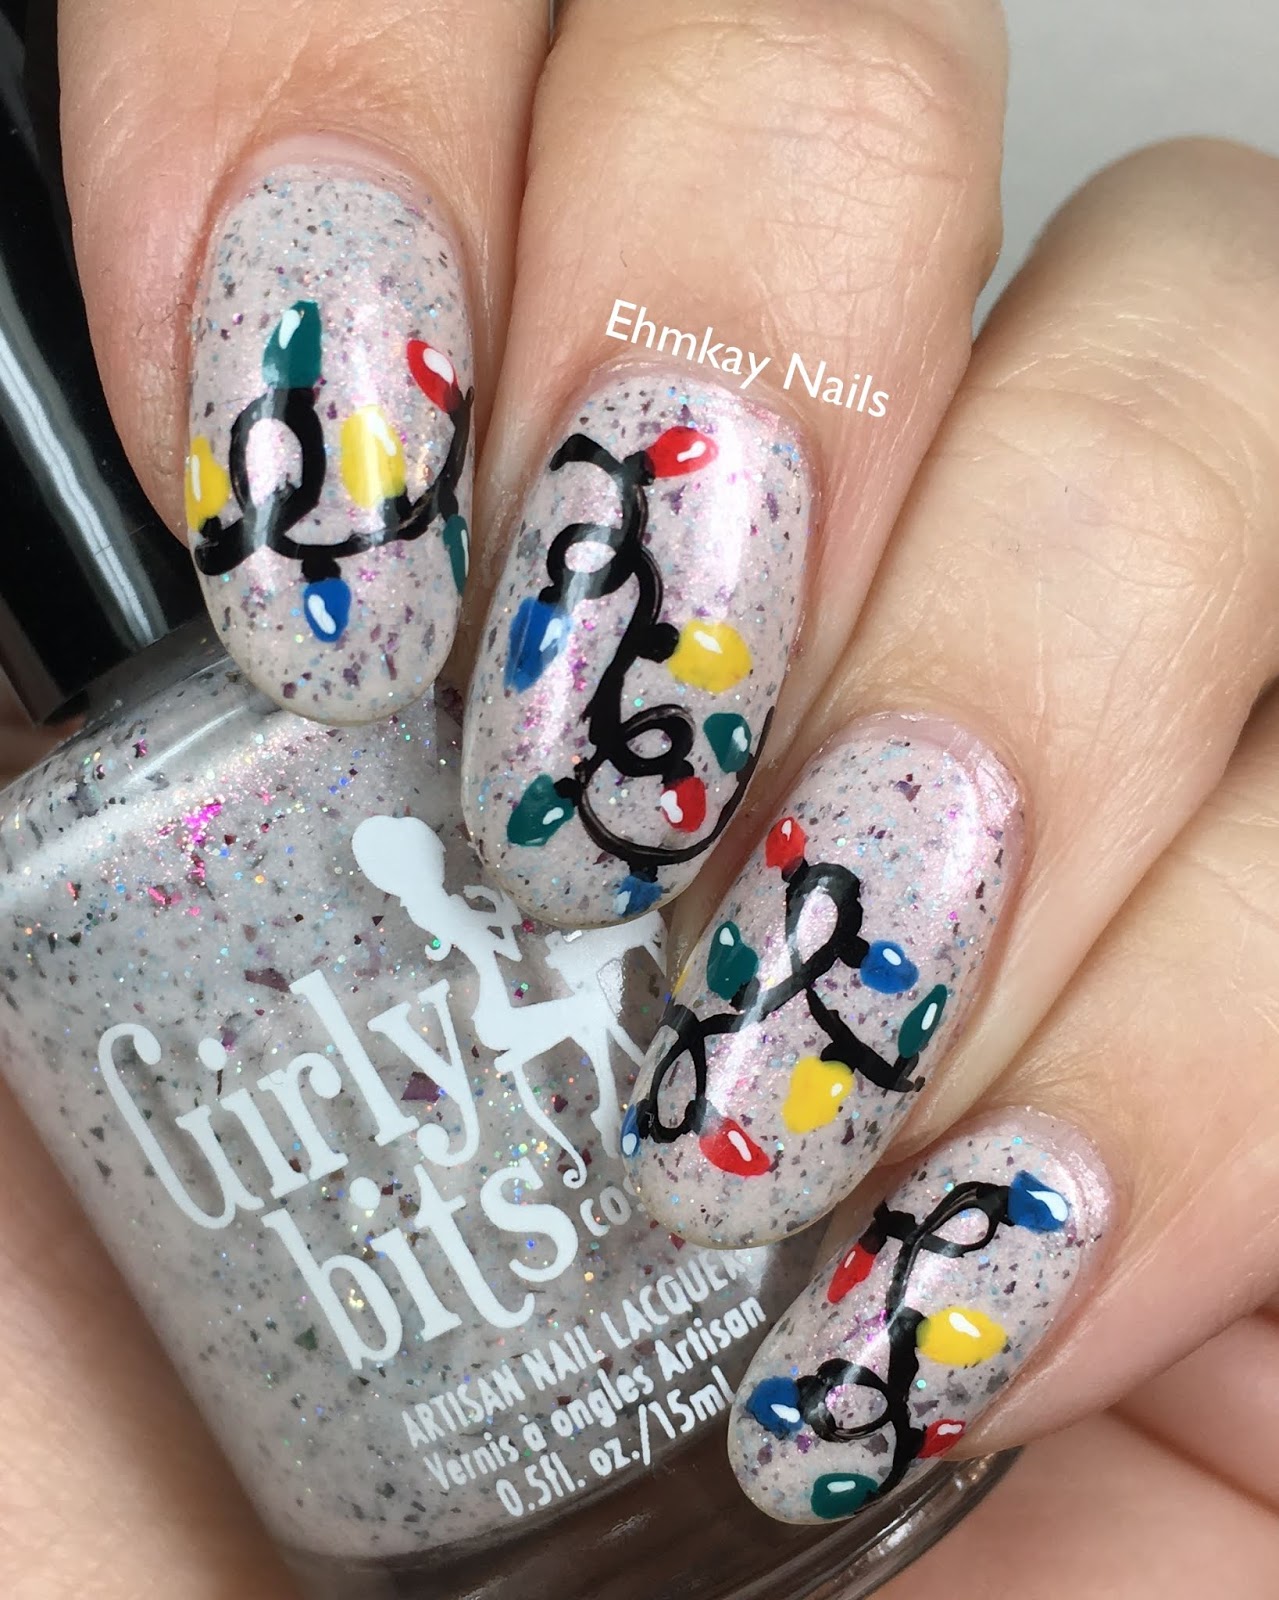
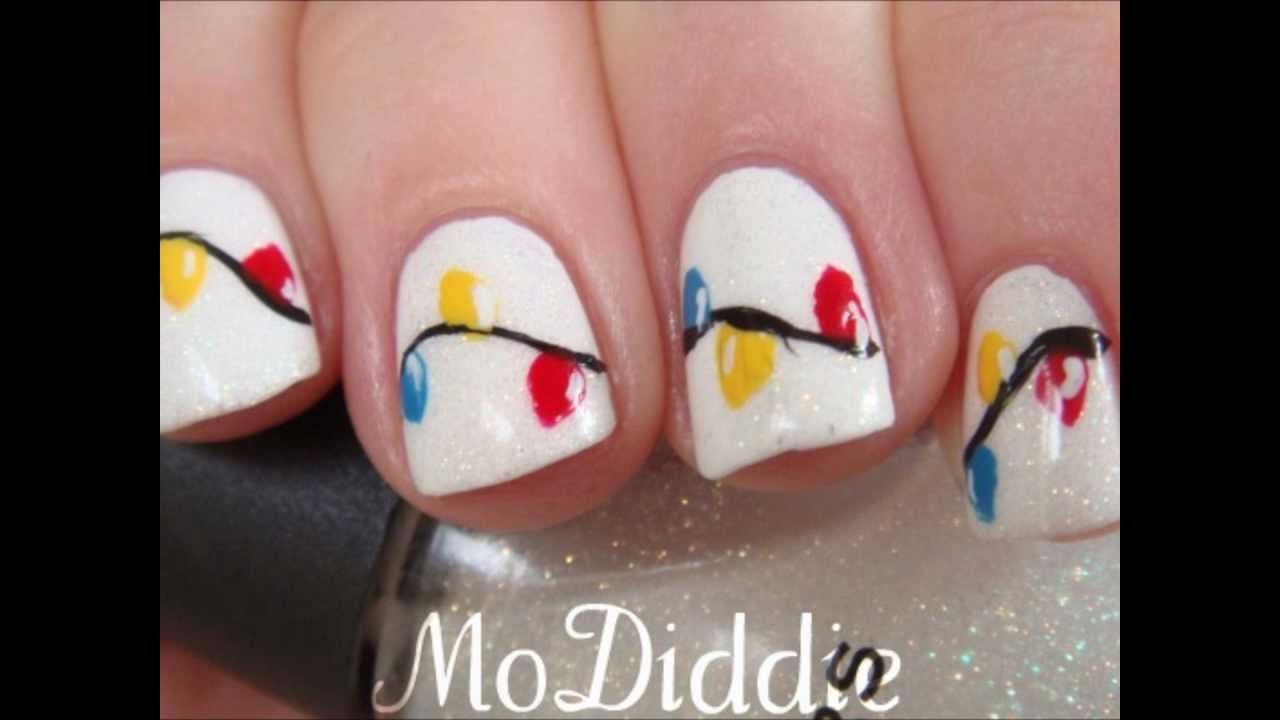
Follow these step-by-step instructions to achieve a flawless Christmas lights nail art design: Step 1: Start by painting your nails with a base color. You can choose a festive red, green, or even a sparkly gold or silver. Step 2: Using a thin brush or a toothpick, create a black line across the top of your nail. This will act as the string for the Christmas lights. Step 3: Using different colors, create small dots along the string to represent the Christmas lights. You can use traditional Christmas colors or mix it up with different shades for a unique look. Step 4: Once the dots are dry, use a white or silver polish to create a small dot on top of each colored dot. This will give the lights a more realistic and 3D effect. Step 5: Finally, use a top coat to seal in your design and give it a glossy finish. And voila! Your Christmas lights nail art is complete.Step-by-Step Christmas Lights Nail Art Tutorial


Step-by-Step Christmas Lights Nail Art Tutorial
If you're a fan of gel polish, you can still achieve this festive nail art look. Simply follow the steps above, but instead of using regular nail polish, use gel polish. Make sure to cure each layer under a UV or LED lamp before moving on to the next step.Christmas Lights Nail Art Tutorial with Gel Polish

Christmas Lights Nail Art Tutorial with Gel Polish
If you prefer using acrylic paint for your nail art designs, you can also create this Christmas lights look with ease. Simply replace the nail polish with acrylic paint and follow the same steps as mentioned above. Acrylic paint gives you more control and precision, making it perfect for creating intricate designs.Christmas Lights Nail Art Tutorial with Acrylic Paint
Christmas Lights Nail Art Tutorial with Acrylic Paint
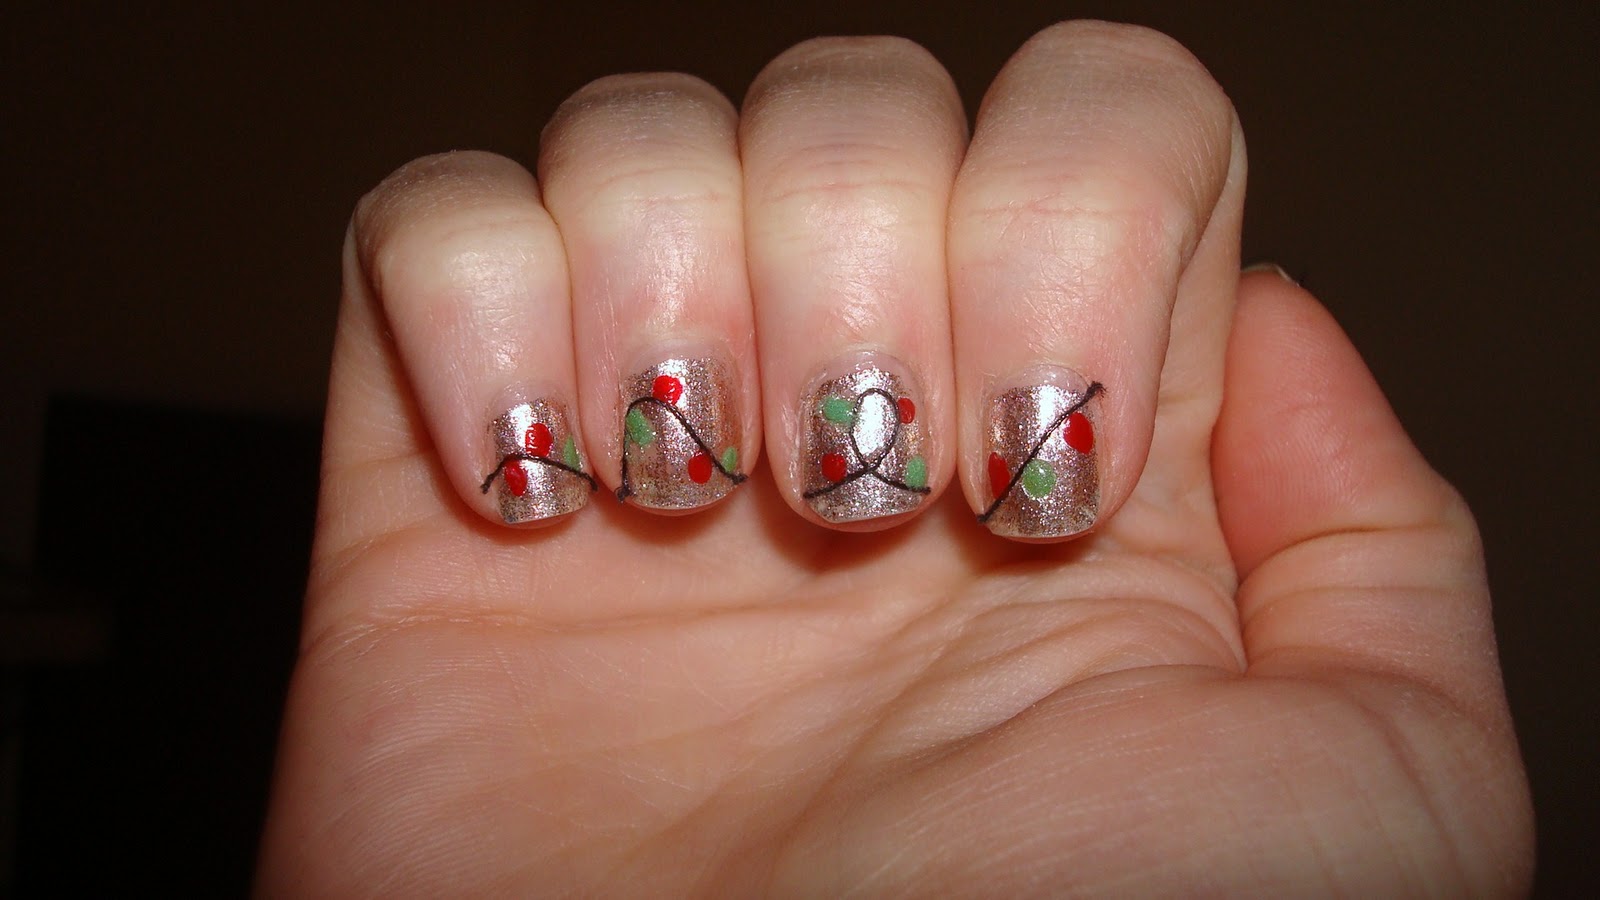
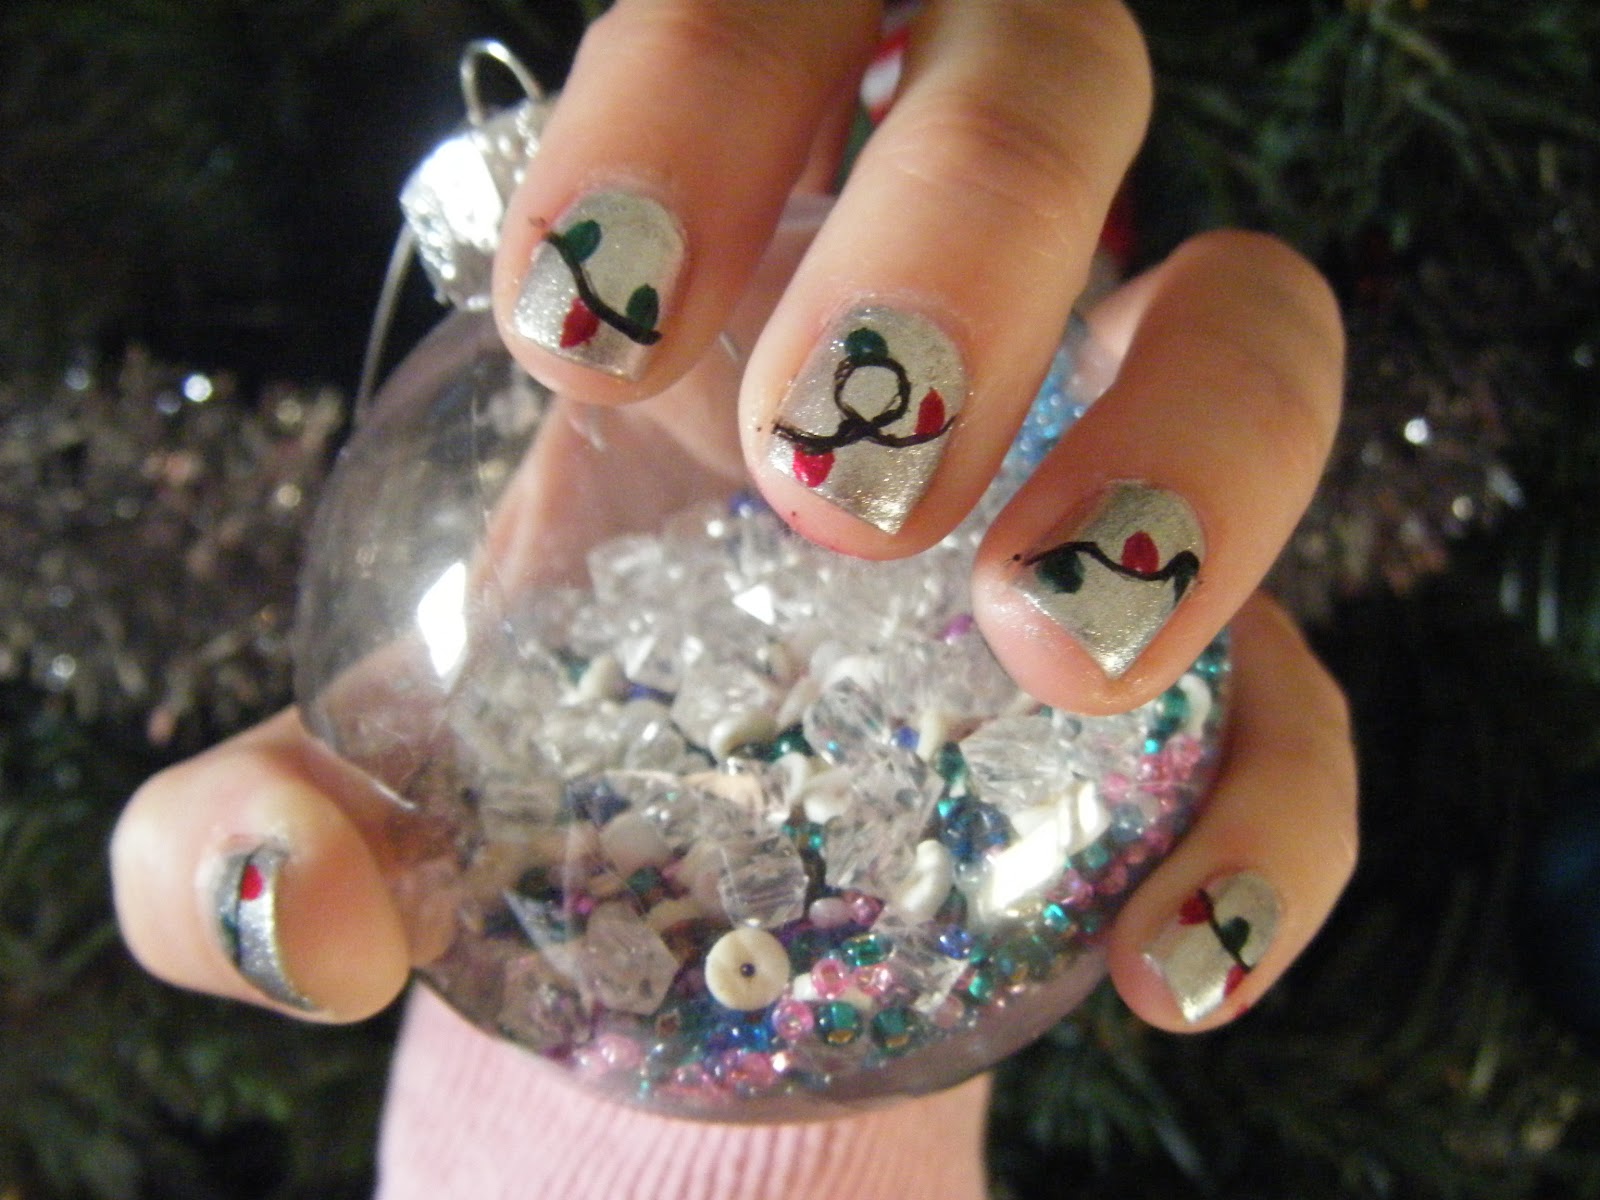
Don't let short nails stop you from rocking this festive nail art. You can still achieve this look on shorter nails by simply scaling down the size of the lights. Use a smaller brush or toothpick to create smaller dots and voila! Your short nails will be glowing with Christmas lights.Christmas Lights Nail Art Tutorial for Short Nails


Christmas Lights Nail Art Tutorial for Short Nails


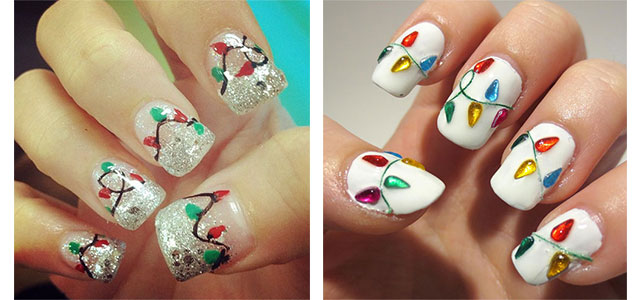
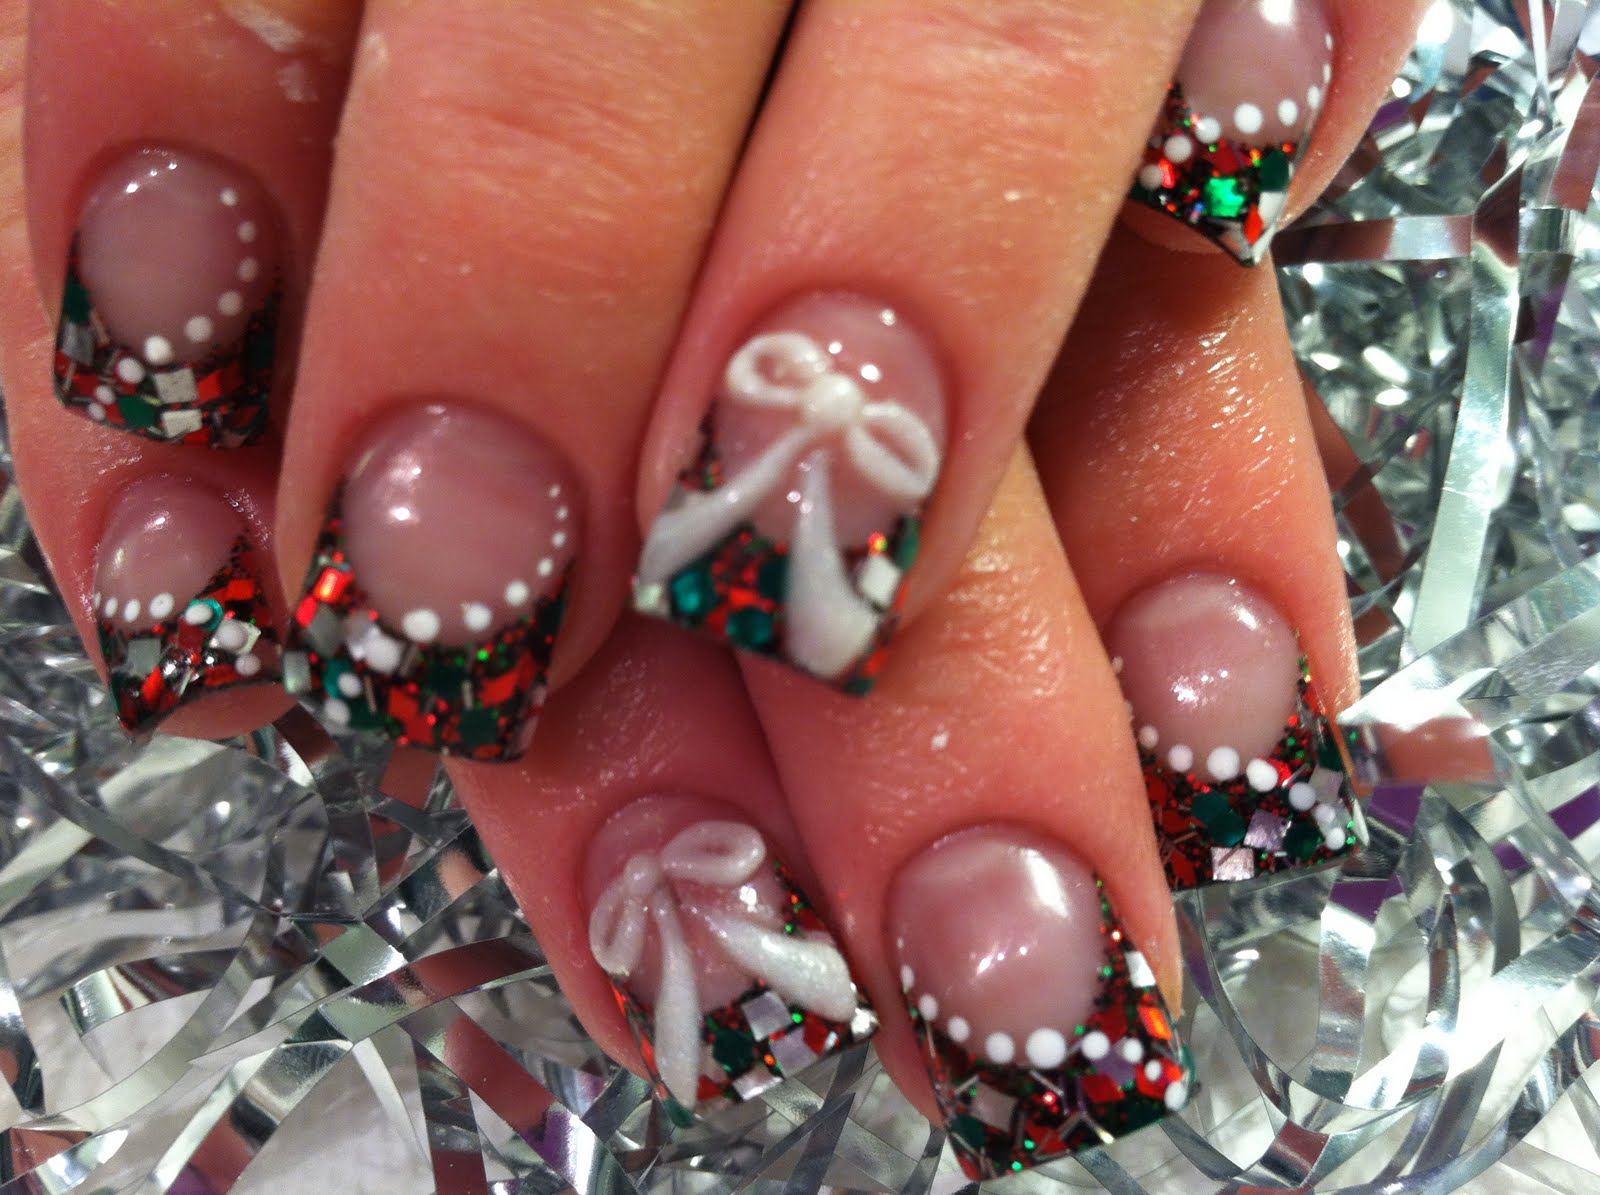
If you have long nails, you have more space to play with and get creative. You can create a whole string of Christmas lights along the length of your nail or even add some extra details like a glittery background. Let your imagination run wild and have fun with this Christmas lights nail art tutorial for long nails.Christmas Lights Nail Art Tutorial for Long Nails


Christmas Lights Nail Art Tutorial for Long Nails

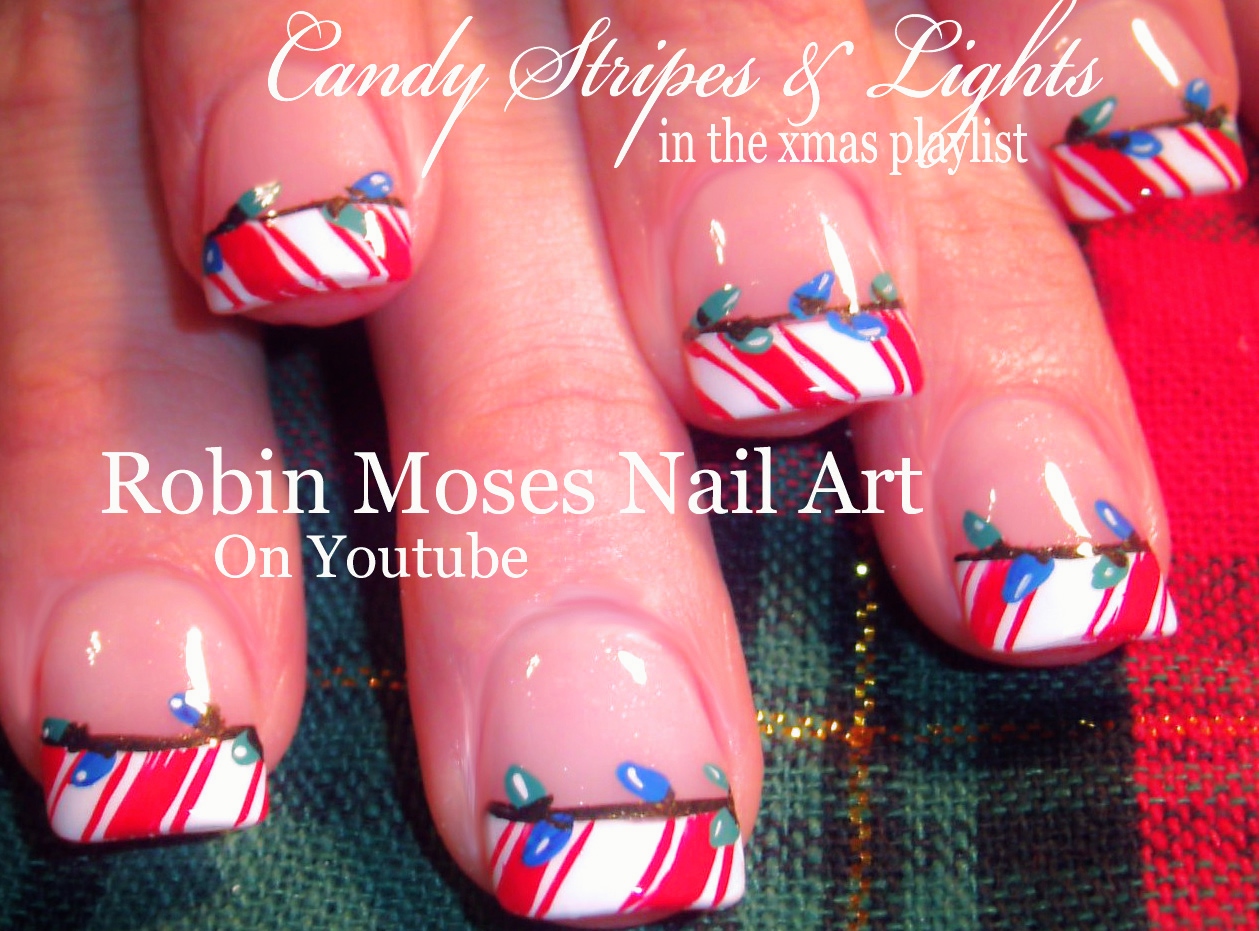
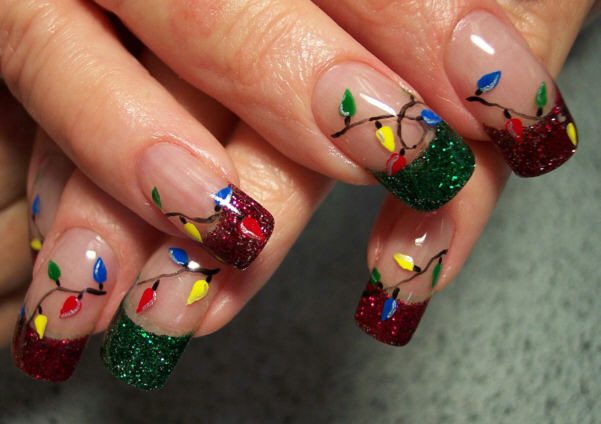
For those who love a bit of sparkle, you can add some glitter to your Christmas lights nail art design. After creating the string and lights, add a layer of clear polish and sprinkle some glitter on top. Seal it in with a top coat and watch your nails shine like the stars on a Christmas tree. Now that you have 10 different ways to create Christmas lights nail art, it's time to get creative and show off your festive spirit. Whether you're a beginner or an experienced nail artist, you can easily achieve this fun and festive look. So go ahead and spread some holiday cheer with your beautifully decorated nails.Christmas Lights Nail Art Tutorial with Glitter
Christmas Lights Nail Art Tutorial with Glitter
The Magic of Christmas Lights Nail Art
Elevate Your Holiday Nail Game
 As the holiday season approaches, it's time to start thinking about how to add a touch of festive cheer to your daily routine. And what better way to do that than with the
Christmas lights nail art
tutorial? This fun and creative nail design will surely bring a smile to your face and brighten up any holiday gathering. So, let's dive in and learn how to create your very own Christmas lights nail art!
As the holiday season approaches, it's time to start thinking about how to add a touch of festive cheer to your daily routine. And what better way to do that than with the
Christmas lights nail art
tutorial? This fun and creative nail design will surely bring a smile to your face and brighten up any holiday gathering. So, let's dive in and learn how to create your very own Christmas lights nail art!
Gather Your Supplies
 Before we get started, make sure you have all the necessary supplies to create this charming nail design. You will need a base coat,
red, green, white, and black
nail polish, a
dotting tool
or toothpick, a thin
nail art brush
, and some
top coat
for a long-lasting finish. Once you have everything prepared, it's time to unleash your creativity.
Before we get started, make sure you have all the necessary supplies to create this charming nail design. You will need a base coat,
red, green, white, and black
nail polish, a
dotting tool
or toothpick, a thin
nail art brush
, and some
top coat
for a long-lasting finish. Once you have everything prepared, it's time to unleash your creativity.
Step by Step Guide
 First, start by applying a base coat to protect your nails and ensure your design lasts longer. Then, paint your nails with a
red
or
green
base color, or you can alternate between the two for a more festive look. Next, using a
dotting tool
or toothpick dipped in
white nail polish
, create small dots in a line across your nail. These will act as the base for your Christmas lights.
Now comes the fun part! Using your
nail art brush
, draw thin
black lines
from the dots to the tip of your nails. These will represent the wires of the Christmas lights. Then, using the same brush or a
dotting tool
, add small colorful dots on top of the black lines to create the
lights
. Get creative with the colors and sizes of the dots to make your design unique.
First, start by applying a base coat to protect your nails and ensure your design lasts longer. Then, paint your nails with a
red
or
green
base color, or you can alternate between the two for a more festive look. Next, using a
dotting tool
or toothpick dipped in
white nail polish
, create small dots in a line across your nail. These will act as the base for your Christmas lights.
Now comes the fun part! Using your
nail art brush
, draw thin
black lines
from the dots to the tip of your nails. These will represent the wires of the Christmas lights. Then, using the same brush or a
dotting tool
, add small colorful dots on top of the black lines to create the
lights
. Get creative with the colors and sizes of the dots to make your design unique.
Finishing Touches
 Once your design has dried, apply a top coat to seal in your artwork and give your nails a shiny finish. You can also add some glitter or rhinestones for some extra sparkle. And voila! Your
Christmas lights nail art
is complete.
Once your design has dried, apply a top coat to seal in your artwork and give your nails a shiny finish. You can also add some glitter or rhinestones for some extra sparkle. And voila! Your
Christmas lights nail art
is complete.
Spread the Holiday Cheer
 Now that you have mastered this festive nail design, show it off to your friends and family. You can also experiment with different color combinations and designs to create a new look every time. This tutorial is not only a great way to elevate your holiday nail game, but it's also a fun and relaxing activity to get into the holiday spirit.
In conclusion, add a touch of magic to your holiday season with the
Christmas lights nail art
tutorial. Not only will it make your nails stand out, but it will also bring joy and cheer wherever you go. So, gather your supplies and let your creativity shine this holiday season. Happy holidays!
Now that you have mastered this festive nail design, show it off to your friends and family. You can also experiment with different color combinations and designs to create a new look every time. This tutorial is not only a great way to elevate your holiday nail game, but it's also a fun and relaxing activity to get into the holiday spirit.
In conclusion, add a touch of magic to your holiday season with the
Christmas lights nail art
tutorial. Not only will it make your nails stand out, but it will also bring joy and cheer wherever you go. So, gather your supplies and let your creativity shine this holiday season. Happy holidays!


