Are you a fan of true crime shows and movies? Do you love solving mysteries and piecing together clues? Then this "Crime Scene" nail art tutorial is perfect for you. Get ready to channel your inner detective and create a unique and eye-catching look on your nails.
To start, gather the following materials:
- Base coat
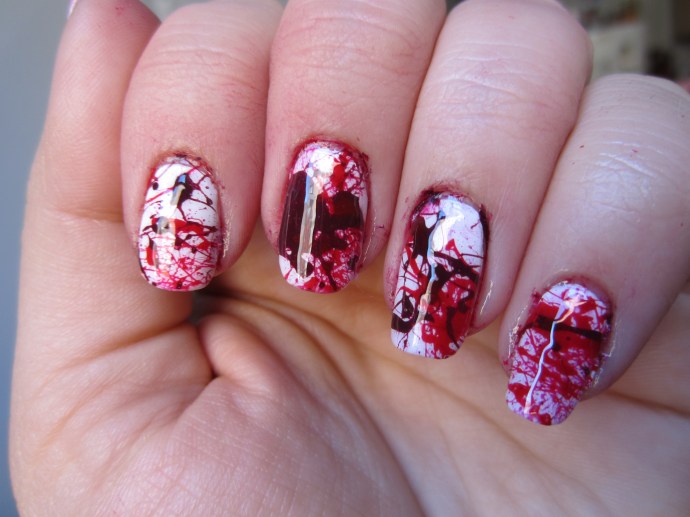
First, apply a base coat to protect your nails and allow it to dry completely. Then, using the black nail polish, paint your nails except for the ring finger. This will be our "crime scene" finger.
Next, take the red nail polish and create a diagonal line across your ring finger, leaving some space at the bottom. This will be the "blood" on the crime scene. Use the thin nail art brush to outline the red line and add some drips for a more realistic effect.
Now, for the fun part, grab your toothpick and dip it into the white nail polish. Use it to create small dots on the black nails, resembling fingerprints. You can also use the toothpick to create small "blood splatters" on the red line.
Once everything is dry, apply a top coat to seal in your design and add shine. And there you have it, your very own "Crime Scene" nails that are sure to turn heads and spark conversations.
1. "Crime Scene" Nail Art Tutorial
- Red, black, and white nail polish
- Thin nail art brush
- Toothpick
- Top coat


1. "Crime Scene" Nail Art Tutorial

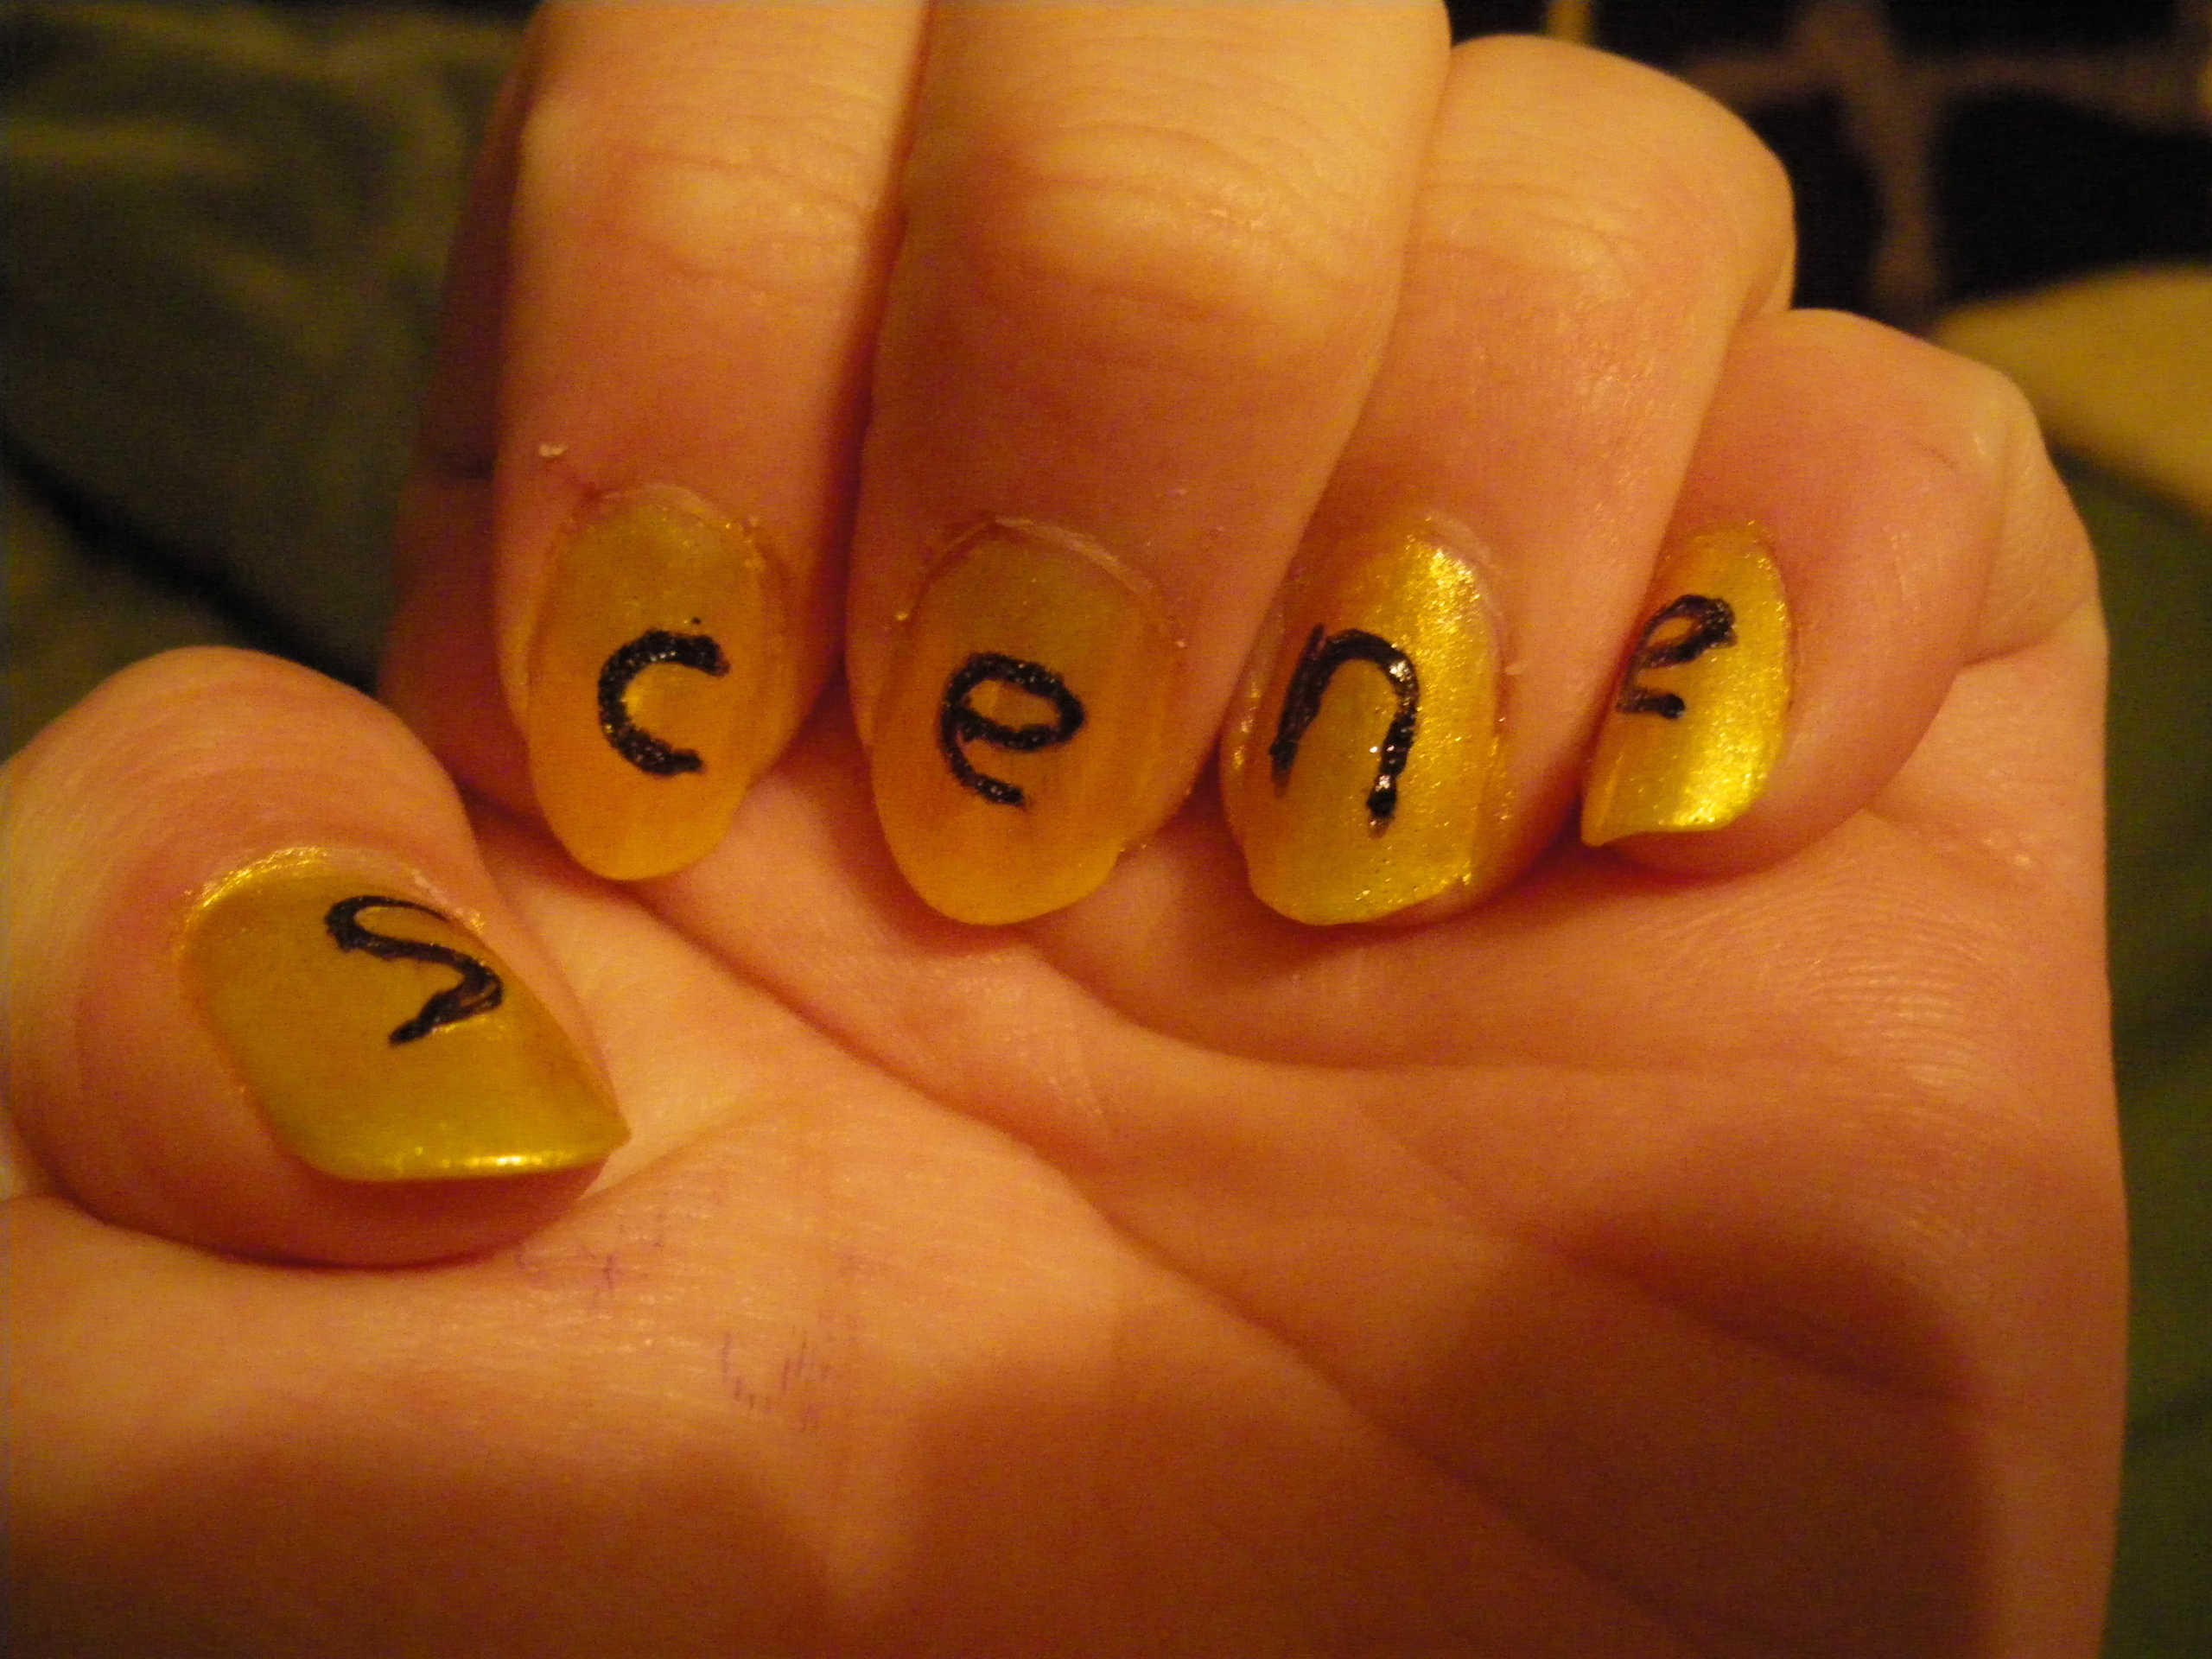
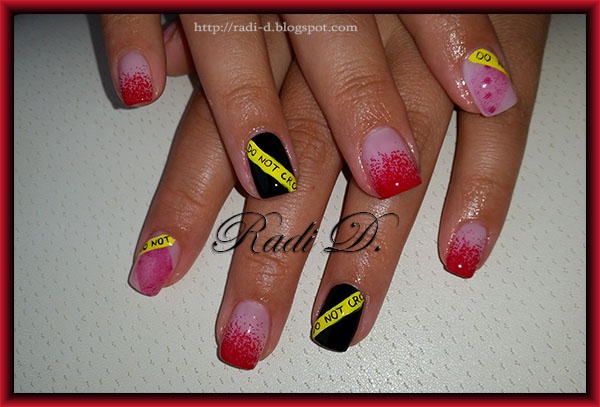


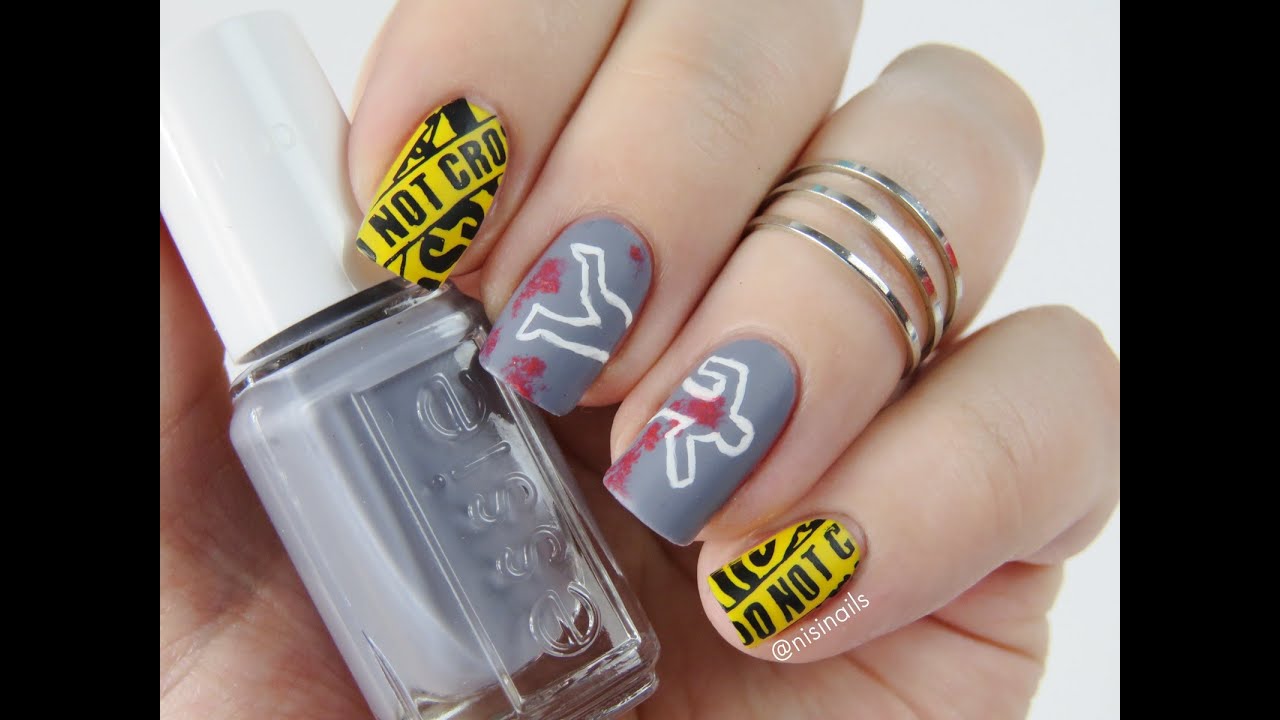
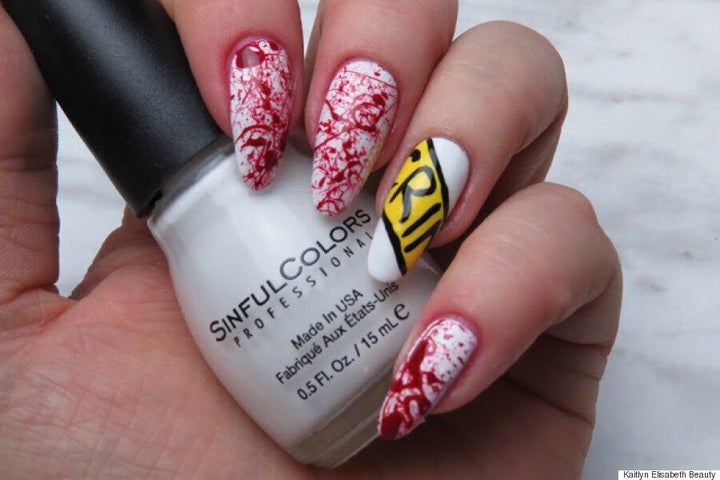
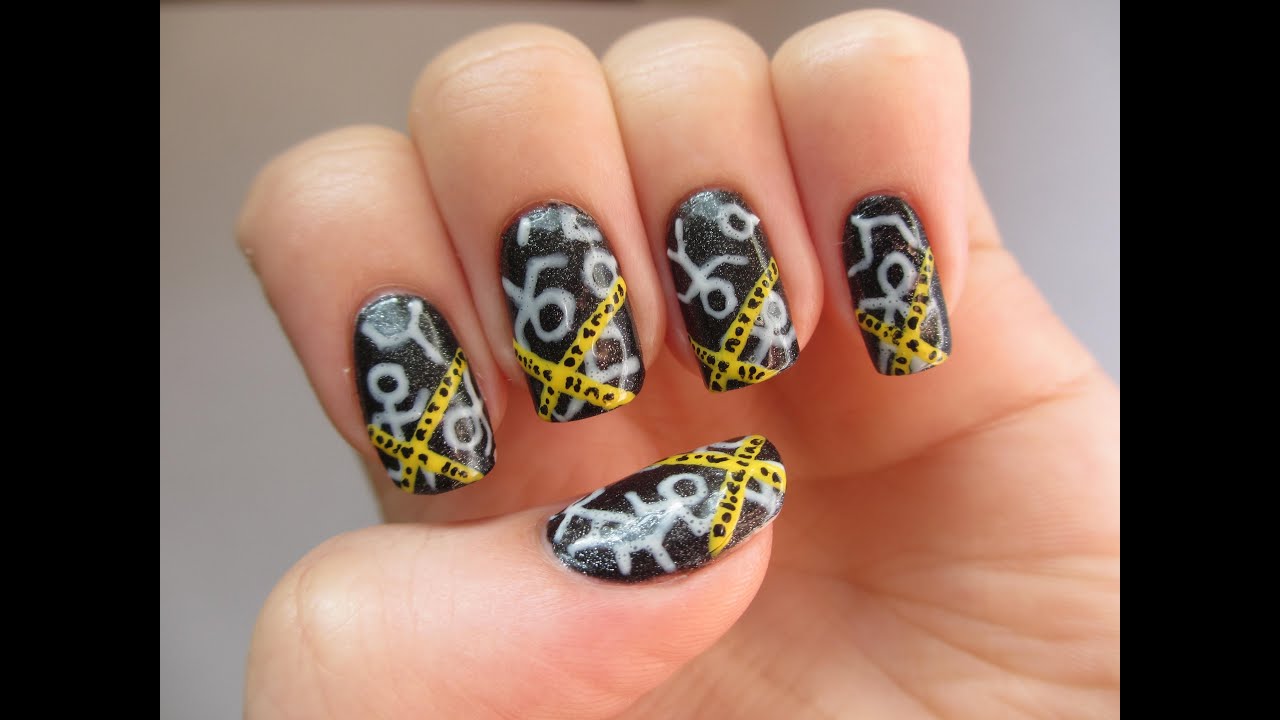
If you're a fan of the popular TV show "CSI," then you'll love these "CSI" inspired nails. This design incorporates elements from the show, such as the iconic yellow police tape and the classic "CSI" logo. Get ready to show off your love for this crime-solving team on your nails.
To start, you will need:
- Base coat
Begin by applying a base coat to protect your nails. Then, paint all your nails with the yellow nail polish except for the ring finger. This will be our "police tape" finger.
Once the yellow polish is dry, use the black nail polish to create two diagonal lines across your ring finger. This will resemble the caution tape. Then, using the white nail polish and thin nail art brush, write "CSI" in block letters on the tape.
For the remaining nails, use the red nail polish to create small dots with a dotting tool. These dots will represent blood spatters, adding a touch of crime scene detail to the design.
Lastly, apply a top coat to seal in your design and give it a shiny finish. Your "CSI" inspired nails are now complete, and you're ready to solve any crime that comes your way.
2. "CSI" Inspired Nails
- Yellow and black nail polish
- White and red nail polish
- Thin nail art brush
- Dotting tool
- Top coat


2. "CSI" Inspired Nails


Are you a fan of murder mystery books or movies? Then this nail design is perfect for you. It's a subtle yet creative way to incorporate your love for mystery and crime-solving into your nails.
Here's what you'll need to create this design:
- Base coat
Start by applying a base coat to protect your nails. Then, paint all your nails with the nude nail polish. This will be our base color for the design.
Next, using the black nail polish and thin nail art brush, create a small "X" on the middle finger. This represents the "X marks the spot" in a murder mystery. You can also add a small question mark on your pinky finger to add to the mystery theme.
For the ring finger, use the red nail polish and create a diagonal line across the nail, leaving some space at the bottom. Then, use the thin nail art brush to outline the red line and add some drips for a blood-like effect.
Finish off by applying a top coat to seal in your design and add shine. Your "Murder Mystery" nails are now complete, and you're ready to solve any crime that comes your way.
3. "Murder Mystery" Nail Design
- Nude and black nail polish
- Thin nail art brush
- Red nail polish
- Top coat


3. "Murder Mystery" Nail Design


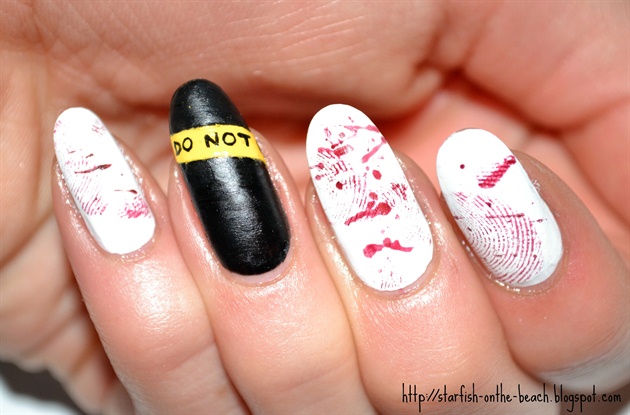
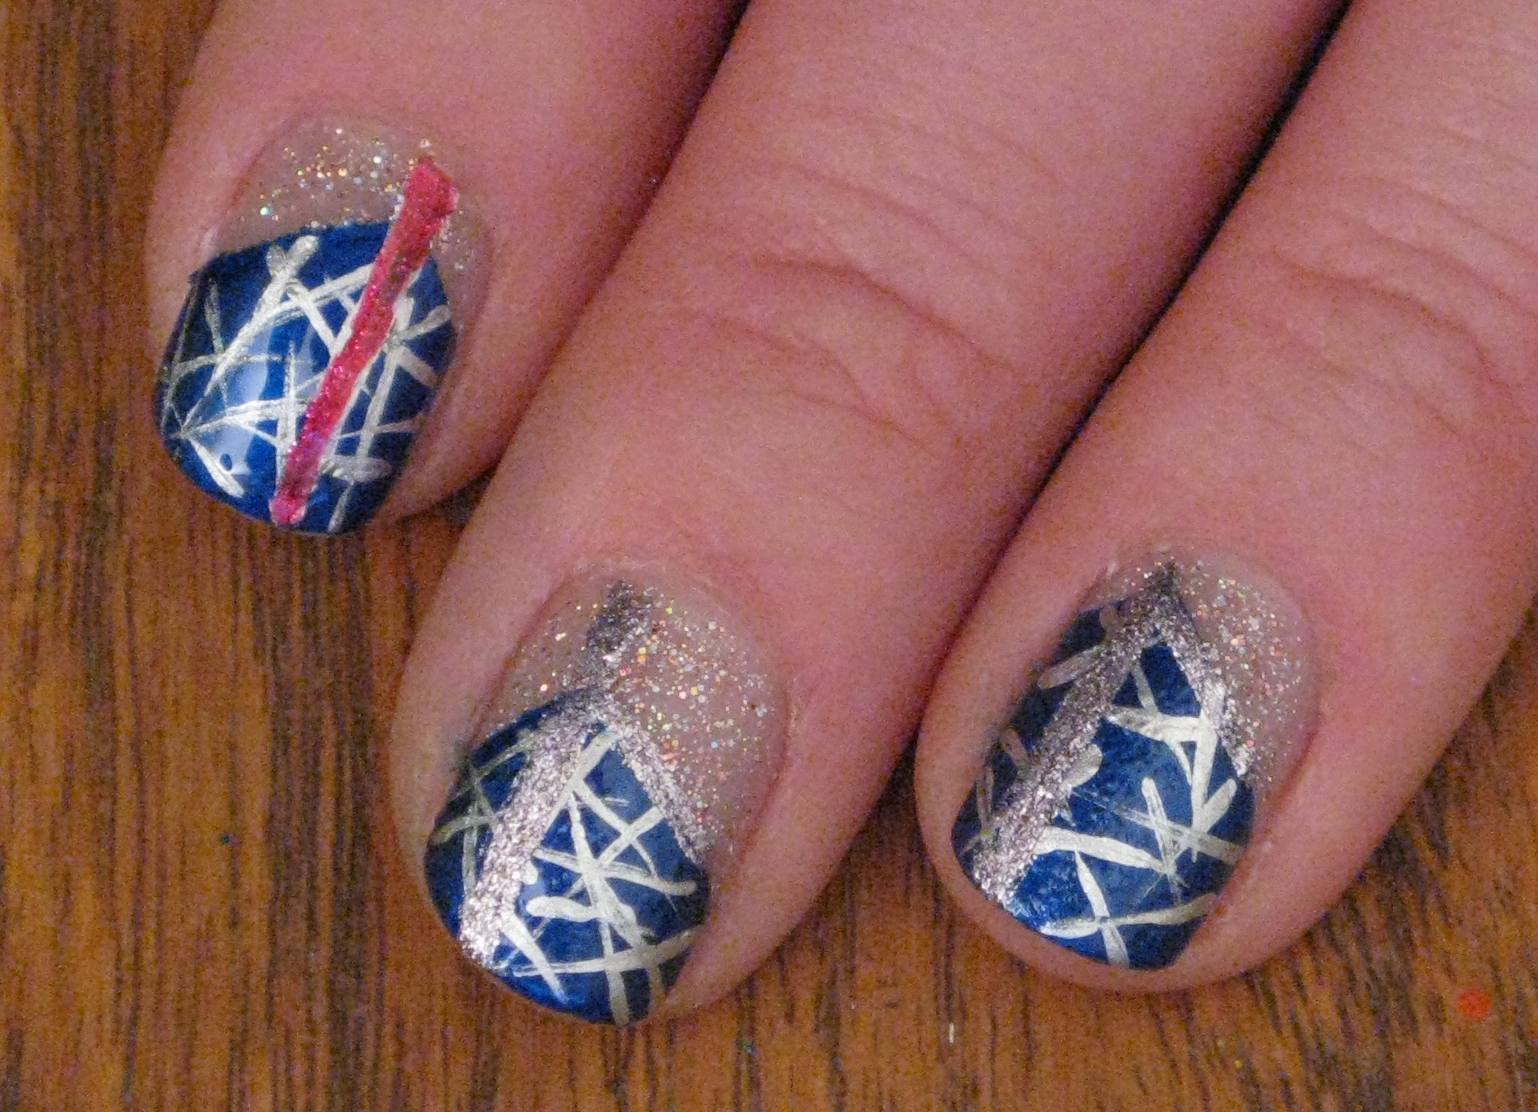
If you want to create a bold and eye-catching nail design, then this "Police Tape" nail art is perfect for you. It's a simple yet effective way to add a pop of color to your nails, resembling the iconic yellow tape used at crime scenes.
To start, you will need:
- Base coat
Begin by applying a base coat to protect your nails. Then, paint all your nails with the white nail polish. This will be our base color for the design.
Once the white polish is dry, use the black nail polish and thin nail art brush to create small lines all over the nails, resembling the caution tape. You can also add the words "Police Line Do Not Cross" in block letters on one of your nails for a more realistic effect.
For the remaining nails, use the yellow nail polish to create small dots with a dotting tool. These dots will represent police lights, adding a touch of detail to the design.
Finish off by applying a top coat to seal in your design and give it a glossy finish. Your "Police Tape" nails are now complete, and you're ready to make a bold statement with your nails.
4. "Police Tape" Nail Art
- White, black, and yellow nail polish
- Thin nail art brush
- Top coat


4. "Police Tape" Nail Art


If you're a fan of the true crime show "Forensic Files," then these nails are a must-try. This design incorporates elements from the show, such as the iconic DNA helix and fingerprint, creating a unique and eye-catching look.
To create this design, you will need:
- Base coat
Start by applying a base coat to protect your nails. Then, paint all your nails with the nude nail polish. This will be our base color for the design.
Next, using the black nail polish and thin nail art brush, create a small DNA helix on the middle finger. Then, use the white nail polish to create a fingerprint on the ring finger using a dotting tool.
For the remaining nails, use the black nail polish to create small dots with a dotting tool, resembling fingerprints. You can also use the thin nail art brush to create small lines and swirls to resemble other forensic details.
Finish off by applying a top coat to seal in your design and add shine. Your "Forensic Files" nails are now complete, and you're ready to solve any crime that comes your way.
5. "Forensic Files" Nails
- Nude, black, and white nail polish
- Thin nail art brush
- Dotting tool
- Top coat


5. "Forensic Files" Nails
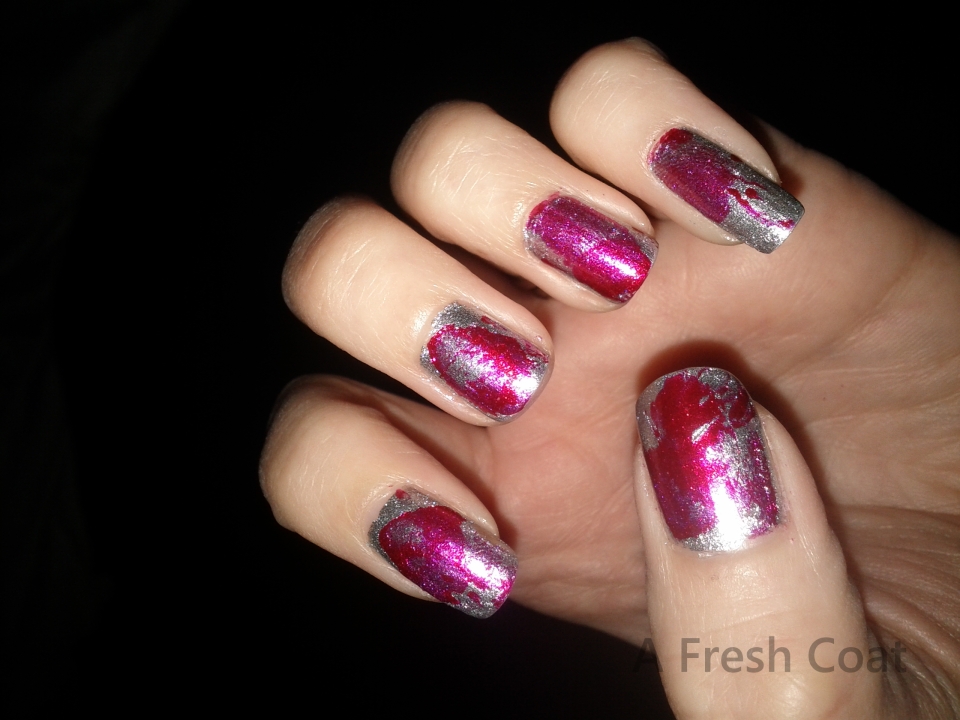


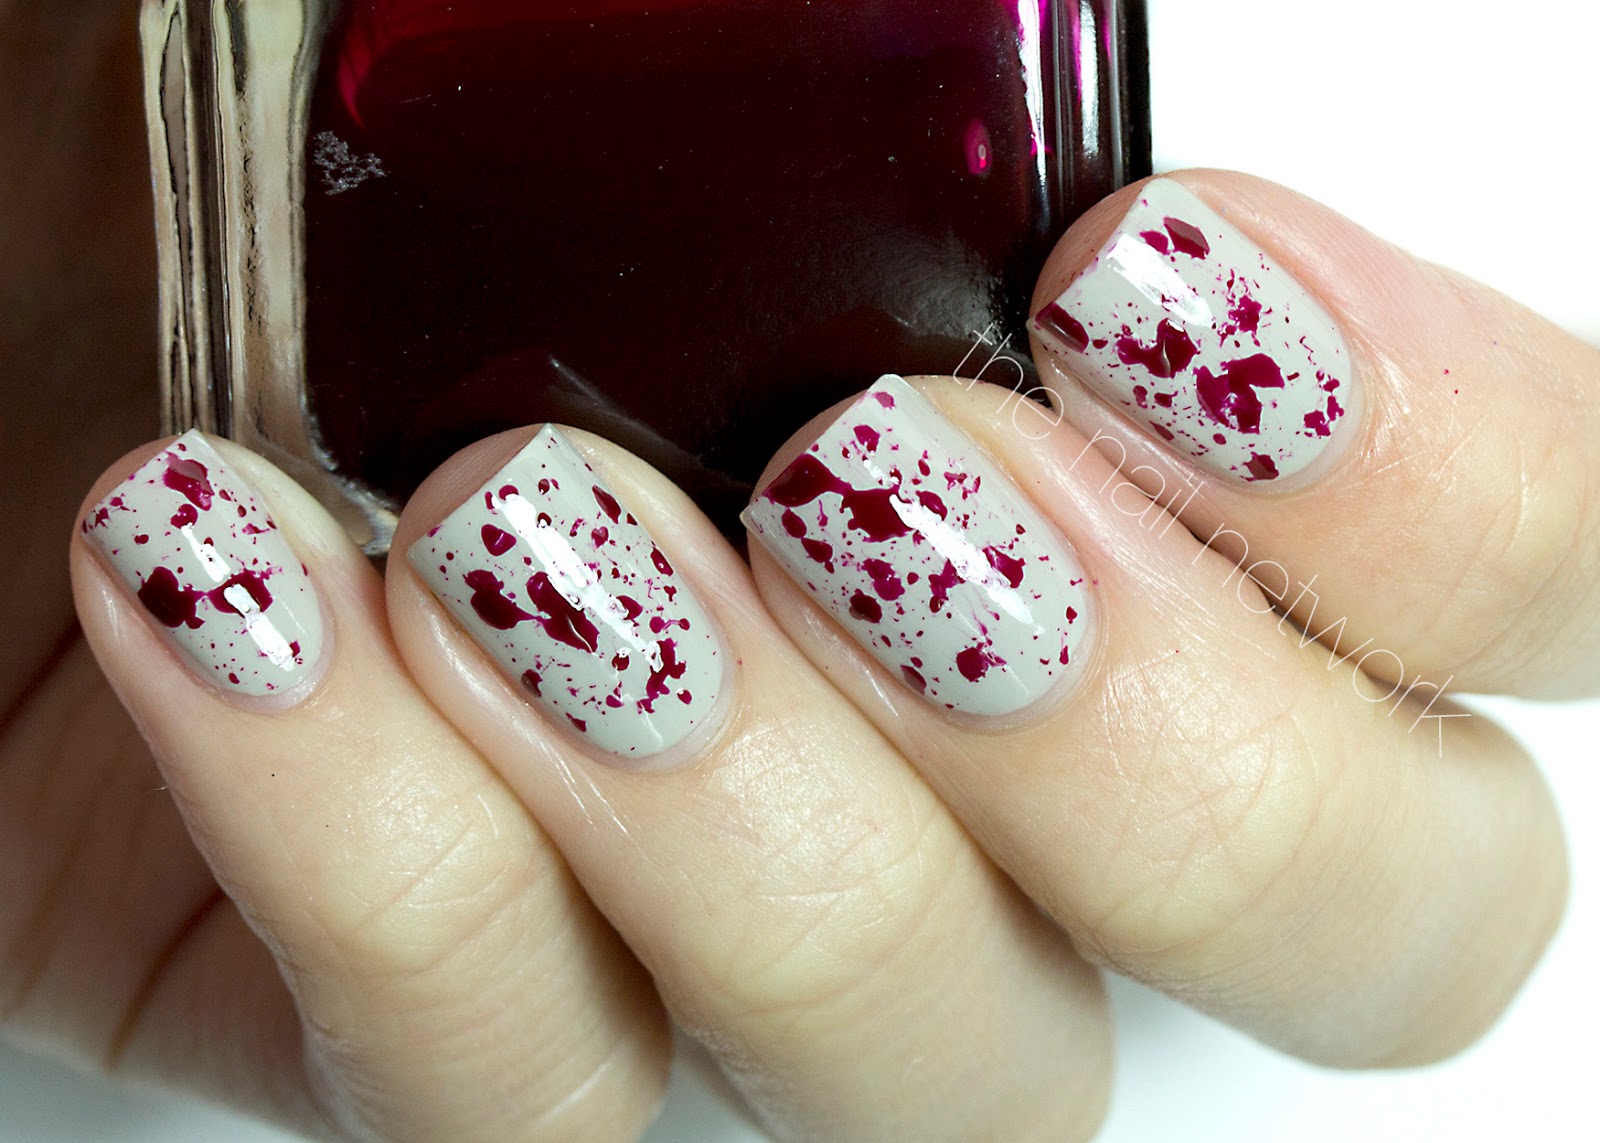
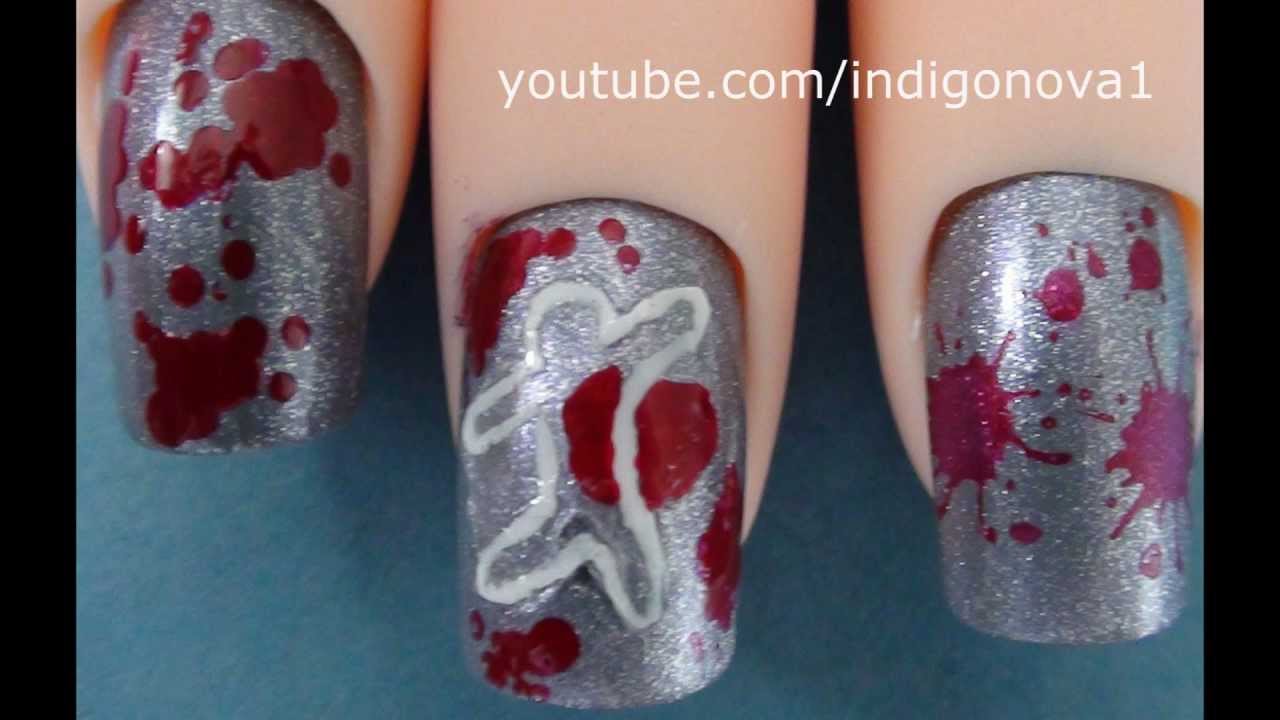
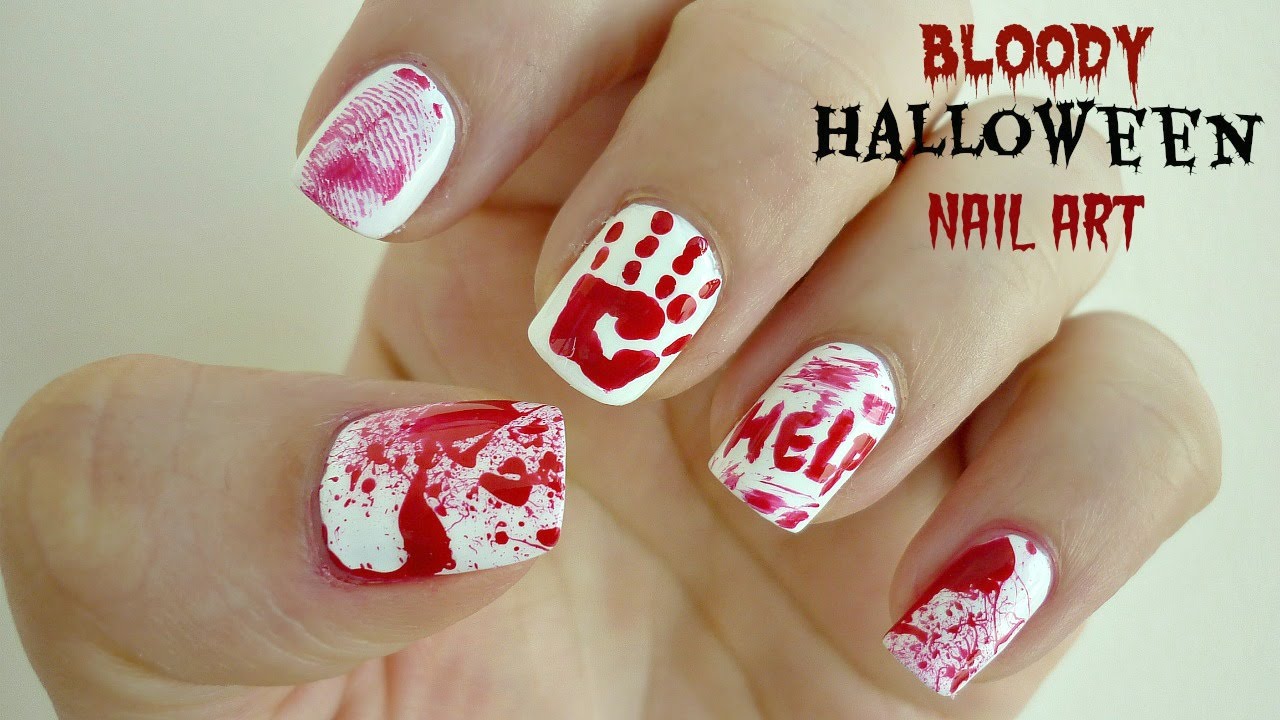
This "Blood Splatter" nail tutorial is perfect for those who want to create a spooky and unique design. It's also great for Halloween or any other occasion where you want to make a statement with your nails.
To start, gather the following materials:
- Base coat
Begin by applying a base coat to protect your nails. Then, paint all your nails with the black nail polish. This will be our base color for the design.
Once the black polish is dry, take the red nail polish and pour a small amount onto a piece of paper. Then, using a straw, dip one end into the red polish and blow through the other end onto your nails. This will create a splatter effect, resembling blood.
You can also use the straw to create lines and swirls for a more realistic blood splatter effect. Once everything is dry, apply a top coat to seal in your design and give it a shiny finish.
6. "Blood Splatter" Nail Tutorial
- Red and black nail polish
- Straw
- Top coat


6. "Blood Splatter" Nail Tutorial


Are you a fan of detective shows or books? Then this "Detective" nail design is perfect for you. It's a subtle way to show off your love for solving mysteries and can be easily recreated with just a few nail polish colors.
Here's what you'll need:
- Base coat
Start by applying a base coat to protect your nails. Then, paint all your nails with the nude nail polish. This will be our base color for the design.
Next, using the black nail polish and thin nail art brush, create a small magnifying glass on the middle finger. Then, use the white nail polish to create a small "detective hat" on the ring finger.
For the remaining nails, use the black nail polish to create small lines and swirls with the thin nail art brush, resembling detective tools like a fingerprint brush or a camera.
Finish off by applying a top coat to seal in your design and give it a glossy finish. Your "Detective" nails are now complete, and you're ready to solve any mystery that comes your way.
7. "Detective" Nail Design
- Nude, black, and white nail polish
- Thin nail art brush
- Top coat


7. "Detective" Nail Design


This "Crime Scene Investigation" nail art is perfect for those who want to create a more detailed and realistic design. It incorporates elements from a typical crime scene, such as fingerprints, footprints, and police tape.
To create this design, you will need:
- Base coat
Begin by applying a base coat to protect your nails. Then, paint all your nails with the nude nail polish. This will be our base color for the design.
Next, using the black nail polish and thin nail art brush, create a small "X" on the middle finger. This represents the "X marks the spot" in a crime scene. Then, use the yellow nail polish to create two diagonal lines across the ring finger, resembling police tape.
For the remaining nails, use the black nail polish to create small lines and swirls with the thin nail art brush, resembling fingerprints and footprints. You can also use a dotting tool to create small dots, resembling blood spatters.
Finish off by applying a top coat to seal in your design and add shine. Your "Crime Scene Investigation" nails are now complete, and you're ready to solve any crime that comes your way.
8. "Crime Scene Investigation" Nail Art
- Nude, black, and yellow nail polish
- Thin nail art brush
- Dotting tool
- Top coat


8. "Crime Scene Investigation" Nail Art

If you're a fan of true crime documentaries, podcasts, or books, then this nail tutorial is perfect for you. It's a subtle yet creative way to show off your love for true crime and can be easily recreated with just a few nail polish colors.
To start, gather the following materials:
- Base coat
Begin by applying a base coat to protect your nails. Then, paint all your nails with the nude nail polish. This will be our base color for the design.
Next, using the black nail polish and thin nail art brush, create a small magnifying glass on the middle finger. Then, use the red nail polish to create a small "blood splatter" on the ring finger.
For the remaining nails, use the black nail polish to create small lines and swirls with the thin nail art brush, resembling fingerprints and footprints. You can also use a dotting tool to create small dots, resembling blood spatters.
Finish off by applying a top coat to seal in your design and give it a glossy finish. Your "True Crime" nails are now complete, and you're ready to solve any mystery that comes your way.
9. "True Crime" Nail Tutorial
- Nude, black, and red nail polish
- Thin nail art brush
- Dotting tool
- Top coat


9. "True Crime" Nail Tutorial


Last but not least, we have the "Mystery Novel" nail design. This design is perfect for those who love reading mystery novels and want to incorporate that love into their nail art. It's a simple yet creative design that can be easily recreated.
To create this design, you will need:
- Base coat
Start by applying a base coat to protect your nails. Then, paint all your nails with the nude nail polish. This will be our base color for the design.
Next, using the black nail polish and thin nail art brush, create a small magnifying glass on the middle finger. Then, use the dotting tool to create small dots on the remaining nails, resembling pages of a book.
Finish off by applying a top coat to seal in your design and give it a glossy finish. Your "Mystery Novel" nails are now complete, and you're ready to get lost in a good book.
10. "Mystery Novel" Nail Design
- Nude and black nail polish
- Thin nail art brush
- Dotting tool
- Top coat


10. "Mystery Novel" Nail Design

The Beauty of Crime Scene Nail Art: A Unique Way to Express Yourself

Unleashing Your Inner Detective
 Have you ever wanted to channel your inner detective and solve a crime? Well, now you can do just that with the latest trend in nail art – crime scene nails. This unique and bold style allows you to express your love for mystery and intrigue in a creative and fashionable way. With
crime scene nail art
, you can transform your nails into a miniature crime scene, complete with
blood splatter
,
fingerprints
, and
police tape
. Not only is it a fun and edgy way to show off your nails, but it also allows you to showcase your love for all things true crime.
Have you ever wanted to channel your inner detective and solve a crime? Well, now you can do just that with the latest trend in nail art – crime scene nails. This unique and bold style allows you to express your love for mystery and intrigue in a creative and fashionable way. With
crime scene nail art
, you can transform your nails into a miniature crime scene, complete with
blood splatter
,
fingerprints
, and
police tape
. Not only is it a fun and edgy way to show off your nails, but it also allows you to showcase your love for all things true crime.
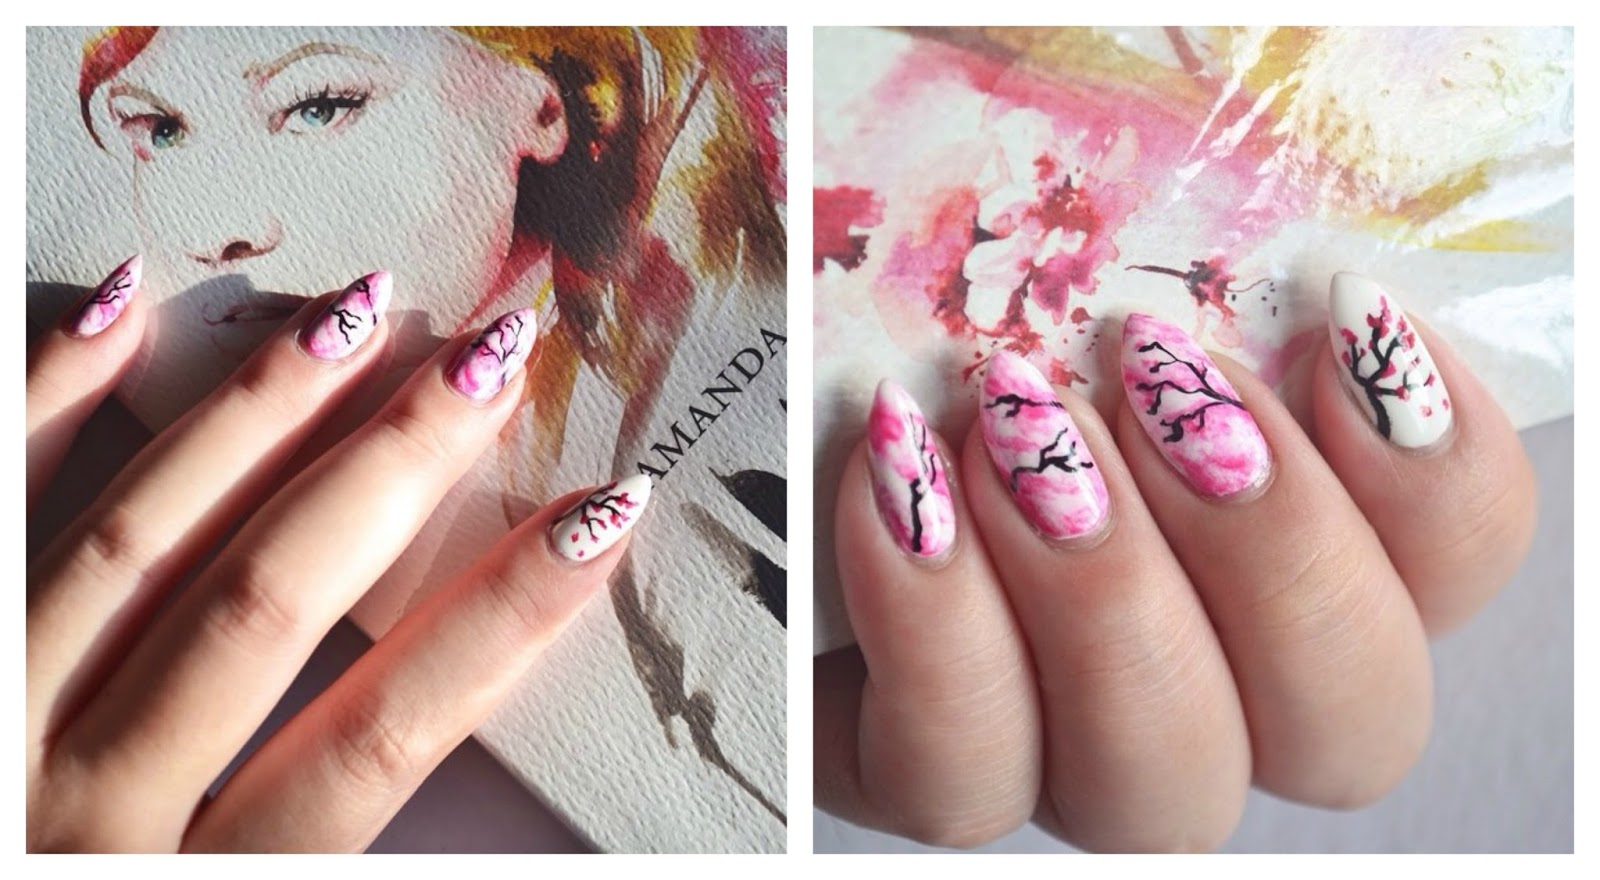
How to Achieve the Look
 Creating your own crime scene nail art may seem daunting, but with a little bit of patience and some creative tools, you can easily achieve the look. Start by painting your nails a base color, such as white, to serve as your blank canvas. Next, using a thin brush or toothpick, carefully create
blood splatter
designs using red nail polish. You can also add
fingerprint
details using a dark color, like black or brown, and a toothpick. To really make your nails stand out, you can even add
police tape
designs using yellow or black nail polish and a thin brush.
Creating your own crime scene nail art may seem daunting, but with a little bit of patience and some creative tools, you can easily achieve the look. Start by painting your nails a base color, such as white, to serve as your blank canvas. Next, using a thin brush or toothpick, carefully create
blood splatter
designs using red nail polish. You can also add
fingerprint
details using a dark color, like black or brown, and a toothpick. To really make your nails stand out, you can even add
police tape
designs using yellow or black nail polish and a thin brush.
Expressing Your Passion for Crime
 Crime scene nail art is not just a trendy fashion statement, it's also a way to express your passion for all things true crime. Whether you're a fan of murder mysteries, detective shows, or forensic science, this unique style allows you to showcase your interests in a creative and eye-catching way. It's also a great conversation starter and a fun way to connect with others who share your love for crime-related topics.
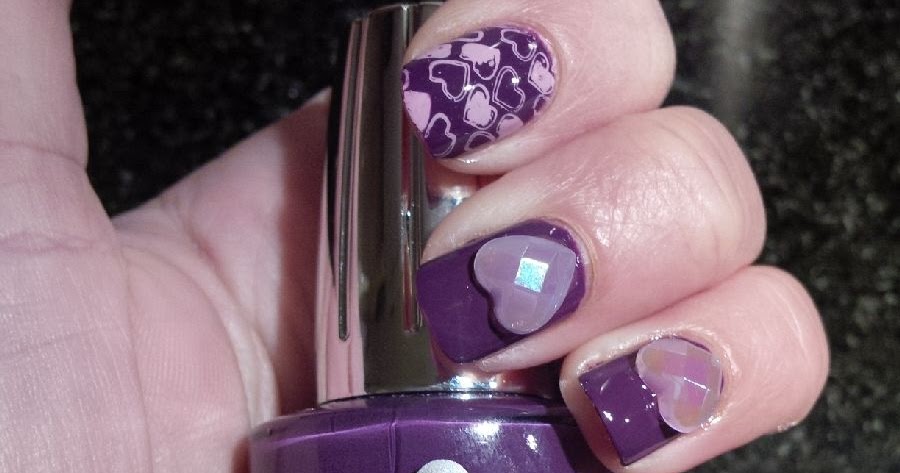
In addition to being a unique form of self-expression, crime scene nail art is also a great way to show support for various causes and organizations. For example, you can create
domestic violence awareness
nail art by incorporating purple ribbons or
mental health awareness
nail art by adding green ribbons. This allows you to not only showcase your love for crime-related topics but also raise awareness for important issues.
In conclusion,
crime scene nail art
is a fun and creative way to express yourself and showcase your love for all things true crime. With a little bit of patience and creativity, you can easily achieve this unique and eye-catching look. So why not unleash your inner detective and give it a try? Your nails will thank you.
Crime scene nail art is not just a trendy fashion statement, it's also a way to express your passion for all things true crime. Whether you're a fan of murder mysteries, detective shows, or forensic science, this unique style allows you to showcase your interests in a creative and eye-catching way. It's also a great conversation starter and a fun way to connect with others who share your love for crime-related topics.
In addition to being a unique form of self-expression, crime scene nail art is also a great way to show support for various causes and organizations. For example, you can create
domestic violence awareness
nail art by incorporating purple ribbons or
mental health awareness
nail art by adding green ribbons. This allows you to not only showcase your love for crime-related topics but also raise awareness for important issues.
In conclusion,
crime scene nail art
is a fun and creative way to express yourself and showcase your love for all things true crime. With a little bit of patience and creativity, you can easily achieve this unique and eye-catching look. So why not unleash your inner detective and give it a try? Your nails will thank you.


