If you're looking for a fun and unique nail art design, then drag marble heart nails are the perfect choice. This tutorial will show you how to achieve this gorgeous look in no time. Get ready to impress your friends with your artistic skills! Step 1: Start by applying a base coat to your nails. This will protect your natural nails and help your polish last longer. Step 2: Choose two or three colors of nail polish that complement each other. It's best to go for contrasting colors to create a more dramatic effect. Some great color combinations to try are pink and purple, red and gold, or blue and silver. Step 3: Using a makeup sponge, apply a small amount of each color to the sponge. Make sure to overlap the colors slightly to create a blended effect. Step 4: Gently press the sponge onto your nail, starting at the base and working your way to the tip. This will create a marbled effect on your nails. You may need to repeat this step a few times to get the desired coverage. Step 5: Once the polish has dried, take a toothpick or a small dotting tool and create a heart shape in the center of each nail. You can also use a small brush if you prefer. Step 6: For a more defined heart shape, you can trace over the heart with a black or white nail polish. This will make the hearts stand out and give your nails a more professional look. Step 7: For an added touch of sparkle, you can use a glitter polish to outline the hearts or add some glitter to the center of the hearts. This will make your nails shine and add a fun element to the design. Step 8: Once all your nails are dry, apply a top coat to seal in your design and give your nails a glossy finish. This will also help your design last longer.Drag Marble Heart Nail Art Tutorial

Drag Marble Heart Nail Art Tutorial

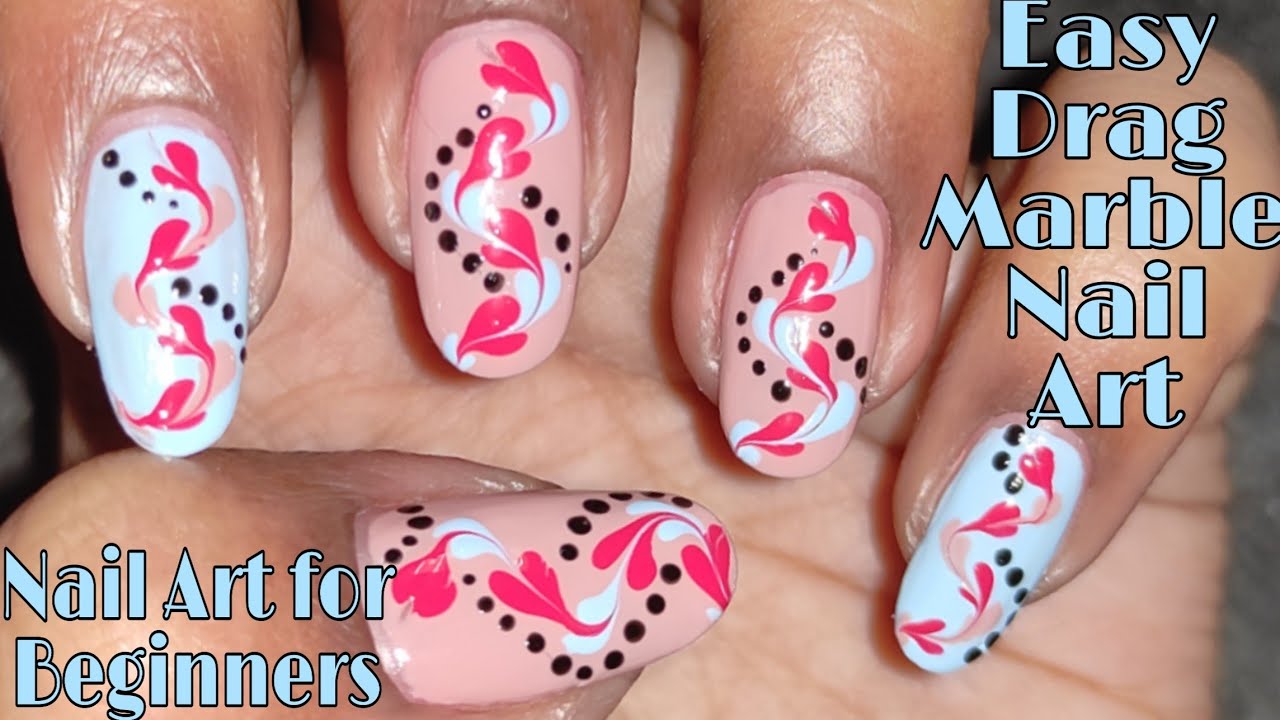

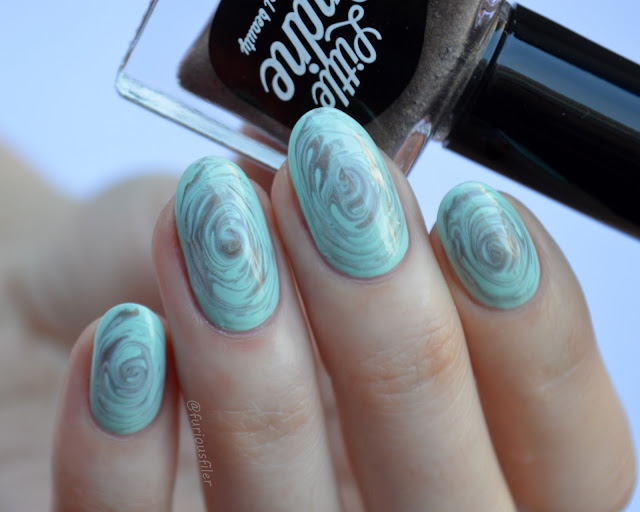

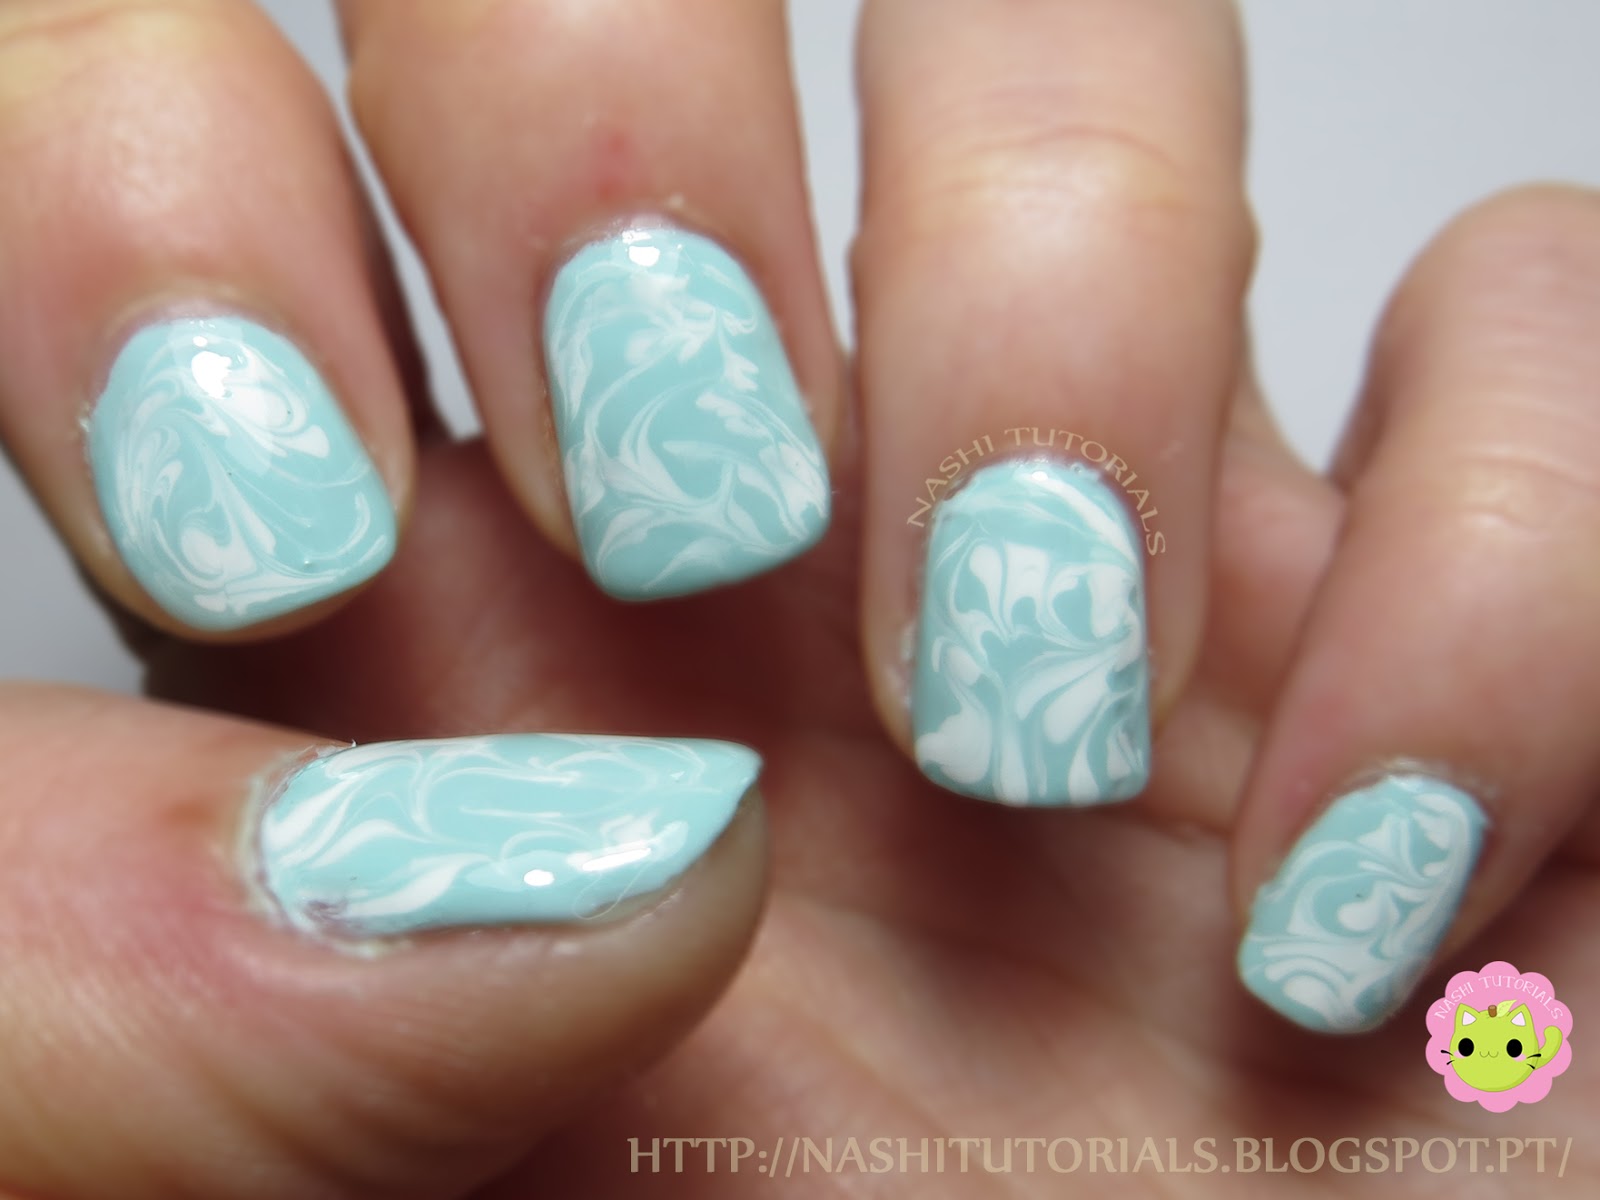
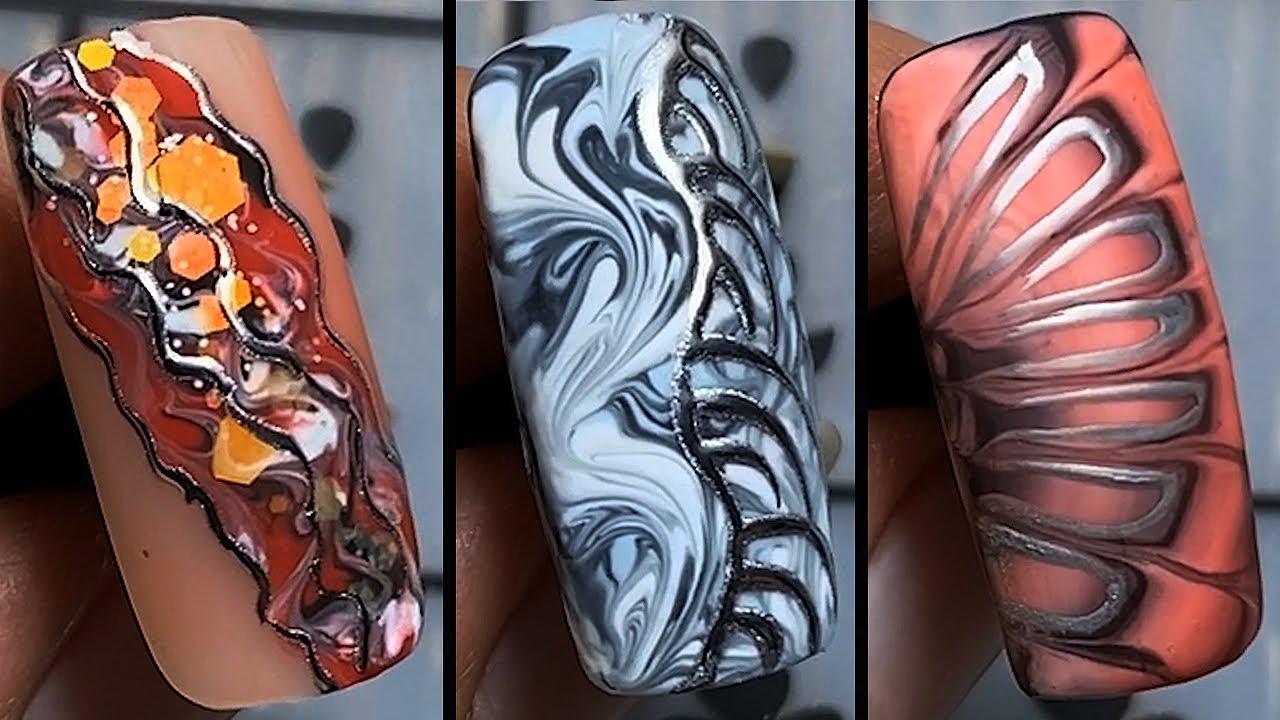
If you're new to drag marble nail art, this easy tutorial will guide you through the steps to create a stunning design. You don't need any special tools, just a few basic nail polishes and a toothpick or dotting tool. Step 1: Start by applying a base coat to your nails. This will protect your natural nails and prevent staining from the nail polish. Step 2: Choose two or three colors of nail polish that you want to use for your design. You can use any colors you like, but bright and bold colors work best for this design. Step 3: Apply a small amount of each color to your nail, creating random dots all over the nail. Make sure to leave some space between the dots, as this will help with the marbling effect. Step 4: Using a toothpick or a dotting tool, gently swirl the dots together to create a marbled effect. Be careful not to overdo it, as you don't want the colors to blend too much. Step 5: For a more defined design, you can use a small brush to create swirls or lines in the polish. This will add more dimension to your design and make it stand out. Step 6: Once the polish has dried, use a toothpick or a dotting tool to create a heart shape in the center of each nail. You can also use a small brush if you prefer. Step 7: For a finishing touch, you can add some glitter polish to your design. This will make your nails sparkle and add a touch of glamour to your look. Step 8: Apply a top coat to seal in your design and give your nails a glossy finish. This will also help your design last longer and prevent chipping.Easy Drag Marble Nail Art Tutorial


Easy Drag Marble Nail Art Tutorial


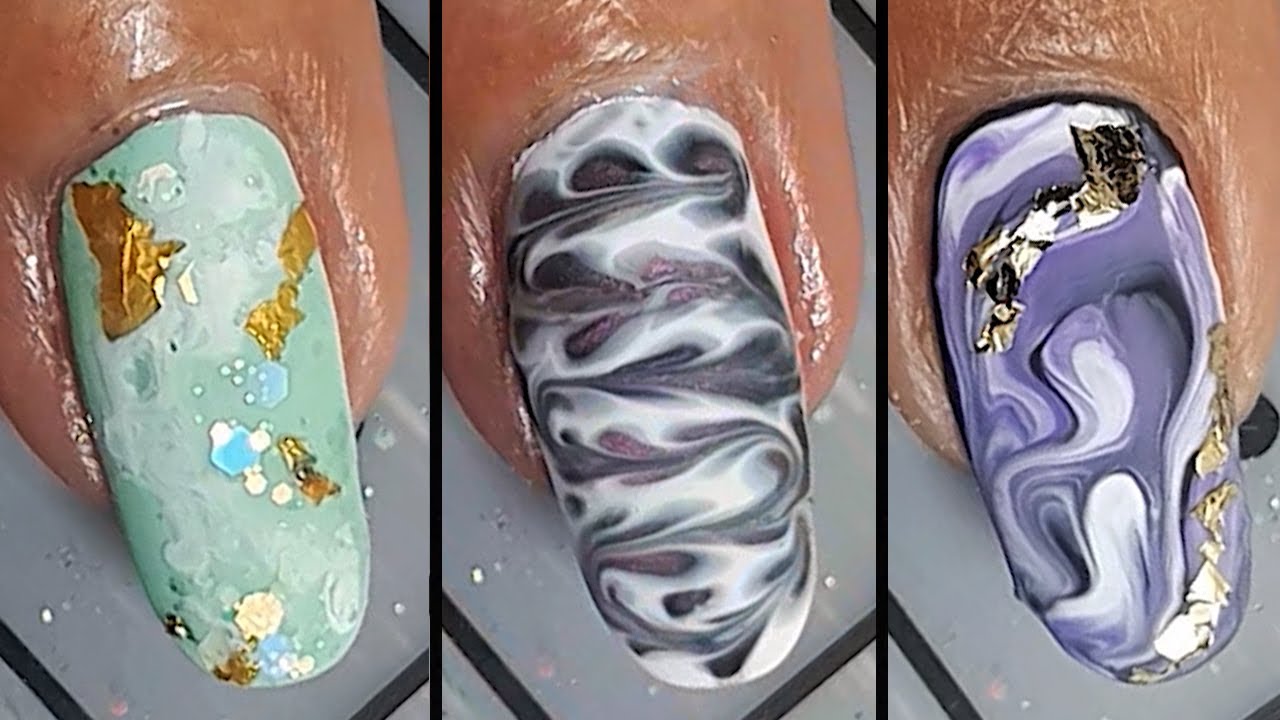
Why spend money at the nail salon when you can create stunning drag marble nails at home? This DIY tutorial will show you how to achieve a professional-looking design without breaking the bank. Step 1: Start by prepping your nails. File and shape your nails, push back your cuticles, and apply a base coat. This will create a smooth and clean base for your design. Step 2: Choose two or three colors of nail polish that you want to use for your design. You can also use a white or black nail polish as a base color to make the marbling stand out. Step 3: Apply a base color to your nails and let it dry completely. This will create a solid base for your design and make the colors pop. Step 4: Using a makeup sponge, apply a small amount of each color to the sponge. Make sure to overlap the colors slightly to create a blended effect. Step 5: Press the sponge onto your nails, starting at the base and working your way to the tip. You may need to repeat this step a few times to get the desired coverage. Step 6: Once the polish has dried, use a toothpick or a dotting tool to create a heart shape in the center of each nail. You can also use a small brush if you prefer. Step 7: For a more defined heart shape, you can trace over the heart with a black or white nail polish. This will make the hearts stand out and give your nails a more professional look. Step 8: Apply a top coat to seal in your design and give your nails a glossy finish. This will also help your design last longer and prevent chipping.DIY Drag Marble Nail Art


DIY Drag Marble Nail Art

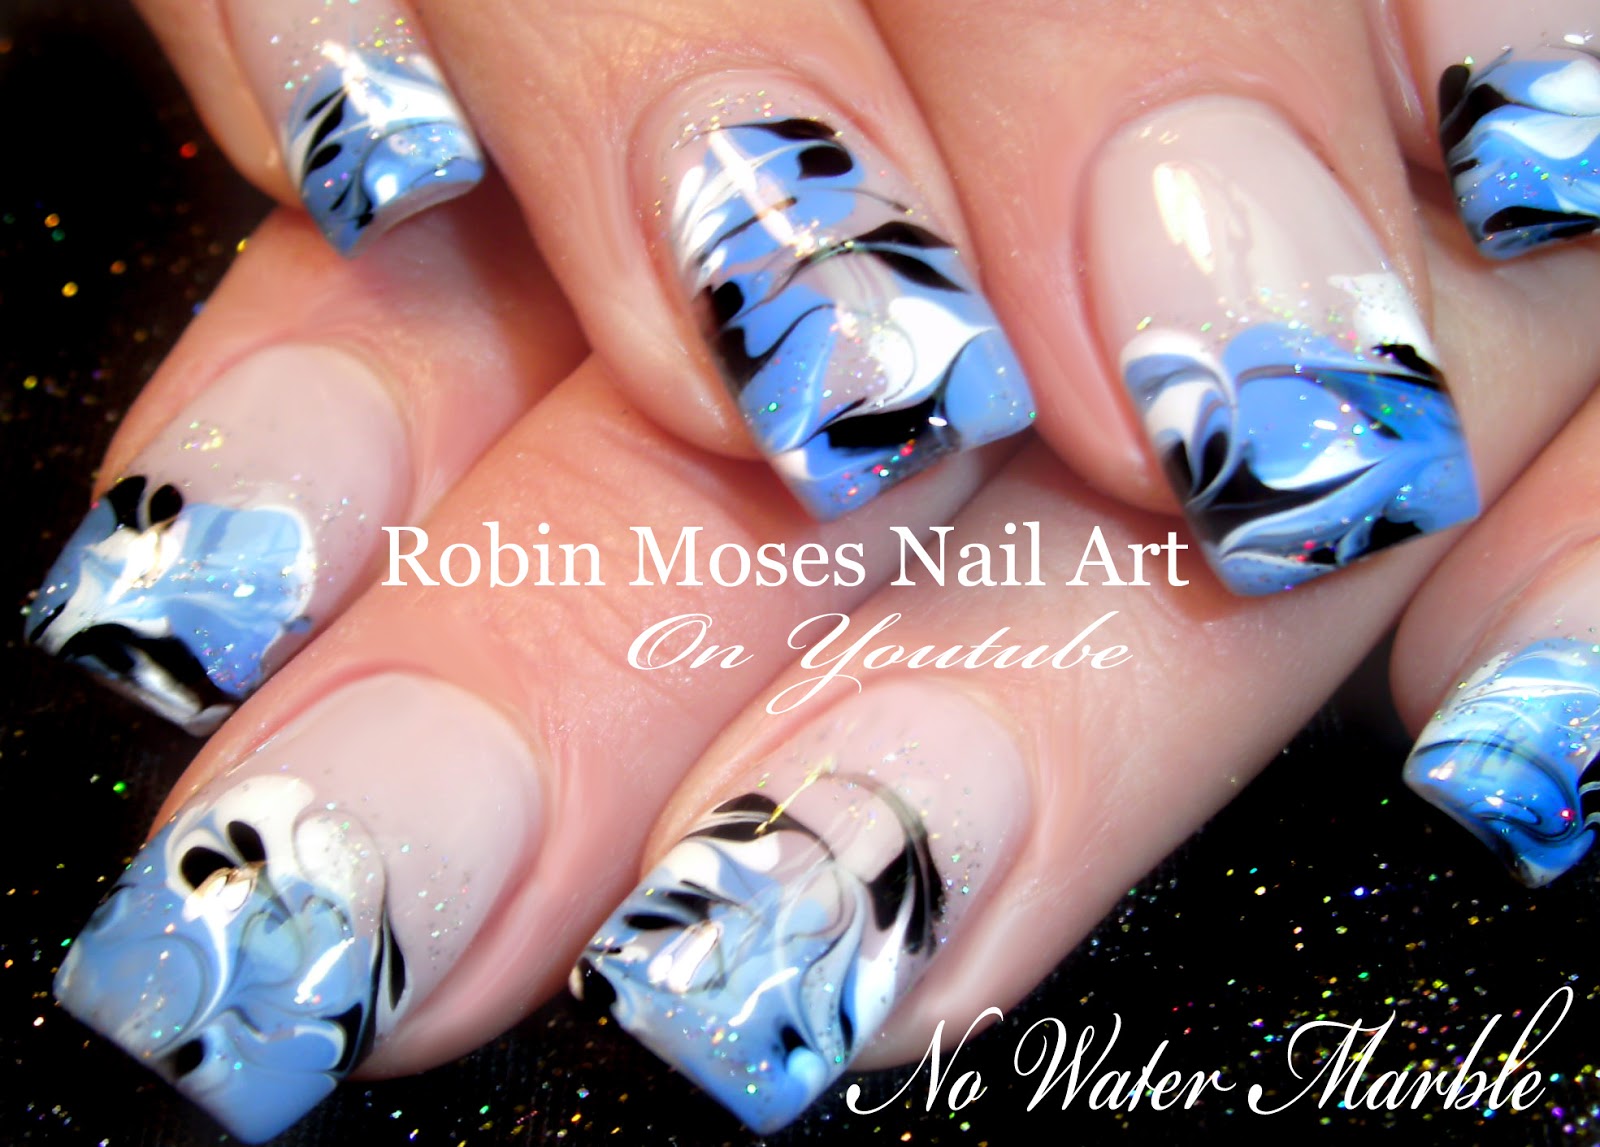
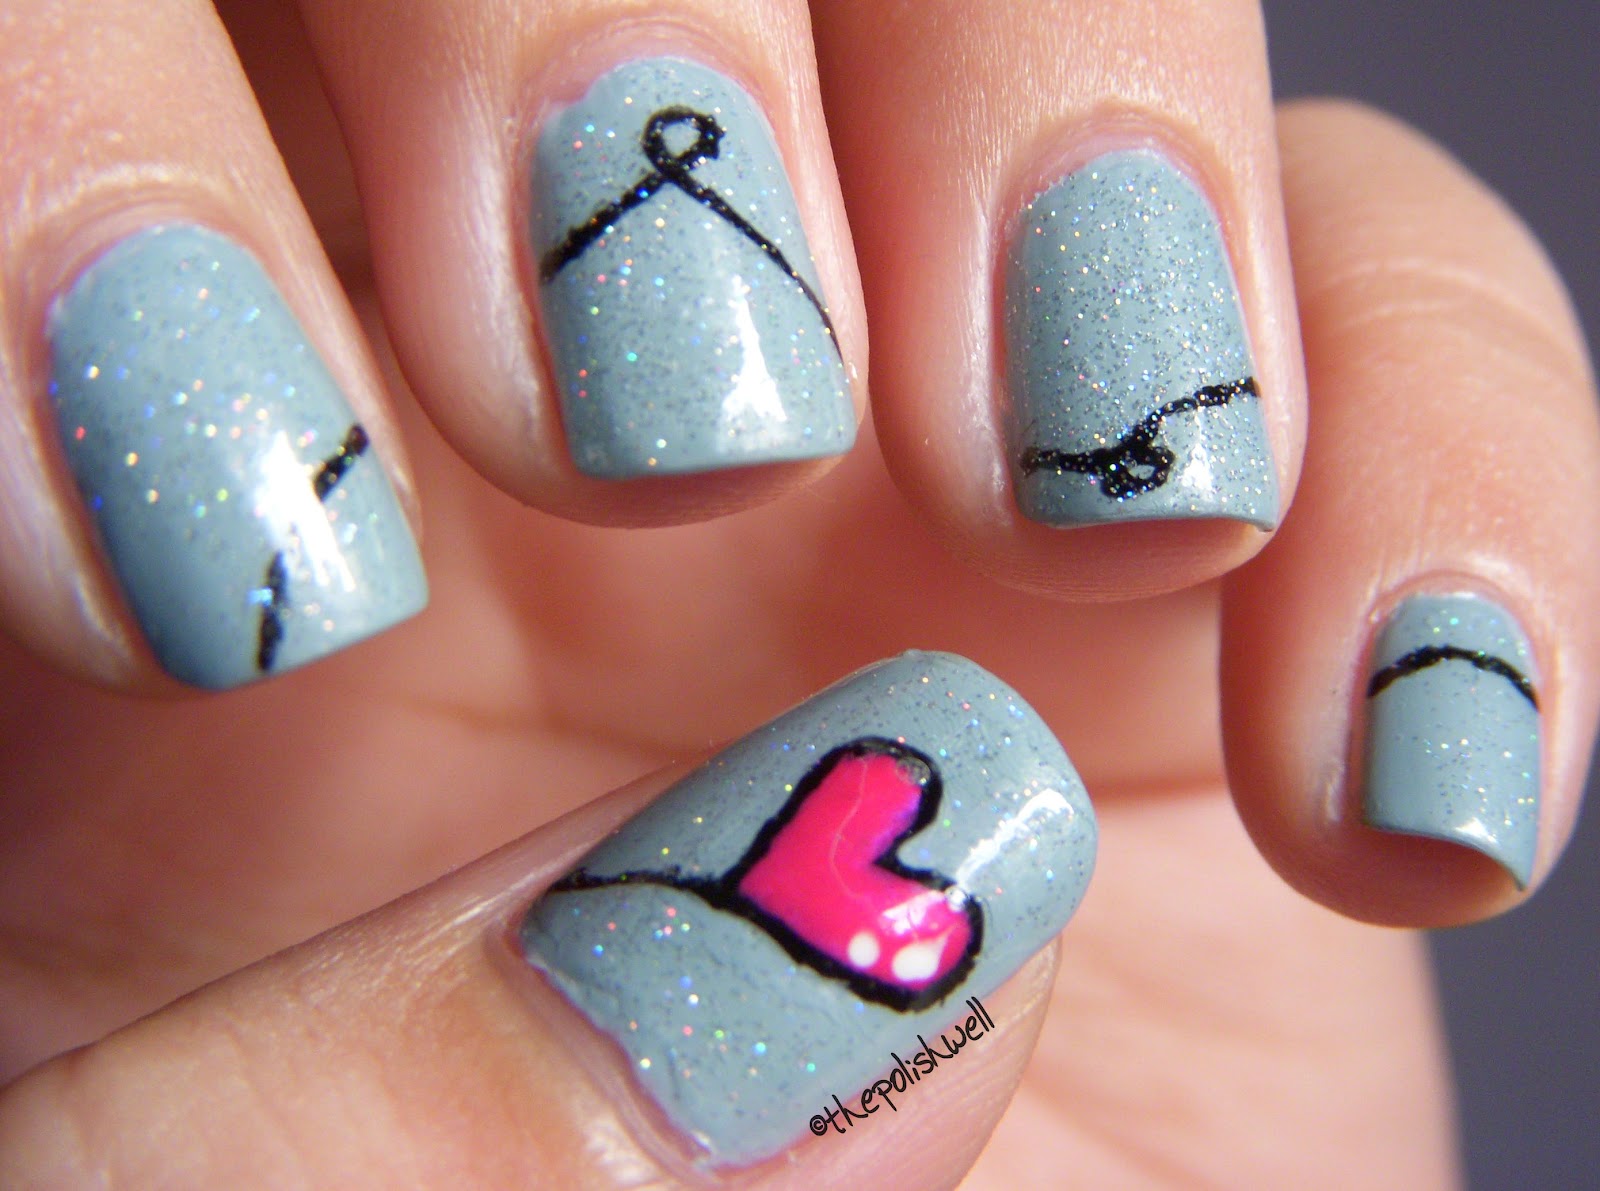
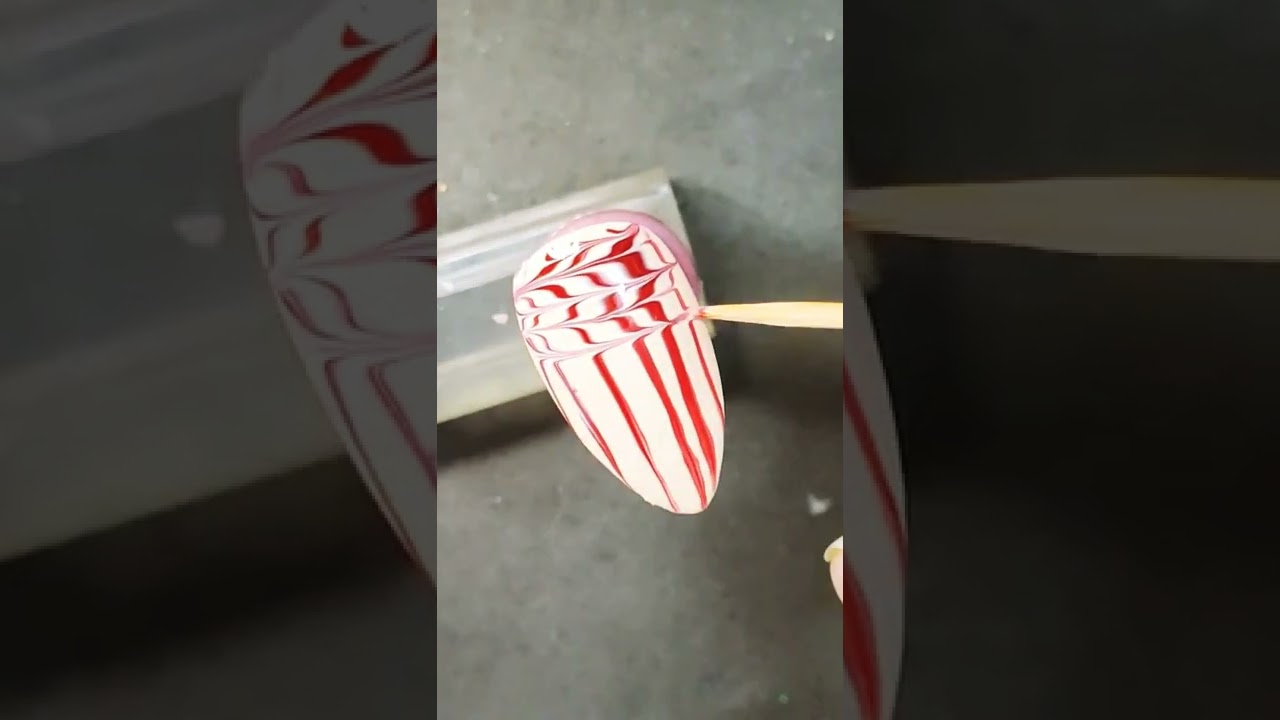
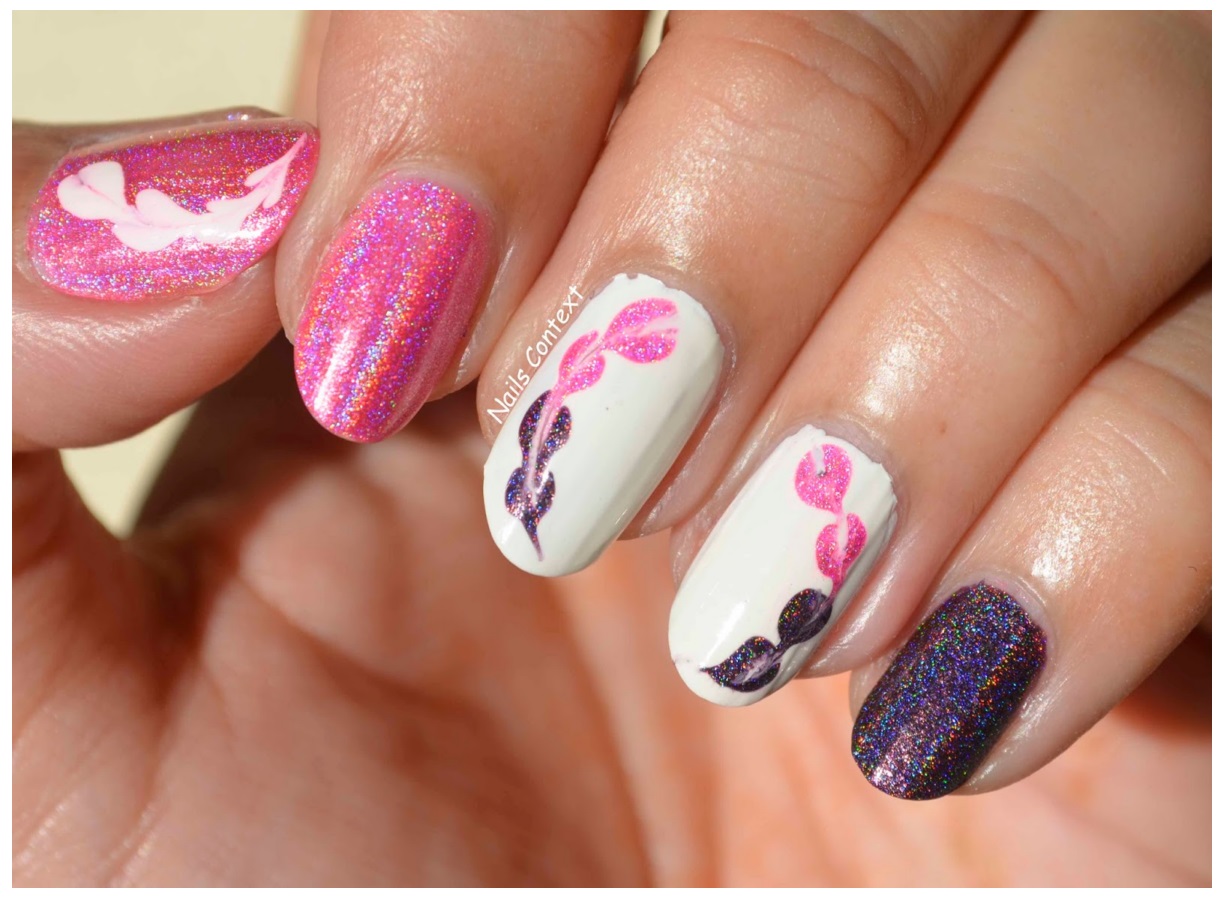
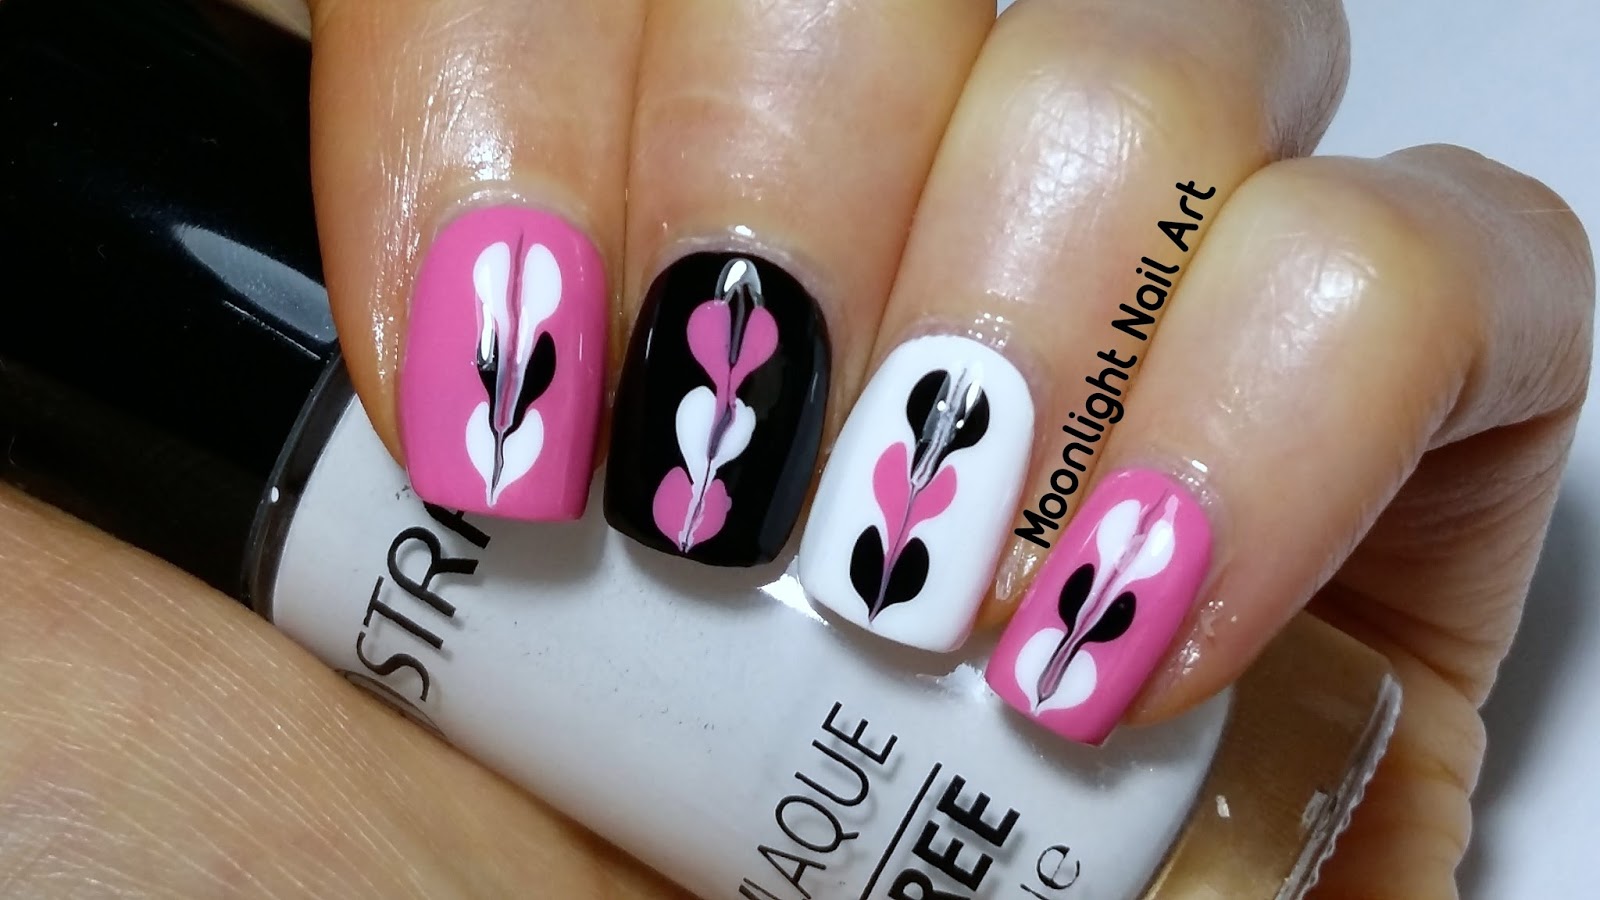
If you're a fan of heart-shaped nails, then this design is perfect for you. This tutorial will show you how to create heart-shaped drag marble nails that will make your heart skip a beat. Step 1: Start by prepping your nails. File and shape your nails, push back your cuticles, and apply a base coat. This will create a smooth and clean base for your design. Step 2: Choose two or three colors of nail polish that you want to use for your design. You can also use a white or black nail polish as a base color to make the marbling stand out. Step 3: Apply a base color to your nails and let it dry completely. This will create a solid base for your design and make the colors pop. Step 4: Using a makeup sponge, apply a small amount of each color to the sponge. Make sure to overlap the colors slightly to create a blended effect. Step 5: Press the sponge onto your nails, starting at the base and working your way to the tip. You may need to repeat this step a few times to get the desired coverage. Step 6: Once the polish has dried, use a toothpick or a dotting tool to create a heart shape in the center of each nail. You can also use a small brush if you prefer. Step 7: For a more defined heart shape, you can trace over the heart with a black or white nail polish. This will make the hearts stand out and give your nails a more professional look. Step 8: Apply a top coat to seal in your design and give your nails a glossy finish. This will also help your design last longer and prevent chipping.Heart Shaped Drag Marble Nail Art

Heart Shaped Drag Marble Nail Art

If you're new to drag marble nail art, don't worry, this tutorial will guide you through the steps to create a beautiful design that anyone can do. Step 1: Start by applying a base coat to your nails. This will protect your natural nails and prevent staining from the nail polish. Step 2: Choose two or three colors of nail polish that you want to use for your design. You can also use a white or black nail polish as a base color to make the marbling stand out. Step 3: Apply a base color to your nails and let it dry completely. This will create a solid base for your design and make the colors pop. Step 4: Using a toothpick or a dotting tool, create random dots of each color on your nail. Make sure to leave some space between the dots, as this will help with the marbling effect. Step 5: Using a toothpick or a dotting tool, gently swirl the dots together to create a marbled effect. Be careful not to overdo it, as you don't want the colors to blend too much. Step 6: Once the polish has dried, use a toothpick or a dotting tool to create a heart shape in the center of each nail. You can also use a small brush if you prefer. Step 7: For a finishing touch, you can add some glitter polish to your design. This will make your nails sparkle and add a touch of glamour to your look. Step 8: Apply a top coat to seal in your design and give your nails a glossy finish. This will also help your design last longer and prevent chipping.Drag Marble Nail Art for Beginners

Drag Marble Nail Art for Beginners


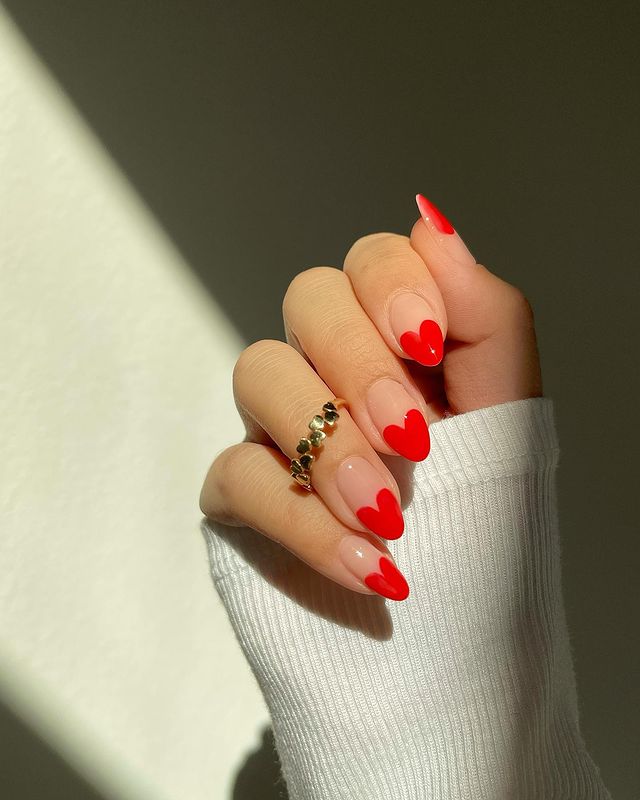
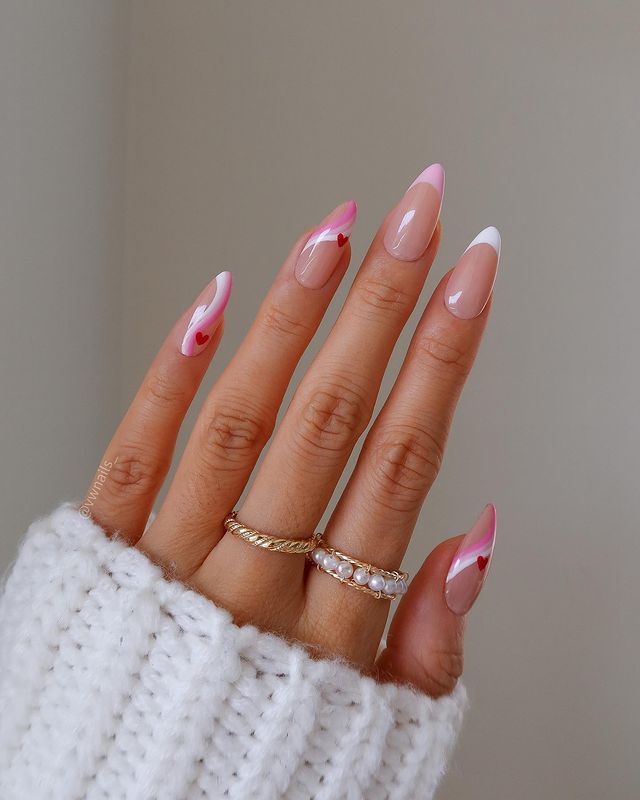
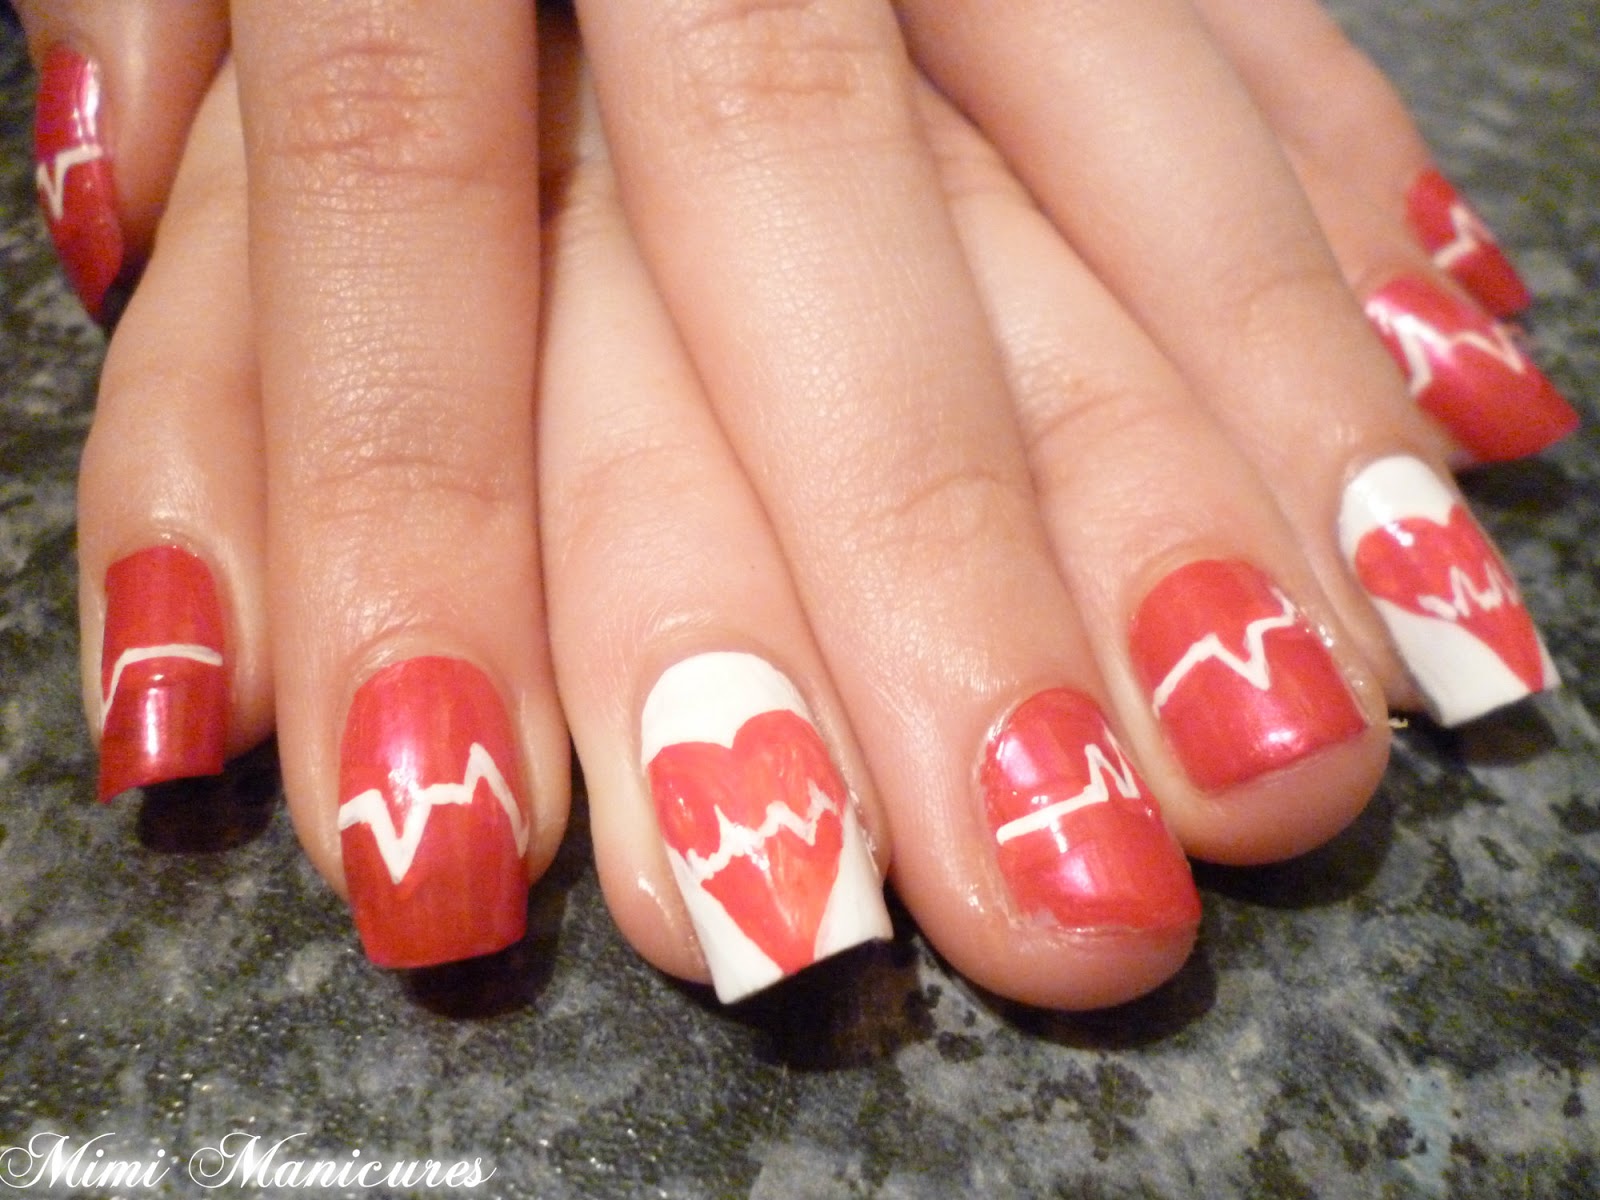
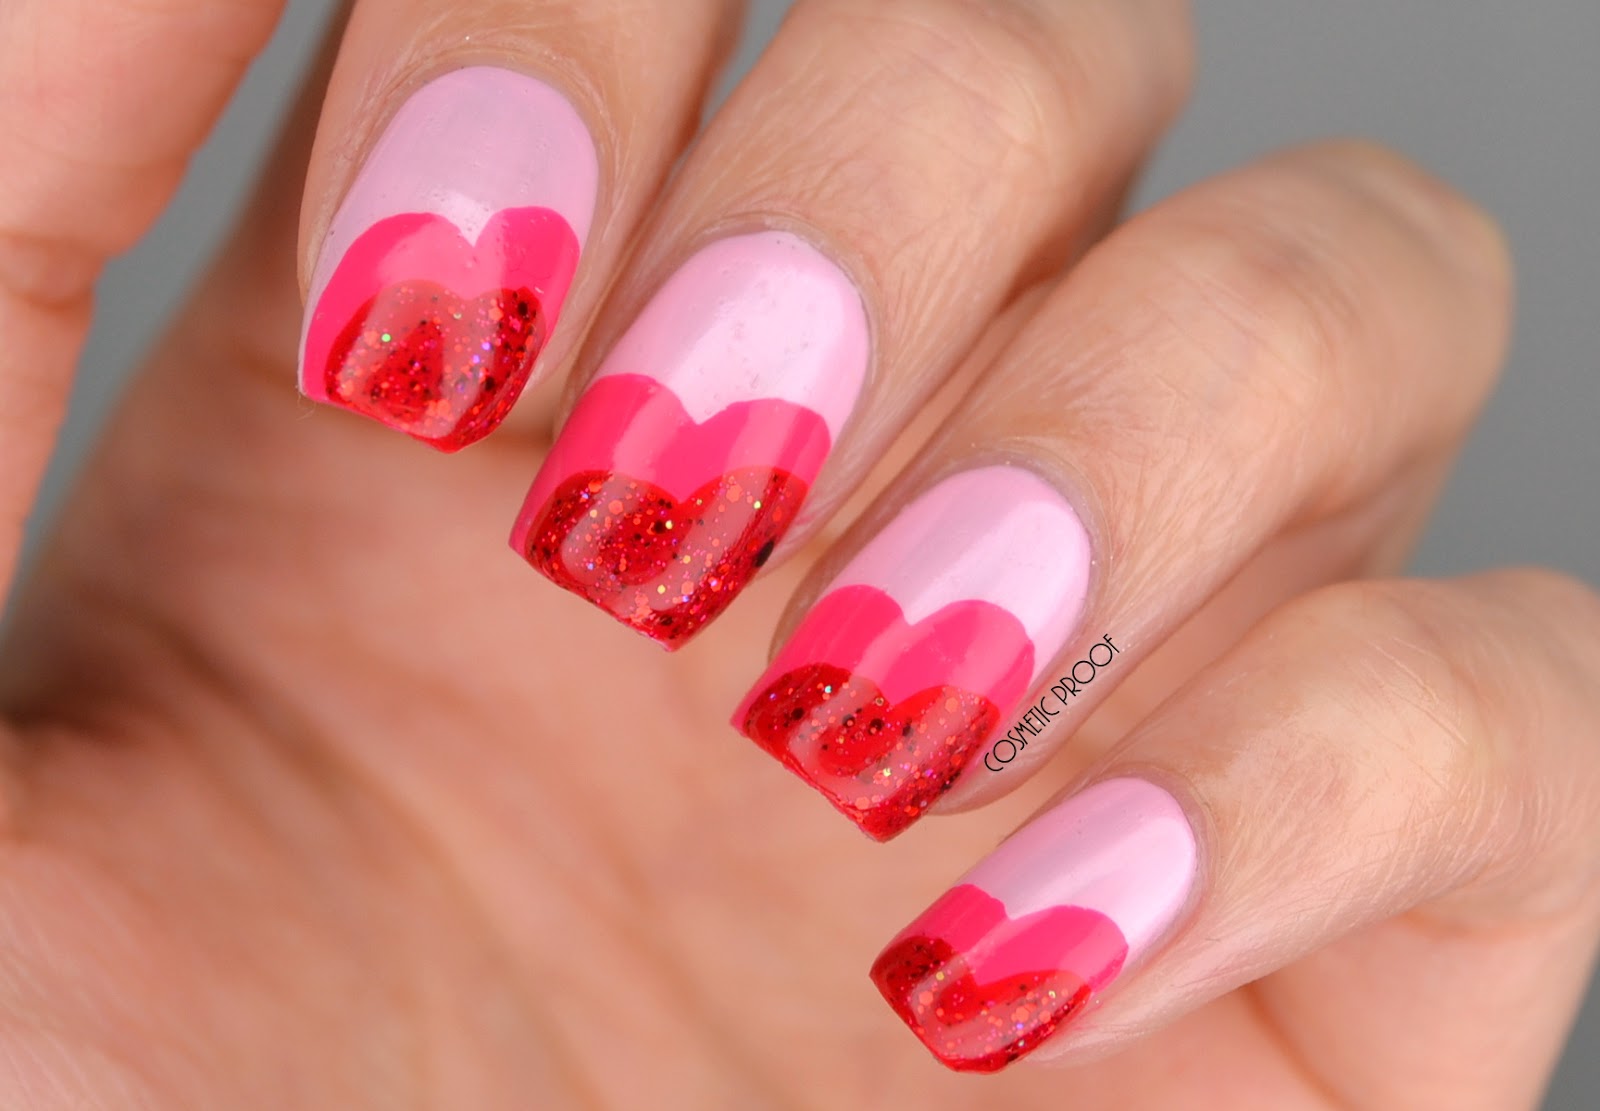
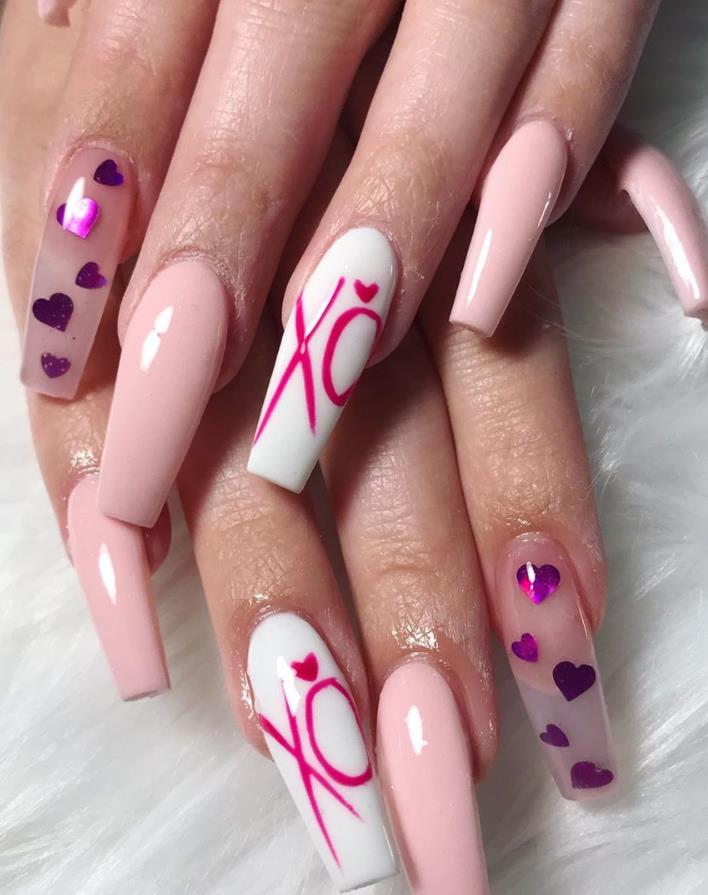
Valentine's Day is the perfect occasion to show off your love with some festive nail art. This tutorial will teach you how to create a beautiful drag marble design that is perfect for the most romantic day of the year. Step 1: Start by applying a base coat to your nails. This will protect your natural nails and prevent staining from the nail polish. Step 2: Choose two or three colors of nail polish that you want to use for your design. You can also use a white or black nail polish as a base color to make the marbling stand out. Step 3: Apply a base color to your nails and let it dry completely. This will create a solid base for your design and make the colors pop. Step 4: Using a makeup sponge, apply a small amount of each color to the sponge. Make sure to overlap the colors slightly to create a blended effect. Step 5: Press the sponge onto your nails, starting at the base and working your way to the tip. You may need to repeat this step a few times to get the desired coverage. Step 6: Once the polish has dried, use a toothpick or a dotting tool to create a heart shape in the center of each nail. You can also use a small brush if you prefer. Step 7: For a more defined heart shape, you can trace over the heart with a black or white nail polish. This will make the hearts stand out and give your nails a more professional look. Step 8: Apply a top coat to seal in your design and give your nails a glossy finish. This will also help your design last longer and prevent chipping.Valentine's Day Drag Marble Nail Art


Valentine's Day Drag Marble Nail Art
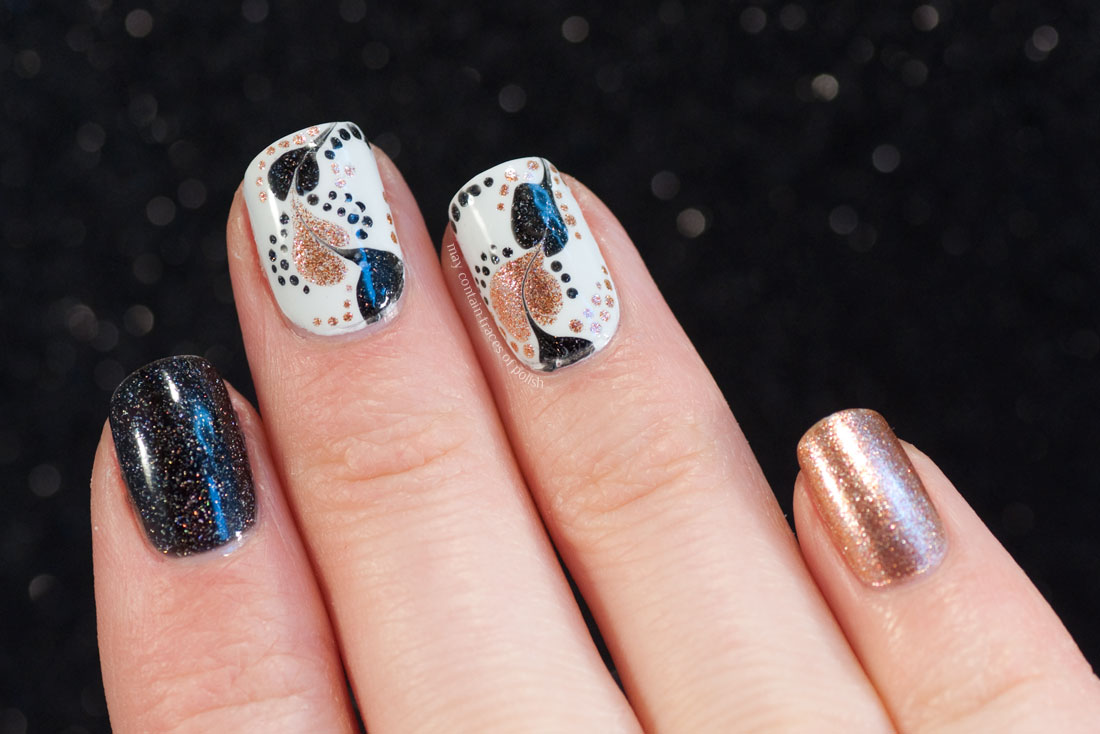
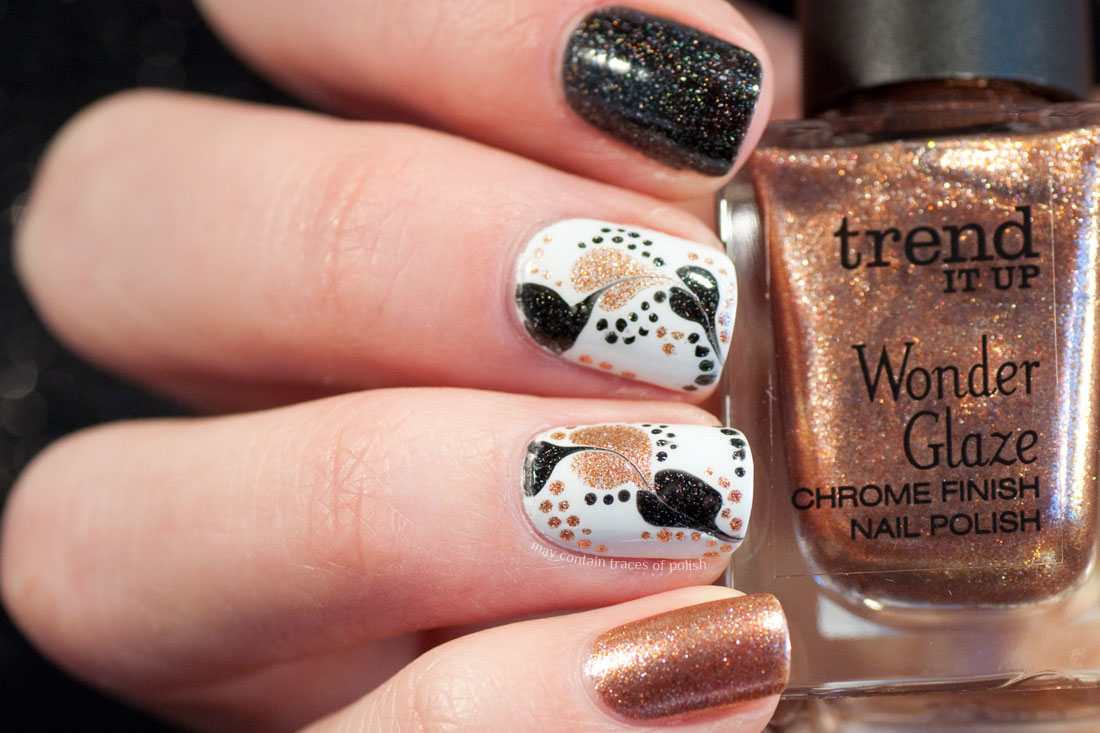

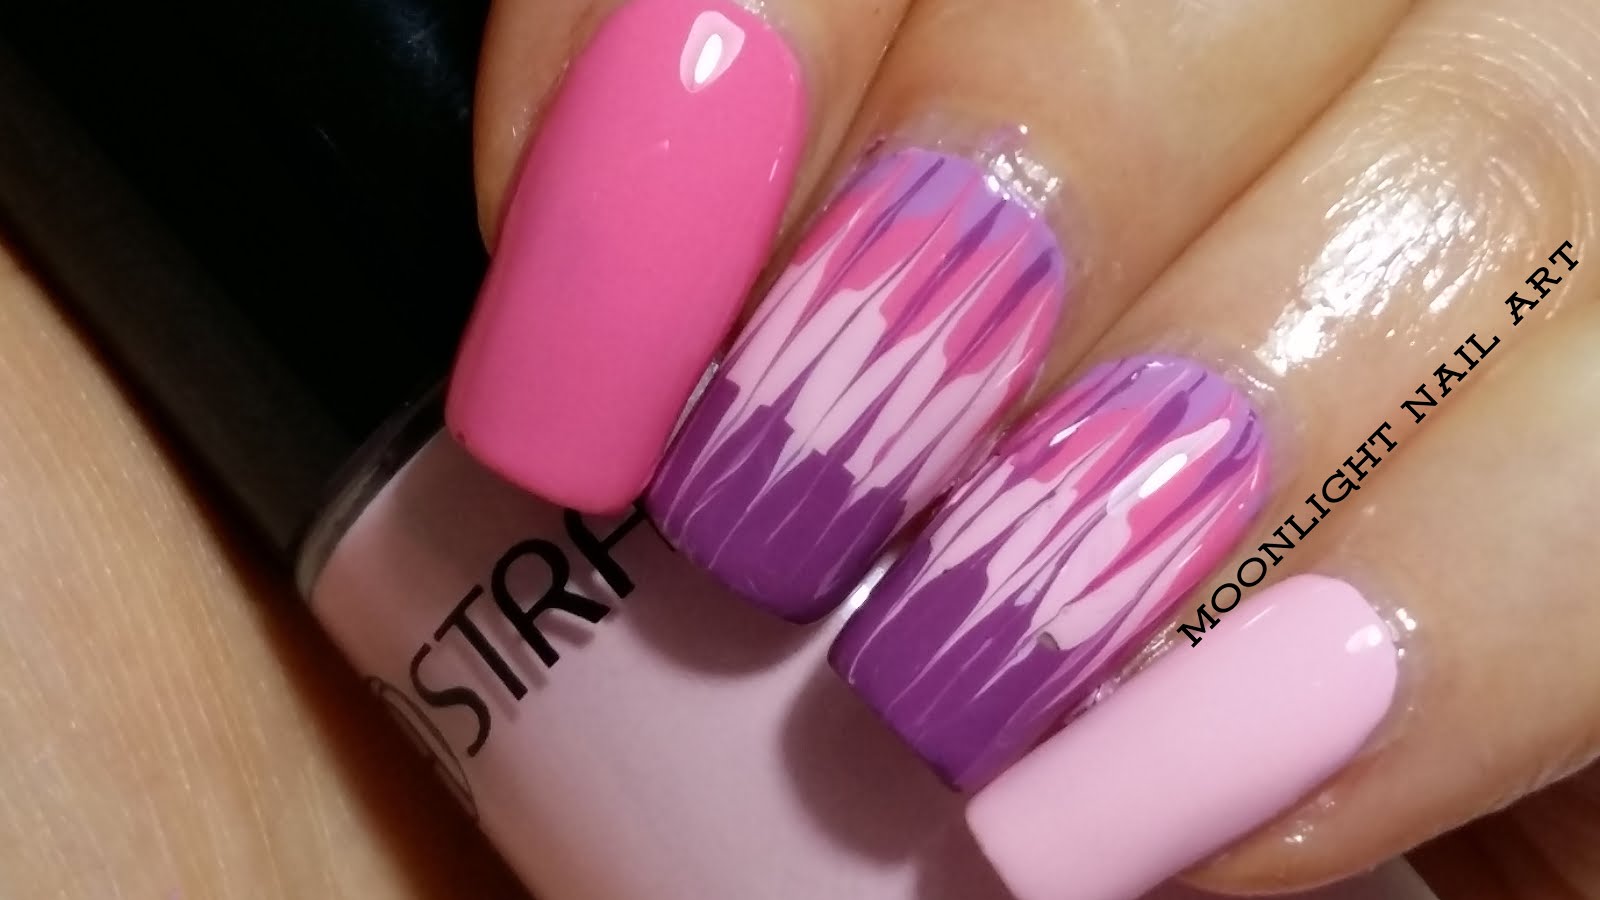
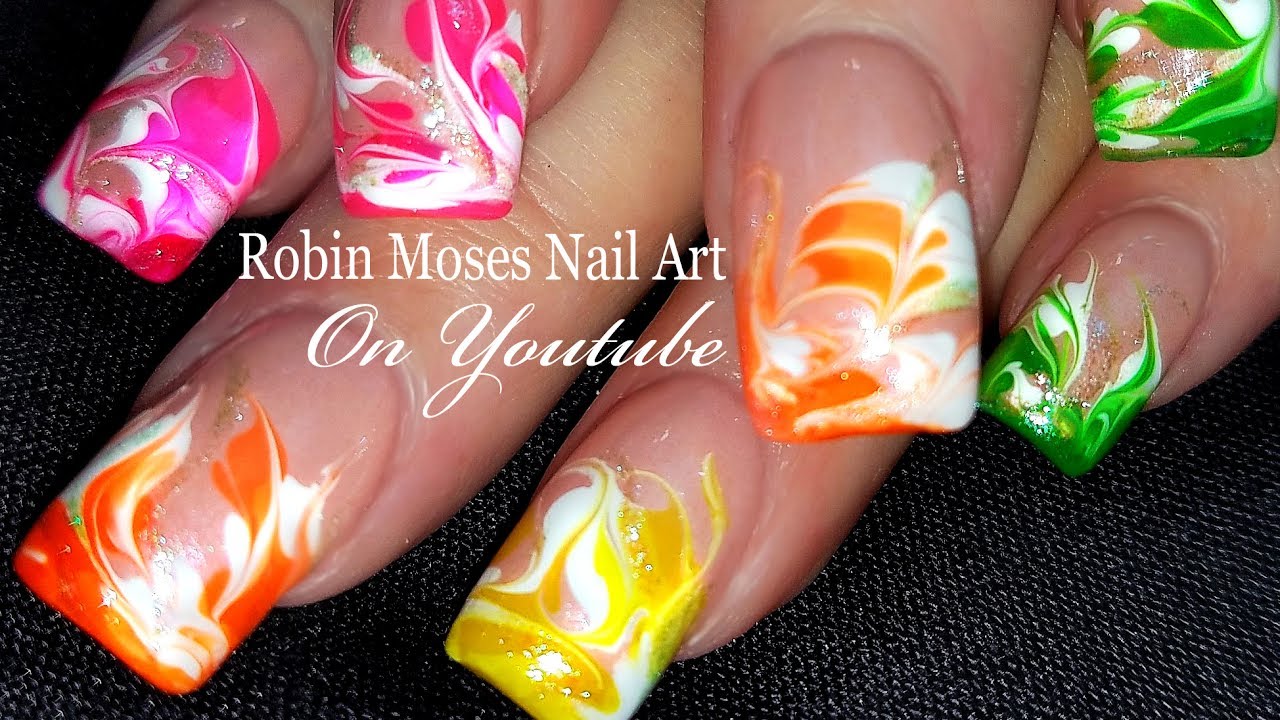
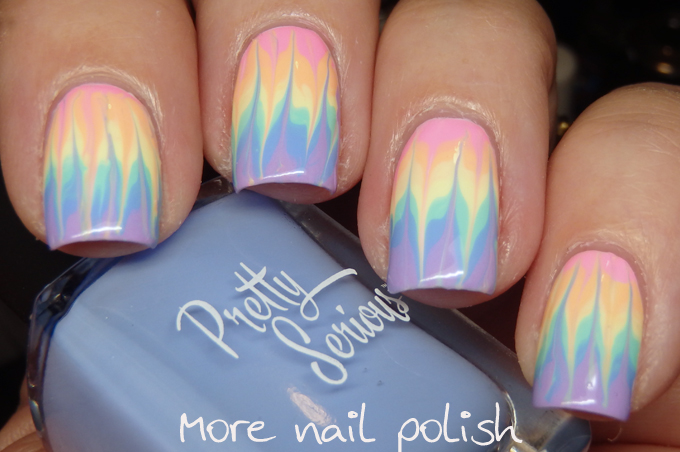
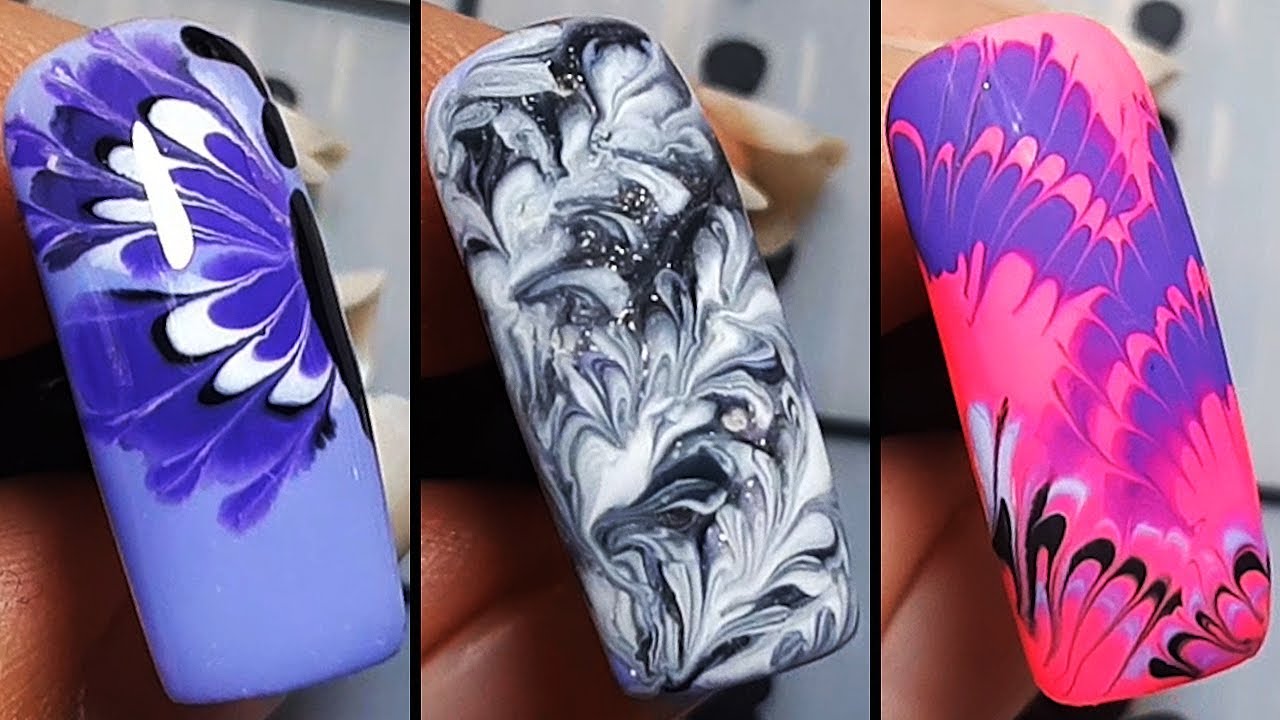
If you love bright and bold colors, then this drag marble nail art design is perfect for you. This tutorial will show you how to create a colorful and eye-catching look that will make your nails pop. Step 1: Start by applying a base coat to your nails. This will protect your natural nails and prevent staining from the nail polish. Step 2: Choose three or four colors of nail polish that you want to use for your design. You can use any colors you like, but bright and bold colors work best for this design. Step 3: Apply a base color to your nails and let it dry completely. This will create a solid base for your design and make the colors pop. Step 4: Using a makeup sponge, apply a small amount of each color to the sponge. Make sure to overlap the colors slightly to create a blended effect. Step 5: Press the sponge onto your nails, starting at the base and working your way to the tip. You may need to repeat this step a few times to get the desired coverage. Step 6: Once the polish has dried, use a toothpick or a dotting tool to create a heart shape in the center of each nail. You can also use a small brush if you prefer. Step 7: For a more defined heart shape, you can trace over the heart with a black or white nail polish. This will make the hearts stand out and give your nails a more professional look. Step 8: Apply a top coat to seal in your design and give your nails a glossy finish. This will also help your design last longer and prevent chipping.Colorful Drag Marble Nail Art


Colorful Drag Marble Nail Art
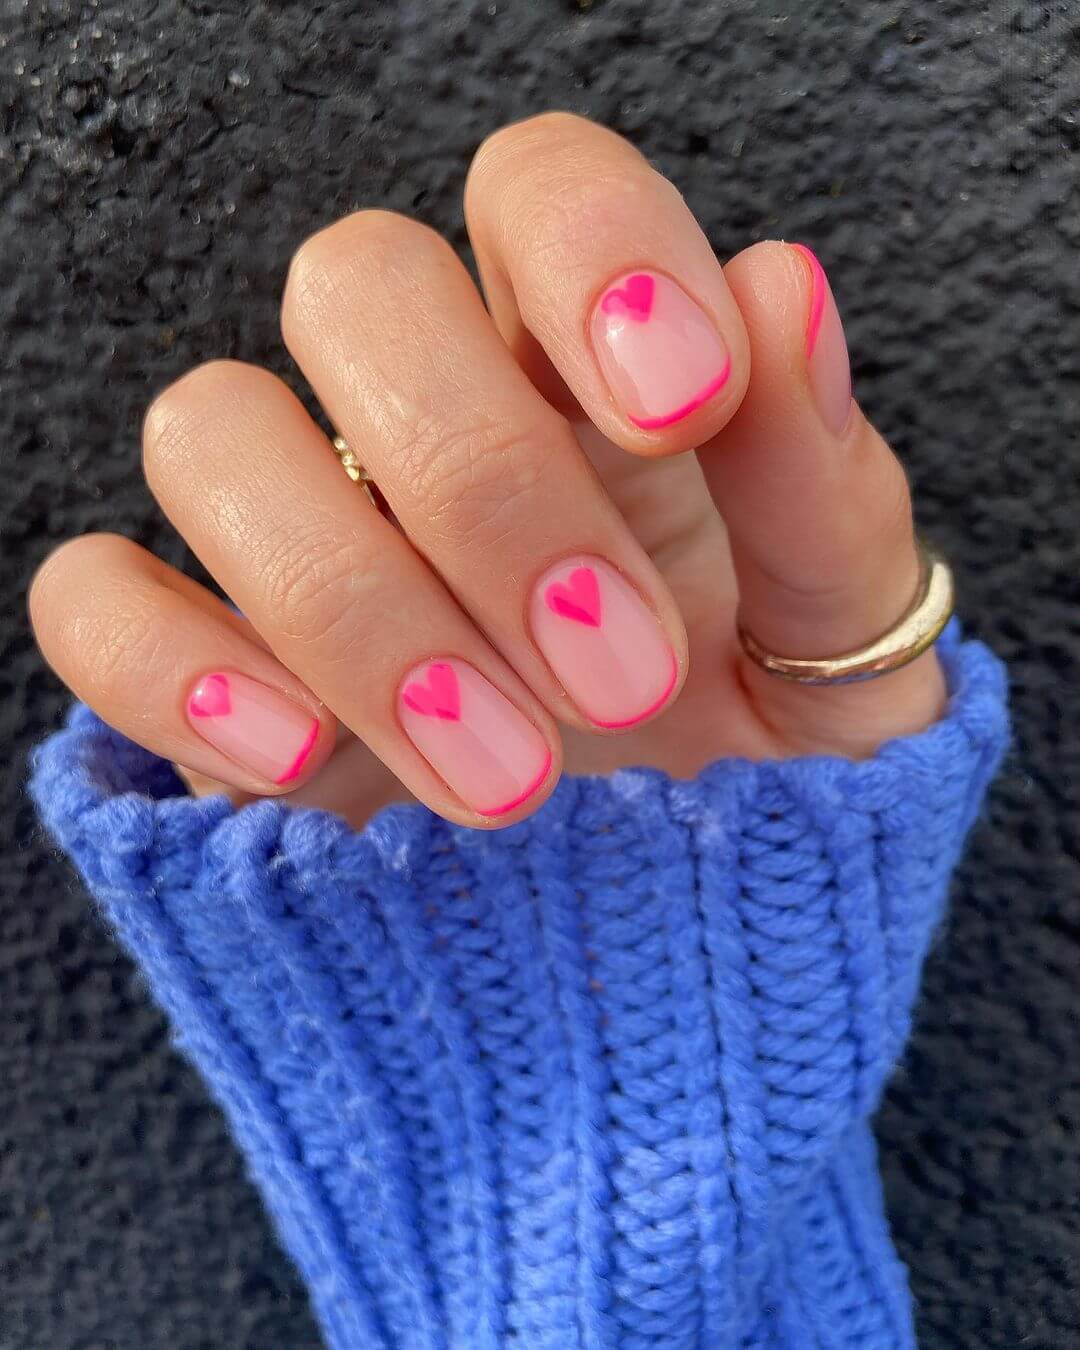
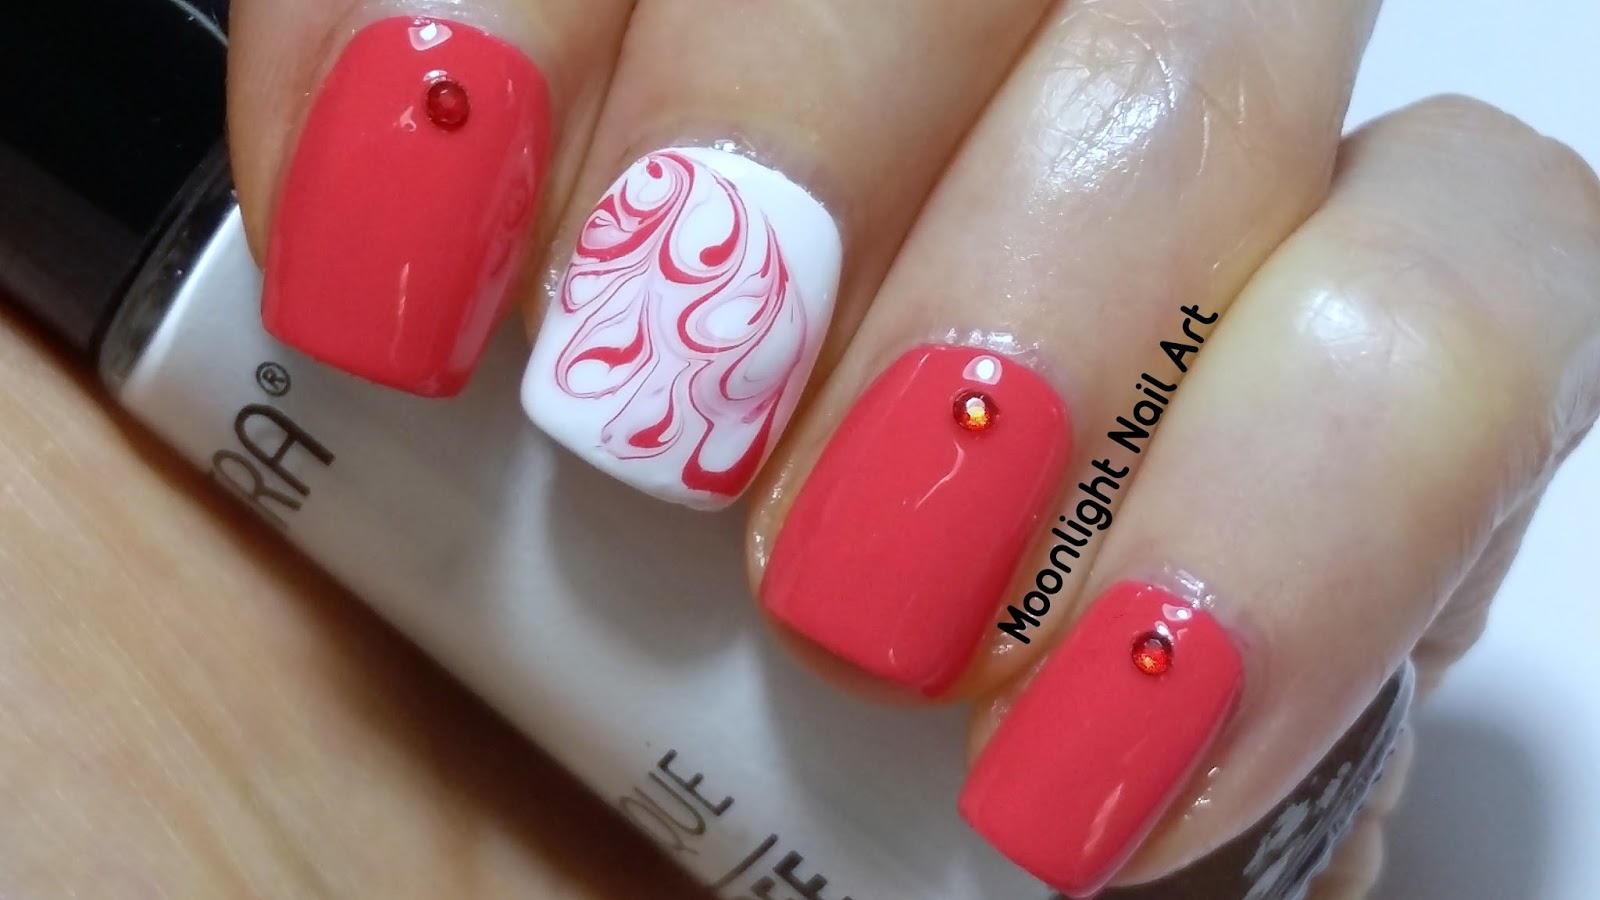
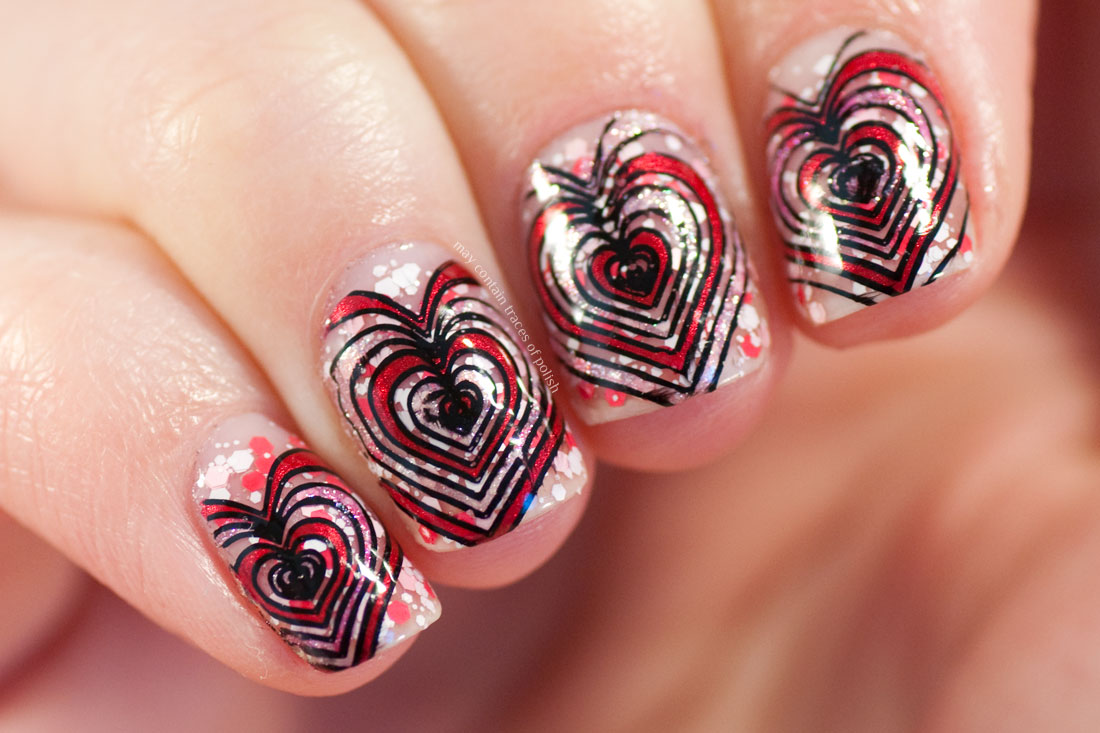
What's better than a drag marble nail design? A drag marble nail design with hearts, of course! This tutorial will show you how to create a beautiful and romantic look using drag marble and heart shapes. Step 1: Start by applying a base coat to your nails. This will protect your natural nails and prevent staining from the nail polish. Step 2: Choose two or three colors of nail polish that you want to use for your design. You can also use a white or black nail polish as a base color to make the marbling stand out.Drag Marble Nail Art with Hearts

Drag Marble Nail Art with Hearts
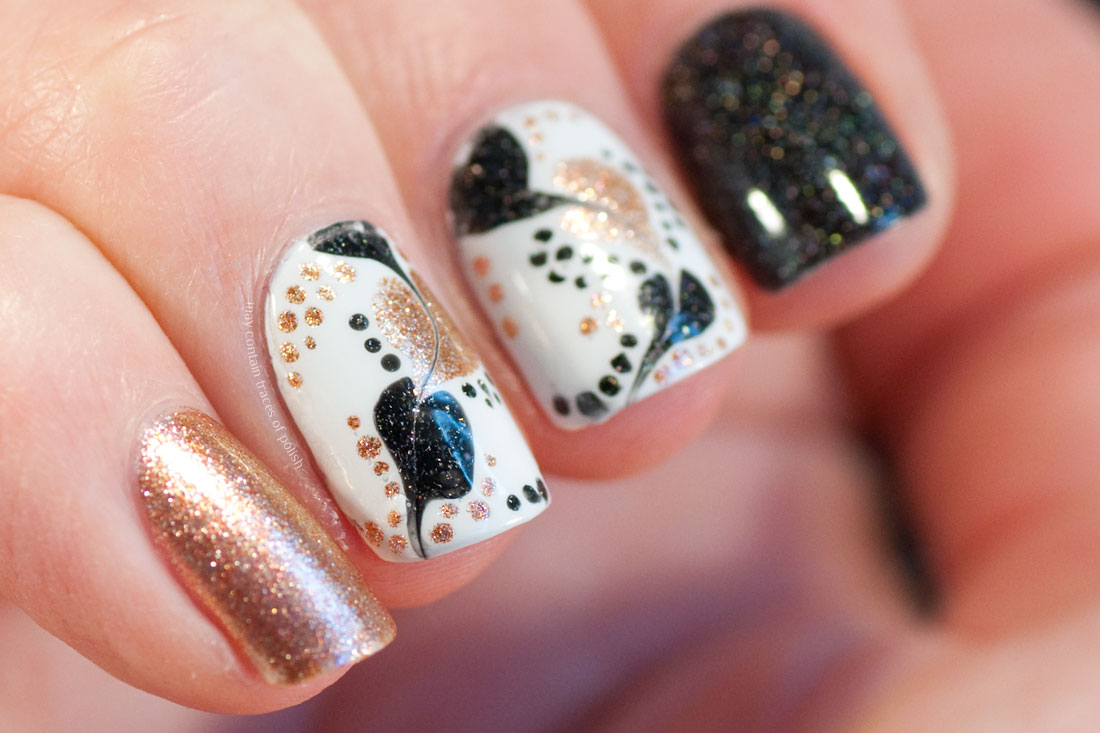
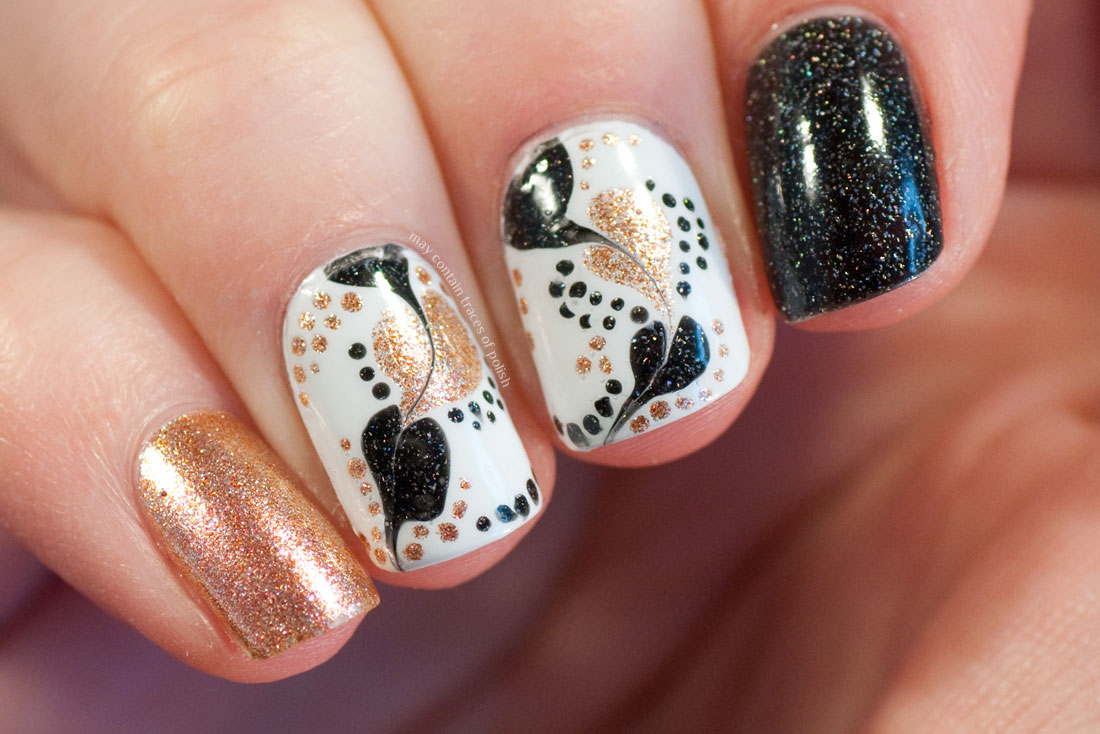
Elevate Your Nail Game with Drag Heart Nail Art

The Power of Nail Art
 Nail art has become a popular form of self-expression in recent years, with people using their nails as a canvas for creativity and personal style. From simple designs to intricate patterns, there are endless possibilities when it comes to nail art. One design that has been gaining popularity is drag heart nail art. This eye-catching and unique design is perfect for those looking to elevate their nail game and make a statement.
The Basics of Drag Heart Nail Art
 Drag heart nail art involves creating a gradient effect on the nails using different shades of
nail polish
. The gradient is then topped with a heart-shaped design, created with a thin brush or a
nail art pen
. This design can be done on all nails or just a few for a more subtle look. The result is a stunning and whimsical design that is sure to turn heads.
Drag heart nail art involves creating a gradient effect on the nails using different shades of
nail polish
. The gradient is then topped with a heart-shaped design, created with a thin brush or a
nail art pen
. This design can be done on all nails or just a few for a more subtle look. The result is a stunning and whimsical design that is sure to turn heads.
Express Yourself
 One of the best things about drag heart nail art is that it allows you to express your personality and creativity. You can use
bold and bright colors
for a fun and playful look, or go for
pastel shades
for a more delicate and feminine design. You can also experiment with different heart sizes and placements to create a unique look that is truly your own.
One of the best things about drag heart nail art is that it allows you to express your personality and creativity. You can use
bold and bright colors
for a fun and playful look, or go for
pastel shades
for a more delicate and feminine design. You can also experiment with different heart sizes and placements to create a unique look that is truly your own.
Perfect for Any Occasion
 Whether you're heading to a fancy event or just want to add some flair to your everyday look, drag heart nail art is perfect for any occasion. The design is versatile and can be tailored to fit any style or theme. It's also a great way to add some color and fun to your outfit without going over the top.
DIY or Professional?
 While drag heart nail art may seem daunting to some, it is actually quite simple to create at home. All you need is a few basic
nail art tools
and some patience. However, if you're not confident in your nail art skills, it's always a good idea to visit a professional nail technician. They have the expertise and precision to create a flawless drag heart nail art design that will last for weeks.
In conclusion, drag heart nail art is a fun and creative way to elevate your nail game and express yourself. It's versatile, perfect for any occasion, and can be done at home or by a professional. So why not give it a try and add some love to your nails?
While drag heart nail art may seem daunting to some, it is actually quite simple to create at home. All you need is a few basic
nail art tools
and some patience. However, if you're not confident in your nail art skills, it's always a good idea to visit a professional nail technician. They have the expertise and precision to create a flawless drag heart nail art design that will last for weeks.
In conclusion, drag heart nail art is a fun and creative way to elevate your nail game and express yourself. It's versatile, perfect for any occasion, and can be done at home or by a professional. So why not give it a try and add some love to your nails?


