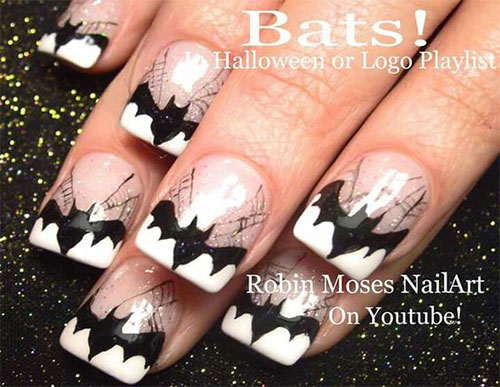
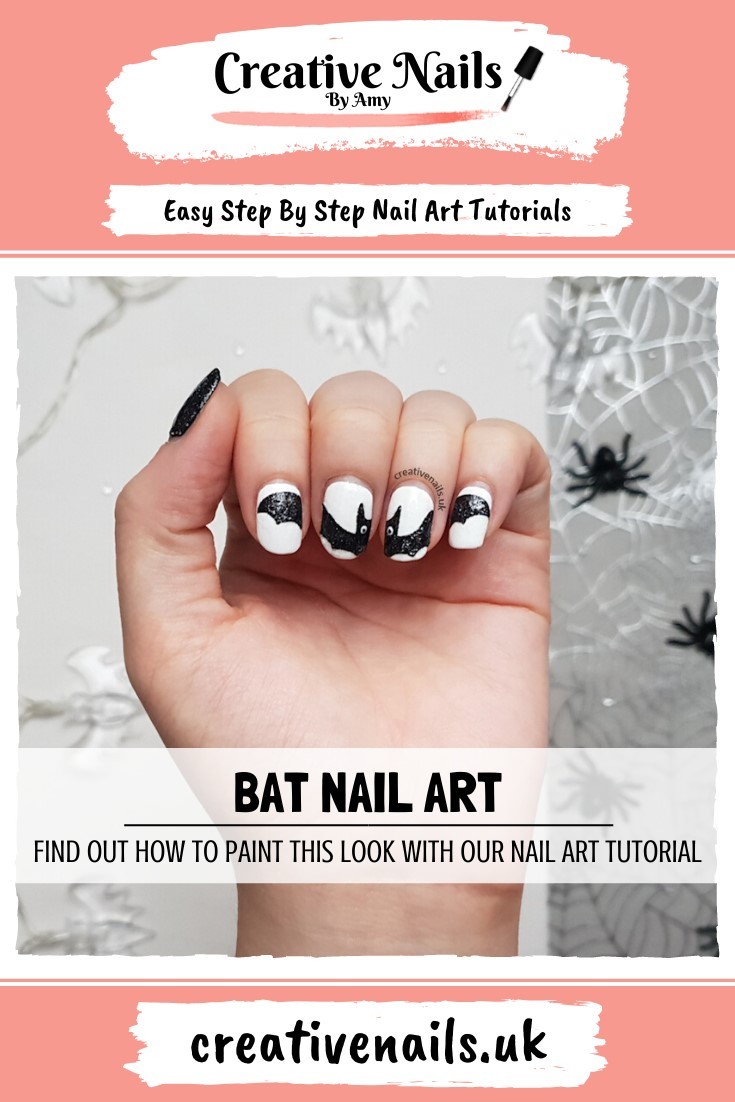
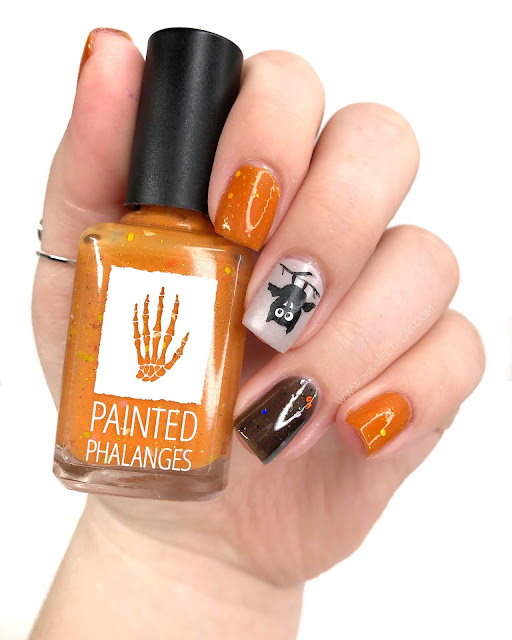
Halloween is just around the corner, and what better way to show your spooky spirit than with some easy bat nail art? This tutorial will guide you through a simple and fun design that will have your nails looking like they're ready to fly off into the night. The first step is to gather all of your materials. You will need a base coat, a black nail polish, a toothpick, and a white nail polish. Optional materials include a top coat and glitter for added sparkle. Start by applying a clear base coat to your nails. This will help protect your natural nails and create a smooth surface for the polish to adhere to. Next, paint all of your nails with a black polish. You can use any brand or type of black polish you have on hand. If you want to add some extra flair, you can use a black glitter polish for added dimension. Now it's time to create the bat design. Using a white nail polish, carefully draw a curved line from one side of your nail to the other, about halfway down your nail. This will be the body of the bat. Next, take a toothpick and dip it into the white polish. Use the toothpick to create two small dots on either side of the curved line. These will be the bat's eyes. Using the toothpick again, create two small triangles on either side of the body to create the bat's wings. Make sure the triangles are symmetrical on both sides. Repeat this process on all of your nails, and voila! You now have cute little bats on your nails that are perfect for Halloween. For an extra touch, you can add a top coat to seal in your design and add some extra shine. You can also add glitter to the wings or eyes for some added sparkle. This bat nail art design is simple and easy enough for anyone to do, and it's the perfect way to add a spooky touch to your Halloween look.1. Easy Halloween Bat Nail Art Tutorial


1. Easy Halloween Bat Nail Art Tutorial


If you're looking for a simple and understated bat nail art design, this one is for you. It's perfect for those who want a little bit of Halloween flair without going overboard. To start, gather your materials. You will need a base coat, a black nail polish, a toothpick, and a white nail polish. Optional materials include a top coat and glitter for added sparkle. Start by applying a base coat to your nails to protect them and create a smooth surface for the polish. Next, paint all of your nails with a black polish. You can use any brand or type of black polish you prefer. Now it's time to create the bat design. Using a white nail polish, carefully draw a curved line from one side of your nail to the other, about halfway down your nail. This will be the body of the bat. Next, take a toothpick and dip it into the white polish. Use the toothpick to create two small dots on either side of the curved line. These will be the bat's eyes. Using the toothpick again, create two small triangles on either side of the body to create the bat's wings. Make sure the triangles are symmetrical on both sides. Repeat this process on all of your nails, and you now have a simple and cute bat design on your nails. For an extra touch, you can add a top coat to seal in your design and add some extra shine. You can also add glitter to the wings or eyes for some added sparkle. This bat nail art design is perfect for those who want a subtle and easy way to incorporate Halloween into their manicure.2. Simple Bat Nail Art Design


2. Simple Bat Nail Art Design


If you're short on time but still want to have some fun with your nails, this quick and easy bat nail art is the perfect solution. It only takes a few minutes to create, but the end result is spooky and cute. To start, gather your materials. You will need a base coat, a black nail polish, a toothpick, and a white nail polish. Optional materials include a top coat and glitter for added sparkle. Start by applying a base coat to your nails to protect them and create a smooth surface for the polish. Next, paint all of your nails with a black polish. You can use any brand or type of black polish you prefer. Now it's time to create the bat design. Using a white nail polish, carefully draw a curved line from one side of your nail to the other, about halfway down your nail. This will be the body of the bat. Next, take a toothpick and dip it into the white polish. Use the toothpick to create two small dots on either side of the curved line. These will be the bat's eyes. Using the toothpick again, create two small triangles on either side of the body to create the bat's wings. Make sure the triangles are symmetrical on both sides. Repeat this process on all of your nails, and you now have a quick and easy bat design on your nails. For an extra touch, you can add a top coat to seal in your design and add some extra shine. You can also add glitter to the wings or eyes for some added sparkle. This bat nail art design is perfect for those who are short on time but still want to have some fun with their nails for Halloween.3. Quick and Easy Bat Nail Art


3. Quick and Easy Bat Nail Art


If you're looking for a cute and easy bat nail art design, look no further. This design is perfect for those who want a fun and playful manicure for Halloween. To start, gather your materials. You will need a base coat, a black nail polish, a toothpick, and a white nail polish. Optional materials include a top coat and glitter for added sparkle. Start by applying a base coat to your nails to protect them and create a smooth surface for the polish. Next, paint all of your nails with a black polish. You can use any brand or type of black polish you prefer. Now it's time to create the bat design. Using a white nail polish, carefully draw a curved line from one side of your nail to the other, about halfway down your nail. This will be the body of the bat. Next, take a toothpick and dip it into the white polish. Use the toothpick to create two small dots on either side of the curved line. These will be the bat's eyes. Using the toothpick again, create two small triangles on either side of the body to create the bat's wings. Make sure the triangles are symmetrical on both sides. Repeat this process on all of your nails, and you now have a cute and playful bat design on your nails. For an extra touch, you can add a top coat to seal in your design and add some extra shine. You can also add glitter to the wings or eyes for some added sparkle. This bat nail art design is perfect for those who want a fun and lighthearted manicure for Halloween.4. Cute and Easy Bat Nail Art

4. Cute and Easy Bat Nail Art


If you're new to nail art or just need some extra guidance, this step-by-step tutorial for bat nail art is perfect for you. It breaks down the process into easy-to-follow steps, so you can create a perfect bat design on your nails. To start, gather your materials. You will need a base coat, a black nail polish, a toothpick, and a white nail polish. Optional materials include a top coat and glitter for added sparkle. Start by applying a base coat to your nails to protect them and create a smooth surface for the polish. Next, paint all of your nails with a black polish. You can use any brand or type of black polish you prefer. Now it's time to create the bat design. Using a white nail polish, carefully draw a curved line from one side of your nail to the other, about halfway down your nail. This will be the body of the bat. Next, take a toothpick and dip it into the white polish. Use the toothpick to create two small dots on either side of the curved line. These will be the bat's eyes. Using the toothpick again, create two small triangles on either side of the body to create the bat's wings. Make sure the triangles are symmetrical on both sides. Repeat this process on all of your nails, and you now have a perfect bat design on your nails. For an extra touch, you can add a top coat to seal in your design and add some extra shine. You can also add glitter to the wings or eyes for some added sparkle. This step-by-step tutorial is perfect for those who are new to nail art or just need some extra guidance to create a flawless bat design.5. Step-by-Step Bat Nail Art Tutorial


5. Step-by-Step Bat Nail Art Tutorial

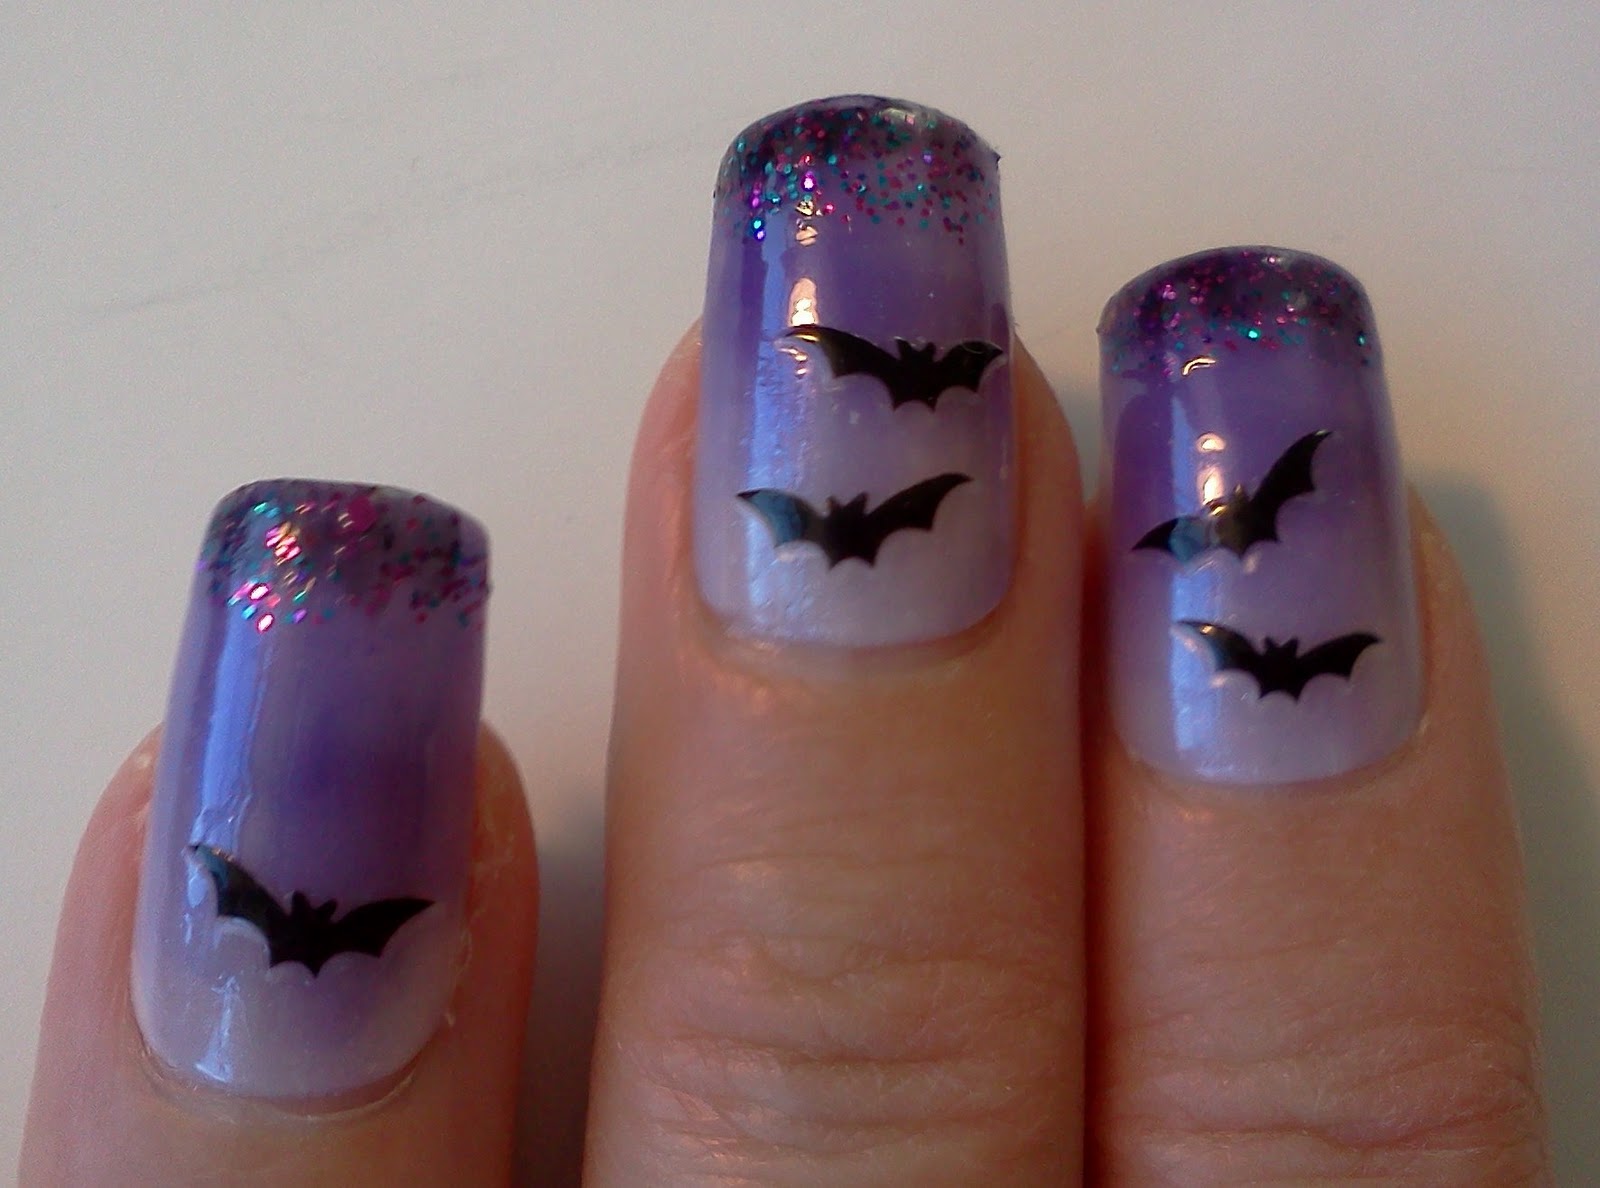
If you prefer a more subtle and minimalist approach to nail art, these bat nail art ideas are perfect for you. They incorporate simple bat designs with clean lines for a chic and understated look. To start, gather your materials. You will need a base coat, a black nail polish, a toothpick, and a white nail polish. Optional materials include a top coat and glitter for added sparkle. Start by applying a base coat to your nails to protect them and create a smooth surface for the polish. Next, paint all of your nails with a black polish. You can use any brand or type of black polish you prefer. Now it's time to create the bat design. Using a white nail polish, carefully draw a curved line from one side of your nail to the other, about halfway down your nail. This will be the body of the bat. Next, take a toothpick and dip it into the white polish. Use the toothpick to create two small dots on either side of the curved line. These will be the bat's eyes. Using the toothpick again, create two small triangles on either side of the body to create the bat's wings. Make sure the triangles are symmetrical on both sides. Repeat this process on all of your nails, and you now have a minimalist bat design on your nails. For an extra touch, you can add a top coat to seal in your design and add some extra shine. You can also add glitter to the wings or eyes for some added sparkle. These minimalist bat nail art ideas are perfect for those who want a simple and chic design for Halloween.6. Minimalist Bat Nail Art Ideas
6. Minimalist Bat Nail Art Ideas


If you love the classic combination of black and white, this black and white bat nail art is perfect for you. It's simple, elegant, and perfect for any Halloween event. To start, gather your materials. You will need a base coat, a black nail polish, a toothpick, and a white nail polish. Optional materials include a top coat and glitter for added sparkle. Start by applying a base coat to your nails to protect them and create a smooth surface for the polish. Next, paint all of your nails with a black polish. You can use any brand or type of black polish you prefer. Now it's time to create the bat design. Using a white nail polish, carefully draw a curved line from one side of your nail to the other, about halfway down your nail. This will be the body of the bat. Next, take a toothpick and dip it into the white polish. Use the toothpick to create two small dots on either side of the curved line. These will be the bat's eyes. Using the toothpick again, create two small triangles on either side of the body to create the bat's wings. Make sure the triangles are symmetrical on both sides. Repeat this process on all of your nails, and you now have a sleek and stylish black and white bat design on your nails. For an extra touch, you can add a top coat to seal in your design and add some extra shine. You can also add glitter to the wings or eyes for some added sparkle. This black and white bat nail art is perfect for those who want a sophisticated and timeless design for Halloween.7. Black and White Bat Nail Art


7. Black and White Bat Nail Art

If you're new to nail art or just want a simple and easy design to try, this DIY bat nail art is perfect for beginners. It only requires a few materials and basic techniques, making it perfect for those who are just starting out. To start, gather your materials. You will need a base coat, a black nail polish, a toothpick, and a white nail polish. Optional materials include a top coat and glitter for added sparkle. Start by applying a base coat to your nails to protect them and create a smooth surface for the polish. Next, paint all of your nails with a black polish. You can use any brand or type of black polish you prefer. Now it's time to create the bat design. Using a white nail polish, carefully draw a curved line from one side of your nail to the other, about halfway down your nail. This will be the body of the bat. Next, take a toothpick and dip it into the white polish. Use the toothpick to create two small dots on either side of the curved line. These will be the bat's eyes. Using the toothpick again, create two small triangles on either side of the body to create the bat's wings. Make sure the triangles are symmetrical on both sides. Repeat this process on all of your nails, and you now have a simple and easy DIY bat design on your nails. For an extra touch, you can add a top coat to seal in your design and add some extra shine. You can also add glitter to the wings or eyes for some added sparkle. This easy DIY bat nail art is perfect for beginners who want to try their hand at nail art for Halloween.8. Easy DIY Bat Nail Art for Beginners

8. Easy DIY Bat Nail Art for Beginners


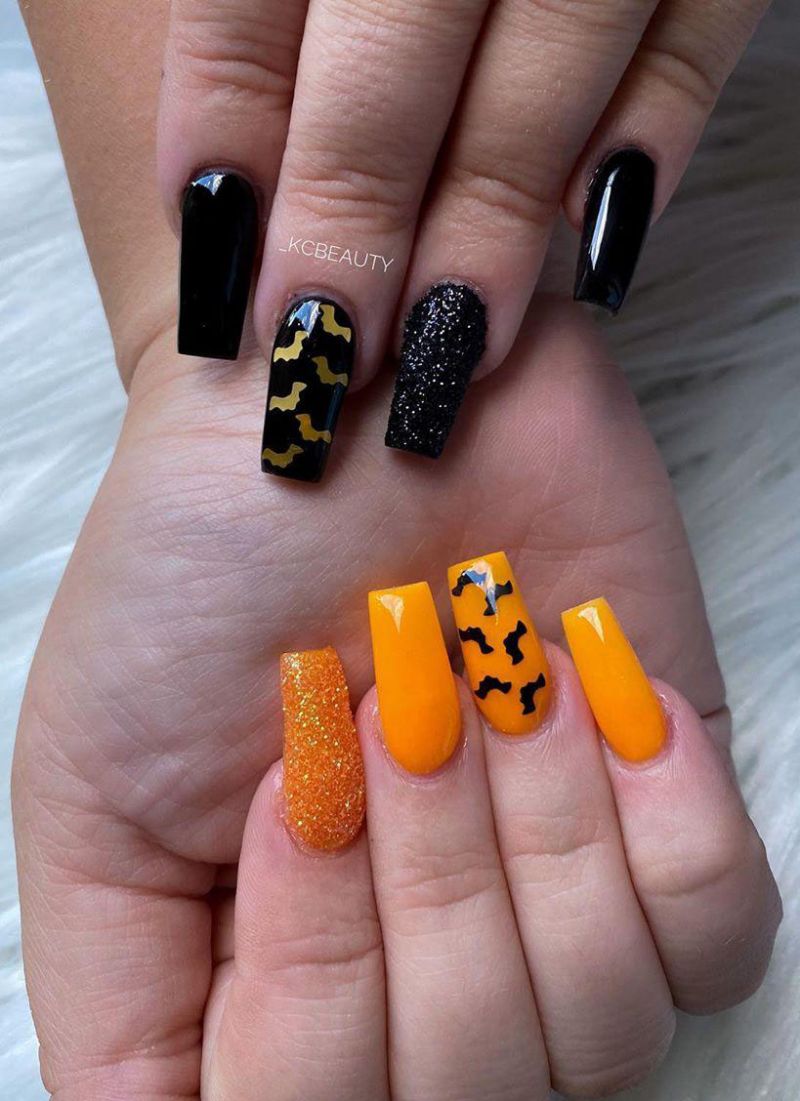
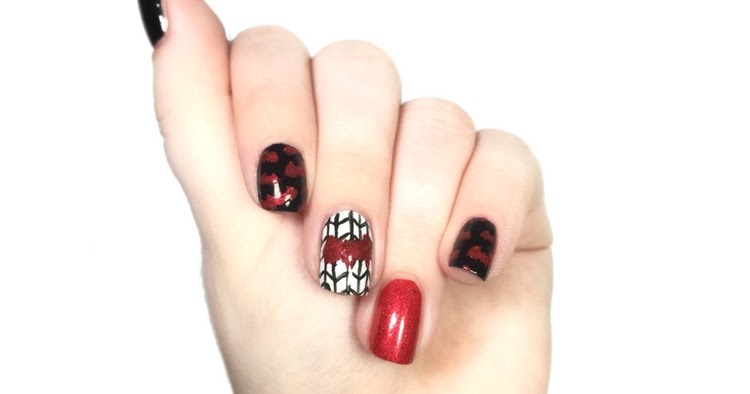
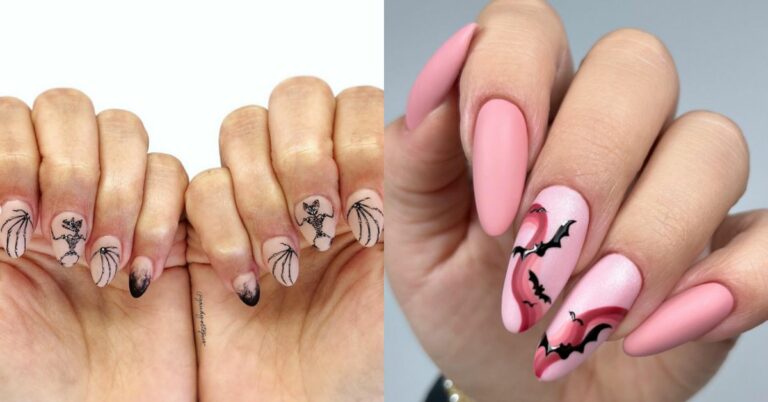
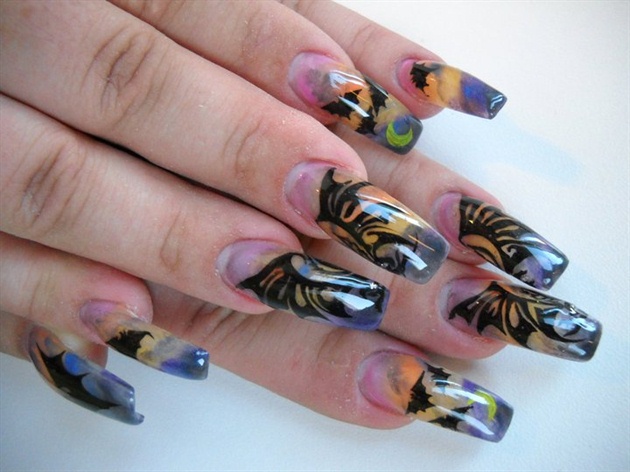
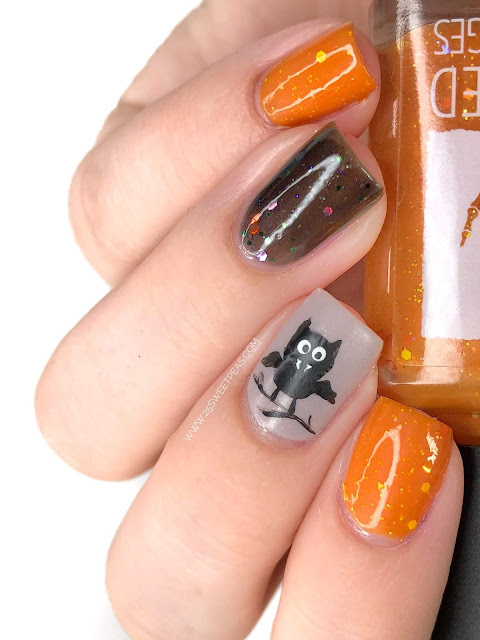
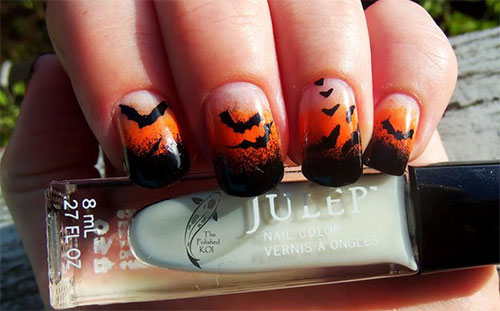
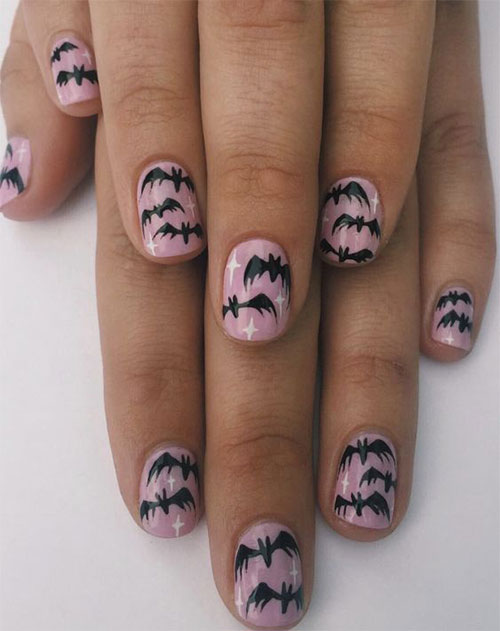
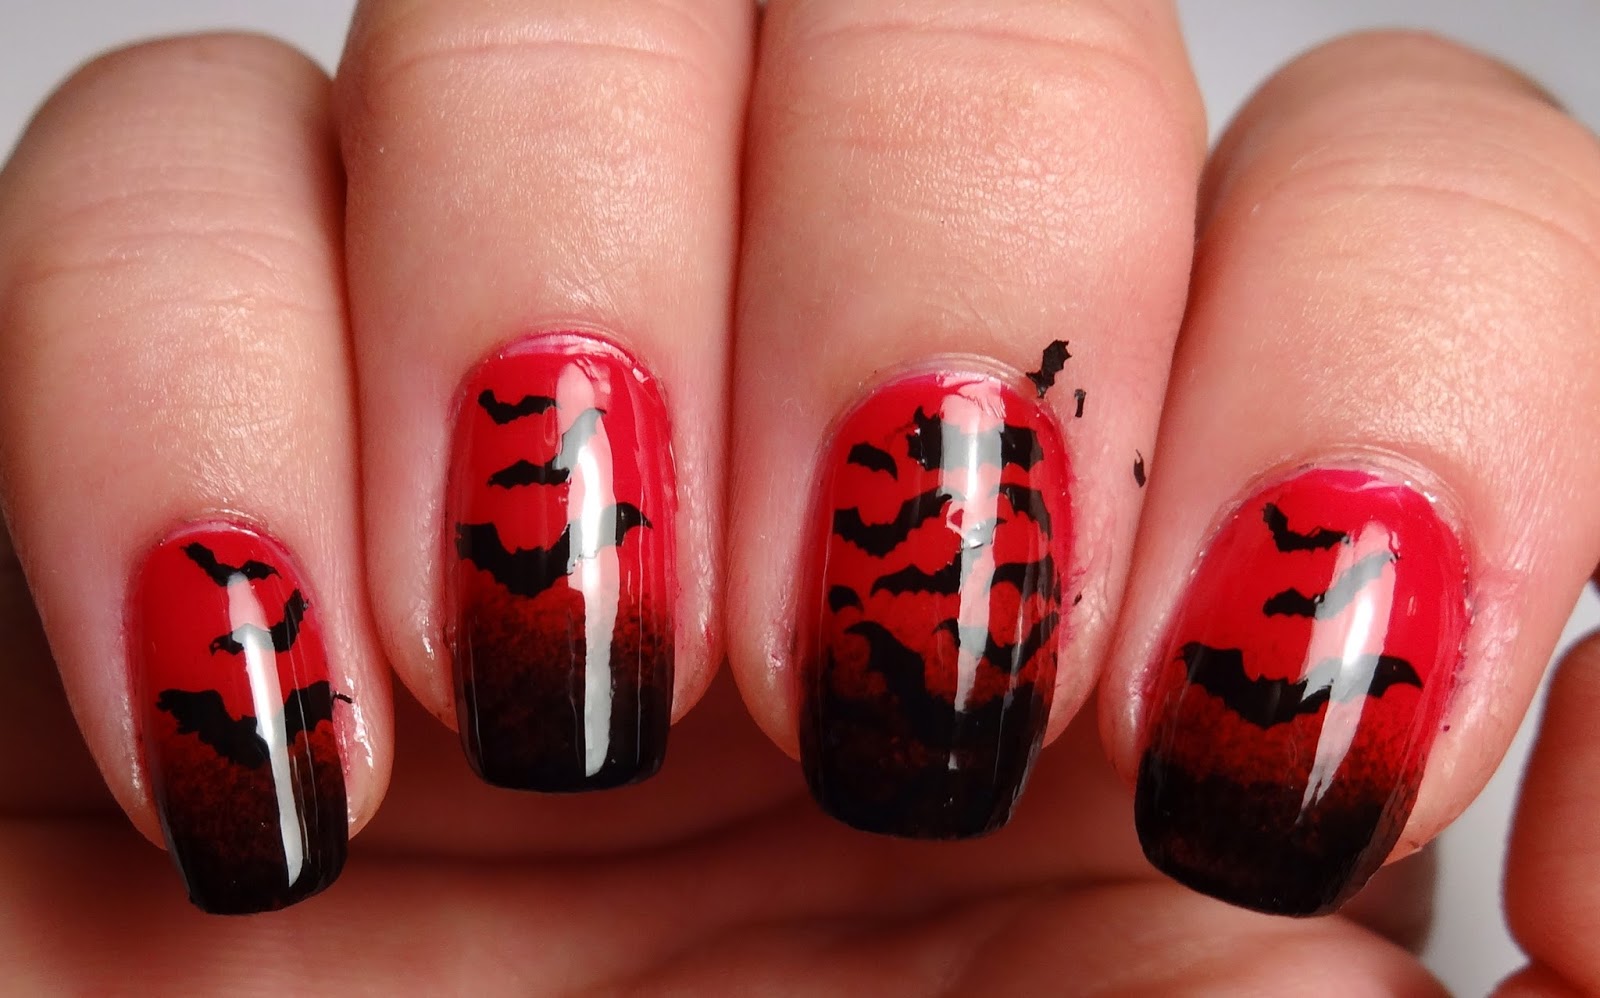
If you're looking for a more spooky and eerie bat nail art design, these ideas are perfect for you. They incorporate darker colors and more intricate designs for a truly haunting manicure.9. Spooky Bat Nail Art Designs


9. Spooky Bat Nail Art Designs
Creating a Spooky Halloween Look with Easy Bat Nail Art
 For those who love all things spooky and fun, Halloween is the perfect time to let your creativity shine. And what better way to show off your Halloween spirit than with a festive and easy bat nail art design? This simple yet eye-catching look is sure to make a statement and add a touch of spooky charm to your Halloween ensemble.
Gather Your Supplies
 First things first, you'll need to gather all the necessary supplies for this easy bat nail art. You'll need a black nail polish as the base color, white nail polish for the bat's eyes and fangs, a fine-tipped brush or toothpick, and a top coat to seal in your design. You can also add some glitter or rhinestones for extra sparkle and dimension.
Step-by-Step Tutorial
 Once you have all your supplies ready, it's time to get started on your easy bat nail art. Follow these simple steps for a spooktacular Halloween look:
Step 1:
Begin by applying a base coat to protect your nails and allow for a smoother application.
Step 2:
Once your base coat is dry, apply two coats of black nail polish to all your nails. Make sure to let each coat dry completely before moving on to the next step.
Step 3:
Using a fine-tipped brush or toothpick, create two small white dots for the bat's eyes near the cuticle area. Make them slightly larger than the size of a pinhead.
Step 4:
Next, use the same brush or toothpick to create two small triangles for the bat's fangs, just below the eyes.
Step 5:
Allow the white polish to dry completely before adding a top coat to seal in your design and add shine.
Step 6:
For an extra touch of glam, you can add some glitter or rhinestones to your bat's eyes or wings using nail glue or a clear top coat.
Once you have all your supplies ready, it's time to get started on your easy bat nail art. Follow these simple steps for a spooktacular Halloween look:
Step 1:
Begin by applying a base coat to protect your nails and allow for a smoother application.
Step 2:
Once your base coat is dry, apply two coats of black nail polish to all your nails. Make sure to let each coat dry completely before moving on to the next step.
Step 3:
Using a fine-tipped brush or toothpick, create two small white dots for the bat's eyes near the cuticle area. Make them slightly larger than the size of a pinhead.
Step 4:
Next, use the same brush or toothpick to create two small triangles for the bat's fangs, just below the eyes.
Step 5:
Allow the white polish to dry completely before adding a top coat to seal in your design and add shine.
Step 6:
For an extra touch of glam, you can add some glitter or rhinestones to your bat's eyes or wings using nail glue or a clear top coat.
Spook-tacular Results
 And just like that, you have a fun and easy bat nail art design that is perfect for Halloween. This look is versatile and can be customized to fit your personal style. You can add more bats, create different sizes, or even add a pop of color for a unique twist. So go ahead and give it a try, and let your nails do the talking this Halloween!


