Christmas is just around the corner and what better way to get into the festive spirit than with some fun and festive nail art? If you're new to nail art and not sure where to start, don't worry! We've got you covered with these easy Christmas nail art ideas for beginners. With just a few simple steps, you'll have gorgeous holiday nails that are sure to impress. Start by choosing a festive color scheme. Traditional Christmas colors like red, green, and gold are always a safe bet, but don't be afraid to mix it up with some non-traditional colors like blue or purple. You can also add some glitter or metallic accents for some extra sparkle. Next, gather your tools. You'll need a base coat, your chosen nail polish colors, a top coat, and some nail art tools like dotting tools, striping tape, and small brushes. Don't worry if you don't have these tools, you can easily create your own with household items like toothpicks and bobby pins. Now, let's get started with some easy Christmas nail art designs that anyone can do!1. Easy Christmas Nail Art Ideas for Beginners

1. Easy Christmas Nail Art Ideas for Beginners


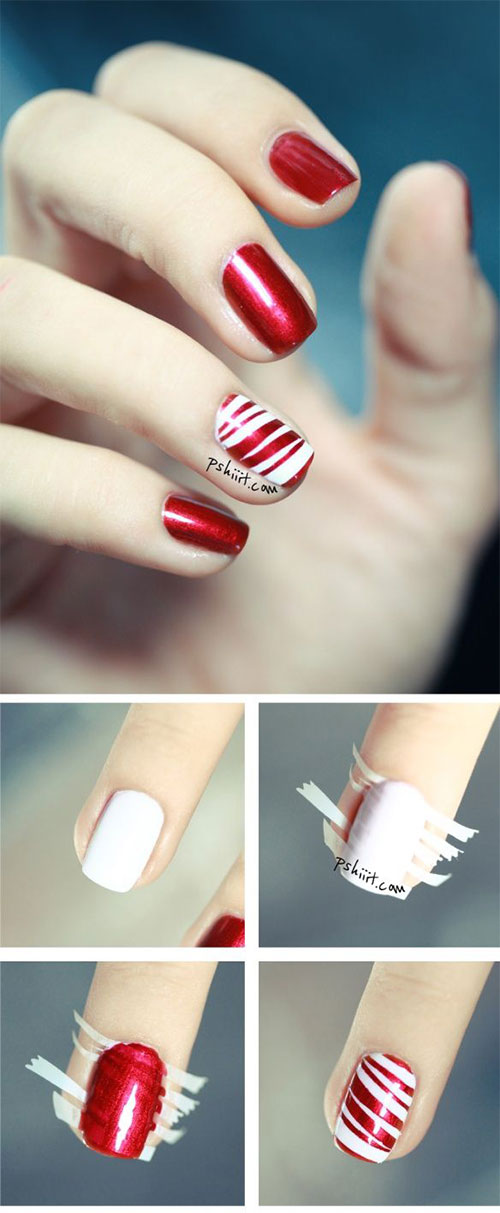
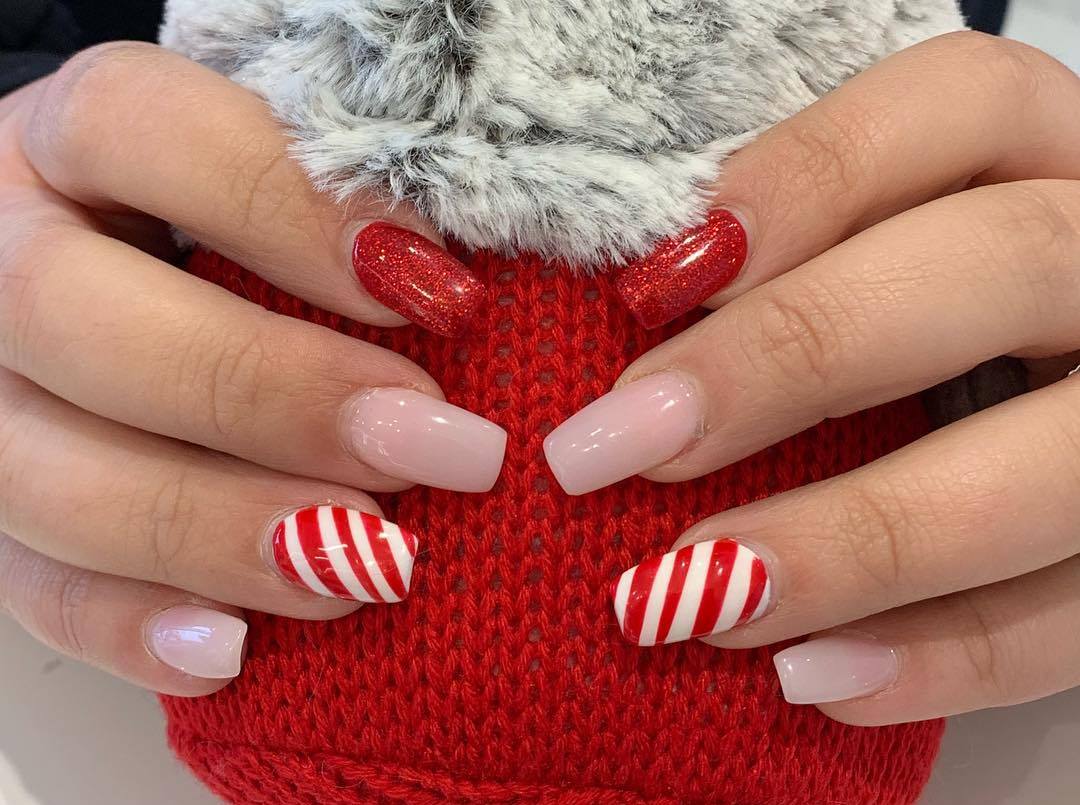
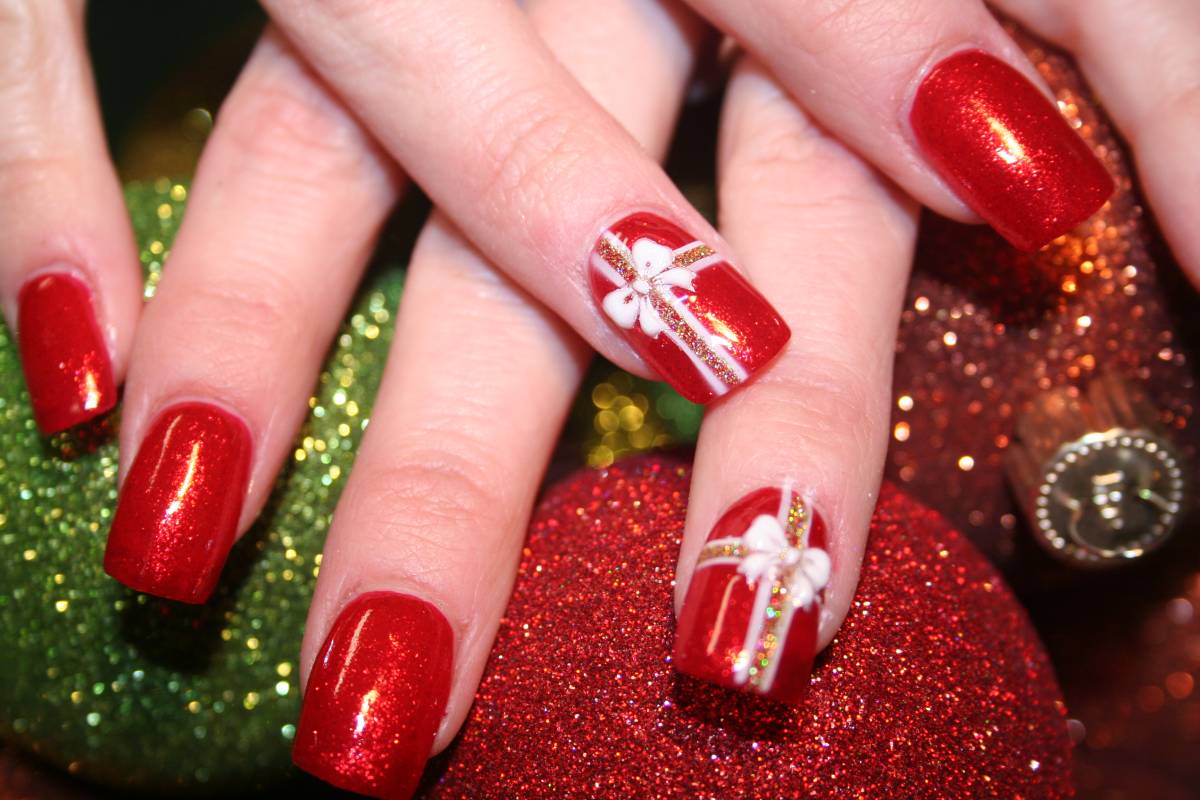
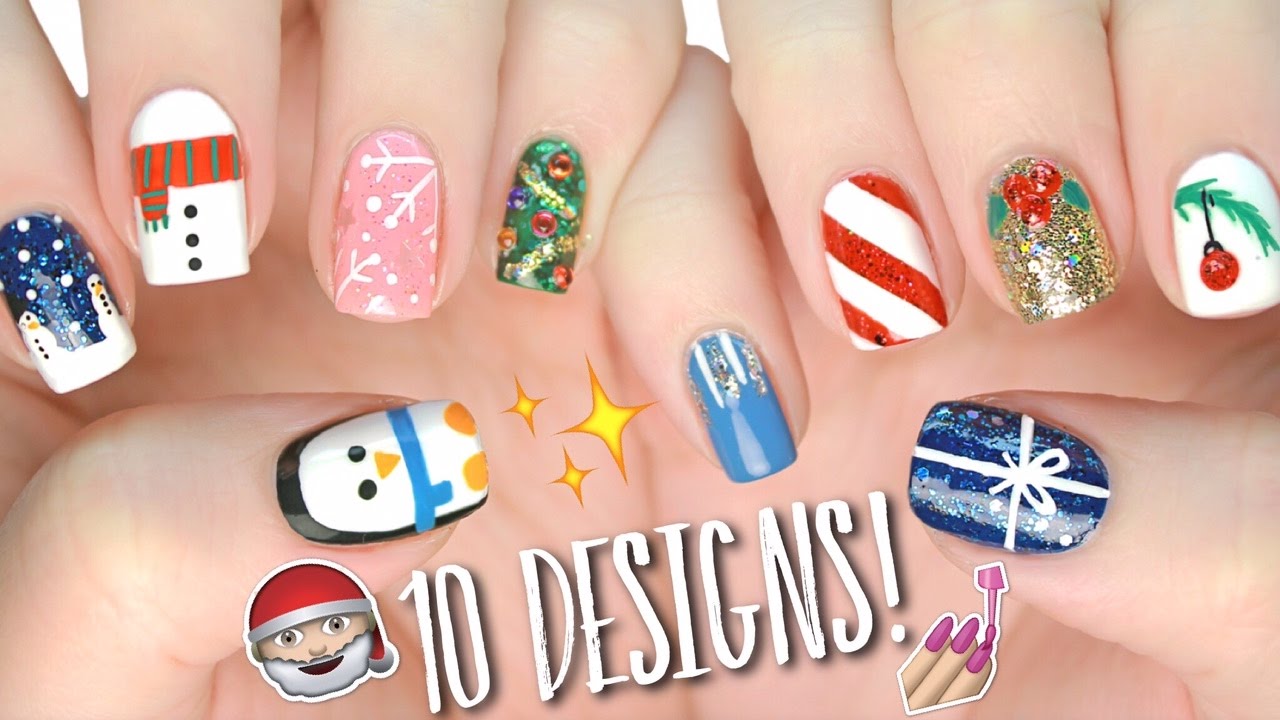
If you're short on time but still want festive nails, these simple Christmas nail designs are perfect for you. They require minimal tools and can be done in just a few easy steps. For a classic look, try a candy cane stripe design. Start with a white base coat and let it dry completely. Then, using a thin brush or striping tape, create diagonal stripes with red nail polish. Once the stripes are dry, add a thin gold stripe on top of each red stripe for some extra holiday flair. Another quick and easy design is a snowflake accent nail. Paint all your nails with a dark blue base coat. Then, using a small brush or toothpick, create a snowflake design on one nail with white nail polish. Finish off with a top coat for a glossy finish. These simple Christmas nail designs are perfect for beginners and can be done in under 10 minutes!2. Simple Christmas Nail Designs Step by Step


2. Simple Christmas Nail Designs Step by Step


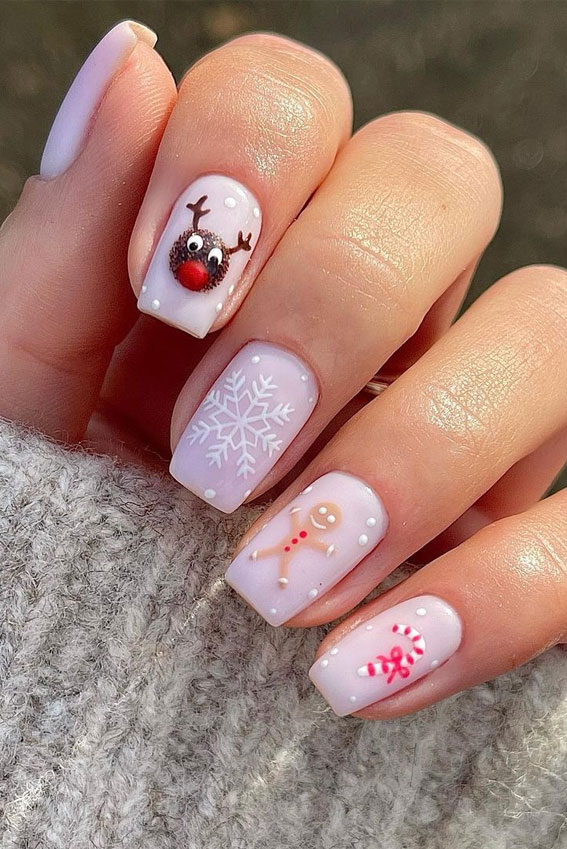
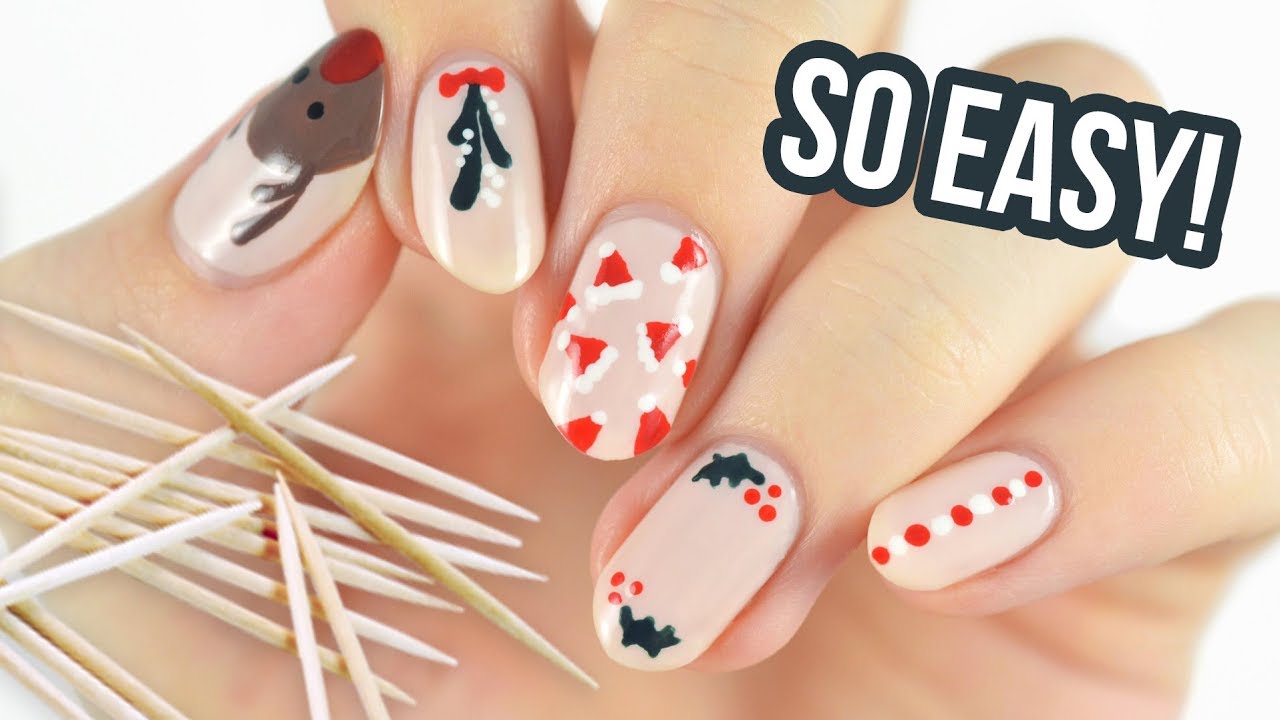
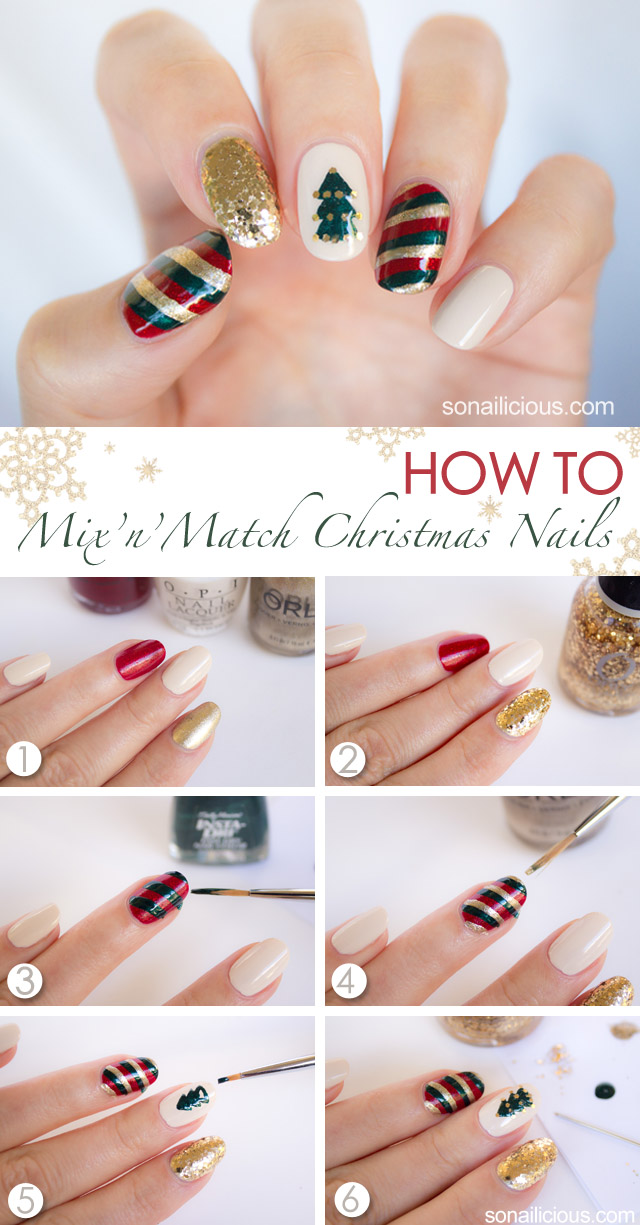
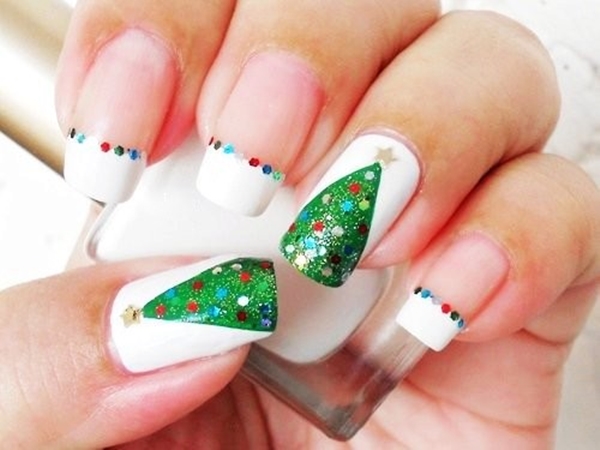
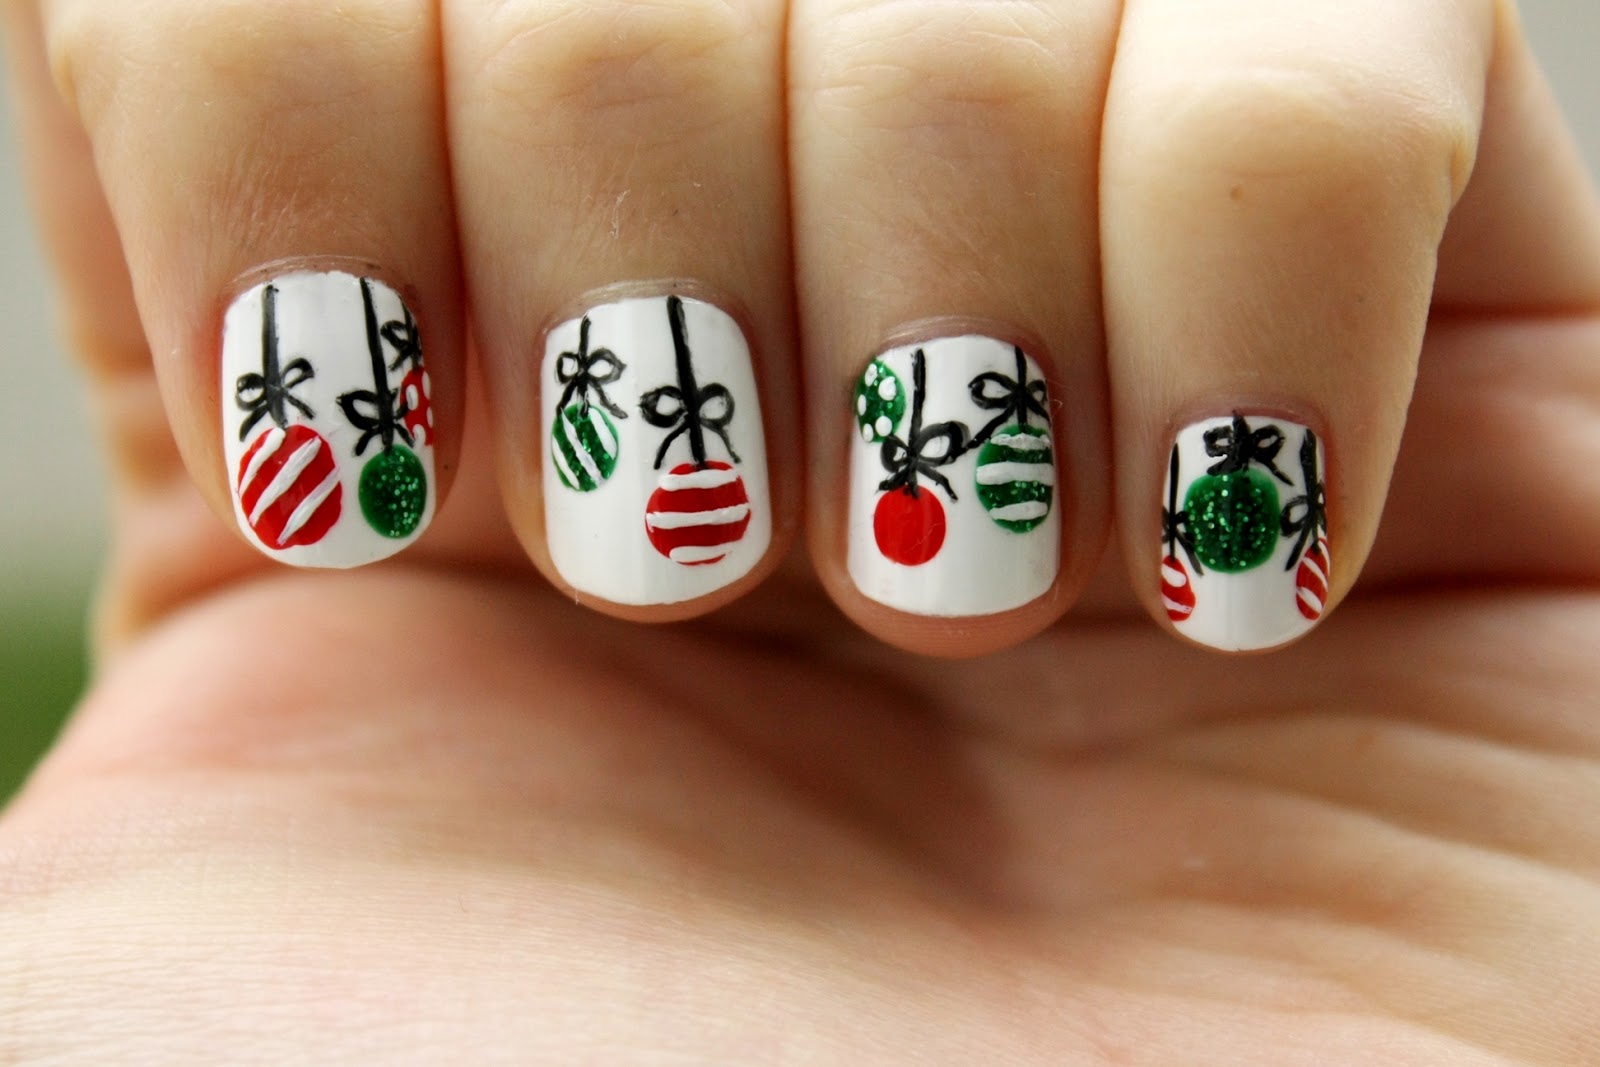
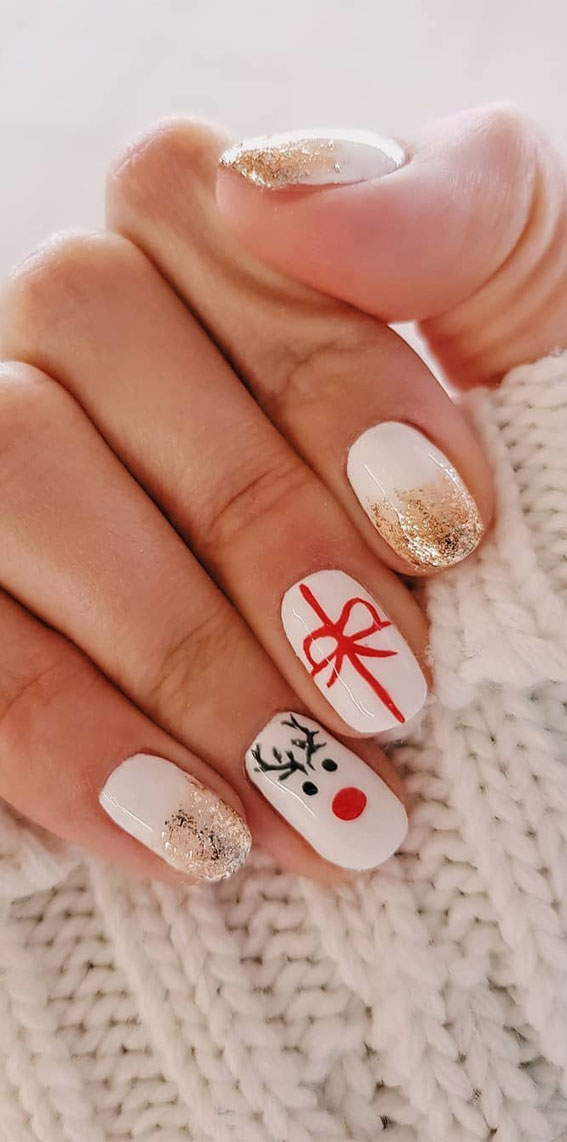
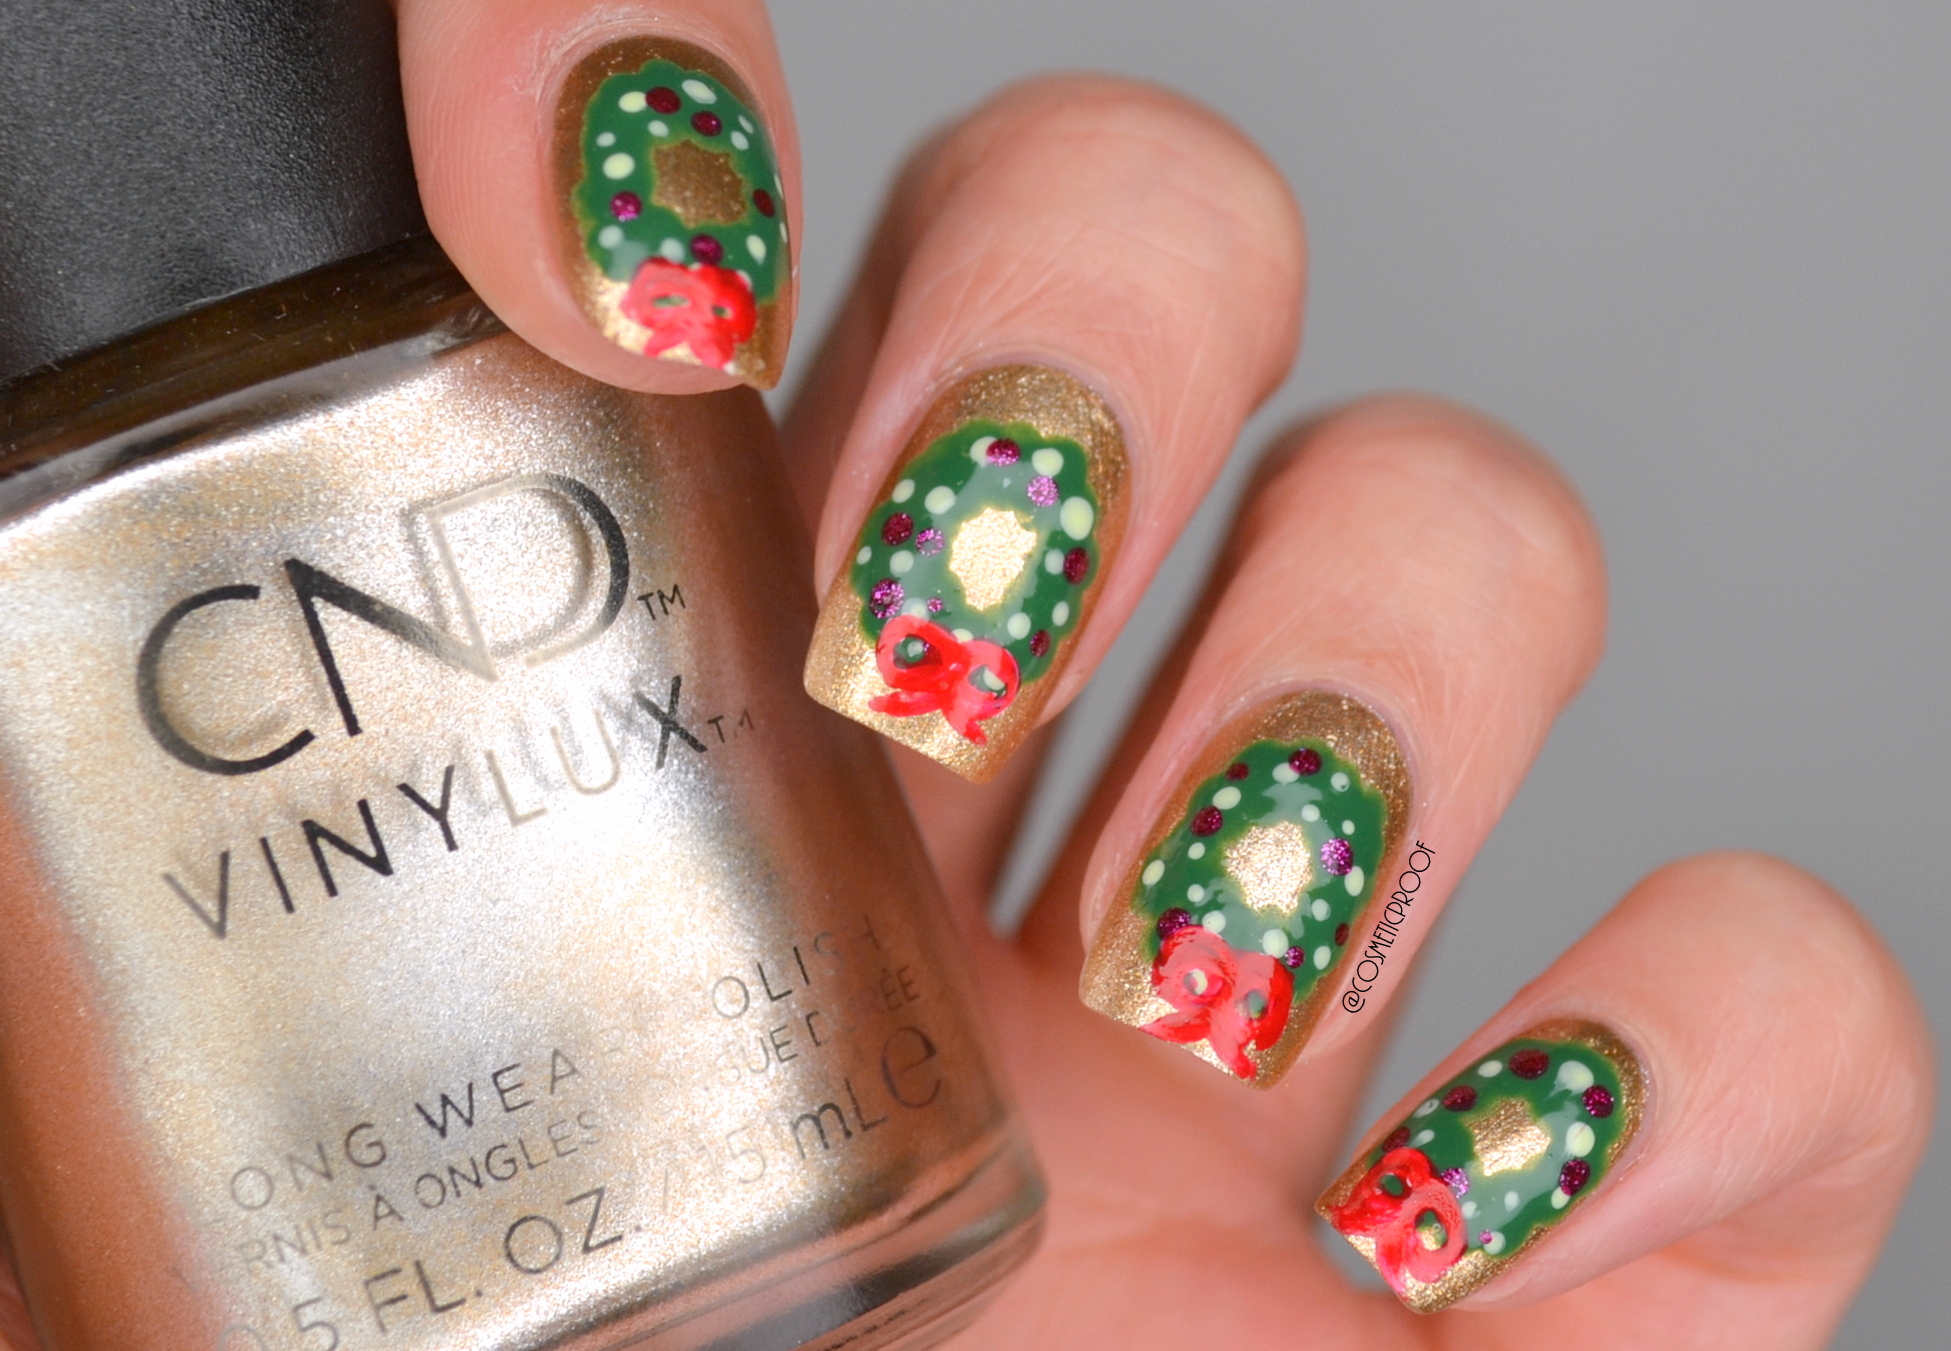
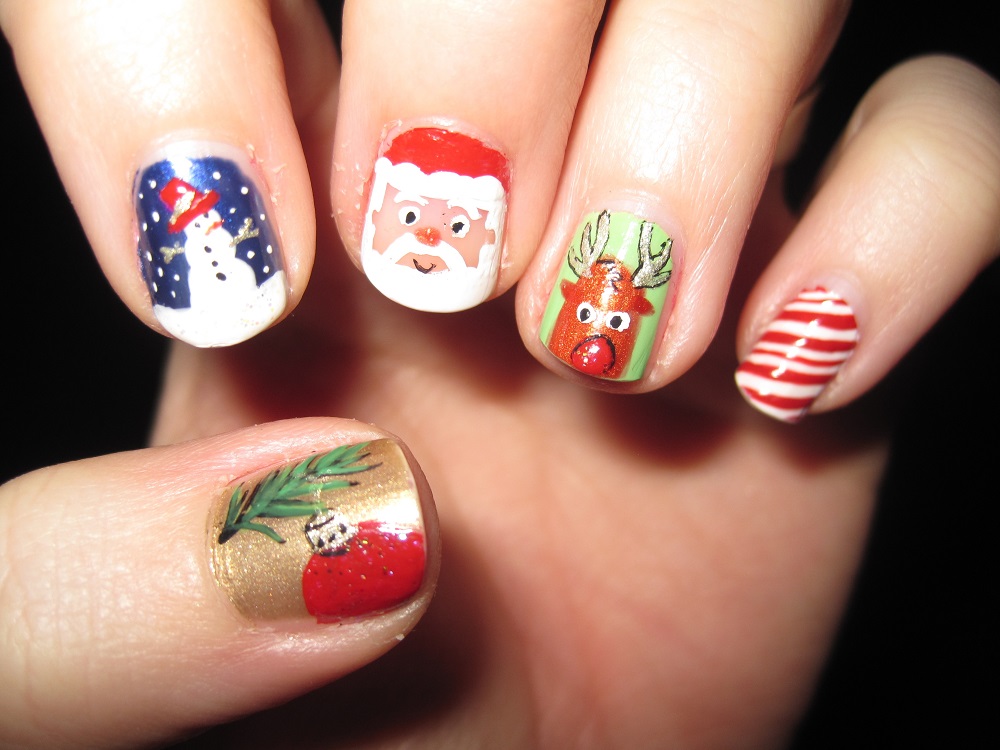
Why spend money on a professional manicure when you can create your own DIY Christmas nail art at home? With these easy tutorials, you'll have salon-worthy nails without breaking the bank. For a festive and fun look, try a Christmas tree design. Start with a green base coat and let it dry completely. Then, using a small brush or toothpick, create a tree trunk with brown nail polish. Next, add small dots of different colored nail polish to create the ornaments on the tree. Finish off with a star on top using a toothpick dipped in yellow nail polish. If you're feeling a bit more adventurous, try a reindeer design. Start with a light brown base coat and let it dry completely. Then, using a small brush or toothpick, create the reindeer's face with a darker brown nail polish. Next, add a red nose using a dotting tool or toothpick dipped in red nail polish. Finish off with some antlers using a toothpick dipped in black nail polish. With these DIY Christmas nail art tutorials, you'll have unique and creative nails that are sure to impress.3. DIY Christmas Nail Art Tutorial


3. DIY Christmas Nail Art Tutorial


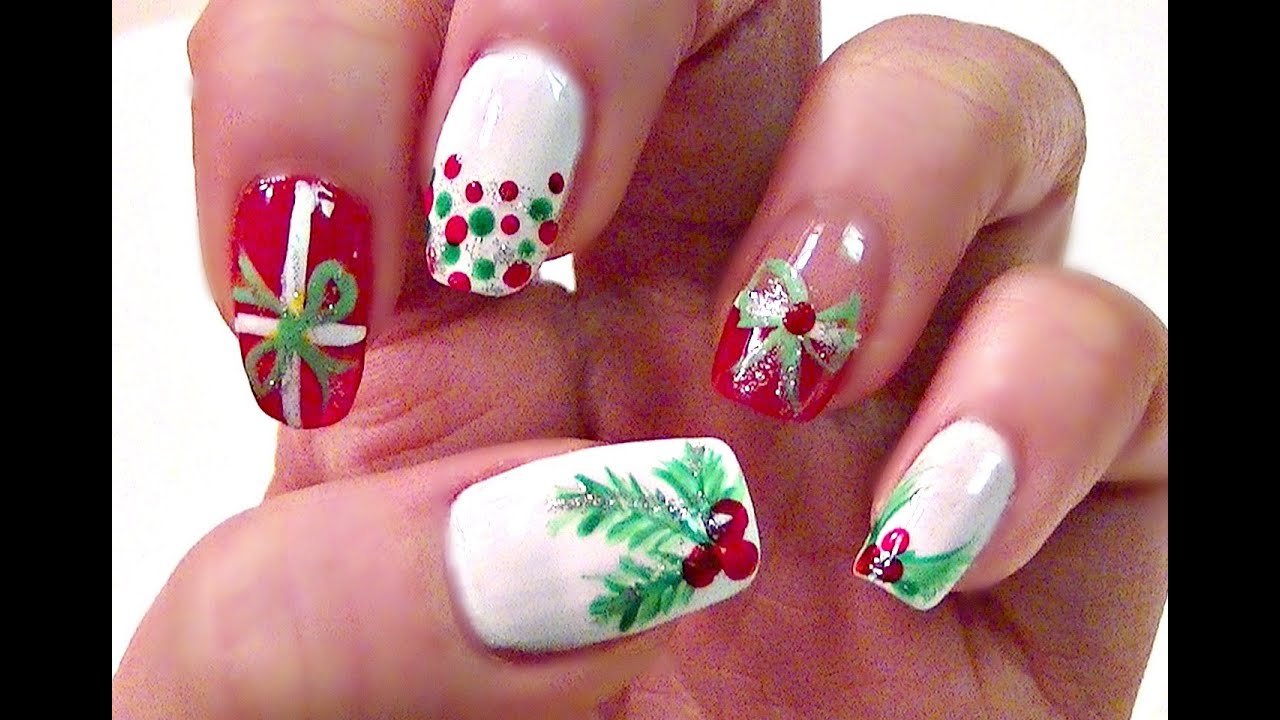

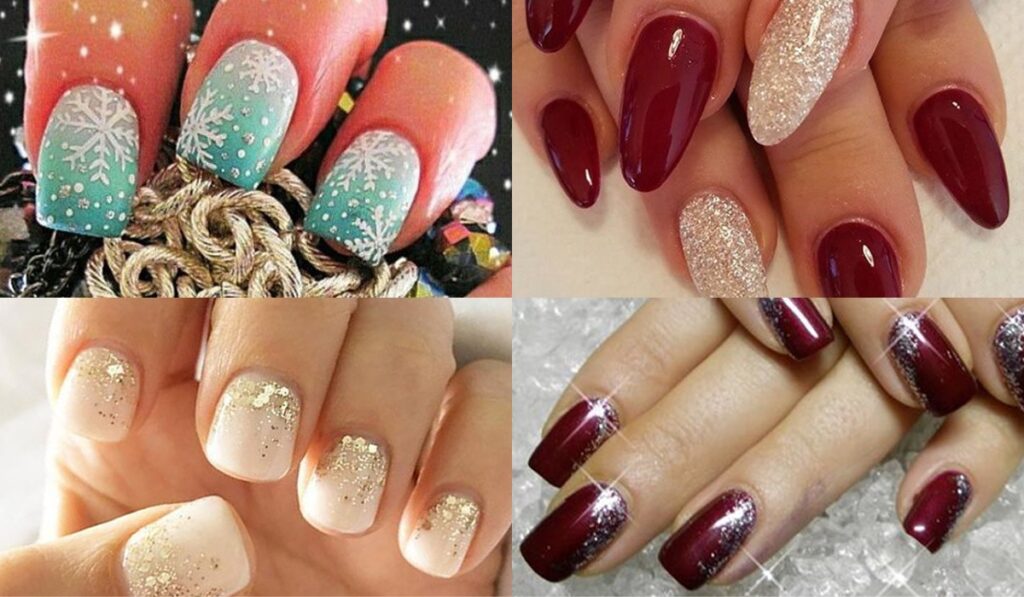
Christmas is the perfect time to experiment with bold and festive nail designs. These holiday-inspired nail art ideas will have you feeling merry and bright all season long. A popular design for the holidays is the ugly Christmas sweater. Start with a white base coat and let it dry completely. Then, using a thin brush or striping tape, create horizontal stripes with different colors of nail polish. Next, add small designs like snowflakes, reindeer, or Christmas trees on top of the stripes. Finish off with a top coat for a smooth finish. If you want to add some sparkle to your nails, try a glitter gradient design. Start with a clear base coat and let it dry completely. Then, using a makeup sponge, dab on a layer of glitter nail polish starting at the tip of your nail and fading towards the base. Repeat this step until you achieve the desired amount of glitter. Finish off with a top coat to seal in the glitter. These festive Christmas nail designs are perfect for holiday parties and will make your nails stand out in a crowd.4. Festive Christmas Nail Designs for the Holidays


4. Festive Christmas Nail Designs for the Holidays
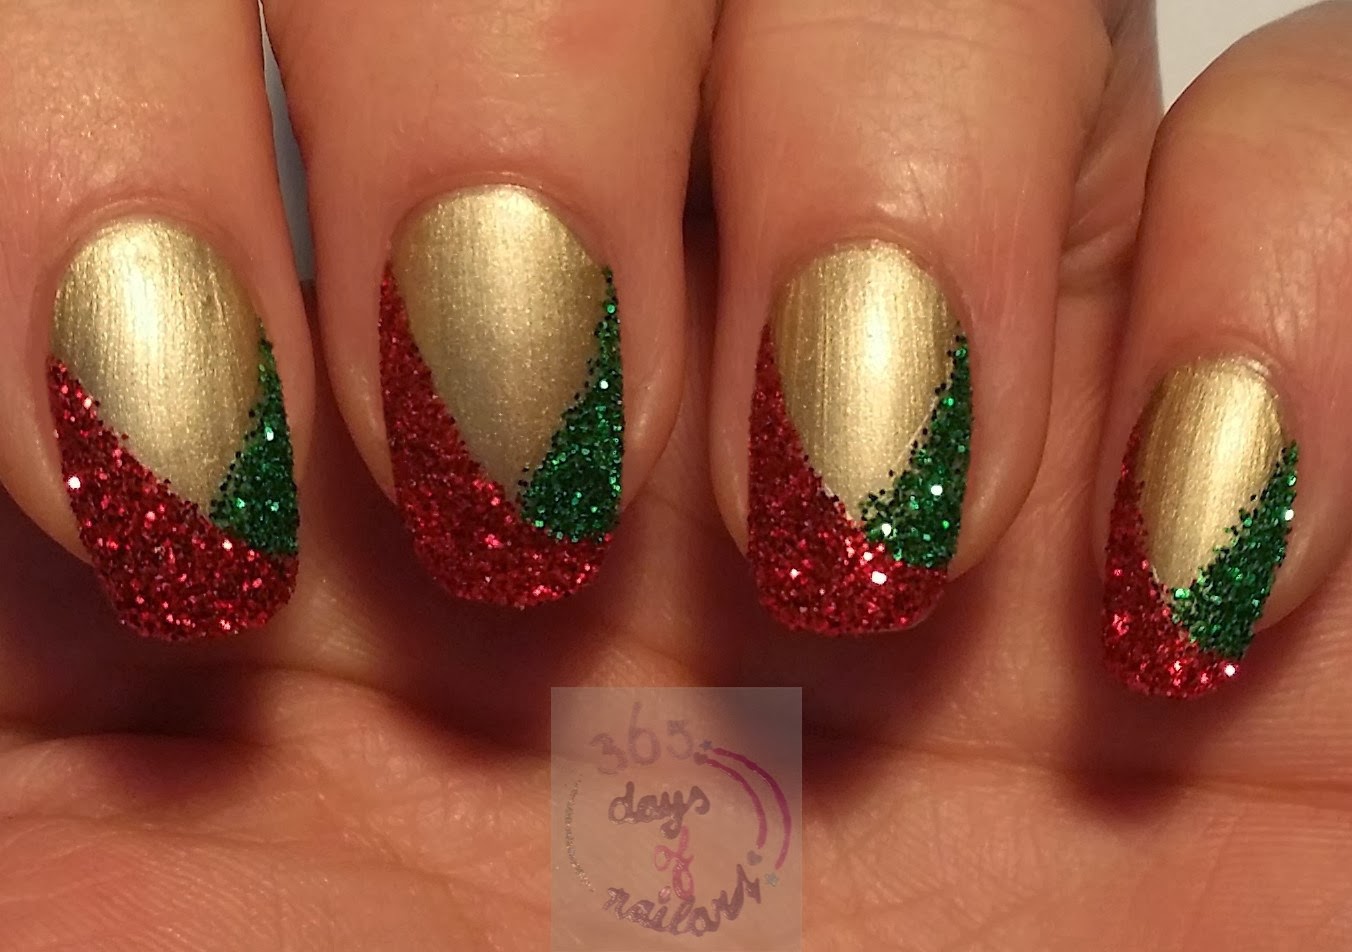
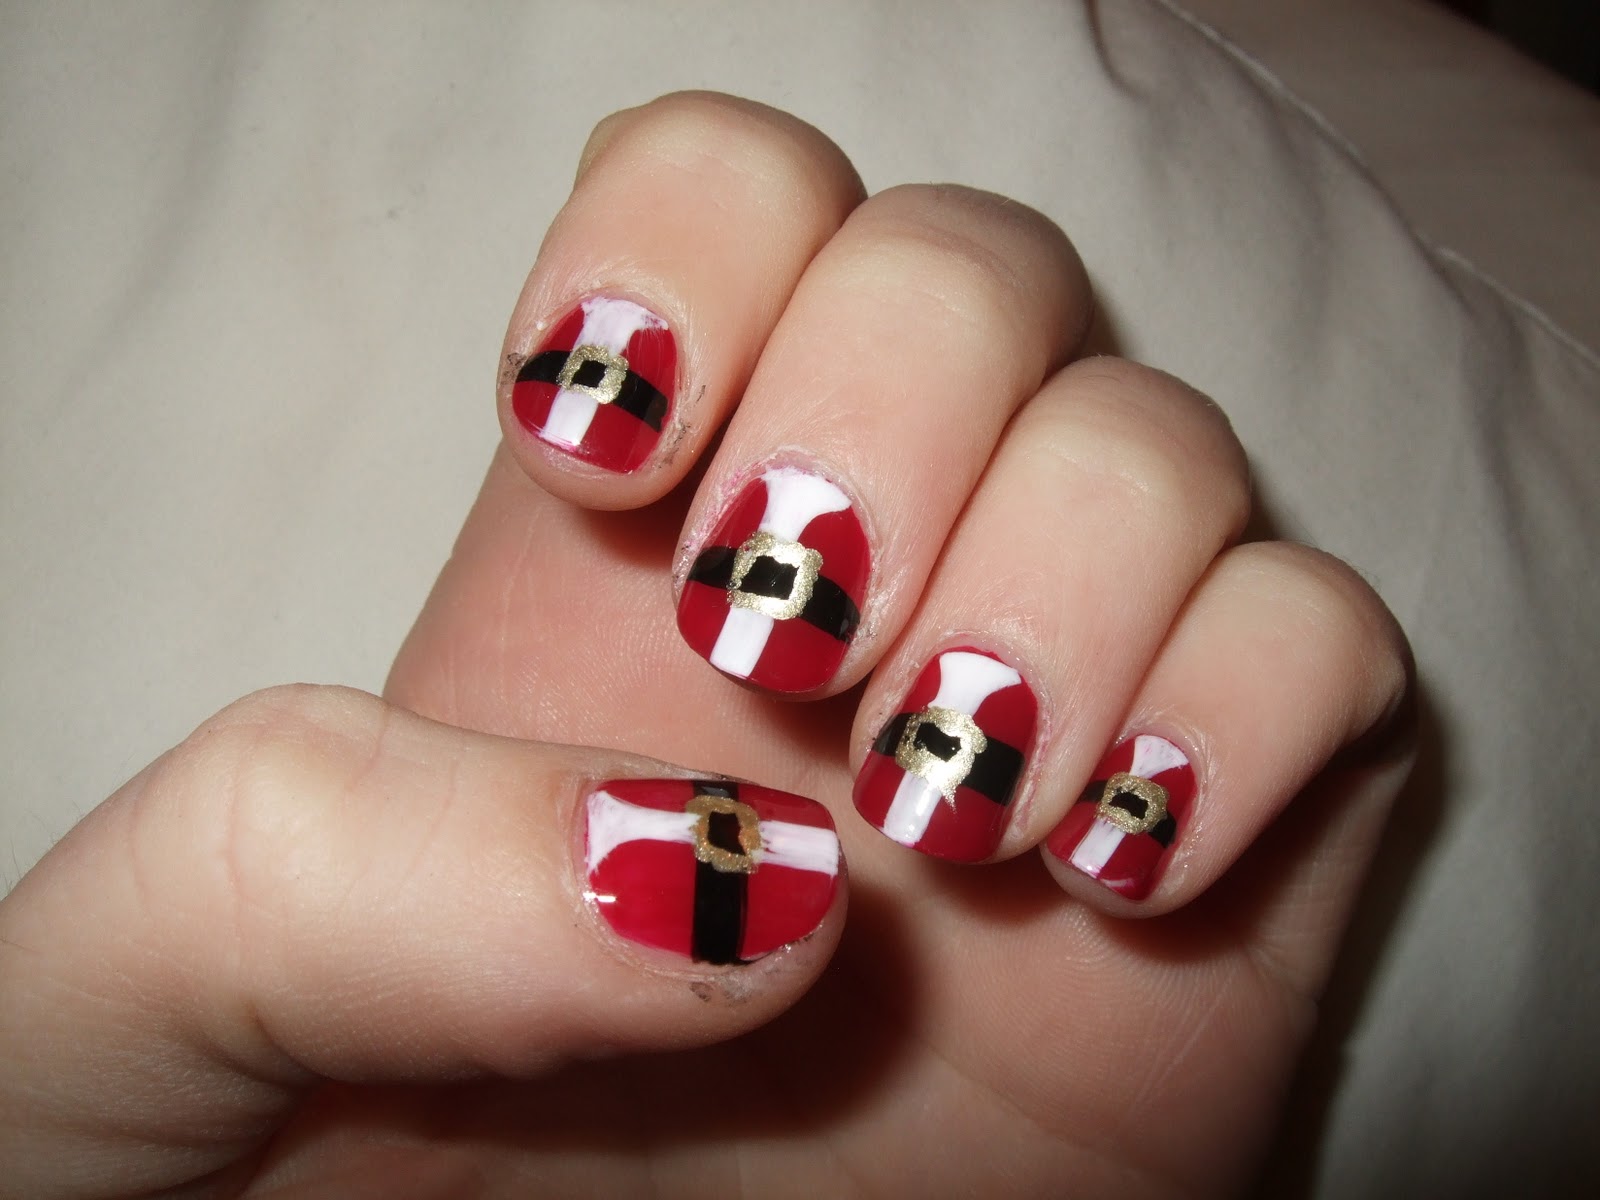
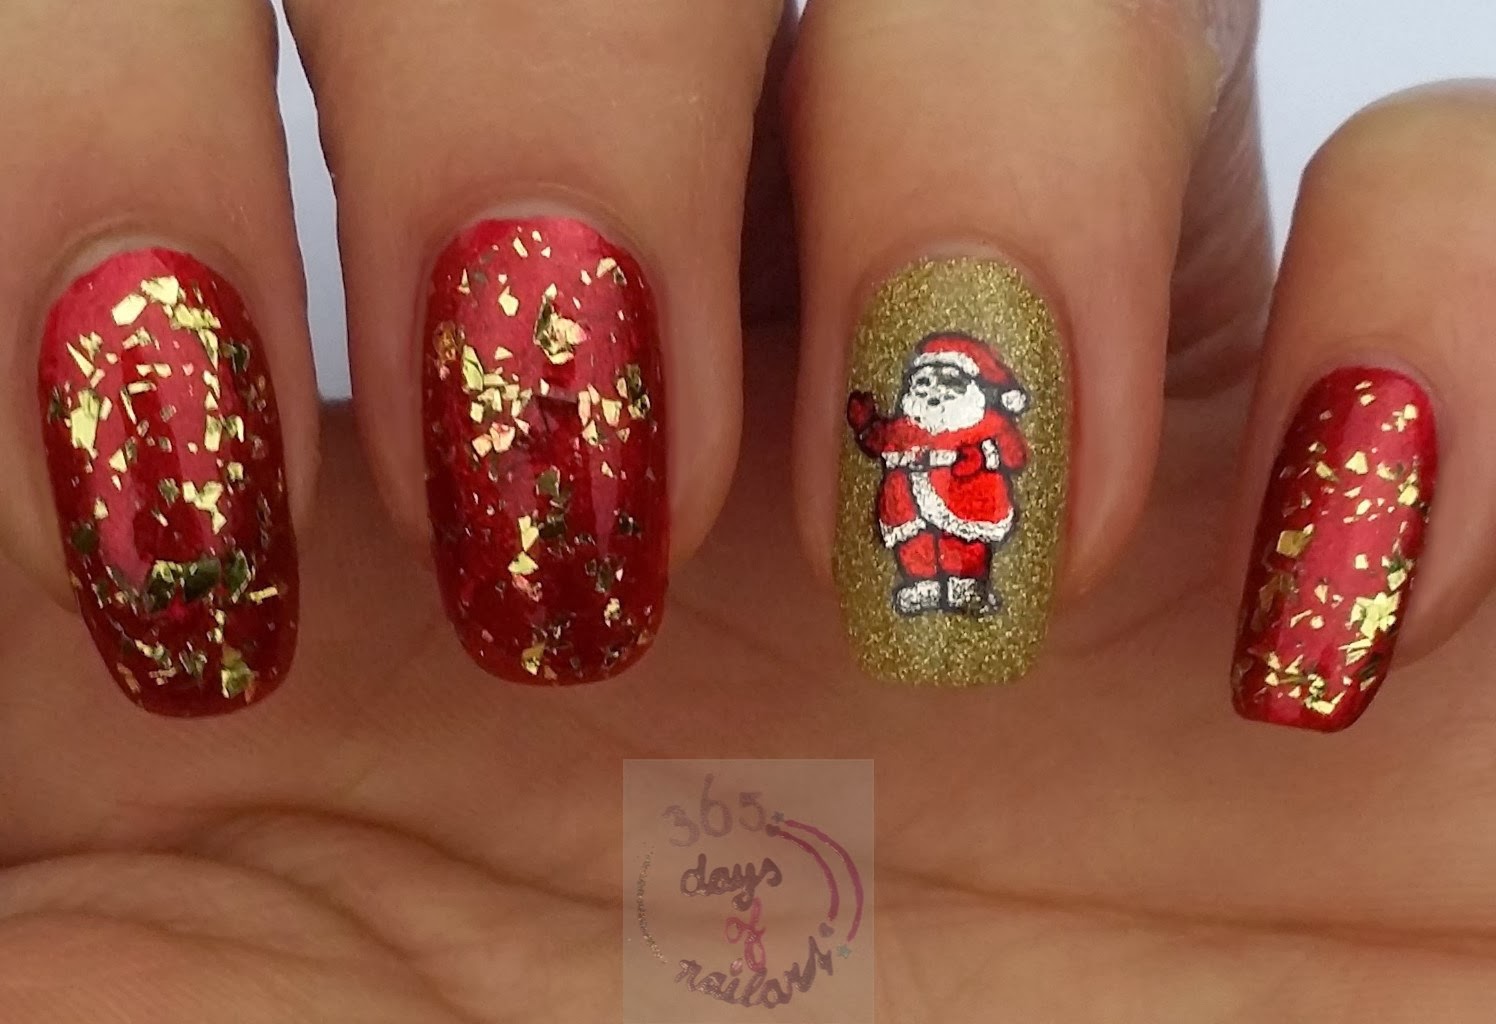
Being a mom is a full-time job, which means you may not have a lot of time to spend on your nails. But that doesn't mean you can't have fun and festive holiday nails. These quick and easy Christmas nail art ideas are perfect for busy moms. A simple yet stunning design is a red and gold half-moon manicure. Start with a red base coat and let it dry completely. Then, using a small brush or striping tape, create a half-moon shape at the base of your nail with gold nail polish. Finish off with a top coat for a shiny finish. If you're feeling extra ambitious, try a snow globe design. Start with a light blue base coat and let it dry completely. Then, using a small brush or toothpick, create a snowman design with white nail polish. Next, add a glittery top coat to create the look of falling snow. Finish off with a top coat to seal in your design. These quick and easy Christmas nail art ideas will have you looking festive and put together, even when you're short on time.5. Quick and Easy Christmas Nail Art for Busy Moms


5. Quick and Easy Christmas Nail Art for Busy Moms

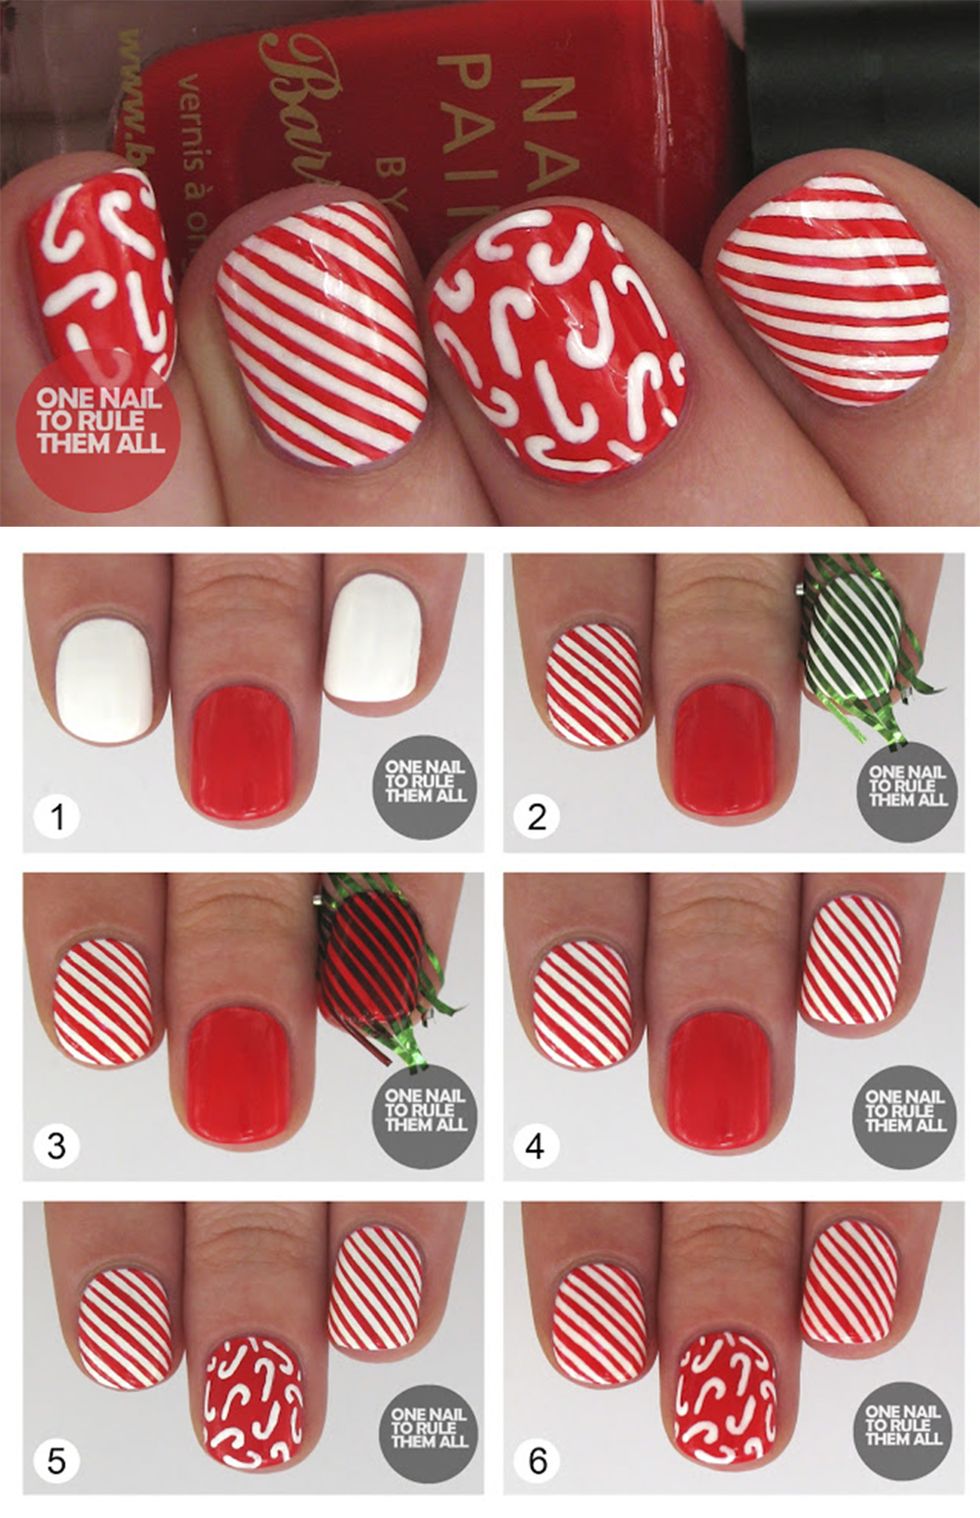
Creating your own Christmas nail art at home can seem intimidating, but with a step by step guide, it's easier than you think. Follow these simple steps to achieve gorgeous holiday nails. Step 1: Prep your nails by removing any old nail polish and filing them into your desired shape. Step 2: Apply a base coat to protect your nails and help your polish last longer. Step 3: Choose your desired colors and make sure they are all well-shaken and opened. Step 4: Start with the lightest color and apply 2 coats, letting each coat dry completely before moving on to the next color. Step 5: Using a small brush or toothpick, create your chosen design with a darker color. If you make a mistake, you can easily fix it by dipping a cotton swab in nail polish remover and gently wiping away the mistake. Step 6: Add any additional details or accents with different colors or tools. Step 7: Finish off with a top coat to seal in your design and add shine. With these simple steps, you can create beautiful Christmas nail art at home without any professional help.6. Step by Step Guide to Creating Christmas Nail Art at Home

6. Step by Step Guide to Creating Christmas Nail Art at Home

Kids love getting into the holiday spirit and what better way to do that than with some fun and festive Christmas nail art? These cute and easy designs are perfect for kids of all ages. A popular design for kids is a Santa hat. Start with a red base coat and let it dry completely. Then, using a small brush or toothpick, create a white triangle at the base of the nail for the hat. Next, add a small white line at the top of the triangle for the fur trim. Finish off with a small dot of white at the tip of the triangle for the pom-pom. Another fun design is a snowman. Start with a light blue base coat and let it dry completely. Then, using a small brush or toothpick, create a snowman with white nail polish. Add eyes, a nose, and buttons with different colored nail polish. Finish off with a top coat to seal in your design. These cute and easy Christmas nail designs will have your little ones feeling festive and excited for the holiday season.7. Cute and Easy Christmas Nail Designs for Kids


7. Cute and Easy Christmas Nail Designs for Kids


If you prefer a more elegant and sophisticated look for your holiday nails, there are plenty of options for you as well. These designs are perfect for formal events or just for those who prefer a more subtle holiday look. A classic and elegant design is a gold and white French manicure. Start with a clear base coat and let it dry completely. Then, using a thin brush or striping tape, create a white tip on your nails. Next, add a thin gold line on top of the white tip. Finish off with a top coat for a glossy finish. If you want to add some sparkle to your nails, try a silver glitter gradient design. Start with a clear base coat and let it dry completely. Then, using a makeup sponge, dab on a layer of silver glitter nail polish starting at the tip of your nail and fading towards the base. Repeat this step until you achieve the desired amount of glitter. Finish off with a top coat to seal in the glitter. These elegant Christmas nail art designs will have you feeling festive and elegant all season long.8. Elegant Christmas Nail Art for a Sophisticated Look


8. Elegant Christmas Nail Art for a Sophisticated Look

:max_bytes(150000):strip_icc()/elegantchristmasnailslede-61562183567a46a89d15ea57ee153cd3.jpg)

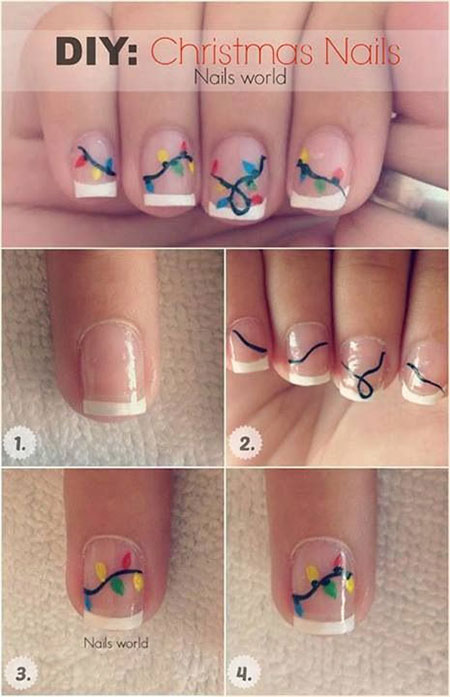
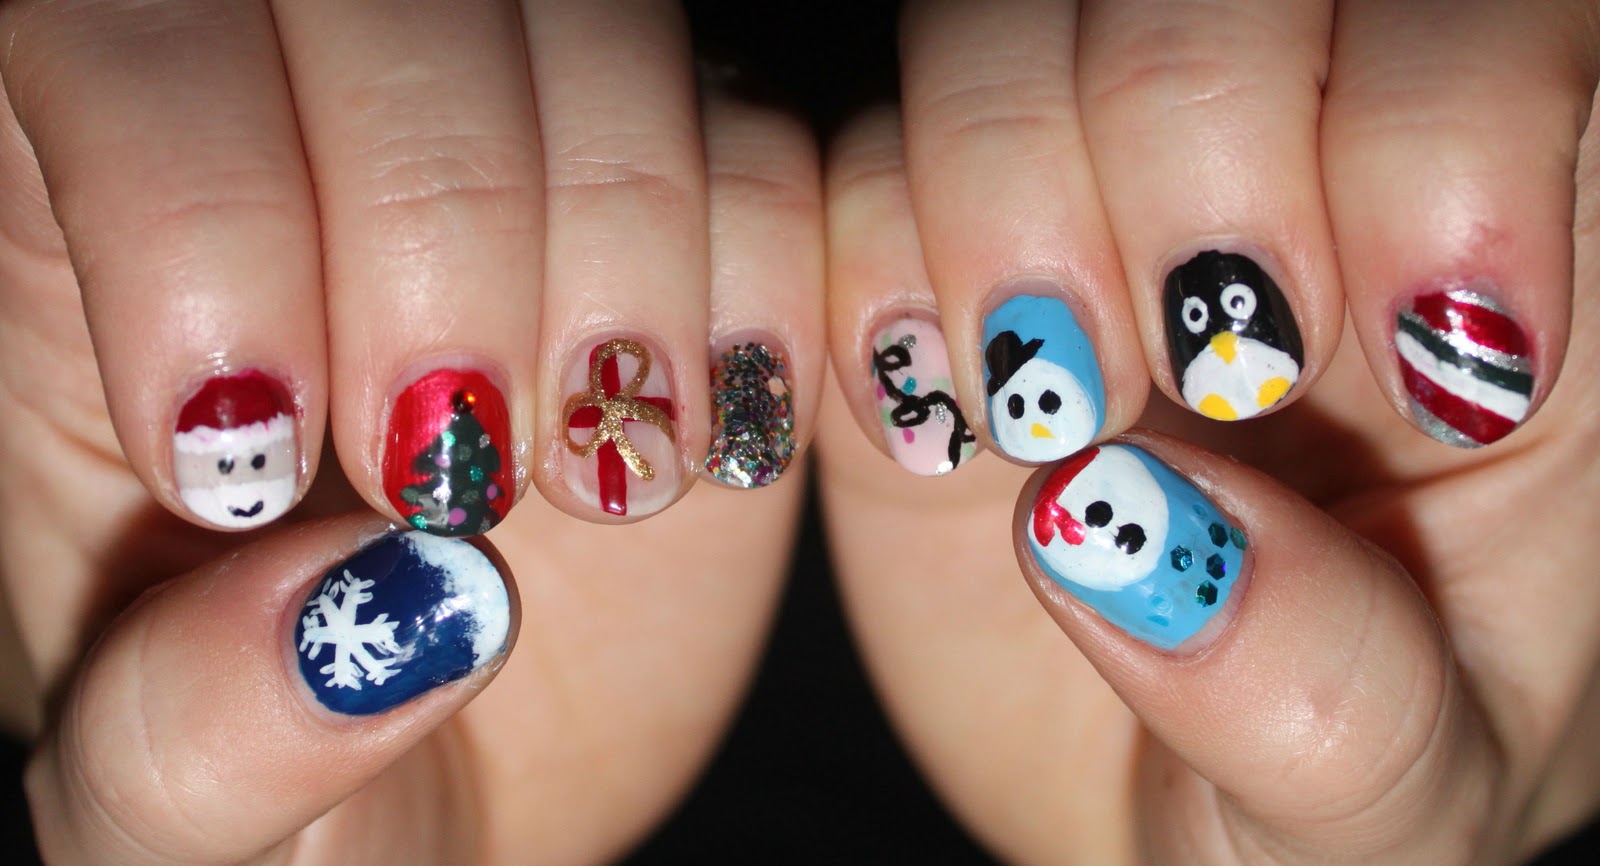
Christmas is a time for family, so why not get everyone involved in the holiday spirit with some fun and festive nail art? These designs are perfect for the whole family to enjoy together. A fun design for the whole family is a Christmas lights manicure. Start with a white base coat and let it dry completely. Then, using a small brush or toothpick, create different colored lines across your nails for the Christmas lights. Finish off with a top coat for a shiny finish. If you want to add some texture to your nails, try a sweater-inspired design. Start with a red base coat and let it dry completely. Then, using a small brush or toothpick, create a snowflake design with white nail polish. Next, add some texture by dabbing on a layer of matte white nail polish over the snowflake. Finish off with a top coat to seal in your design. These fun and festive Christmas nail art designs are perfect for family bonding time during the holiday season.9. Fun and Festive Christmas Nail Art for the Whole Family

9. Fun and Festive Christmas Nail Art for the Whole Family
You don't need fancy nail art tools to create beautiful Christmas nail designs. In fact, you can easily use common household items to achieve the same results. Here are some ideas for easy Christmas nail art using items you probably already have at home. For a snowflake design, use a toothpick to create the snowflake shape with white nail polish. You can also use a bobby pin to create smaller snowflakes. For a candy cane stripe design, use striping tape or thin strips of scotch tape to create the stripes. You can also use a toothpick to create the stripes by dipping it in red nail polish and dragging it across your nail. For a snow globe design, use a bobby pin or toothpick to create the snowman with white nail polish. You can also use glitter nail polish for some added sparkle. With these easy Christmas nail art ideas using household items, you can achieve beautiful holiday nails without having to buy any extra tools.10. Easy Christmas Nail Art Ideas Using Common Household Items


10. Easy Christmas Nail Art Ideas Using Common Household Items


Easy Christmas Nail Art: A Festive Addition to Your Holiday Look
 The holiday season is a time to spread joy and cheer, and what better way to do so than through festive nail art? If you're looking to add some Christmas spirit to your manicure, we've got you covered with these easy step-by-step designs. Whether you're a beginner or a seasoned nail artist, these
Christmas nail art
ideas are sure to elevate your holiday look.
The holiday season is a time to spread joy and cheer, and what better way to do so than through festive nail art? If you're looking to add some Christmas spirit to your manicure, we've got you covered with these easy step-by-step designs. Whether you're a beginner or a seasoned nail artist, these
Christmas nail art
ideas are sure to elevate your holiday look.
Step 1: Prepare Your Nails
 Before diving into the fun part, it's important to properly prepare your nails. Start by removing any old polish and shaping your nails to your desired length and shape. Then, push back your cuticles and gently buff the surface of your nails to create a smooth canvas for the nail art.
Step 2: Choose Your Colors
 When it comes to
Christmas nail art
, the color options are endless. You can go for classic red and green, or opt for a more subtle approach with shades of gold, silver, and white. Whichever colors you choose, make sure they complement each other for a cohesive and festive look.
When it comes to
Christmas nail art
, the color options are endless. You can go for classic red and green, or opt for a more subtle approach with shades of gold, silver, and white. Whichever colors you choose, make sure they complement each other for a cohesive and festive look.
Step 3: Simple Snowflakes
 For an elegant and easy
Christmas nail art
design, try painting delicate snowflakes on your nails. Start by applying a base coat and letting it dry completely. Then, using a small nail art brush, create small lines and dots to form a snowflake pattern. Finish off with a top coat for a glossy finish.
For an elegant and easy
Christmas nail art
design, try painting delicate snowflakes on your nails. Start by applying a base coat and letting it dry completely. Then, using a small nail art brush, create small lines and dots to form a snowflake pattern. Finish off with a top coat for a glossy finish.
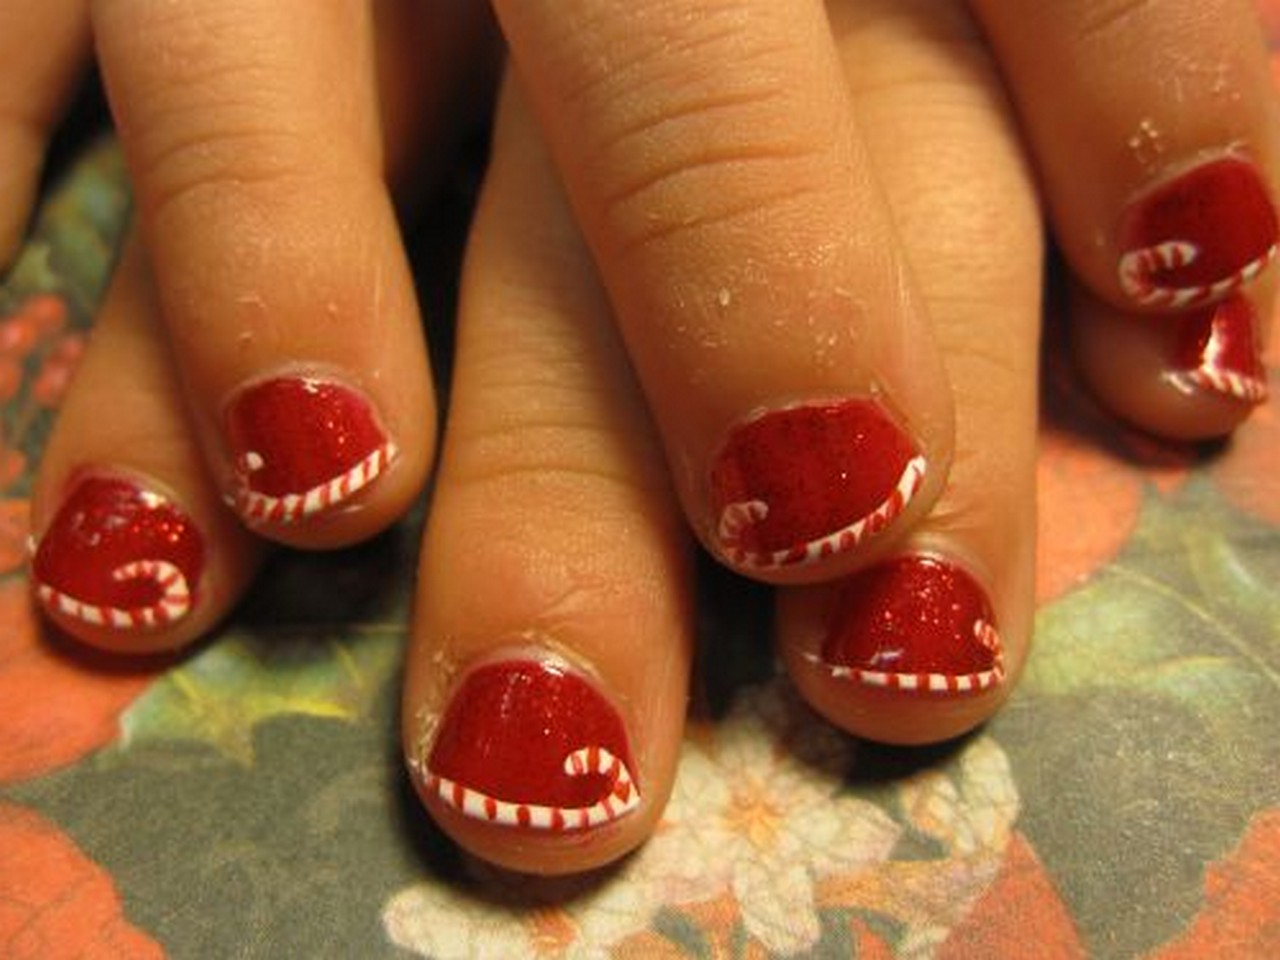
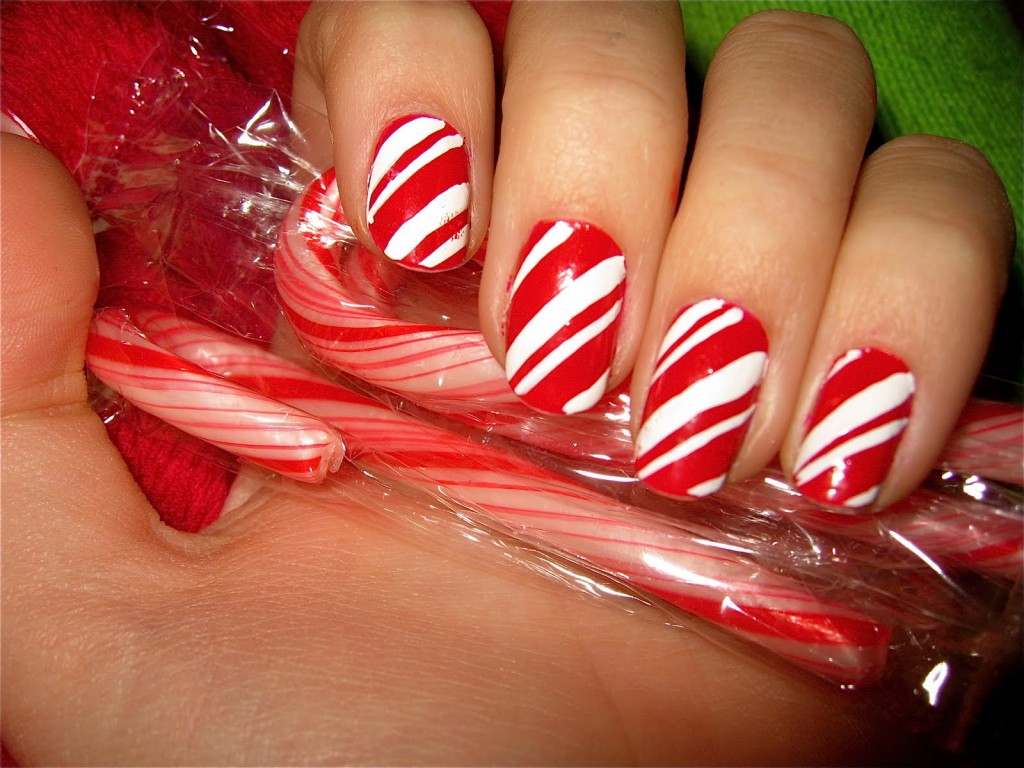
Step 4: Candy Cane Stripes
 Bring some sweetness to your nails with candy cane stripes. Apply a base coat and let it dry, then use a thin nail art brush to create diagonal stripes in red and white. You can also use tape or striping tape to create clean and precise lines. Finish with a top coat for a polished look.
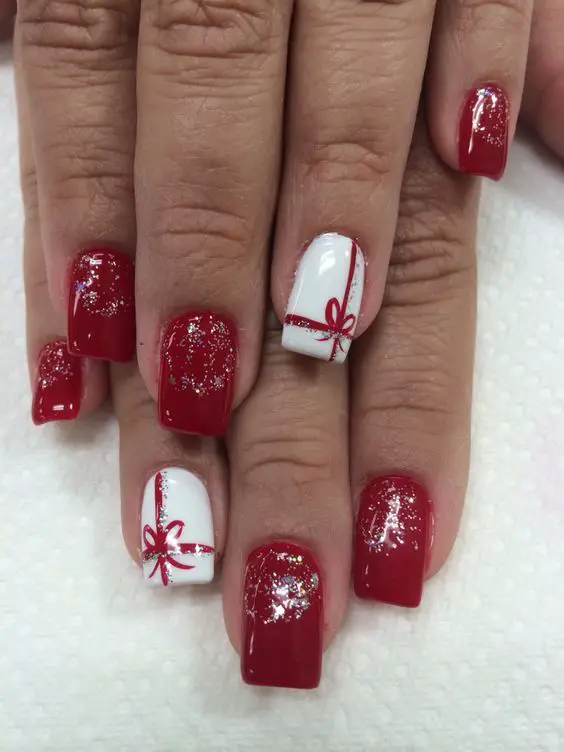
Step 5: Festive French Tips
 Put a Christmas spin on the classic French manicure by adding some holiday cheer to the tips of your nails. Start with a clear base coat, then paint the tips of your nails in a festive color of your choice. To add some extra sparkle, you can also add glitter to the tips. Finish off with a top coat for a long-lasting finish.
Step 6: Holiday Decals
 If you're not confident in your nail art skills, don't worry. You can still achieve a festive look by using nail decals. There are plenty of Christmas-themed decals available, from snowflakes to Santa hats. Simply apply them on top of your base color, and seal with a top coat.
With these easy step-by-step
Christmas nail art
designs, you can add a touch of holiday magic to your manicure. So, why not gather some friends and make it a fun holiday activity? Let your creativity shine and have a merry and stylish Christmas!
If you're not confident in your nail art skills, don't worry. You can still achieve a festive look by using nail decals. There are plenty of Christmas-themed decals available, from snowflakes to Santa hats. Simply apply them on top of your base color, and seal with a top coat.
With these easy step-by-step
Christmas nail art
designs, you can add a touch of holiday magic to your manicure. So, why not gather some friends and make it a fun holiday activity? Let your creativity shine and have a merry and stylish Christmas!


