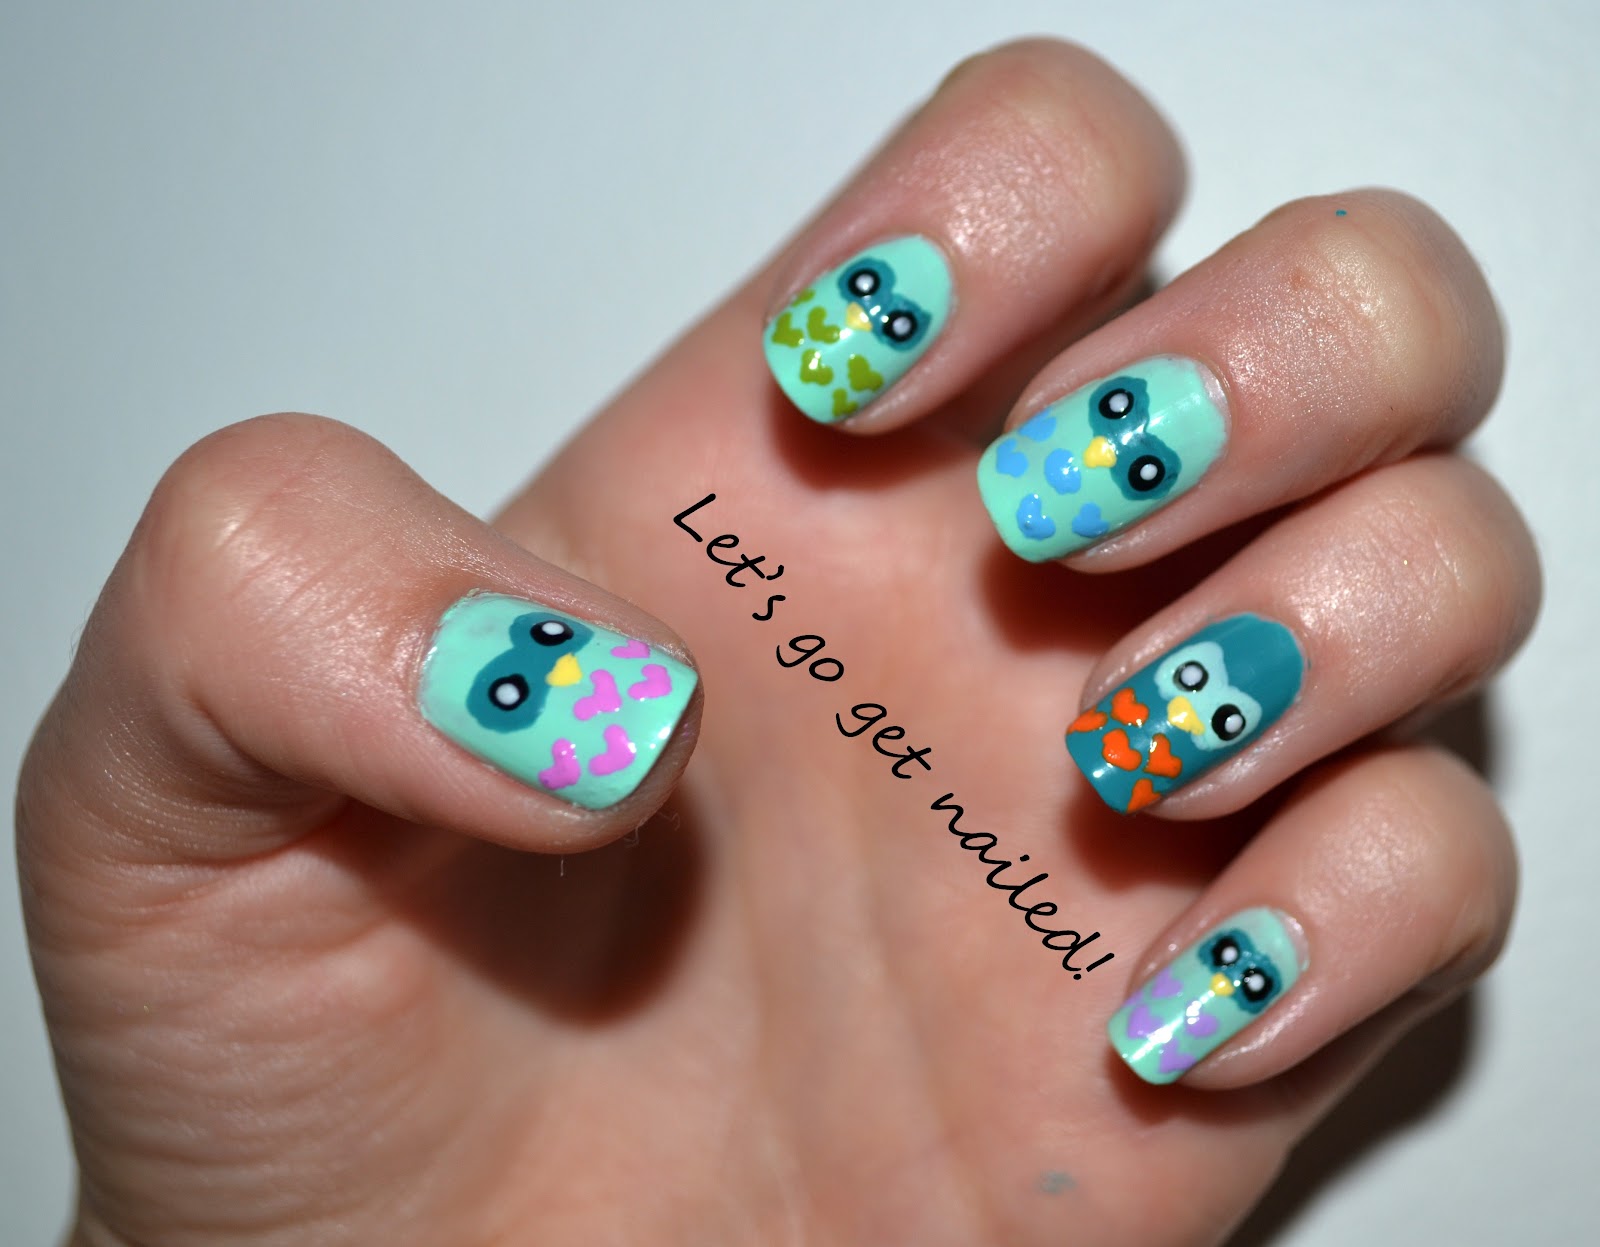
Are you looking for a cute and fun nail design to try out? Look no further than this easy owl nail art tutorial. With just a few simple steps, you can achieve a whimsical and adorable look that will make your nails stand out. To start, gather your supplies. You will need a base coat, a light and dark nail polish of your choice, a small brush, and a dotting tool or toothpick. Once you have everything ready, let's get started! Featured keyword: easy owl nail art tutorial1. Easy Owl Nail Art Tutorial


1. Easy Owl Nail Art Tutorial


If you're new to nail art or just looking for a quick and easy design, this simple owl nail design is perfect for you. With minimal tools and steps, you can create a cute and stylish look that will have everyone asking where you got your nails done. Start by applying a base coat to protect your nails and allow it to dry completely. Then, using a light-colored nail polish, paint your nails. Once dry, use a dotting tool or toothpick to create two small dots for the owl's eyes. Next, use a small brush and a darker nail polish to draw a curved line above the eyes for the owl's eyebrows. Finish off by creating two small triangles at the bottom of the nail for the owl's beak. Voila, you have a simple owl nail design! Featured keyword: simple owl nail design2. Simple Owl Nail Design


2. Simple Owl Nail Design


Get ready to show off your cute and easy owl nails with this step-by-step tutorial. With just a few simple tools and some patience, you can achieve a charming look that will make a statement. Begin by applying a base coat to protect your nails. Once dry, paint your nails with a light-colored polish. Then, use a dotting tool or toothpick to create two small dots for the eyes. Next, use a small brush and a darker nail polish to draw a curved line above the eyes for the eyebrows. To create the owl's body, use the same brush and polish to make a curved line starting from the top of the nail and ending at the bottom. Finish off by creating two small triangles at the bottom for the beak and two small lines for the feet. Let your nails dry and you're done! Featured keyword: cute and easy owl nails3. Cute and Easy Owl Nails


3. Cute and Easy Owl Nails

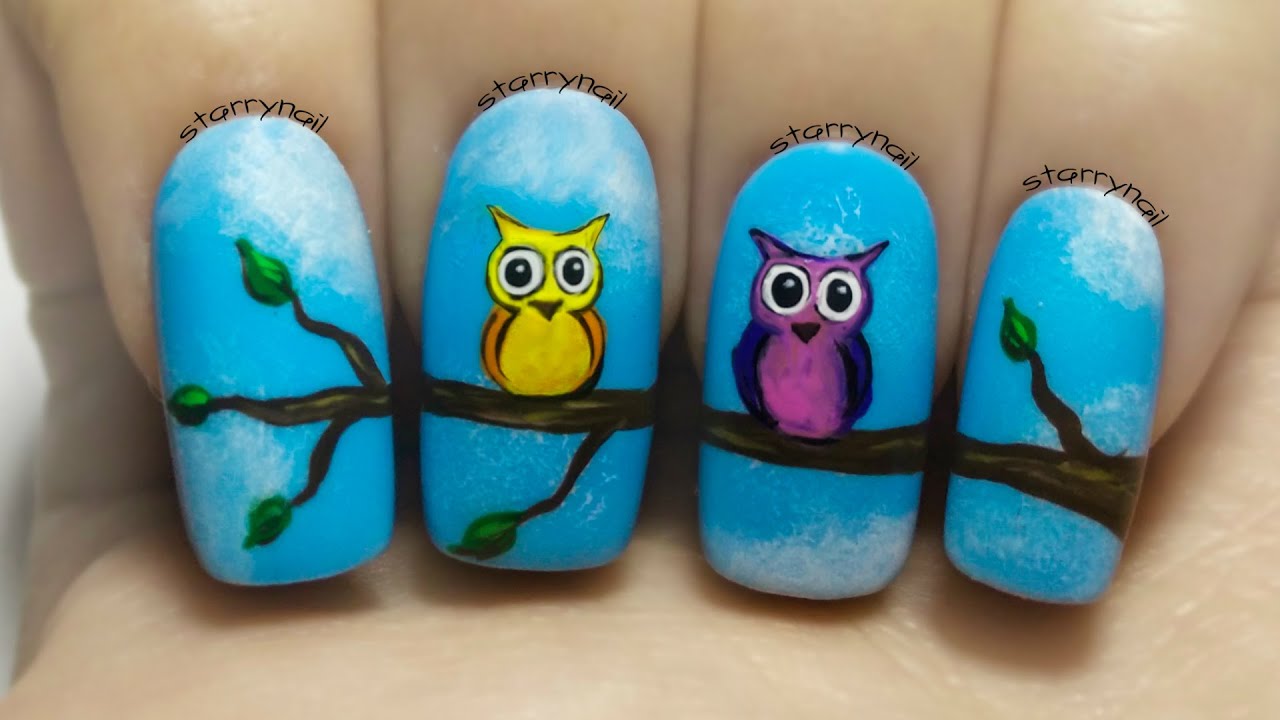

Are you a visual learner? Then this step-by-step owl nail art tutorial is perfect for you. Follow along and create a stunning nail design that will impress everyone. To start, apply a base coat to protect your nails. Then, paint your nails with a light-colored polish and allow it to dry completely. Next, use a dotting tool or toothpick to create two small dots for the owl's eyes. Using a small brush and a darker nail polish, draw a curved line above the eyes for the eyebrows. Then, create the owl's body by making a curved line from the top of the nail to the bottom. For the beak, create two small triangles at the bottom of the nail, and for the feet, make two small lines. Let your nails dry and seal with a top coat for a long-lasting look. Featured keyword: step-by-step owl nail art4. Step-by-Step Owl Nail Art

4. Step-by-Step Owl Nail Art


Short on time but still want to have cute nails? Try out this quick and easy owl nail tutorial. With just a few simple steps, you can achieve a chic and playful look in no time. Start by applying a base coat to protect your nails. Once dry, use a light-colored polish to paint your nails. Then, using a dotting tool or toothpick, create two small dots for the eyes. Next, use a small brush and a darker nail polish to draw a curved line above the eyes for the eyebrows. For the owl's body, make a curved line from the top of the nail to the bottom. Finish off by creating two small triangles for the beak and two small lines for the feet. Let your nails dry, and you're ready to go! Featured keyword: quick and easy owl nails5. Quick and Easy Owl Nails


5. Quick and Easy Owl Nails
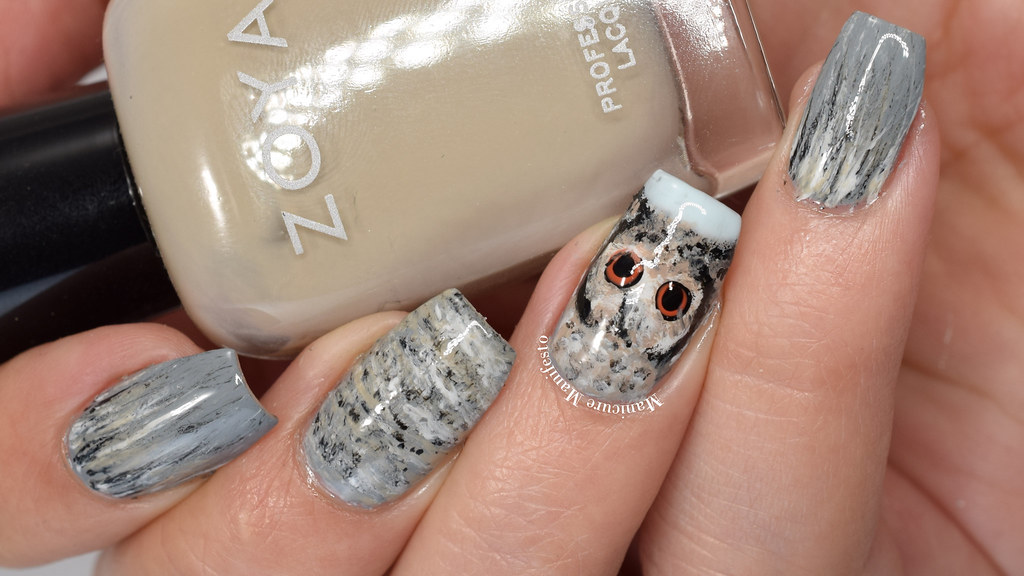


If you're new to nail art and looking for a design to try out, this beginner-friendly owl nail tutorial is perfect for you. With simple steps and minimal tools, you can create a fun and charming look that will make your nails pop. To begin, apply a base coat to protect your nails. Once dry, use a light-colored polish to paint your nails. Then, using a dotting tool or toothpick, create two small dots for the eyes. Next, use a small brush and a darker nail polish to draw a curved line above the eyes for the eyebrows. For the owl's body, make a curved line from the top of the nail to the bottom. Finish off by creating two small triangles for the beak and two small lines for the feet. Let your nails dry, and you're all set! Featured keyword: beginner-friendly owl nail tutorial6. Beginner-Friendly Owl Nail Tutorial


6. Beginner-Friendly Owl Nail Tutorial

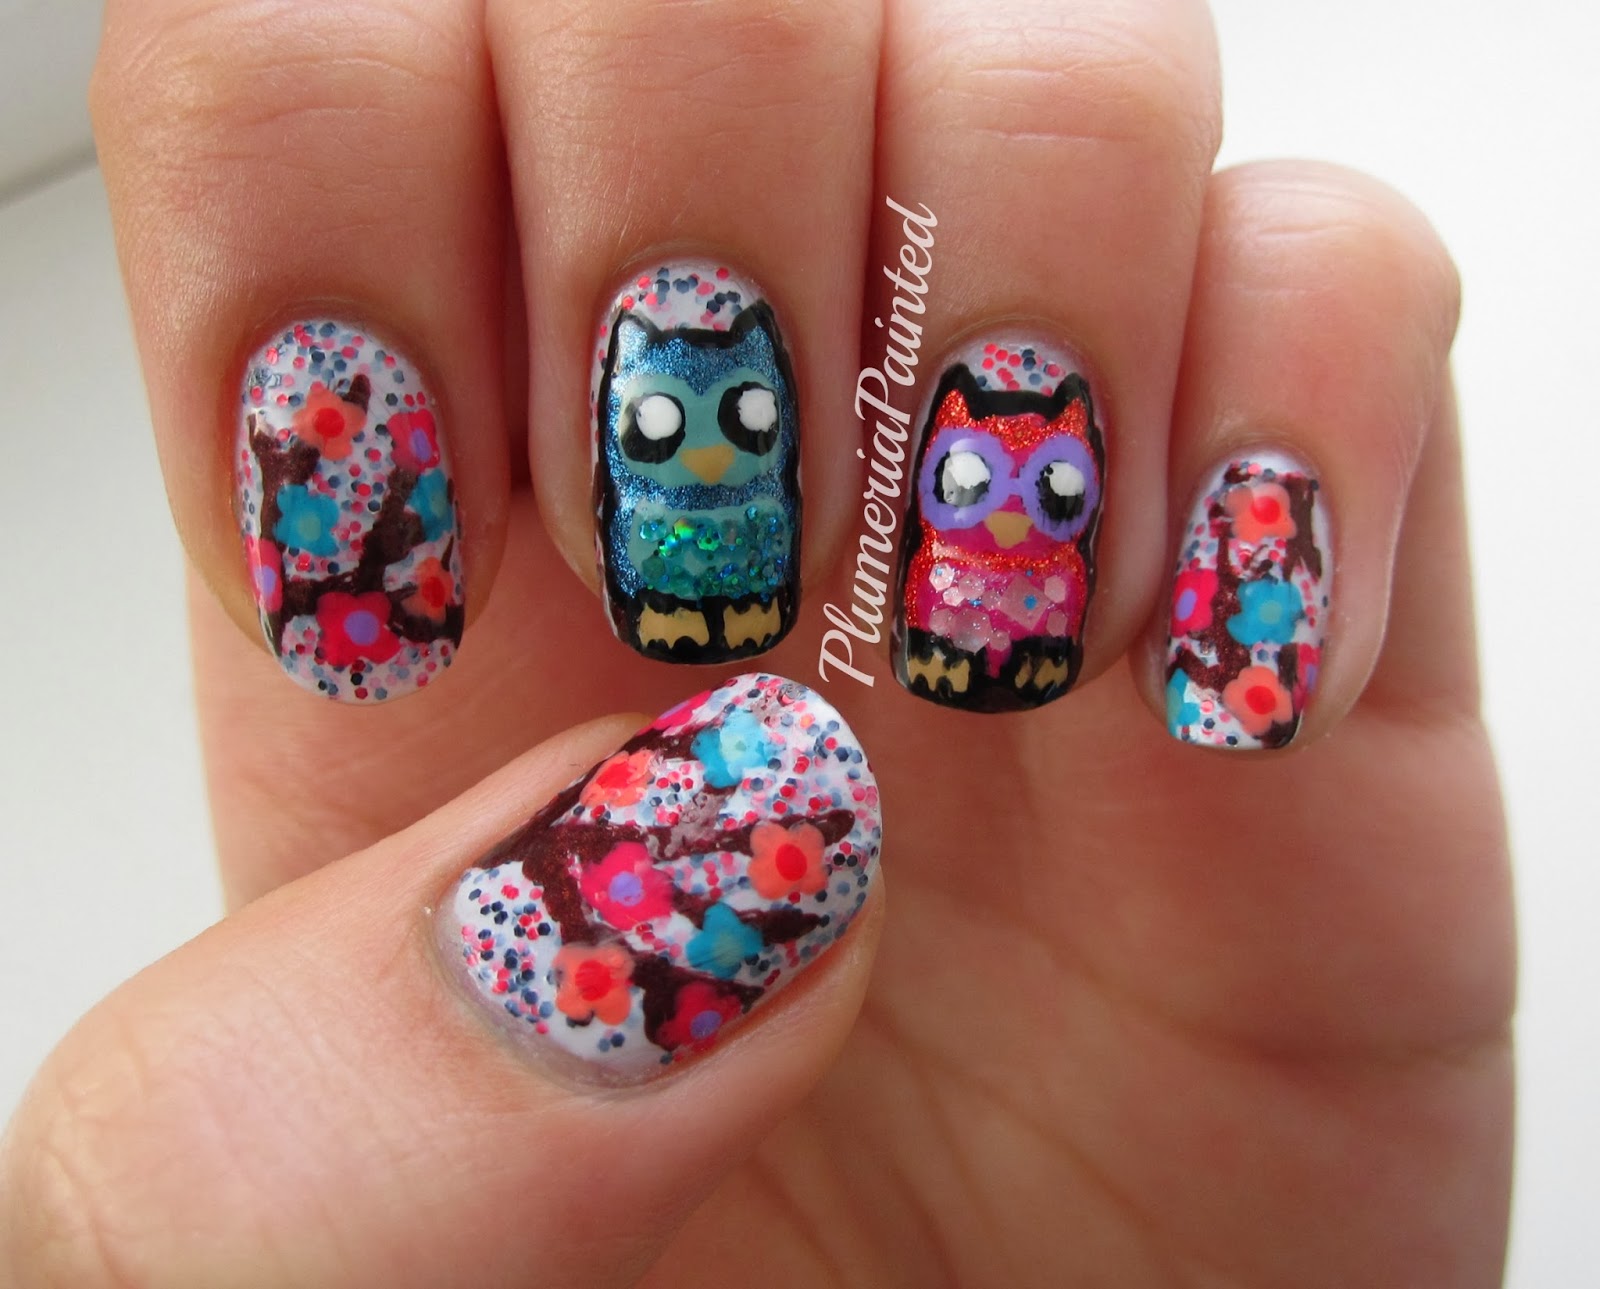
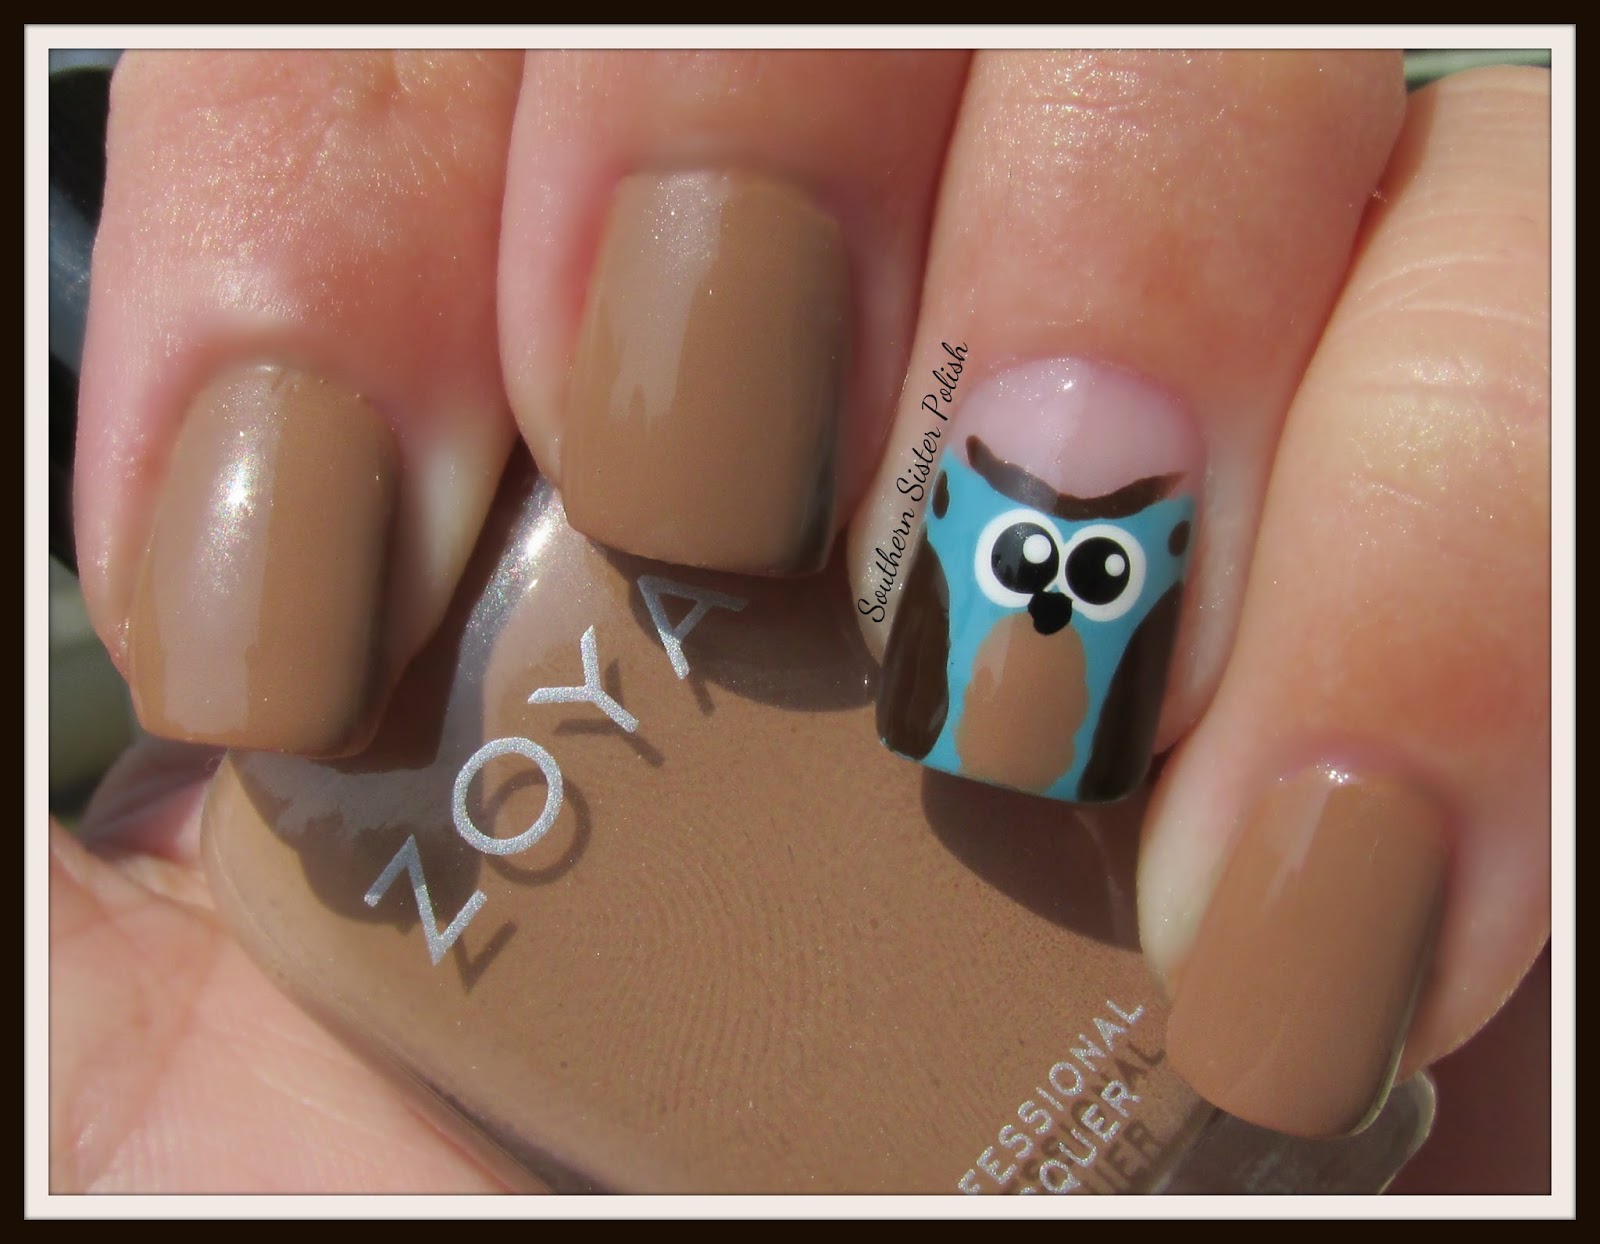
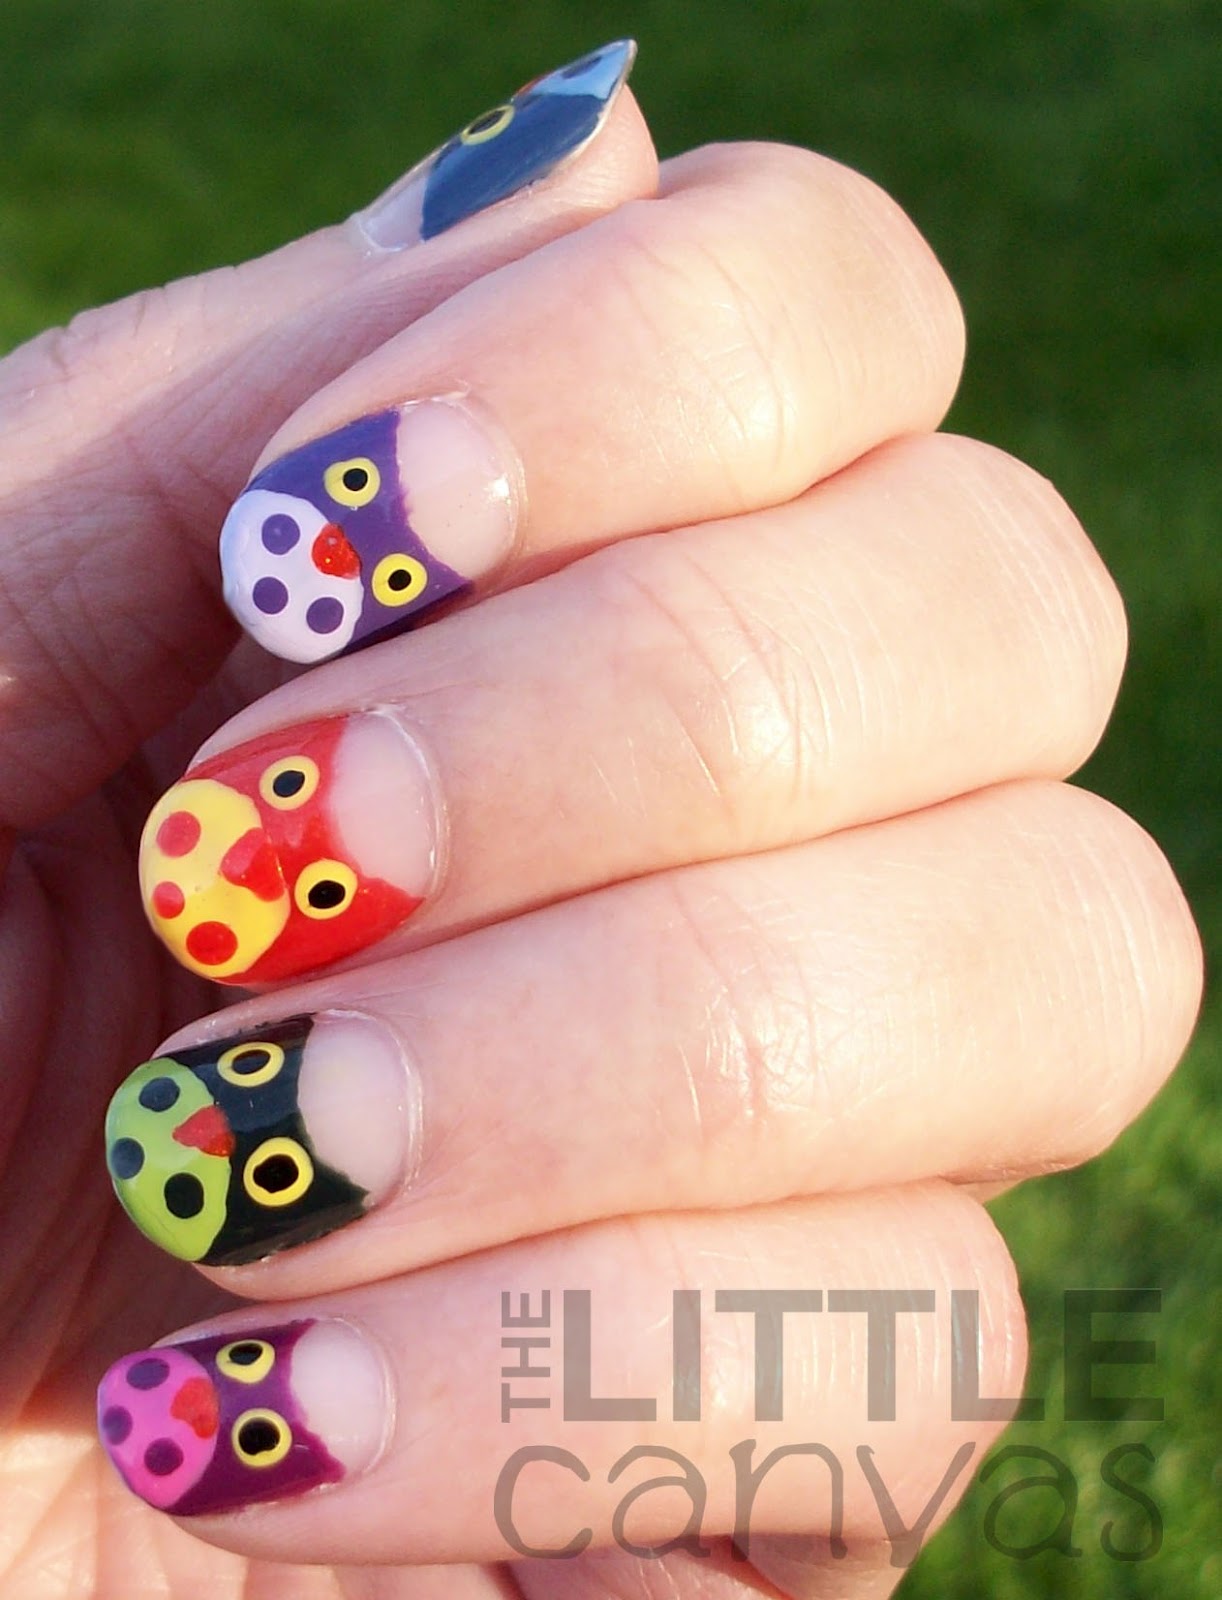
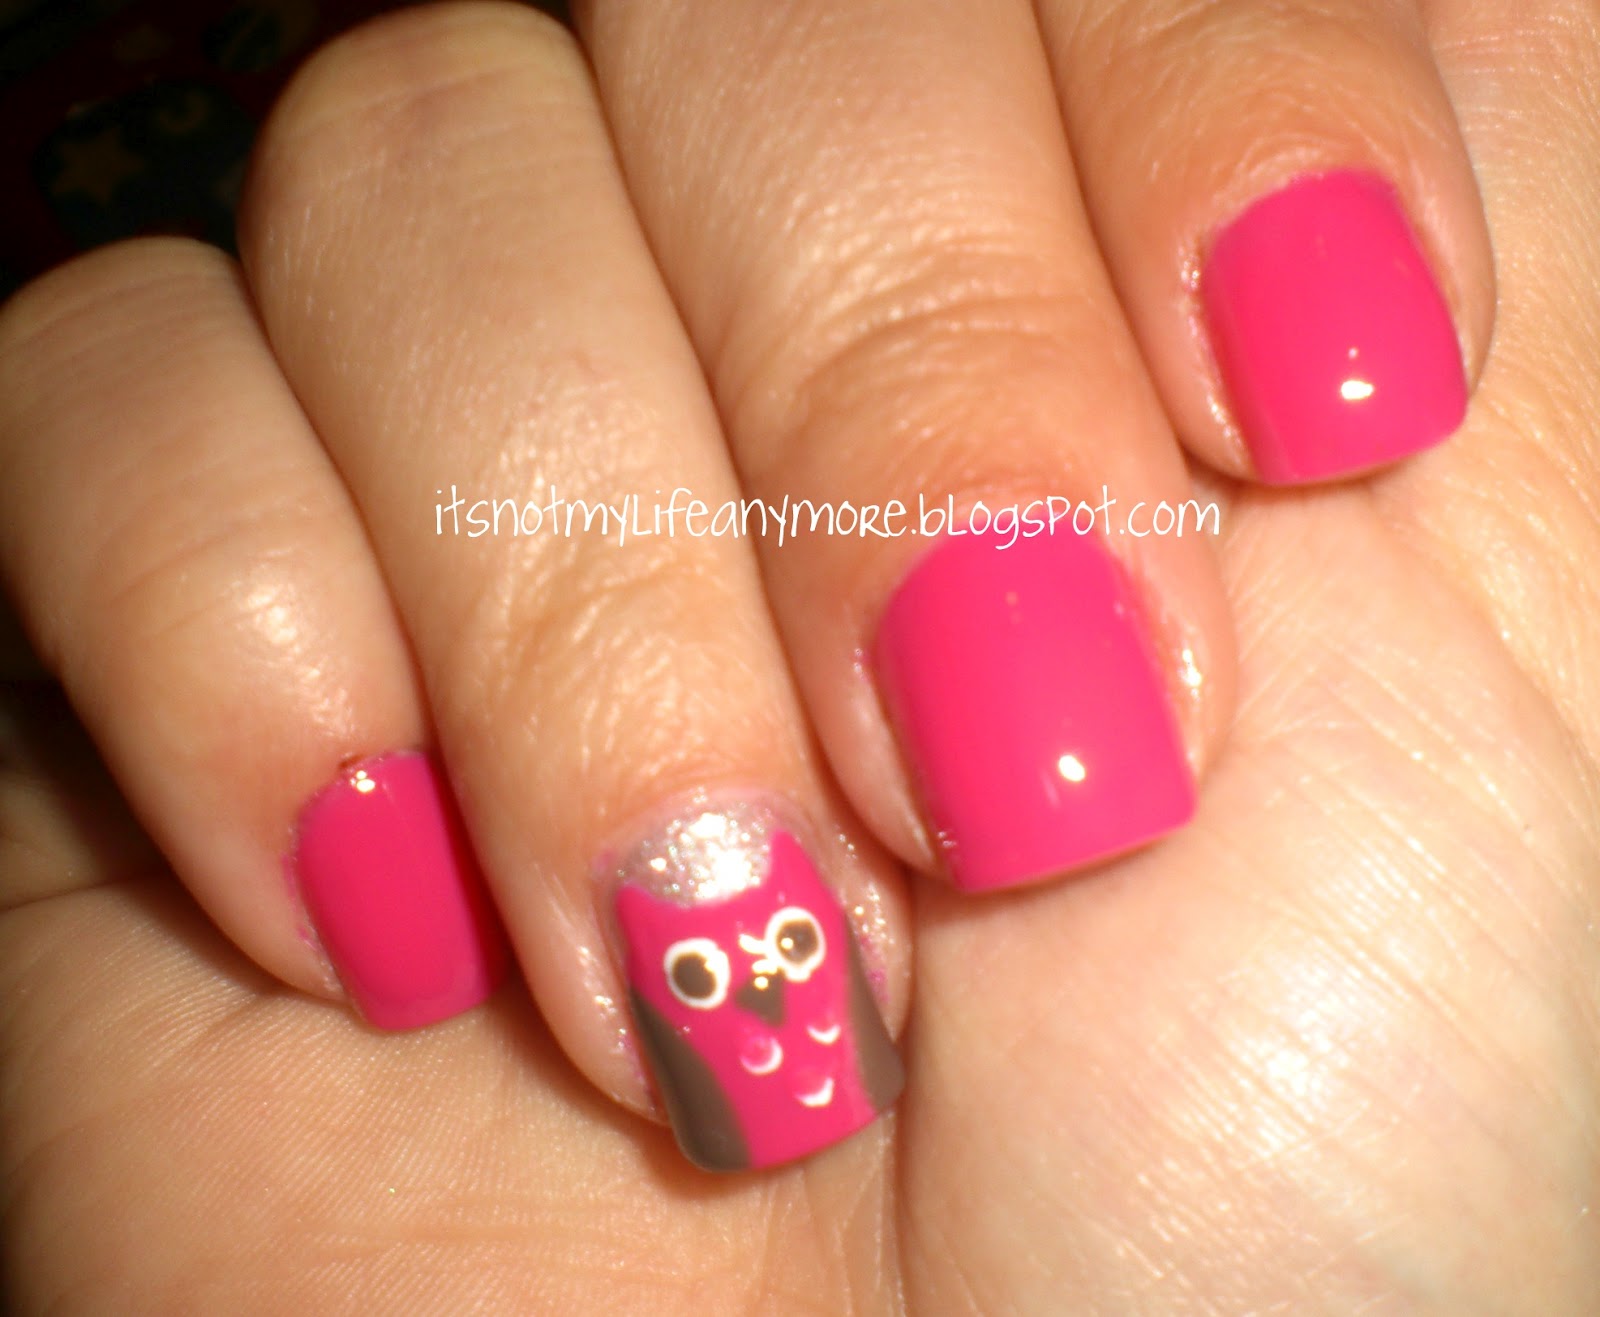
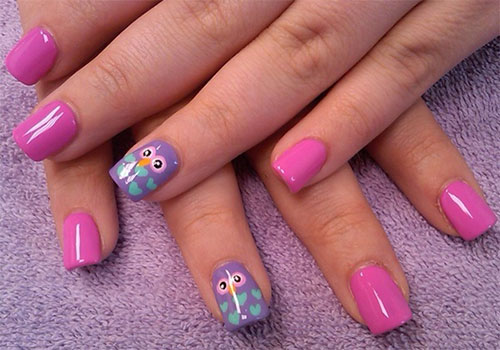
Add a touch of cuteness to your nails with these adorable owl nail designs. With different variations and styles, you can find the perfect design to match your personality and style. One option is to create a simple owl design on one accent nail and paint the rest of your nails with a coordinating color. Another option is to have a different owl design on each nail for a playful and fun look. You can also try out different color combinations and add glitter or gems for a more glamorous look. The possibilities are endless with these adorable owl nail designs. Featured keyword: adorable owl nail designs7. Adorable Owl Nail Designs

7. Adorable Owl Nail Designs

Looking to save some money and create your own nail art at home? This DIY owl nail art tutorial is perfect for beginners and will give you professional-looking results without breaking the bank. Start by gathering your supplies, including a base coat, light and dark nail polish, a small brush, and a dotting tool or toothpick. Begin by applying a base coat to protect your nails. Once dry, paint your nails with a light-colored polish. Then, use a dotting tool or toothpick to create two small dots for the eyes. Using a small brush and a darker nail polish, draw a curved line above the eyes for the eyebrows. Create the owl's body by making a curved line from the top of the nail to the bottom. Finish off by creating two small triangles at the bottom for the beak and two small lines for the feet. Seal with a top coat, and you have a beautiful DIY owl nail art design. Featured keyword: DIY owl nail art for beginners8. DIY Owl Nail Art for Beginners


8. DIY Owl Nail Art for Beginners


Are you feeling adventurous and looking for some fun and easy owl nail ideas? Look no further, as we have some creative and unique designs that will make your nails stand out. One idea is to create a whimsical owl design on all of your nails using different colors and patterns. Another idea is to create an ombre effect on your nails and add a cute owl design on one accent nail. You can also try out different techniques, such as using watercolor or stamping, to achieve a one-of-a-kind look. Let your imagination run wild and have fun with these fun and easy owl nail ideas. Featured keyword: fun and easy owl nail ideas9. Fun and Easy Owl Nail Ideas

9. Fun and Easy Owl Nail Ideas
Get inspired by these whimsical owl nail art designs and elevate your nail game. These creative and beautiful designs will give you endless inspiration for your next nail look. One idea is to use pastel colors and create an owl design on one accent nail, while keeping the rest of the nails a solid color. You can also try a negative space design, where the owl is created by leaving a space unpainted on the nail. Another idea is to create an owl on each nail, using different colors and patterns for each one. Let your imagination run wild and use these whimsical owl nail art designs as inspiration for your own unique look. Featured keyword: whimsical owl nail art inspiration10. Whimsical Owl Nail Art Inspiration
10. Whimsical Owl Nail Art Inspiration
Creating an Adorable Look with Easy Owl Nail Art
Unleashing Your Creativity with Owl Nail Art
 Are you looking for a fun and unique way to spice up your nail game? Look no further than easy owl nail art! This adorable design is perfect for any occasion and can be easily customized to fit your personal style. Plus, it's a great way to express your love for nature and these wise creatures.
Owl nail art
is a great way to add a playful touch to your
nail design
. With its cute and whimsical elements, it's sure to turn heads and make a statement. But don't let its intricate details fool you, this design is surprisingly easy to achieve, making it perfect for beginners and experts alike.
Are you looking for a fun and unique way to spice up your nail game? Look no further than easy owl nail art! This adorable design is perfect for any occasion and can be easily customized to fit your personal style. Plus, it's a great way to express your love for nature and these wise creatures.
Owl nail art
is a great way to add a playful touch to your
nail design
. With its cute and whimsical elements, it's sure to turn heads and make a statement. But don't let its intricate details fool you, this design is surprisingly easy to achieve, making it perfect for beginners and experts alike.
Gathering Your Supplies
 Before jumping into the
nail art
process, it's important to have all the necessary supplies on hand. The main items you'll need are a base coat,
nail polish
in various colors, a top coat, and
nail art tools
such as a dotting tool, fine-tipped brush, and toothpick. You can also use household items, like bobby pins or Q-tips, as substitutes for
nail art
tools.
Before jumping into the
nail art
process, it's important to have all the necessary supplies on hand. The main items you'll need are a base coat,
nail polish
in various colors, a top coat, and
nail art tools
such as a dotting tool, fine-tipped brush, and toothpick. You can also use household items, like bobby pins or Q-tips, as substitutes for
nail art
tools.
Step-by-Step Guide to Easy Owl Nail Art
 Now that you have your supplies ready, it's time to create your own
owl nail art
design. Here's a step-by-step guide to help you achieve this cute and playful look:
Step 1:
Start by applying a base coat to protect your nails and create a smooth surface for your
nail polish
to adhere to.
Step 2:
Choose a light color as your base and apply two coats for an opaque finish. Light colors work best for
owl nail art
as they provide a clean canvas for the intricate details to stand out.
Step 3:
Using a dotting tool or toothpick, create two large circles on the top half of your nail. These will be the owl's eyes.
Step 4:
Once the circles are dry, use a fine-tipped brush or toothpick to add a smaller circle inside each eye for the pupils.
Step 5:
Next, use a darker color to create a small triangle for the owl's beak between the two eyes.
Step 6:
With a lighter color, create a small curved shape above the eyes to represent the owl's eyebrows.
Step 7:
To add some dimension to your design, use a fine-tipped brush or toothpick to create small strokes around the eyes and beak. This will give the illusion of feathers.
Step 8:
Lastly, finish off with a top coat to seal in your
nail art
and add shine.
Now that you have your supplies ready, it's time to create your own
owl nail art
design. Here's a step-by-step guide to help you achieve this cute and playful look:
Step 1:
Start by applying a base coat to protect your nails and create a smooth surface for your
nail polish
to adhere to.
Step 2:
Choose a light color as your base and apply two coats for an opaque finish. Light colors work best for
owl nail art
as they provide a clean canvas for the intricate details to stand out.
Step 3:
Using a dotting tool or toothpick, create two large circles on the top half of your nail. These will be the owl's eyes.
Step 4:
Once the circles are dry, use a fine-tipped brush or toothpick to add a smaller circle inside each eye for the pupils.
Step 5:
Next, use a darker color to create a small triangle for the owl's beak between the two eyes.
Step 6:
With a lighter color, create a small curved shape above the eyes to represent the owl's eyebrows.
Step 7:
To add some dimension to your design, use a fine-tipped brush or toothpick to create small strokes around the eyes and beak. This will give the illusion of feathers.
Step 8:
Lastly, finish off with a top coat to seal in your
nail art
and add shine.
Express Yourself with Owl Nail Art
 With endless color combinations and design variations,
owl nail art
is a great way to express your creativity and style. Make it your own by experimenting with different colors, patterns, and even adding other elements like flowers or leaves. So, gather your supplies and unleash your inner artist with this easy and adorable
nail art
design.
With endless color combinations and design variations,
owl nail art
is a great way to express your creativity and style. Make it your own by experimenting with different colors, patterns, and even adding other elements like flowers or leaves. So, gather your supplies and unleash your inner artist with this easy and adorable
nail art
design.


