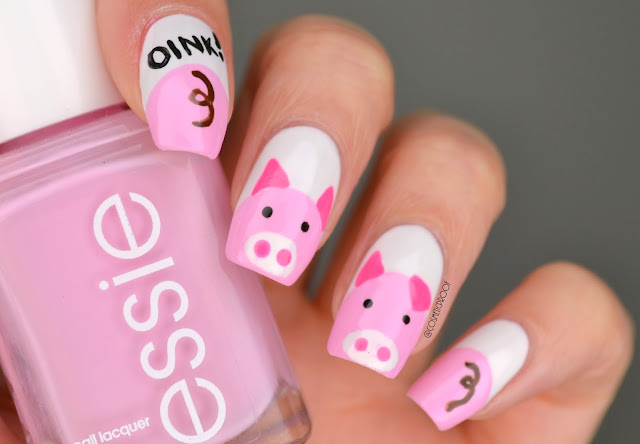
If you're a fan of all things cute and whimsical, then pig nail art is the perfect design for you! Not only is it adorable and fun, but it's also surprisingly easy to create. So grab your nail polish and let's get started on this cute and easy pig nail art tutorial! To begin, you'll need a light pink polish for the base color and a darker pink polish for the pig's body. Start by painting your nails with the light pink polish and allow it to dry completely. Next, using the darker pink polish, create a small circle in the middle of your nail to represent the pig's body. Don't worry about making it perfect, as pigs come in all shapes and sizes! Using a black nail polish or a black nail art pen, draw two small dots for the pig's eyes and a small curved line for its nose. You can also add a small smile using the black polish. To finish off the design, use a white nail polish or a white nail art pen to add two small dots inside the black dots for the eyes. This will give your pig a cute and playful expression. And there you have it, a cute and easy pig nail art design that will surely make your nails stand out!1. Cute and Easy Pig Nail Art Tutorial


1. Cute and Easy Pig Nail Art Tutorial


If you're an animal lover, then why not show your love for pigs with some adorable pig nail designs? These designs are perfect for any occasion, whether you're attending a farm-themed party or simply want to add a touch of cuteness to your everyday look. For a subtle yet cute design, paint your nails with a light pink polish and use a darker pink polish to create small pig silhouettes on each nail. You can also add some grass or flowers to complete the farm-inspired look. If you want to be a bit more creative, try a pig face design on your nails. Paint your nails with a light pink polish and use a black nail art pen to draw a pig face on each nail. You can even add some small ears using the black polish. For a more playful look, try a pink and white ombre design with a pig accent nail. Start by painting your nails with a light pink polish, then use a white polish to create an ombre effect on one nail. Finally, add a cute pig design on the accent nail using the same colors. These adorable pig nail designs are sure to make any animal lover squeal with delight!2. Adorable Pig Nail Designs for Animal Lovers


2. Adorable Pig Nail Designs for Animal Lovers


If you're new to the world of nail art, don't worry, you can still create a cute pig design on your nails! This simple pig nail art tutorial is perfect for beginners and requires minimal tools and skills. Start by painting your nails with a light pink polish and allow it to dry completely. Next, use a black nail art pen to draw a small oval in the center of your nail for the pig's body. Using the same black nail art pen, draw two small dots for the eyes and a small curved line for the nose. You can also add a small smile using the black polish. For the final touch, use a white nail art pen to add two small dots inside the black dots for the eyes. This will give your pig a cute and playful expression. And there you have it, a simple pig nail art design that even beginners can easily recreate!3. Simple Pig Nail Art for Beginners

3. Simple Pig Nail Art for Beginners

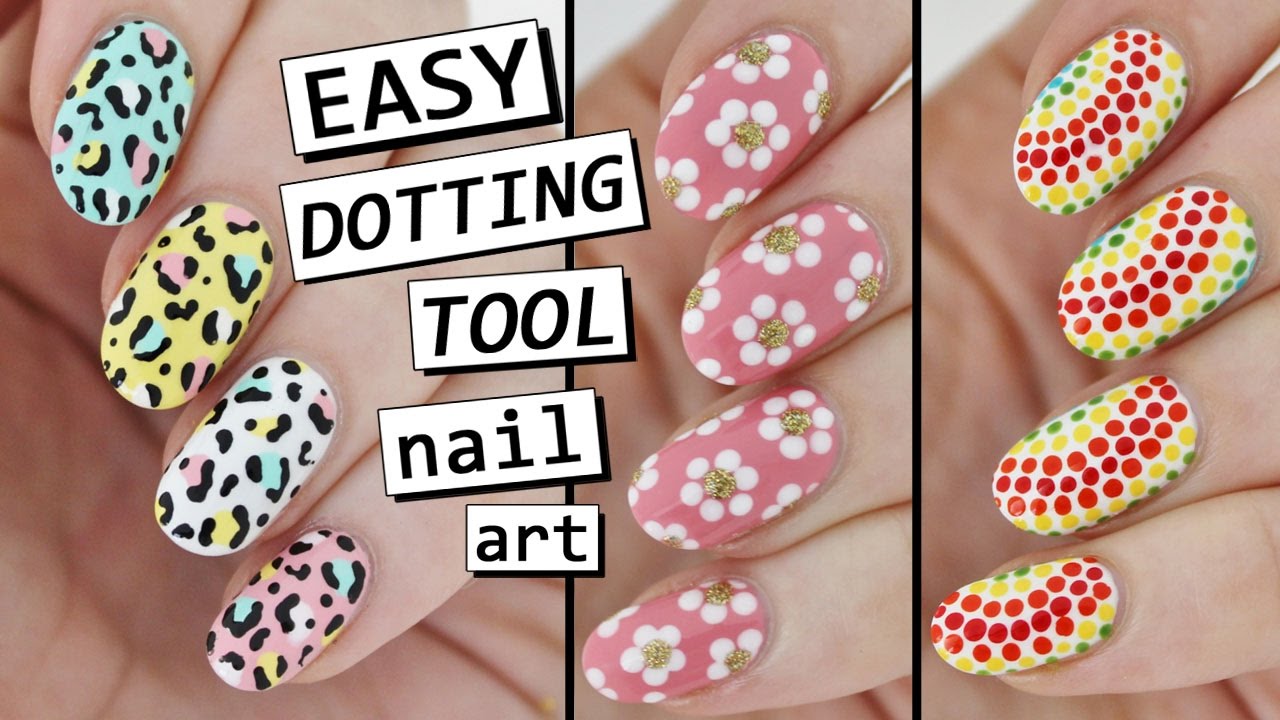
If you love using dotting tools for your nail art, then this tutorial is for you! With just a few simple steps, you can create a cute pig design using dotting tools for a unique and fun look. Start by painting your nails with a light pink polish and allow it to dry completely. Next, using a dotting tool, create small dots using a darker pink polish to represent the pig's body. Vary the sizes of the dots to add dimension to the design. Using a black nail art pen or a small brush, draw two small dots for the eyes and a small curved line for the nose. You can also add a small smile using the black polish. For the final touch, use a white nail art pen to add two small dots inside the black dots for the eyes. This will give your pig a cute and playful expression. Experiment with different sizes and colors of dots to create a unique pig nail design that will surely turn heads!4. How to Create a Pig Nail Design Using Dotting Tools


4. How to Create a Pig Nail Design Using Dotting Tools

Pig nail art doesn't always have to be cute and sweet, it can also be fun and playful! These pig nail art ideas are perfect for those who want to make a statement with their nails. For a pop of color, try a neon pig nail design. Paint your nails with a neon pink polish and use a black nail art pen to draw a pig silhouette on each nail. You can also add some grass or flowers for an extra touch. If you're feeling adventurous, try a 3D pig nail design using nail gems. Paint your nails with a light pink polish and use a darker pink polish to create a pig silhouette on one nail. Then, using nail glue, carefully place small pink gems on the pig's body for a textured effect. Another fun idea is to create a piggy bank nail design. Paint your nails with a metallic silver polish and use a black nail art pen to draw a piggy bank on each nail. You can also add some coins using different shades of metallic polish. Get creative and have fun with these playful pig nail art ideas!5. Fun and Playful Pig Nail Art Ideas


5. Fun and Playful Pig Nail Art Ideas

If you prefer a more detailed guide, then this step-by-step tutorial is for you. Follow these easy steps to create a cute pig nail art design that will make your nails stand out. Step 1: Start by painting your nails with a light pink polish and allow it to dry completely. Step 2: Using a dotting tool or a toothpick, create small dots using a darker pink polish to represent the pig's body. Vary the sizes of the dots for a more realistic look. Step 3: Using a black nail art pen or a small brush, draw two small dots for the eyes and a small curved line for the nose. You can also add a small smile using the black polish. Step 4: Use a white nail art pen to add two small dots inside the black dots for the eyes. This will give your pig a cute and playful expression. Step 5: Finally, apply a top coat to seal in your design and add a glossy finish. With these simple steps, you can easily create a pig nail art design that will impress everyone!6. Step-by-Step Guide to DIY Pig Nail Art

6. Step-by-Step Guide to DIY Pig Nail Art

Pig nail art is not just for adults, it can also be a fun and creative activity for kids! These pig nail art designs are perfect for young ones who love all things cute and colorful. For a quick and easy design, paint your child's nails with a light pink polish and use a black nail art pen to draw a pig face on each nail. You can also add some small ears using the black polish. If your child loves glitter, try a glittery pig nail design. Paint their nails with a light pink polish and use a glittery pink polish to create a pig silhouette on one nail. You can also add some grass or flowers using a green glitter polish. For a more playful look, try a pig and piglet design. Paint your child's nails with a light pink polish and use a black nail art pen to draw a large pig on one nail and a smaller piglet on another. You can also add some hearts or flowers for an extra touch. Let your child's imagination run wild with these fun and cute pig nail art designs!7. Pig Nail Art Designs for Kids

7. Pig Nail Art Designs for Kids
If you're short on time but still want to rock a cute pig nail design, then try using stickers! These easy pig nail art stickers are perfect for those who want a quick and hassle-free way to create a fun and playful look. Start by painting your nails with a light pink polish and allow it to dry completely. Next, carefully peel off a pig nail art sticker and place it on your nail. Press down gently to ensure it adheres properly. You can also use other pig-themed stickers such as pig faces, piglets, or even barnyard animals. Get creative and mix and match different stickers for a unique and fun look. Finish off with a top coat to seal in your design and your easy pig nail art is complete!8. Easy Pig Nail Art Using Stickers


8. Easy Pig Nail Art Using Stickers


If you're looking for some inspiration for your next manicure, then look no further! These pig nail art designs are sure to give you some ideas on how to incorporate this cute animal into your nails. Try a minimalist design by painting your nails with a light pink polish and using a white nail art pen to draw a small pig silhouette on each nail. This subtle yet cute design is perfect for any occasion. For a more intricate design, try a pig and flower design. Paint your nails with a light pink polish and use a black nail art pen to draw a large pig on one nail. Then, using different shades of pink polish, create small flowers on the remaining nails. If you want to take it up a notch, try a 3D pig nail design using acrylic powder. Paint your nails with a light pink polish and use a darker pink polish to create a pig silhouette on one nail. Then, using clear acrylic powder, carefully place small pink acrylic beads on the pig's body for a textured effect. Get inspired and create your own unique pig nail art design for your next manicure!9. Pig Nail Art Inspiration for Your Next Manicure


9. Pig Nail Art Inspiration for Your Next Manicure

If you don't have any nail art tools on hand, don't worry, you can still create a cute pig nail design using toothpicks! This quick and easy tutorial is perfect for those who want a simple yet adorable design. Start by painting your nails with a light pink polish and allow it to dry completely. Next, using a toothpick, create small dots using a darker pink polish to represent the pig's body. Vary the sizes of the dots for a more realistic look. Using the toothpick, draw two small dots for the eyes and a small curved line for the nose using a black polish. You can also add a small smile using the black polish. For the final touch, use a white nail polish to add two small dots inside the black dots for the eyes. And there you have it, a quick and easy pig nail art design using only toothpicks!10. Quick and Easy Pig Nail Art Using Toothpicks

10. Quick and Easy Pig Nail Art Using Toothpicks
Create Adorable Pig Nail Art with These Easy Steps

Adding a Playful Touch to Your Nails
 When it comes to nail art, there are endless possibilities to express your personal style and creativity. And if you're a fan of cute and playful designs, pig nail art is definitely worth trying. With its adorable and whimsical appeal, pig nail art is a fun and unique way to add some personality to your nails. And the best part? It's easy to do at home with just a few tools and some
nail polish
colors.
When it comes to nail art, there are endless possibilities to express your personal style and creativity. And if you're a fan of cute and playful designs, pig nail art is definitely worth trying. With its adorable and whimsical appeal, pig nail art is a fun and unique way to add some personality to your nails. And the best part? It's easy to do at home with just a few tools and some
nail polish
colors.
Gather Your Supplies
 Before you start creating your pig nail art, make sure you have all the necessary supplies. This includes a base coat,
nail polish
in pink, white, black, and a light shade of brown, a thin brush or a toothpick, a top coat, and some cotton swabs. You can also use any additional
nail art
tools you have, such as stencils or decals, to make the process even easier.
Before you start creating your pig nail art, make sure you have all the necessary supplies. This includes a base coat,
nail polish
in pink, white, black, and a light shade of brown, a thin brush or a toothpick, a top coat, and some cotton swabs. You can also use any additional
nail art
tools you have, such as stencils or decals, to make the process even easier.
Step-by-Step Guide
 Now, let's dive into the easy steps to create adorable pig nail art:
Step 1:
Start by applying a base coat to your nails. This will protect your nails and help the polish last longer.
Step 2:
Once the base coat is dry, apply two coats of pink
nail polish
to all your nails. This will be the base color for your pig design.
Step 3:
Using a thin brush or a toothpick, create two white circles on each nail, leaving some space in between. These will be the eyes of your pig.
Step 4:
With the same brush or toothpick, create two smaller black circles inside the white ones to add pupils to the eyes.
Step 5:
Next, using the light brown
nail polish
, create a small triangle just below the eyes to make the nose of your pig.
Step 6:
Using the same color, add two small dots on either side of the nose to create the nostrils.
Step 7:
To give your pig some personality, you can add a little smile using the thin brush or toothpick and the black
nail polish
.
Step 8:
Once the design is complete, let it dry for a few minutes.
Step 9:
To add some dimension to your design, you can use a cotton swab dipped in the light brown
nail polish
to create some small dots on the pink base.
Step 10:
Finally, seal in your design with a top coat to prevent chipping and add shine.
Now, let's dive into the easy steps to create adorable pig nail art:
Step 1:
Start by applying a base coat to your nails. This will protect your nails and help the polish last longer.
Step 2:
Once the base coat is dry, apply two coats of pink
nail polish
to all your nails. This will be the base color for your pig design.
Step 3:
Using a thin brush or a toothpick, create two white circles on each nail, leaving some space in between. These will be the eyes of your pig.
Step 4:
With the same brush or toothpick, create two smaller black circles inside the white ones to add pupils to the eyes.
Step 5:
Next, using the light brown
nail polish
, create a small triangle just below the eyes to make the nose of your pig.
Step 6:
Using the same color, add two small dots on either side of the nose to create the nostrils.
Step 7:
To give your pig some personality, you can add a little smile using the thin brush or toothpick and the black
nail polish
.
Step 8:
Once the design is complete, let it dry for a few minutes.
Step 9:
To add some dimension to your design, you can use a cotton swab dipped in the light brown
nail polish
to create some small dots on the pink base.
Step 10:
Finally, seal in your design with a top coat to prevent chipping and add shine.
Final Thoughts
 With these easy steps, you can create adorable pig nail art in no time. This fun and playful design are perfect for any occasion and will surely make your nails stand out. So go ahead and give it a try, and don't be afraid to add your own personal touch to make it even more unique. Have fun and enjoy your cute pig nails!


