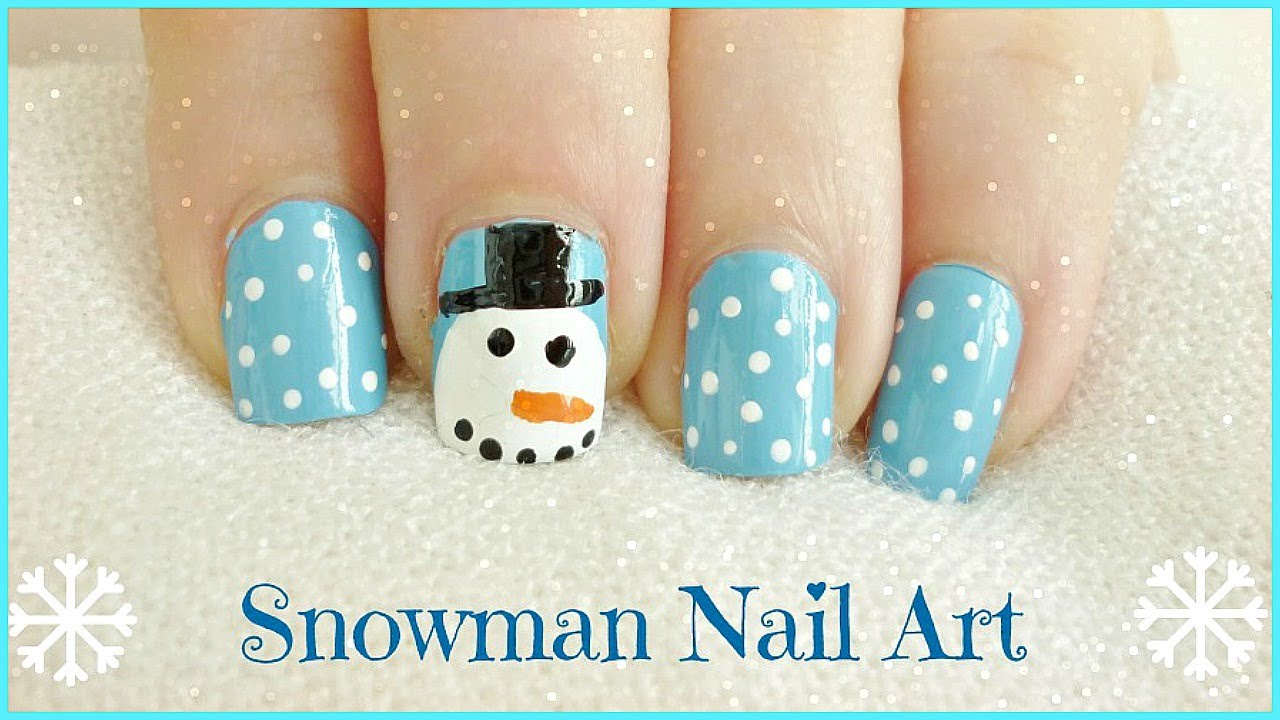
Looking for an easy and fun way to get into the winter spirit? Try out this simple snowman nail art tutorial! With just a few simple steps, you can have adorable snowmen adorning your nails in no time. To start, gather your materials. You will need a base coat, white, black, and orange nail polish, a toothpick or dotting tool, and a top coat. Make sure your nails are clean and dry before beginning. Start by applying a base coat to your nails to protect them and help the polish last longer. Once the base coat is dry, apply two coats of white nail polish to all of your nails. Next, take your black nail polish and create two small dots for the snowman's eyes. Use a toothpick or dotting tool to create a small triangle for the nose with orange nail polish. Using the toothpick or dotting tool, create small black dots for the buttons on the snowman's body. You can also add a small stripe of black nail polish for the brim of the snowman's hat. Finally, seal in your design with a top coat to help it last longer and add shine. And there you have it, your very own simple snowman nail art!1. Simple Snowman Nail Art Tutorial


1. Simple Snowman Nail Art Tutorial


Winter is the perfect time to get creative with your nail designs. Snowflakes, snowmen, and other festive designs are all great options. But if you're looking for something that's quick and easy to do, try out these winter nail designs. A classic option is to paint your nails a solid color, such as white, and then add a glitter top coat for some sparkle. You can also add a few dots or stripes in a contrasting color for a simple yet elegant look. Another easy design is to use a toothpick or dotting tool to create small snowflakes on a dark or glittery background. Just dip the tool in white nail polish and create a small asterisk shape on each nail. If you want to add some winter animals to your nails, try using a toothpick to create a penguin or polar bear. You can also use a small brush or nail art pen to draw on a scarf or hat for added cuteness. These easy winter nail designs are great for beginners or anyone looking for a quick and festive manicure. Have fun experimenting with different colors and designs to find what works best for you!2. Easy Winter Nail Designs


2. Easy Winter Nail Designs


Why spend money at the salon when you can create your own adorable snowman nails at home? With a few simple tools and some creativity, you can have DIY snowman nails that are sure to impress. To start, gather your materials. You will need white, black, and orange nail polish, a toothpick or dotting tool, a small brush or nail art pen, and a top coat. Make sure your nails are clean and dry before beginning. Begin by painting your nails with two coats of white nail polish. Once it's dry, use a toothpick or dotting tool to create two small black dots for the snowman's eyes. Then, use a small brush or nail art pen to create a small orange triangle for the nose. Next, create the snowman's hat by using the toothpick or dotting tool to create a black stripe across the top of the nail. Then, use the brush or pen to fill in the rest of the hat and add a small white pom-pom on top. Finally, use the toothpick or dotting tool to create small black dots for the snowman's buttons. Once everything is dry, seal in your design with a top coat to help it last longer. With a little patience and practice, you can create your own DIY snowman nails that are perfect for the winter season.3. DIY Snowman Nails


3. DIY Snowman Nails


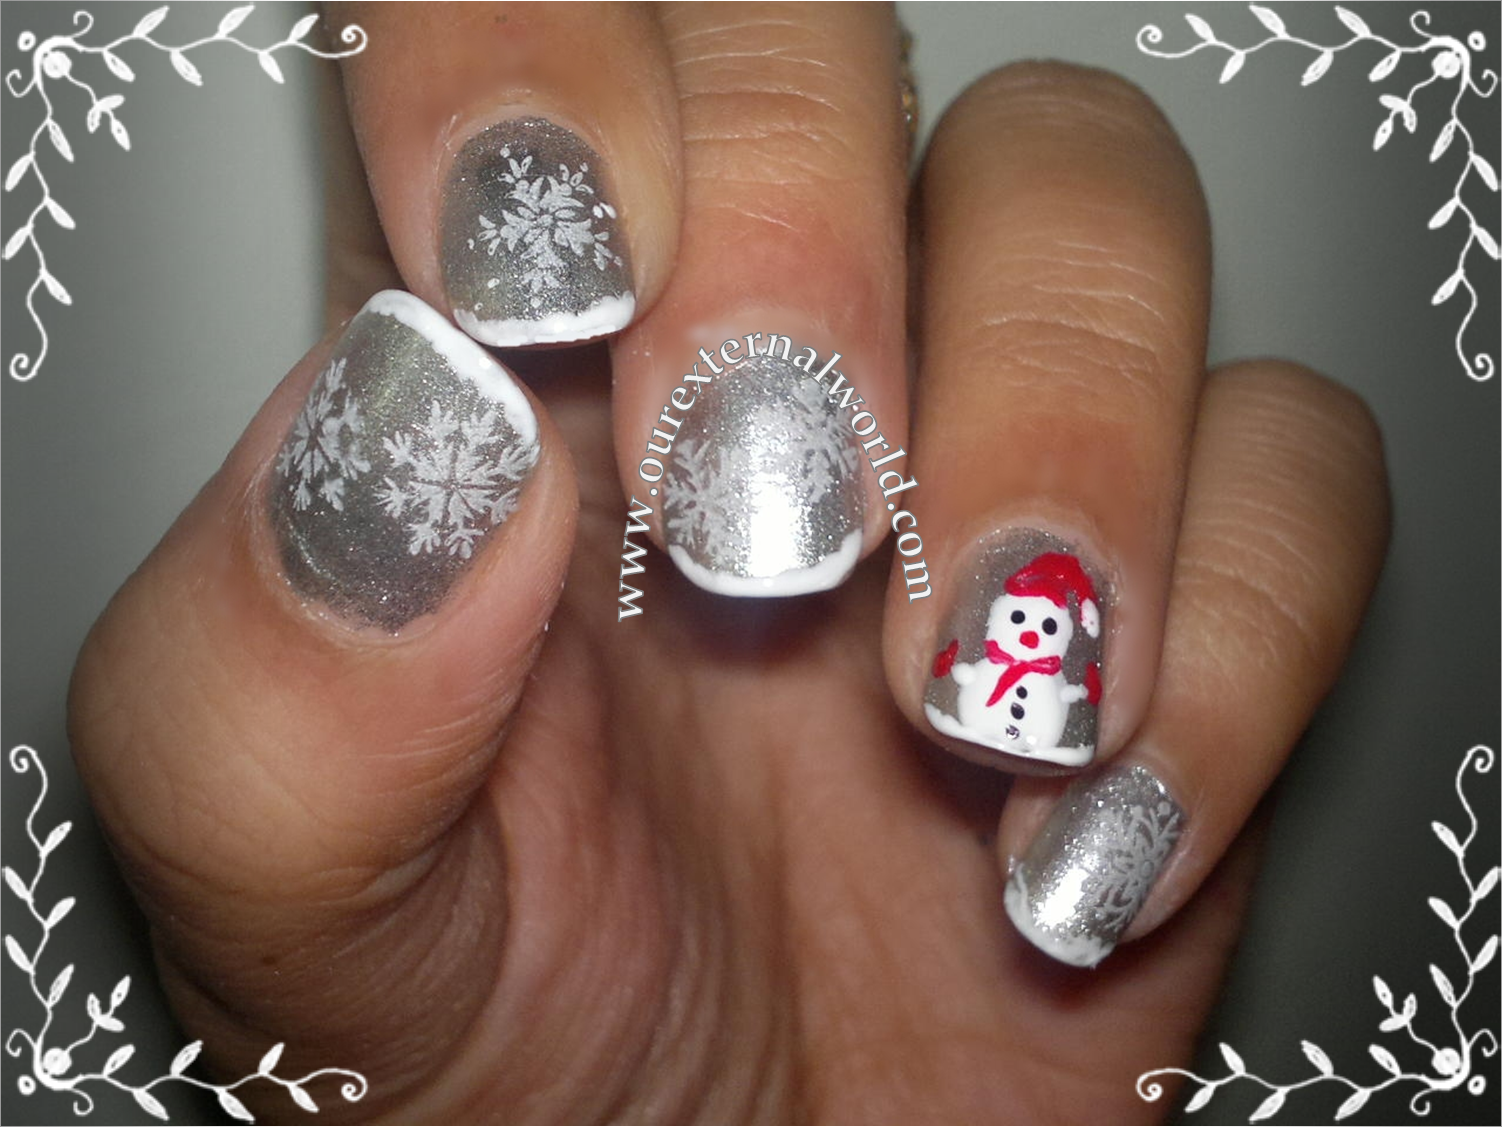
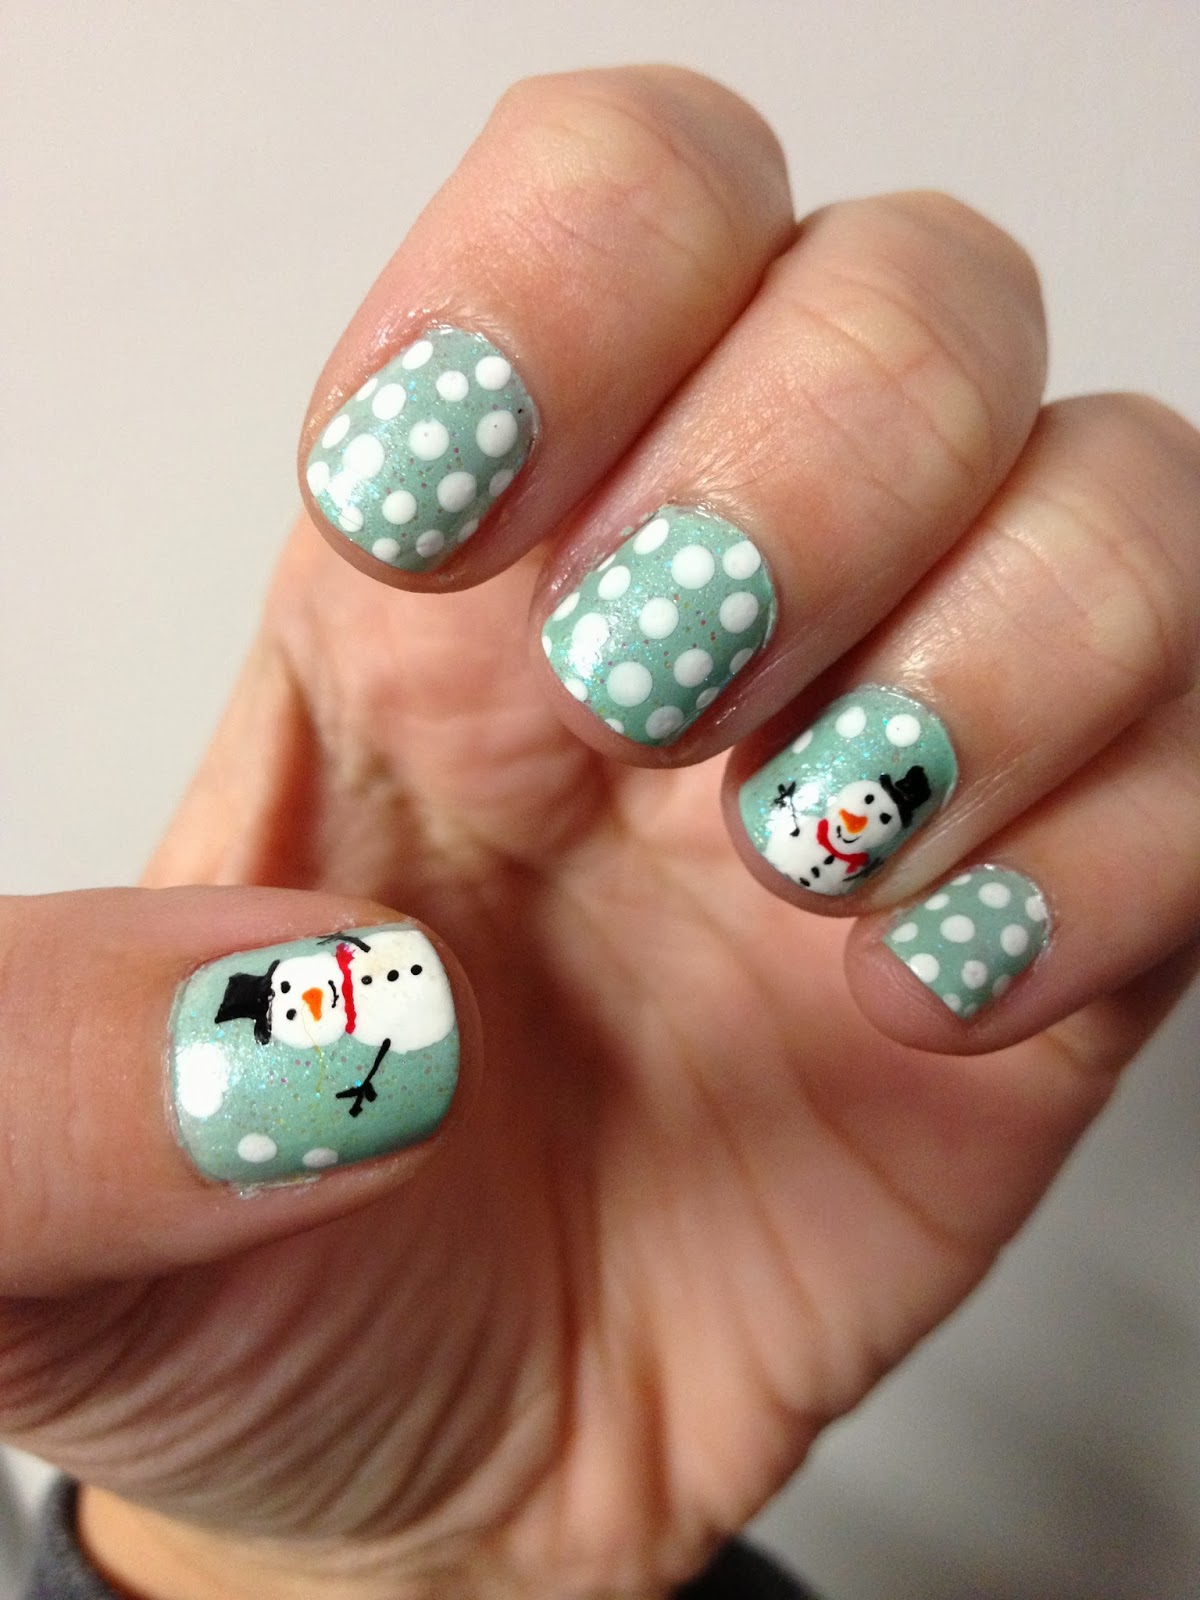
Snowmen are a classic symbol of winter and the holiday season. So why not incorporate them into your nail art? These cute snowman nail art ideas are perfect for anyone who wants to add a little festive flair to their manicure. One idea is to create a different snowman on each nail. Use a base of white polish and then get creative with the accessories. Add a scarf, hat, and even a broom for a unique and adorable look. You can also try a more subtle approach by painting your nails with a light blue or gray polish and then adding a glittery or shimmery top coat to represent snow. Then, use a toothpick or nail art pen to add small snowmen in different poses on each nail. If you're feeling extra creative, try creating a 3D snowman by using nail polish to attach small rhinestones or beads to your nails. You can also use small googly eyes for a fun and quirky touch. No matter which cute snowman nail art idea you choose, you're sure to have a festive and eye-catching manicure that will get you in the winter spirit.4. Cute Snowman Nail Art Ideas


4. Cute Snowman Nail Art Ideas


Short on time but still want to rock some snowman nails? No problem! These quick and easy snowman nails can be done in just a few minutes, perfect for those busy holiday parties or last-minute get-togethers. Start by painting your nails with a light blue or gray polish to represent the sky. Then, using a toothpick or dotting tool, create a line of white dots along the bottom of your nail for the snow. You can also add a few small dots in the sky to represent snowflakes. Next, use a toothpick or nail art pen to create a snowman on each nail. This can be as simple as a few white dots stacked on top of each other, or you can get more creative with accessories like hats and scarves. Finally, use a toothpick or dotting tool to add small details like buttons and a nose. You can also use a small brush or pen to add arms or a broom for a unique touch. Seal in your design with a top coat and you're ready to go with these quick and easy snowman nails!5. Quick and Easy Snowman Nails

5. Quick and Easy Snowman Nails
If you're new to nail art, don't worry! This snowman nail art for beginners is simple and easy to recreate. With just a few basic steps, you can have adorable snowmen adorning your nails in no time. Start by painting your nails with a light blue or gray polish as the base. Then, using a toothpick or dotting tool, create a line of white dots along the bottom of your nail for the snow. Next, use a toothpick or nail art pen to create a snowman on each nail. This can be as simple as a few white dots stacked on top of each other. You can also add a small triangle for the nose and a few black dots for the eyes. To finish off the design, use a toothpick or dotting tool to add small details like buttons and a mouth. You can also use a small brush or pen to add a scarf or hat. With just a few easy steps, you can have adorable snowman nail art that's perfect for beginners.6. Snowman Nail Art for Beginners

6. Snowman Nail Art for Beginners
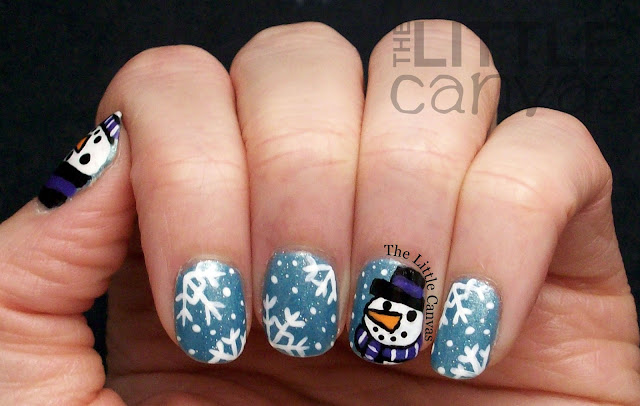
Looking for a more festive and elaborate snowman nail design? These options are perfect for anyone who wants to go all out with their winter manicure. One option is to create a different snowman on each nail, each with its own unique accessories. You can use a variety of colors and patterns to make each one stand out. Another idea is to use a dark blue or black polish as the base and then create a snowy scene with small snowmen and snowflakes on top. You can also add glitter or rhinestones for some added sparkle. If you're feeling extra creative, try creating a 3D snowman by using nail polish to attach small beads or rhinestones to your nails. You can also use small googly eyes for a fun and quirky touch. No matter which festive snowman nail design you choose, you're sure to have a unique and eye-catching manicure that will stand out during the winter season.7. Festive Snowman Nail Designs

7. Festive Snowman Nail Designs


Want to follow a step-by-step guide to create your own snowman nail art? Look no further! Step 1: Start by painting your nails with a light blue or gray polish as the base. Step 2: Using a toothpick or dotting tool, create a line of white dots along the bottom of your nail for the snow. Step 3: Use a toothpick or nail art pen to create a snowman on each nail. This can be as simple as a few white dots stacked on top of each other. Step 4: Use a toothpick or dotting tool to add small details like buttons and a nose. You can also use a small brush or pen to add arms or a broom for a unique touch. Step 5: Seal in your design with a top coat and enjoy your cute snowman nails!8. Snowman Nail Art Step by Step

8. Snowman Nail Art Step by Step
If you don't have a dotting tool or nail art pen, no problem! You can still create adorable snowman nail art using just a toothpick. Start by painting your nails with a light blue or gray polish. Then, use the toothpick to create a line of white dots along the bottom of your nail for the snow. Next, use the toothpick to create a snowman on each nail. This can be as simple as a few white dots stacked on top of each other. You can also add a small triangle for the nose and a few black dots for the eyes. To finish off the design, use the toothpick to add small details like buttons and a mouth. You can also use a small brush or pen to add a scarf or hat. With just a toothpick, you can create cute and unique snowman nail art that's sure to impress.9. Snowman Nail Art with Toothpick


9. Snowman Nail Art with Toothpick

If you have a dotting tool, you can create even more detailed and intricate snowman nail art. Here's how: Start by painting your nails with a light blue or gray polish. Then, use the dotting tool to create a line of white dots along the bottom of your nail for the snow. Next, use the dotting tool to create a snowman on each nail. This can be as simple as a few white dots stacked on top of each other. You can also add a small triangle for the nose and a few black dots for the eyes. To finish off the design, use the dotting tool to add small details like buttons and a mouth. You can also use a small brush or pen to add a scarf or hat. With a dotting tool, you can create more intricate and detailed snowman nail art that will be sure to impress everyone. Have fun experimenting with different designs and colors to find what works best for you!10. Snowman Nail Art with Dotting Tool

10. Snowman Nail Art with Dotting Tool
Create Festive Snowman Nails with Ease

Adding Some Winter Charm to Your Nails
 Are you looking for a fun and creative way to add some winter charm to your nails? Look no further than easy snowman nail art! This simple and festive design is perfect for the holiday season or any snowy day. With just a few tools and some creativity, you can have adorable snowmen gracing your nails in no time.
The Tools You'll Need
 Before getting started, make sure you have the following tools on hand:
- White, black, and orange nail polish
- A toothpick or dotting tool
- A small brush or Q-tip
- Clear top coat
- Paper towel or scrap paper for cleanup
Before getting started, make sure you have the following tools on hand:
- White, black, and orange nail polish
- A toothpick or dotting tool
- A small brush or Q-tip
- Clear top coat
- Paper towel or scrap paper for cleanup
Step-by-Step Guide
 Now that you have all the necessary tools, let's get started on creating your snowman nails:
Step 1: Prep Your Nails
Start by prepping your nails with a clear base coat. This will protect your nails and help the polish to last longer.
Step 2: Paint Your Nails
Using a white nail polish, paint each nail and let it dry completely. If needed, apply a second coat for a more opaque finish.
Step 3: Create the Snowman Bodies
Using a small brush or Q-tip, dip it into the black nail polish and create two small dots towards the top of your nail for the snowman's body. Repeat this on all your nails.
Step 4: Add the Accents
Using the toothpick or dotting tool, dip it into the orange nail polish and create a small triangle shape for the snowman's nose in between the two black dots. Then, using the same tool, dip it into the black nail polish and create two small dots for the eyes above the nose.
Step 5: Finish with Top Coat
Once everything is dry, apply a clear top coat to seal in your design and add some shine.
Now that you have all the necessary tools, let's get started on creating your snowman nails:
Step 1: Prep Your Nails
Start by prepping your nails with a clear base coat. This will protect your nails and help the polish to last longer.
Step 2: Paint Your Nails
Using a white nail polish, paint each nail and let it dry completely. If needed, apply a second coat for a more opaque finish.
Step 3: Create the Snowman Bodies
Using a small brush or Q-tip, dip it into the black nail polish and create two small dots towards the top of your nail for the snowman's body. Repeat this on all your nails.
Step 4: Add the Accents
Using the toothpick or dotting tool, dip it into the orange nail polish and create a small triangle shape for the snowman's nose in between the two black dots. Then, using the same tool, dip it into the black nail polish and create two small dots for the eyes above the nose.
Step 5: Finish with Top Coat
Once everything is dry, apply a clear top coat to seal in your design and add some shine.
Tips and Tricks
 - If you don't have a small brush or Q-tip, you can use the end of a bobby pin or the tip of a toothpick to create the dots for the snowman's body.
- If you're feeling extra creative, you can add some colorful accents to your snowmen such as scarves, hats, or even different colored noses.
- Practice makes perfect, so don't be afraid to experiment and have fun with different designs and techniques.
Now that you have all the steps and tips, you're ready to create your own winter wonderland on your nails! This easy snowman nail art is a great way to add some festive charm to your look and show off your creativity. So grab your tools and get ready to have the cutest nails this winter season.
- If you don't have a small brush or Q-tip, you can use the end of a bobby pin or the tip of a toothpick to create the dots for the snowman's body.
- If you're feeling extra creative, you can add some colorful accents to your snowmen such as scarves, hats, or even different colored noses.
- Practice makes perfect, so don't be afraid to experiment and have fun with different designs and techniques.
Now that you have all the steps and tips, you're ready to create your own winter wonderland on your nails! This easy snowman nail art is a great way to add some festive charm to your look and show off your creativity. So grab your tools and get ready to have the cutest nails this winter season.


