Sponge nail art is a popular trend in the world of nail design. It involves using a sponge to create unique and textured designs on your nails. While many people opt to get their sponge nail art done at a salon, it's actually quite easy to do at home. In this article, we'll be sharing our top 10 eponge nail art maison designs that you can try out for yourself. Sponge Nail Art Maison


Sponge Nail Art Maison


Creating your own sponge nail art at home is a fun and creative way to express yourself. Not to mention, it's also a great money-saving alternative to getting it done at a salon. All you need is a few basic supplies and some patience, and you'll be on your way to creating beautiful designs on your nails. DIY Sponge Nail Art


DIY Sponge Nail Art


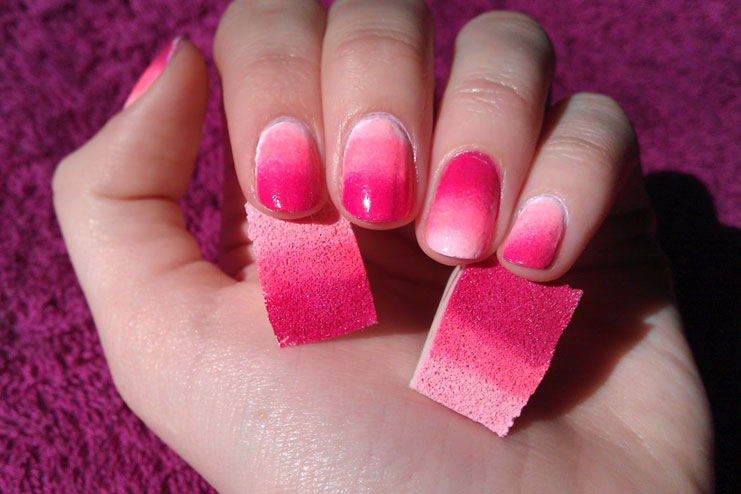
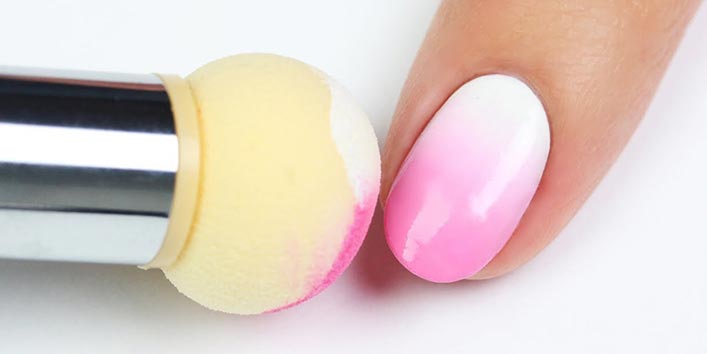
If you're new to sponge nail art, it's best to start with some easy designs. This will help you get a feel for the technique and build your skills before attempting more complex designs. You can try out a simple ombre effect or a gradient design using two or three colors. These are easy to achieve and still give your nails a unique look. Easy Sponge Nail Art


Easy Sponge Nail Art

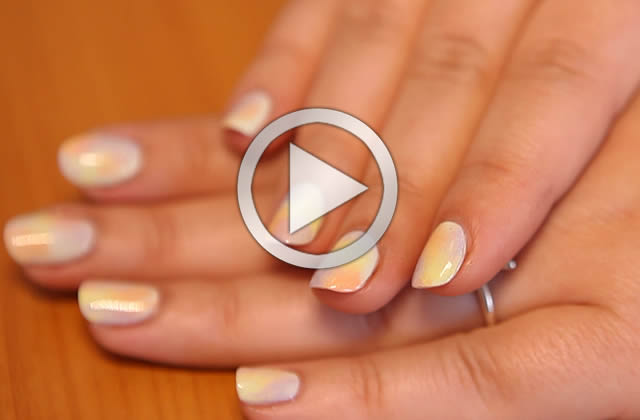
If you're a visual learner, watching a tutorial can be incredibly helpful when it comes to learning how to do sponge nail art. There are plenty of tutorials available online that show you step-by-step how to create different designs using a sponge. You can also find tutorials specifically for beginners, which break down the process and make it easier to follow along. Sponge Nail Art Tutorial


Sponge Nail Art Tutorial

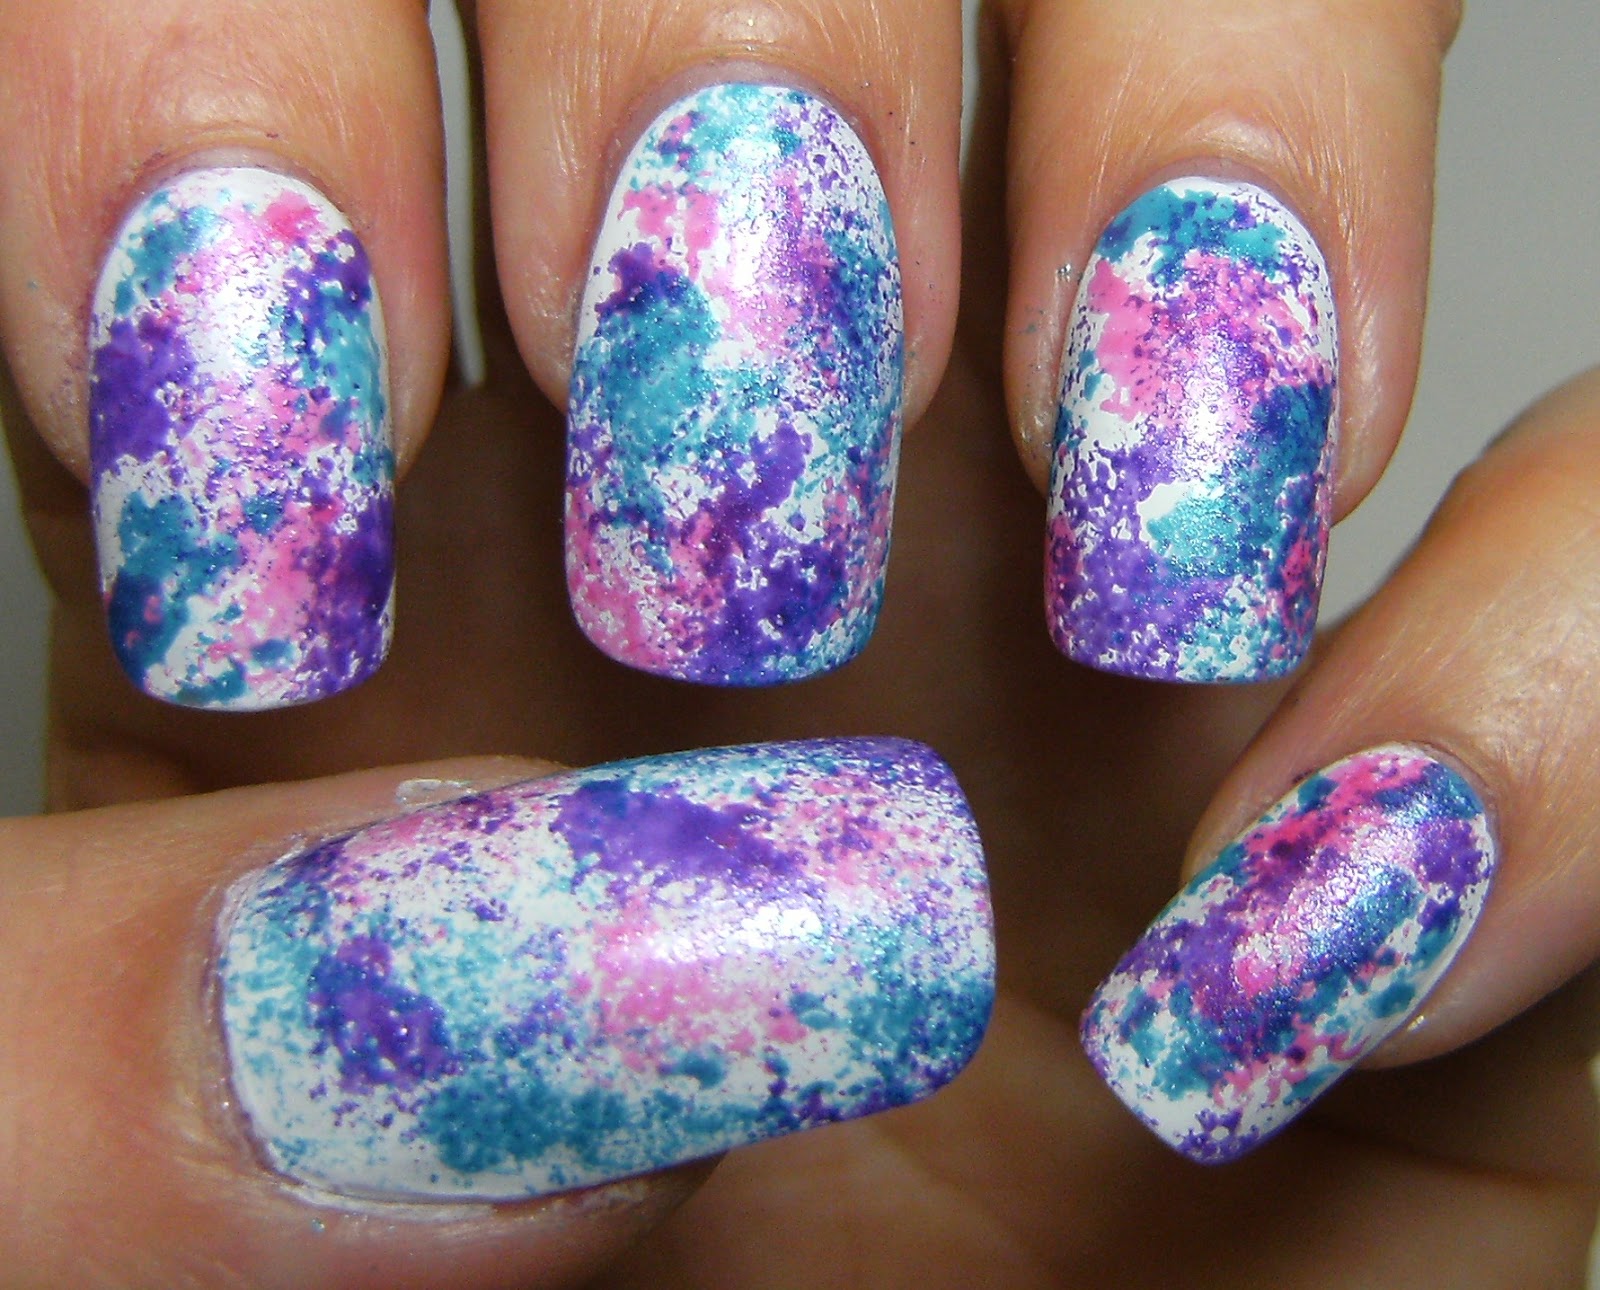
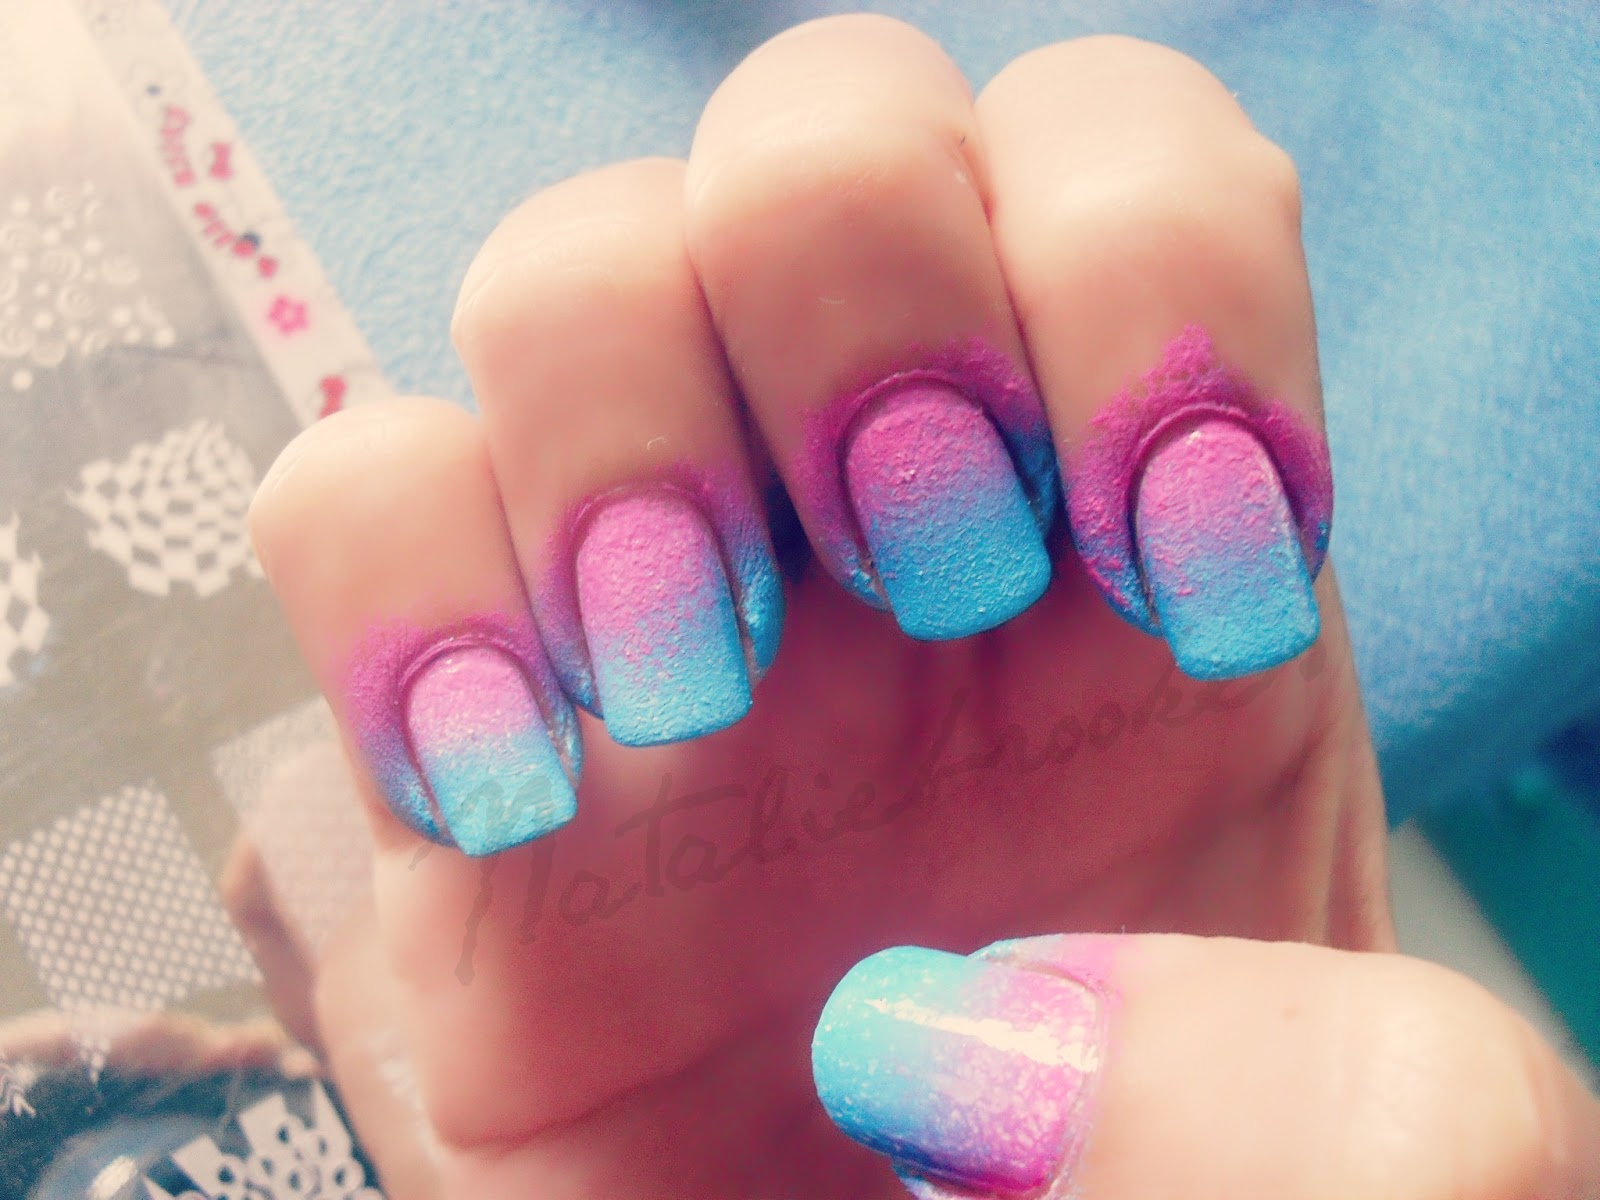
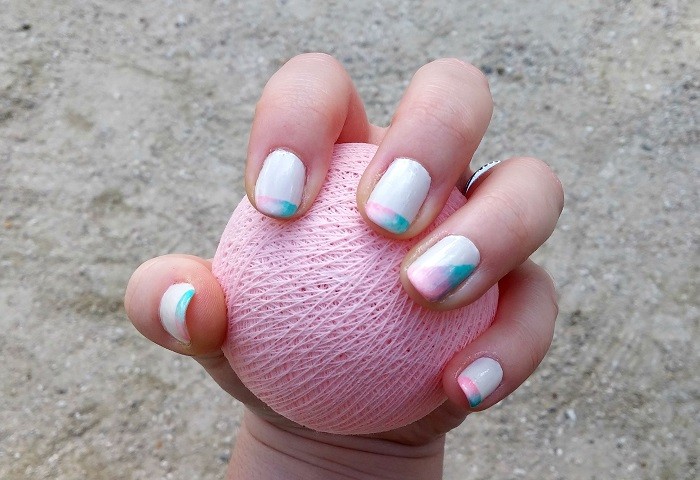
The possibilities are endless when it comes to sponge nail art designs. You can create different patterns, shapes, and textures using a sponge. Some popular designs include marble, tie-dye, and abstract designs. You can also mix and match different colors to create your own unique designs. Sponge Nail Art Designs


Sponge Nail Art Designs


If you're looking for some inspiration for your next sponge nail art design, there are plenty of ideas to choose from. You can browse through social media platforms like Instagram and Pinterest to see what others have created using a sponge. You can also experiment with different color combinations or add in some glitter for a touch of sparkle. Sponge Nail Art Ideas

Sponge Nail Art Ideas
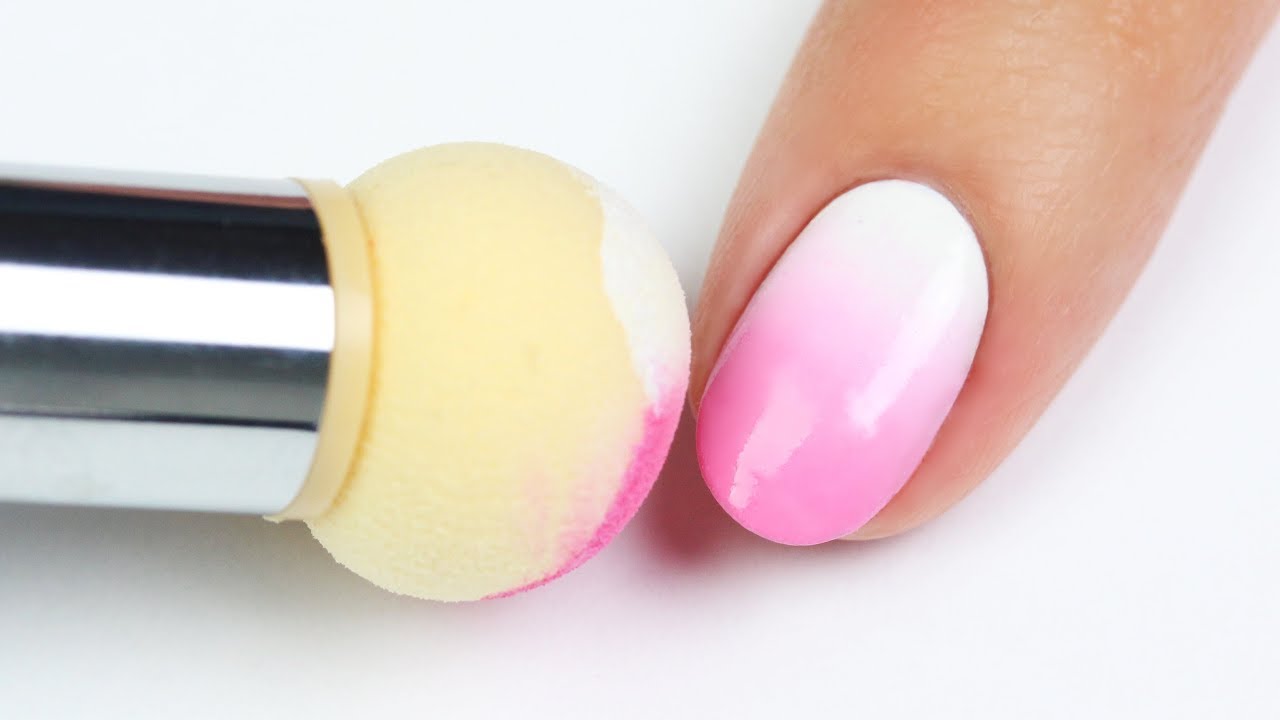
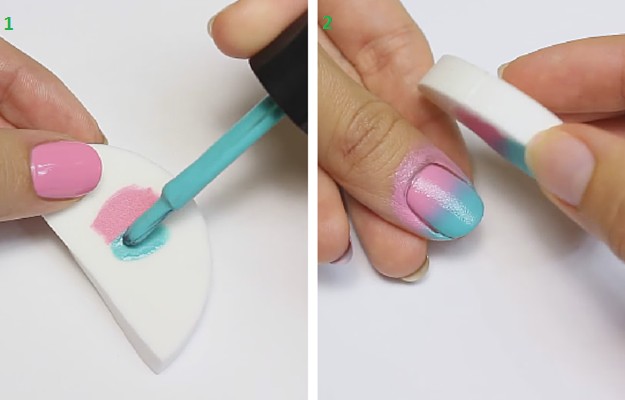
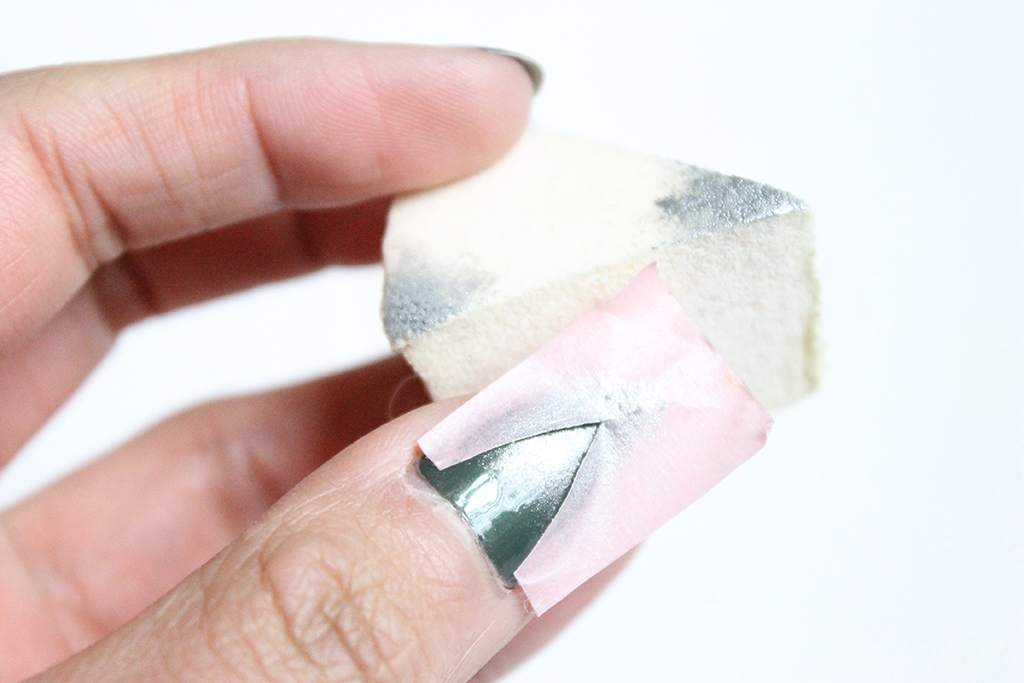
While sponge nail art may seem intimidating at first, it's actually a simple process once you get the hang of it. To create your own sponge nail art, start by painting your nails with a base color and letting it dry completely. Then, dip your sponge into your chosen nail polish and lightly dab it onto your nails. Repeat this process until you achieve the desired effect. Sponge Nail Art Step by Step

Sponge Nail Art Step by Step
If you're new to sponge nail art, it's important to start with the basics and build your skills before attempting more complex designs. You can start with a simple gradient or ombre design and gradually work your way up to more intricate designs. Remember to be patient and have fun with it! Sponge Nail Art for Beginners

Sponge Nail Art for Beginners

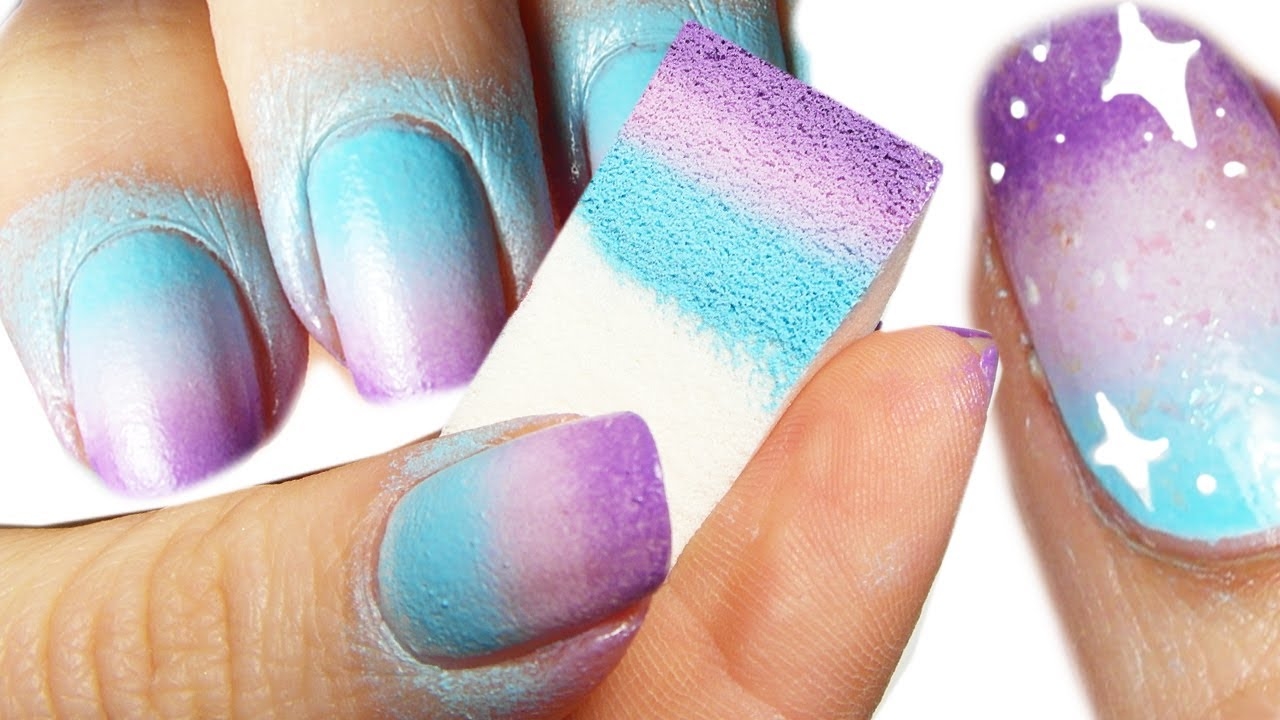
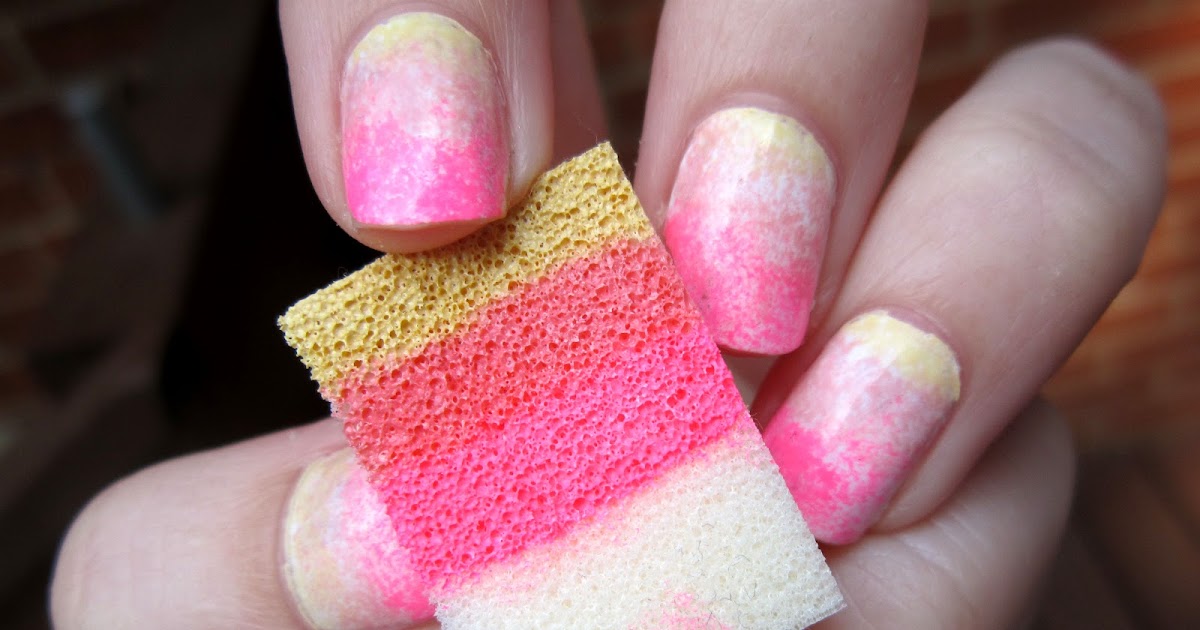
There are a few different techniques you can use when creating sponge nail art. One technique is to use a makeup sponge to create a gradient effect, while another is to use a textured sponge for a more unique design. You can also experiment with different types of sponges, such as a sea sponge or a kitchen sponge, to achieve different effects. Sponge Nail Art Techniques

Sponge Nail Art Techniques

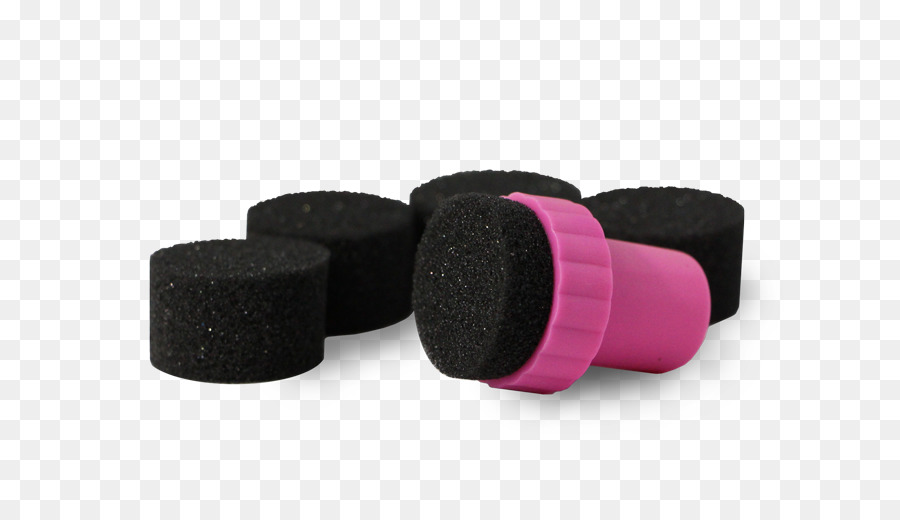
To create your own sponge nail art at home, you'll need a few basic supplies. These include different colors of nail polish, a makeup sponge or textured sponge, and a top coat to seal in your design. You may also want to have some nail polish remover and cotton swabs on hand for any mistakes. Sponge Nail Art Supplies


Sponge Nail Art Supplies
How to Elevate Your House Design With Eponge Nail Art
The Power of Details
 When it comes to designing your house, every little detail matters. From the color of the walls to the furniture pieces, each element contributes to the overall aesthetic of your home. But have you ever considered using
eponge nail art
as a way to add a unique touch to your house design? This versatile and affordable DIY technique can instantly elevate the look and feel of your home, making it stand out from the rest.
When it comes to designing your house, every little detail matters. From the color of the walls to the furniture pieces, each element contributes to the overall aesthetic of your home. But have you ever considered using
eponge nail art
as a way to add a unique touch to your house design? This versatile and affordable DIY technique can instantly elevate the look and feel of your home, making it stand out from the rest.
What is Eponge Nail Art?
 Eponge nail art, also known as sponge nail art, is a technique where you use a sponge to create a gradient effect on your nails. This technique has gained popularity in the world of
nail art
and is now making its way into the world of interior design. By using a sponge to apply paint or other materials onto your walls, you can achieve a stunning textured effect that adds depth and dimension to any room.
Eponge nail art, also known as sponge nail art, is a technique where you use a sponge to create a gradient effect on your nails. This technique has gained popularity in the world of
nail art
and is now making its way into the world of interior design. By using a sponge to apply paint or other materials onto your walls, you can achieve a stunning textured effect that adds depth and dimension to any room.
Unleash Your Creativity
 The best part about eponge nail art is that it allows you to unleash your creativity and experiment with different colors, patterns, and textures. You can use a single color for a subtle look, or mix and match different colors for a more vibrant and eclectic design. You can also play around with the density of the sponge and the amount of pressure you apply to create different effects. The possibilities are endless, and you can easily customize the design to match your personal style and the overall theme of your house.
Easy and Budget-Friendly
 Not only is eponge nail art a fun and creative way to decorate your house, but it is also extremely easy and budget-friendly. You don't need any special skills or tools to achieve this look, and the materials are easily accessible and affordable. All you need is a sponge, some paint, and a bit of time and patience, and you can transform your walls into a work of art.
Final Thoughts
 Incorporating eponge nail art into your house design can add a touch of uniqueness and personality to your home. It's a simple yet effective way to elevate the look of your walls and make them stand out. So why not give it a try and see the difference it can make in your house? With a little bit of creativity and some
eponge nail art
, you can turn your house into a beautiful and inviting space that reflects your style and taste.
Incorporating eponge nail art into your house design can add a touch of uniqueness and personality to your home. It's a simple yet effective way to elevate the look of your walls and make them stand out. So why not give it a try and see the difference it can make in your house? With a little bit of creativity and some
eponge nail art
, you can turn your house into a beautiful and inviting space that reflects your style and taste.


