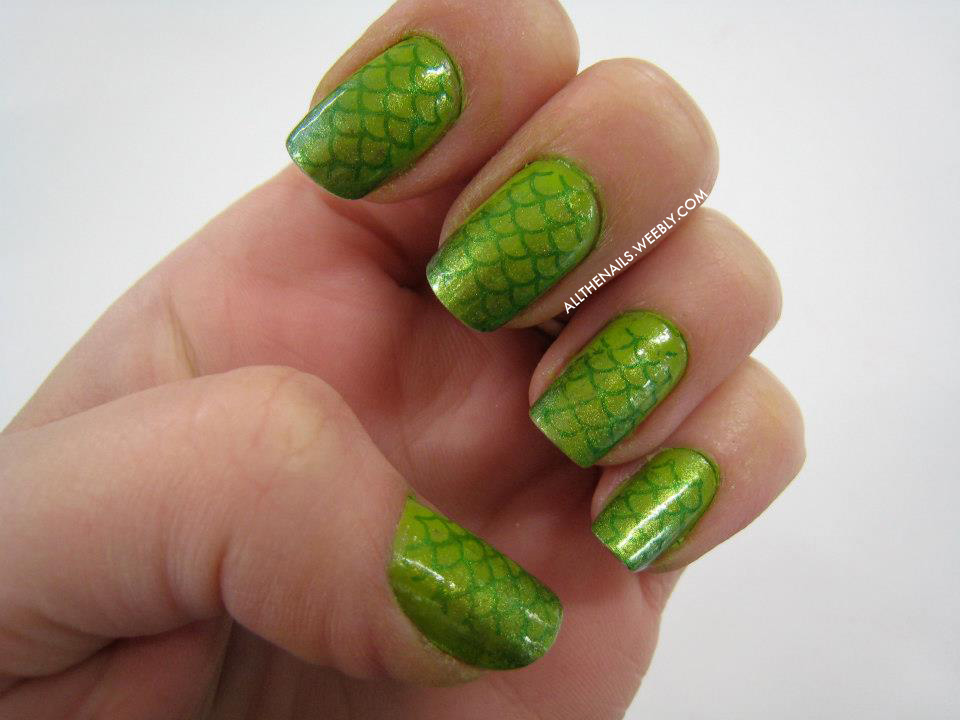
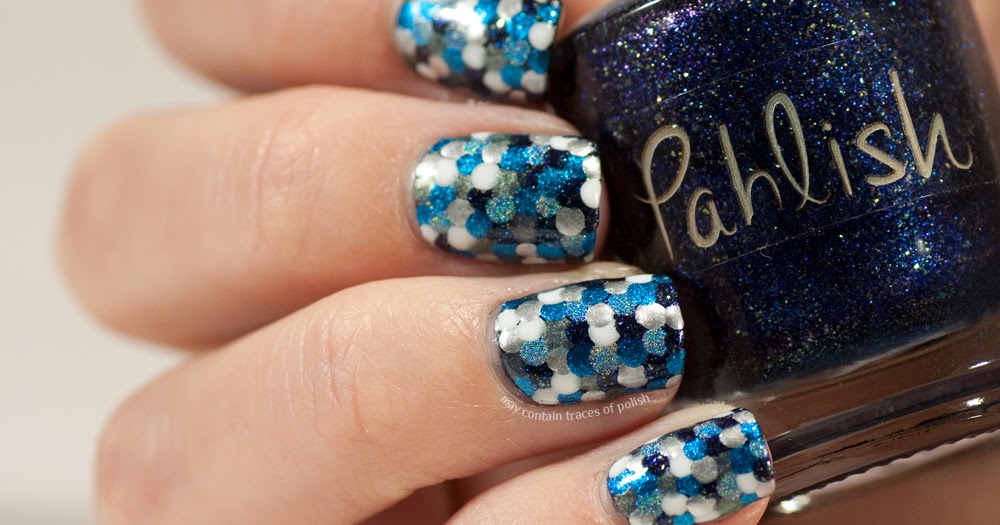
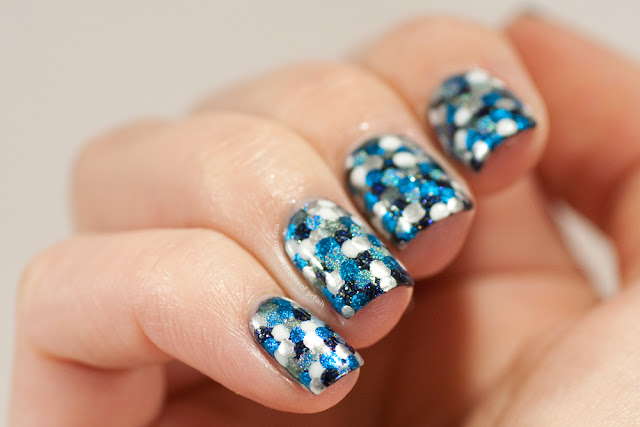
Are you looking for a unique and eye-catching nail design? Look no further than fish scale nail art using foil! This technique adds a shimmery and dimensional effect to your nails, perfect for a night out or a special occasion. Follow these simple steps to create your own foil fish scale nails. Materials needed: Base coat, foil adhesive, foil sheets, scissors, tweezers, top coat, and a nail art brush. 1. Start by prepping your nails with a base coat to protect them and create a smooth surface for the foil to adhere to. 2. Apply a thin layer of foil adhesive to your nails, making sure to cover the entire nail. Use a gentle touch to avoid any bubbles or streaks. 3. Once the adhesive is tacky, carefully place a piece of foil onto your nail, pressing down gently with your finger or a cotton swab. 4. Use scissors to trim off any excess foil around the edges of your nail. 5. Take your tweezers and gently press and smooth the foil onto your nail, creating a seamless and even texture. 6. Repeat this process on all of your nails, using different colors of foil for a fun and playful look. 7. Once all of your nails are covered in foil, use a nail art brush to add any additional designs or details with the foil adhesive. 8. Finish off with a layer of top coat to seal in your design and add shine. Tips: For a more subtle look, try using a single color of foil on all of your nails, or experiment with different shapes and sizes of foil pieces.1. "How to Create Fish Scale Nail Art Using Foil"


1. "How to Create Fish Scale Nail Art Using Foil"


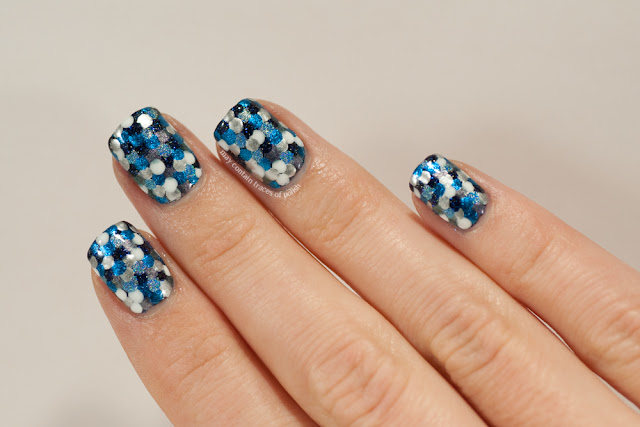
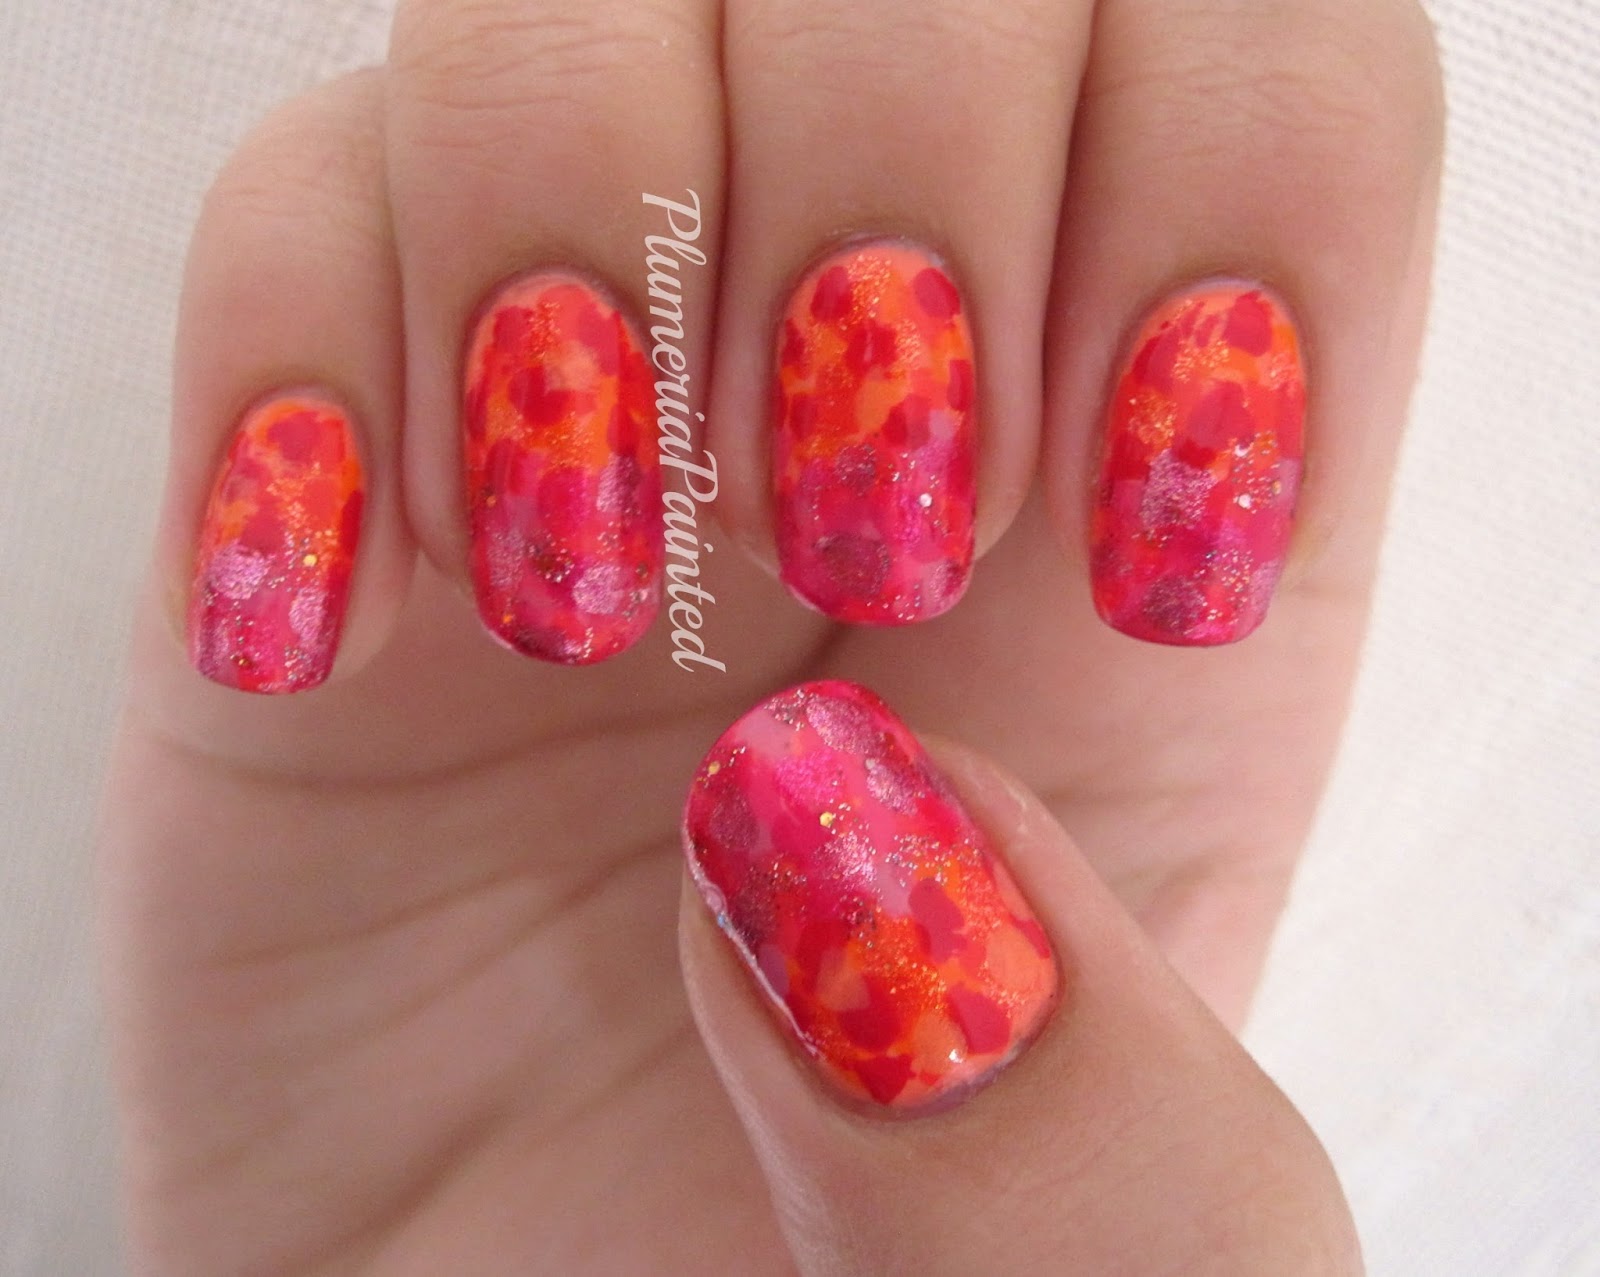
Fish scale nail art has been taking the beauty world by storm with its mesmerizing and unique look. There are endless possibilities when it comes to this nail design, so we've rounded up 10 stunning fish scale nail art designs for you to try out. 1. Mermaid Vibes: Create a mermaid-inspired look by using different shades of blue and green foil on each nail, and adding small rhinestones for an extra touch of sparkle. 2. Rainbow Bright: Use a rainbow of foil colors to create a gradient effect on your nails, starting with red on the pinky finger and ending with purple on the thumb. 3. Pretty in Pink: Keep it simple and chic with a soft pink base and a single layer of holographic foil on top for a subtle yet stunning look. 4. Gold Goddess: Add a touch of luxury to your nails by using gold foil to create a fish scale design, and finish off with a layer of matte top coat for a modern twist. 5. Midnight Magic: Create a dark and moody look by using black foil on a deep purple or navy base, and add a pop of color with a holographic foil accent nail. 6. Pearl Perfection: For a more elegant and sophisticated look, use pearl foil to create a fish scale design on a neutral or pastel base. 7. Glitter Galore: Take your fish scale nails to the next level by adding a layer of chunky glitter over your foil design for a dazzling effect. 8. Galaxy Glam: Create a cosmic-inspired look by using a variety of foil colors, including silver, purple, and blue, and adding small star-shaped rhinestones for a celestial touch. 9. Chromatic Charm: Use iridescent foil to create a fish scale design on a black base, and watch as the colors shift and change with every movement. 10. Geometric Glam: Create a modern and edgy take on fish scale nails by using foil to create a geometric design, with different colors and shapes on each nail.2. "10 Stunning Fish Scale Nail Art Designs"


2. "10 Stunning Fish Scale Nail Art Designs"


If you're new to the world of nail art, fish scale nails may seem intimidating, but with a little practice, anyone can master this technique. Follow this simple tutorial for beginners to create your own fish scale nail art. Materials needed: Base coat, foil adhesive, foil sheets, scissors, tweezers, top coat, and a nail art brush. 1. Start by prepping your nails with a base coat to protect them and create a smooth surface for the foil to adhere to. 2. Apply a thin layer of foil adhesive to your nails, making sure to cover the entire nail. Use a gentle touch to avoid any bubbles or streaks. 3. Once the adhesive is tacky, carefully place a piece of foil onto your nail, pressing down gently with your finger or a cotton swab. 4. Use scissors to trim off any excess foil around the edges of your nail. 5. Take your tweezers and gently press and smooth the foil onto your nail, creating a seamless and even texture. 6. Repeat this process on all of your nails, using different colors of foil for a fun and playful look. 7. Once all of your nails are covered in foil, use a nail art brush to add any additional designs or details with the foil adhesive. 8. Finish off with a layer of top coat to seal in your design and add shine. Tips: Start with a simple design, such as a single color of foil on all of your nails, and gradually work your way up to more intricate designs.3. "Fish Scale Nail Art Tutorial for Beginners"

3. "Fish Scale Nail Art Tutorial for Beginners"

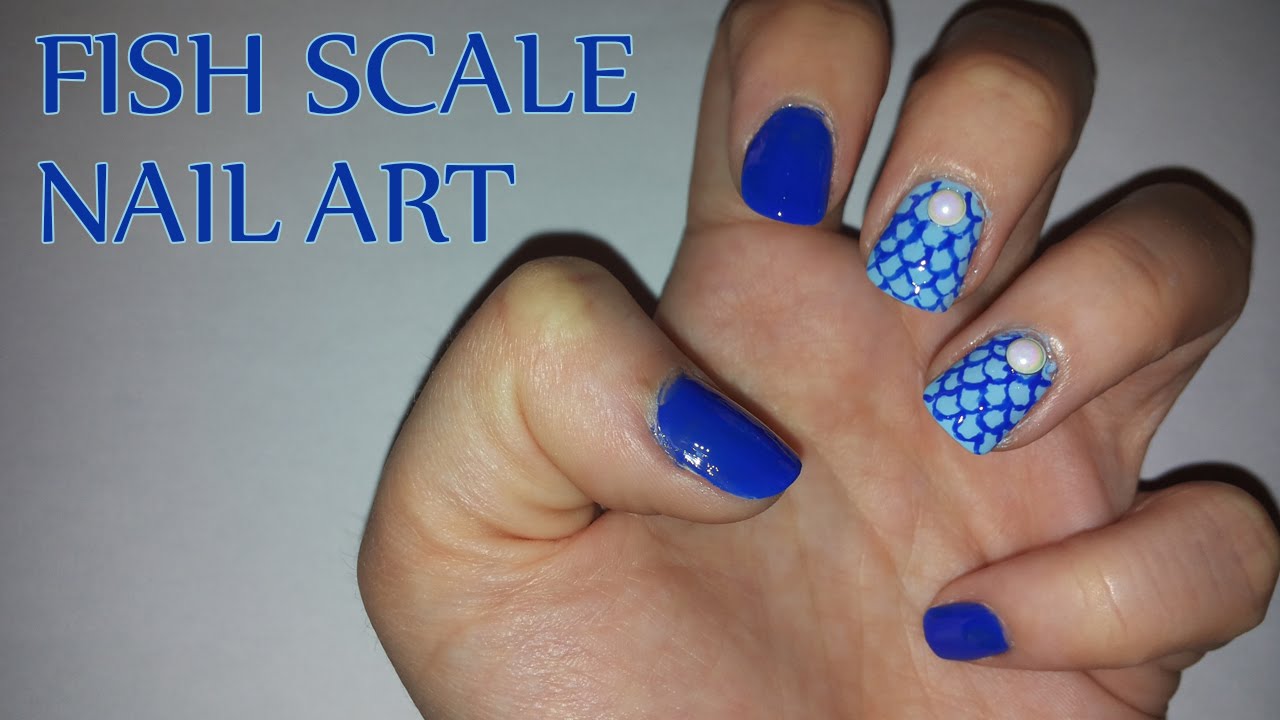
If you're a fan of stamping nail art, you'll love the fish scale design options available on stamping plates. We've tested out a variety of stamping plates and have a review of our top picks for creating fish scale nail art. 1. MoYou London "Mother Nature 03" Stamping Plate: This plate features a variety of fish scale designs, ranging from small and subtle to large and bold. The deep etching and quality of the plate make it easy to transfer the design onto your nails. 2. Born Pretty "BP-L019" Stamping Plate: This plate offers a mix of different fish scale designs, including mermaid scales and a geometric pattern. The designs transfer well onto the nail and the plate is easy to clean. 3. Moyra "Fish Scale" Stamping Plate: This plate is specifically designed for creating fish scale nail art, with a variety of sizes and shapes to choose from. The designs transfer easily and the plate is durable. 4. Lina Nail Art Supplies "Make Your Mark 03" Stamping Plate: Along with fish scale designs, this plate also offers other ocean-inspired designs such as seashells and waves. The etching is deep and the designs transfer well. 5. UberChic Beauty "Mermaid Life" Stamping Plate: This plate is perfect for creating a mermaid-inspired look with its variety of intricate scales and mermaid tail designs. The plate is high quality and the designs transfer smoothly.4. "Fish Scale Nail Art Stamping Plate Review"


4. "Fish Scale Nail Art Stamping Plate Review"

Mermaid-inspired fish scale nail art is a dreamy and whimsical design that is sure to make a statement. Follow these steps to create your own mermaid-inspired fish scale nails. Materials needed: Base coat, nail polish in shades of blue and green, top coat, and a makeup sponge. 1. Start by prepping your nails with a base coat to protect them and create a smooth surface for the polish. 2. Apply a coat of blue nail polish to your nails and let it dry completely. 3. On a makeup sponge, apply stripes of blue and green nail polish, overlapping the colors slightly. 4. Dab the sponge onto your nails in a downward motion to create a gradient effect. 5. Once the polish is dry, apply a layer of top coat to seal in the colors. 6. Using a small nail art brush, create a fish scale design by painting scales with a lighter shade of blue or green on top of the gradient. 7. Finish off with a layer of top coat to seal in your design and add shine. Tips: For an added touch, add small rhinestones or glitter to your mermaid scales for a touch of sparkle.5. "Mermaid Inspired Fish Scale Nail Art"

5. "Mermaid Inspired Fish Scale Nail Art"


If you're a fan of long-lasting and chip-free nails, try out fish scale nail art with gel polish. Follow these steps for a flawless and long-lasting design. Materials needed: Base coat, gel polish in shades of your choice, top coat, nail art brush, and a UV or LED lamp. 1. Start by prepping your nails with a base coat to protect them and create a smooth surface for the gel polish. 2. Apply a thin layer of your base gel polish and cure it under the lamp. 3. Apply a layer of your chosen color of gel polish and cure it under the lamp. 4. Repeat this process for each nail, using different colors of gel polish for a fun and colorful look. 5. Once the gel polish is cured, use a nail art brush to create a fish scale design with a different color of gel polish on each nail. 6. Cure the gel polish under the lamp once again. 7. Finish off with a layer of top coat and cure it under the lamp for a shiny and long-lasting finish.6. "Fish Scale Nail Art with Gel Polish"


6. "Fish Scale Nail Art with Gel Polish"
Nail vinyls are a great tool for creating precise and clean designs, including fish scale nail art. Follow these steps to create fish scale nails using nail vinyls. Materials needed: Base coat, nail vinyls, nail polish in shades of your choice, tweezers, top coat, and a cleanup brush. 1. Start by prepping your nails with a base coat to protect them and create a smooth surface for the polish. 2. Once the base coat is dry, place a fish scale nail vinyl on your nail, making sure to press down the edges firmly. 3. Apply a coat of your chosen nail polish over the vinyl and let it dry for a few seconds. 4. Use tweezers to carefully remove the vinyl, revealing a clean fish scale design. 5. Repeat this process on all of your nails, using different colors of polish for a fun and colorful look. 6. Clean up any excess polish around your nails with a cleanup brush dipped in acetone. 7. Finish off with a layer of top coat to seal in your design and add shine. Tips: For a more subtle look, try using a single color of polish on all of your nails, or experiment with different patterns and shapes of vinyls.7. "Fish Scale Nail Art Using Nail Vinyls"


7. "Fish Scale Nail Art Using Nail Vinyls"
Add a pop of color to your nails with this rainbow fish scale nail art tutorial. Follow these steps to create your own rainbow fish scale nails. Materials needed: Base coat, nail polish in rainbow colors, top coat, nail art brush, and a makeup sponge. 1. Start by prepping your nails with a base coat to protect them and create a smooth surface for the polish. 2. Apply a white base coat to your nails and let it dry completely. 3. On a makeup sponge, apply stripes of each color of nail polish, with the colors slightly overlapping. 4. Dab the sponge onto your nails in a downward motion to create a rainbow gradient effect. 5. Once the polish is dry, use a nail art brush and a white polish to create a fish scale design on top of the rainbow gradient. 6. Finish off with a layer of top coat to seal in your design and add shine. Tips: For a more subtle look, try using pastel shades of polish for a softer rainbow effect.8. "Rainbow Fish Scale Nail Art Tutorial"
8. "Rainbow Fish Scale Nail Art Tutorial"

Ombre is a popular and versatile nail design, and it can be easily incorporated into fish scale nail art. Follow these steps to create a stunning fish scale ombre design. Materials needed: Base coat, nail polish in shades of your choice, top coat, nail art brush, and a makeup sponge. 1. Start by prepping your nails with a base coat to protect them and create a smooth surface for the polish. 2. Apply a coat of your chosen base color and let it dry completely. 3. On a makeup sponge, apply stripes of your chosen colors, with the colors slightly overlapping. 4. Dab the sponge onto your nails in a downward motion to create an ombre effect, starting with the lightest color at the tip of your nail and fading into the base color. 5. Once the polish is dry, use a nail art brush to create a fish scale design with a darker shade of polish on top of the ombre. 6. Finish off with a layer of top coat to seal in your design and add shine. Tips: For a more dramatic look, try using a black or dark blue polish for the fish scale design.9. "Fish Scale Nail Art with Ombre Effect"

9. "Fish Scale Nail Art with Ombre Effect"


Add some bling to your fish scale nails with the addition of rhinestones and gems. Follow these steps to create a glamorous and sparkly fish scale nail art design.10. "Fish Scale Nail Art with Rhinestones and Gems"

10. "Fish Scale Nail Art with Rhinestones and Gems"

Taking Nail Art to the Next Level: Fish Scale Nail Art
Unleash Your Inner Mermaid
 When it comes to nail art, the possibilities are endless. From intricate designs to bold colors, there is something for everyone. But if you want to truly make a statement with your nails, why not try fish scale nail art? This trend has been taking the nail industry by storm and for good reason – it's unique, eye-catching, and surprisingly easy to achieve.
Fish scale nail art
involves creating a textured, scale-like effect on your nails, mimicking the look of fish scales. Not only does it add a touch of whimsy to your nails, but it also gives off major mermaid vibes. This trend is perfect for those who want to stand out and add a bit of personality to their nail game.
When it comes to nail art, the possibilities are endless. From intricate designs to bold colors, there is something for everyone. But if you want to truly make a statement with your nails, why not try fish scale nail art? This trend has been taking the nail industry by storm and for good reason – it's unique, eye-catching, and surprisingly easy to achieve.
Fish scale nail art
involves creating a textured, scale-like effect on your nails, mimicking the look of fish scales. Not only does it add a touch of whimsy to your nails, but it also gives off major mermaid vibes. This trend is perfect for those who want to stand out and add a bit of personality to their nail game.
How to Achieve the Look
 Achieving
fish scale nail art
may seem intimidating at first, but with the right tools and techniques, you can easily achieve the look at home. Start with a base coat and then apply your desired base color. Next, you will need a fish scale nail stencil or a small piece of fishnet stocking. Place the stencil or stocking over your nail and use a sponge to dab on a contrasting color. This will create the scale effect. Repeat this process on all of your nails and finish with a top coat to seal in the design.
Achieving
fish scale nail art
may seem intimidating at first, but with the right tools and techniques, you can easily achieve the look at home. Start with a base coat and then apply your desired base color. Next, you will need a fish scale nail stencil or a small piece of fishnet stocking. Place the stencil or stocking over your nail and use a sponge to dab on a contrasting color. This will create the scale effect. Repeat this process on all of your nails and finish with a top coat to seal in the design.
Make it Your Own
 One of the best things about fish scale nail art is that it can be customized to fit your style. You can play around with different colors, stencils, and even add glitter or rhinestones for extra sparkle. The possibilities are endless, so don't be afraid to get creative and make it your own.
Fish scale nail art
is a fun and unique way to add a touch of whimsy to your nail game. Whether you're headed to the beach or just want to add a bit of mermaid magic to your day, this trend is sure to turn heads. So why not dive in and give it a try? Your nails will thank you.
One of the best things about fish scale nail art is that it can be customized to fit your style. You can play around with different colors, stencils, and even add glitter or rhinestones for extra sparkle. The possibilities are endless, so don't be afraid to get creative and make it your own.
Fish scale nail art
is a fun and unique way to add a touch of whimsy to your nail game. Whether you're headed to the beach or just want to add a bit of mermaid magic to your day, this trend is sure to turn heads. So why not dive in and give it a try? Your nails will thank you.


