Floss Gloss nail polishes are known for their vibrant and bold colors, making them perfect for creating fun and colorful nail art. In this tutorial, we will show you how to use Floss Gloss polishes to create a playful and eye-catching look. To start, begin by prepping your nails with a base coat to protect them from staining. Then, apply two coats of your chosen Floss Gloss color. We recommend using Neon Nacho for a bright and bold look or Gangsta Boo for a more subtle pop of color. Next, using a detail brush, create small dots on your nails using different Floss Gloss shades. You can use colors that complement each other or create a rainbow effect for a truly fun and colorful look. Once the dots are dry, use a striping brush to create thin lines between the dots. This will add dimension and interest to your design. You can also add some glitter polish to some of the dots for a touch of sparkle. Finally, seal in your design with a top coat to ensure your Floss Gloss nail art lasts for days. And there you have it, a fun and colorful look that is sure to turn heads!1. Floss Gloss Nail Art Tutorial: How to Create a Fun and Colorful Look


1. Floss Gloss Nail Art Tutorial: How to Create a Fun and Colorful Look


If you're new to nail art, don't worry – Floss Gloss polishes are easy to work with and perfect for beginners. In this tutorial, we will show you how to create a simple yet stunning design using Floss Gloss nail polishes. Start by applying a base coat to protect your nails. Then, paint your nails with two coats of Bikini Coral, a beautiful coral shade that is perfect for summer. Next, using a detail brush, create small dots on your nails with Perf, a pastel yellow shade. You can also use a bobby pin or toothpick for this step if you don't have a detail brush. Once the dots are dry, use a striping brush to create thin lines between the dots, similar to the previous tutorial. You can also add some Glittergasm polish to a few of the dots for some extra sparkle. Finish off your design with a top coat and voila! You now have a simple yet beautiful Floss Gloss nail art look that is perfect for beginners.2. Easy Floss Gloss Nail Art Tutorial for Beginners


2. Easy Floss Gloss Nail Art Tutorial for Beginners


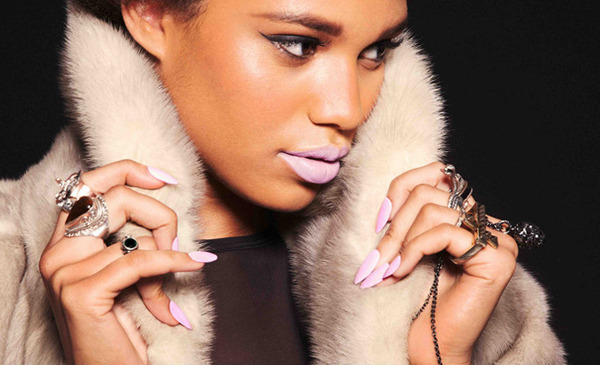
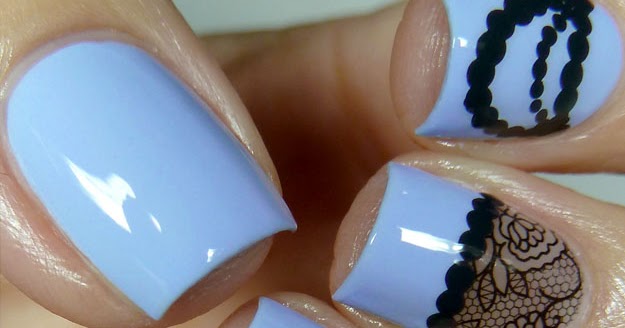
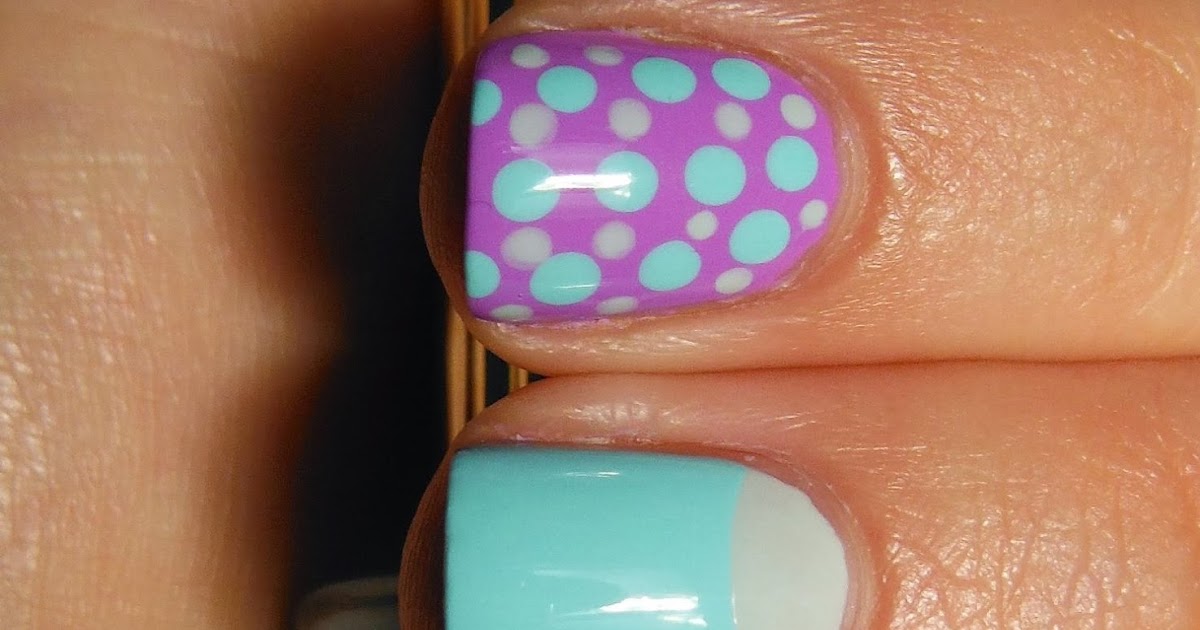
For those who prefer a more minimalistic and chic look, this Floss Gloss nail art tutorial is for you. It's simple yet stylish and perfect for any occasion. Start by applying a base coat to your nails. Then, paint your nails with two coats of Lavish, a gorgeous dusty rose shade. Next, using a detail brush, create small dots on your nails using Perf, a pastel yellow shade. Make sure to space out the dots and vary their sizes for a more modern look. Once the dots are dry, use a detail brush and Gangsta Boo to create thin lines between the dots. This will add a touch of contrast and interest to your design. Seal in your design with a top coat, and you're all set. This chic and simple look is perfect for those who want to make a statement without going over the top.3. Floss Gloss Nail Art Tutorial: Create a Chic and Simple Design


3. Floss Gloss Nail Art Tutorial: Create a Chic and Simple Design


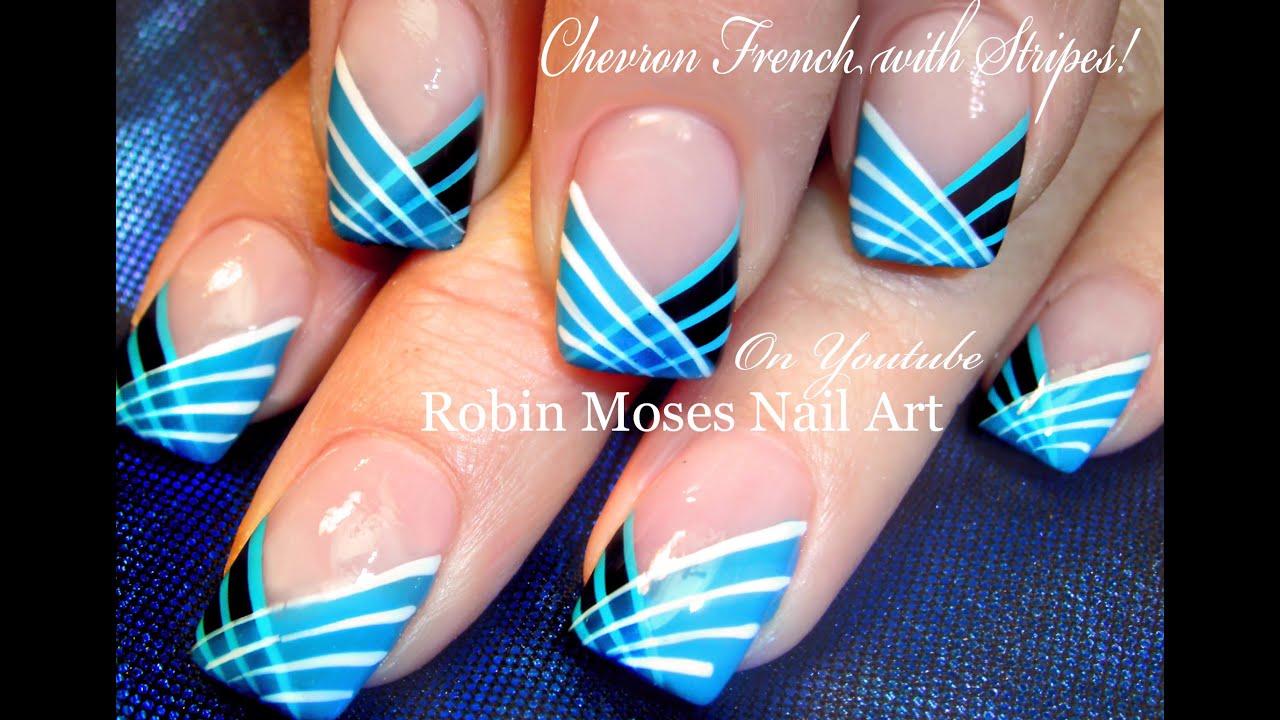
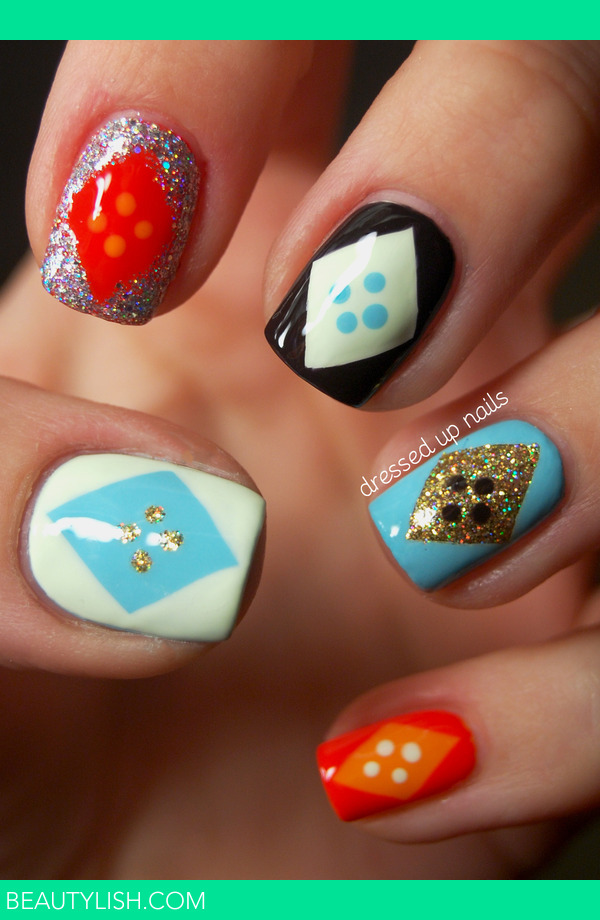
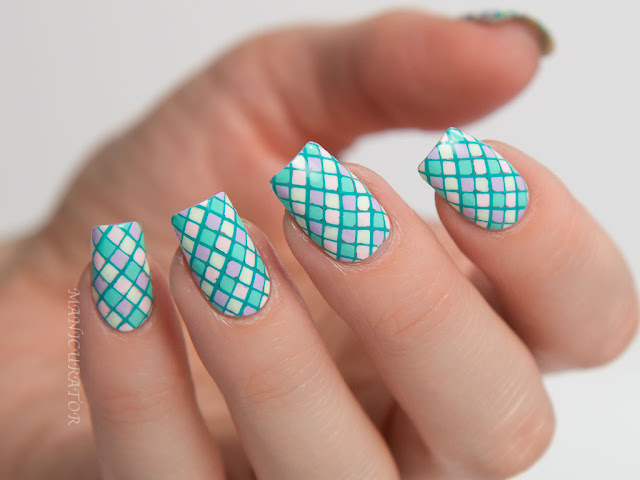
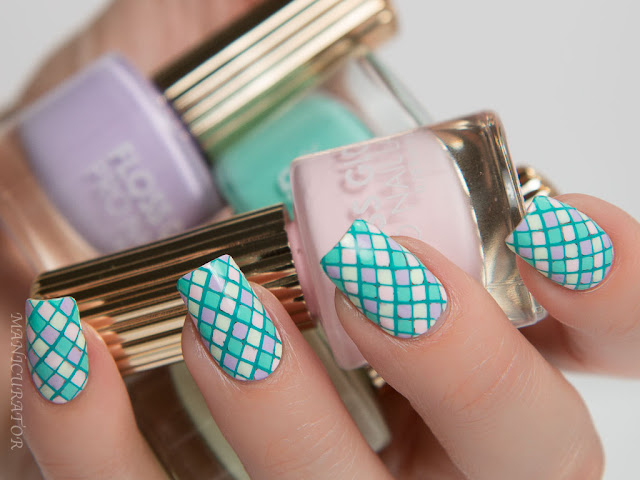
The Floss Gloss nail polishes are perfect for creating intricate and geometric designs. In this tutorial, we will show you how to create a stunning geometric look step-by-step. Start by prepping your nails with a base coat. Then, paint your nails with two coats of Pony, a pretty lilac shade. Next, using a detail brush, create a triangle shape on your nail using Keys to the Mansion, a beautiful turquoise shade. Fill in the triangle with the polish and let it dry. Once the triangle is dry, use a detail brush and Wet, a bright pink shade, to create a smaller triangle within the first one. This will create a layered effect and add dimension to your design. Continue creating triangles with different Floss Gloss shades, such as Neon Nacho and Maliboob Job, until you are happy with the look. Finish off with a top coat, and you have a stunning geometric Floss Gloss nail art look.4. Step-by-Step Floss Gloss Nail Art Tutorial for a Geometric Look

4. Step-by-Step Floss Gloss Nail Art Tutorial for a Geometric Look


Gradient nail art is a popular trend, and Floss Gloss polishes are perfect for achieving this look. In this tutorial, we will show you how to create a beautiful gradient effect using Floss Gloss nail polishes. To start, apply a base coat to protect your nails. Then, paint your nails with two coats of Glowstar, a stunning metallic gold shade. Next, take a makeup sponge and paint Glowstar and Perf on it, overlapping the colors slightly. Dab the sponge onto your nail to create a gradient effect. You may need to do this a few times to build up the color. Once you are happy with the gradient, clean up any excess polish around your nails with a detail brush and nail polish remover. Finish off with a top coat, and you have a beautiful and trendy gradient Floss Gloss nail art look.5. Floss Gloss Nail Art Tutorial: Learn How to Create a Gradient Effect

5. Floss Gloss Nail Art Tutorial: Learn How to Create a Gradient Effect


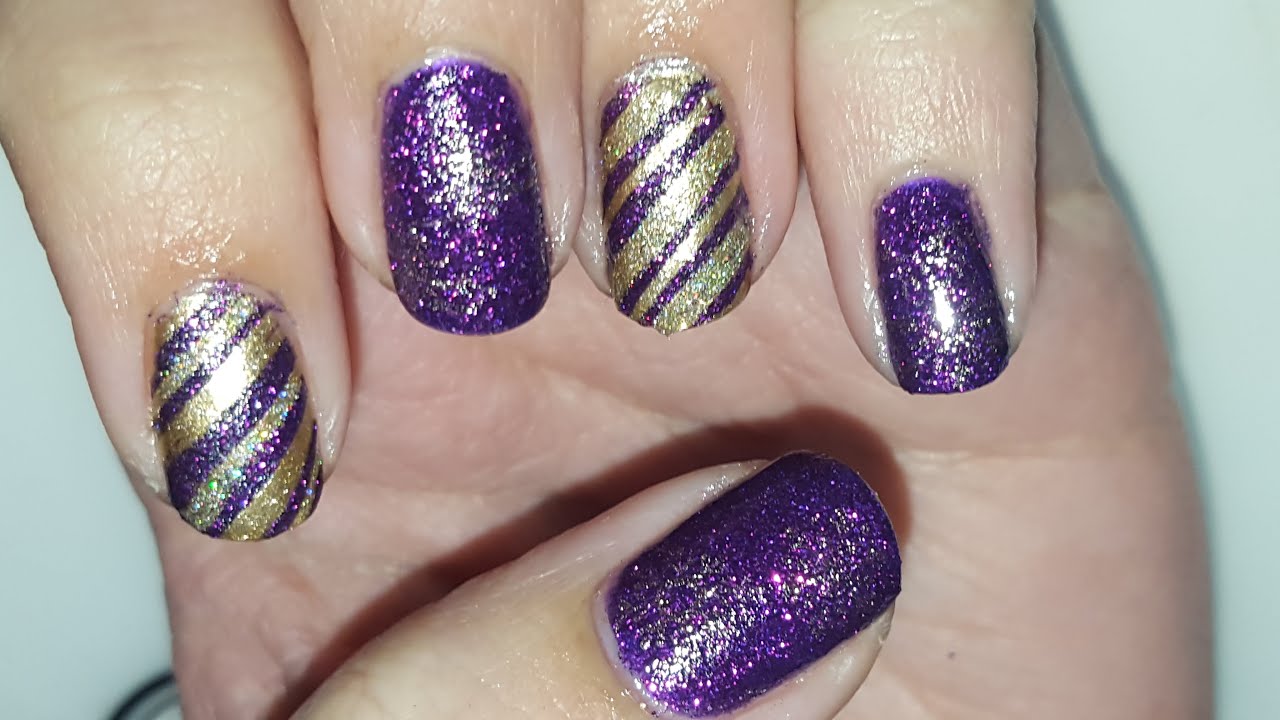
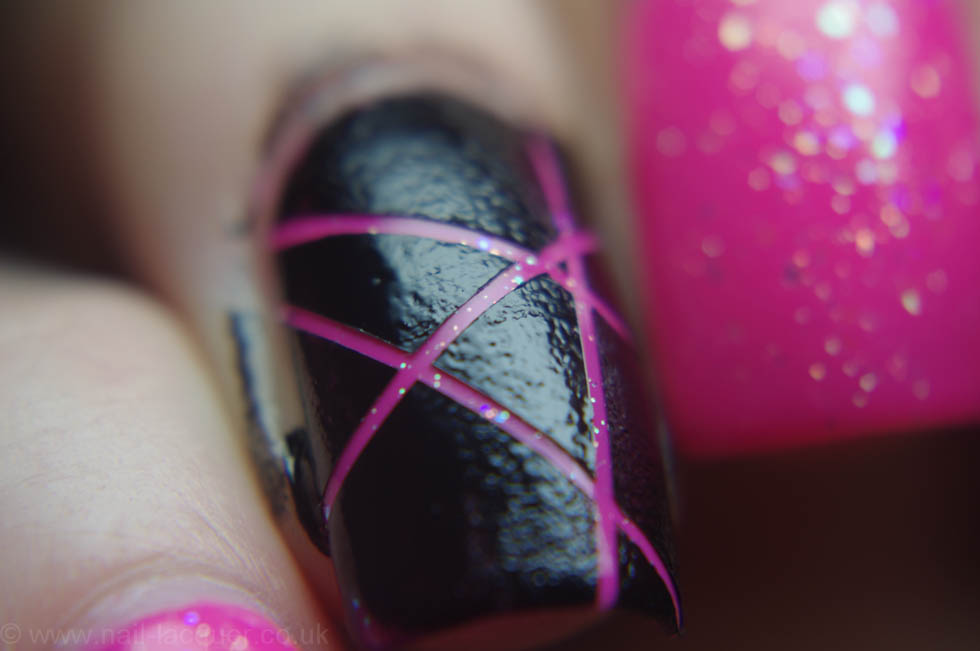
Striping tape is a handy tool for creating precise and clean lines in nail art. In this tutorial, we will show you how to use striping tape with Floss Gloss polishes to create a striped design. Begin by applying a base coat to your nails. Then, paint your nails with two coats of Perf, a pastel yellow shade. Once the polish is dry, place striping tape in a criss-cross pattern over your nails. Make sure to press down firmly to ensure the tape adheres to your nails. Next, paint over the tape with Neon Nacho, a bright neon yellow shade. Carefully remove the striping tape while the polish is still wet to reveal your striped design. Finish off with a top coat to seal in your design, and you have a fun and bold striped Floss Gloss nail art look.6. Floss Gloss Nail Art Tutorial: How to Use Striping Tape for a Striped Design

6. Floss Gloss Nail Art Tutorial: How to Use Striping Tape for a Striped Design


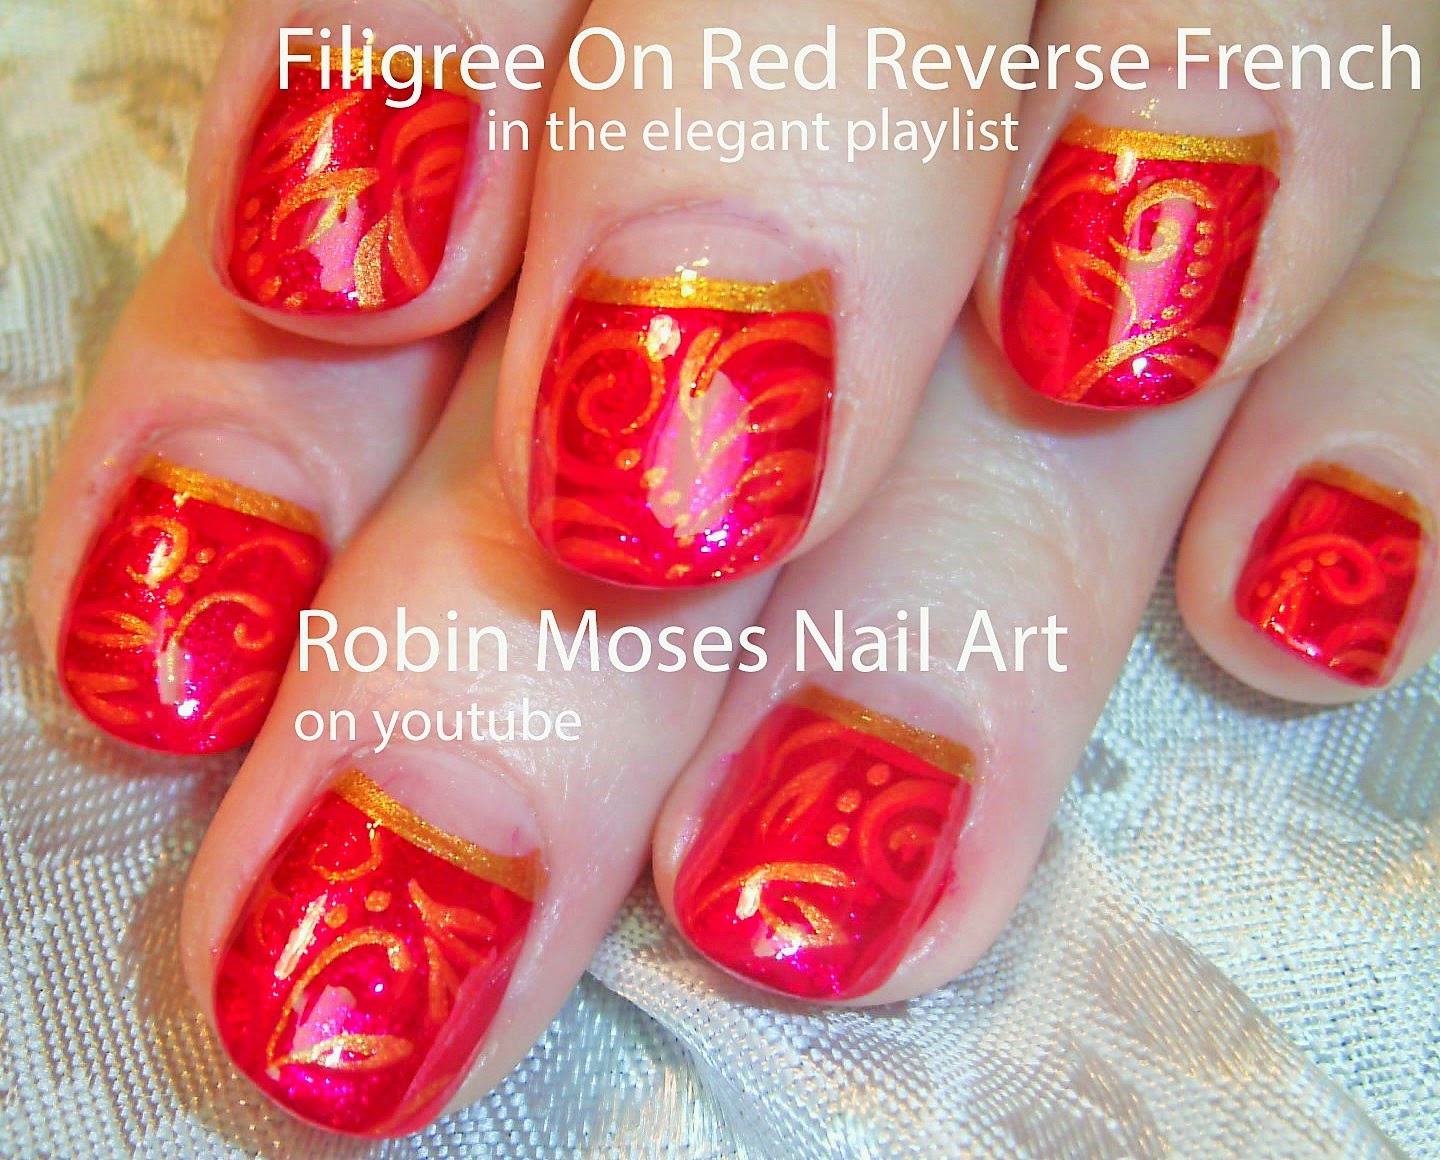
Stamping is a fun and easy way to create intricate and detailed designs on your nails. In this tutorial, we will show you how to use stamping plates with Floss Gloss polishes to create a beautiful floral design. Start by applying a base coat to your nails. Then, paint your nails with two coats of Glowstar, a gorgeous metallic gold shade. Next, choose a floral design stamping plate and stamp Maliboob Job, a bright pink shade, onto the plate. Transfer the design onto your nails by pressing the plate onto your nails. Once the design is dry, use a detail brush and Gangsta Boo to add some leaves and vines to your design. Seal it all in with a top coat, and you have a stunning floral Floss Gloss nail art look.7. Floss Gloss Nail Art Tutorial: Create a Floral Design with Stamping
7. Floss Gloss Nail Art Tutorial: Create a Floral Design with Stamping
/cdn.vox-cdn.com/uploads/chorus_image/image/45253718/2014_08_listings-august-7.0.jpg)
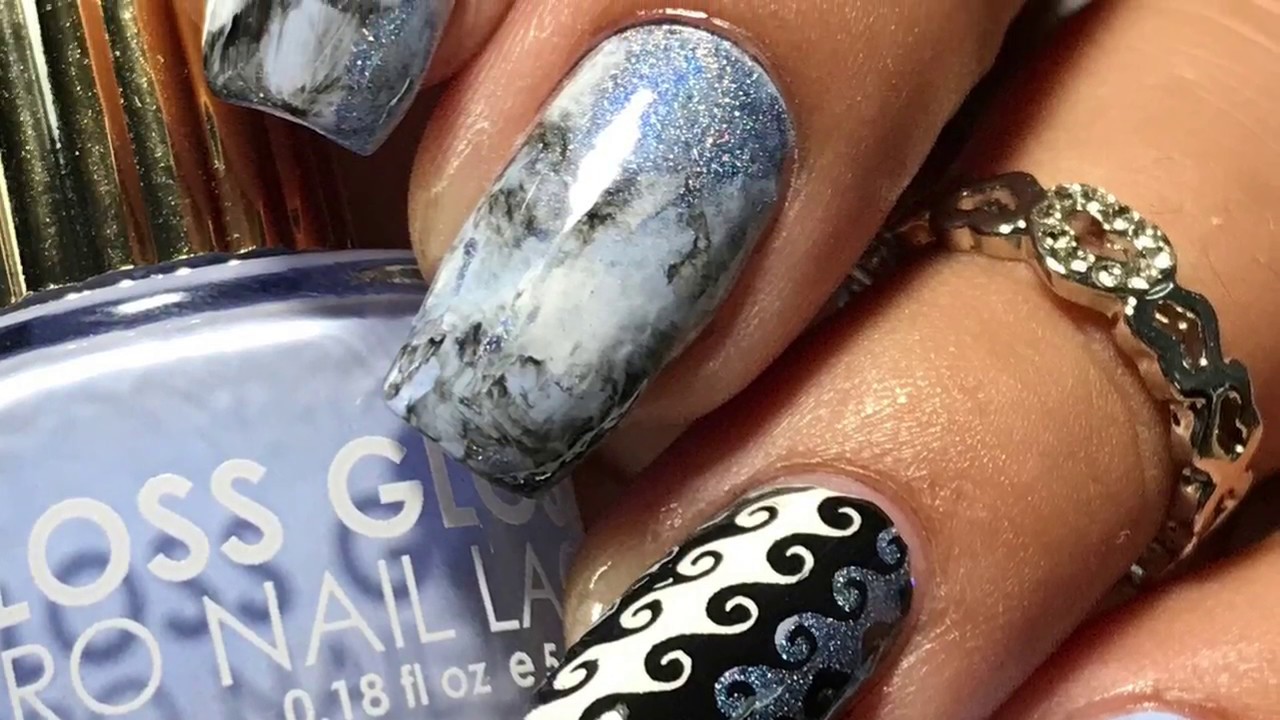

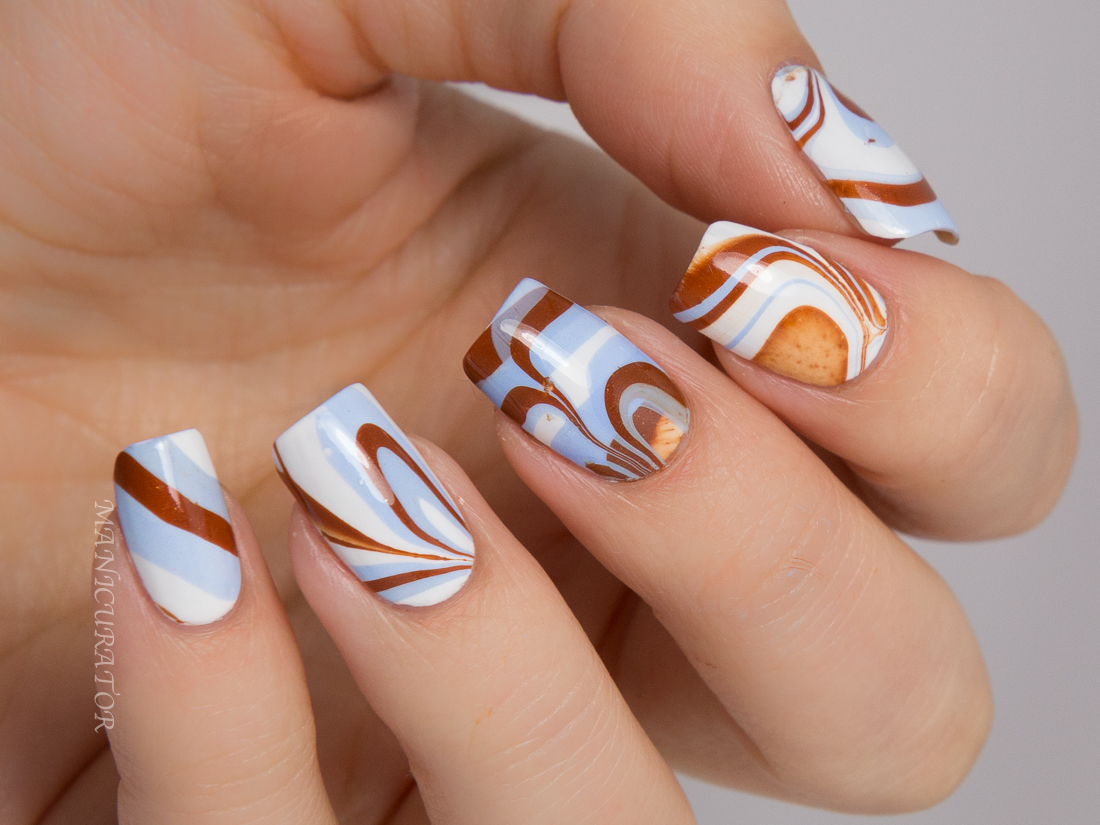
The marble effect is a classic and elegant nail art design that is easy to achieve with Floss Gloss polishes. In this tutorial, we will show you how to create a marble effect on your nails step-by-step. To start, apply a base coat to your nails. Then, paint your nails with two coats of Wet, a bright pink shade. Next, take a plastic bag or cling wrap and crumple it up. Dab it into Neon Nacho, a bright neon yellow shade, and then dab it onto your nails to create a marbled effect. You can also use other Floss Gloss shades to create a multi-colored marble effect. Once the polish is dry, clean up around your nails with a detail brush and nail polish remover. Finish off with a top coat, and you have a beautiful and elegant marble Floss Gloss nail art look.8. Floss Gloss Nail Art Tutorial: How to Create a Marble Effect

8. Floss Gloss Nail Art Tutorial: How to Create a Marble Effect

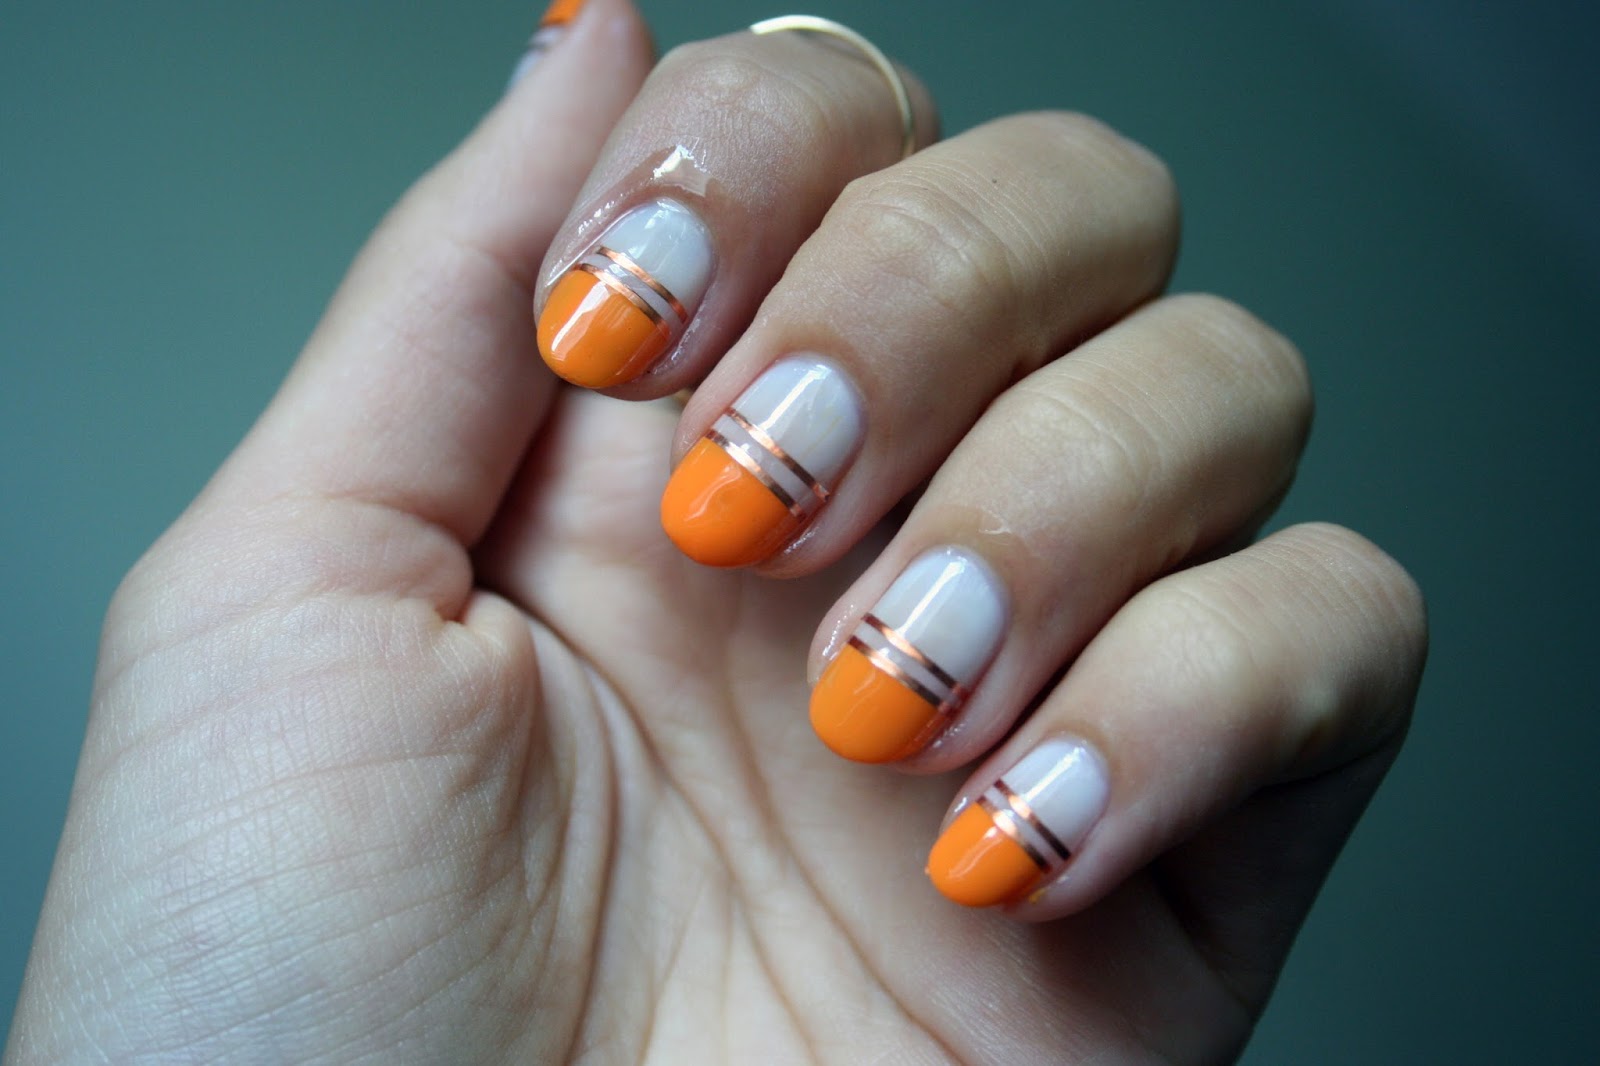
Negative space nail art is a trendy and modern look that is easy to create with Floss Gloss polishes. In this tutorial, we will show you how to create a negative space design on your nails. Start by applying a base coat to protect your nails. Then, paint your nails with two coats of Bikini Coral, a beautiful coral shade. Next, take a detail brush and create small dots on your nails using Keys to the Mansion, a stunning turquoise shade. Leave some negative space between the dots to create a unique and modern look. Once the dots are dry, use a striping brush and Keys to the Mansion to create thin lines around the dots. This will add definition to your design. Finish off with a top coat, and you have a chic and trendy negative space Floss Gloss nail art look.9. Floss Gloss Nail Art Tutorial: Learn How to Create a Negative Space Design

9. Floss Gloss Nail Art Tutorial: Learn How to Create a Negative Space Design

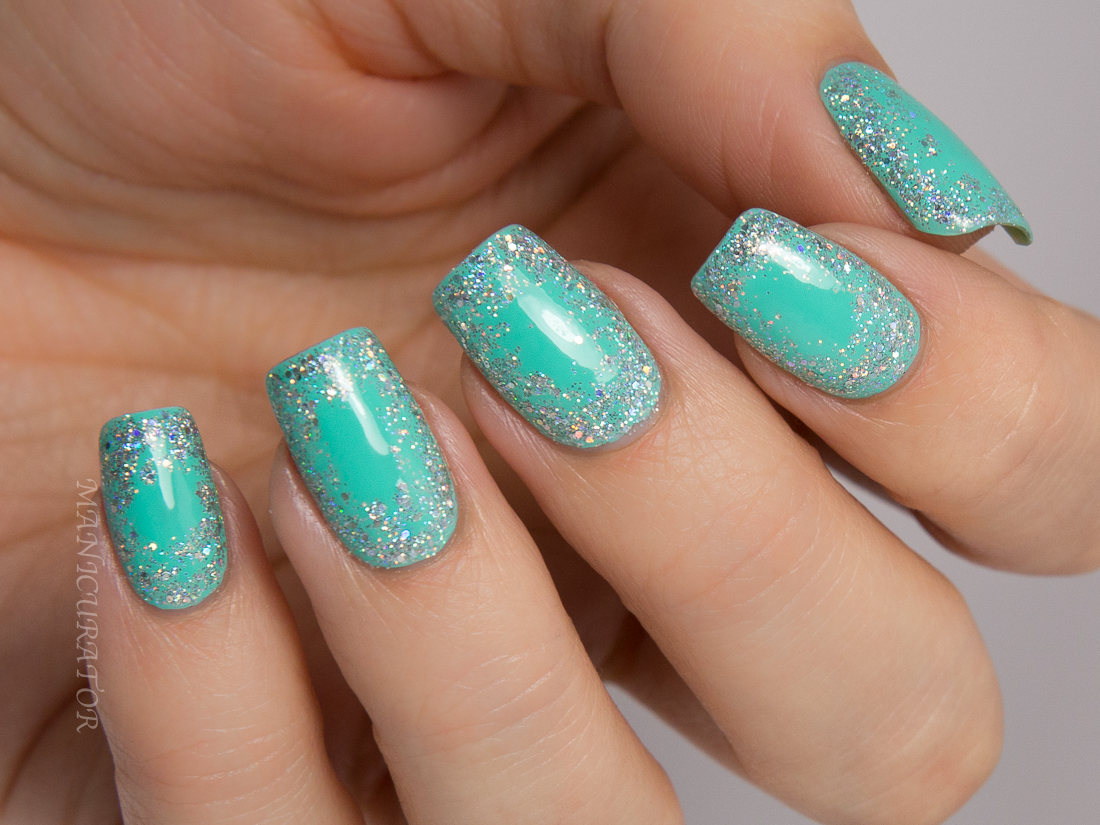
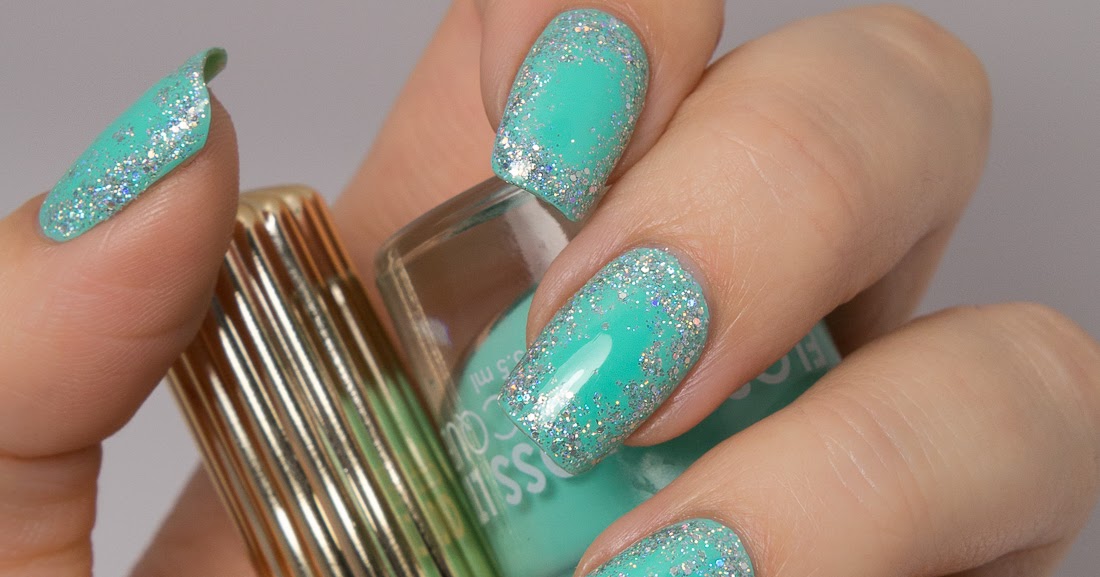
Glitter nail polish is a great way to add some sparkle to your nail art. In this tutorial, we will show you how to create a glitter gradient look using Floss Gloss polishes. To start, apply a base coat to your nails. Then, paint your nails with two coats of Lavish, a beautiful dusty rose shade. Next, take a makeup sponge and paint Stun, a holographic silver glitter polish, on it. Dab the sponge onto your nails to create a glitter gradient effect. You may need to do this a few times to build up the glitter. Once you are happy with the glitter gradient, clean up any excess polish around your nails with a detail brush and nail polish remover. Finish off with a top coat, and you have a stunning glitter gradient Floss Gloss nail art look.10. Floss Gloss Nail Art Tutorial: How to Create a Glitter Gradient Look


10. Floss Gloss Nail Art Tutorial: How to Create a Glitter Gradient Look

Floss Gloss Nail Art Tutorial: Create Stunning Designs at Home
Introduction
 Are you looking to add a pop of color and creativity to your nails? Look no further than the Floss Gloss nail art tutorial. This guide will walk you through step-by-step on how to create stunning nail designs at home using Floss Gloss products. Whether you're a beginner or a seasoned nail artist, this tutorial will give you the tools and techniques to achieve professional-looking results. So grab your Floss Gloss nail polish and let's get started!
The Basics: What is Floss Gloss?
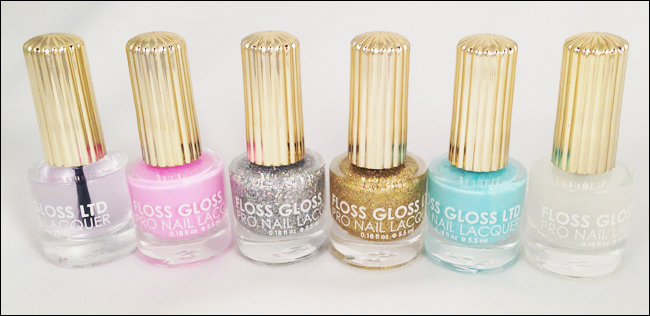
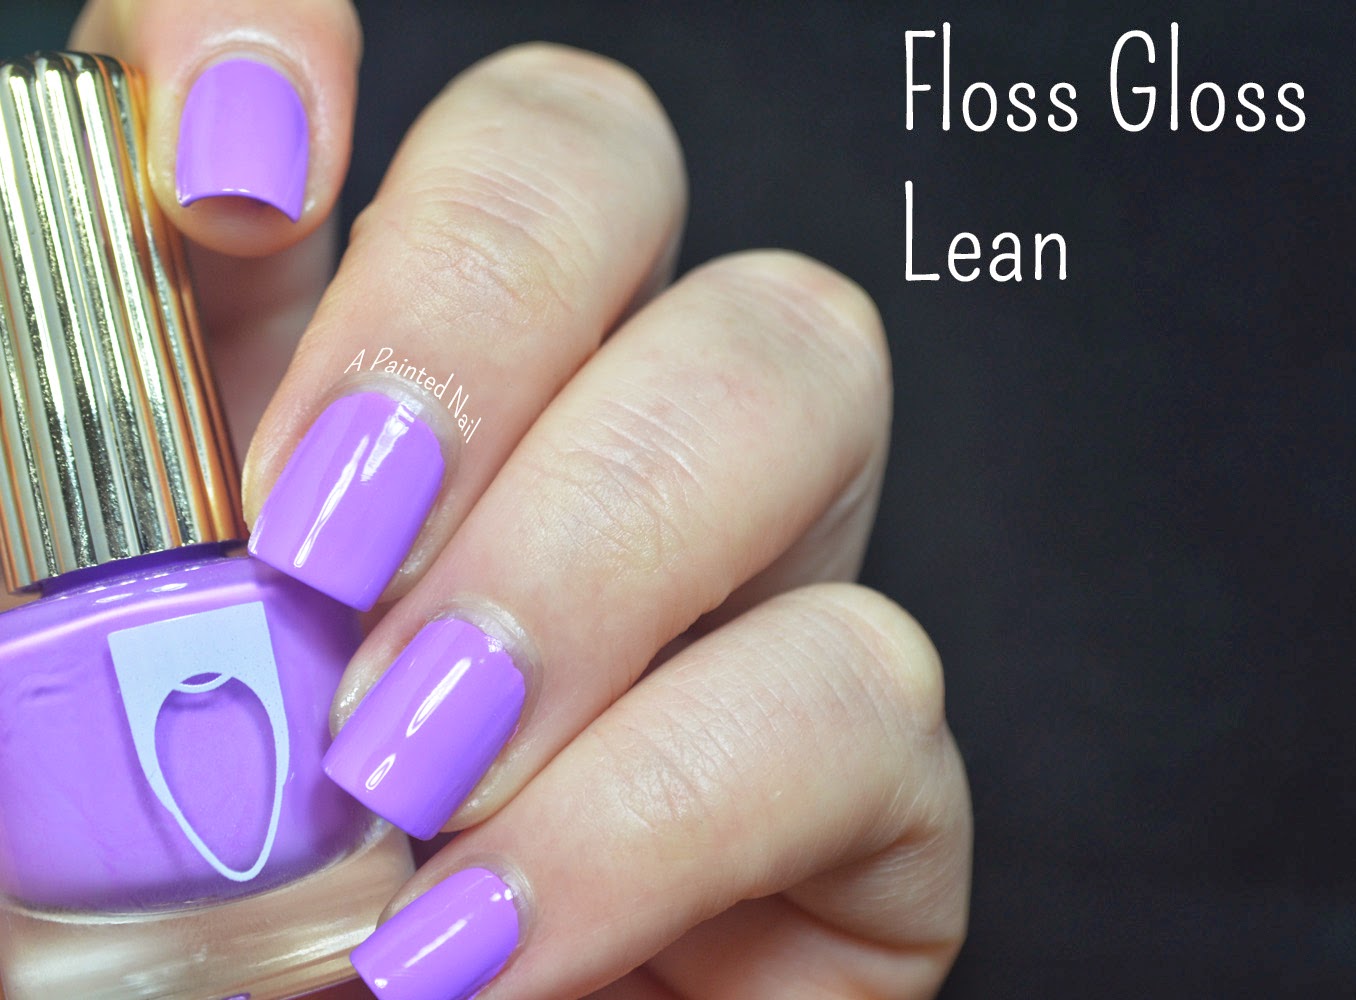
 Floss Gloss is a popular nail polish brand known for its vibrant and unique colors. Their formula is vegan and cruelty-free, making it a favorite among beauty enthusiasts. Floss Gloss offers a wide range of shades and finishes, from creamy pastels to glittery metallics, perfect for any occasion. Not only are their polishes high-quality, but they also come in fun and eye-catching packaging that will elevate your nail collection.
Step-by-Step Tutorial
 Now that you have your Floss Gloss polishes, it's time to dive into the tutorial. Follow these easy steps to create your own Floss Gloss nail art:
Step 1: Prep Your Nails
Before applying any polish, make sure your nails are clean and free of any old polish. Use a nail polish remover to wipe away any residue and cut and file your nails to your desired shape and length.
Step 2: Apply a Base Coat
Using a clear base coat, apply a thin layer to your nails. This will help your nail polish last longer and prevent chipping.
Step 3: Choose Your Colors
The beauty of Floss Gloss is that you can mix and match different shades to create your own unique nail designs. Choose two or three colors that complement each other and set them aside.
Step 4: Get Creative
Now comes the fun part! With your chosen colors, use the brush to create different designs on each nail. You can experiment with stripes, dots, swirls, or any other designs that come to mind. Don't worry about making it perfect – the imperfections will add character to your design.
Step 5: Add a Top Coat
Once your design is complete, seal it with a clear top coat. This will give your nails a glossy finish and protect your design from chipping.
Now that you have your Floss Gloss polishes, it's time to dive into the tutorial. Follow these easy steps to create your own Floss Gloss nail art:
Step 1: Prep Your Nails
Before applying any polish, make sure your nails are clean and free of any old polish. Use a nail polish remover to wipe away any residue and cut and file your nails to your desired shape and length.
Step 2: Apply a Base Coat
Using a clear base coat, apply a thin layer to your nails. This will help your nail polish last longer and prevent chipping.
Step 3: Choose Your Colors
The beauty of Floss Gloss is that you can mix and match different shades to create your own unique nail designs. Choose two or three colors that complement each other and set them aside.
Step 4: Get Creative
Now comes the fun part! With your chosen colors, use the brush to create different designs on each nail. You can experiment with stripes, dots, swirls, or any other designs that come to mind. Don't worry about making it perfect – the imperfections will add character to your design.
Step 5: Add a Top Coat
Once your design is complete, seal it with a clear top coat. This will give your nails a glossy finish and protect your design from chipping.
Final Thoughts
 Congratulations – you have successfully completed the Floss Gloss nail art tutorial! With a little practice and creativity, you can create endless designs using Floss Gloss polishes. So next time you're in the mood for a DIY manicure, remember this tutorial and let your imagination run wild. And for more inspiration, check out Floss Gloss' social media pages for even more nail art ideas. Happy painting!
HTML Code:
Floss Gloss Nail Art Tutorial: Create Stunning Designs at Home

Introduction
Are you looking to add a pop of color and creativity to your nails? Look no further than the Floss Gloss nail art tutorial. This guide will walk you through step-by-step on how to create stunning nail designs at home using Floss Gloss products. Whether you're a beginner or a seasoned nail artist, this tutorial will give you the tools and techniques to achieve professional-looking results. So grab your Floss Gloss nail polish and let's get started!
The Basics: What is Floss Gloss?
Floss Gloss is a popular nail polish brand known for its vibrant and unique colors. Their formula is vegan and cruelty-free, making it a favorite among beauty enthusiasts. Floss Gloss offers a wide range of shades and finishes, from creamy pastels to glittery metallics, perfect for any occasion. Not only are their polishes high-quality, but they also come in fun and eye-catching packaging that will elevate your nail collection.
Step-by-Step Tutorial

Now that you have your Floss Gloss polishes, it's time to dive into the tutorial. Follow these easy steps to create your own Floss Gloss nail art:
Step 1: Prep Your Nails
Before applying any polish, make sure your nails are clean and free of any old polish. Use a nail polish remover to wipe away any residue and cut and file your nails to your desired shape and length.
Step 2: Apply a Base


