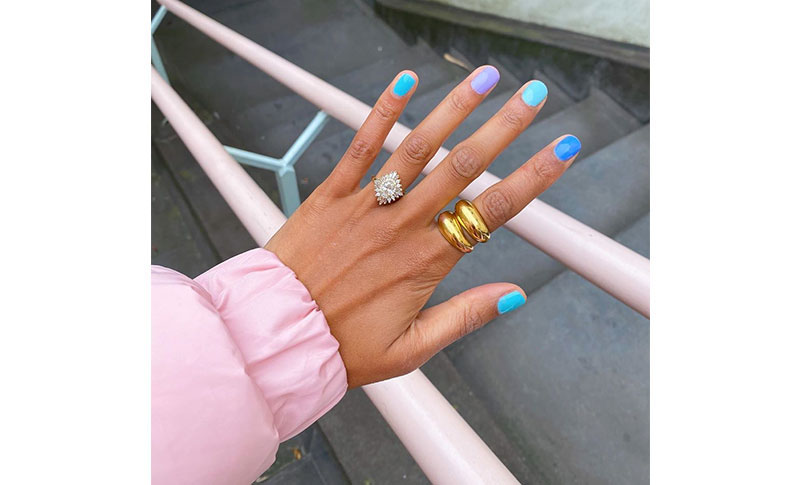
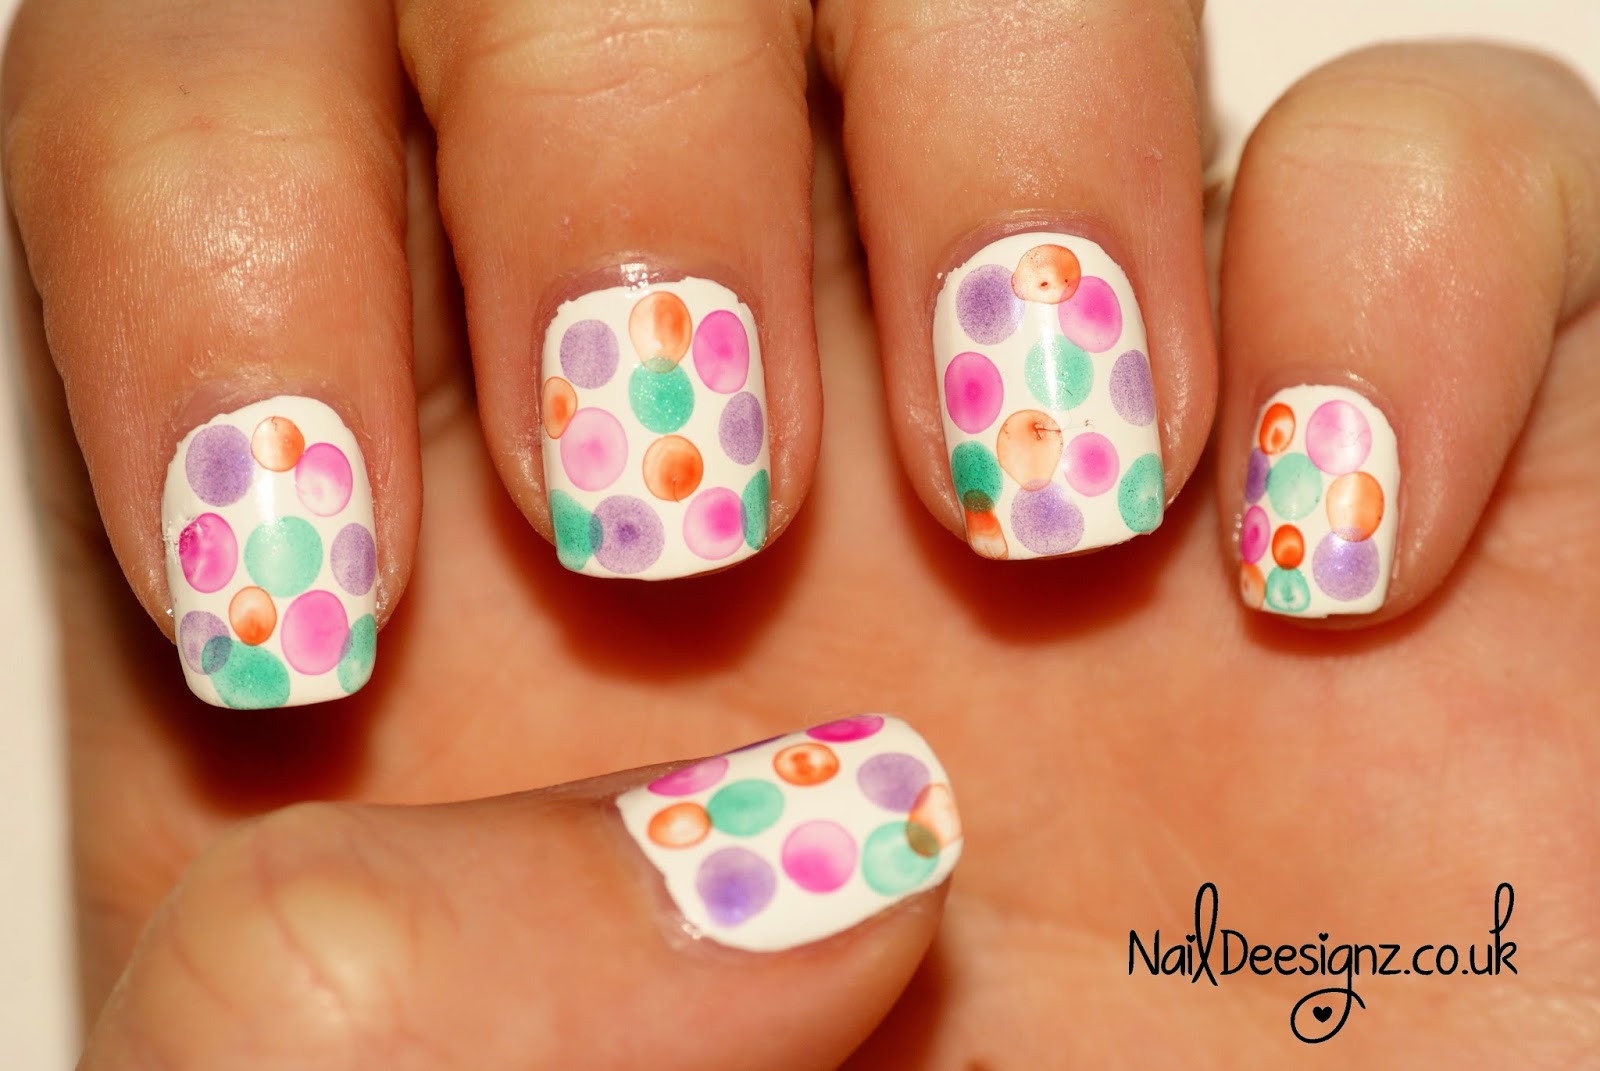
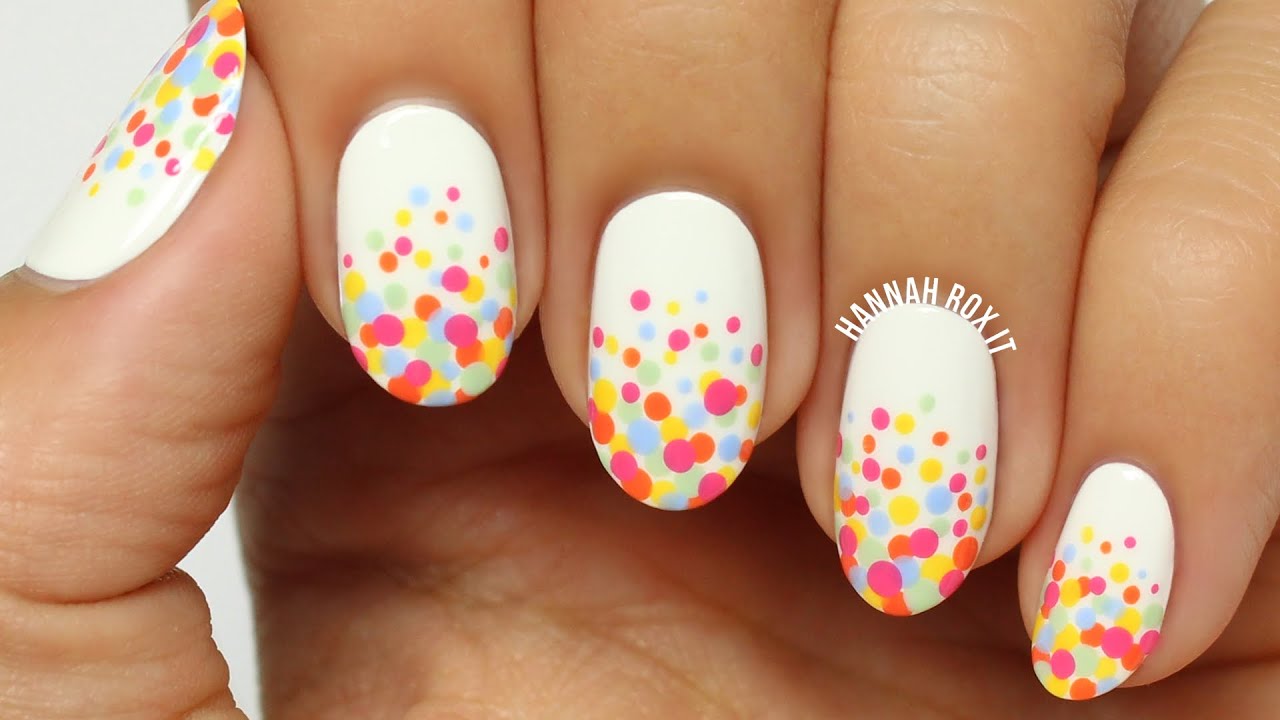
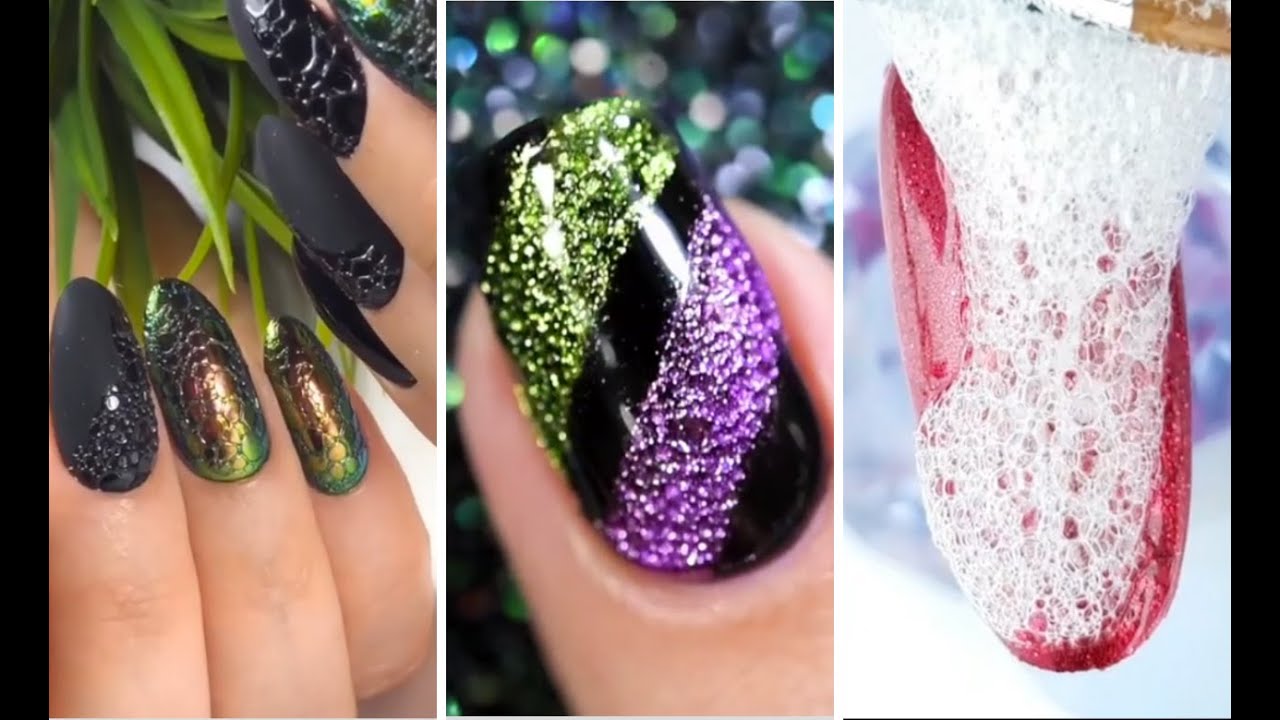
If you're tired of the same old nail art designs, why not try something new and fun? Foam bubble nail art is a trendy and creative way to add texture and dimension to your nails. Not to mention, it's super easy to do at home! Follow our step-by-step tutorial to learn how to create this unique and eye-catching nail art. To start, you'll need a few supplies: a base coat, a top coat, your choice of nail polish colors, a makeup sponge, and a bowl of water. Make sure to also have some paper towels nearby for easy cleanup. Begin by painting your nails with a base coat to protect them and help the nail polish adhere better. Then, apply a base color of your choice and let it dry completely. We recommend using a lighter color as your base to make the foam bubbles stand out more. Next, pour a small amount of your featured nail polish color onto a piece of scrap paper or a plastic lid. Dip the edge of your makeup sponge into the polish and dab it onto your nail. Don't worry about making it neat, as the uneven texture adds to the bubble effect. Now comes the fun part – creating the bubbles! Take a drinking straw and dip one end into the bowl of water. Place the other end near the edge of the polish on your nail and blow gently. This will create small bubbles in the polish, giving it a foam-like appearance. Repeat this step until you're happy with the amount of bubbles on your nail. Once you're satisfied with the bubbles, let your nails dry for a few minutes. Then, apply a top coat to seal in your design and add shine. And voila, you have a stunning foam bubble nail art look!1. Foam Bubble Nail Art Tutorial


1. Foam Bubble Nail Art Tutorial

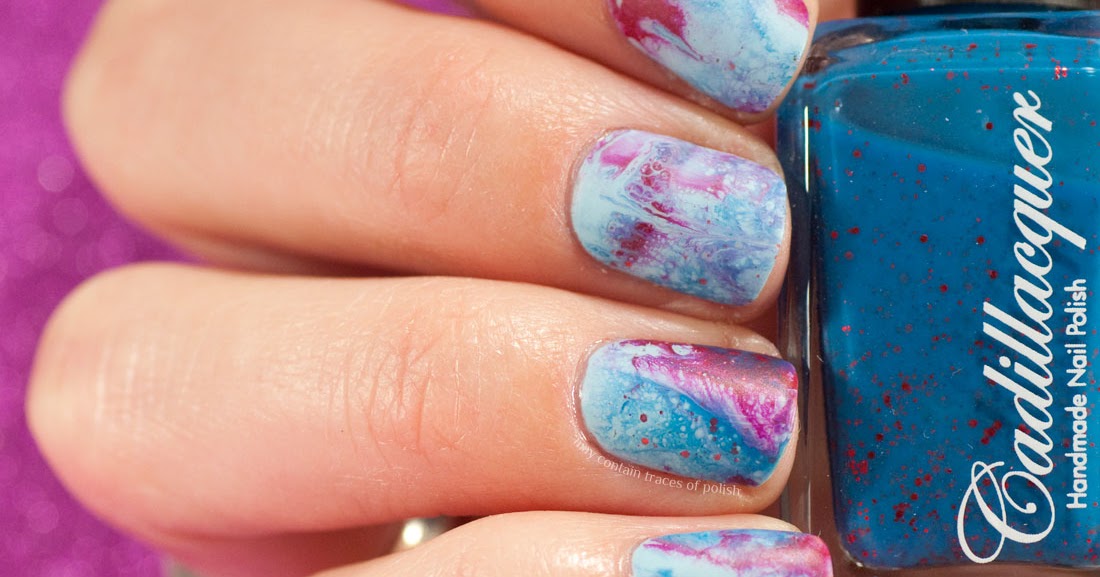

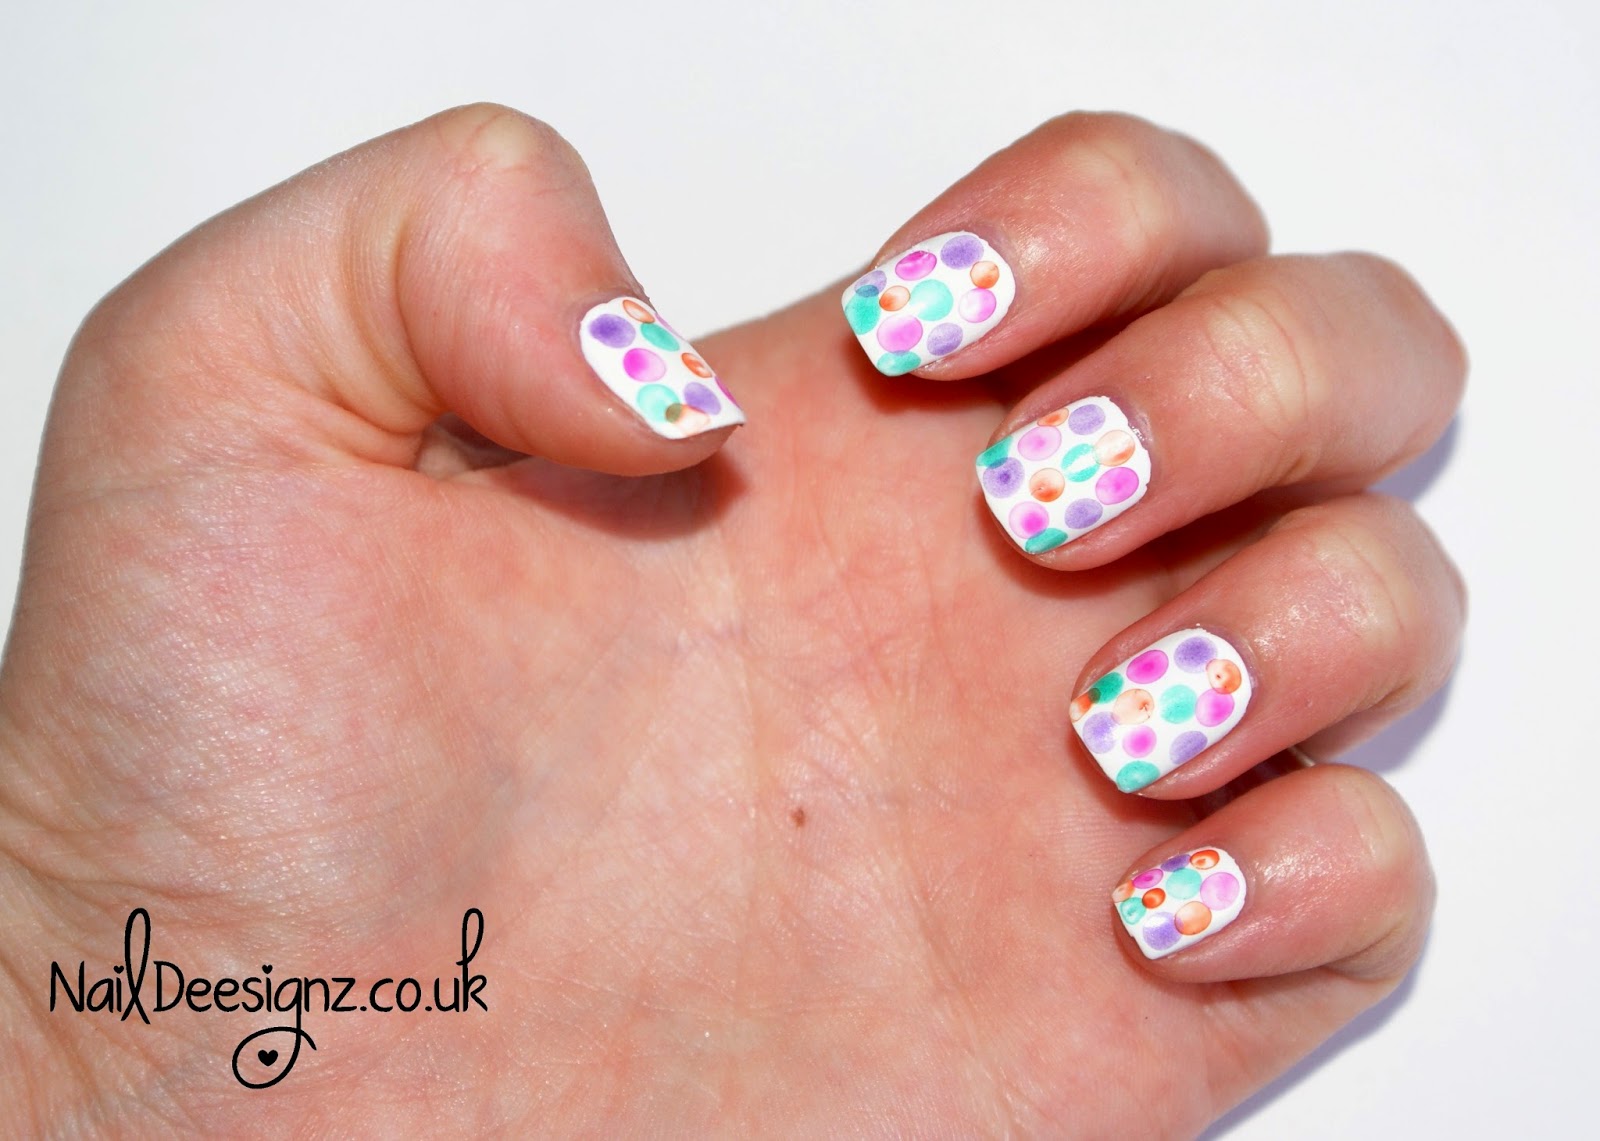
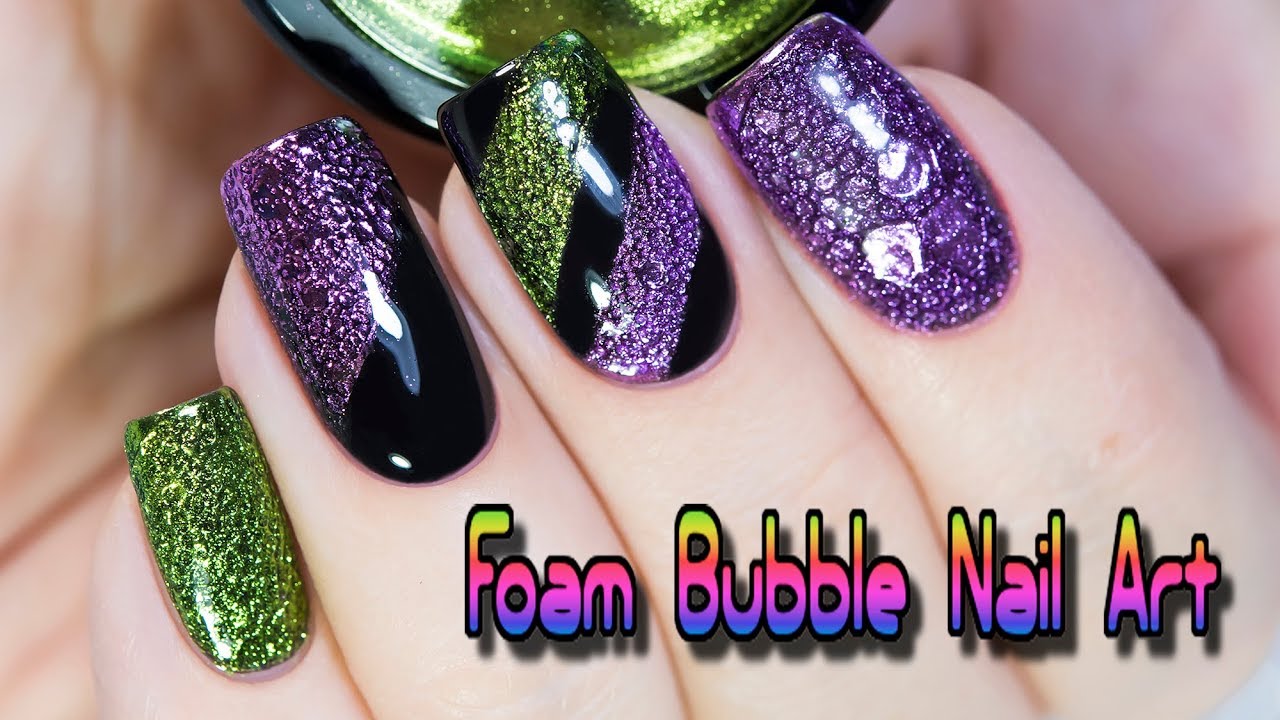
If you're new to nail art or just looking for a quick and easy design, foam bubble nail art is the perfect choice. It requires minimal supplies and can be done in just a few simple steps. Start by applying a base coat to your nails, followed by a light-colored base polish. Then, using a makeup sponge, dab on your featured nail polish color to create the bubbles. You can also experiment with different colors to create a multicolored foam effect. Next, use a straw to blow small bubbles onto your nail. You can control the size and placement of the bubbles by adjusting the amount of polish and water on your straw. Once you're satisfied with the bubbles, let your nails dry and finish with a top coat for a long-lasting finish. This easy foam bubble nail art is great for beginners or anyone looking for a quick and fun nail design. Plus, you can customize it with different colors and patterns to make it your own.2. Easy Foam Bubble Nail Art

.jpg)

2. Easy Foam Bubble Nail Art


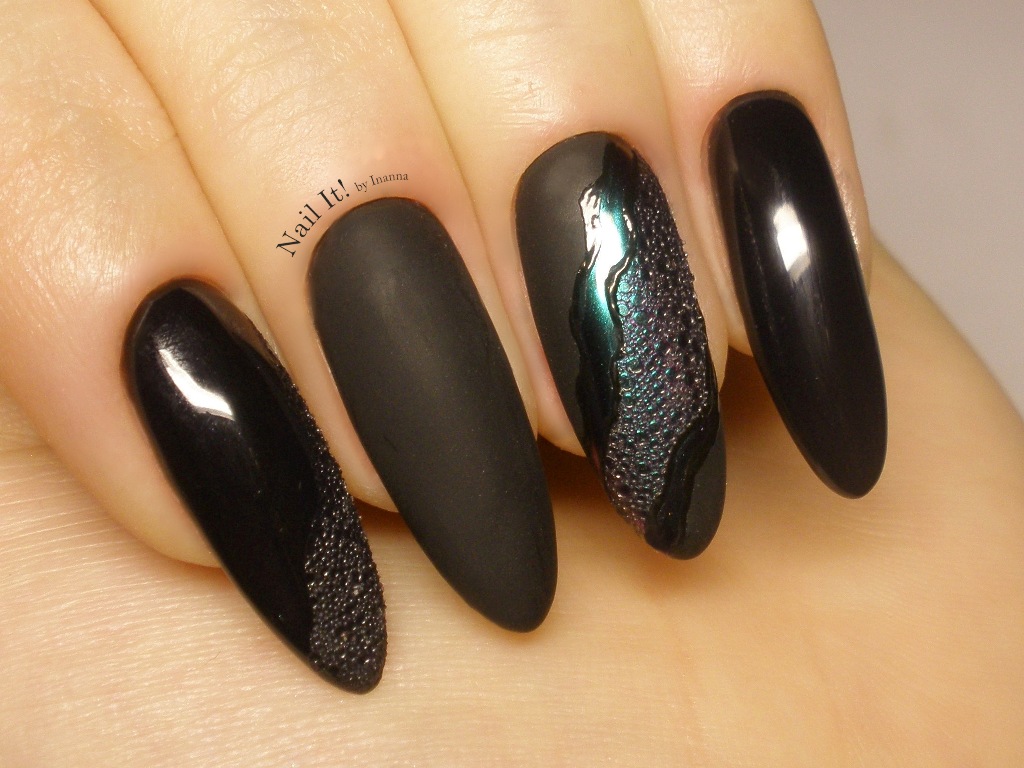
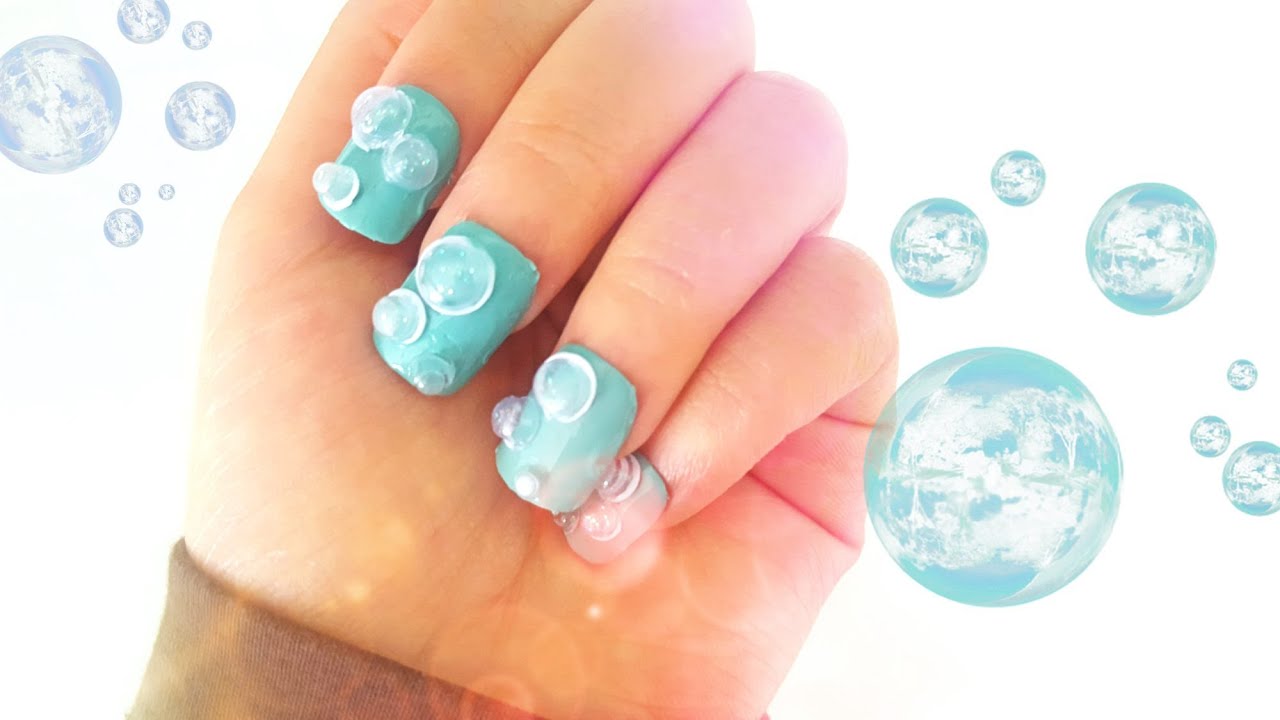
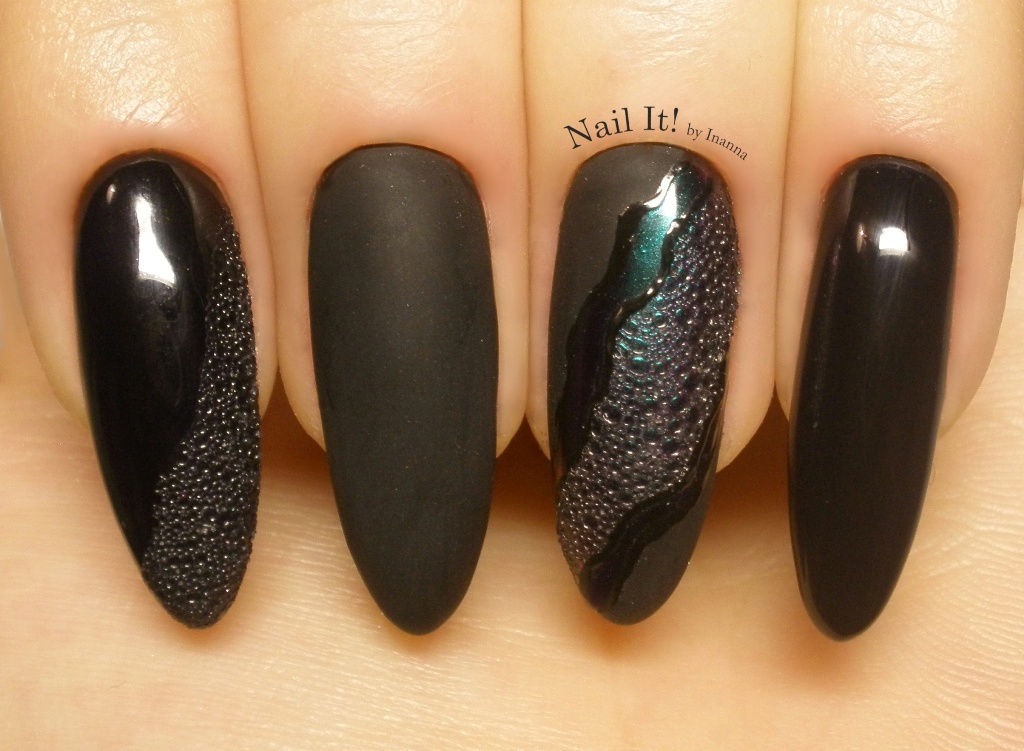
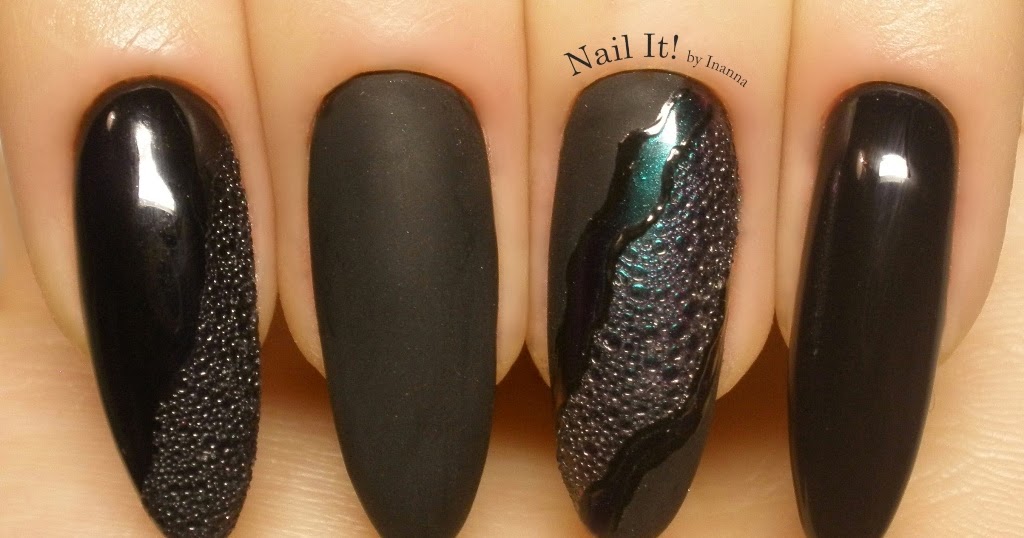
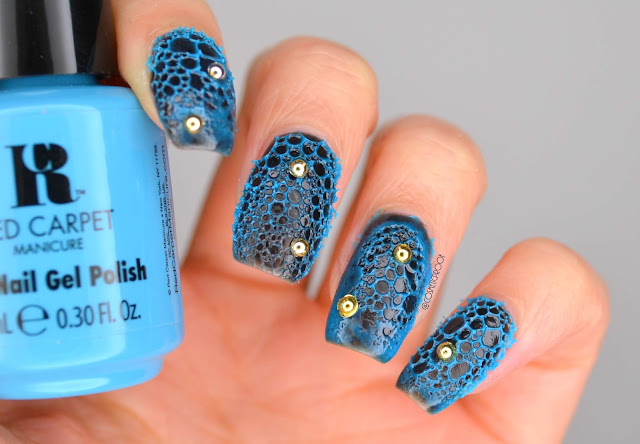
While most foam bubble nail art is created using a straw and water, you can also achieve a similar look with actual foam pieces. This adds an extra element of texture and gives the bubbles a more 3D effect. To create this type of foam bubble nail art, start by applying a base coat and base polish as usual. Then, using tweezers, place small foam pieces onto your nails. You can find foam pieces in various shapes and colors at craft stores or online. Once you have your foam pieces in place, use a top coat to seal them onto your nails and add shine. This type of foam bubble nail art is a great option for those who want a more unique and intricate design. You can play around with different shapes and sizes of foam pieces to create your own personalized look.3. Bubble Nail Art with Foam


3. Bubble Nail Art with Foam

One of the best things about foam bubble nail art is that it's easy to do at home with items you likely already have on hand. Plus, it's a budget-friendly alternative to expensive salon nail art. To create your own DIY foam bubble nail art, start with a base coat and base polish. Then, instead of using a straw to blow bubbles, you can use a toothpick or bobby pin to create small dots in the polish. This mimics the look of bubbles and gives you more control over the placement and size of the bubbles. Once you've created your bubbles, let your nails dry and finish with a top coat. This DIY foam bubble nail art is perfect for those who want to add a fun and playful touch to their nails without breaking the bank.4. DIY Foam Bubble Nail Art

4. DIY Foam Bubble Nail Art


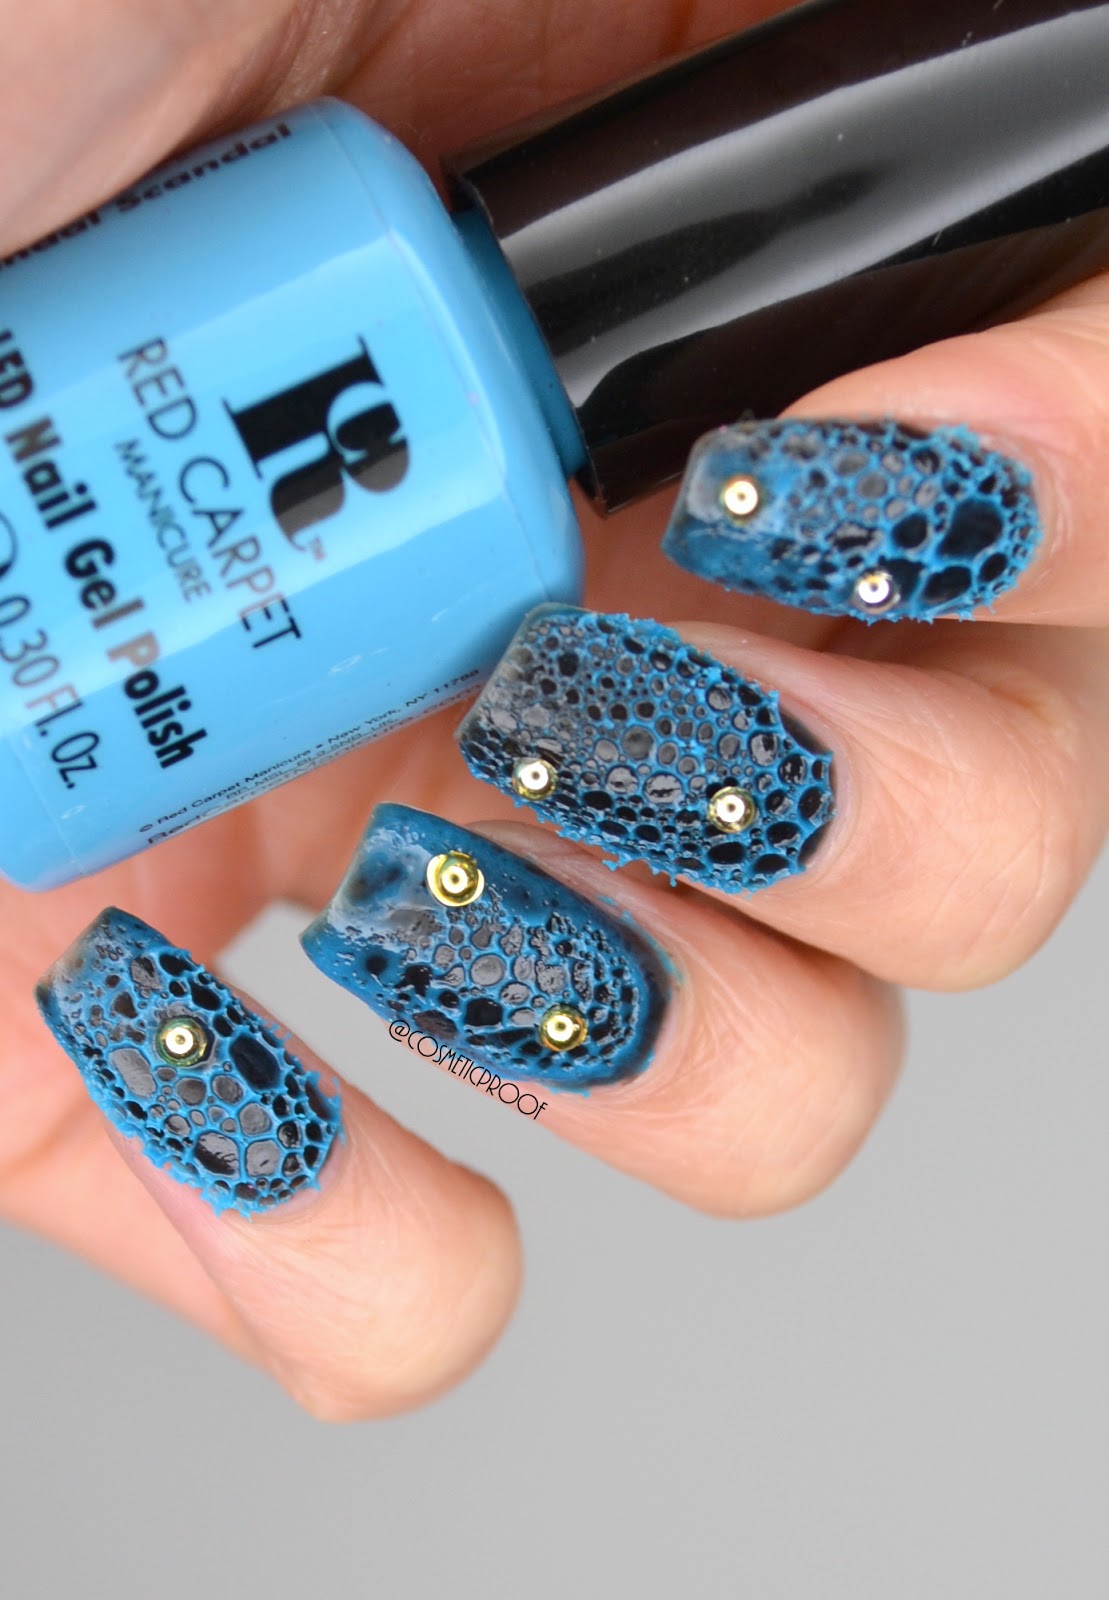
While the traditional foam bubble nail art involves creating a bubbly texture on your nails, there are also other designs you can create with the bubble technique. For a more subtle look, you can use the bubble technique to create a gradient effect on your nails. Start with a light base color and use a darker shade for the bubbles. Dab the darker color onto the tips of your nails and blow bubbles to create a gradient effect. Finish with a top coat for a polished look. Another idea is to use the bubble technique to create a galaxy-inspired nail art. Use a black base color and dab on featured nail polish colors to create a starry sky. Then, use a straw to blow small bubbles onto your nails to represent galaxies. This unique and creative design is perfect for those who love all things celestial.5. Bubble Nail Art Designs


5. Bubble Nail Art Designs


The possibilities for bubble nail art are endless, so here are a few more ideas to inspire you: - Use different shades of the same color for a monochromatic look - Create a rainbow ombre effect by using different colors for each nail - Add glitter or rhinestones for a glam twist on bubble nail art - Use the bubble technique on just one accent nail for a subtle yet eye-catching detail - Experiment with different shapes and sizes of bubbles for a more abstract design Don't be afraid to get creative and come up with your own unique bubble nail art ideas!6. Bubble Nail Art Ideas


6. Bubble Nail Art Ideas
For those who are more visual learners, here is a quick step-by-step guide to creating foam bubble nail art: Step 1: Prep your nails by applying a base coat. Step 2: Apply a light-colored base polish and let it dry completely. Step 3: Using a makeup sponge, dab on your choice of nail polish colors to create the bubbles. Step 4: Use a straw to blow small bubbles onto your nails. Step 5: Let your nails dry for a few minutes. Step 6: Apply a top coat to seal in your design and add shine. And that's it – you now have a gorgeous foam bubble nail art look!7. Bubble Nail Art Step by Step

7. Bubble Nail Art Step by Step
To create your own foam bubble nail art, you'll need a few key supplies: - Base coat and top coat - Nail polish colors of your choice - Makeup sponge - Drinking straw - Bowl of water - Paper towels You can also get creative and use other tools such as toothpicks, bobby pins, or foam pieces to achieve different looks.8. Bubble Nail Art Supplies


8. Bubble Nail Art Supplies
There are a few different techniques you can use to create your foam bubble nail art. Some involve using a straw and water, while others use a toothpick or foam pieces. Experiment with different techniques and see which one you prefer. You can also play around with the amount of polish and water you use to create different effects. For example, using more water will create larger bubbles, while using less water will create smaller bubbles.9. Bubble Nail Art Techniques


9. Bubble Nail Art Techniques
If you're still not sure how to incorporate foam bubble nail art into your nail routine, here are a few Instagram accounts to follow for some inspiration: @nailartbyqueenie @naildecor @nailart_loveby @naildecor_ @naildecor_ig These accounts feature a wide variety of bubble nail art designs and techniques, so you're sure to find some inspiration for your next nail look. So go ahead and give this fun and unique nail art trend a try – you'll have everyone asking, "How did you do that?"10. Bubble Nail Art Inspiration
10. Bubble Nail Art Inspiration

The Latest Trend: Foam Bubble Nail Art
Unleash Your Creativity and Add a Fun Twist to Your Nails
 If you're tired of the same old plain nail designs and looking for something unique and eye-catching, then you're in luck. The latest trend in nail art is here and it's making waves in the beauty community -
foam bubble nail art
. This playful and fun nail design is perfect for those who love to experiment with their nails and want to add a touch of whimsy to their look.
If you're tired of the same old plain nail designs and looking for something unique and eye-catching, then you're in luck. The latest trend in nail art is here and it's making waves in the beauty community -
foam bubble nail art
. This playful and fun nail design is perfect for those who love to experiment with their nails and want to add a touch of whimsy to their look.
What is Foam Bubble Nail Art?
 Foam bubble nail art involves creating a bubbly texture on the nails using
foam beads
and
nail polish
. The result is a stunning 3D effect that looks like tiny bubbles on your nails. This trend has taken over social media, with nail artists and beauty enthusiasts showcasing their creative designs using different colors and techniques.
Foam bubble nail art involves creating a bubbly texture on the nails using
foam beads
and
nail polish
. The result is a stunning 3D effect that looks like tiny bubbles on your nails. This trend has taken over social media, with nail artists and beauty enthusiasts showcasing their creative designs using different colors and techniques.
How to Achieve Foam Bubble Nail Art?
 To achieve this unique nail art, you will need a few essential materials, including
foam beads
,
nail polish
,
top coat
, and
liquid latex
(to protect your skin from excess polish). First, apply a base coat and let it dry. Then, apply a layer of your chosen nail polish color and let it dry completely. Next, apply a layer of liquid latex around your nails to protect your skin. Now, it's time to add the foam beads. Dip your nails into the foam beads while the nail polish is still wet and gently press them onto your nails. You can also use a toothpick to apply the beads individually for more control. Once you're satisfied with the design, apply a layer of top coat to seal the beads in place and voila! You have your very own foam bubble nail art.
To achieve this unique nail art, you will need a few essential materials, including
foam beads
,
nail polish
,
top coat
, and
liquid latex
(to protect your skin from excess polish). First, apply a base coat and let it dry. Then, apply a layer of your chosen nail polish color and let it dry completely. Next, apply a layer of liquid latex around your nails to protect your skin. Now, it's time to add the foam beads. Dip your nails into the foam beads while the nail polish is still wet and gently press them onto your nails. You can also use a toothpick to apply the beads individually for more control. Once you're satisfied with the design, apply a layer of top coat to seal the beads in place and voila! You have your very own foam bubble nail art.
Why You Should Try Foam Bubble Nail Art?
 Foam bubble nail art is not only a fun and creative way to express yourself, but it also has many benefits. The foam beads add a unique texture and dimension to your nails, making them stand out from the crowd. It's also a great way to hide any imperfections on your nails or add a pop of color to a plain nail design. Plus, with endless color combinations and designs, you can let your imagination run wild and create a different look every time.
So, why not give this trendy nail art a try and add a fun twist to your nails? With its playful and whimsical appeal, foam bubble nail art is perfect for any occasion, whether it's a casual day out or a special event. Let your creativity shine and get ready to make a statement with your nails.
Foam bubble nail art is not only a fun and creative way to express yourself, but it also has many benefits. The foam beads add a unique texture and dimension to your nails, making them stand out from the crowd. It's also a great way to hide any imperfections on your nails or add a pop of color to a plain nail design. Plus, with endless color combinations and designs, you can let your imagination run wild and create a different look every time.
So, why not give this trendy nail art a try and add a fun twist to your nails? With its playful and whimsical appeal, foam bubble nail art is perfect for any occasion, whether it's a casual day out or a special event. Let your creativity shine and get ready to make a statement with your nails.


