If you're looking to add some chic and elegant flair to your toe nails, then French toe nail art is the way to go. The classic French manicure has been a staple in the nail world for decades, and now it has made its way to our toes. Whether you want a simple and clean look or something more intricate and eye-catching, there is a French toe nail art design for everyone. Follow these instructions to achieve the perfect French toe nail look.French Toe Nail Art Instructions


French Toe Nail Art Instructions


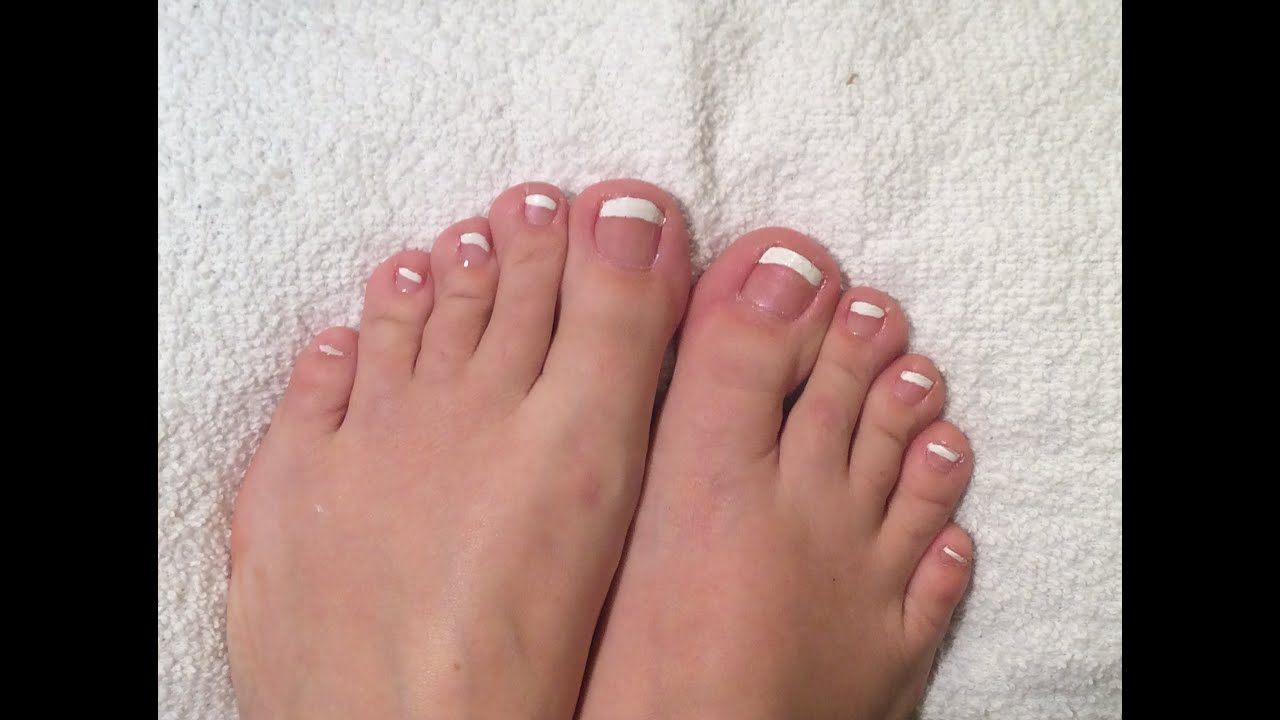
Doing French toe nail art may seem intimidating at first, but with the right tools and techniques, it can be easily achieved. To start, you will need a base coat, a white nail polish, a nude or light pink nail polish, a top coat, and some nail art tools such as a thin brush or dotting tool. Start by applying a base coat to protect your nails and allow it to dry completely. Then, using the white nail polish, paint the tips of your toenails, creating a curved line that follows the natural shape of your nails. Once the white polish has dried, paint the rest of your nails with the nude or light pink polish. Finally, seal in your design with a top coat.How to Do French Toe Nail Art


How to Do French Toe Nail Art


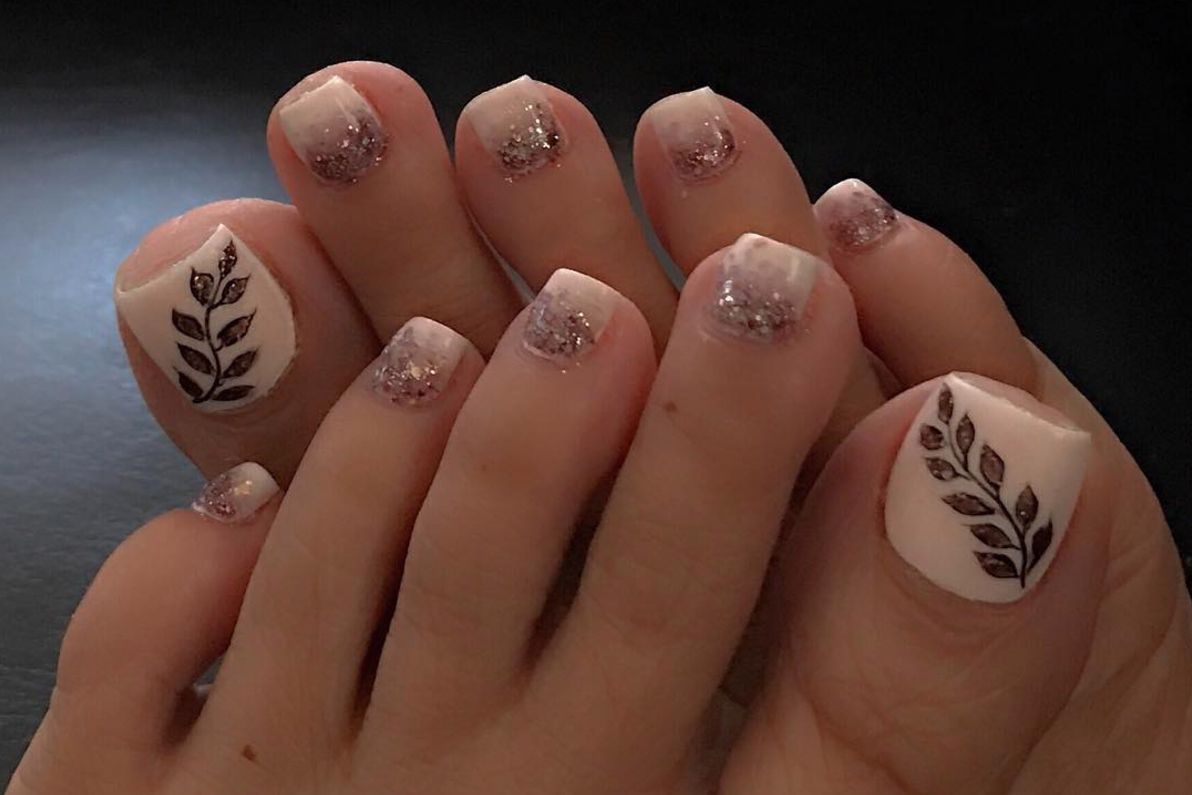
If you're a visual learner, a step-by-step tutorial can be helpful in achieving the perfect French toe nail art look. Start by applying a base coat and letting it dry completely. Then, using a thin brush or a dotting tool, paint the tips of your toenails with white nail polish, creating a curved line. Next, fill in the rest of your nails with a nude or light pink polish. You can also add some extra flair by using a glitter or metallic polish for the tips. Finally, seal in your design with a top coat for a long-lasting and glossy finish.Step-by-Step French Toe Nail Art Tutorial


Step-by-Step French Toe Nail Art Tutorial

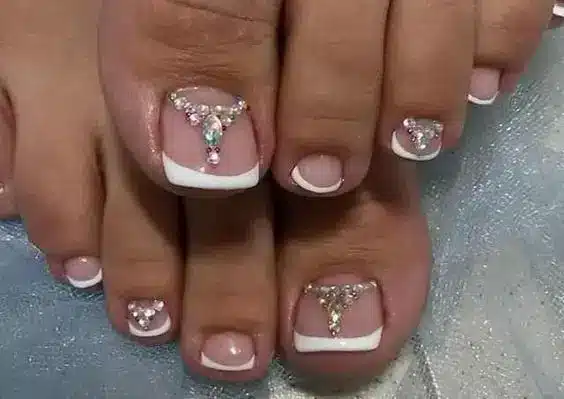

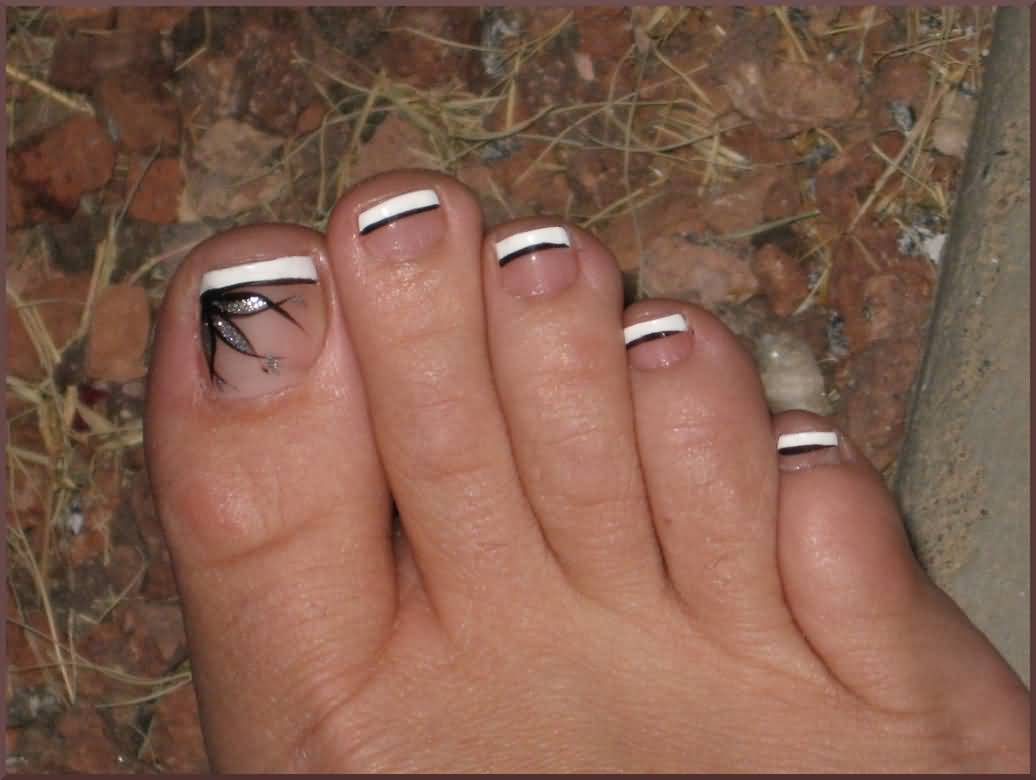
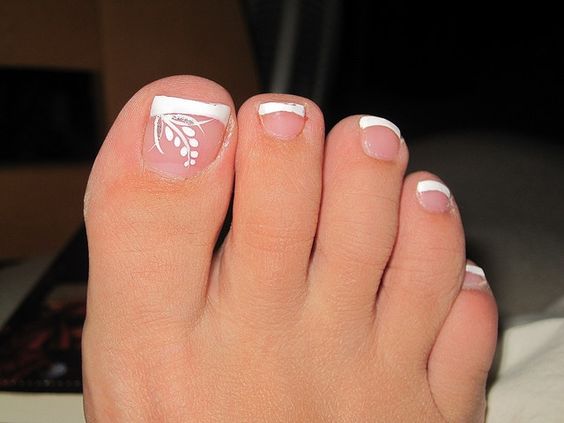
If you're new to French toe nail art, there are plenty of simple and easy designs that you can try. One of the most popular designs for beginners is the classic white tips with a nude or light pink base. You can also add a twist to this design by using a pastel color for the tips or adding some glitter or rhinestones. Another easy design is the half-moon French, where the white tips are replaced with a half-moon shape at the base of the nail. This design is perfect for those who want a more subtle French look.French Toe Nail Art Designs for Beginners


French Toe Nail Art Designs for Beginners


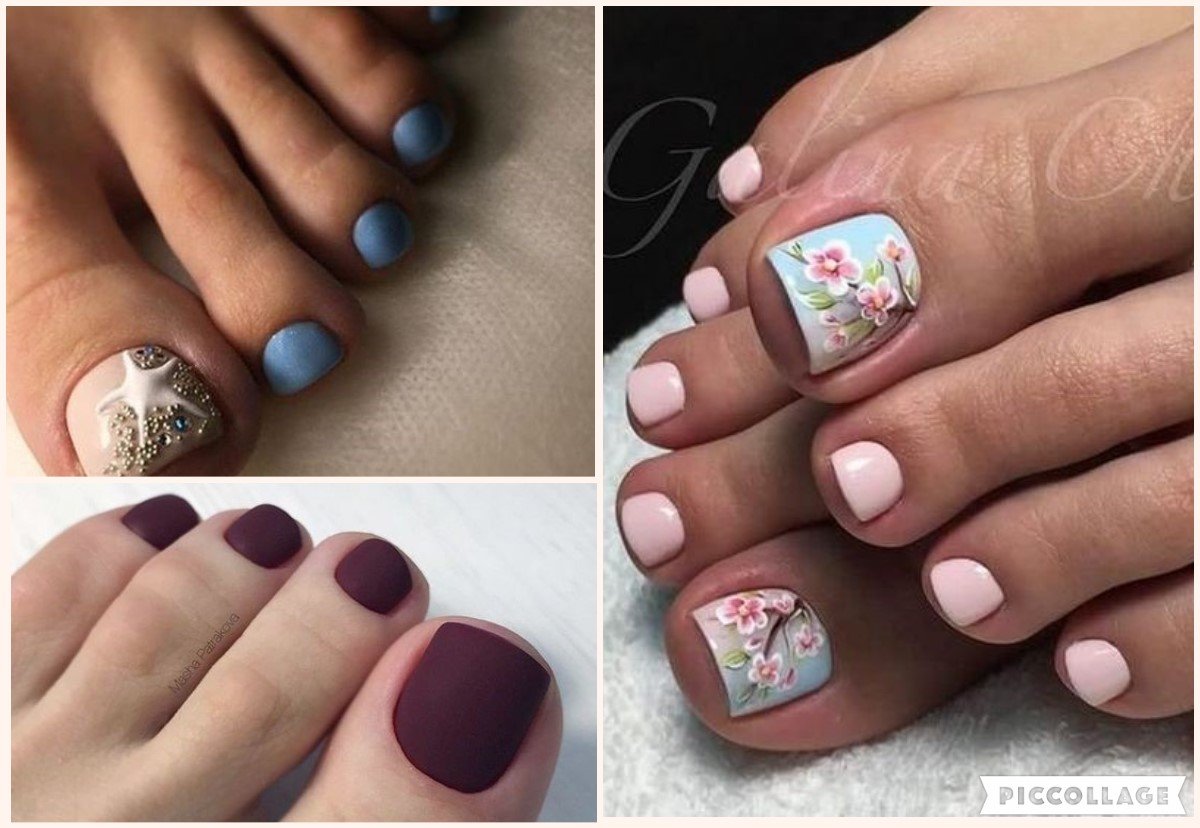


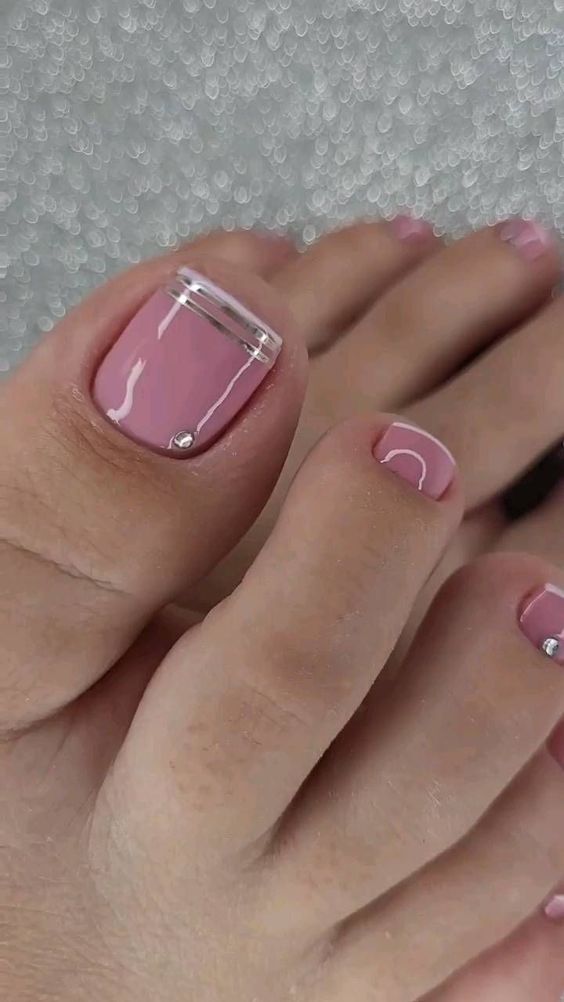
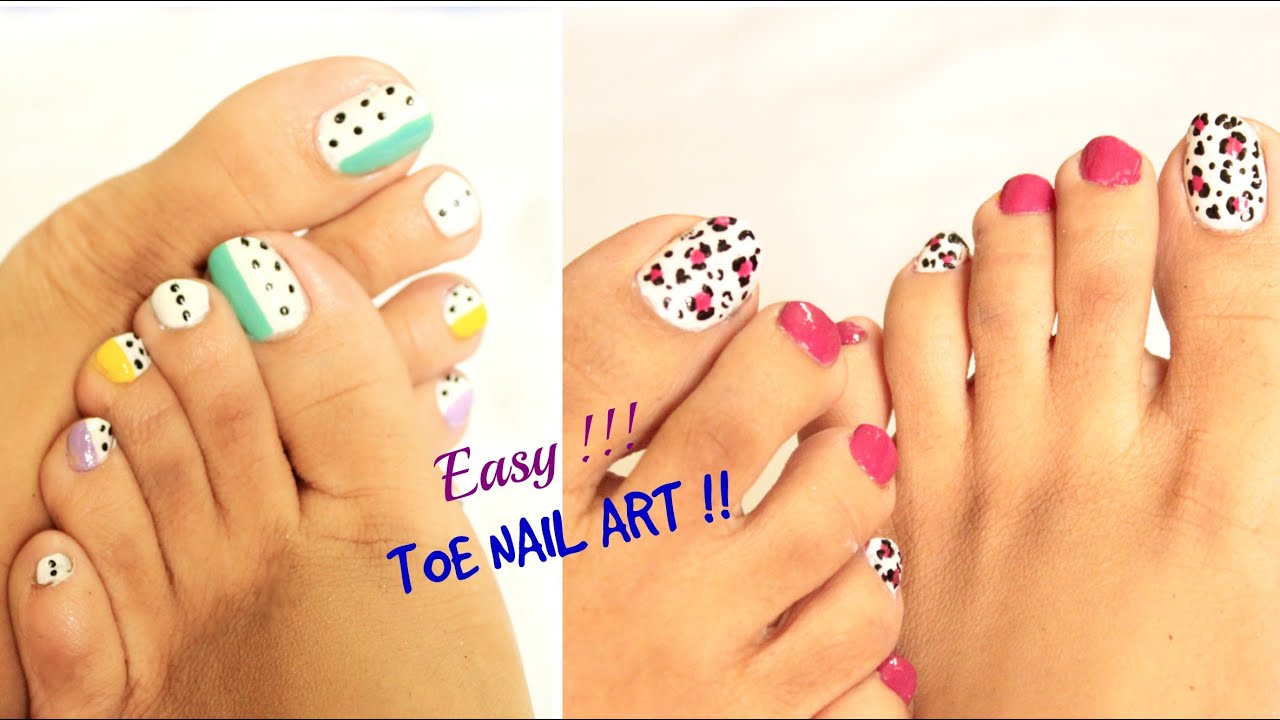
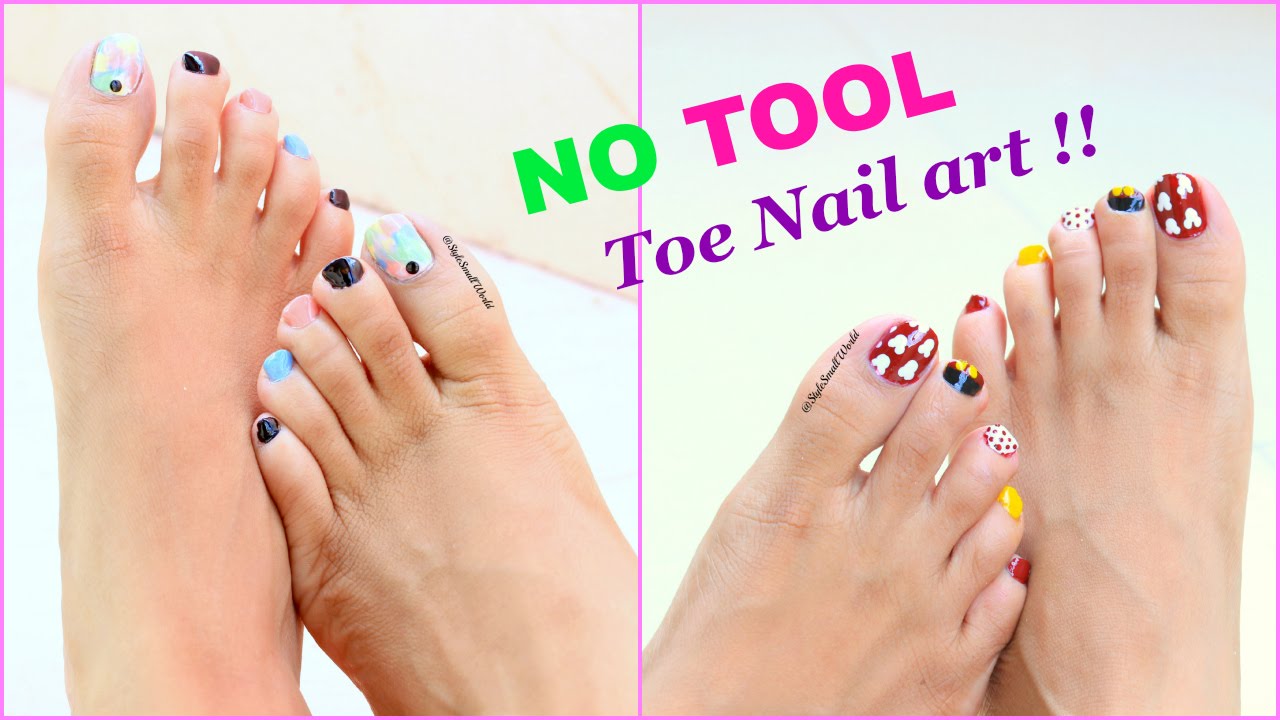
French toe nail art doesn't always have to be the traditional white tips on a nude or light pink base. There are plenty of easy and creative ideas that you can try to spice up your toe nails. You can try a reverse French, where the base color is applied on the tips and the tips are left bare. Another idea is to add a pop of color by using a bright or neon polish for the tips. You can also experiment with different shapes such as a diagonal or triangular French.Easy French Toe Nail Art Ideas


Easy French Toe Nail Art Ideas


To achieve the perfect French toe nail art look, there are some tips and tricks that can come in handy. First, make sure to use a thin brush or dotting tool for precise application of the white tips. You can also use masking tape or nail guides to help you create a clean and straight line. Another tip is to use a quick-drying top coat to avoid smudging or ruining your design. And lastly, don't be afraid to experiment and have fun with different colors and designs.French Toe Nail Art Tips and Tricks


French Toe Nail Art Tips and Tricks


To create the perfect French toe nail art, you will need a few essential supplies. These include a base coat, a white nail polish, a nude or light pink nail polish, a top coat, and some nail art tools such as a thin brush or dotting tool. You can also add some extra supplies such as a glitter or metallic polish, rhinestones, or nail stickers for added flair. Make sure to have all your supplies ready before starting your French toe nail art.French Toe Nail Art Supplies You'll Need

French Toe Nail Art Supplies You'll Need


When it comes to French toe nail art, there are different techniques that you can use to achieve different designs. The traditional technique is to paint the tips of your toenails with a white polish, but you can also try using a nail stamping plate to create intricate designs. Another technique is to use a sponge to create an ombre effect on the tips. You can also use nail art brushes and tools to create different shapes and patterns for a more unique French toe nail art look.French Toe Nail Art Techniques


French Toe Nail Art Techniques
If you're not sure what design to try or you're looking for some inspiration, there are plenty of sources to turn to. You can search for French toe nail art on social media platforms such as Instagram and Pinterest, where you can find endless ideas and designs. You can also look to your favorite celebrities and influencers for some inspiration. Don't be afraid to mix and match different designs and create your own unique French toe nail art look.French Toe Nail Art Inspiration


French Toe Nail Art Inspiration
If you prefer visual instructions, there are plenty of video tutorials available online that can guide you through the process of creating French toe nail art. You can find tutorials for different designs and techniques, making it easier for you to follow along and achieve the perfect look. Make sure to follow reputable and trusted channels for accurate and helpful tutorials.French Toe Nail Art Video Tutorial
French Toe Nail Art Video Tutorial
Step 3: Applying the Design

Choosing Your Nail Polish Colors
 Now that you have prepped your nails, it's time to choose the perfect nail polish colors for your French toe nail art. This is where you can let your creativity shine!
Choose colors that complement each other and reflect your personal style.
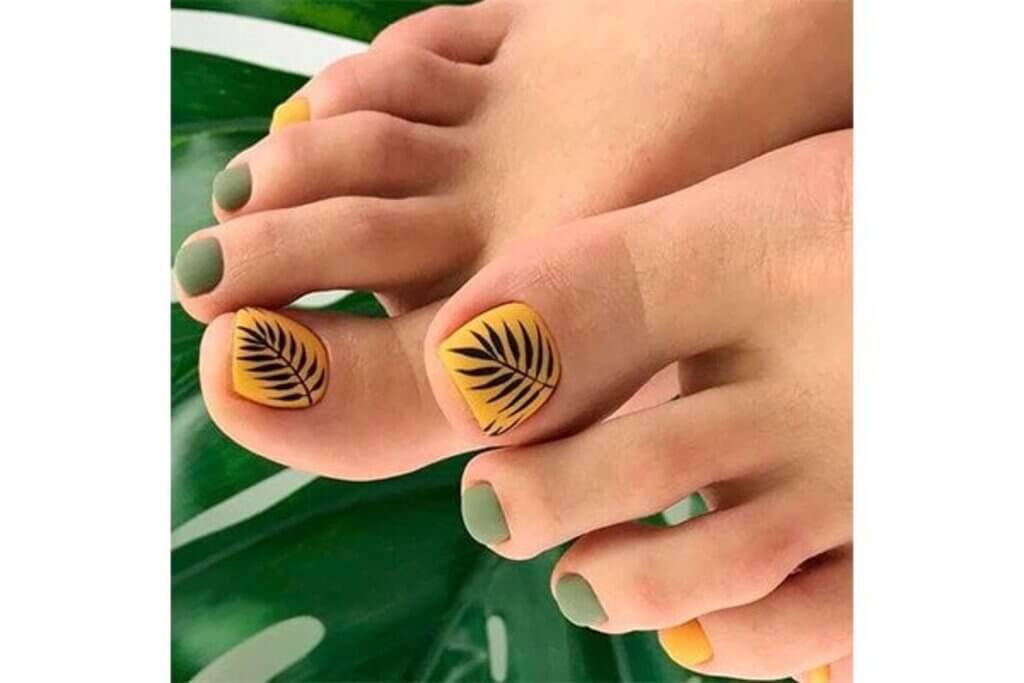
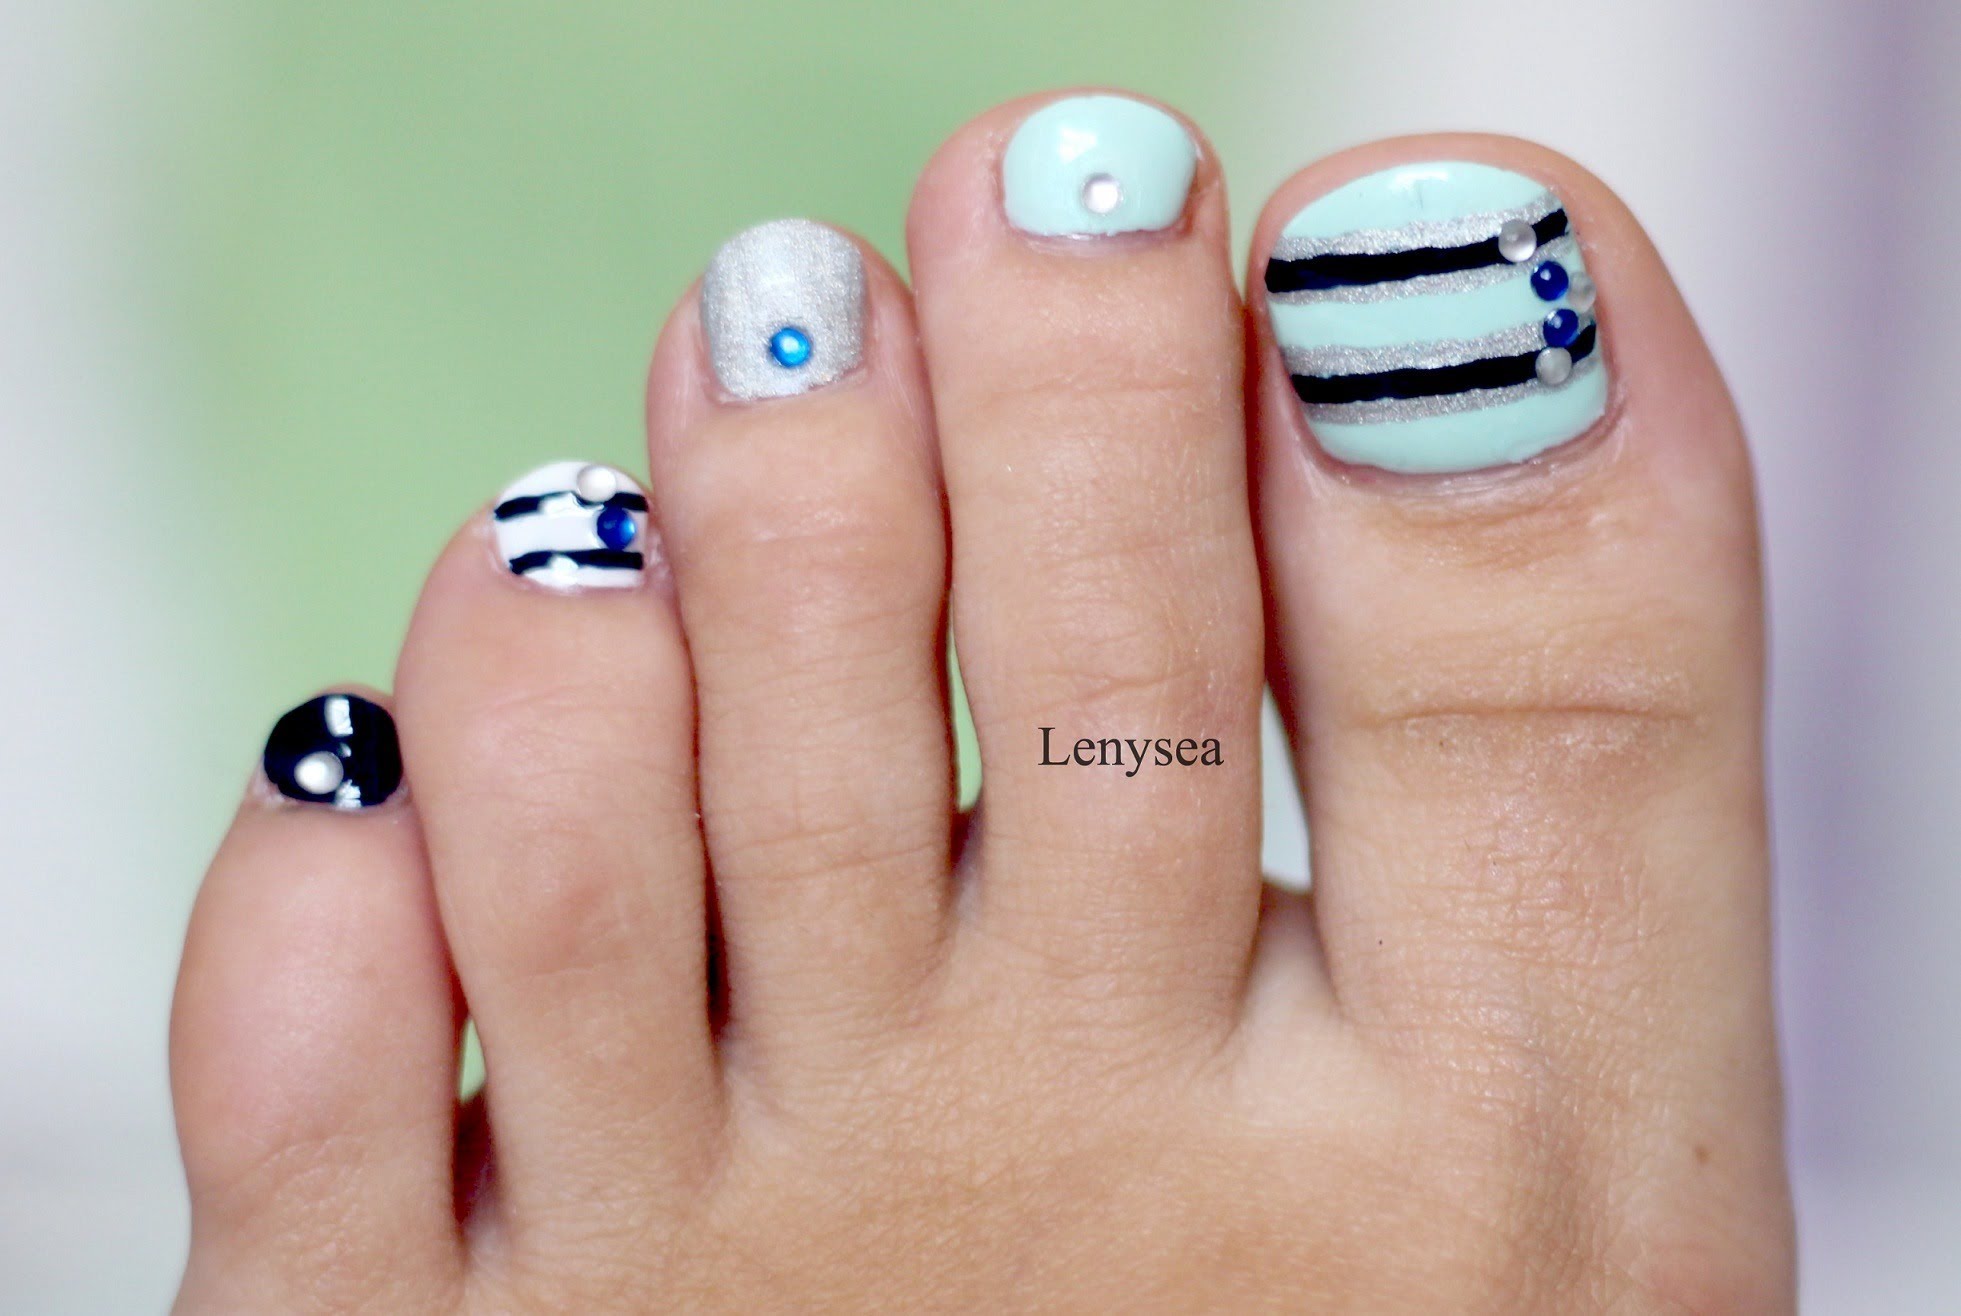
For a classic French look, opt for a nude or pink shade for the base and a white polish for the tips. For a more fun and playful look, try using bright or pastel colors for the tips.
Make sure to have a good quality base coat and top coat to ensure your design lasts longer.
Now that you have prepped your nails, it's time to choose the perfect nail polish colors for your French toe nail art. This is where you can let your creativity shine!
Choose colors that complement each other and reflect your personal style.
For a classic French look, opt for a nude or pink shade for the base and a white polish for the tips. For a more fun and playful look, try using bright or pastel colors for the tips.
Make sure to have a good quality base coat and top coat to ensure your design lasts longer.
Creating the French Tip
 To create the perfect French tip,
start by painting the base color on your entire nail and let it dry completely.
Then, using a thin brush or a nail art pen,
carefully paint a white line across the tip of your nail.
You can also use tape or French tip guides to help you achieve a clean and precise line.
Make sure to let the white polish dry completely before moving on to the next step.
To create the perfect French tip,
start by painting the base color on your entire nail and let it dry completely.
Then, using a thin brush or a nail art pen,
carefully paint a white line across the tip of your nail.
You can also use tape or French tip guides to help you achieve a clean and precise line.
Make sure to let the white polish dry completely before moving on to the next step.
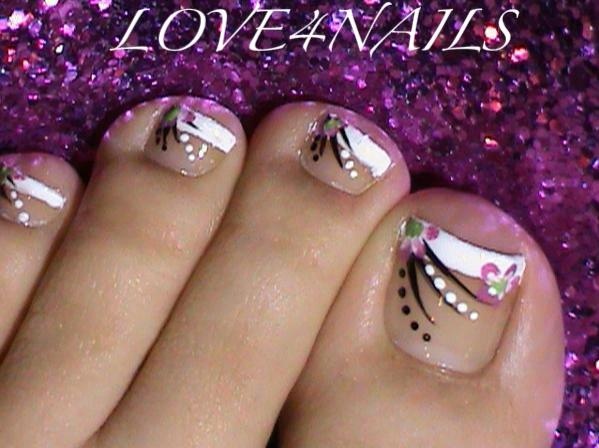
Adding the Details
 This is where you can really get creative and add your personal touch to your French toe nail art.
You can use a small brush or a toothpick to create different designs and patterns on the white tip.
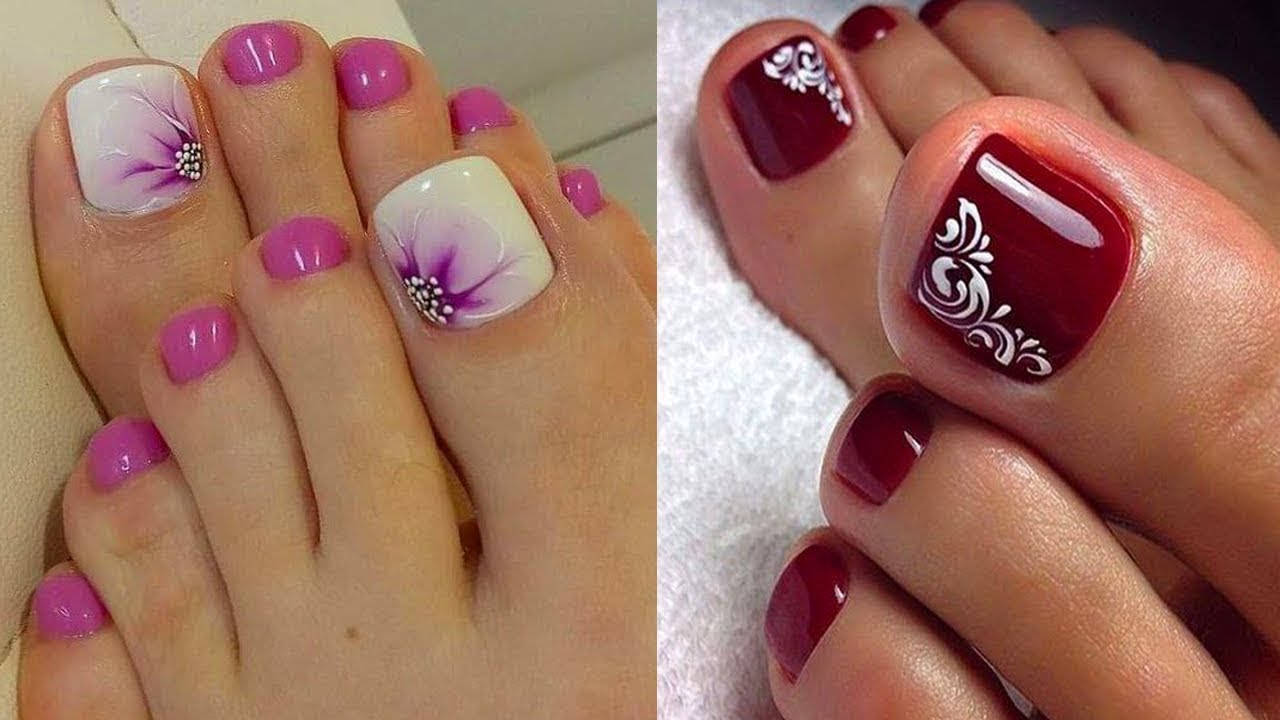
Some popular designs include polka dots, stripes, and flowers.
For a more intricate design, you can use nail art stickers or stencils.
Remember to let the design dry completely before applying a top coat to seal and protect your beautiful nail art.
This is where you can really get creative and add your personal touch to your French toe nail art.
You can use a small brush or a toothpick to create different designs and patterns on the white tip.
Some popular designs include polka dots, stripes, and flowers.
For a more intricate design, you can use nail art stickers or stencils.
Remember to let the design dry completely before applying a top coat to seal and protect your beautiful nail art.
Final Thoughts
 Creating French toe nail art may seem daunting at first, but with these simple instructions, you can easily achieve a professional and stylish look in no time.
Remember to have fun, experiment with different colors and designs, and most importantly, take your time to ensure a flawless result.
With these tips, you'll be rocking beautiful French toe nail art all summer long. So go ahead and show off your new pedicure with confidence!
Bon chance!
Creating French toe nail art may seem daunting at first, but with these simple instructions, you can easily achieve a professional and stylish look in no time.
Remember to have fun, experiment with different colors and designs, and most importantly, take your time to ensure a flawless result.
With these tips, you'll be rocking beautiful French toe nail art all summer long. So go ahead and show off your new pedicure with confidence!
Bon chance!


