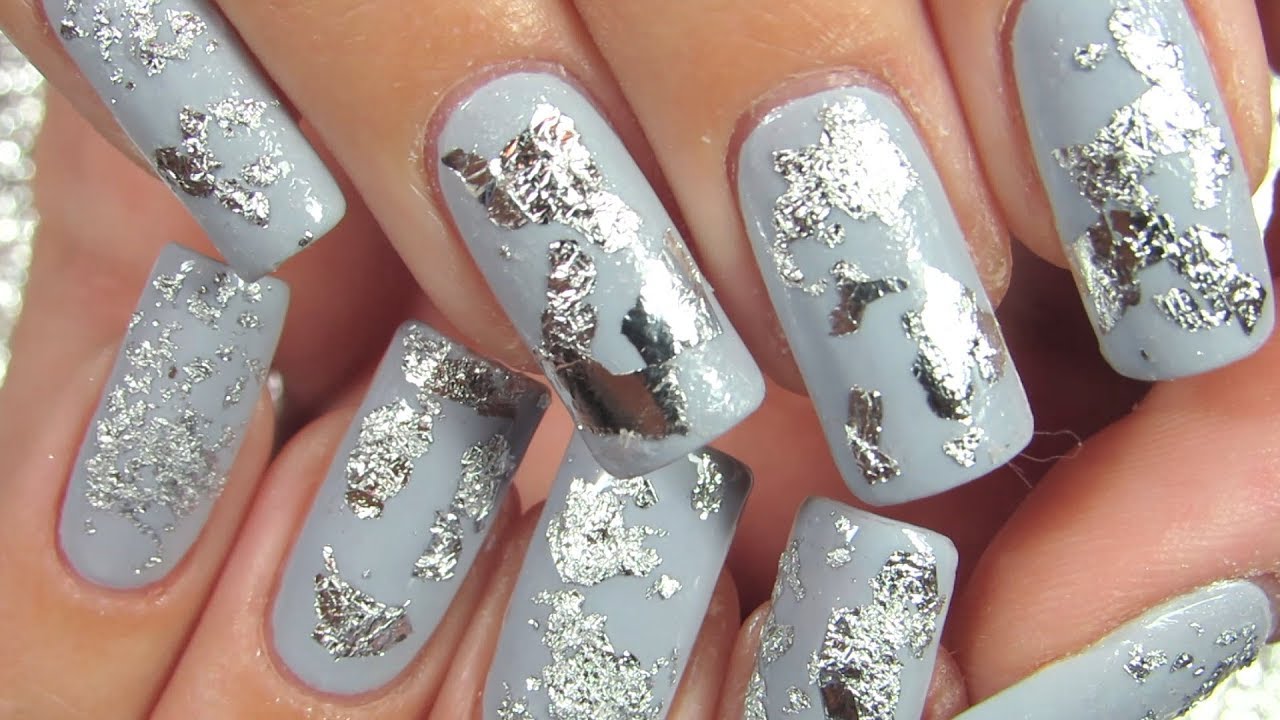
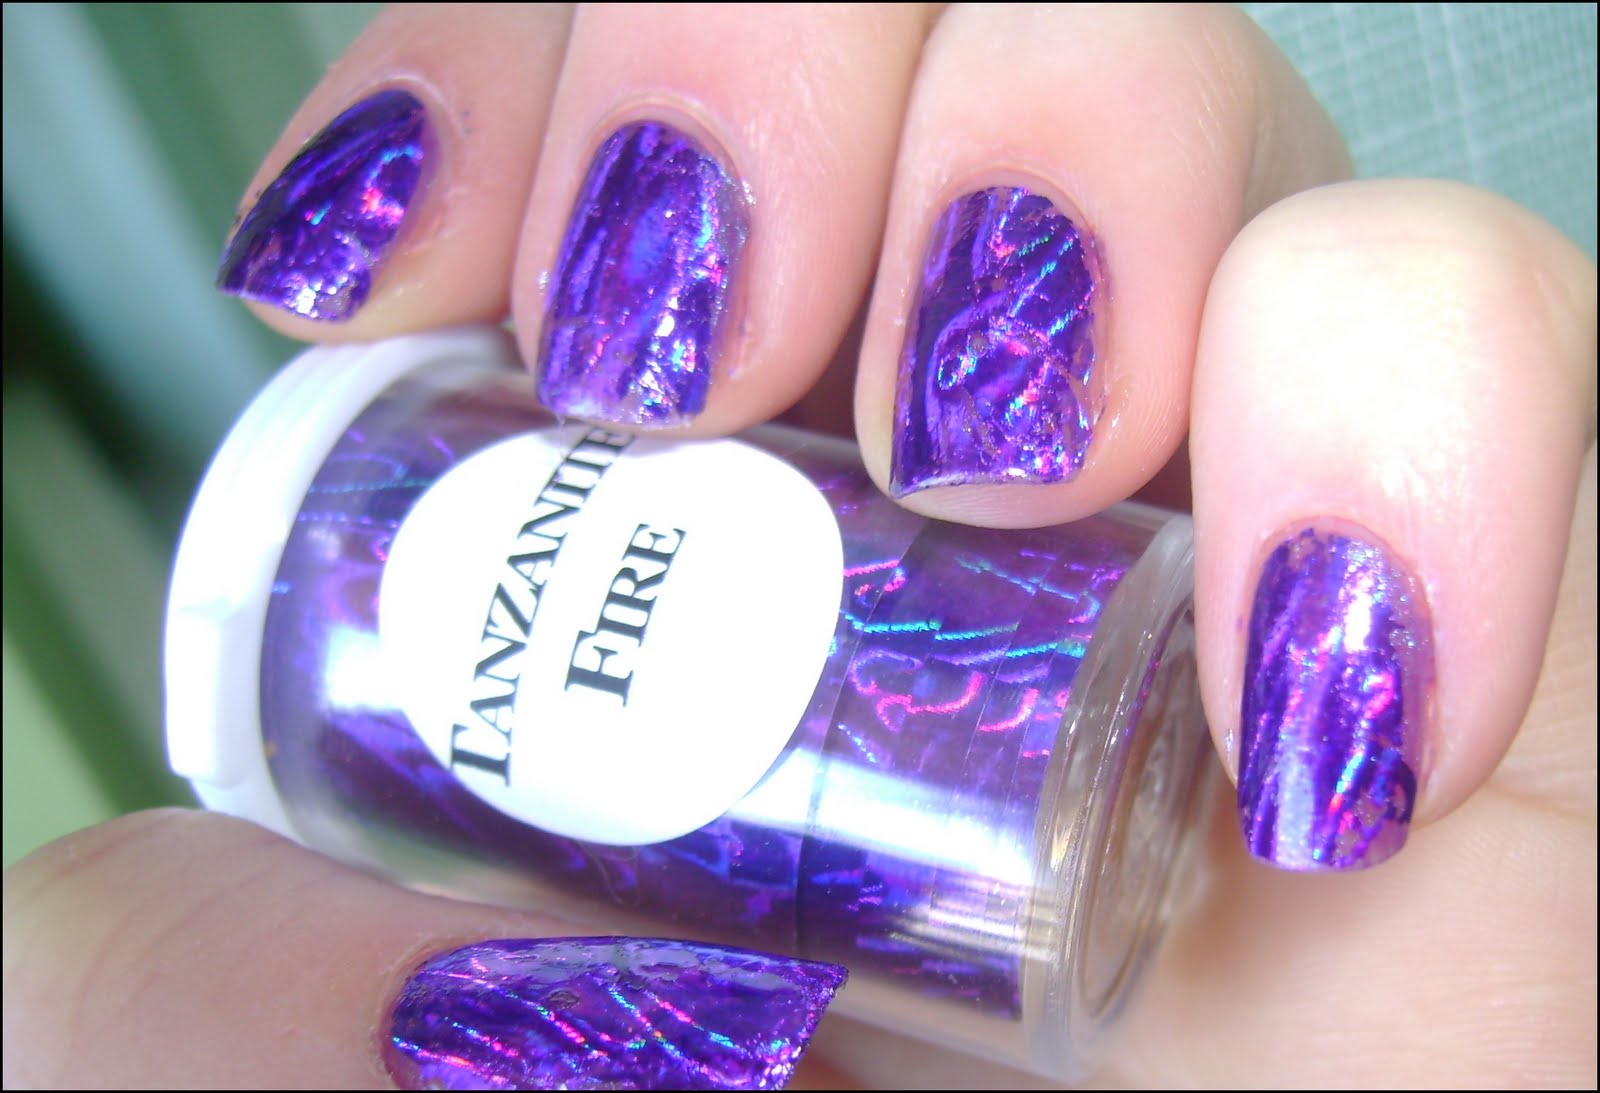
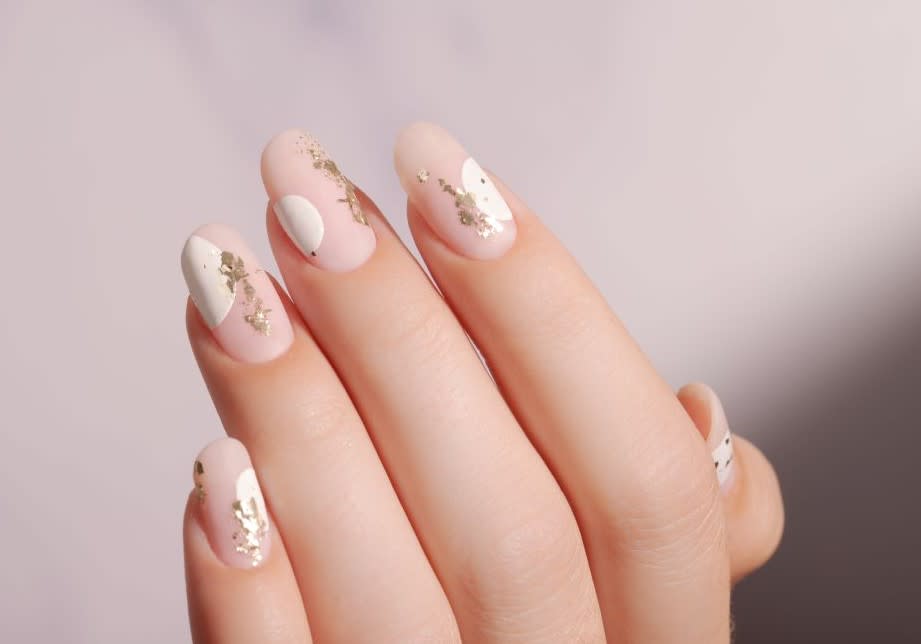
If you're looking to add some sparkle and shine to your nails, glass foil nail art is the perfect choice. It's a fun and easy way to create unique and eye-catching designs that will make your nails stand out. In this tutorial, we'll guide you through the steps of creating your own stunning glass foil nail art. First, you'll need to gather your supplies. You'll need a base coat, a top coat, a gel polish in your desired color, glass foil pieces, and a small brush for application. Make sure your nails are clean and free of any old polish before you begin. Next, apply a base coat to protect your nails and help the polish adhere better. Once the base coat is dry, apply your gel polish in your chosen color. You can use any color you like, but for a more dramatic effect, choose a dark or bright shade. Now it's time to add the glass foil pieces. Carefully cut or tear small pieces of the foil and place them on your nail while the gel polish is still wet. You can create any design you like, but for a more abstract look, try placing the pieces randomly or in a scattered pattern. Using a small brush, gently press the foil pieces onto your nail to ensure they stick well. Once all the pieces are in place, apply a top coat to seal in the design and give your nails a glossy finish. Cure your nails under a UV or LED lamp to set the gel polish and foil. And there you have it! Your very own glass foil nail art design. Experiment with different colors and designs to create a unique look every time.1. Glass Foil Nail Art Tutorial
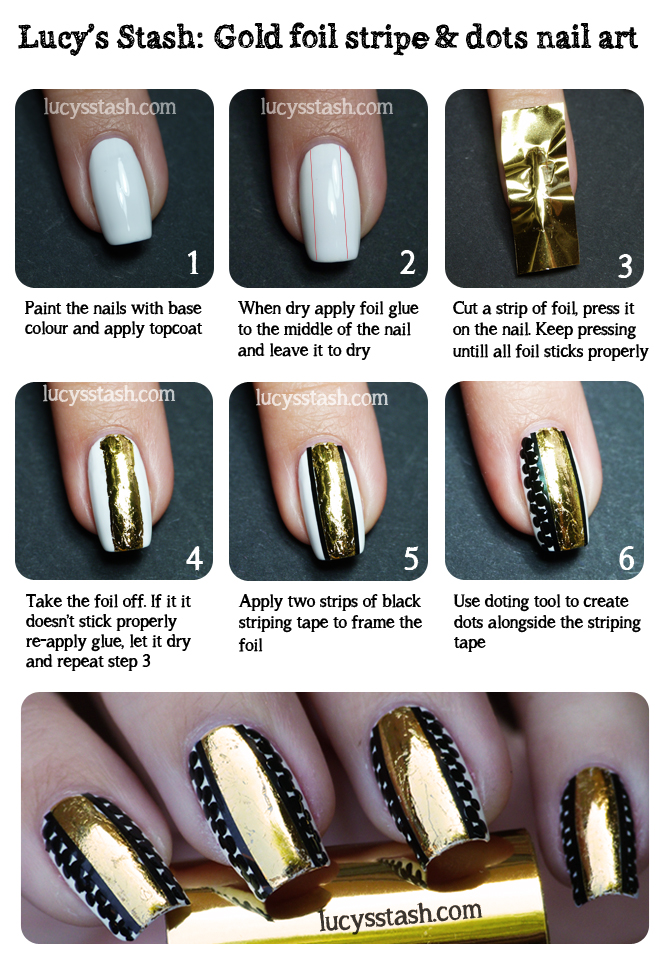


1. Glass Foil Nail Art Tutorial


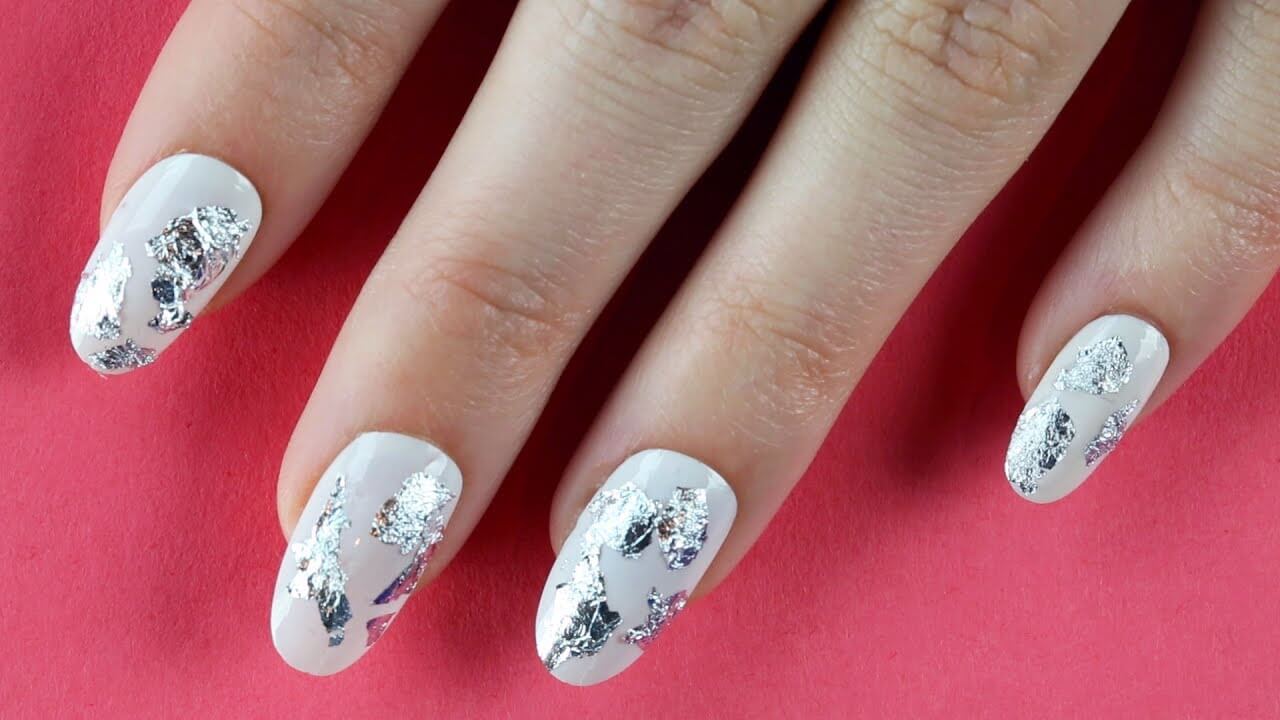
Glass foil nail art is a popular trend for its vibrant and eye-catching designs. If you want to try it out for yourself, we've got you covered with this step-by-step guide on how to create stunning glass foil nail art. Start by prepping your nails – remove any old polish and push back your cuticles. Next, apply a base coat to protect your nails and help the polish adhere better. Once the base coat is dry, apply a gel polish in your desired color. You can choose a single color or mix and match for a more playful look. Now comes the fun part – adding the glass foil pieces. Cut or tear small pieces of the foil and place them on your wet gel polish. You can create any design you like, from simple lines to intricate patterns. Use a small brush to gently press the foil pieces onto your nail for a smooth and even finish. Once you're happy with your design, apply a top coat to seal in the foil and give your nails a glossy finish. Cure your nails under a UV or LED lamp to set the gel polish and foil. And voila! You now have stunning glass foil nail art. Don't be afraid to experiment with different colors and designs to create your own unique look. With glass foil nail art, the possibilities are endless!2. How to Create Stunning Glass Foil Nail Art


2. How to Create Stunning Glass Foil Nail Art
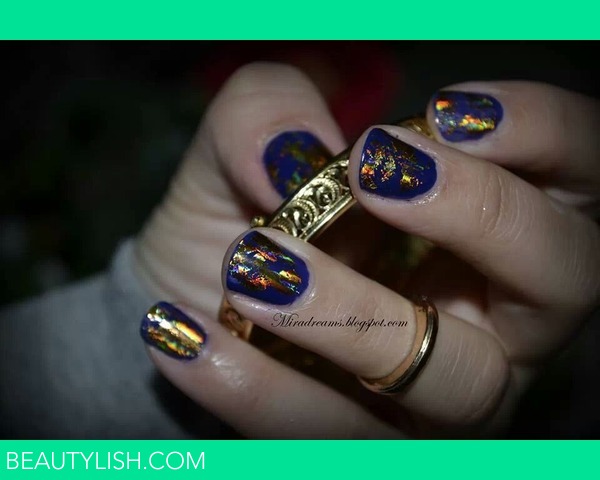

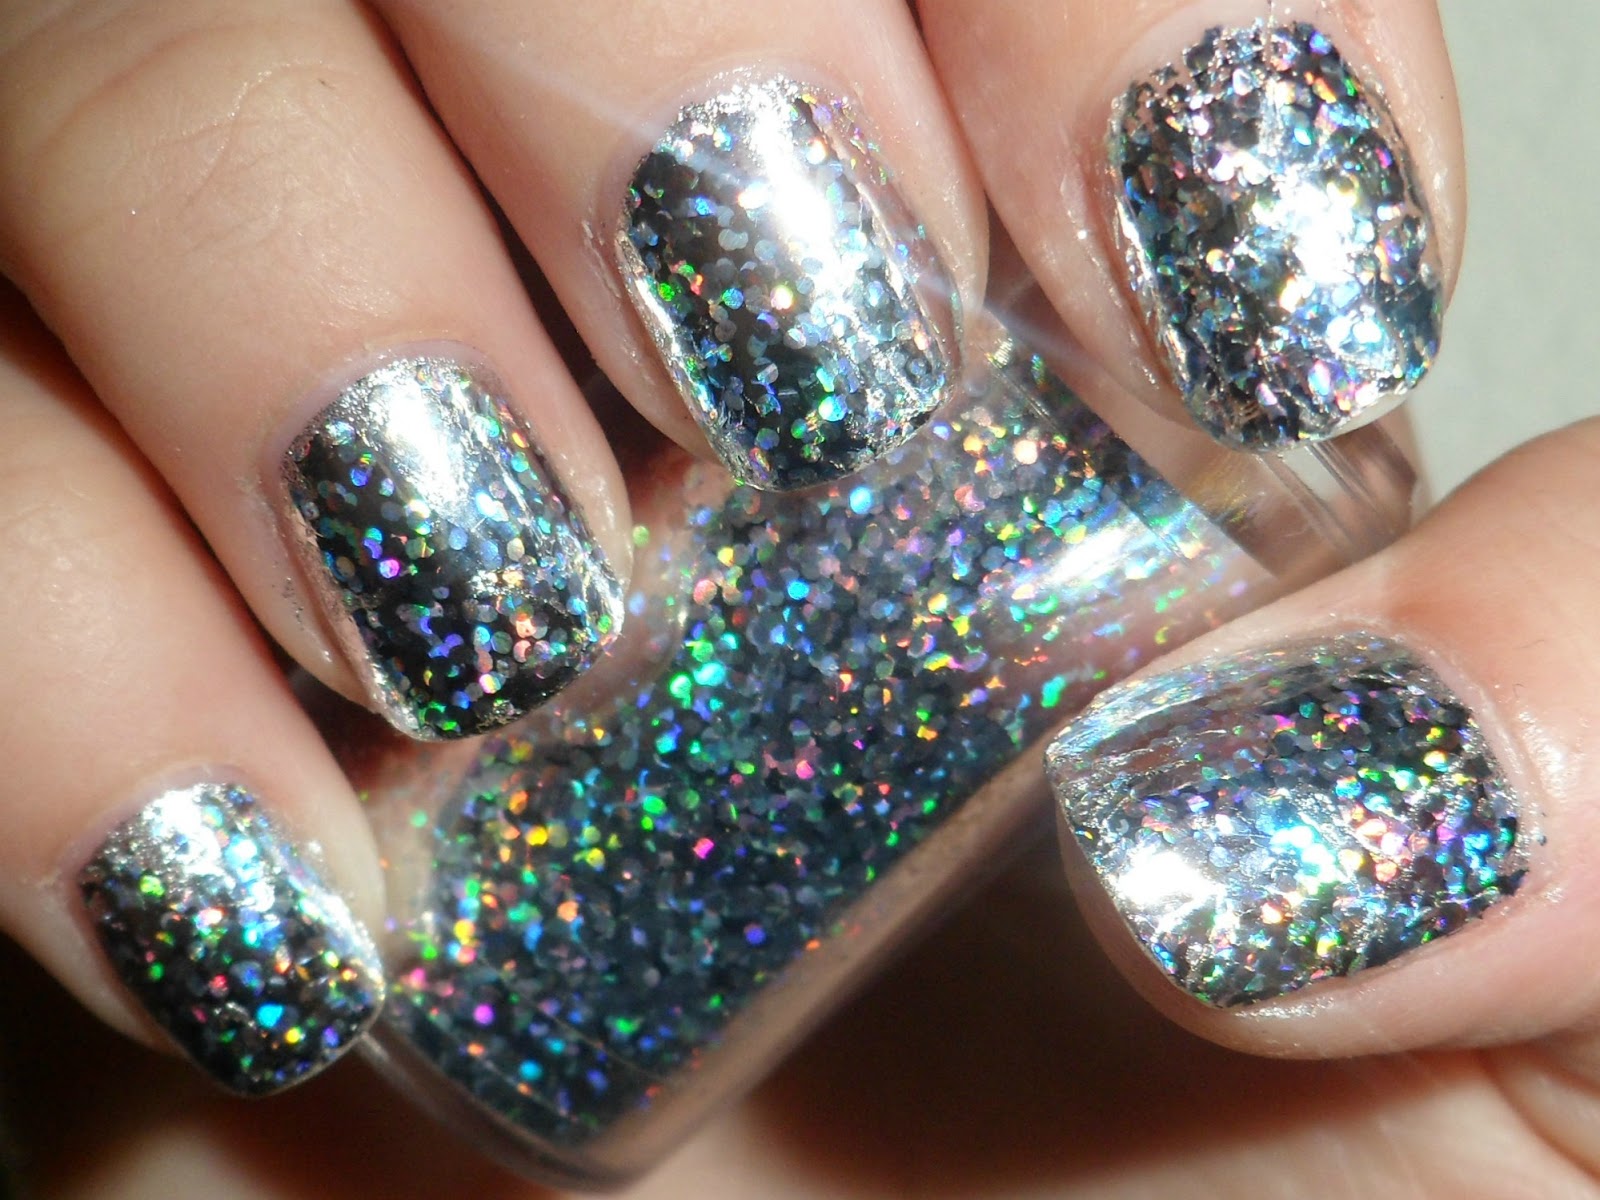
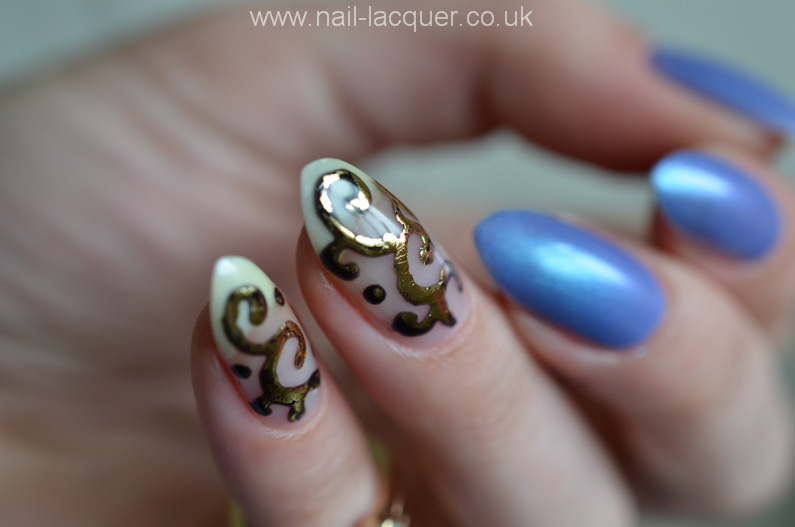
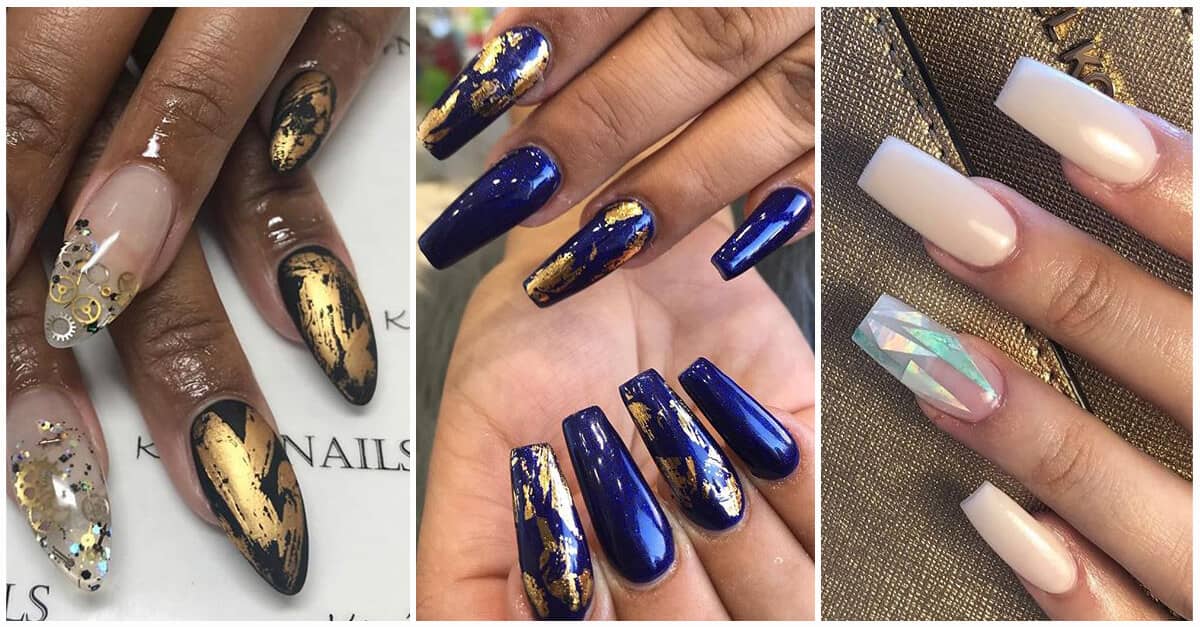
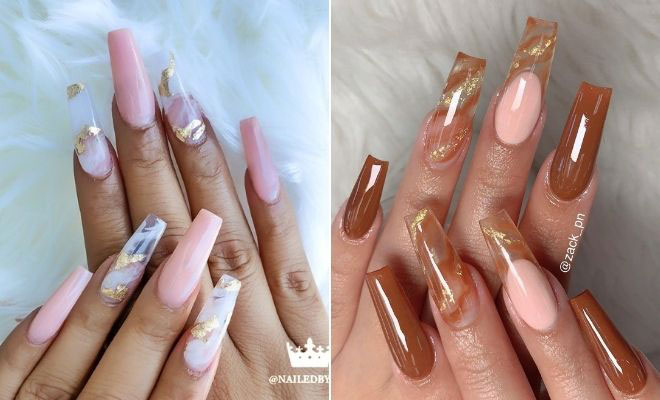
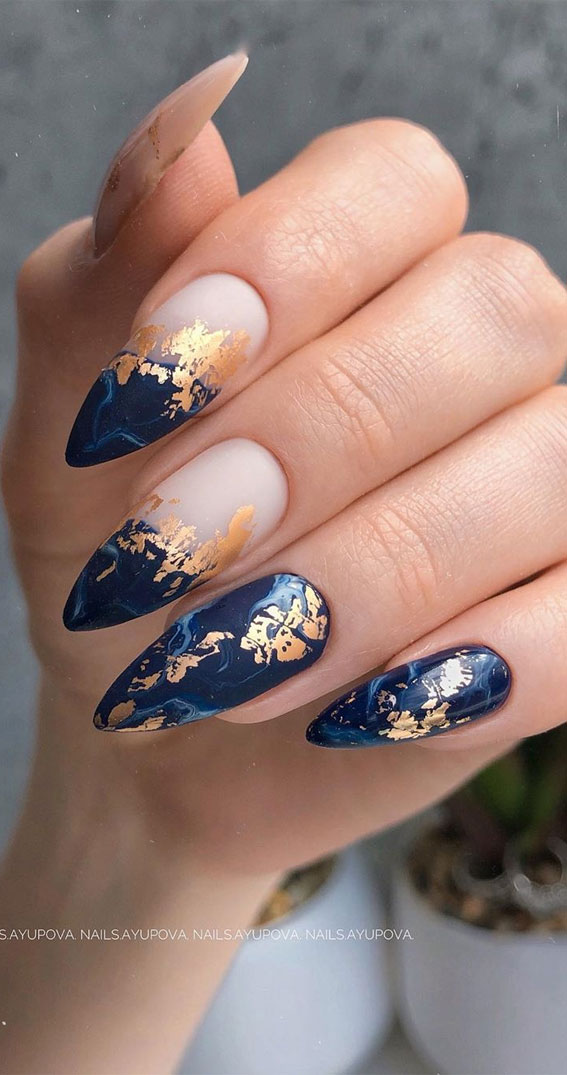
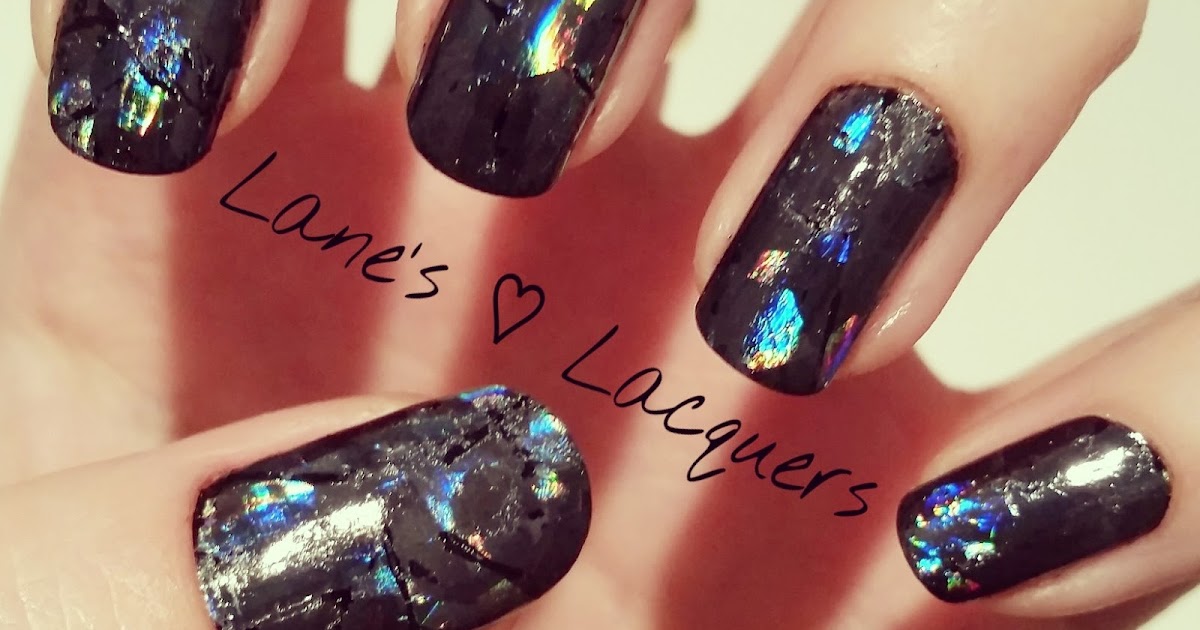
Glass foil nail art is a versatile and trendy way to add some sparkle and shine to your nails. Whether you're getting ready for a special occasion or just want to add some fun to your everyday look, there's a glass foil design for every occasion. Here are some ideas to inspire your next nail art session. For a glamorous and elegant look, try a black or dark base with gold or silver glass foil accents. These designs are perfect for a night out or a special event like a wedding or prom. For a more playful and colorful look, try mixing and matching different colors of foil on a light or neutral base. You can also create fun designs like stripes, triangles, or dots for a unique and eye-catching look. If you want to keep it simple but still make a statement, try a single foil accent nail on each hand. This is a great option for those who prefer a more subtle look or for those who are new to glass foil nail art. And for the holidays, why not try a festive design with red and green foil for Christmas or pastel colors for Easter? The possibilities are endless and always sure to impress.3. Glass Foil Nail Art Designs for Every Occasion
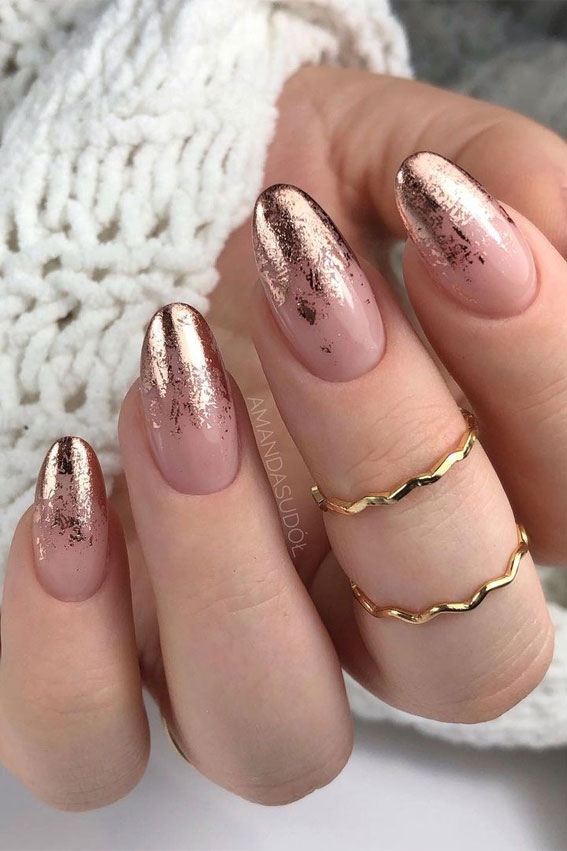


3. Glass Foil Nail Art Designs for Every Occasion

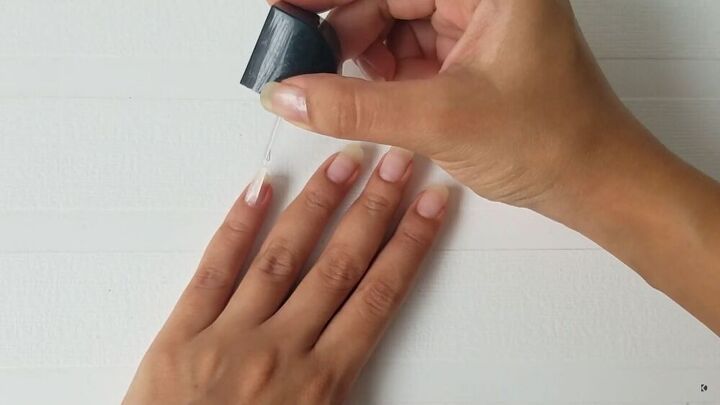
Glass foil nail art is a fun and easy way to create unique and eye-catching designs on your nails. If you've never tried it before, don't worry – we've got you covered with this step-by-step guide. First, gather your supplies: base coat, gel polish, glass foil pieces, a small brush, and a top coat. Make sure your nails are clean and free of any old polish before you begin. Next, apply a base coat to protect your nails and help the polish adhere better. Once the base coat is dry, apply your desired gel polish color. You can use any color you like, but for a more dramatic effect, choose a dark or bright shade. Now it's time to add the glass foil pieces. Cut or tear small pieces of foil and place them on your nail while the gel polish is still wet. You can create any design you like, from abstract patterns to simple lines. Using a small brush, gently press the foil pieces onto your nail to ensure they stick well. Once all the pieces are in place, apply a top coat to seal in the design and give your nails a glossy finish. Cure your nails under a UV or LED lamp to set the gel polish and foil. And that's it! You now have a stunning glass foil nail art design. Experiment with different colors and designs to create a unique look every time.4. Step-by-Step Guide to Glass Foil Nail Art


4. Step-by-Step Guide to Glass Foil Nail Art


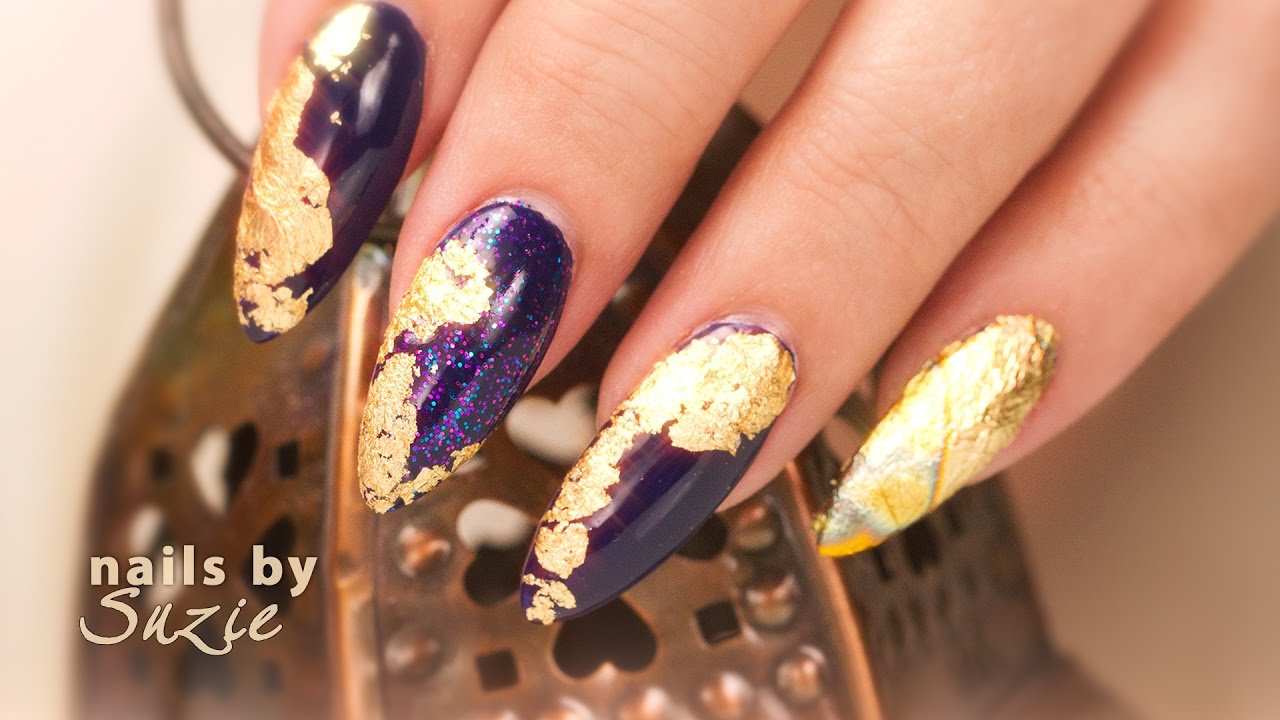
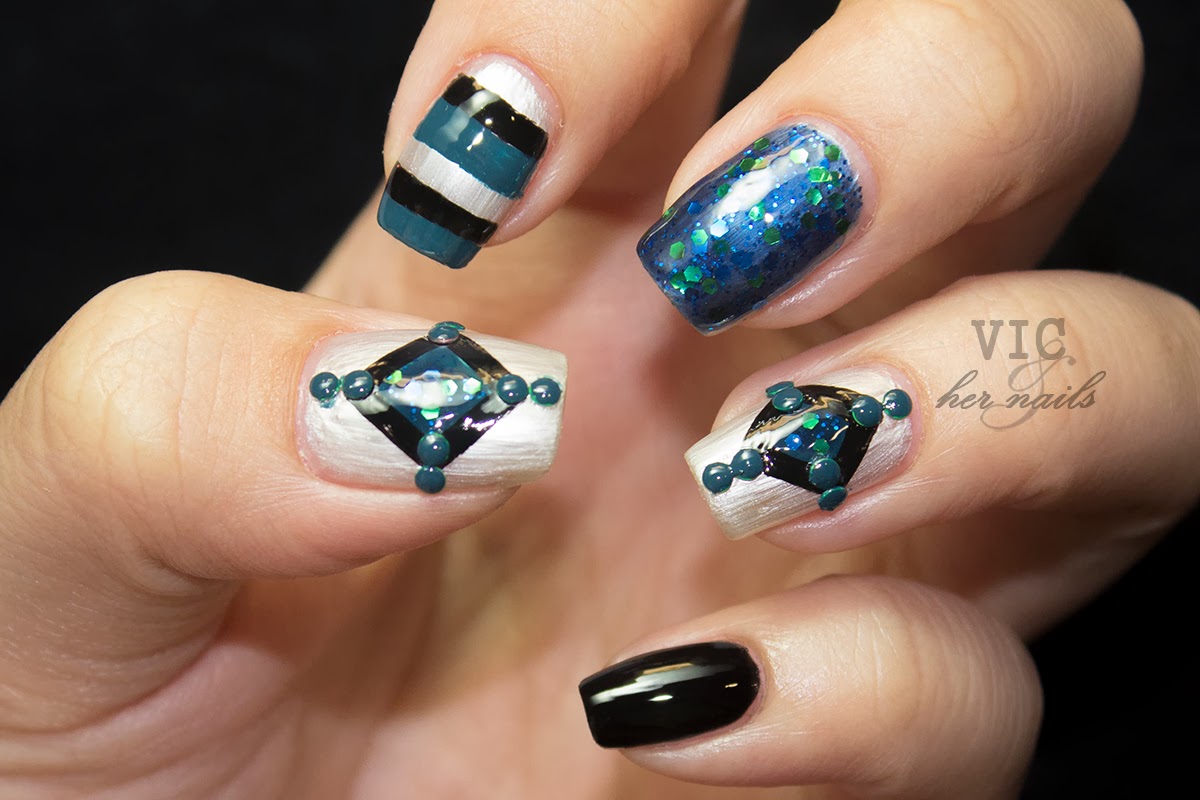
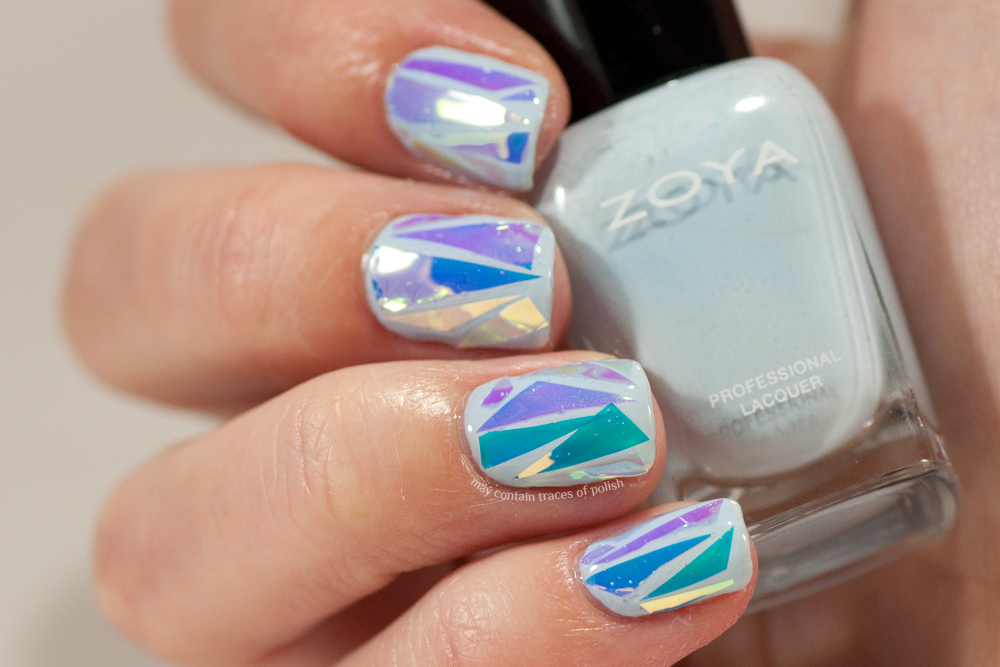
If you're looking for some inspiration for your next glass foil nail art design, look no further. We've rounded up some of the best ideas to help you create a unique and eye-catching look. For a simple but striking look, try a black or dark base with gold or silver foil accents. You can create a geometric pattern, stripes, or just add a few foil accents for a touch of glamour. If you're feeling more adventurous, try a colorful and playful look with different shades of foil on a light or neutral base. You can also mix and match different designs, like stripes and dots, for a fun and unique look. To make a statement, try a single foil accent nail on each hand. This is a great option for those who prefer a more subtle look or for those who are new to glass foil nail art. And for the holidays, why not try a festive design with red and green foil for Christmas or pastel colors for Easter? The possibilities are endless and always sure to impress.5. Best Glass Foil Nail Art Ideas


5. Best Glass Foil Nail Art Ideas

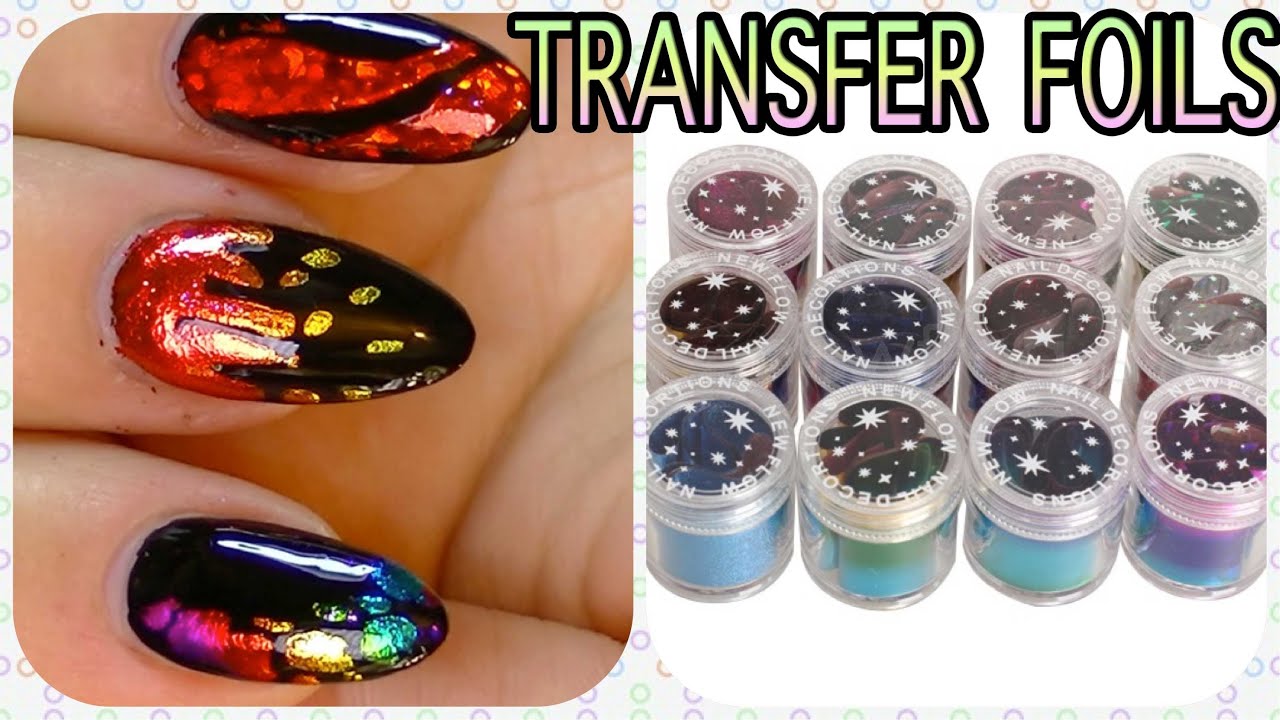

Glass foil nail art is a popular trend for its unique and eye-catching designs. If you're ready to give it a try, here are some must-have supplies to add to your collection. First and foremost, you'll need glass foil pieces in various colors and patterns. You can find these at most beauty supply stores or online. Make sure to get a variety of sizes and shapes to create different designs. You'll also need a base coat and top coat specifically designed for gel polish. These will help protect your nails and ensure your design lasts longer. A gel polish in your desired color is also a must. You can choose any color you like, but for a more dramatic effect, go for dark or bright shades. A small brush for application is also essential to ensure the foil pieces stick well to your nails. Alternatively, you can use a toothpick or the end of a makeup brush. And lastly, you'll need a UV or LED lamp to cure your nails and set the gel polish and foil. These can be found at most beauty supply stores or online.6. Glass Foil Nail Art Supplies You Need to Try


6. Glass Foil Nail Art Supplies You Need to Try


Instagram is a great platform to find inspiration for your next glass foil nail art design. Here are some accounts to follow for beautiful and creative designs. @nailsbycambria is a must-follow for all things nail art. Her glass foil designs are always unique and stunning. @justagirlandherpolish is another great account for nail art inspiration. Her glass foil designs often incorporate fun and colorful patterns. @nailartbyfrida is known for her intricate and detailed nail art, including gorgeous glass foil designs. And lastly, don't forget to follow @glassfoilnailart for even more inspiration and to share your own glass foil designs with the community.7. Glass Foil Nail Art Inspiration from Instagram
7. Glass Foil Nail Art Inspiration from Instagram

Glass foil nail art is a fun and easy way to create unique and eye-catching designs on your nails. To help you perfect your technique, here are some tips to keep in mind. First, make sure to clean your nails thoroughly before starting. Any old polish or oils can prevent the gel polish from adhering properly. When applying the gel polish, make sure to cover the entire nail and avoid getting any on your cuticles or skin. This will make the removal process easier and prevent any lifting or chipping. When placing the foil pieces, use a small brush or toothpick to gently press them onto your nail. This will ensure they stick well and prevent any air bubbles. And lastly, be patient with the curing process. Make sure to follow the instructions for your specific gel polish and cure your nails for the recommended time. This will ensure your design lasts longer.8. Tips for Perfecting Glass Foil Nail Art


8. Tips for Perfecting Glass Foil Nail Art

Glass foil nail art is always evolving, and there are always new trends to try. Here are some of the latest glass foil nail art trends to inspire your next design. Marble designs are a popular trend that incorporates glass foil pieces for a unique and stunning look. You can also try combining different colors and patterns for a more abstract marble effect. Chrome nails are also a must-try trend, where the foil is applied in a thin layer over the entire nail for a metallic finish. This trend is perfect for a futuristic and edgy look. And for a more subtle and elegant look, try incorporating foil accents into a classic French manicure. This adds a touch of glamour and makes for a modern twist on a traditional look.9. Glass Foil Nail Art Trends to Try Now

9. Glass Foil Nail Art Trends to Try Now

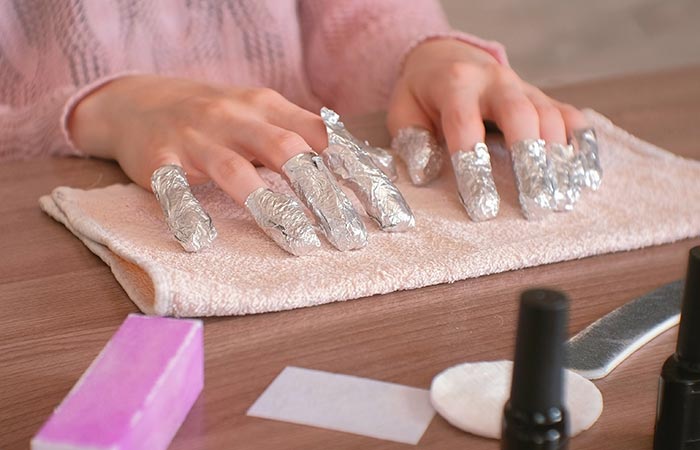
When it's time to remove your glass foil nail art, it's important to do it properly to avoid damaging your nails. Here's how to remove your glass foil design without any harm. First, gently file the top layer of the gel polish to break the seal and allow the removal solution to penetrate. Next, soak a cotton pad in acetone and place it on top of your nail. Wrap your finger in aluminum foil to keep the cotton pad in place and let it sit for 10-15 minutes. After the time has passed, gently remove the foil and cotton pad. The gel polish and foil should now be soft and easy to remove with a cuticle pusher or wooden stick. If there is still some residue, you can repeat the process until your nails are clean. Once all the gel polish and foil are removed, gently buff your nails and apply a nourishing oil or cuticle cream to restore moisture. And that's it – your nails are now ready for a new design!10. How to Remove Glass Foil Nail Art Without Damaging Your Nails

10. How to Remove Glass Foil Nail Art Without Damaging Your Nails


The Beauty of Glass Foil Nail Art for Your Home Design

Add Some Sparkle to Your Home
 When it comes to home design, the possibilities are endless. From wall colors to furniture, every little detail plays a crucial role in creating the perfect ambiance. And what better way to add some glamour and sparkle to your home than with
glass foil nail art
? This unique and eye-catching design trend has taken the world of interior design by storm, bringing a touch of elegance and sophistication to any space.
When it comes to home design, the possibilities are endless. From wall colors to furniture, every little detail plays a crucial role in creating the perfect ambiance. And what better way to add some glamour and sparkle to your home than with
glass foil nail art
? This unique and eye-catching design trend has taken the world of interior design by storm, bringing a touch of elegance and sophistication to any space.
What is Glass Foil Nail Art?
 Before we dive into how
glass foil nail art
can elevate your home design, let's first understand what it is. Also known as
foiled glass
, this technique involves applying thin sheets of metallic foil onto glass surfaces, creating a stunning and reflective effect. The foil comes in various colors and patterns, allowing for endless design possibilities.
Before we dive into how
glass foil nail art
can elevate your home design, let's first understand what it is. Also known as
foiled glass
, this technique involves applying thin sheets of metallic foil onto glass surfaces, creating a stunning and reflective effect. The foil comes in various colors and patterns, allowing for endless design possibilities.
Transform Your Room with Glass Foil Nail Art
 One of the main reasons why
glass foil nail art
has become a popular choice among interior designers is its ability to transform any room into a luxurious and stylish space. Whether it's a statement wall in the living room, a backsplash in the kitchen, or even a bathroom mirror, adding this unique element instantly adds a touch of glamour and sophistication.
One of the main reasons why
glass foil nail art
has become a popular choice among interior designers is its ability to transform any room into a luxurious and stylish space. Whether it's a statement wall in the living room, a backsplash in the kitchen, or even a bathroom mirror, adding this unique element instantly adds a touch of glamour and sophistication.
Endless Design Possibilities
 With
glass foil nail art
, the sky's the limit when it comes to design possibilities. You can choose from a variety of colors, patterns, and textures to create a look that complements your home's overall design aesthetic. You can also mix and match different foils to create a one-of-a-kind design that truly reflects your style and personality.
With
glass foil nail art
, the sky's the limit when it comes to design possibilities. You can choose from a variety of colors, patterns, and textures to create a look that complements your home's overall design aesthetic. You can also mix and match different foils to create a one-of-a-kind design that truly reflects your style and personality.
The Durability and Low Maintenance of Foiled Glass
 Apart from its aesthetic appeal,
glass foil nail art
is also a practical choice for your home. The foils are durable and long-lasting, making them suitable for high-traffic areas. They are also easy to clean and maintain, making them a hassle-free addition to your home design.
Apart from its aesthetic appeal,
glass foil nail art
is also a practical choice for your home. The foils are durable and long-lasting, making them suitable for high-traffic areas. They are also easy to clean and maintain, making them a hassle-free addition to your home design.
In Conclusion
 Incorporating
glass foil nail art
into your home design is a surefire way to add a touch of elegance and luxury. With its endless design possibilities, durability, and low maintenance, it's no wonder this trend is gaining popularity among homeowners and interior designers alike. So why not add some sparkle and shine to your home with
glass foil nail art
today?
Incorporating
glass foil nail art
into your home design is a surefire way to add a touch of elegance and luxury. With its endless design possibilities, durability, and low maintenance, it's no wonder this trend is gaining popularity among homeowners and interior designers alike. So why not add some sparkle and shine to your home with
glass foil nail art
today?


