Are you tired of the same old solid color nail designs? Why not try something new and exciting with a gradient sponge nail art? This style is a fun and easy way to add a pop of color to your nails, and the best part is, you don't need any fancy tools or skills to achieve it. In this tutorial, we will guide you through the steps to create a beautiful gradient sponge nail art that will surely make your nails stand out. To start, you will need a few things:1. Gradient Sponge Nail Art Tutorial


1. Gradient Sponge Nail Art Tutorial


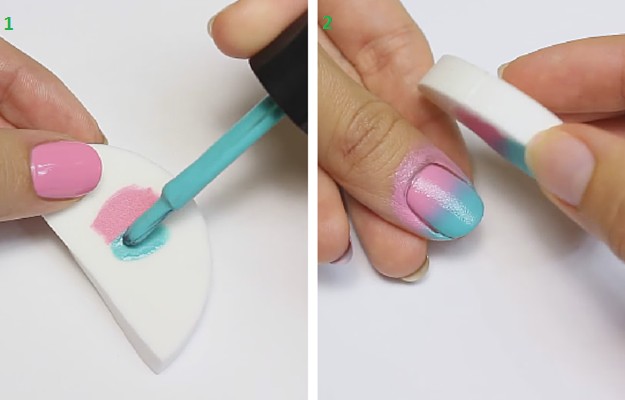
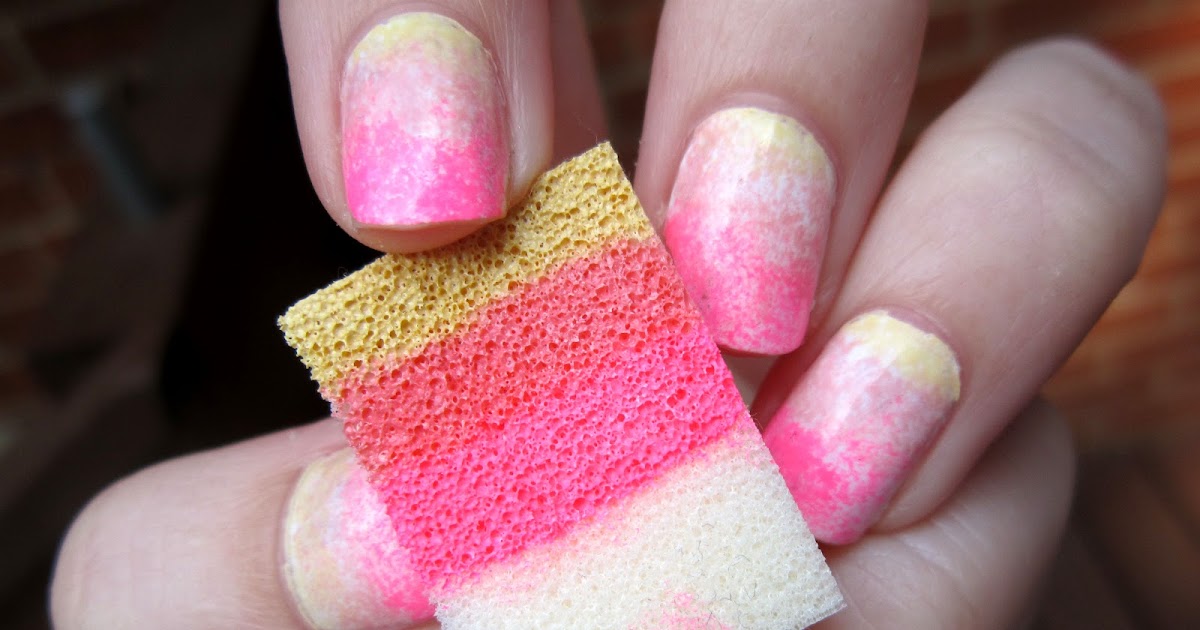
Step 1: Begin by applying a base coat to protect your nails from staining and to help the nail polish adhere better. Let it dry completely. Step 2: Pick your first nail polish color and apply it to the top half of your nails. You can use a brush or the polish itself to create a thick line across the middle of your nail. Step 3: Take your makeup sponge and cut a small piece that is big enough to cover your nail. Apply a few drops of your second color onto the sponge, making sure to overlap the first color slightly. Step 4: Gently dab the sponge onto your nail, starting from the top and working your way down. You may need to do this a few times to get the desired opacity and blend of colors. Step 5: Once you are happy with the gradient effect, clean up any excess polish around the edges of your nail using a cotton swab dipped in nail polish remover. Step 6: Repeat the process on the rest of your nails and let them dry completely before moving on to the next step.2. How to Create a Gradient Sponge Nail Art Design


2. How to Create a Gradient Sponge Nail Art Design


Now that you have mastered the technique, let's explore some of the best gradient sponge nail art ideas to inspire your next manicure:3. Best Gradient Sponge Nail Art Ideas


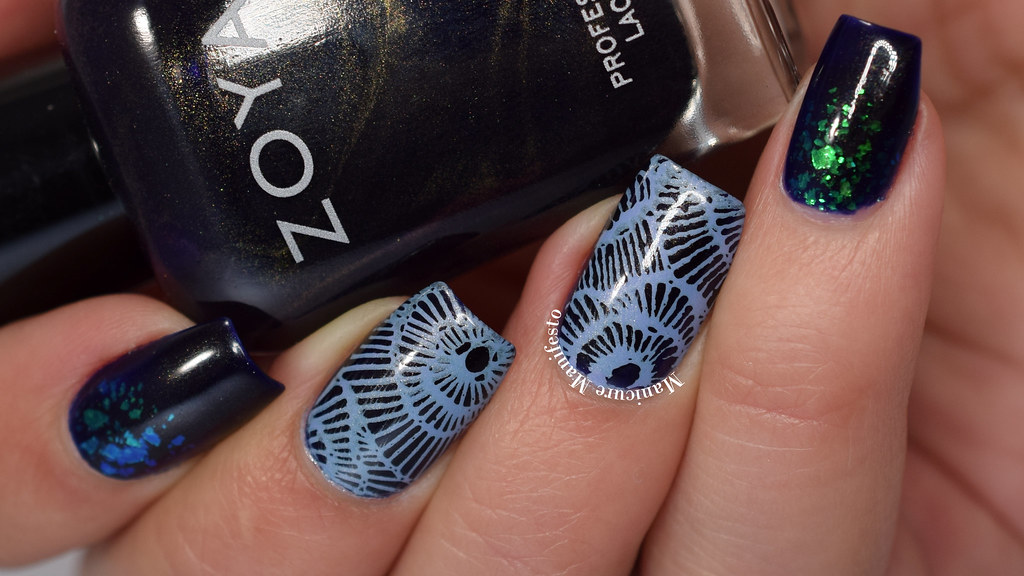
3. Best Gradient Sponge Nail Art Ideas

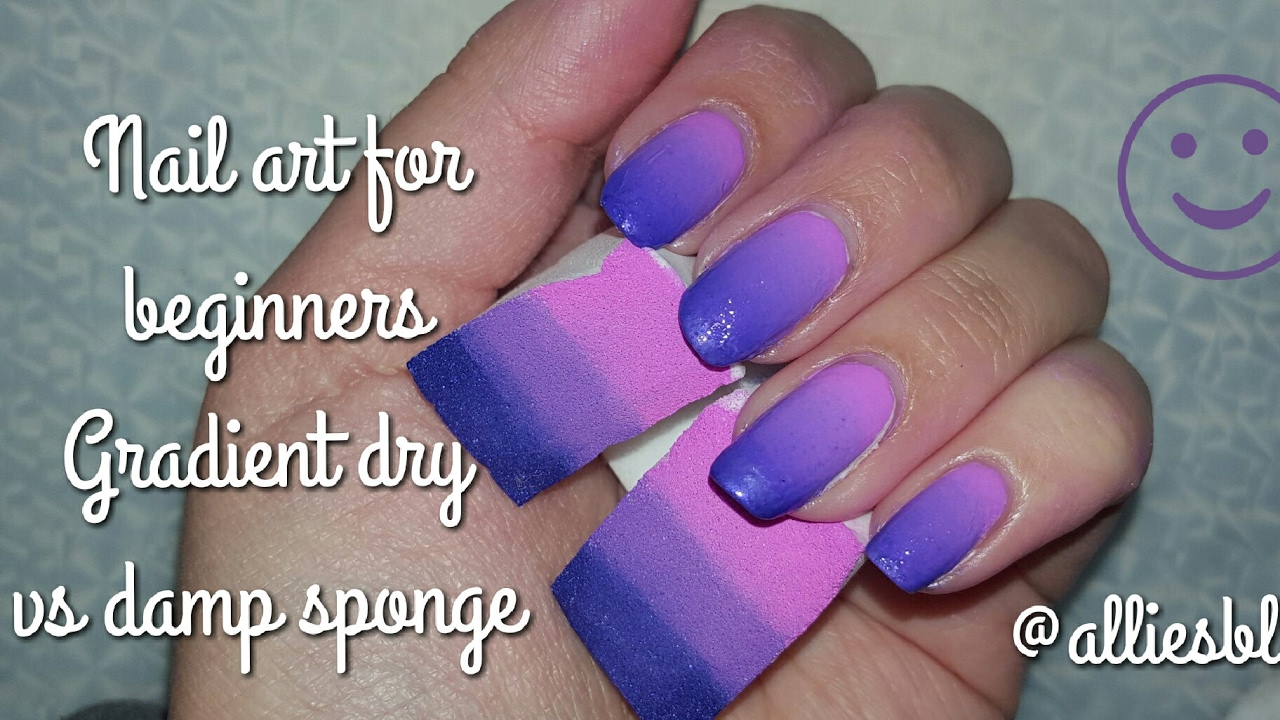
If you are new to nail art, don't worry, the gradient sponge technique is perfect for beginners. It is a forgiving and versatile method that allows for some imperfections and experimentation. Start with two colors and gradually add more as you become more comfortable with the technique. Remember to practice on a piece of paper or a spare nail before attempting it on your nails.4. Gradient Sponge Nail Art for Beginners


4. Gradient Sponge Nail Art for Beginners
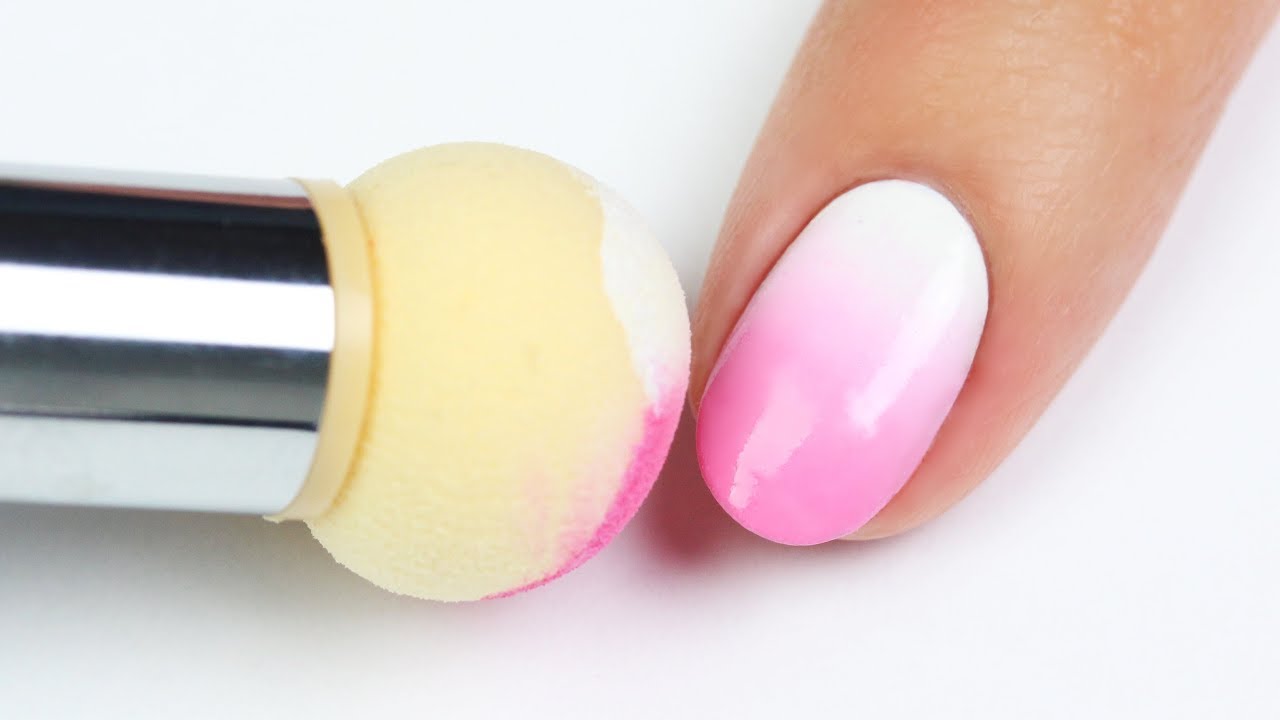

For a more detailed guide on how to create a gradient sponge nail art, follow these step-by-step instructions:5. Step-by-Step Gradient Sponge Nail Art Guide

5. Step-by-Step Gradient Sponge Nail Art Guide


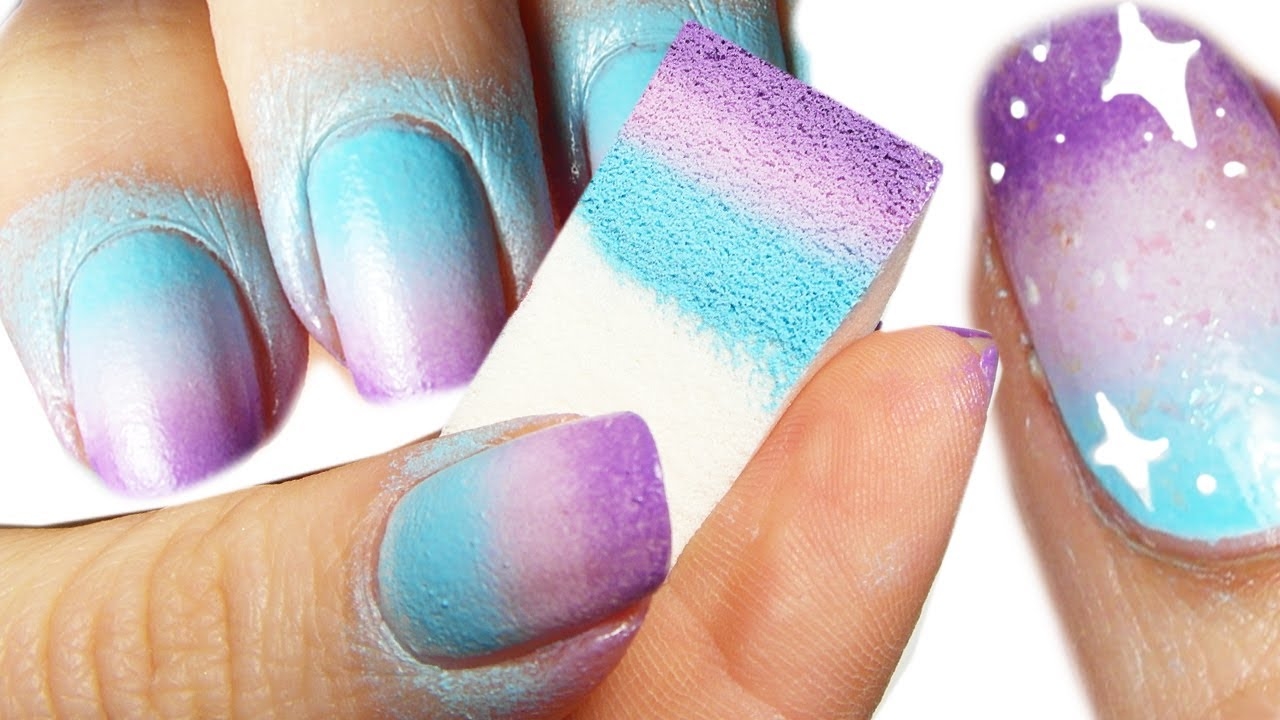
There are a few techniques you can use to create different effects with a gradient sponge nail art:6. Gradient Sponge Nail Art Techniques

6. Gradient Sponge Nail Art Techniques
Still looking for more inspiration? Check out Instagram or Pinterest for endless ideas and designs. Don't be afraid to experiment and make the design your own by adding your own personal touches.7. Gradient Sponge Nail Art Inspiration

7. Gradient Sponge Nail Art Inspiration

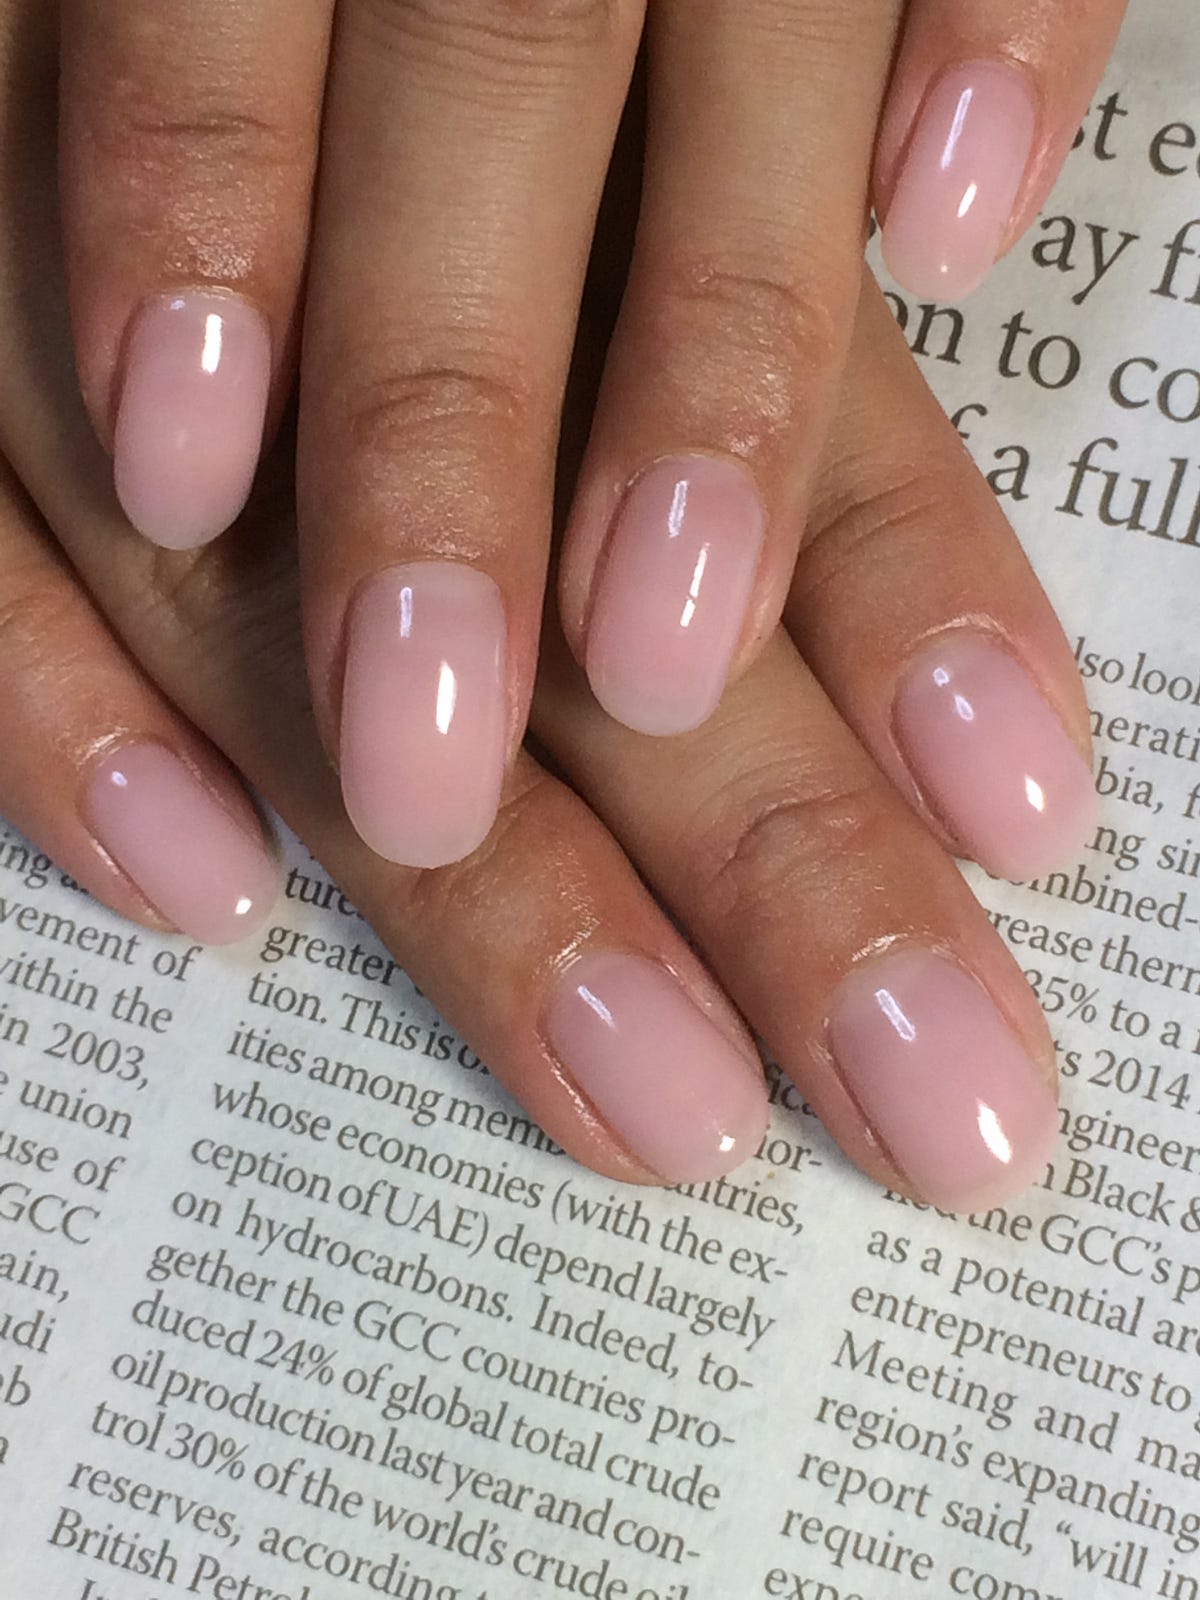
Short nails can also rock a gradient sponge nail art. Try using lighter colors and sponging on a smaller area to create a subtle and delicate gradient effect. You can also use the technique to create a French manicure with a twist by blending a nude base with a white tip.8. Gradient Sponge Nail Art Designs for Short Nails


8. Gradient Sponge Nail Art Designs for Short Nails


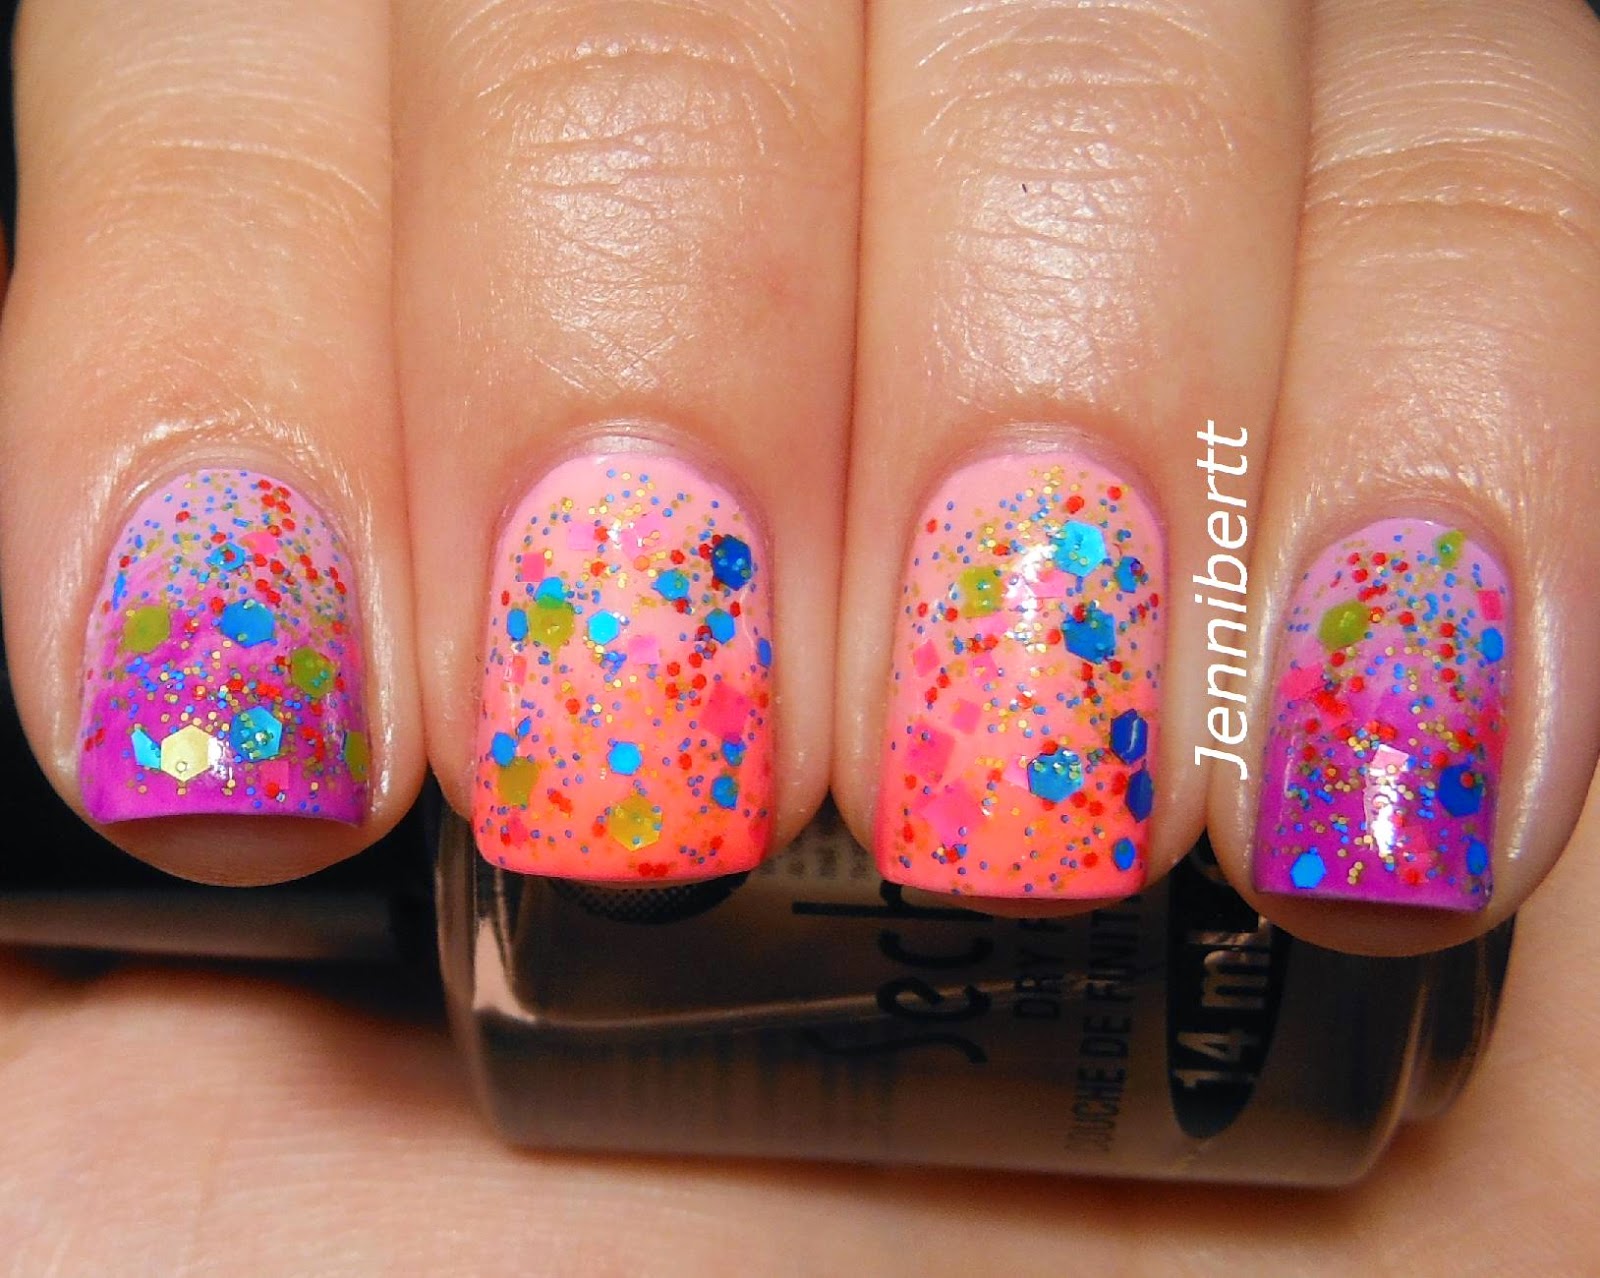
For a touch of glamour, add some glitter to your gradient sponge nail art. You can either sponge on a glitter polish or use loose glitter to create a gradient effect. Just make sure to seal it in with a top coat to prevent any glitter fallout.9. Gradient Sponge Nail Art with Glitter

9. Gradient Sponge Nail Art with Glitter
Take your gradient sponge nail art to the next level by creating an ombre effect. Instead of using two colors, use three or four shades of the same color and blend them together for a seamless and gradient look. This works particularly well with blues, purples, and pinks. With this tutorial and ideas, you are now ready to create your own beautiful gradient sponge nail art. Get creative and have fun with it! Remember to share your designs with us on social media. Happy sponging!10. Gradient Sponge Nail Art with Ombre Effect


10. Gradient Sponge Nail Art with Ombre Effect


The Beauty of Gradation Sponge Nail Art

Creating a Unique Look for Your Nails
 When it comes to nail art, there are endless possibilities to express your creativity and style. One trend that has been gaining popularity in recent years is gradation sponge nail art. This technique involves using a sponge to create a gradient effect on your nails, giving them a unique and eye-catching look. Not only is it easy to do at home, but it also allows you to experiment with different colors and designs to match your mood or outfit. In this article, we will explore the beauty of gradation sponge nail art and how you can achieve this look yourself.
Step-by-Step Guide
 The first step in creating gradation sponge nail art is to prepare your nails. Start by filing and shaping your nails to your desired length and shape. Next, apply a base coat to protect your nails and help the polish last longer. Once the base coat is dry, choose your desired colors for the gradient effect. You can use two or more colors, depending on the design you want to achieve.
Pro tip:
Choose colors that complement each other for a seamless gradient look.
Next, take a makeup sponge and cut it into small pieces.
Pro tip:
The denser the sponge, the better the gradient effect will be.
Apply a few drops of each chosen color onto the sponge, making sure to overlap them slightly. Then, gently dab the sponge onto your nails, starting at the tip and working your way up towards the base of your nails. Repeat this step until you achieve the desired gradient effect.
Pro tip:
You can use a clean part of the sponge for each nail to avoid mixing colors.
The first step in creating gradation sponge nail art is to prepare your nails. Start by filing and shaping your nails to your desired length and shape. Next, apply a base coat to protect your nails and help the polish last longer. Once the base coat is dry, choose your desired colors for the gradient effect. You can use two or more colors, depending on the design you want to achieve.
Pro tip:
Choose colors that complement each other for a seamless gradient look.
Next, take a makeup sponge and cut it into small pieces.
Pro tip:
The denser the sponge, the better the gradient effect will be.
Apply a few drops of each chosen color onto the sponge, making sure to overlap them slightly. Then, gently dab the sponge onto your nails, starting at the tip and working your way up towards the base of your nails. Repeat this step until you achieve the desired gradient effect.
Pro tip:
You can use a clean part of the sponge for each nail to avoid mixing colors.
Adding the Final Touches
 Once the gradient effect is achieved, let the polish dry completely before moving on to the next step. Next, use a small brush dipped in nail polish remover to clean up any excess polish around your nails. This will give your nails a clean and polished look.
Pro tip:
You can also use a q-tip dipped in nail polish remover for easier clean-up.
Finally, apply a top coat to seal and protect your design, and your gradation sponge nail art is complete!
Once the gradient effect is achieved, let the polish dry completely before moving on to the next step. Next, use a small brush dipped in nail polish remover to clean up any excess polish around your nails. This will give your nails a clean and polished look.
Pro tip:
You can also use a q-tip dipped in nail polish remover for easier clean-up.
Finally, apply a top coat to seal and protect your design, and your gradation sponge nail art is complete!
Unleash Your Creativity
 The beauty of gradation sponge nail art is its versatility. You can experiment with different color combinations, designs, and even add glitter or rhinestones for a more glamorous look. It's a fun and easy way to express your style and add a pop of color to your overall look. So why not give it a try and unleash your creativity with gradation sponge nail art?
In conclusion, gradation sponge nail art is a trendy and unique way to elevate your nail game. With just a few simple steps, you can achieve a beautiful and eye-catching look that is sure to turn heads. So next time you're looking to add a little something extra to your nails, remember the beauty of gradation sponge nail art.
The beauty of gradation sponge nail art is its versatility. You can experiment with different color combinations, designs, and even add glitter or rhinestones for a more glamorous look. It's a fun and easy way to express your style and add a pop of color to your overall look. So why not give it a try and unleash your creativity with gradation sponge nail art?
In conclusion, gradation sponge nail art is a trendy and unique way to elevate your nail game. With just a few simple steps, you can achieve a beautiful and eye-catching look that is sure to turn heads. So next time you're looking to add a little something extra to your nails, remember the beauty of gradation sponge nail art.


