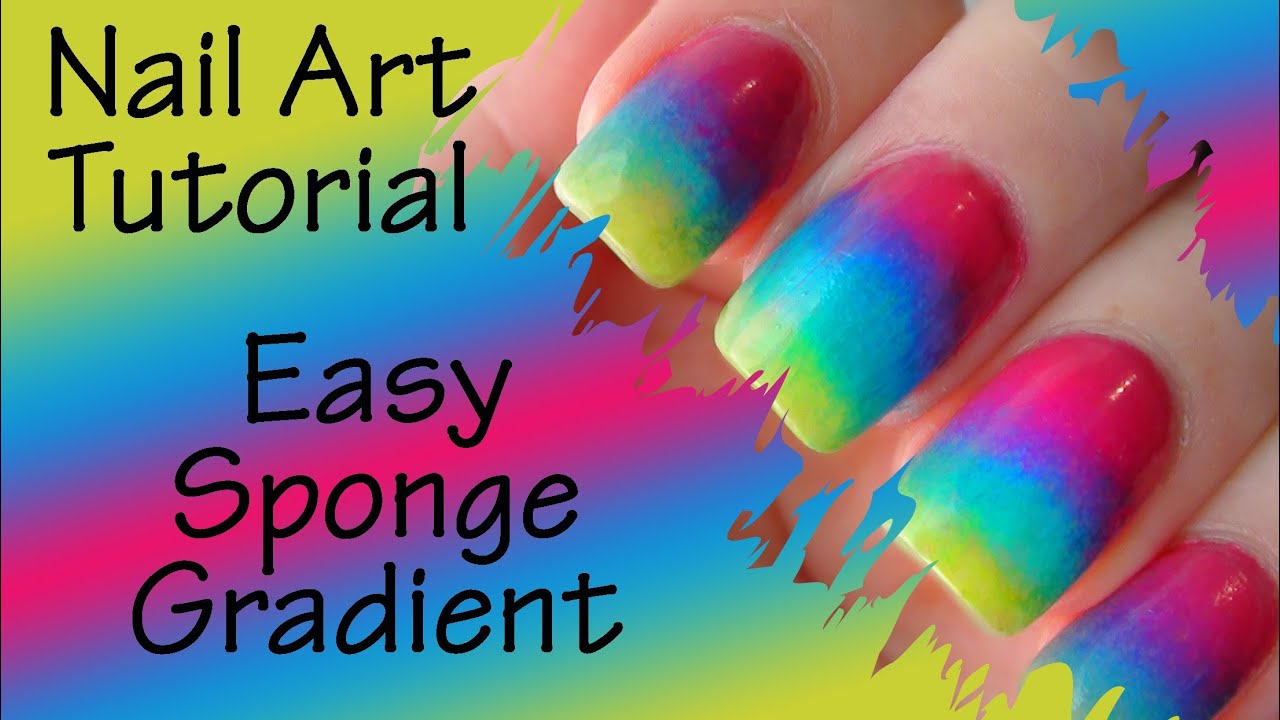
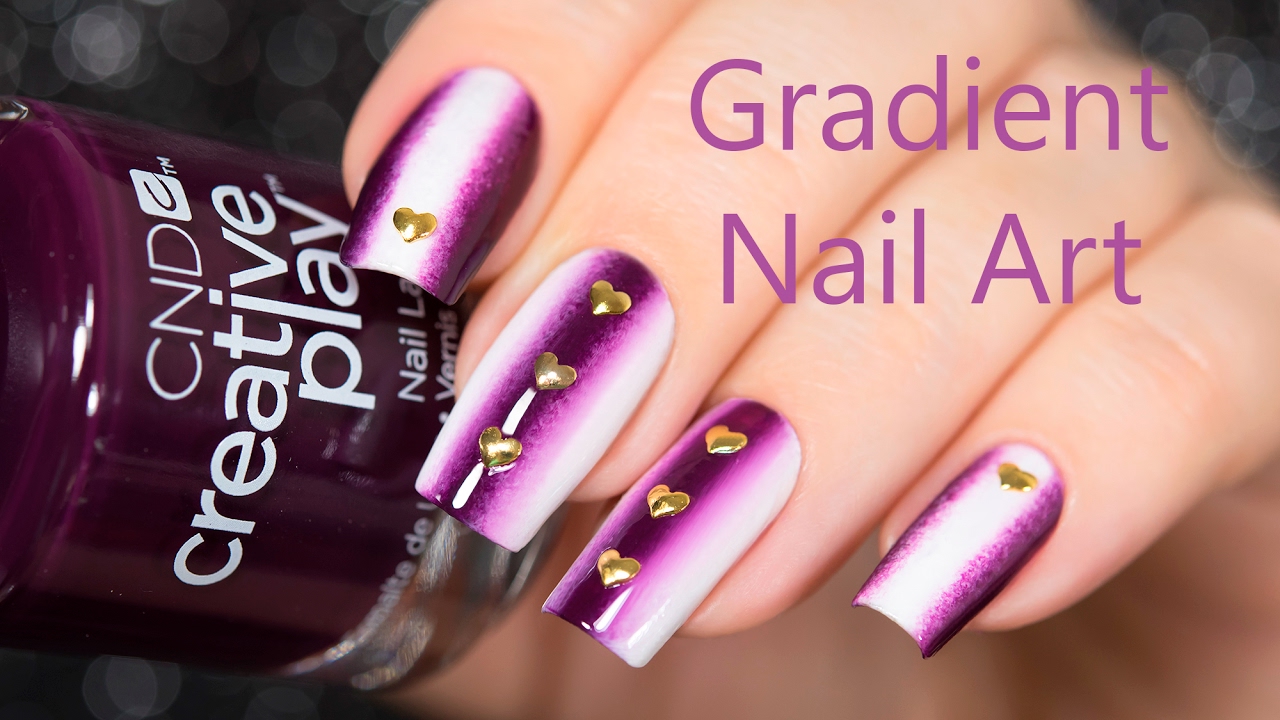
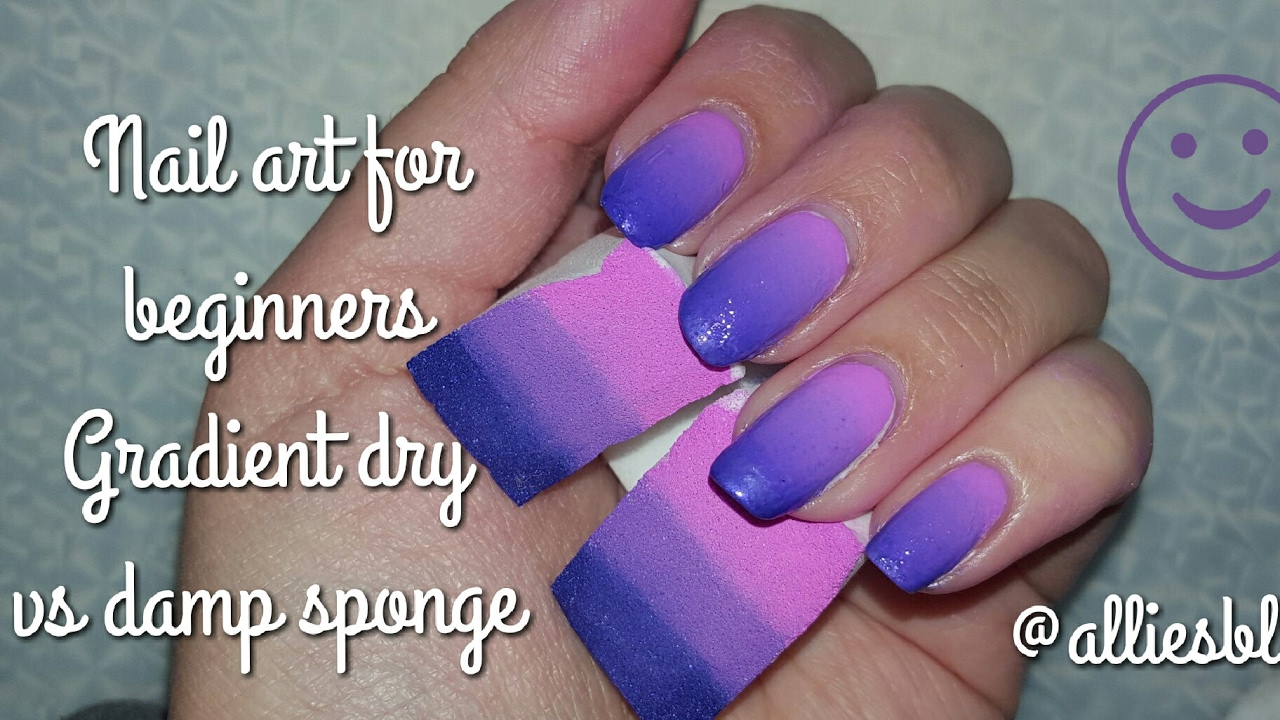
If you're tired of the same old solid color nail polish, it's time to try out some new techniques. One of the easiest and most popular nail art techniques is creating a gradient effect using a sponge. It may sound intimidating, but with the right tools and a little practice, you can achieve a professional-looking gradient nail art in no time. To get started, you will need a makeup sponge, two or more nail polish colors, a top coat, and a base coat. It's important to have a base coat to protect your nails and make the gradient colors stand out. You can also use a white or light-colored base to make the gradient more vibrant. Featured keywords: gradient nail art, sponge, easy, popular, professional-looking, makeup sponge, nail polish, top coat, base coat, protect, vibrant.1. How to Create a Gradient Nail Art with a Sponge


1. How to Create a Gradient Nail Art with a Sponge


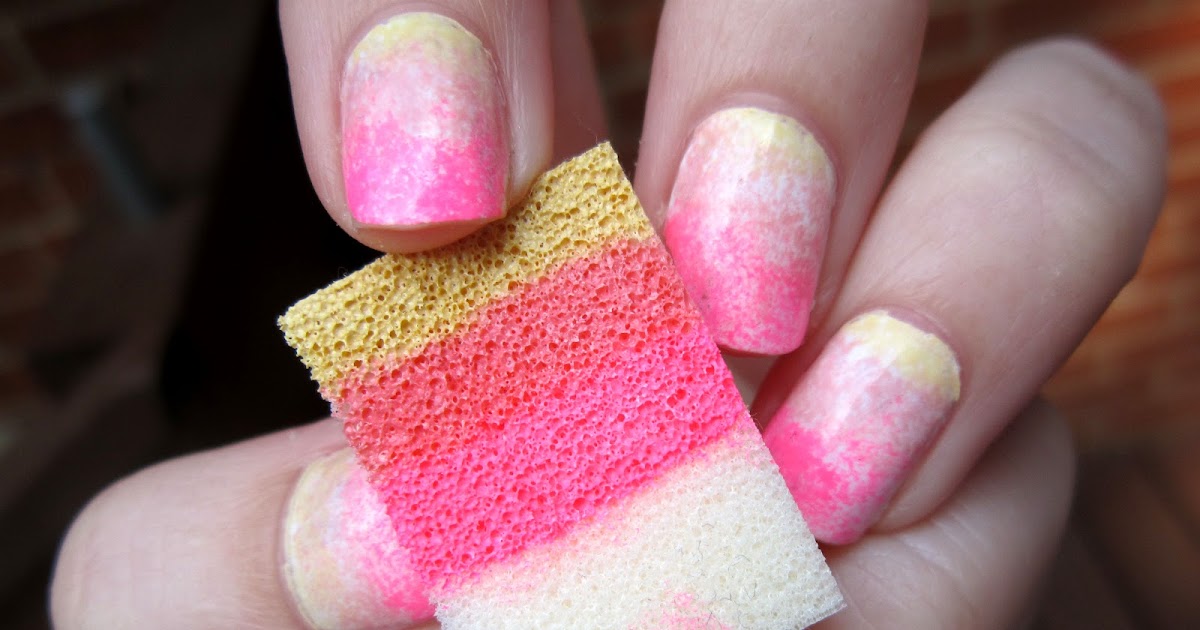
If you're new to creating gradient nail art, it's best to start with a simple tutorial. Begin by painting your nails with a base coat and let it dry completely. Then, take your makeup sponge and apply a few drops of your chosen nail polish colors onto it, making sure they slightly overlap. Dab the sponge gently onto your nails in a rolling motion, starting from the tip and moving towards the base of your nails. Repeat this process until you achieve the desired gradient effect. You can also use a clean part of the sponge to blend the colors together for a smoother gradient. Finish off with a top coat to seal in your design and give it a glossy finish. Featured keywords: easy, sponge, gradient nail art, tutorial, base coat, makeup sponge, nail polish, dab, rolling motion, tip, base, desired, blend, top coat, glossy finish.2. Easy Sponge Gradient Nail Art Tutorial


2. Easy Sponge Gradient Nail Art Tutorial


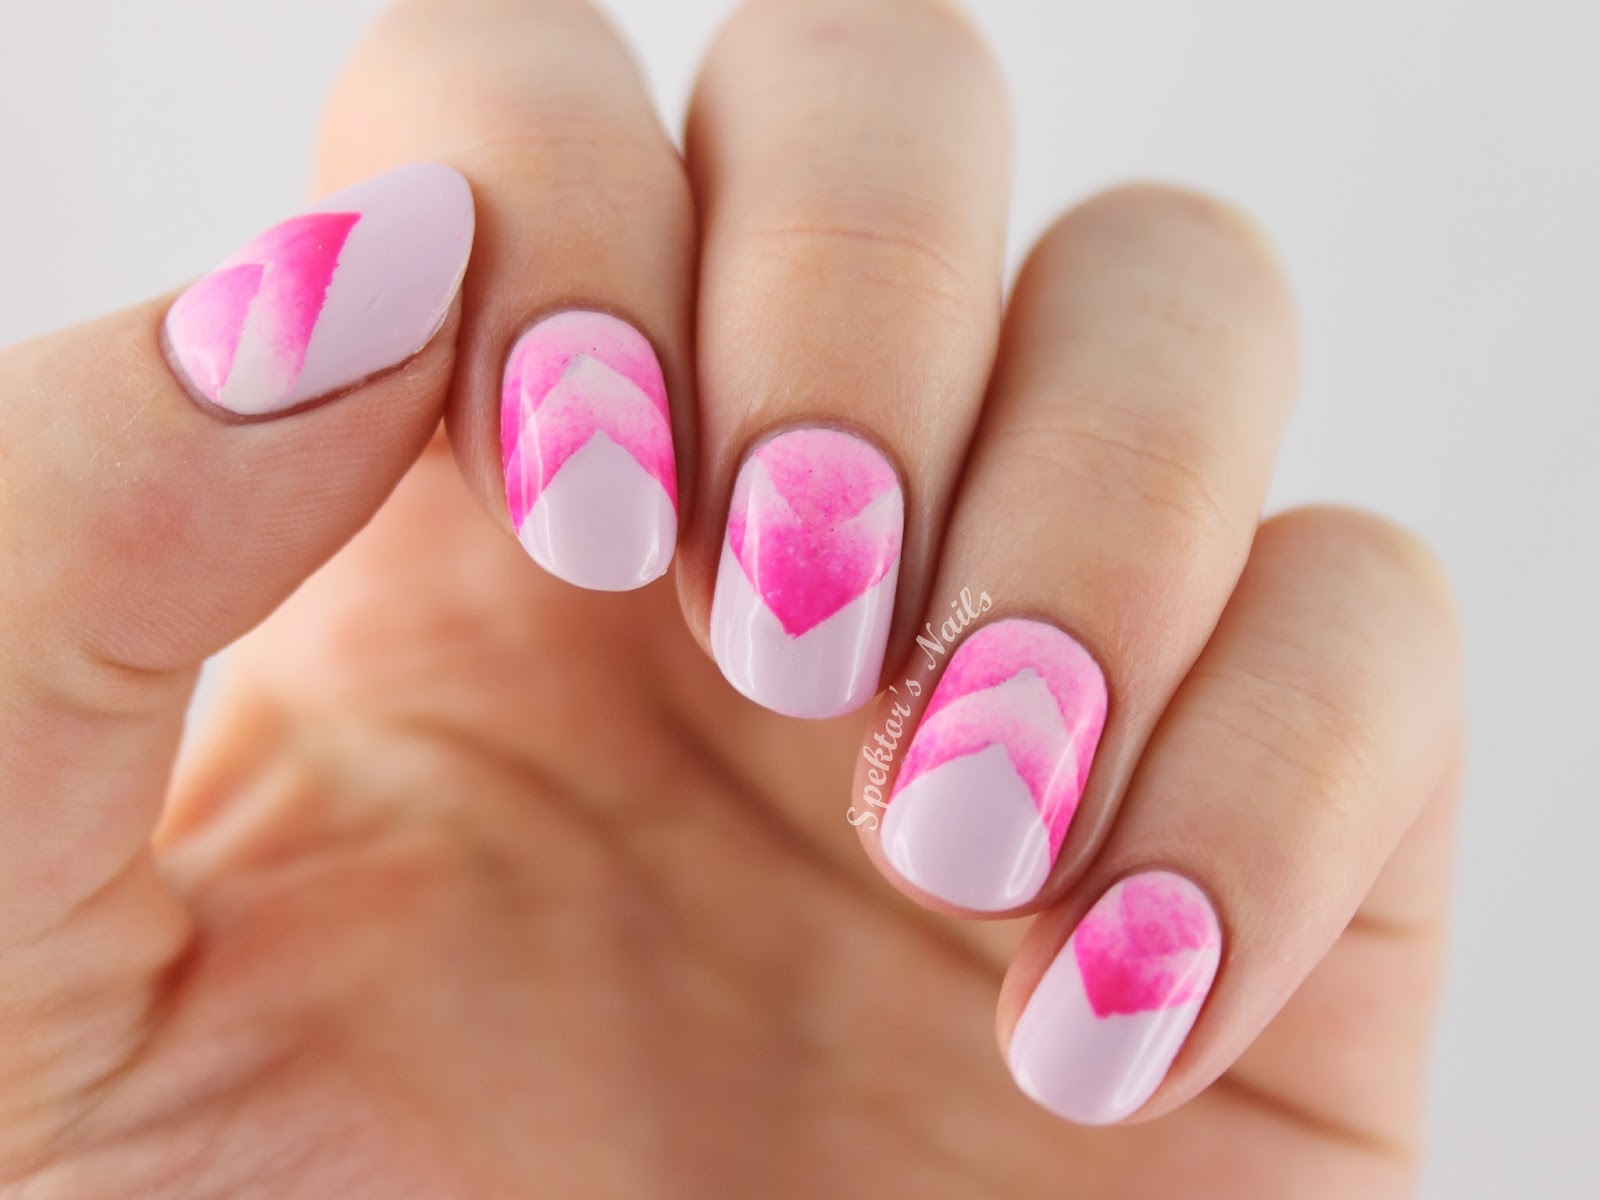
If you want to add some texture to your gradient nail art, you can try using plastic wrap instead of a sponge. After applying your base coat and letting it dry, paint your chosen colors onto the plastic wrap in a random pattern. Then, press the plastic wrap onto your nails, gently rolling it to transfer the colors. You can also add more colors and repeat the process until you achieve your desired look. This technique creates a unique and abstract gradient effect, perfect for those who want to experiment with their nail art. Finish off with a top coat to seal in the design and add shine. Featured keywords: gradient nail art, sponge, plastic wrap, texture, base coat, paint, random, press, transfer, abstract, experiment, top coat, seal, shine.3. Gradient Nail Art with Sponge and Plastic Wrap


3. Gradient Nail Art with Sponge and Plastic Wrap

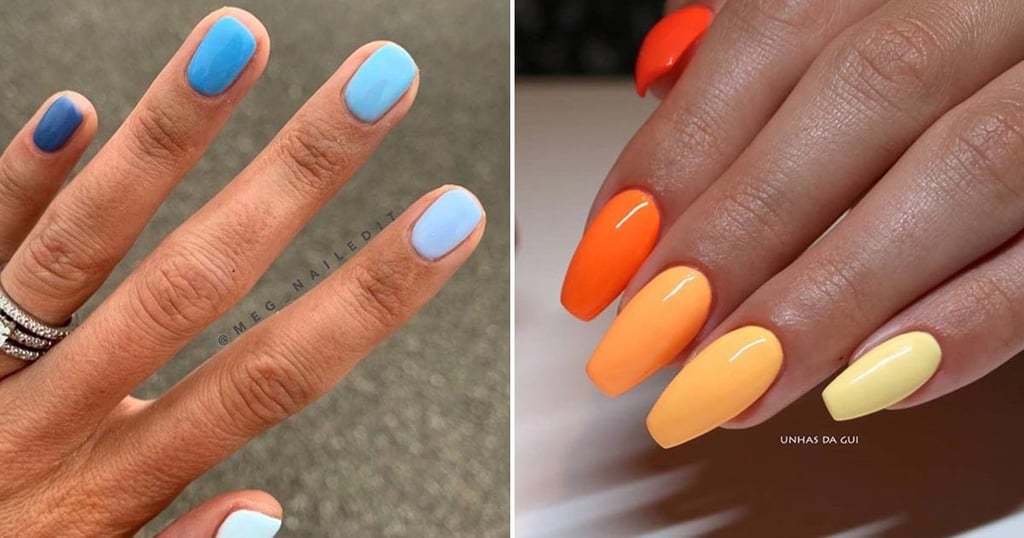
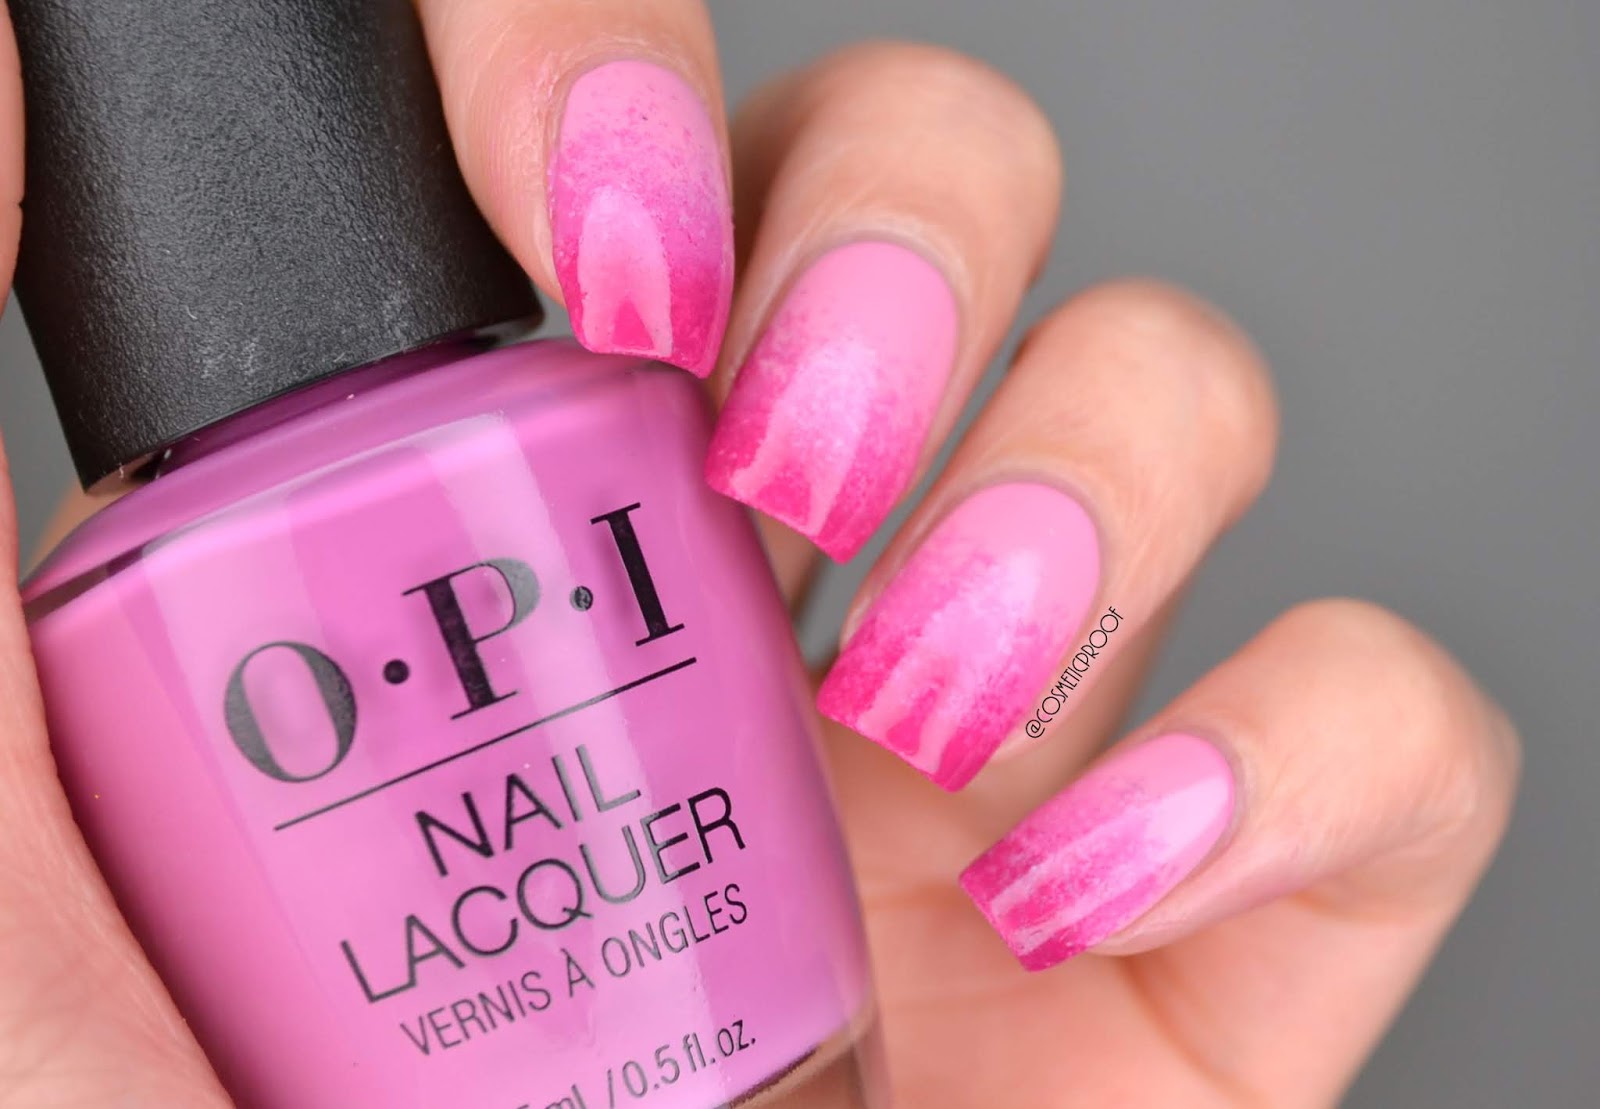
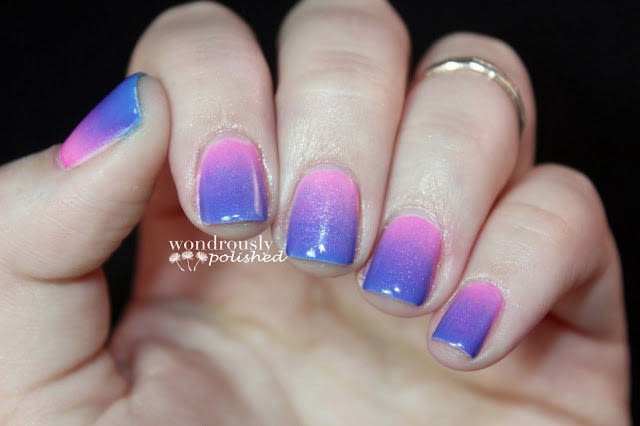
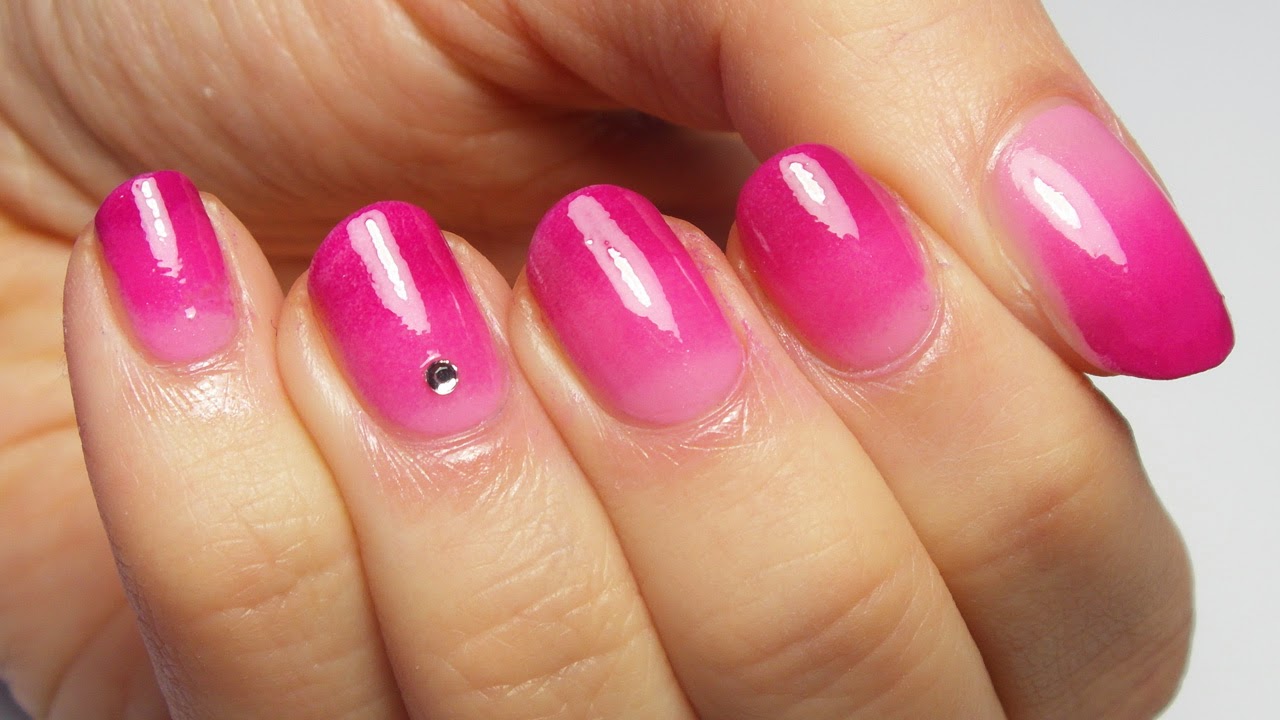
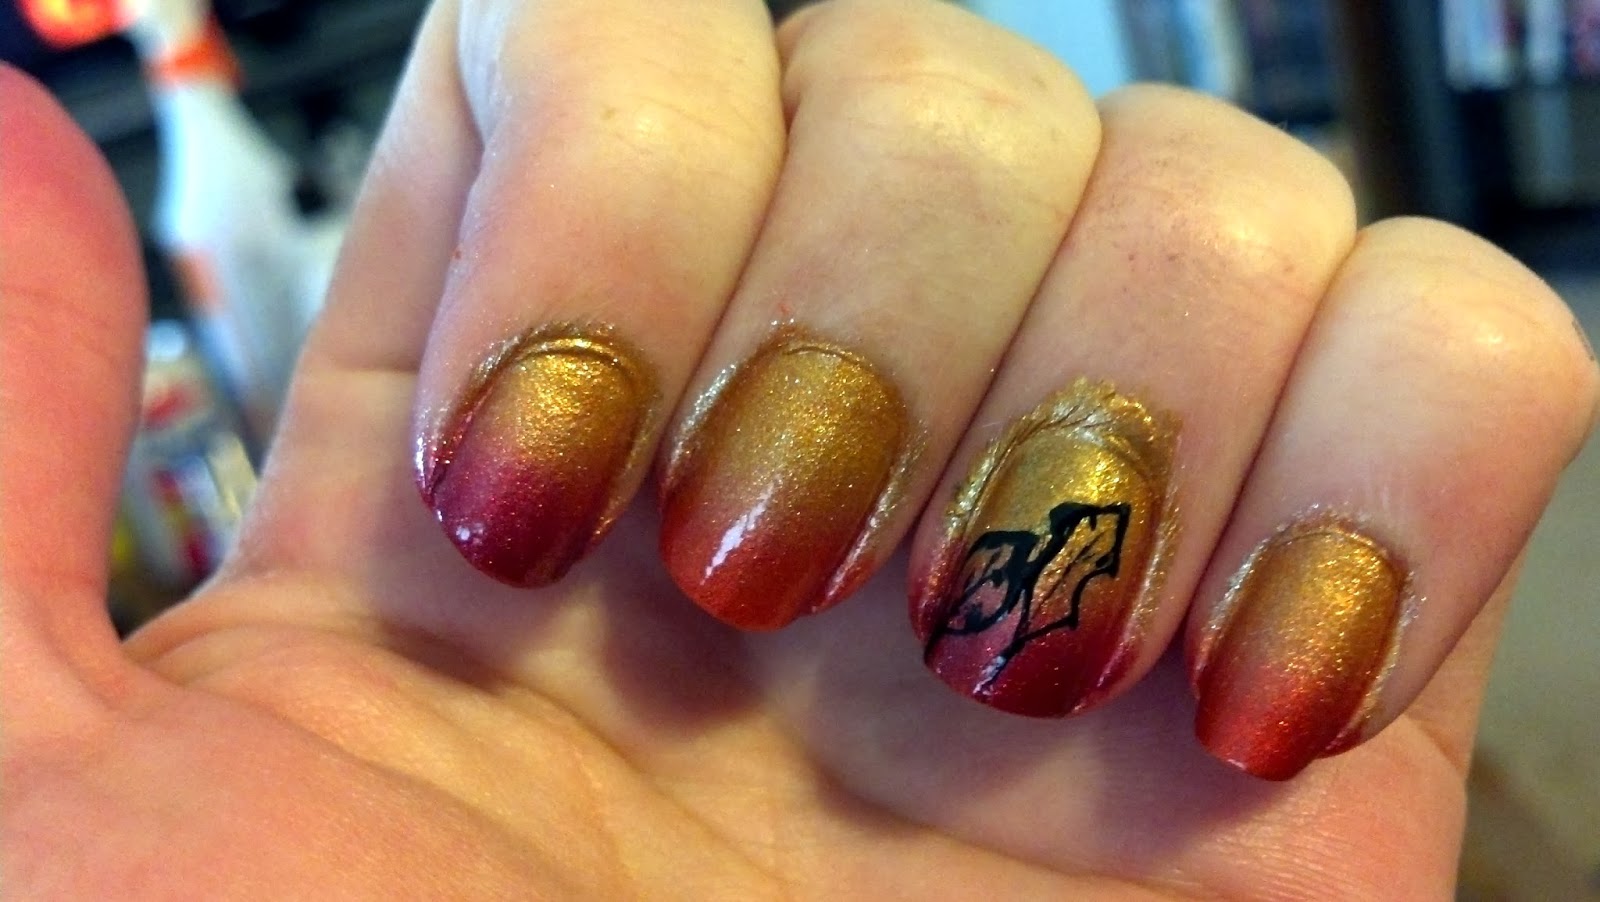
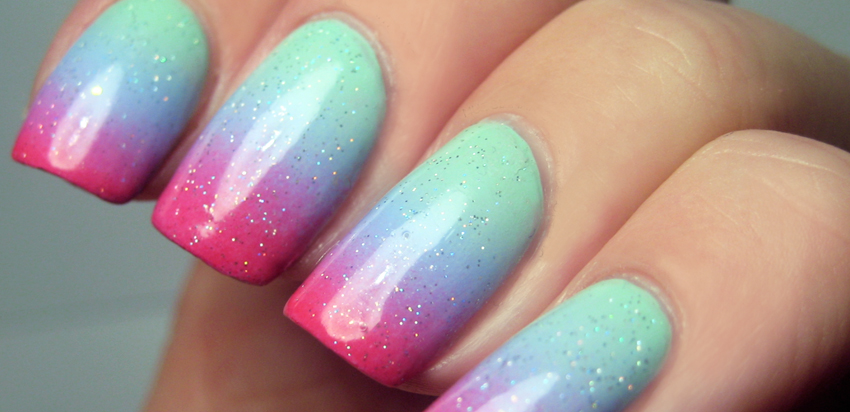
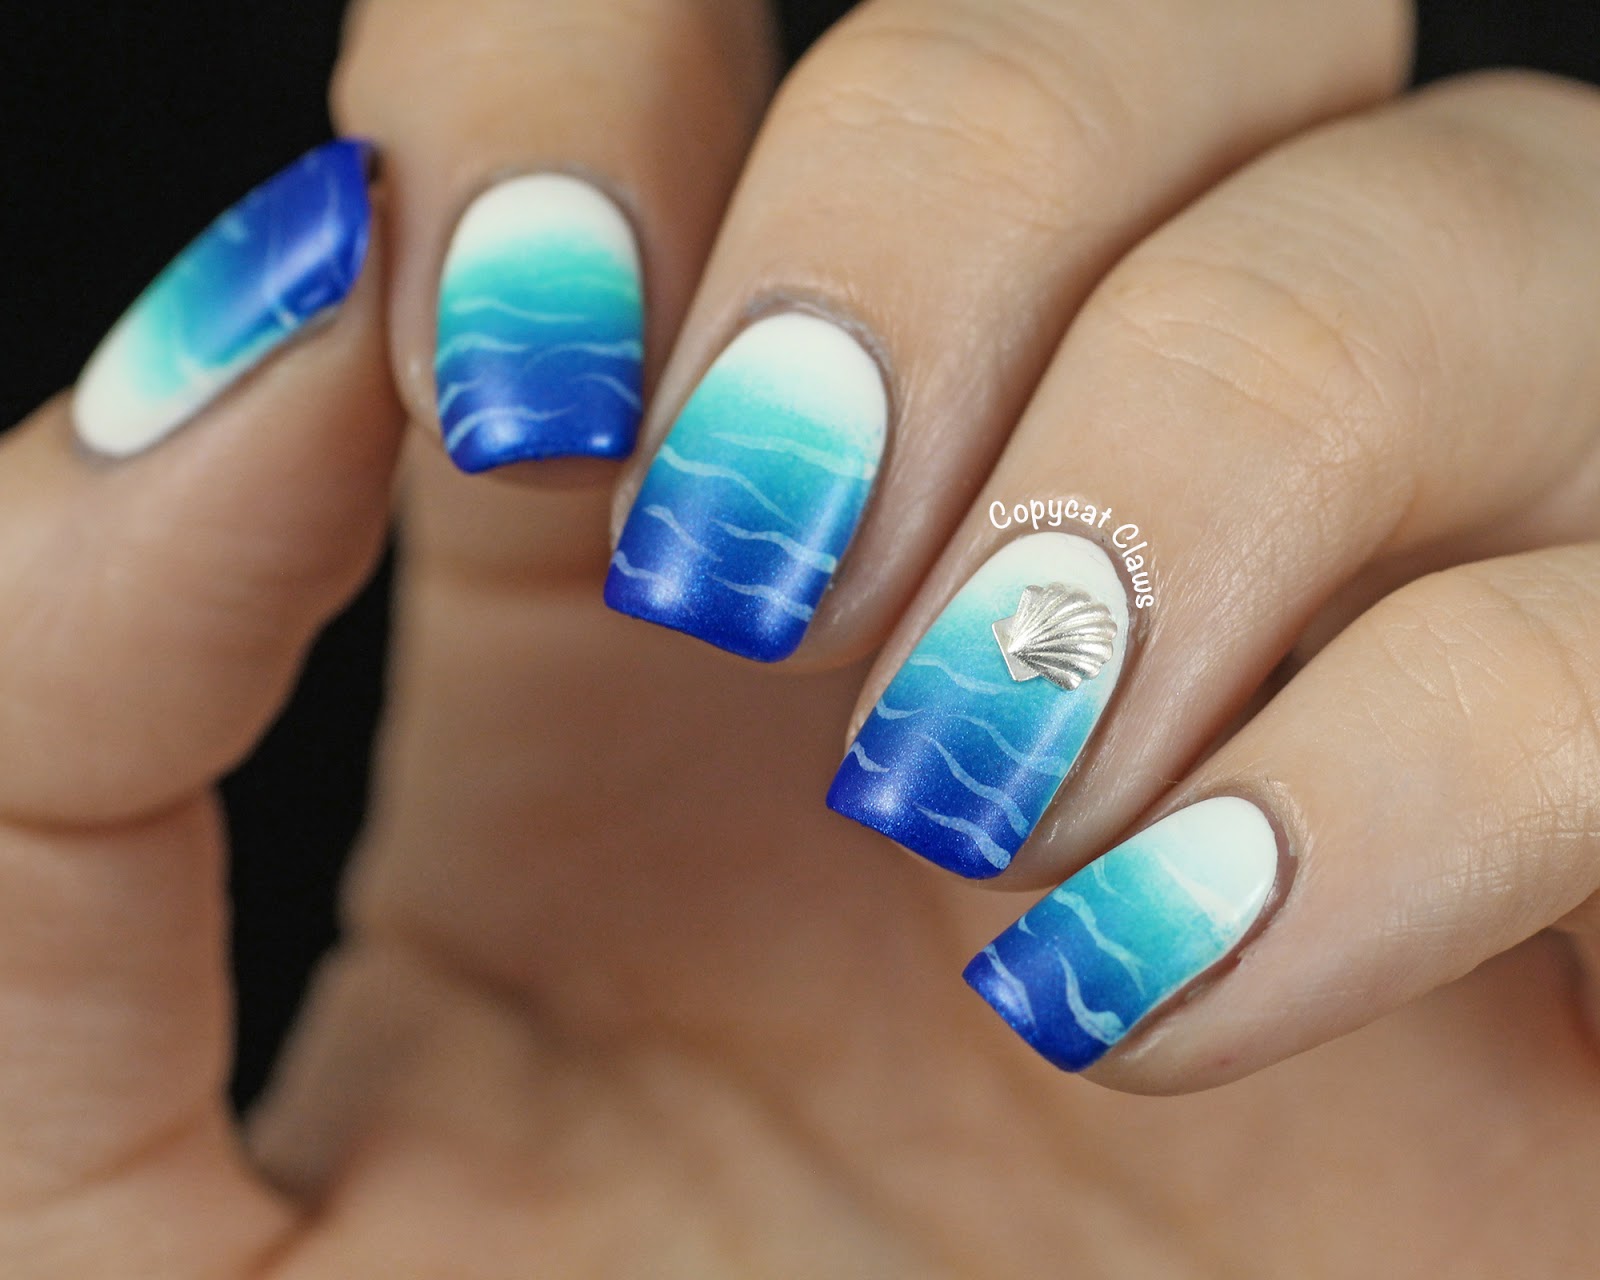
If you're a fan of the ombre trend, you can easily achieve this look with a sponge. After applying your base coat and letting it dry, paint your nails with your chosen base color. Then, take your makeup sponge and apply a few drops of a lighter shade of the same color onto it. Dab the sponge gently onto the tips of your nails, gradually fading the color towards the base. You can also use multiple colors to create a rainbow ombre effect. Finish off with a top coat to seal in your design and give it a smooth finish. Featured keywords: ombre, sponge, nail art, tutorial, base coat, dry, paint, lighter shade, dab, tips, gradually, fade, multiple colors, rainbow, smooth finish.4. Ombre Sponge Nail Art Tutorial


4. Ombre Sponge Nail Art Tutorial


Creating gradient nail art doesn't have to be expensive. You can easily achieve this look with a DIY makeup sponge. Cut a small piece of a makeup sponge and apply your chosen nail polish colors onto it. Then, follow the same process of dabbing the sponge onto your nails in a rolling motion to create a gradient effect. This is a great technique for those on a budget or for those who like to get creative and make their own tools. Finish off with a top coat to seal in your design and give it a professional touch. Featured keywords: DIY, gradient nail art, makeup sponge, expensive, dabbing, rolling motion, budget, creative, tools, professional touch.5. DIY Gradient Nail Art with a Makeup Sponge


5. DIY Gradient Nail Art with a Makeup Sponge
If you're new to nail art and want to try out the gradient technique, it's important to start with a simple design. You can achieve a subtle gradient effect by using similar colors or shades. Another tip for beginners is to use a smaller sponge or cut a regular sponge into smaller pieces for more control. Practice makes perfect, so don't be discouraged if your first attempt doesn't turn out as expected. With some patience and practice, you'll be creating beautiful gradient nail art in no time. Featured keywords: sponge, gradient nail art, beginners, simple, subtle, similar colors, shades, smaller, control, practice, perfect, patience, beautiful.6. Sponge Gradient Nail Art for Beginners


6. Sponge Gradient Nail Art for Beginners
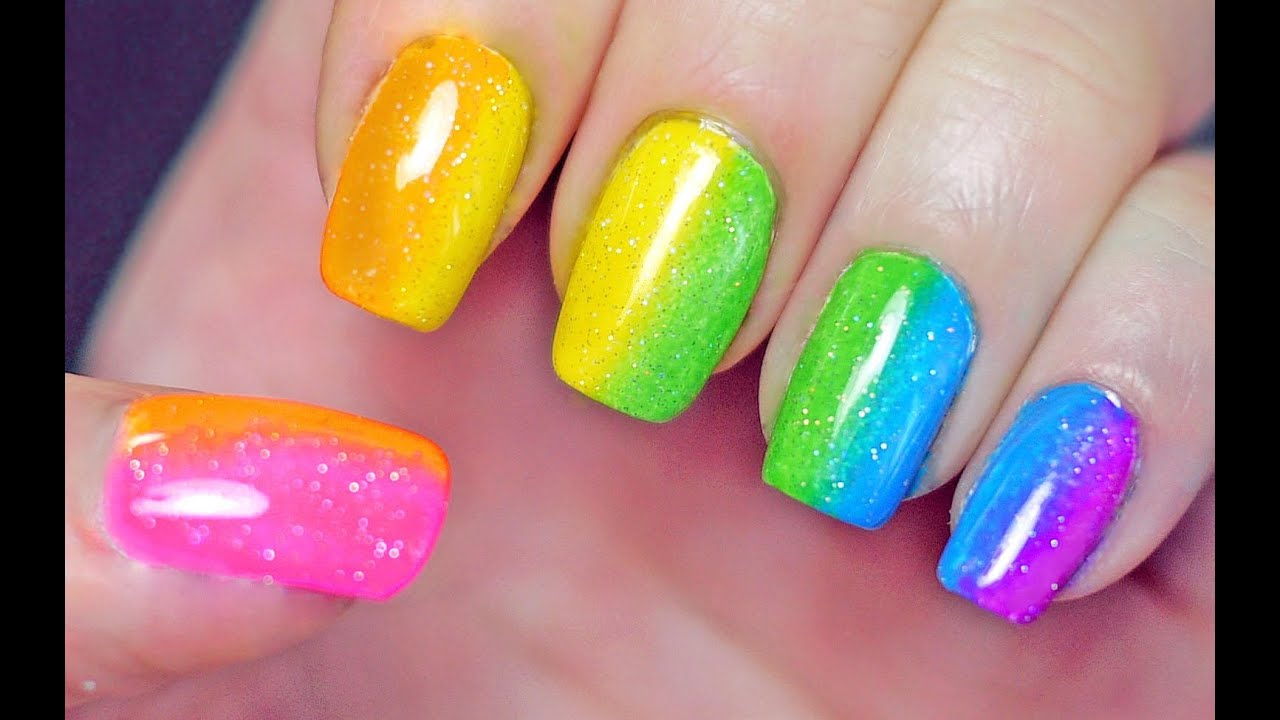
If you're feeling bold and want to make a statement with your nails, why not try a rainbow gradient design? Start by applying a white base coat to make the colors pop. Then, use a makeup sponge to apply different colors onto your nails, starting from the tip and moving towards the base. You can also use a toothpick or a small brush to blend the colors together for a seamless gradient effect. This colorful and fun design will surely make your nails stand out. Finish off with a top coat to seal in your design and give it a professional touch. Featured keywords: rainbow, gradient nail art, sponge, bold, statement, white base coat, pop, toothpick, small brush, blend, seamless, colorful, fun, stand out, professional touch.7. Rainbow Gradient Nail Art with a Sponge

7. Rainbow Gradient Nail Art with a Sponge
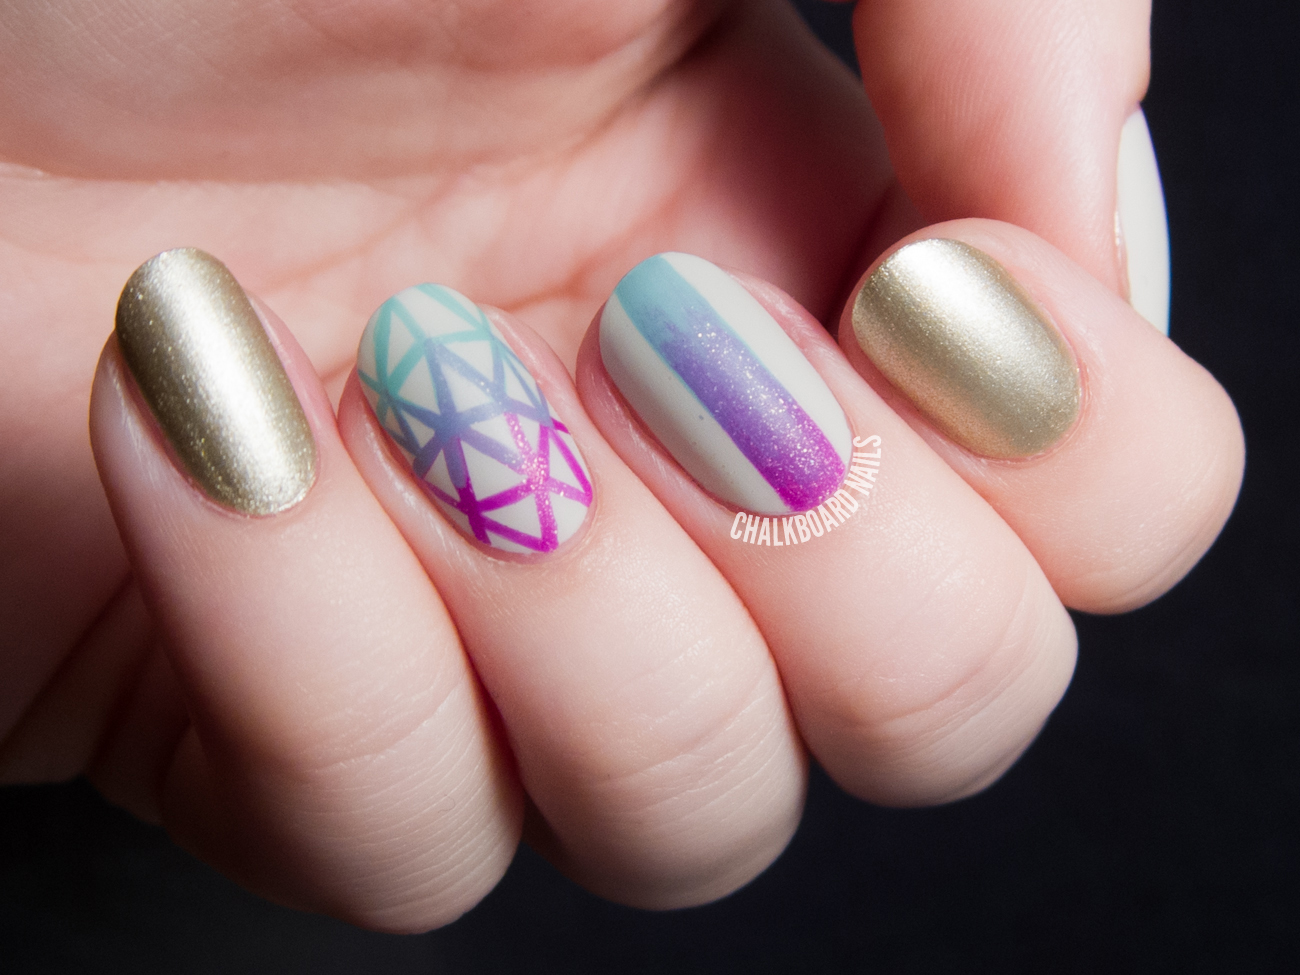
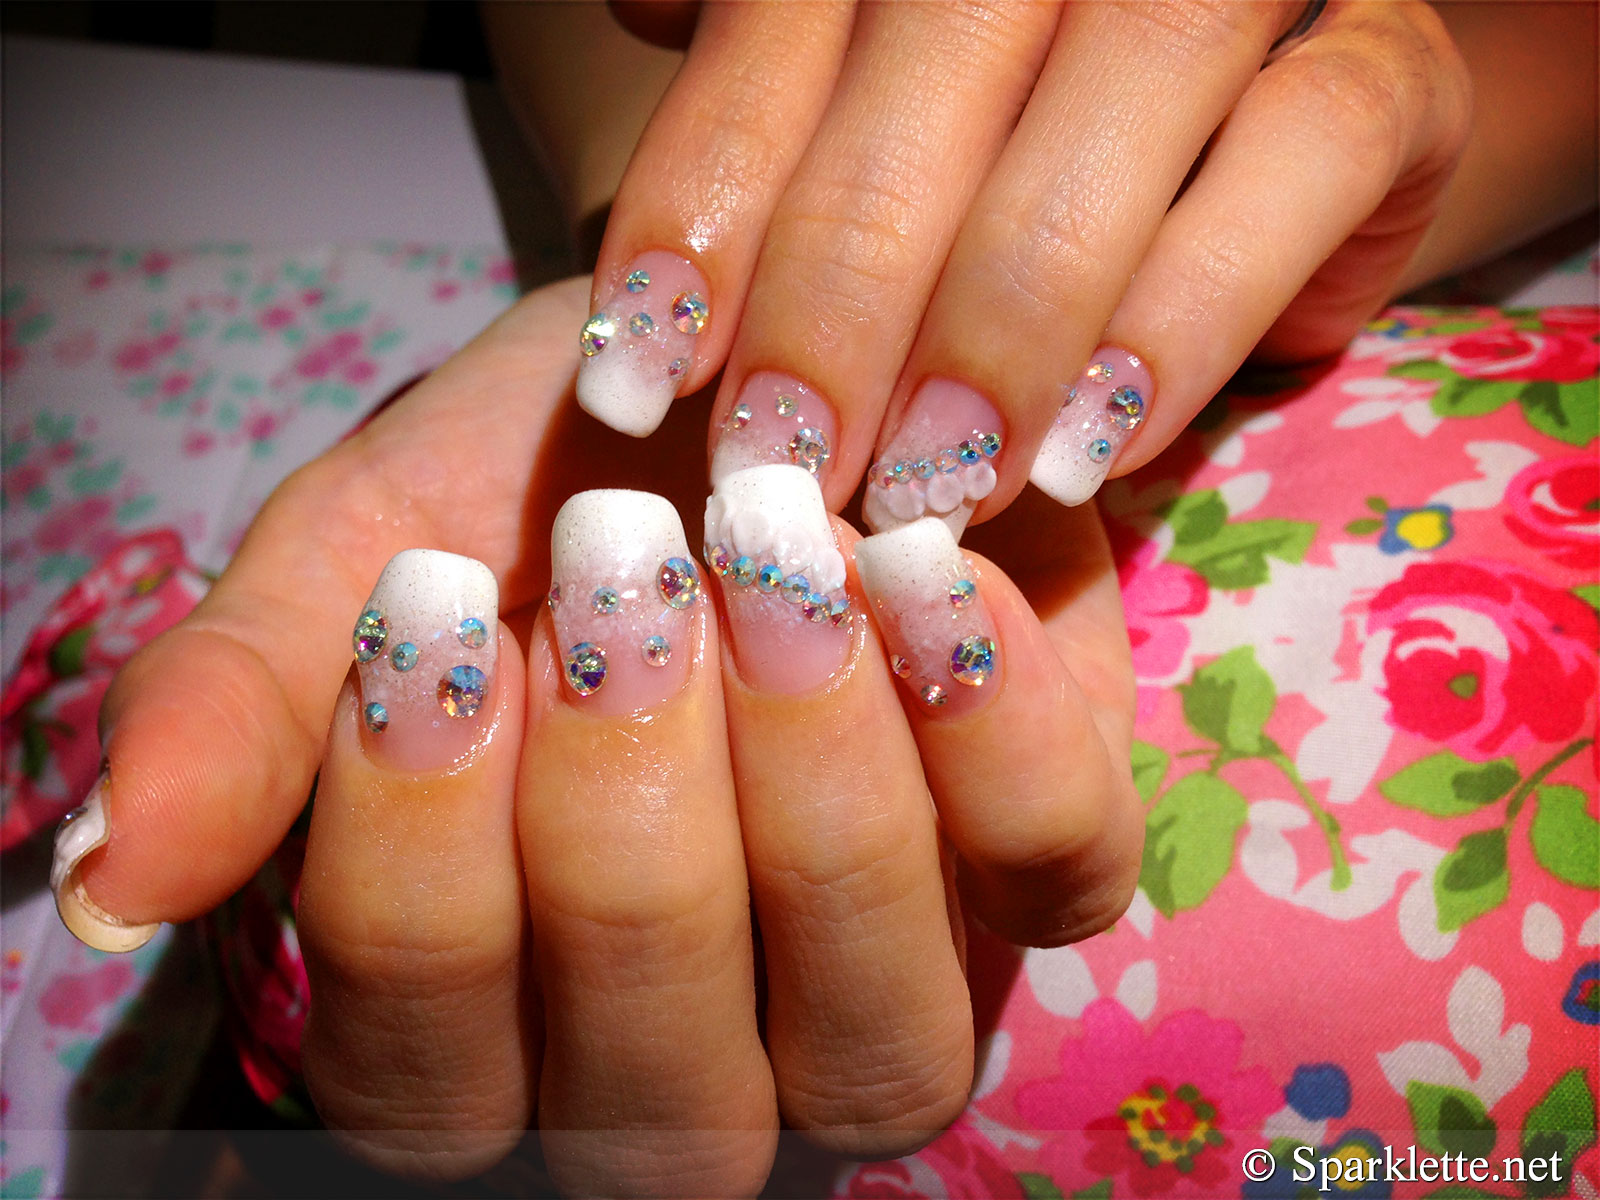
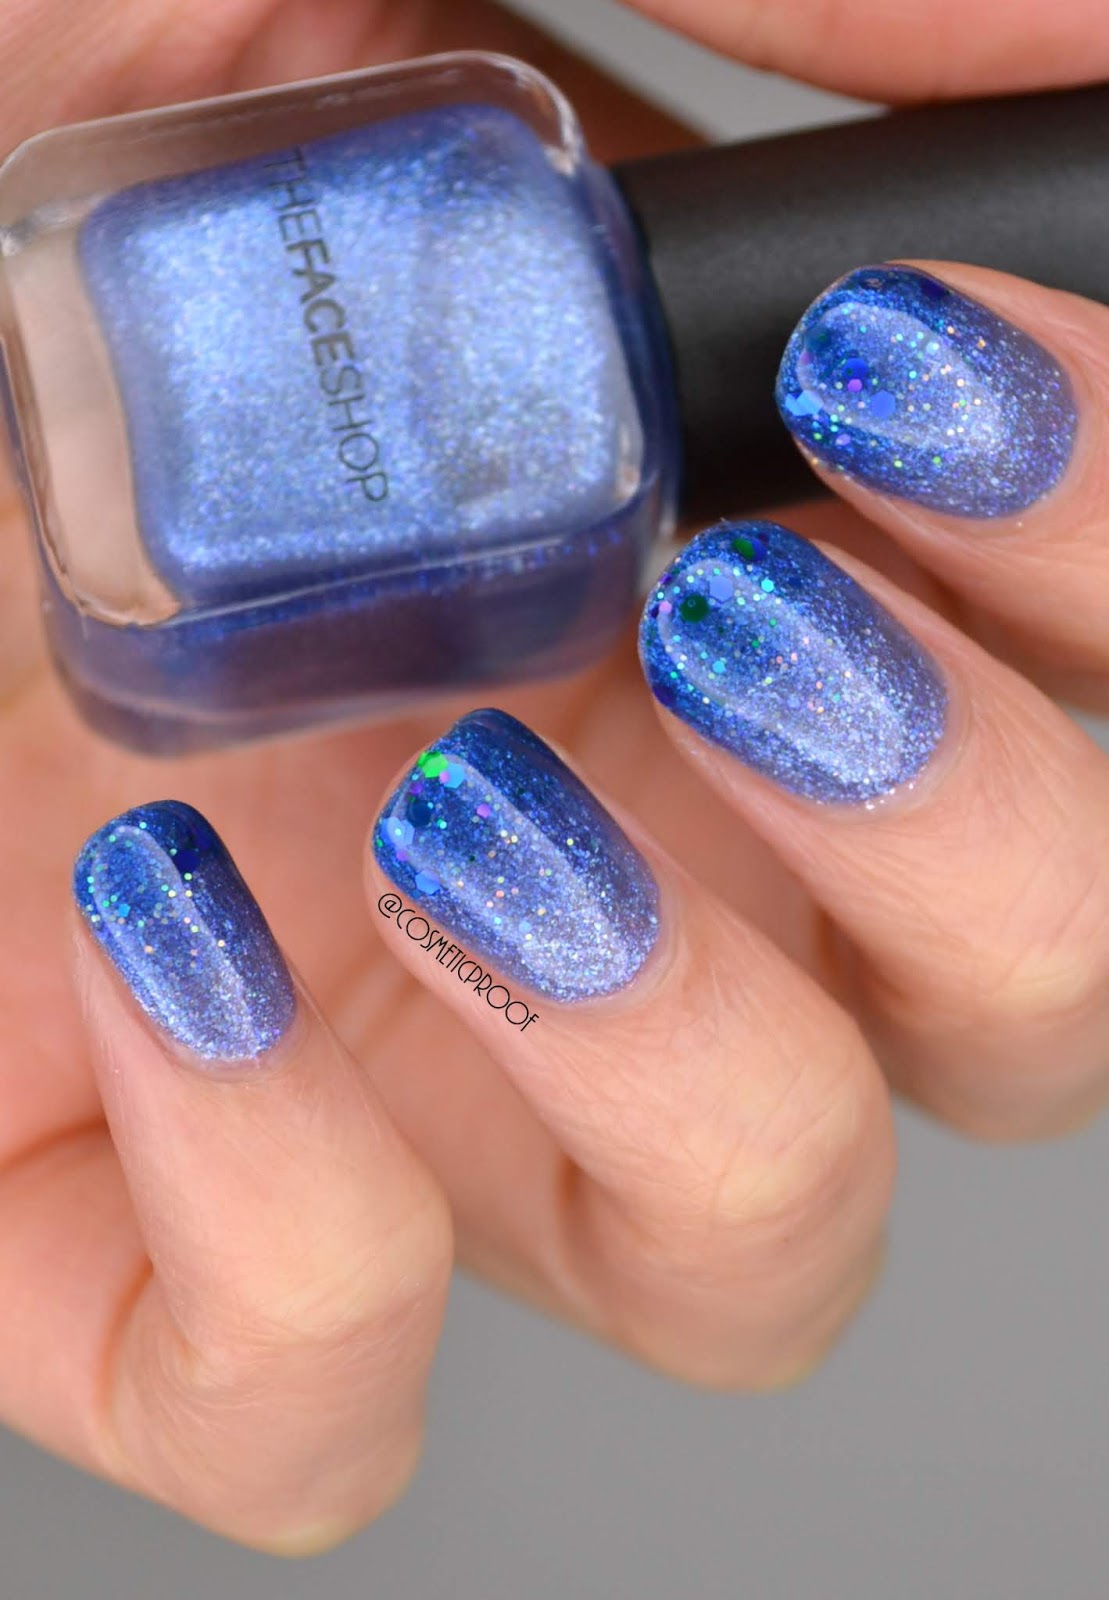
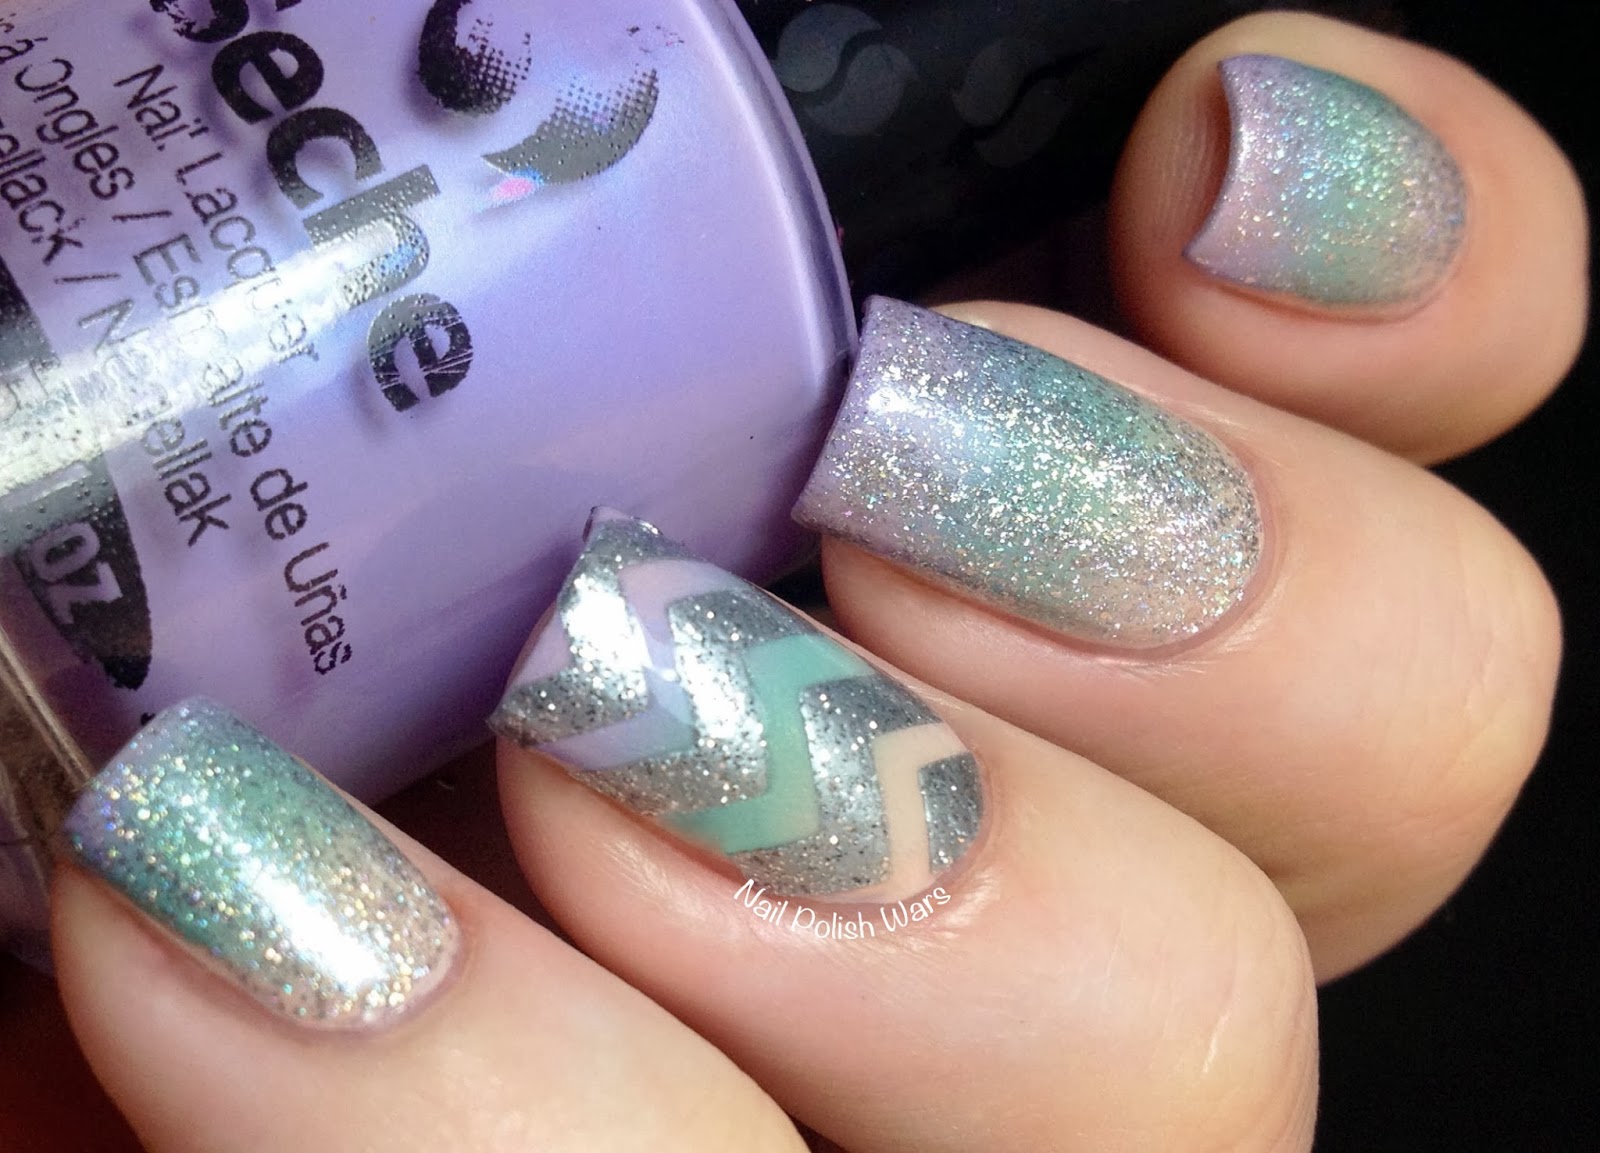
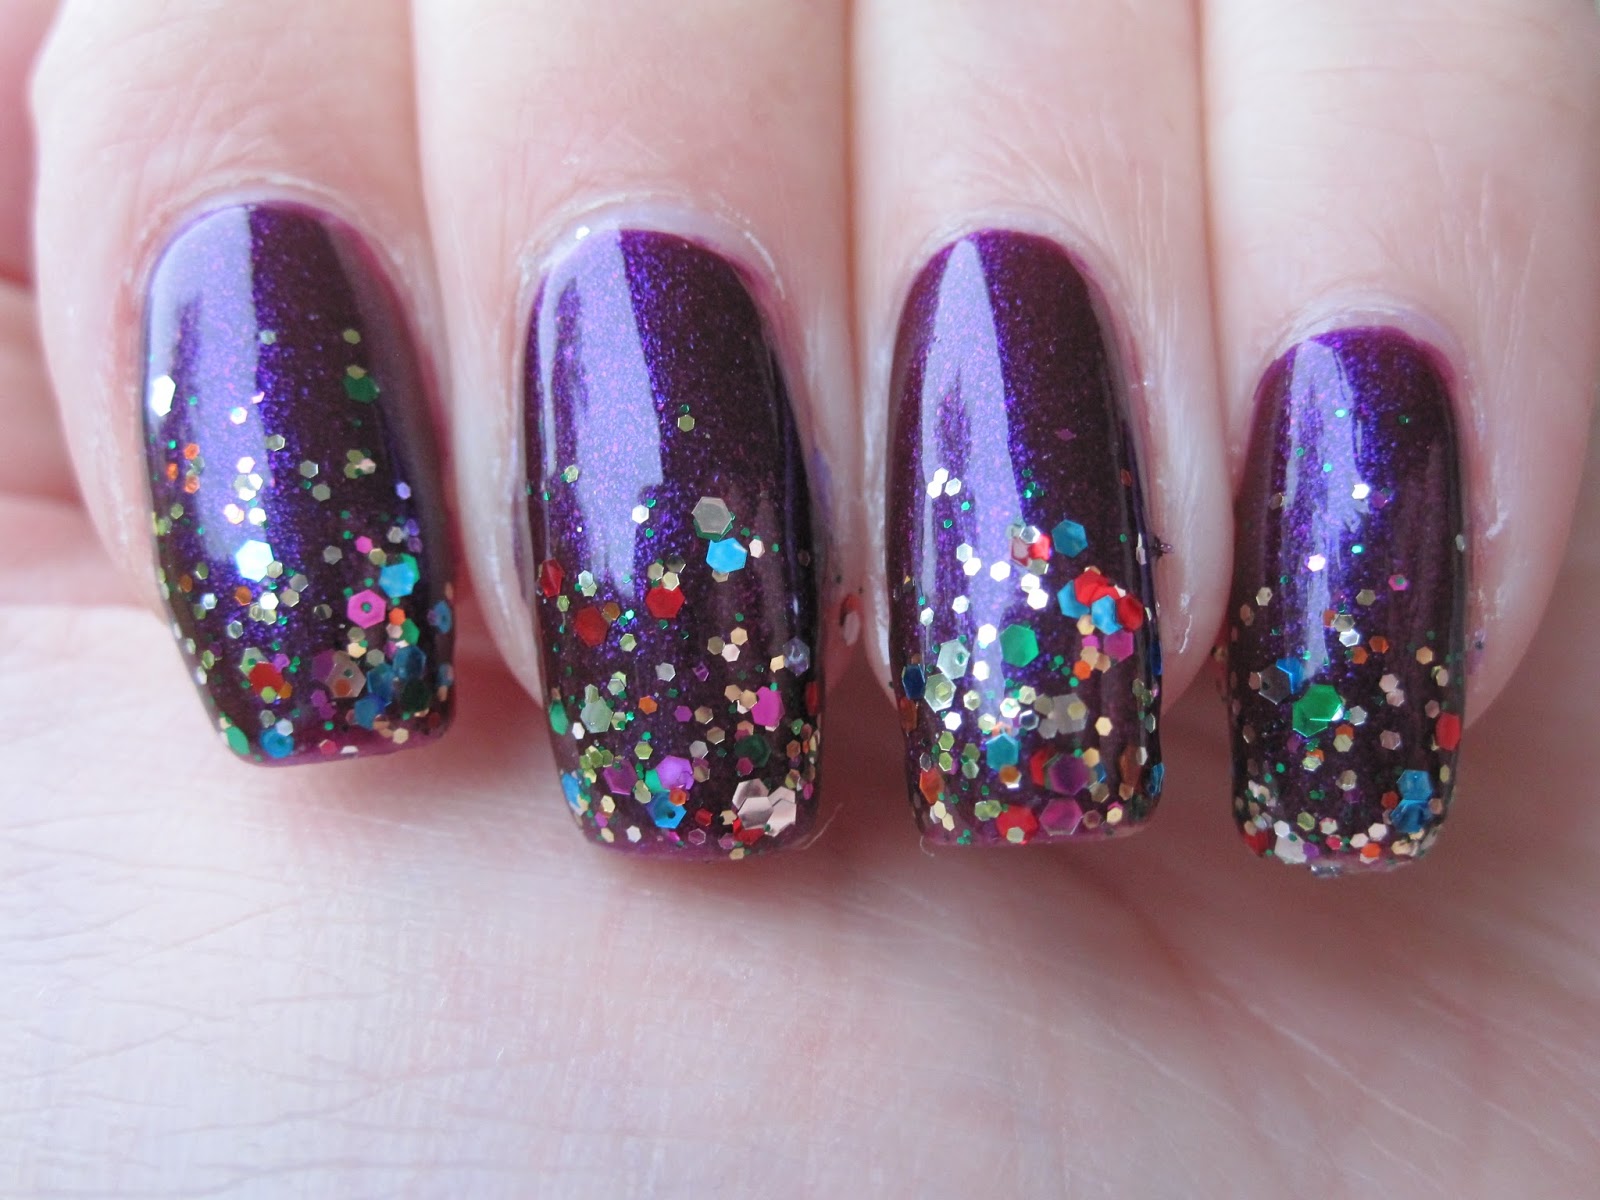
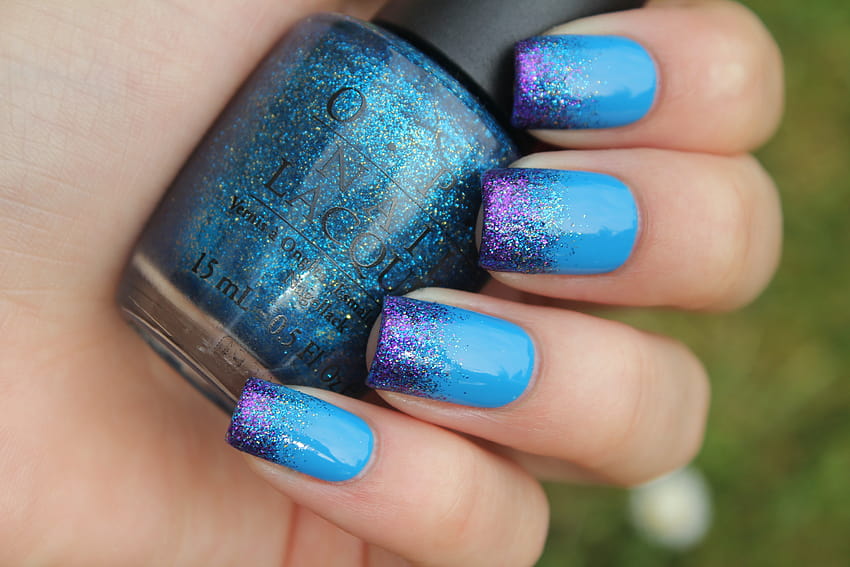
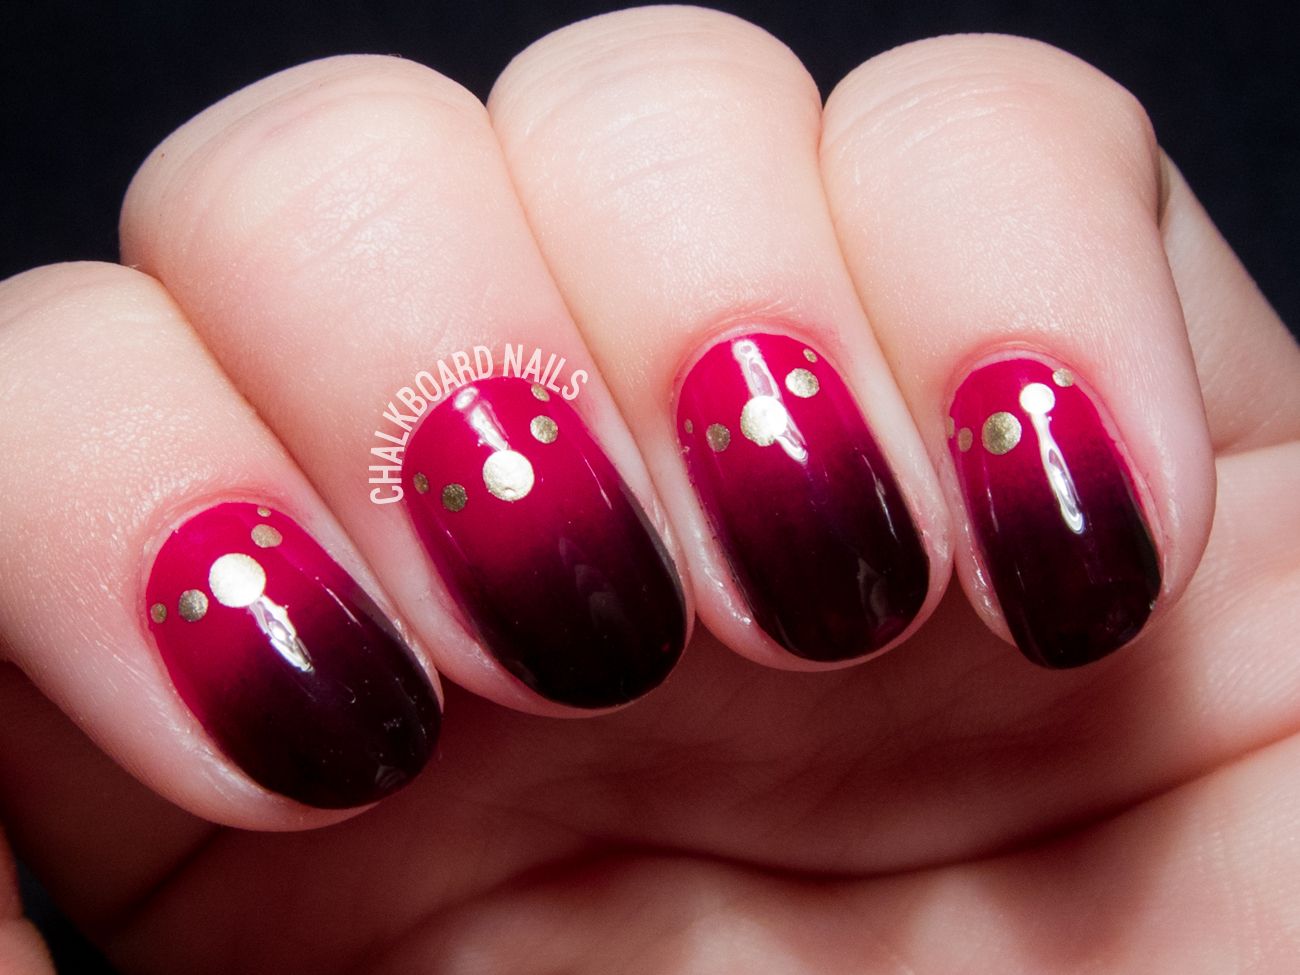
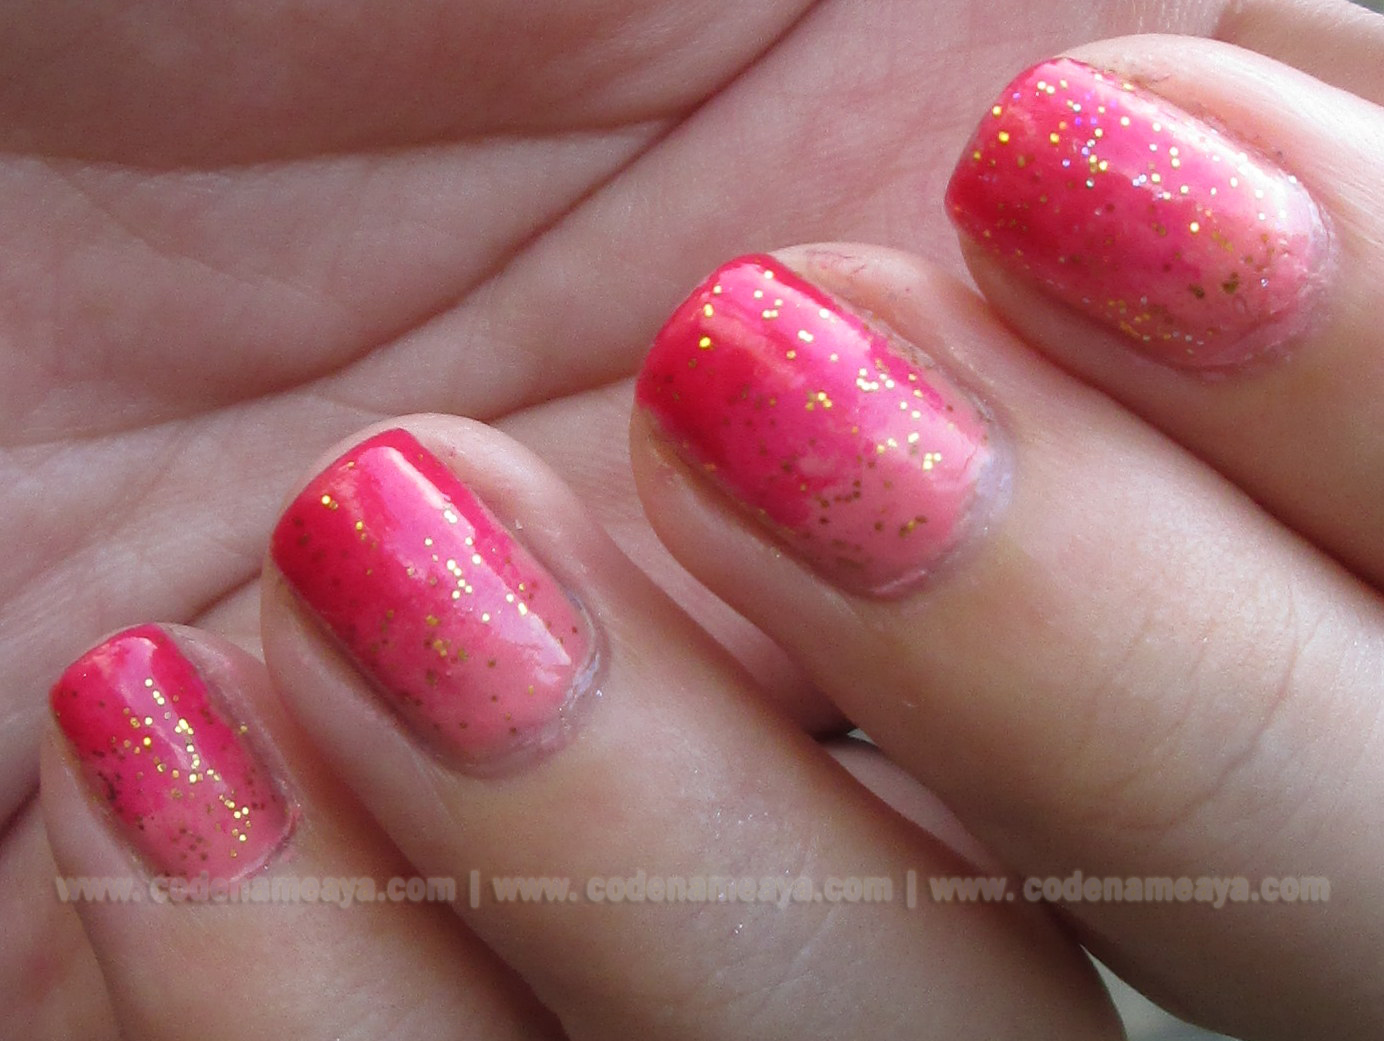
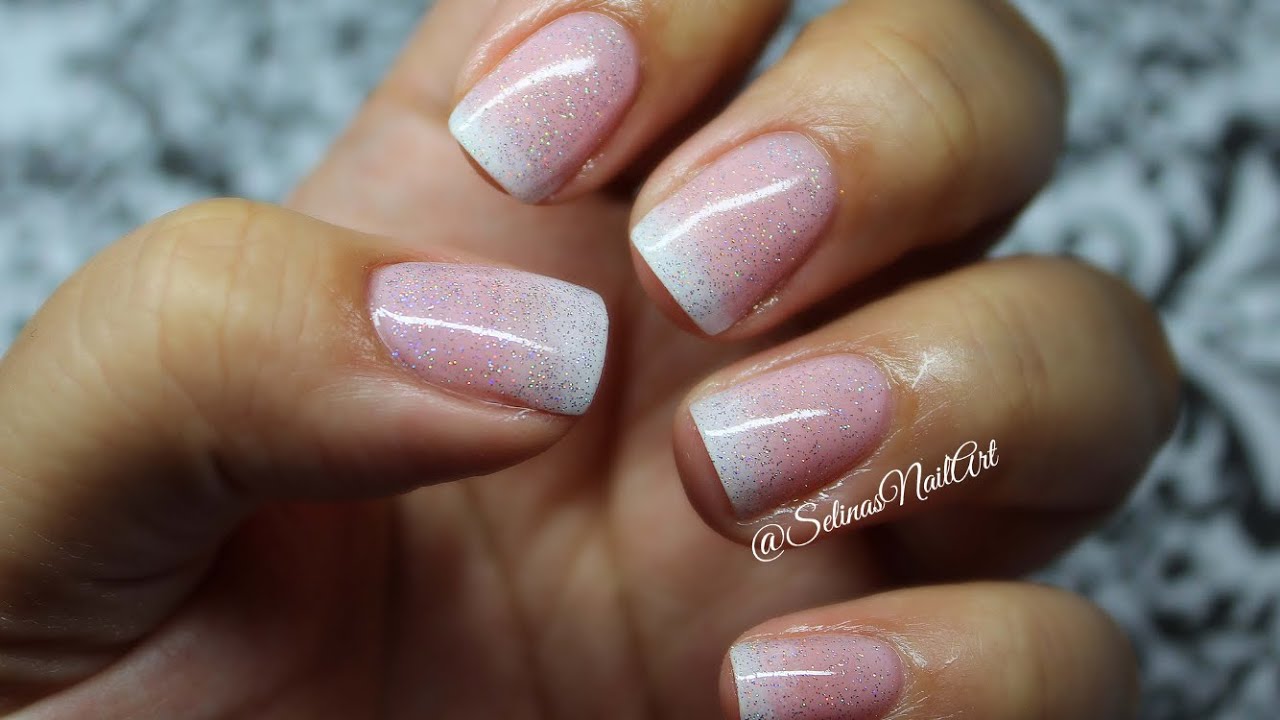
Take your gradient nail art to the next level by adding some sparkle. After creating your gradient with a sponge, you can add some glitter polish on top to give it a shimmery effect. You can also use a glittery nail polish to create a gradient on its own by dabbing it onto your nails with a sponge. This is a great way to add some glam to your nails for a special occasion or just to switch up your everyday look. Finish off with a top coat to seal in your design and give it a glossy finish. Featured keywords: sponge, gradient nail art, glitter, sparkle, shimmery, glitter polish, dabbing, special occasion, switch up, everyday look, glam, glossy finish.8. Sponge Gradient Nail Art with Glitter


8. Sponge Gradient Nail Art with Glitter

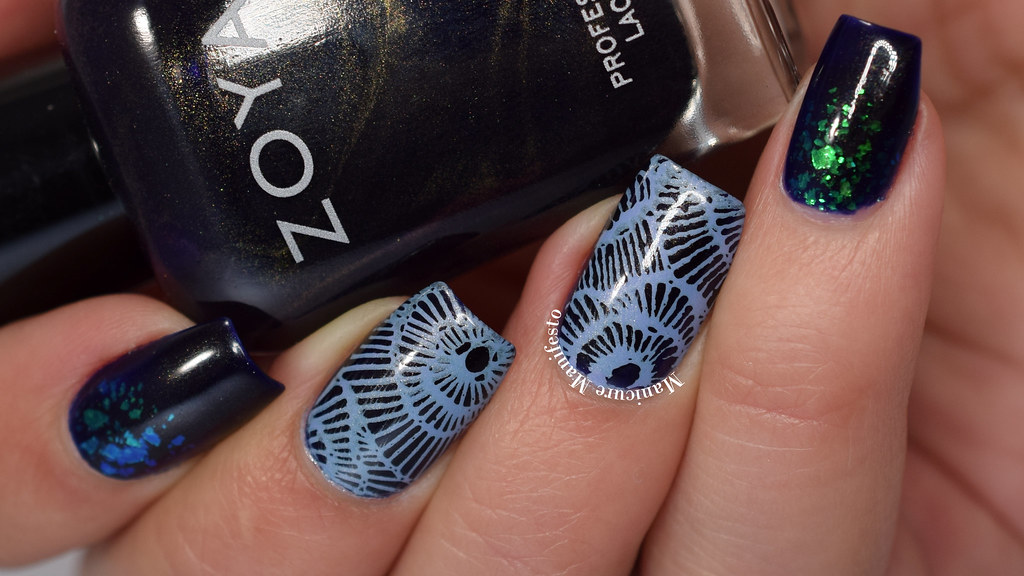
If you're a fan of nail stamping, you can incorporate this technique into your gradient design. After creating your gradient with a sponge, use a stamping plate and stamp your chosen design onto your nails. This will create a unique and eye-catching gradient nail art. You can also use different stamping plates and designs to switch up your gradient look. Finish off with a top coat to seal in your design and give it a professional touch. Featured keywords: gradient nail art, sponge, stamping, stamping plate, unique, eye-catching, switch up, professional touch, design, nail stamping.9. Gradient Nail Art with Sponge and Stamping


9. Gradient Nail Art with Sponge and Stamping
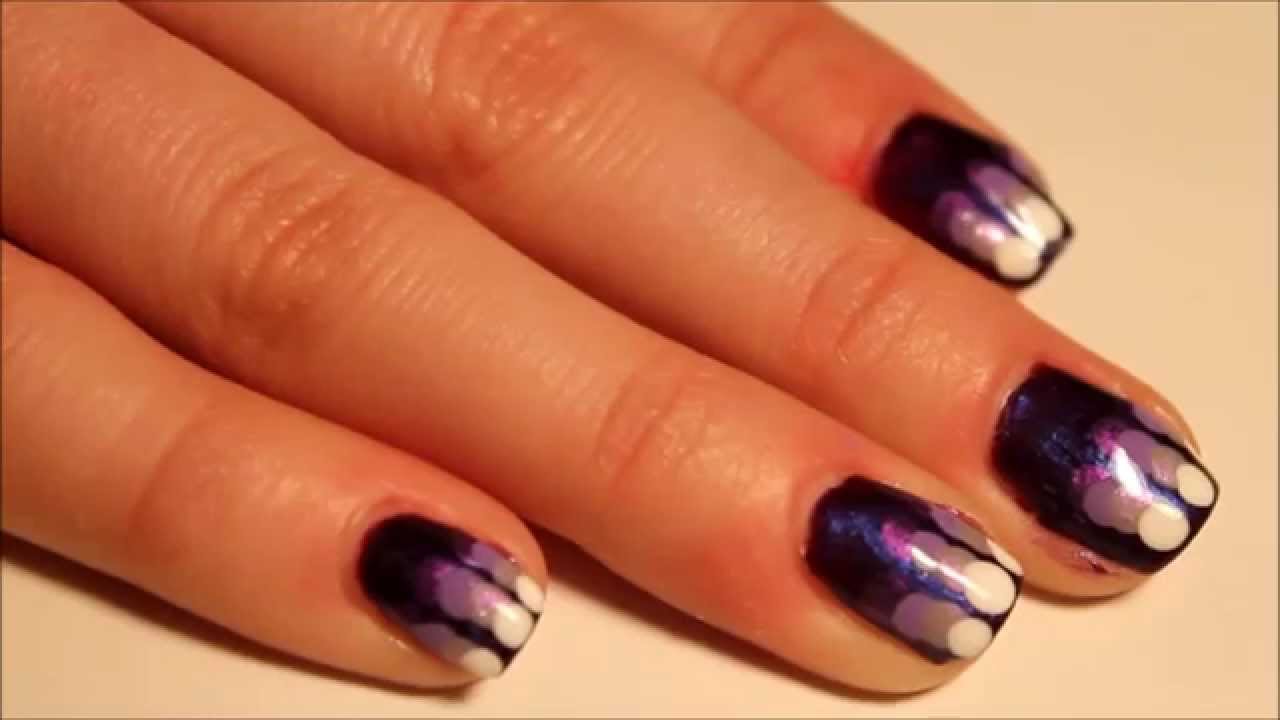
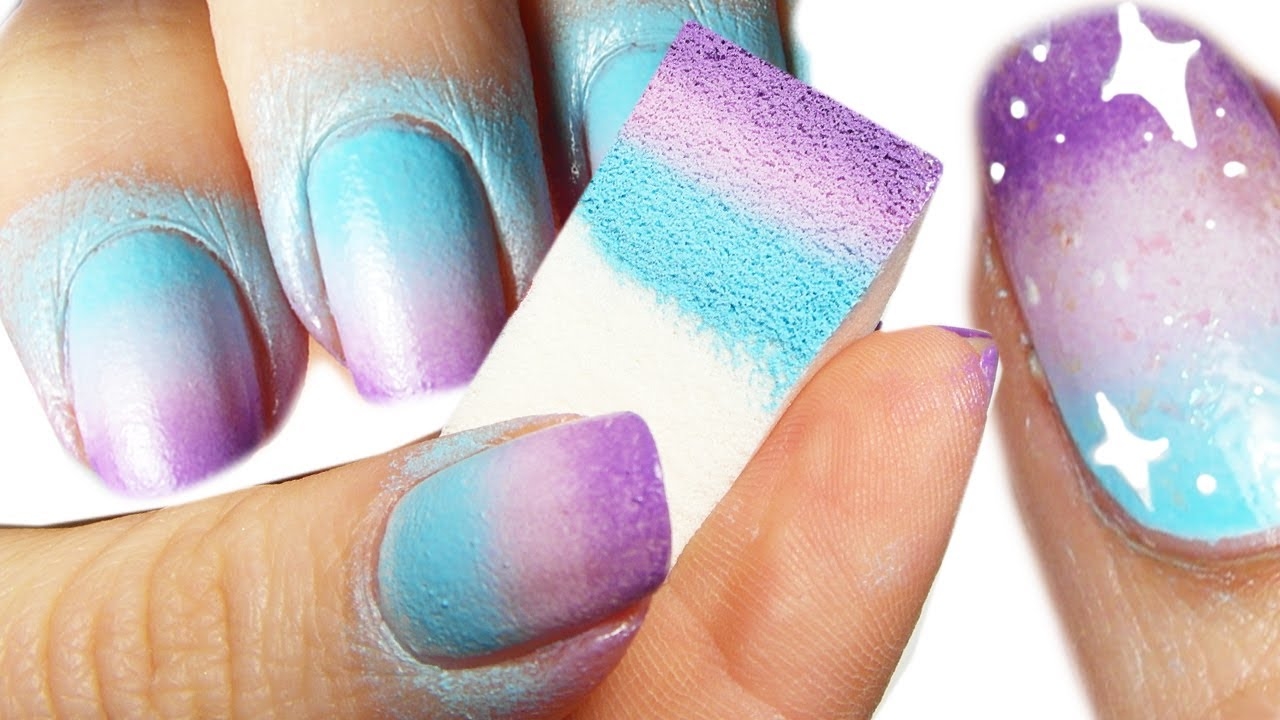
If you're a fan of all things celestial, this gradient nail art design is perfect for you. After applying your base coat and letting it dry, paint your nails with a dark blue or black polish. Then, use a sponge to dab on different shades of blue, purple, and pink onto your nails, creating a galaxy-like effect. You can also add some small white dots with a toothpick or a small brush to represent stars. Finish off with a top coat to seal in your design and give it a mesmerizing finish. Featured keywords: galaxy, gradient nail art, sponge, celestial, dark blue, black polish, shades, blue, purple, pink, effect, small white dots, toothpick, small brush, stars, mesmerizing finish.10. Galaxy Gradient Nail Art with a Sponge


10. Galaxy Gradient Nail Art with a Sponge

Creating Stunning Gradient Nail Art with Sponge

Take Your Nail Design to the Next Level
 If you're tired of the same old solid color nail polish, it's time to try something new and exciting. Gradient nail art with sponge is a unique and eye-catching technique that will elevate your nail game to a whole new level. Not only is it easy to do, but it also allows for endless creativity and experimentation. So, gather your supplies and let's dive into the world of gradient nail art using a simple household item – a sponge.
What You'll Need
 To achieve perfect gradient nails, you will need
nail polishes in at least two different colors
, a
small makeup sponge
,
nail polish remover
, and
a top coat
. You can use any color combination you like, but it's best to start with two complementary shades to create a smooth transition.
To achieve perfect gradient nails, you will need
nail polishes in at least two different colors
, a
small makeup sponge
,
nail polish remover
, and
a top coat
. You can use any color combination you like, but it's best to start with two complementary shades to create a smooth transition.
Step-by-Step Guide
 Now that you have your supplies ready, here's how you can create a stunning gradient nail art using a sponge:
Step 1: Prep Your Nails
 Start by removing any old nail polish and shaping your nails. Then, apply a base coat to protect your natural nails and help the polish last longer.
Step 2: Paint Your Base Color
 Choose the lighter shade of nail polish and apply it to your nails as usual. Make sure to let it dry completely before moving on to the next step.
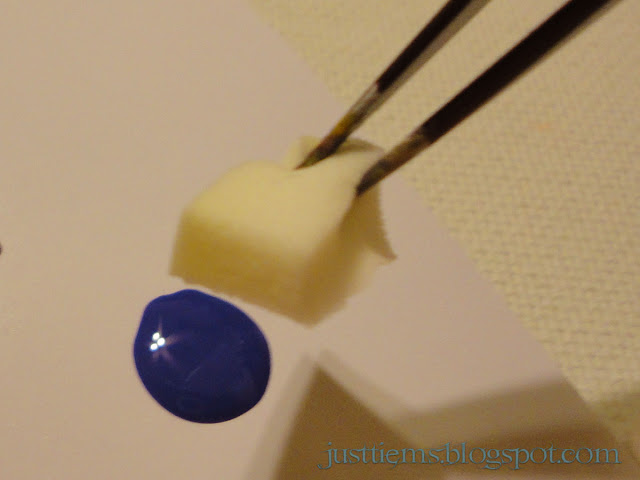
Step 3: Get Your Sponge Ready
 Take your makeup sponge and cut it into small pieces. These will be used to create the gradient effect on your nails. You can also use a clean and dry kitchen sponge if you don't have a makeup sponge on hand.
Step 4: Apply the Second Color
 Now, take the darker shade of nail polish and apply it to the sponge. Make sure to cover the entire surface of the sponge with the polish.
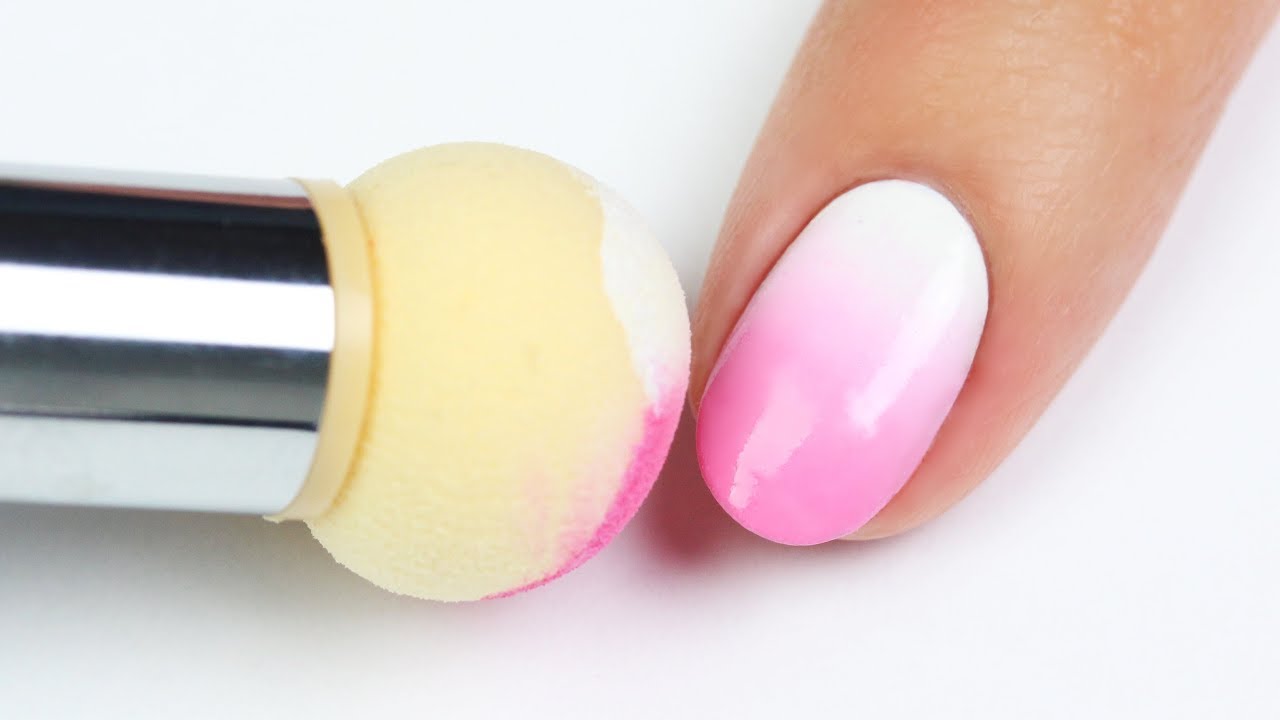
Step 5: Dab the Sponge on Your Nails
 Gently press the sponge onto your nails, starting from the tip and moving downwards. You can repeat this step a few times to build up the color and create a smooth gradient effect. Make sure to let it dry before moving on to the next step.
Step 6: Clean Up
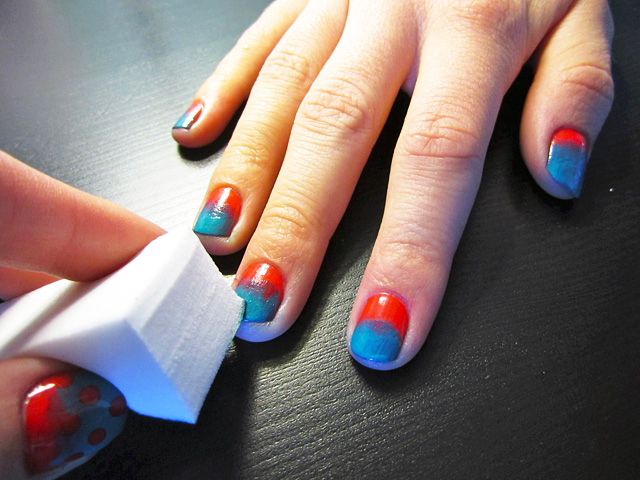 Use a cotton swab dipped in nail polish remover to clean up any excess polish around your nails. This will give your manicure a neat and professional finish.
Step 7: Seal the Look
 Once your gradient nails are dry, apply a top coat to seal the design and give it a glossy finish. This will also help your manicure last longer.
Experiment and Have Fun
 Now that you know how to create gradient nail art with a sponge, the possibilities are endless. You can mix and match different colors, try different sponge techniques, or even add glitter for a sparkly touch. Let your creativity run wild and have fun with your new gradient nail art!
In Conclusion
 Gradient nail art with sponge is a simple and affordable way to achieve stunning and unique nail designs. With just a few basic supplies and a little bit of practice, you can create beautiful gradient nails that will turn heads and add a pop of color to any outfit. So, why not give it a try and see the amazing results for yourself? Your nails will thank you.


