If you’re a fan of Harley Davidson motorcycles, then why not show your love for the brand on your nails? With these easy and creative nail art tutorials, you can sport a unique and stylish look that pays homage to this iconic brand. So, grab your nail polish and let's get started!Harley Davidson Nail Art Tutorial


Harley Davidson Nail Art Tutorial


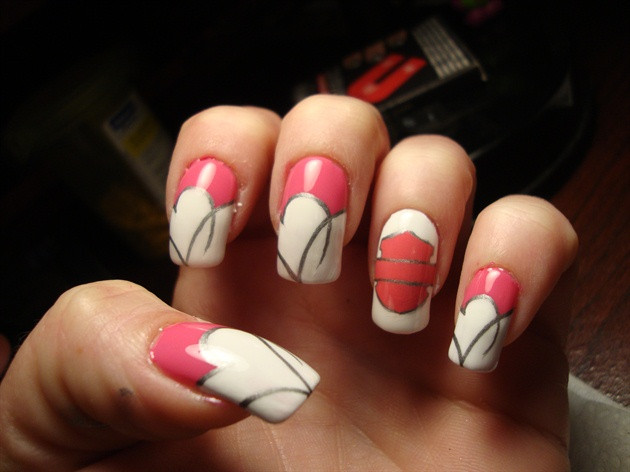
For those who are new to nail art, this tutorial is perfect for you. With just a few simple steps, you can achieve a stunning Harley Davidson-inspired design on your nails. Step 1: Start by painting your nails with a base coat of black nail polish. Let it dry completely before moving on to the next step. Step 2: Using a white nail polish, create a diagonal stripe on the top half of your nail. This will be the base for the Harley Davidson logo. Step 3: On the lower half of your nail, create another diagonal stripe using a red nail polish. Step 4: Using a thin brush or a toothpick, carefully draw a white circle in the middle of the white stripe. This will be the center of the Harley Davidson logo. Step 5: With a black nail polish, draw the letter “H” in the center of the white circle. Then, on each side of the “H”, draw a smaller letter “D” to complete the logo. Step 6: Finish off the look by adding a top coat to seal in your design and make it last longer.Easy Harley Davidson Nail Art Tutorial


Easy Harley Davidson Nail Art Tutorial


If you’re looking for a more detailed Harley Davidson nail art design, then this step-by-step tutorial is perfect for you. Get ready to take your nail game to the next level! Step 1: Start by painting your nails with a base coat of black nail polish. Let it dry completely before moving on to the next step. Step 2: Using a white nail polish, create a diagonal stripe on the top half of your nail. Then, on the lower half, create another diagonal stripe using a red nail polish. Make sure the two stripes meet in the middle to create a V-shape. Step 3: With a thin brush or a toothpick, draw a thin black line on the top and bottom of the V-shape. This will create the outline of the Harley Davidson logo. Step 4: Using the same thin brush or toothpick, draw a curved line in the center of the V-shape to create the Harley Davidson logo’s wings. Step 5: Fill in the wings with a silver or chrome nail polish to add some shine to your design. Step 6: Using a black nail polish, carefully draw the letter “H” in the center of the white stripe, and on each side of the “H”, draw a smaller letter “D”. This will complete the logo. Step 7: Finish off the look by adding a top coat to seal in your design and make it last longer.Step-by-Step Harley Davidson Nail Art Tutorial


Step-by-Step Harley Davidson Nail Art Tutorial

If you want to add some extra flair to your Harley Davidson nail art, then this tutorial is for you. This design is perfect for those who want to showcase their love for the brand in a more subtle way. Step 1: Start by painting your nails with a base coat of black nail polish. Let it dry completely before moving on to the next step. Step 2: Using a white nail polish, create a diagonal stripe on the top half of your nail. Then, on the lower half, create another diagonal stripe using a red nail polish. Make sure the two stripes meet in the middle to create a V-shape. Step 3: With a thin brush or a toothpick, draw a thin black line on the top and bottom of the V-shape. This will create the outline of the Harley Davidson logo. Step 4: Using the same thin brush or toothpick, draw a curved line in the center of the V-shape to create the Harley Davidson logo’s wings. Step 5: Fill in the wings with a silver or chrome nail polish to add some shine to your design. Step 6: Using a black nail polish, carefully draw the letter “H” in the center of the white stripe, and on each side of the “H”, draw a smaller letter “D”. This will complete the logo. Step 7: To add some extra detail, use a toothpick to create small dots along the edges of the V-shape, similar to the design of a Harley Davidson motorcycle. Step 8: Finish off the look by adding a top coat to seal in your design and make it last longer.Harley Davidson Inspired Nail Art Tutorial
Harley Davidson Inspired Nail Art Tutorial
For those who love to get creative, this DIY Harley Davidson nail art tutorial is just what you need. With a few simple supplies, you can create a unique and personalized design that will make your nails stand out. Step 1: Start by painting your nails with a base coat of black nail polish. Let it dry completely before moving on to the next step. Step 2: Cut out small pieces of masking tape and place them on your nails to create a chevron pattern. Make sure to leave some spaces in between the tape to create the stripes of the Harley Davidson logo. Step 3: Paint over the tape with a white nail polish and let it dry completely. Step 4: Carefully remove the tape to reveal the chevron pattern on your nails. Step 5: Using a thin brush or a toothpick, draw a thin black line on the top and bottom of the chevron pattern to create the outline of the Harley Davidson logo. Step 6: Using the same thin brush or toothpick, draw a curved line in the center of the chevron pattern to create the Harley Davidson logo’s wings. Step 7: Fill in the wings with a silver or chrome nail polish to add some shine to your design. Step 8: Using a black nail polish, carefully draw the letter “H” in the center of the white stripe, and on each side of the “H”, draw a smaller letter “D”. This will complete the logo. Step 9: Finish off the look by adding a top coat to seal in your design and make it last longer.DIY Harley Davidson Nail Art Tutorial


DIY Harley Davidson Nail Art Tutorial
If you’re new to nail art and want to try your hand at creating a Harley Davidson-inspired design, then this tutorial is perfect for you. With just a few simple steps, you can achieve a stunning and unique look on your nails. Step 1: Start by painting your nails with a base coat of black nail polish. Let it dry completely before moving on to the next step. Step 2: Using a white nail polish, create a diagonal stripe on the top half of your nail. Then, on the lower half, create another diagonal stripe using a red nail polish. Make sure the two stripes meet in the middle to create a V-shape. Step 3: With a thin brush or a toothpick, draw a thin black line on the top and bottom of the V-shape. This will create the outline of the Harley Davidson logo. Step 4: Using the same thin brush or toothpick, draw a curved line in the center of the V-shape to create the Harley Davidson logo’s wings. Step 5: Fill in the wings with a silver or chrome nail polish to add some shine to your design. Step 6: Using a black nail polish, carefully draw the letter “H” in the center of the white stripe, and on each side of the “H”, draw a smaller letter “D”. This will complete the logo. Step 7: Finish off the look by adding a top coat to seal in your design and make it last longer.Harley Davidson Nail Art Tutorial for Beginners
Harley Davidson Nail Art Tutorial for Beginners


If you’re a visual learner, then this tutorial is perfect for you. With step-by-step pictures, you can easily follow along and create a stunning Harley Davidson nail art design. Step 1: Start by painting your nails with a base coat of black nail polish. Let it dry completely before moving on to the next step. Step 2: Using a white nail polish, create a diagonal stripe on the top half of your nail. Then, on the lower half, create another diagonal stripe using a red nail polish. Make sure the two stripes meet in the middle to create a V-shape. Step 3: With a thin brush or a toothpick, draw a thin black line on the top and bottom of the V-shape. This will create the outline of the Harley Davidson logo. Step 4: Using the same thin brush or toothpick, draw a curved line in the center of the V-shape to create the Harley Davidson logo’s wings. Step 5: Fill in the wings with a silver or chrome nail polish to add some shine to your design. Step 6: Using a black nail polish, carefully draw the letter “H” in the center of the white stripe, and on each side of the “H”, draw a smaller letter “D”. This will complete the logo. Step 7: Finish off the look by adding a top coat to seal in your design and make it last longer.Harley Davidson Nail Art Tutorial with Pictures
Harley Davidson Nail Art Tutorial with Pictures
If you prefer to watch a tutorial rather than reading one, then this video tutorial is perfect for you. With a step-by-step guide and detailed instructions, you can easily recreate this Harley Davidson nail art design.Harley Davidson Nail Art Tutorial Video
Harley Davidson Nail Art Tutorial Video
Just because you have short nails doesn’t mean you can’t sport a cool and stylish Harley Davidson nail art design. This tutorial is perfect for those with shorter nails and will show you how to create a stunning look on your fingertips. Step 1: Start by painting your nails with a base coat of black nail polish. Let it dry completely before moving on to the next step. Step 2: Using a white nail polish, create a diagonal stripe on the top half of your nail. Then, on the lower half, create another diagonal stripe using a red nail polish. Make sure the two stripes meet in the middle to create a V-shape. Step 3: With a thin brush or a toothpick, draw a thin black line on the top and bottom of the V-shape. This will create the outline of the Harley Davidson logo. Step 4: Using the same thin brush or toothpick, draw a curved line in the center of the V-shape to create the Harley Davidson logo’s wings. Step 5: Fill in the wings with a silver or chrome nail polish to add some shine to your design. Step 6: Using a black nail polish, carefully draw the letter “H” in the center of the white stripe, and on each side of the “H”, draw a smaller letter “D”. This will complete the logo. Step 7: Finish off the look by adding a top coat to seal in your design and make it last longer.Harley Davidson Nail Art Tutorial for Short Nails


Harley Davidson Nail Art Tutorial for Short Nails
If you have longer nails, you can take your Harley Davidson nail art to the next level with this tutorial. Sporting a bold and eye-catching design, this tutorial will show you how to make a statement with your nails. Step 1: Start by painting your nails with a base coat of black nail polish. Let it dry completely before moving on to the next step. Step 2: Using a white nail polish, create a diagonal stripe on the top half of your nail. Then, on the lower half, create another diagonal stripe using a red nail polish. Make sure the two stripes meet in the middle to create a V-shape. Step 3: With a thin brush or a toothpick, draw a thin black line on the top and bottom of the V-shape. This will create the outline of the Harley Davidson logo. Step 4: Using the same thin brush or toothpick, draw a curved line in the center of the V-shape to create the Harley Davidson logo’s wings. Step 5: Fill in the wings with a silver or chrome nail polish to add some shine to your design. Step 6: Using a black nail polish, carefully draw the letter “H” in the center of the white stripe, and on each side of the “H”, draw a smaller letter “D”. This will complete the logo. Step 7: To add some extra detail, use a toothpick to create small dots along the edges of the V-shape, similar to the design of a Harley Davidson motorcycle. Step 8: Finish off the look by adding a top coat to seal in your design and make it last longer. With these 10 Harley Davidson nail art tutorials, you can show off your love for the brand in a unique and stylish way. So, grab your favorite nail polish colors and get ready to create some amazing designs on your nails! Harley Davidson Nail Art Tutorial for Long Nails
Harley Davidson Nail Art Tutorial for Long Nails

Creating a Bold Statement with Harley Davidson Nail Art

Rev Up Your Nails with This Unique Tutorial
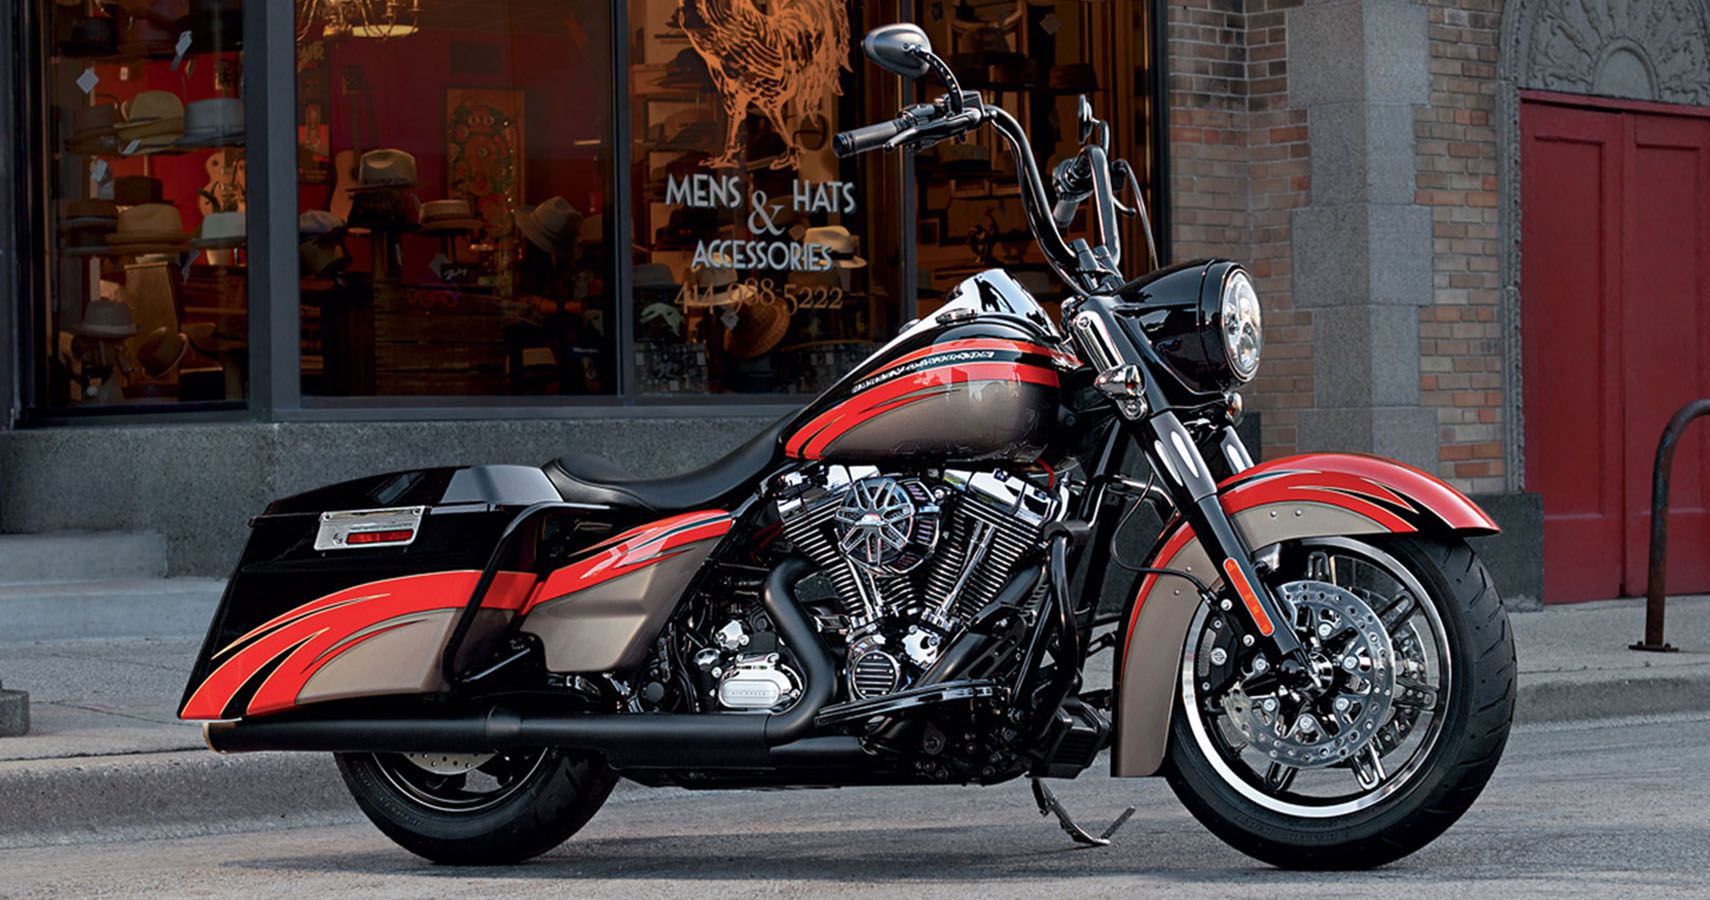
 Looking to add some edge to your nail game? Look no further than this Harley Davidson nail art tutorial. Not only is it a fun and creative way to express your love for motorcycles, but it will also make a bold statement and turn heads wherever you go. So grab your nail polish and get ready to rev up your nails with this unique tutorial.
Gather Your Supplies
 Before you begin, make sure you have all the necessary supplies. You will need a base coat, top coat, black, white, and orange nail polish, a thin brush, and a dotting tool. Optional supplies include nail studs or decals to add some extra flair to your design.
Start with a Solid Base
 Begin by applying a base coat to protect your nails and help your polish last longer. Then, using a black polish, paint all of your nails except for the ring finger. This will be the accent nail and will feature the iconic Harley Davidson logo.
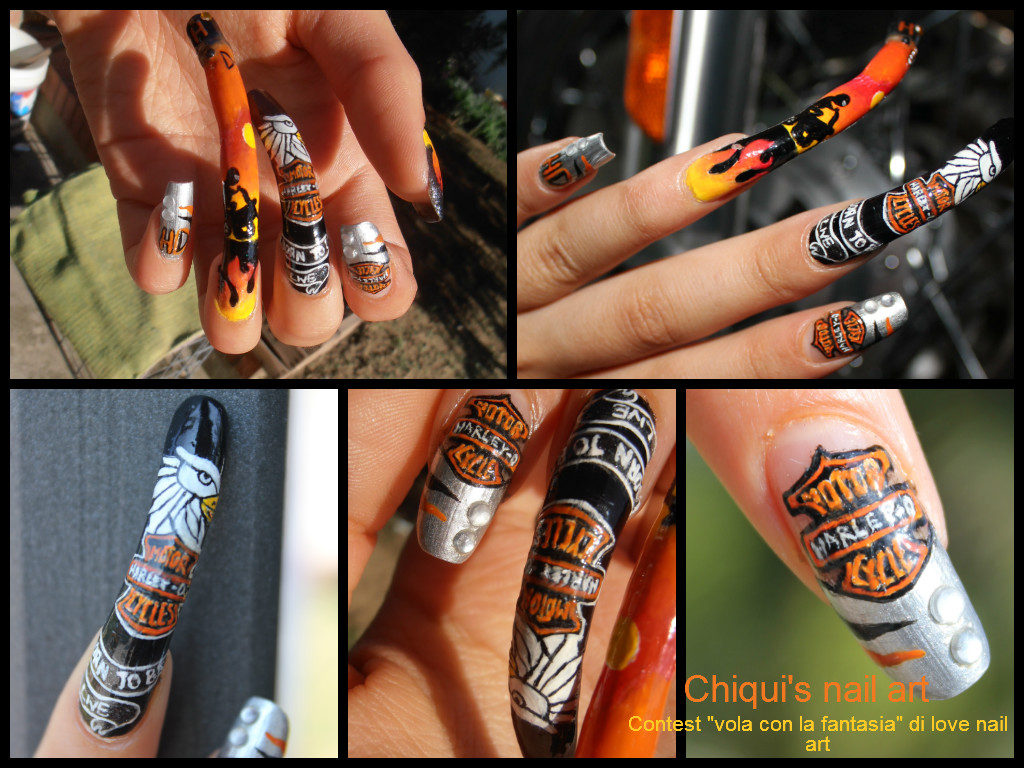
Get Creative with the Logo
 Using a thin brush and white nail polish, carefully draw a circle on your accent nail. This will serve as the base for the logo. Next, using the same brush and black nail polish, draw the Harley Davidson logo inside the circle. Don't worry if it's not perfect, a little imperfection adds to the edginess of the design.
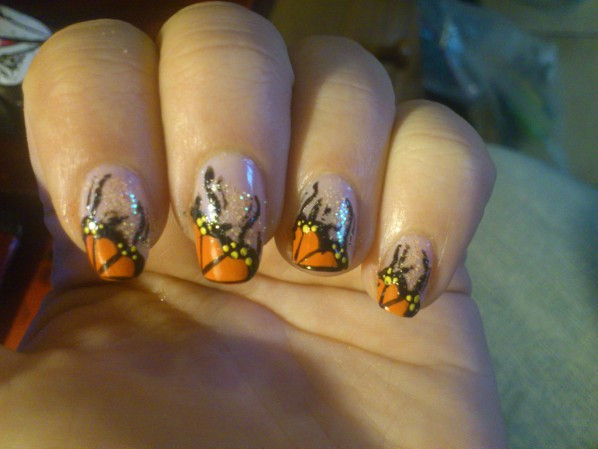
Add Some Orange Flames
 To give your nails that fiery Harley Davidson look, use an orange nail polish to create a flame design on your black nails. Start by painting a curved line from the tip of your nail to the center, then add smaller curved lines branching off of it. You can use a dotting tool to create the flames if you're not confident with freehand drawing.
Seal the Deal
 Once your design is complete and dry, finish off with a top coat to seal in your artwork and add some shine. This will also help your design last longer and prevent chipping.
And there you have it, a bold and edgy Harley Davidson nail art design that will surely make a statement. Whether you're a motorcycle enthusiast or just looking to add some attitude to your nails, this tutorial is a must-try. So go ahead and show off your love for Harley Davidson with this unique nail art design.
Once your design is complete and dry, finish off with a top coat to seal in your artwork and add some shine. This will also help your design last longer and prevent chipping.
And there you have it, a bold and edgy Harley Davidson nail art design that will surely make a statement. Whether you're a motorcycle enthusiast or just looking to add some attitude to your nails, this tutorial is a must-try. So go ahead and show off your love for Harley Davidson with this unique nail art design.


